


VAC090S
IMPORTANT: IMPORTANT : IMPORTANTE:
Read Before Using Lire avant usage Leer antes de usar
Operating/Safety Instructions
Consignes de fonctionnement/sécurité
Instrucciones de funcionamiento y seguridad
VAC090S
VAC090A
VAC140S
VAC140A
For English Version Version française Versión en español
See page 2 Voir page 21 Ver la página 40
1-877-BOSCH99 (1-877-267-2499) www.boschtools.com
Call Toll Free for
Consumer Information
& Service Locations
Pour obtenir des informations
et les adresses de nos centres
de service après-vente,
appelez ce numéro gratuit
Llame gratis para
obtener información
para el consumidor y
ubicaciones de servicio
2610027608_VAC090 VAC140 8/21/17 2:19 PM Page 1
Read and understand all instructions before using this appliance.
Failure to follow all instructions listed below, may result in electric shock,
fire and/or serious personal injury.
SAVE THESE INSTRUCTIONS
-2-
Work Area
Keep your work area clean and well lit.
Cluttered and dark areas invite accidents.
Do not operate dust extr a c t o r s i n
explosive atmospheres, such as in the
presence of flammable liquids, gases, or
dust. Appliances create sparks, which may
ignite the dust or fumes.
Keep bystanders, children, and visitors
away while operating the dust extractor.
Do not allow to be used as a toy. Close
attention is necessary when used by or near
children.
Electrical Safety
This dust extractor intended for use indoor /
outdoor and for dry or wet pick-up.
The power tool outlet is grounded and the
dust extractor must be plugged into an
outlet properly installed and grounded in
accordance with al l code s and
ordinances. Never remove the grounding
prong or modify the plug in any way. Do
not use any adapter plugs. Check with a
qualified electrician if you are in doubt as
to whether the outlet is pr o p e r l y
grounde d . If th e dust ext r a c t o r should
electr i c a l l y malfunction or break down,
grounding provides a low resistance path to
carry electricity away from the user.
Do not insert objects like paper clips or
screwdrivers into power tool outlet. The
out let is liv e when the dust extract or is
plugged into power source and switch is set
to ‘Power Tool Activation’ mode ‘ON’ mode.
Electric shock may occur.
Avoid body con t a c t wi t h gr ou nd ed
surfaces such as pipes, radiators, ranges
and refrigerators. There is an increased risk
of electric shock if your body is grounded. If
operating the d u s t extra c t o r in damp
locations is unavoidable; a Ground Fault
Circuit Interrupter must be used to supply the
power to your dust extractor. Electrician’s
rubb e r gloves a n d footwe a r will f u r ther
enhance your personal safety.
Don’t expose dust extractor to rain or wet
conditions. This dust extractor can be used
for picking up non-flammable liquids but it is
not intended to be immersed or submerged
in a fluid. Electric shock may occur.
Do not handle plug or appliance with wet
hands. Electric shock may occur.
Do not abuse the cord. Never use the cord
to carry the dust extractor, pull the dust
extractor or yank the plug from an outlet.
Ke ep cord a way from heat , oil, sharp
edges or moving parts. Replace damaged
cords immediately. Don’t drive over it or
close a door on it. Damaged cords increase
the risk of electric shock.
IMPORTANT SAFETY RULES
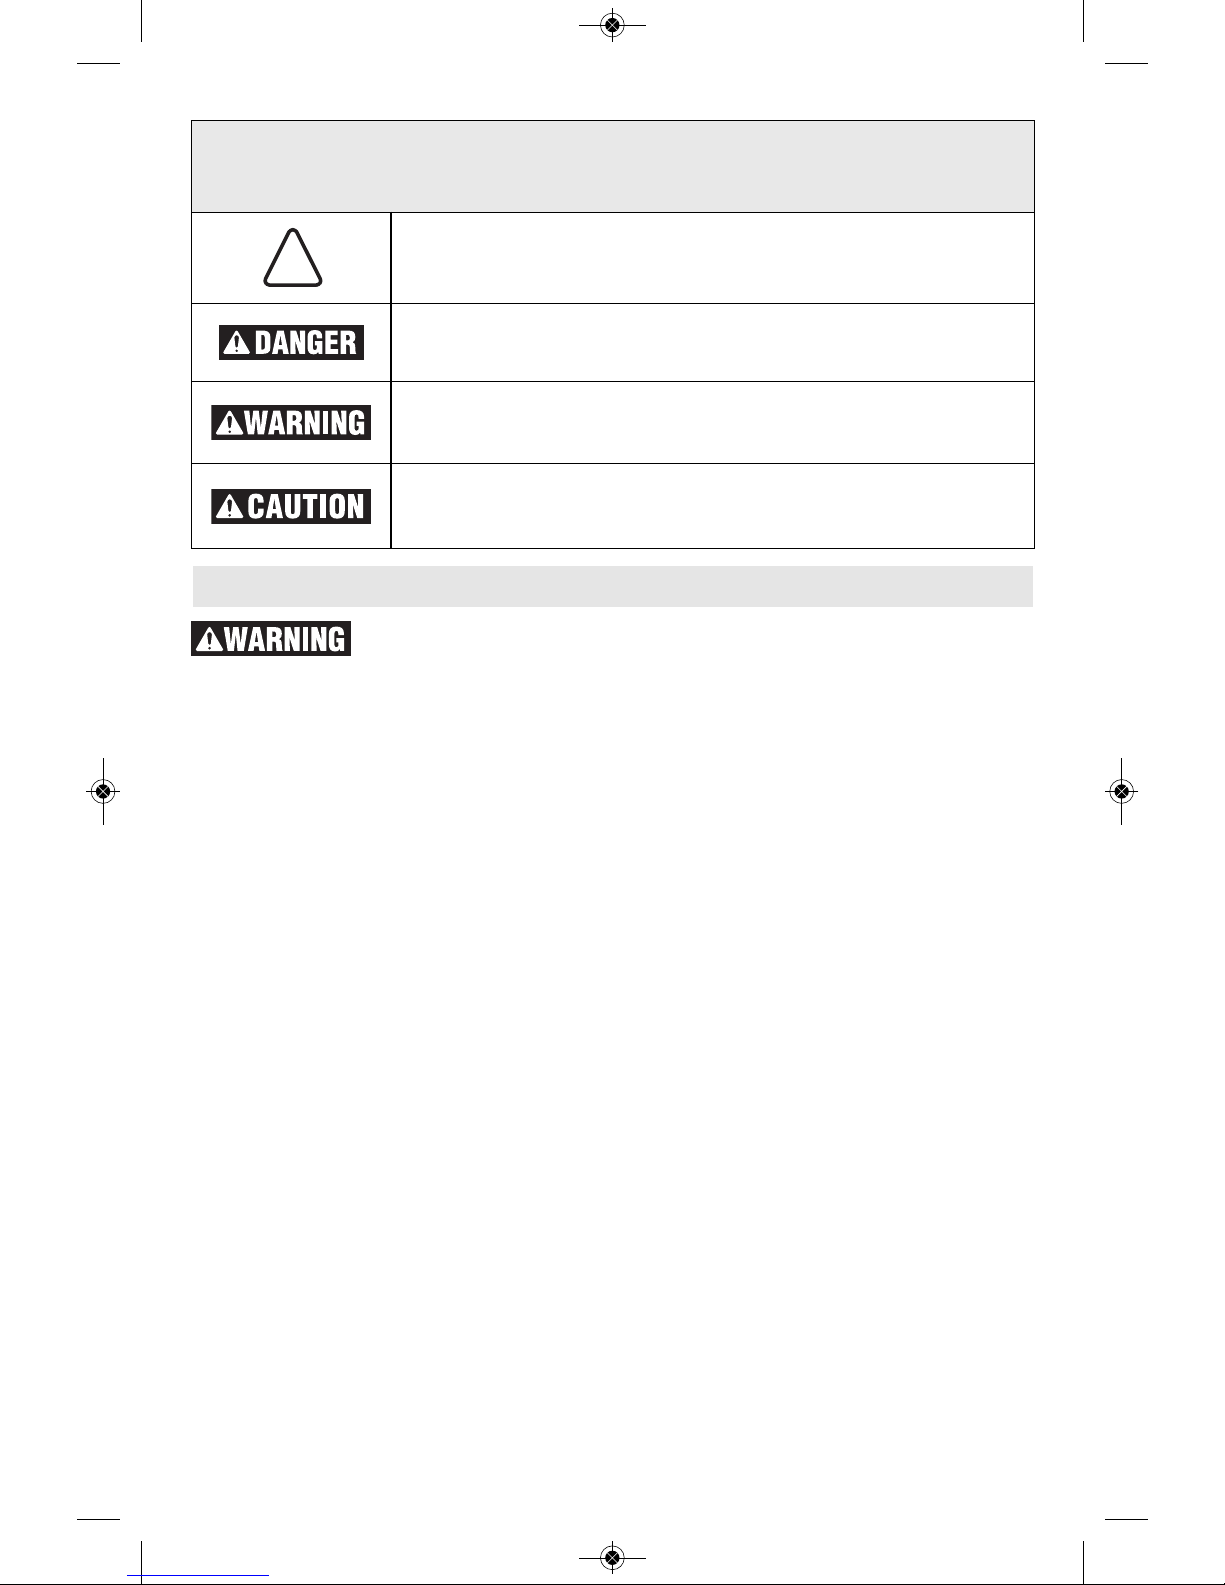
Safety Symbols
The definitions below describe the level of severity for each signal word. Please read the manual
and pay attention to these symbols.
!
This is the safety alert symbol. It is used to alert you to potential
personal injury hazards. Obey all safety messages that follow this
symbol to avoid possible injury or death.
DANGER indicates a hazardous situation which, if not avoided, will
result in death or serious injury.
WARNING indicates a hazardous situation which, if not avoided, could
result in death or serious injury.
CAUTION, used with the safety alert symbol, indicates a hazardous
situation which, if not avoided, will result in minor or moderate injury.
2610027608_VAC090 VAC140 8/21/17 2:19 PM Page 2

W
hen operating a dust extractor outside,
use an outdoor extension cord marked
“W-A” or “W”. These cords are rated for
outdoor use and reduce the risk of electric
sh ock. R efer to Recomme nded sizes of
Extension Cords in the “Extension Cords”
section of this manual.
Personal Safety and
Dust Extractor Use
Stay alert, watch what you are doing and
us e common sense when operating a
dust extractor. Do not use dust extractor
while tired or under the influence of drugs,
alcohol, or medi c a t i o n . A m o m e n t o f
inattention while operating dust extractor
may result in serious personal injury.
Avoid accidental starting. Be sure the dust
extractor and tool switches are OFF before
plugging in. Tool must be turned off before
placing the dust extractor switch in “Power
Tool Activation” or “ON” mode. Do not
keep power tool plugged into power tool
outlet on the dust extractor during normal
va cuumin g (mode switc h at th e “ON”
position). Plugging in dust extractors or tools
that have switch ON invites accidents.
Do not overreach. Keep proper footing
and balance both for you and the dust
extractor at all times. Use extra care when
cle aning on s tairs. Pro per footing and
balance enables better control of the dust
extractor in unexpected situations.
Do no t va c u u m burn i n g , smo k i n g or
smoldering things l i ke cigare t t e s ,
matches or hot ashes. Fire inside the dust
extractor canister may occur.
Do not use to vacuum flammable liquids,
alcohol, gases, or explosive dusts, like
gas oline or other fuels , lighte r flui d,
varnish, polyurethane coatings, cleaners,
oil-based paints, natural gas, hydrogen,
coal dust, magnesium dust, grain dust, or
g
un powder. Electric motors create sparks
which may ignite the dust or fumes.
Dress properly. Do not wear loose clothing
or jewelry. Contain long hair. Keep your
hai r, clot hing, and glove s away from
moving parts. Loose clothes, jewelry, or long
hair can be caught in moving parts, hose, and
suction nozzles. Keep handles dry, clean and
free from oil and grease.
Do not hold the hose against any body
parts during operation. Static electricity build-
up in the hose during operation may result in
static shock.
Use safety equipment.
Alw ays wear eye and
hearing protection. Dust mask, non-skid
safety shoes, hard hat, or hearing protection
must be used for appropriate conditions.
This product contains chemicals, including
lead, known to the State of California to cause
cancer, and birth defects or other reproductive
harm. Wash hands after handling.
Do not use with damaged cord or plug. If
appliance is not working as it should, has
been dropped, damaged, left outdoors, or
dropped into water, return it to a service
center.
Do not put any object into openings. Do
not use with any opening blocked; keep
free of dust, lint, hair, and anything that
may reduce air flow.
Turn off all controls before unplugging.
Use onl y attachments t h at are
recommended by the manufacturer for
your model. At t a c h me nt s th a t may be
suitable for one dust extractor may become
hazardous when used o n a n o t h e r du s t
extractor.
Connect to a properly grounded outlet
only. See Grounding Instructions.
-3-
2610027608_VAC090 VAC140 8/21/17 2:19 PM Page 3

This appliance must be grounded. If it should
malfunction or breakdown, grounding provides
a path of least resistance for electric current to
reduce the risk of electric shock. This appliance
is equipped with a cord having an equipmentgrounding conductor and grounding plug. The
plug must be inserted into an appropriate outlet
tha t is prop erly i nstall ed an d gro unded in
accordance with all local codes and ordinances.
Improper connection of the
e q u i p me n t - g r o u n d in g
conductor can result in a risk of electric shock.
Check with a qualified electrician or service
person if you are in doubt as to whether the
outlet is properly grounded. Do not modify the
plug provided with the appliance – if it will not fit
the outlet, have a proper outlet installed by a
qualified electrician.
This appliance is for use on a nominal 120-V
circuit and has a grounding attachment plug
that looks like the plug illustrated. Make sure
that the appliance is connected to an outlet
having the same configuration as the plug. No
adaptor should be used with this appliance.
-4-
Grounding Instructions
2610027608_VAC090 VAC140 8/21/17 2:19 PM Page 4
-5-
Dust Extractor Safety Rules
Dust Extractor Care
Bosch HEPA filters must
be used when using this
dust extractor for EPA Lead Based Paint
Renovation, Repair and Painting Program
(RRP), where lead may be present. Not
usi ng Bos ch HEPA filte rs for EPA RR P
program may cause health and environmental
hazards.
Not suitable to vacuum
haz ardous or toxic
substances or dusts e.g. asbestos. Neither
the standard filter nor the optional HEPA filter
is able to capture all hazardous particles,
which may cause health hazards.
Once this dust extractor is
used for EPA Lead Based
Paint Renovation, Repair and Painting
Program (RRP) where lead may be present, it
is recommended that it always be used for
RRP. Residual hazardous substances in the dust
extractor may cause health and environmental
hazards.
Whe n usin g this dust
extractor for EPA Lead
Bas ed Pa int Renovat ion, Repair and
Painting Program (RRP), this dust extractor
is not r ecomme nded f or vac uuming
carpets and rugs. Dust extractor may not be
able to completely remove all hazardous
substance, which m ay cause health and
environmental hazards.
Do not use dust extractor if switch does
not turn it ON or OFF. Any dust extractor
that cannot be controlled with the switch is
dangerous and must be repaired.
Disconnect the plug from the p o we r
source before making any adjustments,
changing attachments, or storing the dust
extractor. Such preventive safety measures
reduce the risk of starting the dust extractor
accidentally.
The s u m of cu r r e n t draw o f the dust
extractor and connected power tool must
not exceed 15A. Exceeding the 15A current
draw could cause the dust extractor and
branch circuitry to overheat, presenting a risk
of fire.
Do not vacuum dust when liquid/fluid is
contained in the dust extractor canister.
Do not vacuum liquids/fluids when dust is
in the canister. In either case empty the
canister and/or remove dust bag before use
so that dust does not cake and harden inside
the canister.
Dry filters completely after wet vacuuming
or use a second dry filter set for dust
vacuuming. Damp or wet filters will cake
with dust or develop mold or mildew.
Store idle dust extractor out of reach of
children and other untrained persons.
Dust extractors are dangerous in the hands
of untrained users.
Maintain d u s t ex t ra ct o r wi th care.
Properly maintain dust extractor to keep
hose unobstructed. Do not put any object
into op e n i n g s . Do no t use wi th any
opening blocked; keep free of dust, lint,
hair and anything that may reduce air
flow. Any alt eration or modificatio n is a
misuse and m a y res u l t in a d a n ge r ou s
condition.
Check for misal ignment or binding of
moving parts, breakage of parts, and any
other condition that may affect the dust
extractor operation. If damaged, have the
du st extractor serviced before using.
Poorly maintained dust extractors cause
many a cc id en ts . Develop a p e r io di c
maintenance sc h e d ul e for you r du s t
extractor.
Service
Onl y qual i fied r e pair p e rsonnel must
perform dust extractor service. Service or
maintenance perfor m e d by unquali f i e d
personnel could result in a risk of injury. For
example: internal wires may be misplaced or
pinched.
When servicing a dust extractor, use only
identical r e p l a c e me n t parts. Fol l o w
instructions in the Maintenance section of
this manual. Use of unauthorized parts or
failure to follow the Maintenance Instructions
may create a risk of electric shock or injury.
Certain cleaning agents such as gasoline,
carbon tetrachloride, ammonia, etc. may
damage plastic parts.
2610027608_VAC090 VAC140 8/21/17 2:19 PM Page 5

-6-
Symbols
IMPORTANT: Some of the following symbols may be used on your tool. Please study them
and learn their meaning. Proper interpretation of these symbols will allow you to operate the
t
ool better and safer.
Symbol Designation / Explanation
V Volts (voltage)
A Amperes (current)
Hz Hertz (frequency, cycles per second)
W Watt (power)
kg Kilograms (weight)
min Minutes (time)
s Seconds (time)
CFM
Cubic feet per minute [or ft3/min] (air flow rate)
⌀
Diameter (size of drill bits, grinding wheels, etc.)
n
0
No load speed (rotational speed at no load)
n Rated speed (maximum attainable speed)
.../min
Revolutions or reciprocation per minute (revolutions, strokes, surface speed,
orbits etc. per minute)
0 Off position (zero speed, zero torque...)
1, 2, 3, ...
I, II, III,
Selector settings (speed, torque or position settings. Higher number means
greater speed)
0
Infinitely variable selector with off (speed is increasing from 0 setting)
Arrow (action in the direction of arrow)
Alternating current (type or a characteristic of current)
Direct current (type or a characteristic of current)
Alternating or direct current (type or a characteristic of current)
Class II construction (designates double insulated construction tools)
Earthing terminal (grounding terminal)
2610027608_VAC090 VAC140 8/21/17 2:19 PM Page 6
-7-
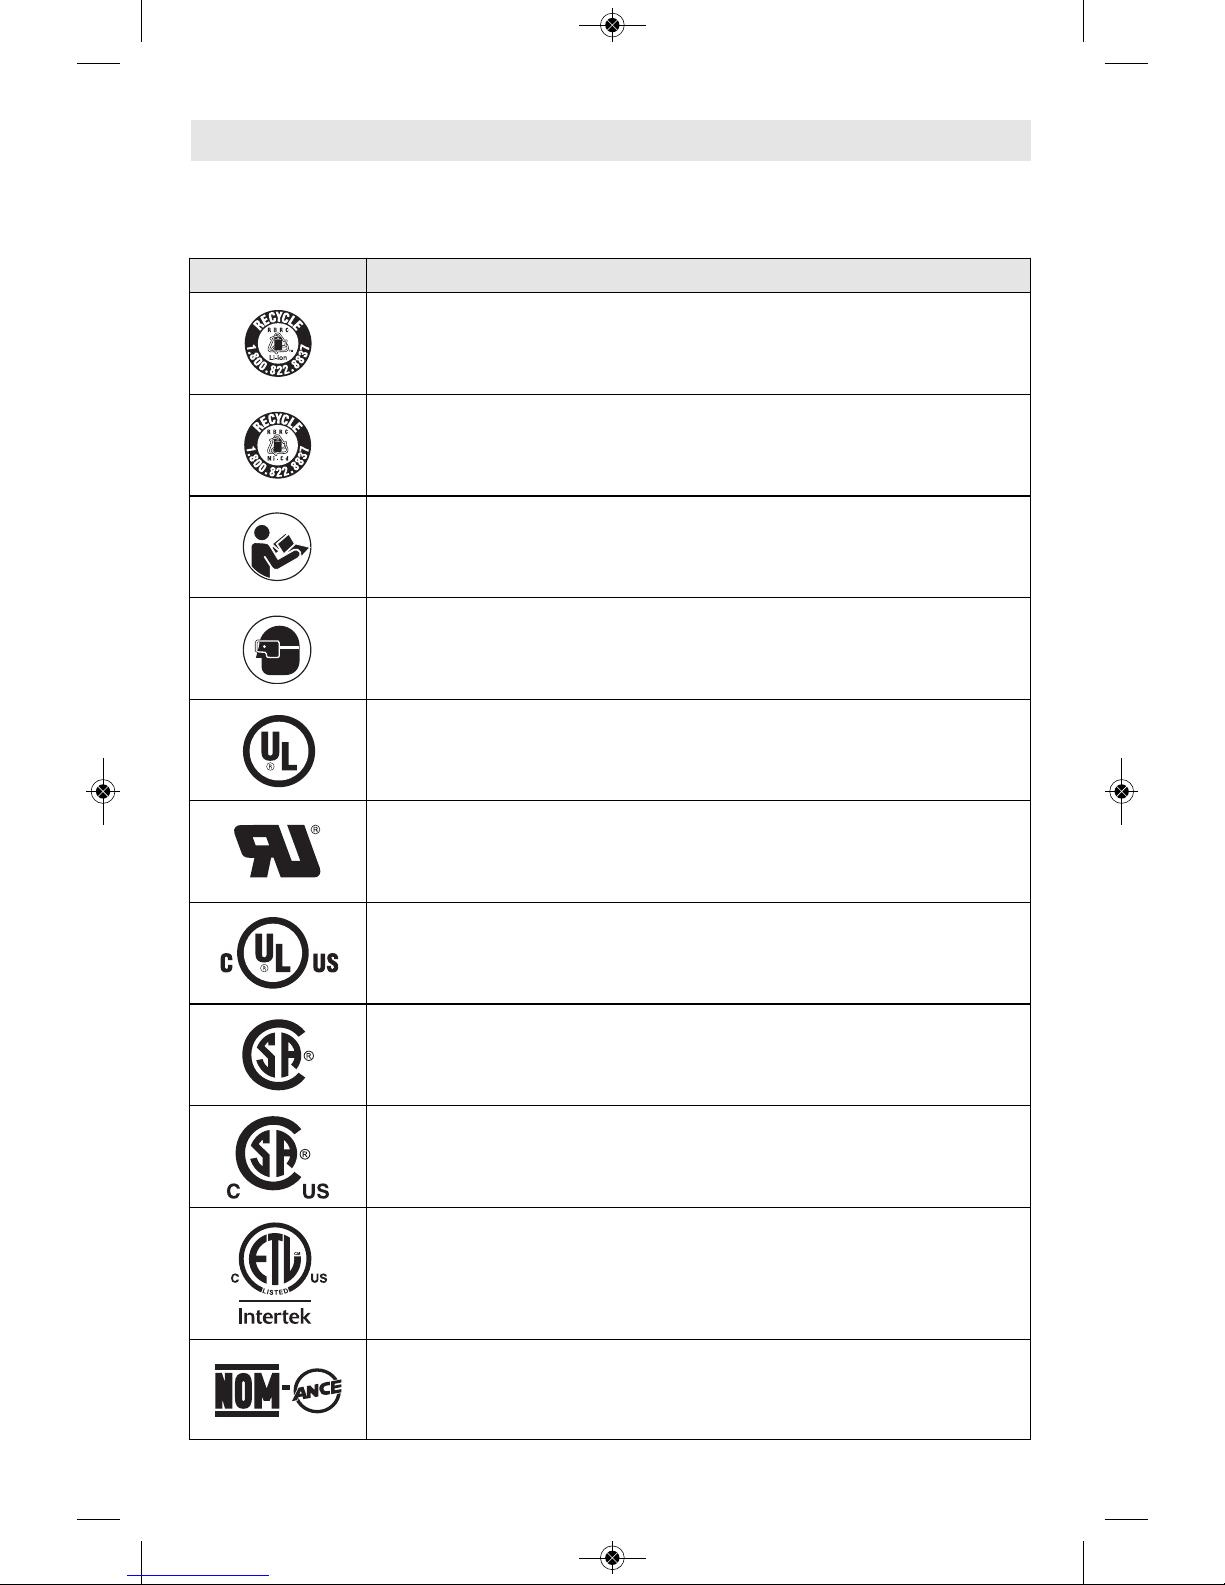
Symbols (continued)
IMPORTANT: Some of the following symbols may be used on your tool. Please study them
and learn their meaning. Proper interpretation of these symbols will allow you to operate the
tool better and safer.
Symbol Designation / Explanation
Designates Li-ion battery recycling program
Designates Ni-Cad battery recycling program
Alerts user to read manual
Alerts user to wear eye protection
This symbol designates that this tool is listed by Underwriters Laboratories.
This symbol designates that this component is recognized by Underwriters
Laboratories.
This symbol designates that this tool is listed by Underwriters Laboratories,
to United States and Canadian Standards.
This symbol designates that this tool is listed by the Canadian Standards
Association.
This symbol designates that this tool is listed by the Canadian Standards
Association, to United States and Canadian Standards.
This symbol designates that this tool is listed by the Intertek Testing
Services, to United States and Canadian Standards.
This symbol designates that this tool complies to NOM Mexican Standards.
2610027608_VAC090 VAC140 8/21/17 2:19 PM Page 7
Functional Description and Specifications
-8-
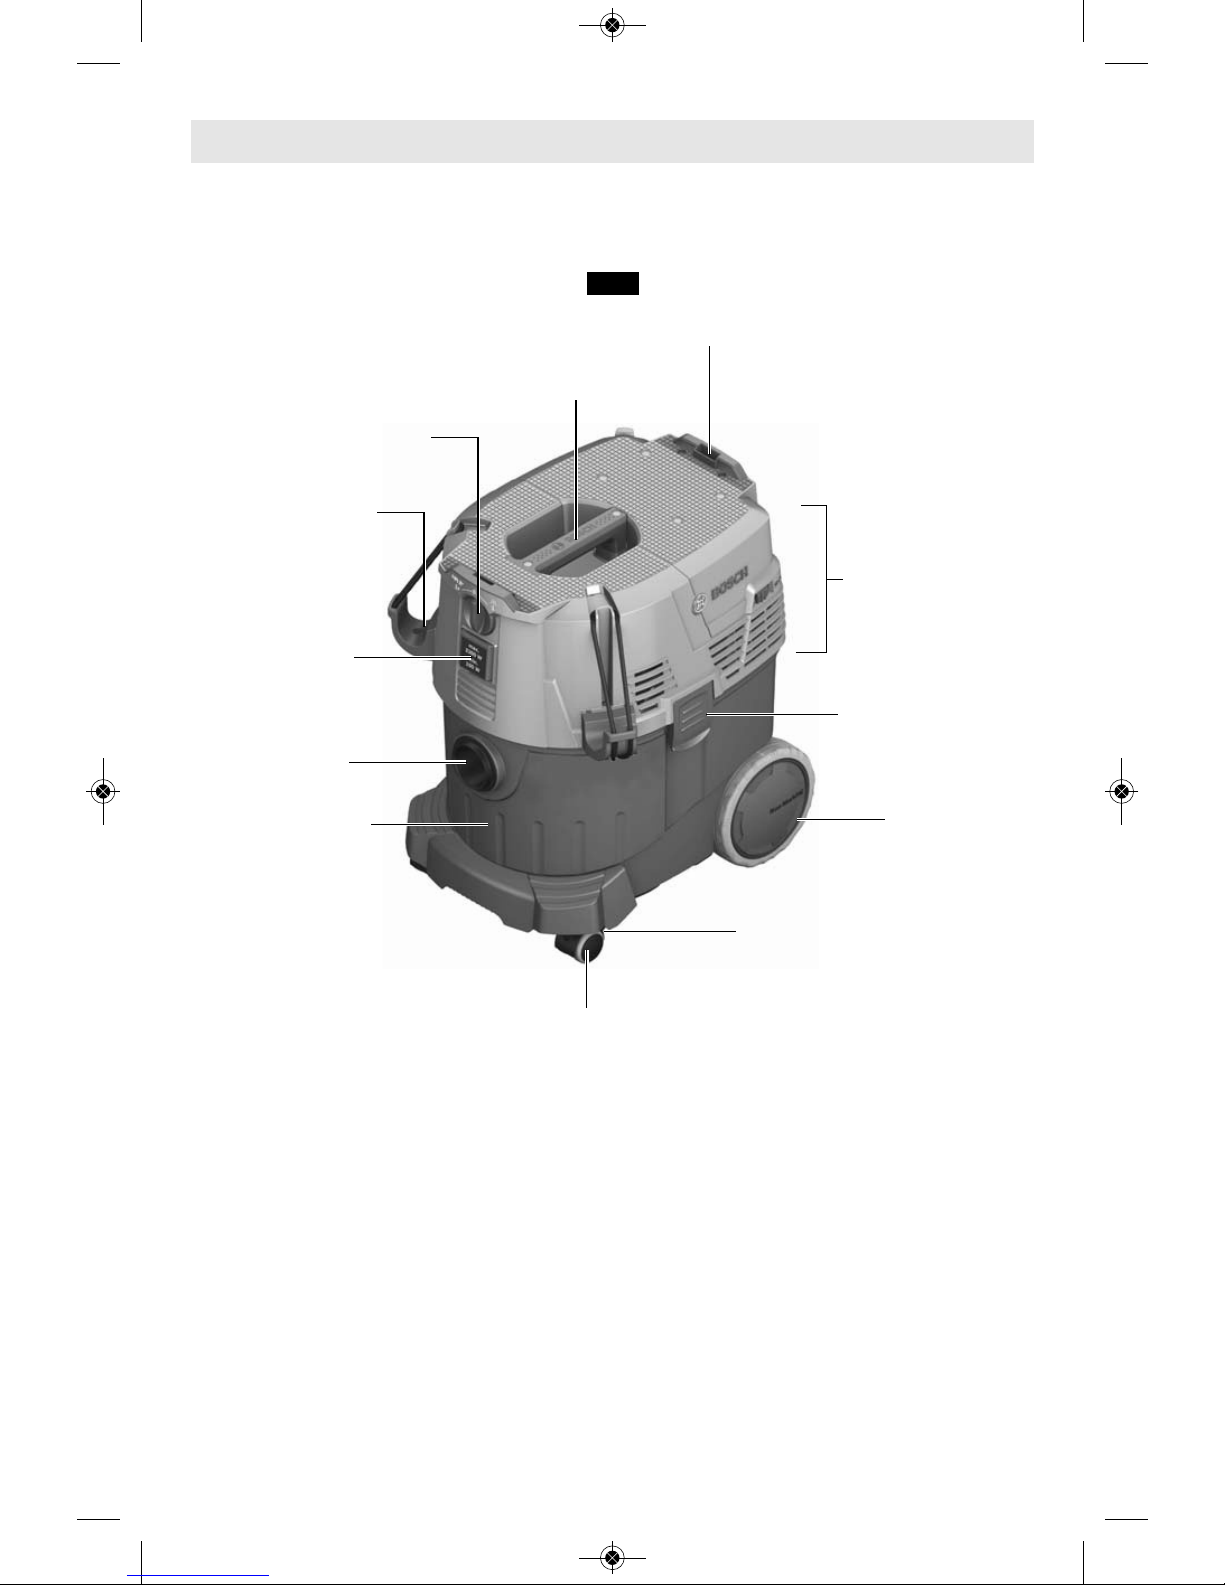
Semi-Automatic Filter Cleaning Dust Extractor
(VAC090S & VAC140S)
CANISTER
HOSE PORT
POWER TOOL
OUTLET
DUST
EXTRACTOR
HOSE HOLDER
MODE SELECTOR
SWITCH
CARRYING
HANDLE
L-BOXX
RETAINER
CANISTER LATCH
REAR WHEEL
CASTER BRAKE
CASTER
FIG. 1
* 9 gallon canister shown. See page 10 for 14 gallon canister
CONTROL UNIT
2610027608_VAC090 VAC140 8/21/17 2:20 PM Page 8
-9-
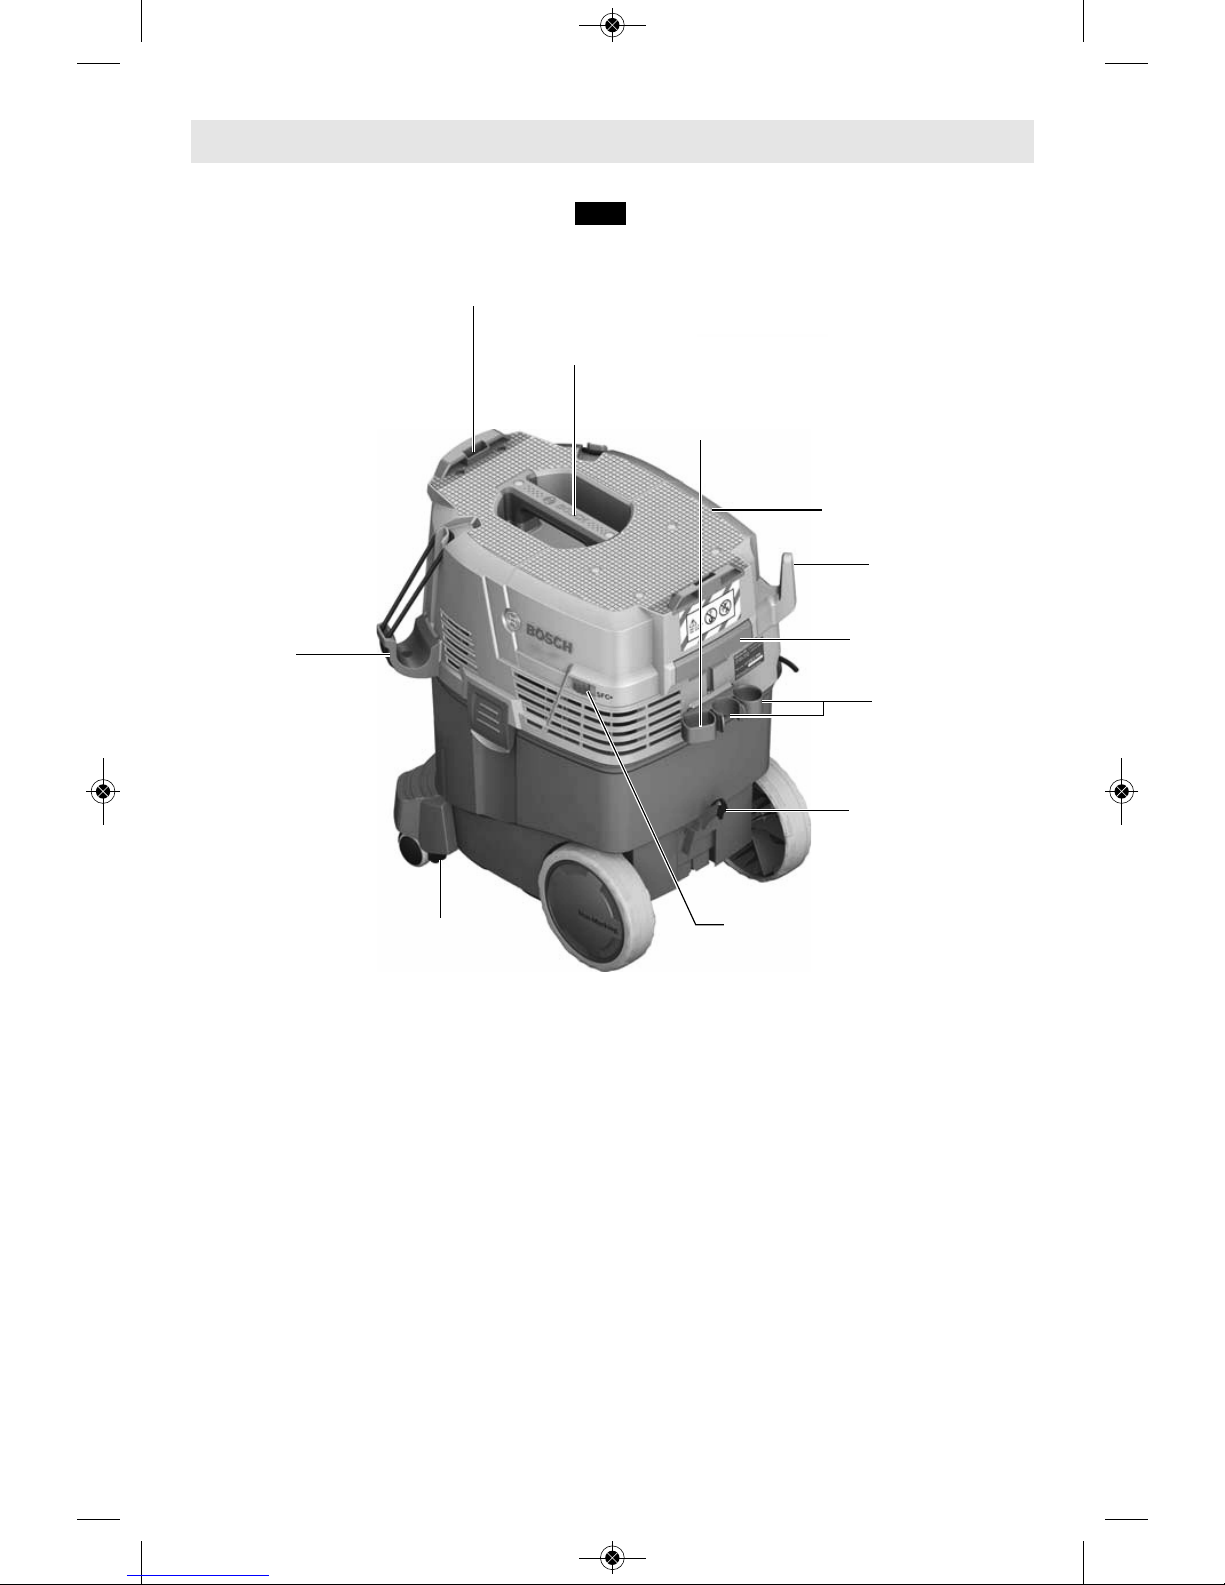
Functional Description and Specifications
FIG. 2
L-BOXX
RETAINER
CARRYING
HANDLE
DUST
EXTRACTOR-
HOSE HOLDER
CASTER BRAKE
CORD
HOOK
LOCKING LATCH
OF FILTER COVER
HOLDER FOR DUST
EXTRACTOR TUBES
HOLDER FOR
FLOOR NOZZLE
FILTER COVER
HOLDER FOR
CREVICE
NOZZLE/ELBOW
SEMI-AUTOMATIC
FILTER CLEANING
SWITCH
2610027608_VAC090 VAC140 8/21/17 2:20 PM Page 9
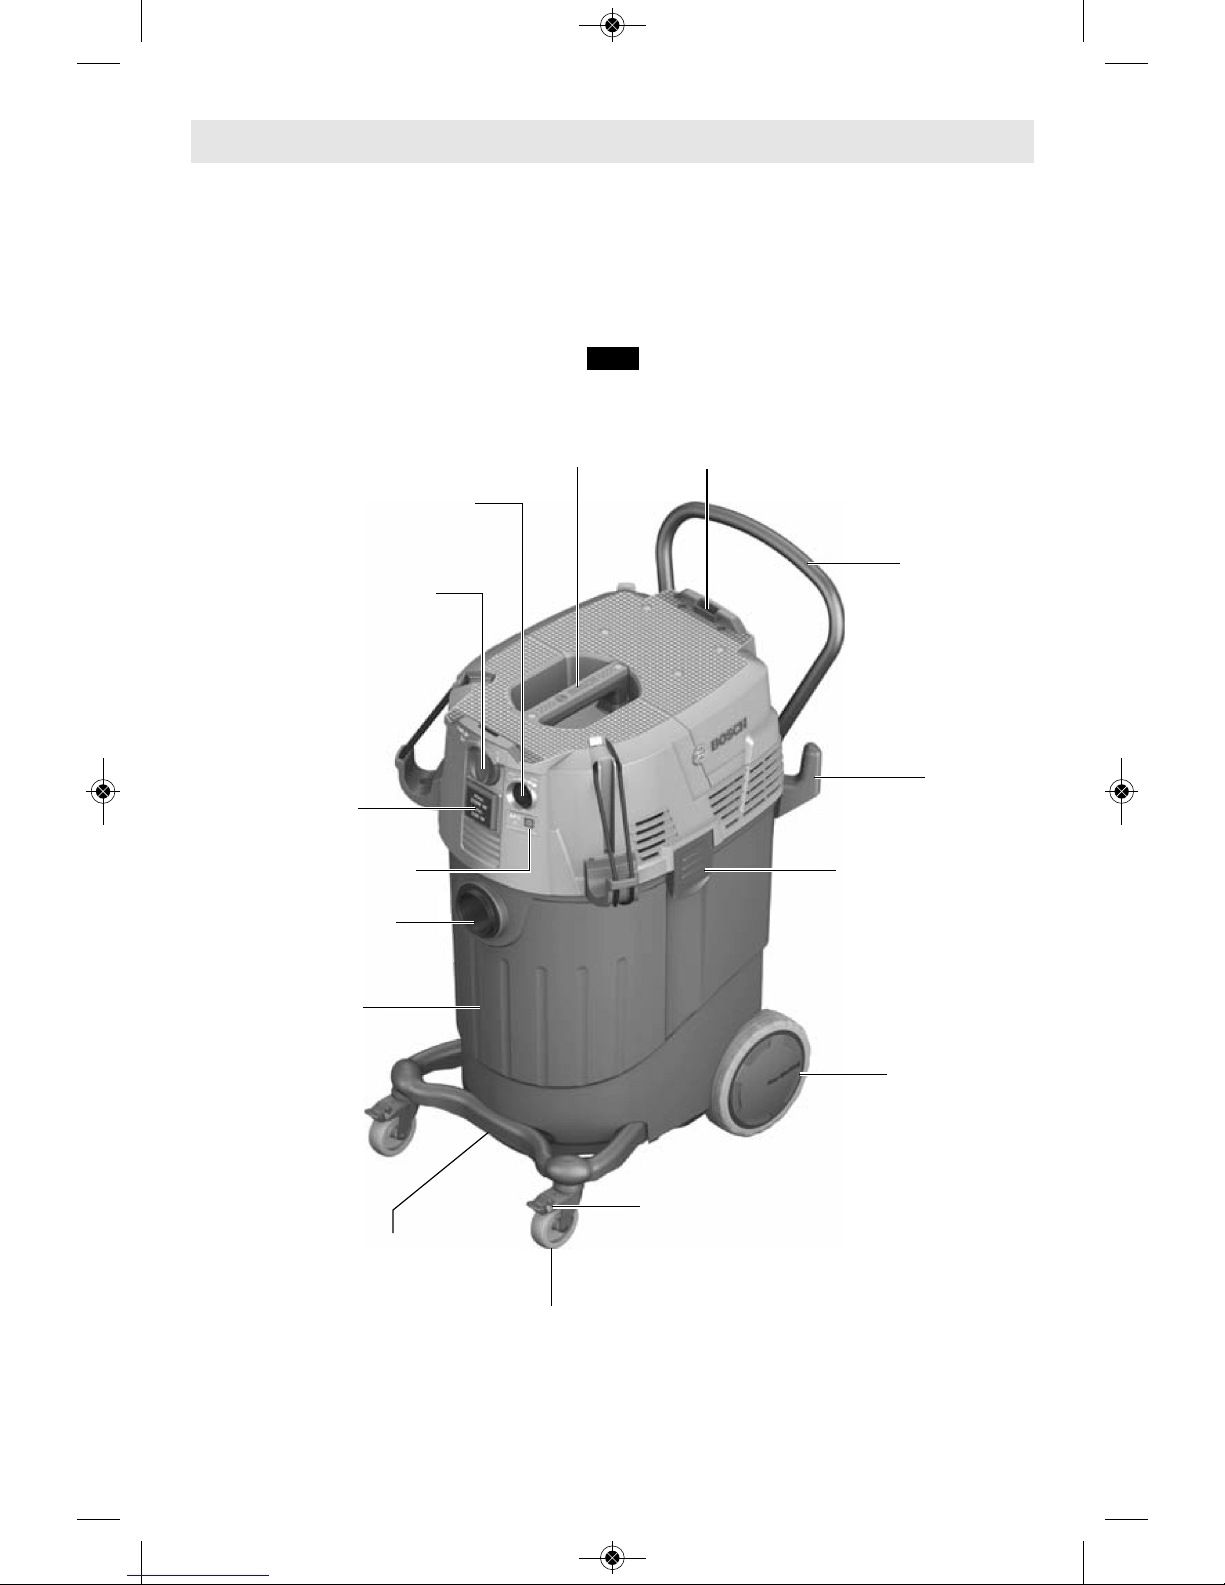
-10-
Functional Description and Specifications
CANISTER
HOSE PORT
POWER TOOL
OUTLET
MODE SELECTOR
SWITCH
CANISTER LATCH
REAR WHEEL
CASTER BRAKE
CASTER
FIG. 3
POWER BROKER DIAL
AUTOMATIC FILTER
CLEANING BUTTON
CASTER FRAME
(VAC140 ONLY)
CORD HOOK
PUSH HANDLE
(VAC140 ONLY)
CARRYING
HANDLE
L-BOXX
RETAINER
Automatic Filter Cleaning Dust Extractor
(VAC090A & VAC140A)
* 14 gallon canister shown. See page 8 for 9 gallon canister
2610027608_VAC090 VAC140 8/21/17 2:20 PM Page 10

-11-
DUST
EXTRACTOR
HOSE HOLDER
LOCKING LATCH
OF FILTER COVER
HOLDER FOR DUST
EXTRACTOR TUBES
HOLDER FOR
FLOOR NOZZLE
HOLDER FOR CREVICE
NOZZLE/ELBOW
Functional Description and Specifications
DRAIN HOSE
FIG. 4
Specifications:
Model Number VAC090A VAC090S VAC140A VAC140S
Voltage 120V 120V 120V 120V
Frequency 60Hz 60Hz 60Hz 60Hz
Rated Power 9.5 Amps 9.5 Amps 9.5 Amps 9.5 Amps
Max power tool draw 7.5 Amps 5.5 Amps 7.5 Amps 5.5 Amps
Filter Cleaning Automatic Semi-Automatic Automatic Semi-Automatic
Canister Volume (gross) 9 Gal 9 Gal 14.5 Gal 14.5 Gal
Air Flow (CFM) 150CFM max* 150CFM 150CFM max* 150CFM
Static Water Lift 97in* 97in 97in* 97in
Suction Pressure 242mbar* 242mbar 242mbar* 242mbar
Sound pressure level 70 dB* 70 dB 70 dB* 70 dB
Weight 28 lb 28 lb 38 lb 37 lb
Cord Length 16.4' (5m) 16.4' (5m) 16.4' (5m) 16.4' (5m)
Hose Length 9.84' (3m) 9.84' (3m) 9.84' (3m) 9.84' (3m)
* when Power Broker™ dial at Maximum setting.
CONTROL
UNIT
FILTER COVER
2610027608_VAC090 VAC140 8/21/17 2:20 PM Page 11

When unpacking, make sure that all of the
standard equipment is present and that there
is no transportation damage.
Bef ore p erform ing any work on the
machine itself, disconnect the power plug.
ATTACHING DUST EXTRACTOR
HOSE HOLDERS
Slide each hose holder firmly into place. Hose
holders will snap into the dust extractor when
fully engaged (Fig. 5).
ATTACHING THE
DUST EXTRACTOR HOSE
Insert hose into port and twist to lock (Fig. 6).
The canister’s 2-1/4” hose port also accepts
many friction-fit dust extractor hoses, including
most 1-1/4” hoses, 1-1/2” hoses, 2-1/2” hoses
and other Bosch hoses. (See ‘Attachments’,
page 15 and 16).
ATTACHING L-BOXX
On ly attach one ( 1)
L-BOXX weighing less
than 30 lbs to the top of a VAC model dust
extractor. More than one (1) L-BOXX or more
than 30 lbs in weight may cause the dust
extractor to become unstable when being
transported.
Do not carry or hoist the
dust extractor by the LBOXX handle. The L-BOXX handle may break
and cause property damage or personal injury.
To attach the L-BOXX to the dust extractor, align
the L-BOXX with the retainers and click the
L-BOXX onto the dust extractor. To remove,
simultaneously depress the red release levers
and lift L-BOXX off the dust extractor (Fig. 7).
DUST COLLECTION OPTIONS
There are five dust collection options: plastic
bag, fleece filter bag, paper bag, wet/dry slurry
bag or no bag.
• A filter must be installed whether or not any
of the bags are used.
Dry Vacuuming Notes:
• When dry-vacuuming such materials as fine
dust from drywall, plaster, cement, soot, and
flour, a dust bag should be inserted. In
general, fleece filter bags are the best bags
for dry-vacuuming because they are durable,
they trap dust before it gets to the filter and
allow the least amount of dust to escape at
the time of bag disposal.
HOSE PORT
DUST EXTRACTOR
HOSE
FIG. 6
-12-
Assembly and Preparation
DUST
EXTRACTOR
HOSE HOLDER
RETAINER FOR DUST
EXTRACTOR-HOSE
HOLDER
FIG. 5
Disconnect the plug from the power source before making any
assembly, adjustments or changing attachments. Such preventive
safety measures reduce the risk of starting the tool accidentally.
FIG. 7
2610027608_VAC090 VAC140 8/21/17 2:20 PM Page 12

•
Using a paper, fleece or wet/dry slurry dust
bag extends the amount of time the unit
operates at high performance and extends
the amount of time it takes for the filter to
become clogged.
• The plastic bags and fleece filter bags can
handle a heavier load without tearing than the
paper or wet/dry slurry bags.
• Fully enclosed Bosch fleece filter bags
provide the best option for reducing exposure
to dust (especially silica) when it is time to
remove the dust extractor control unit for bag
removal/disposal. The use of other Bosch
bags should be based on the application
being performed. For example: plastic bags
can be used for general jobsite clean up and
wet filter bags can be used for slurry.
Wet Vacuuming Notes:
• The wet/dry slurry bags can be used when
vacuuming wet materials. They are ideally
suited for slurry-suction applications.
• The fleece filter bags and paper bags should
not be used when wet vacuuming because
the water will cause the bag to come apart.
• The plastic bags should not be used when
wet vacuuming because the bag may tear
when removed if it is fully loaded with liquid.
• See WET VACUUMING section for more
information.
Sem i a utomat ic filter
cleaning and automatic
filter cleaning must be turned off when
using paper bags. The reversal of air during
filter cleaning may damage the paper bag.
INSTALLING A DUST BAG
1. Unlock the canister latches and remove the
control unit.
2. Make sure to install a bag that is suitable for
the application and has the proper size for
canister.
3
.
G
rasp a new dust bag at the flange. Push it
over the internal dust port first and then over
the raised ring. Make sure the entire flange is
seated in the recessed area of the internal dust
port. Make sure that the dust bag is not folded
over on itself and the full length of the bag
faces the front and bottom of the canister.
4. For plastic bags only – After the plastic bag
has been attached to the internal dust port,
wrap the upper edges of the plastic bag over
the entire perimeter of the rim at the top of
the canister. Make sure that the plastic bag
does not interfere with the canister latches.
5. Re-attach the control unit.
6. Lock the canister latches.
REMOVING THE DUST BAG
Regardless of the bag
used, special caution is
needed when removing bags filled with
debris in order to reduce exposure to
airborne dust (especially silica dust from
concrete applications).
- Unlock the canister latches and remove the
control unit.
If a plastic bag is used:
1. Align the top of the plastic bag. Peel the
cover off the adhesive strip and fold over
onto the plastic bag to seal the top closed.
Save the cover for use in step 4.
2. Remove the plastic bag from the internal
dust port by pulling the bag towards the rear
of the canister.
3. Remove the bag from the canister and twist
the top of the bag.
4. Tie off th e pla stic b ag be low t he por t
op ening using the co ver that wa s just
removed from the bag’s adhesive strip in
step 1 and dispose of properly.
5. Wipe dust extractor with a damp cloth to
clean the dust residue.
If a paper, fleece, or wet/dry slurry bag is
used:
1. Remove the bag from the internal dust port by
pulling the flange towards the rear of the
canister.
2. Pull the tab on the flange up until the opening
has been closed off by the paper cover.
3. Remove the bag from the canister and
dispose of properly.
4. Wipe dust extractor with a damp cloth to
clean the dust residue.
Note: Use extra caution when removing paper
bags. If overfilled, they can tear during removal
from the dust extractor.
FIG. 8
HOSE
PORT
FLEECE
FILTER
BAG
-13-
2610027608_VAC090 VAC140 8/21/17 2:20 PM Page 13

-14-
Operating Instructions
Whe n usin g this dust
extractor for EPA Lead
Bas ed Pa int Renovat ion, Repair and
Painting Program (RRP), this dust extractor
is not r ecomme nded f or vac uuming
carpets and rugs. Dust extractor may not be
able to completely remove all hazardous
substance, which m ay cause health and
environmental hazards.
Not suitable to vacuum
haz ardous or toxic
substances or dusts e.g. asbestos. Neither
the standard filter nor the optional HEPA filter
is able to capture all hazardous particles,
which may cause health hazards.
NOTE: Read the OSHA regulation on silica
dust and the related OSHA Silica Table 1 to
understa nd t he require ments nee ded to
reduce exposure to silica dust at the jobsite.
Specific rules apply to the drilling, demolition
cutting and grinding materials that contain
silica. According to OSHA Silica Table 1,
when dry cutti ng or dry surface grindin g
concrete type materials using hand held
grinders, the dust extractor (dust collector)
being used must provide 25 CFM or greater of
air flow per inch of wheel diameter.
All OSHA requirements can be found at
OSHA website:
www.osha.gov
Always check OSHA website for the latest
regulations.
When using the dust extractor in concrete
app licati ons w ith r elated tool s an d dus t
extraction attachments (such as rotary /
demolition hammers or grinders), always follow
the instructions provided with the tools /
attachments to ensure proper dust collection
throughout the application.
SWITCHING DUST EXTRACTOR
ON/OFF
Au toma tic filter cleaning (AFC) is active
whenever the VAC090A and VAC140A dust
extractor is switched on in either the “Power
tool activation” mode or normal vacuuming
mode.
NORMAL VACUUMING MODE
Swi tching t he Unit On: Unplu g any
connected power tool from the power tool
outlet on the dust extractor. Set mode selector
switch to on “ON”.
Switching the Unit Off: Set mode selector
switch to off “OFF”.
“POWER TOOL ACTIVATION” MODE
In the “Power Tool Activation” mode, when the
power tool is switched on, the power tool
automatically switches on the dust extractor.
Switching the Dust Extractor ON
1. Make sure the power tool is switched off,
and then plug it in to the power tool outlet
on the dust extractor.
2. Turn the mode selector switch to “Power
Tool Activation” position (Fig. 9).
3. When the power tool is switched on, the
dust extractor automatically switches on.
Switching the Dust Extractor OFF
To turn off the dust extractor, switch off the
con n e cted po wer too l or t u rn the mode
selector switch to “OFF” position.
NOTE: After the tool is switched off, in order
to em p t y the ho s e , the du st e x t r a c t or
switches off 10-15 second later.
CONNECTING POWER TOOL
TO DUST EXTRACTOR
Avo id accid ental
starting. Be sure the dust
extractor and tool switches are OFF before
plugging in. Tool must be turned off before
placing the dust extractor switch in “Power
Tool Activation” or “ON” mode. Do not
keep power tool plugged into power tool
outlet on the dust extractor during normal
va cuumin g (mode switc h at th e “ON”
position). Plugging in dust extractors or tools
that have switch ON invites accidents.
FIG. 9
Disconnect the plug from the power source before making any
assembly, adjustments or changing attachments. Such preventive
safety measures reduce the risk of starting the tool accidentally.
2610027608_VAC090 VAC140 8/21/17 2:20 PM Page 14

T
he sum of current draw
of the dust extractor and
connected power tool must not exceed
15A. Exceeding the 15A current draw could
cause the dust extractor and branch circuitry
to overheat, presenting a risk of fire.
Models VAC090A and VAC140A only:
POWER BROKER™
POWER ALLOCATION FEATURE
The Power Broker™ feature allows optimal
allocation of the power available between the
dust extractor and power tool.
Before connecting power tool to power tool
outlet, set POWER BROKER™ dial as follows:
1. Get tool amp rating from tool dataplate.
2. Subtract tool amp rating from 15A.
3. Set dial to the difference. Tool amp and dial
setting must not exceed 15A.
Models VAC090S and VAC140S only:
Before connecting tool to the power tool
outlet, make sure the tool rating does not
exceed 5.5A.
Notes:
• The building's circuit breaker can trip if the
combination of power tool amp rating and
the dial setting exceed the building circuit's
amp rating.
• If full dust extractor power is needed with a
power tool that draws high amps, it may be
necessary to plug the power tool into a
separate circuit.
CONNECTING DUST EXTRACTOR TO
POWER TOOLS AND ATTACHMENTS
This dust extractor can also be connected to
various power tools or their attachments to
easily extract and collect dust. Applications
include drilling and demolition of concrete
using rotary and demolition hammers, as well
as sanding various materials using grinders
and sanders. Other power tools that can be
con nected to t he dus t ext ractor inclu de
routers, planers and saws. To determine if
any attachment and/or adapter is required to
connect a g iv en power too l a nd dust
extractor hose, consult the Bosch catalog or
website (www.boschtools.com). Depending
on the h o s e po r t on the power tool o r
attachment, the included VX120 power tool
hose adapter can be either slid into the hose
port or snapped into place. Bosch also offers
a varie t y of o t h e r dust ex t r a c t o r hose
adapters (not included) to allow the hose to
be connected to hose ports of various sizes.
See page 19.
REMOVING AND REPLACING FILTER
1. Pull the locking latch for the filter cover and
open cover. When cover is fully open, it will
click into place (Fig. 11).
2. Grasp the filter by the edge, pull up and
remove (Fig. 11).
3. Before inserting new filter, use a moist cloth
and remove any dust and debris from the
filter compartment.
4. Insert new filter and make sure the filter is
seated firmly in place (Fig. 12).
5. Shut the filter cover, ensuring cover locks
into place
FILTER CLEANING SYSTEM
The Bosch VAC-Series dust extractors have
2 types of filter cleaning systems: automatic
fil ter cl eaning and se mi-auto m atic f i lter
cleaning. These are very aggressive systems
which maximize filter cleaning to maintain a
high air flow (CFM) rate even in heavy duty
applications.
FIG. 11
FILTER COVER
LOCKING LATCH
OF FILTER COVER
FILTER
FIG. 10
-15-
2610027608_VAC090 VAC140 8/21/17 2:20 PM Page 15

Check filter periodically
and replace if worn out
or damaged. Using damaged filter can lead
to rele a s e of unw a n t e d airborne
contaminants from the canister.
Semi automatic filte r
cleaning and automatic
filter cleaning must be turned off when
using paper bags. The reversal of air during
filter cleaning may damage the paper bag.
Notes:
• Always use fleece filter bags when using
HEPA filters with dust extractor.
• Fleece filter bags in conjunction with the
automatic or semi-automatic filter cleaning
will help extend filter life and maintain dust
extractor suction efficiency.
• With regular usage of the filter cleaning
system, t h e maximum vacuuming
performance is maintained longer.
• Th e f i l t e r c l e a ni ng sy s t e m m u s t be
activated w h e n th e su ct io n po we r
decreases t o t h e point of b e i n g
insufficient.
• The sound of the filter cleaning system
may surprise those near the work area.
Before using filter cleaning, alert those in
the vicinity of the dust extractor of this
f
eature an d the a s s o c i at e d sound it
makes.
• The proper frequency for activating the
filter cleaning system depends on the type
and amount of dust. With regular usage,
the maximum vacuuming performance is
maintained longer.
Automatic filter cleaning (AFC) (Available
on models VAC090A, VAC140A)
Automatic filter cleaning is active whenever
the dust extractor is switched on in either the
“Po wer to ol acti vation ” mode or no rmal
vacuuming mode.
To deactivate the AFC feature, press the red
membrane button the front of the d us t
extractor. The LED will turn off to signal this
feature is deactivated. To reactivate, press
the red membrane button a second time and
the greed LED light will turn on signaling the
AFC feature is activated (Fig. 3).
Air reversals will clean the filters every 15
seconds, maintaining the highest level of
suction power. Dust extractor suction will be
maintained as the filters are being cleaned.
Semi-automatic f i l t e r cleaning (S F C )
(Available on models VAC090S, VAC140S)
Air reversals will clean the filters when either
the actuator on the hose is depressed, or the
airflow is blocked by covering the end of the
hose. No suction will be available as the
filters are being cleaned (Fig. 13).
To deactivate the SFC function, slide the red
switch on the side of the dust extractor towards
the front of the dust extractor. To reactivate,
slide the red switch towards the rear of the dust
extractor (Fig. 2).
DRY VACUUMING
To reduce exposure to
si lica dust, fol low the
below guidelines:
• Always use HEPA filter and fleece filter bag.
• For models equipped with Automatic Filter
Cleaning (AFC), leave the AFC system
“ON”. Do not turn off the AFC system.
• For models equipped with Semi-automatic
ACTUATOR
FIG. 13
-16-
J2
FIG. 12
FILTER
2610027608_VAC090 VAC140 8/21/17 2:20 PM Page 16
EMPTYING THE CANISTER
1. Switch the unit off.
2. Disconnect from the power supply.
3. Remove the filter bag (see “REMOVING
THE DUST BAG” on page 13, or dump out
the canister as appropriate.
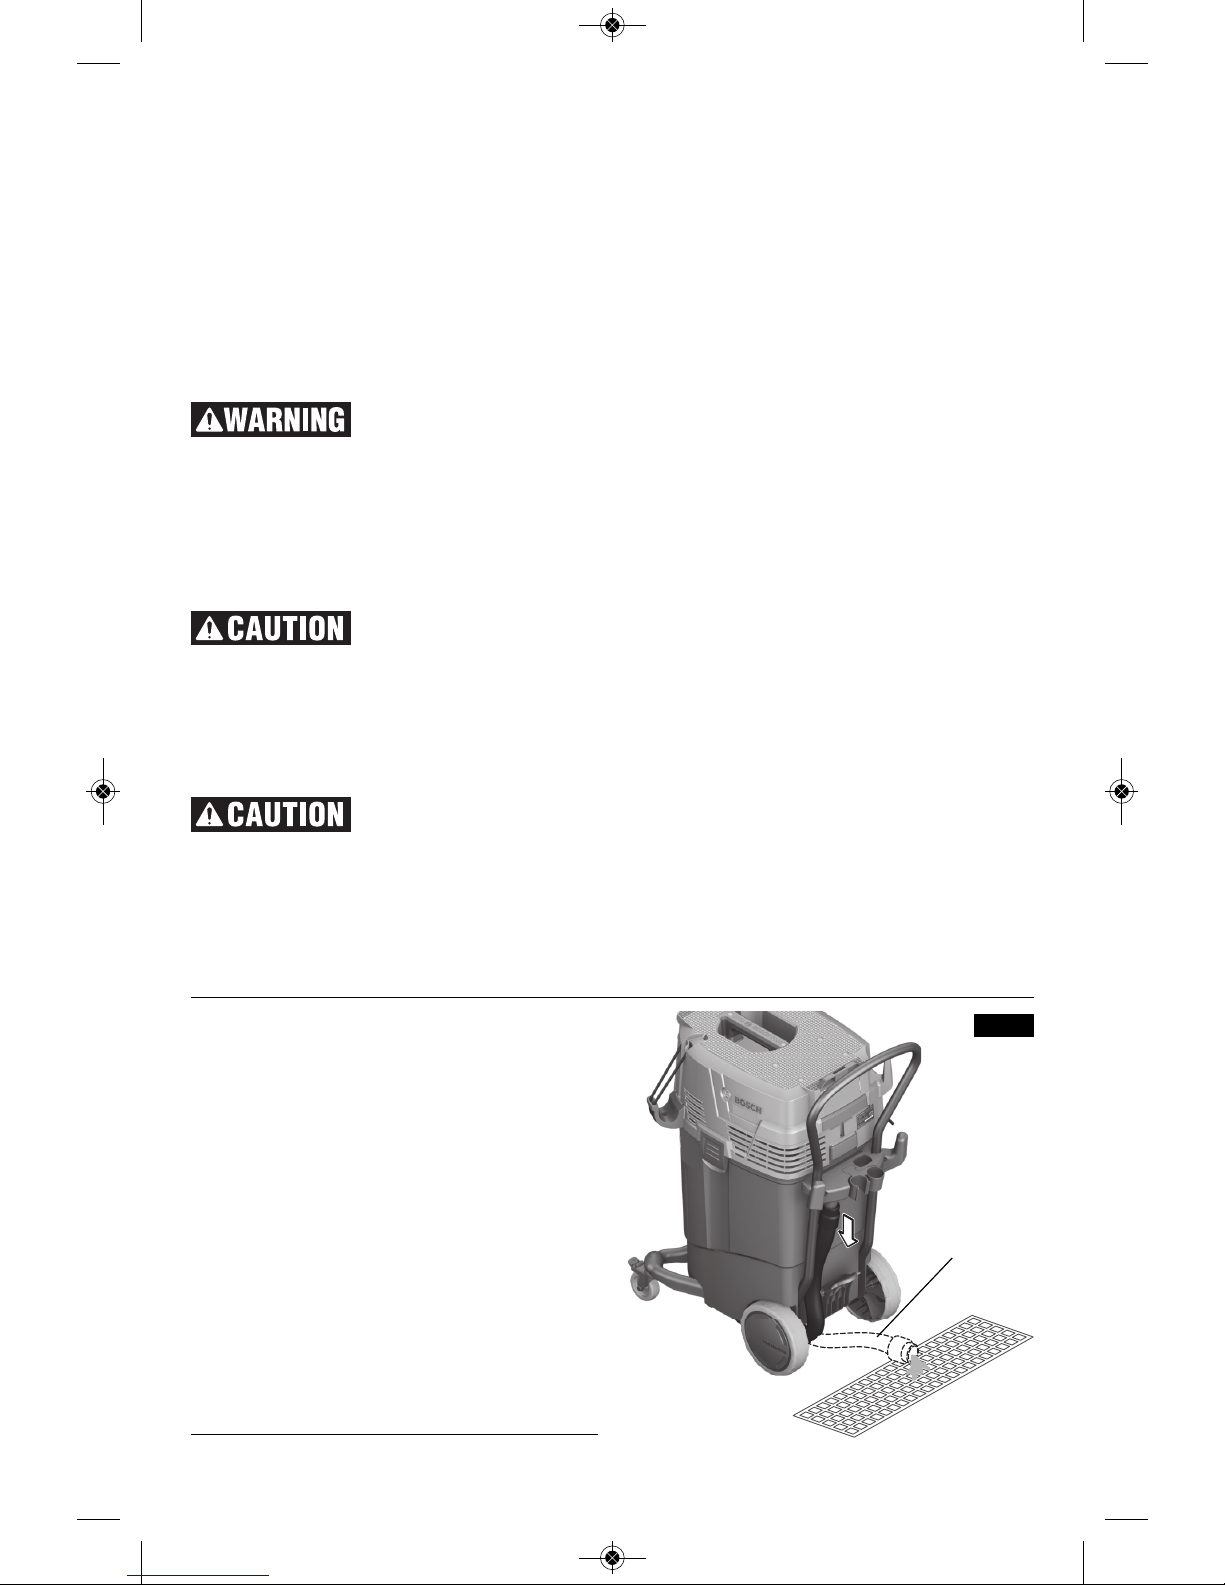
EMPTYING THE CANISTER OF LIQUIDS
(Models VAC140A and VAC140S only)
1. Switch the unit off.
2. Disconnect from the power supply.
3. Position dust extractor in area where the
contents of the canister can be drained.
4. Detach drain hose from stored position on
dust extractor and lay hose on the ground
(Fig. 14).
5. Once canister is emptied, secure drain hose
and allow canister to air dry.
FIG. 14
DRAIN HOSE
f
ilter cleaning (SFC) system, periodically
act ivate the SFC syste m to mai ntain
maximum vacuuming efficiency.
• Check filter periodically and replace if worn
out or damaged. Never use compressed air,
shake filter or hit filter against object to
clean filter.
• Wipe dust off dust extractor control unit with
moist cloth. Use water to clean the canister
and attachments. Do not use dust extractor
until completely dry.
WET VACUUMING
Do not use to vacuum
flammable liquids, gases,
or explosive dusts, like gasoline or other
fuels, lighter fluid, varnish, polyurethane
coatings, cleaners, oil-based paints, natural
gas, hydrogen, coal dust, magnesium dust,
grain dust, or gun powder. Electric motors
create sparks, which may ignite the dust or
fumes.
A filter must be used when
wet vacuuming. Do not use
HEPA filter for wet vacuuming. A polyester
(PES) filter (sold separately) is recommended
for wet vacuuming. A paper filter can be used
occasionally for wet vacuuming, but it must be
allowed to dry thoroughly after such usage to
help minimize deterioration.
Do not use paper, plastic
or fleece filter bag when
wet vacuuming. If a bag is to be used when
vacuuming wet materials, a wet/dry slurry bag
must be used.
N
otes:
• Do not activate the filter cleaning mode
when the canister contents are wet.
• The u nit is equi pped w ith wat er lev el
sensors. The unit switches off when the
maximum filling height is reached. The unit
still has power, but will not operate. The unit
must be switched off and emptied before it
can be switched on again.
• When the unit is shut off, some water may
flow out of the hose.
• To prevent siphoning or spillage, lift the
suction hose out of the liquid before draining
the dust extractor.
• Before opening and emptying, move the
switch to the OFF position.
• Befo re openi ng and empty ing, alw ays
disconnect the dust extractor cord from the
power supply.
• In ord er to avoi d mildew , after we t
vac uuming , remove the bag (if one is
installed) and remove the filter and allow it to
dry thoroughly. Dry the filter and control unit
thoroughly so that dust cannot adhere to
moist parts.
• Use a dr y filter f or subse quent dr y
vacuuming. We suggest purchasing an
extra filter when frequently alternating
between wet and dry vacuuming and swap
them out as appropriate.
• Wipe dust off dust extractor control unit with
moist cloth. Use water to clean the canister
and attachments. Do not use dust extractor
until completely dry.
-17-
2610027608_VAC090 VAC140 8/21/17 2:20 PM Page 17

WATER-LEVEL SENSOR MAINTENANCE
Clean the water level sensors occasionally:
1. Unlock the canister latches and remove the
control unit.
2. Clean the water level sensors with a soft
cloth.
3. Reattach the control unit again
4. Lock the canister latches.
-18-
Maintenance
Service
Preventive maintenance
must be performed by a
Bosch Factory Service Center or Autho rized B o s c h Service Station. Se r v i c e
performed by unauthorized per so n nel may
result in misplacing of internal wires and
com p onents which could cause serious
injury.
TOOL LUBRICATION
Your Bosch tool has been properly lubricated
and is ready to use.
Cleaning
To avo i d ac c i d e n t s
always dis connect the
tool from the power supply before
cleaning or performing any main tenance.
Ventilation openings and switch levers must
be kept clean and free of foreign matter. Do
not at tempt to clean by inserting pointed
objects through openings.
Wipe dust off dust extractor control unit with
moist cloth. Use water to clean the canister
and attachments. Do not use dust extractor
until completely dry.
Certain cleaning agents
and s o l vents d a m a g e
plastic parts. Some of these are: gasoline,
carbon tetrachlo ride, chlo rinated cleaning
solvents, am m on ia and hou s e hold
detergents that contain ammonia.
WATER-LEVEL SENSORS
FIG. 15
2610027608_VAC090 VAC140 8/21/17 2:20 PM Page 18
 Loading...