

Page 1
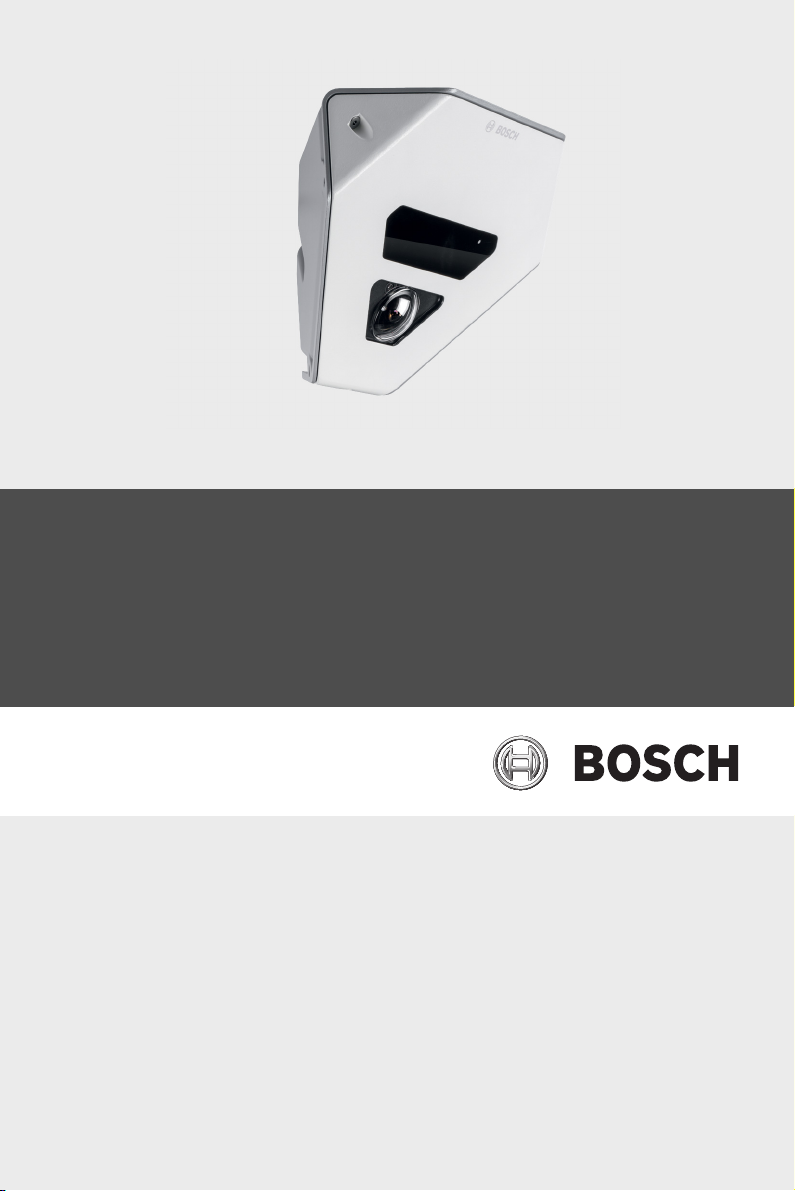
FLEXIDOME corner 9000 IR
VCN-9095
en OSD Menu
Page 2

Page 3

Table of Contents | 3
Table of Contents
1 Configuration 4
1.1 Menus 4
1.1.1 Menu navigation 4
1.1.2 Top level menus 4
1.2 Pre-defined modes 6
1.3 Day/Night switching 7
1.4 Camera control communication (Bilinx) 7
1.5 Main menu structure 8
1.5.1 Mode submenu 8
1.5.2 ALC submenu 9
1.5.3 Day/Night submenu 11
1.5.4 Enhance / Dynamic Engine submenu 13
1.5.5 Color submenu 15
1.5.7 VMD submenu 17
1.6 Install menu structure 18
1.6.1 Language submenu 19
1.6.2 Synchronization submenu 20
1.6.3 Alarm I/O submenu 21
1.6.4 Connections submenu 22
1.6.5 Test signal submenu 22
1.6.6 Camera ID submenu 22
1.6.7 Privacy masking submenu 24
1.6.9 Defaults submenu 25
| |
Page 4
4 en | Configuration FLEXIDOME corner 9000 IR
1 Configuration
The camera normally provides an optimal picture without the
need for further adjustments. Advanced set-up options are
available in a menu system for getting the best results under
special circumstances.
The camera implements your changes immediately so that
before and after settings are easily compared.
1.1 Menus
1.1.1 Menu navigation
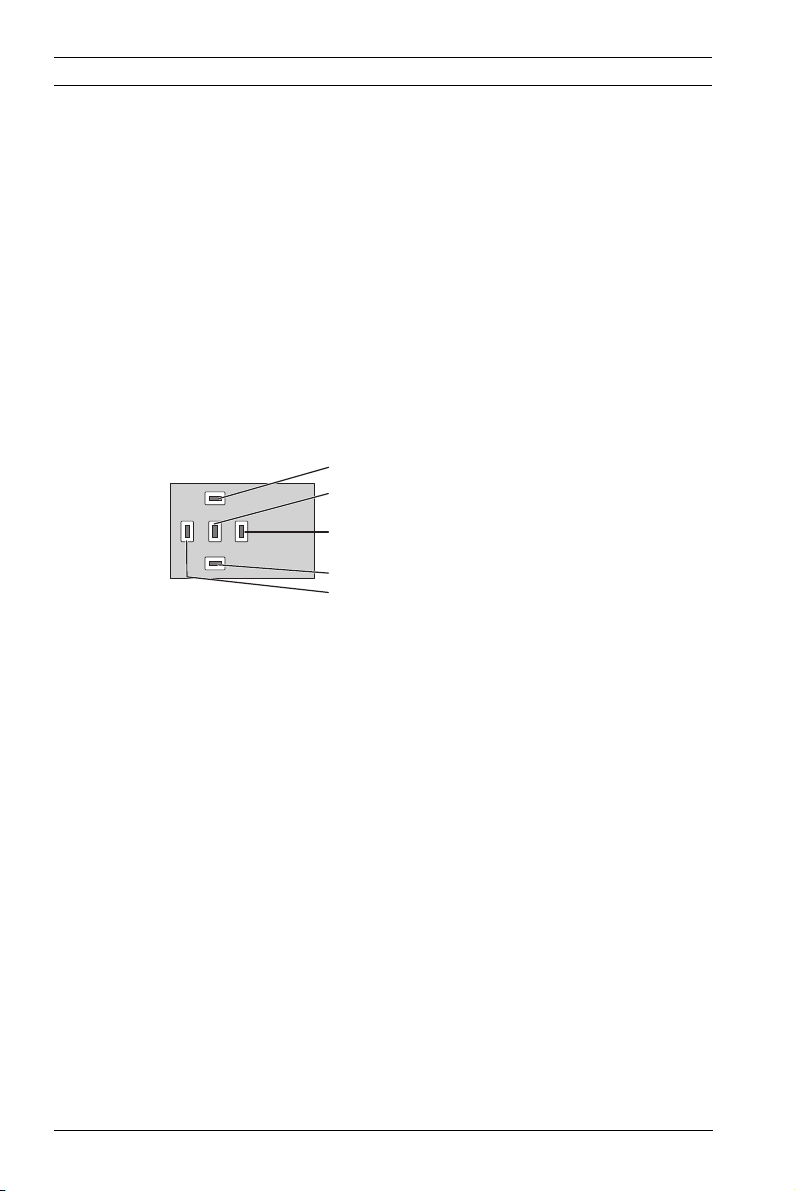
Five keys are used for navigating through menu system.
Up button
Menu/Select button (center)
Right button
Down button
Left button
– Use the up or down keys to scroll through a menu.
– Use the left or right keys to move through options or to set
parameters.
– To close all menus at once hold down the menu/select key
until the menu display disappears or continually select the
Exit item.
Some menus automatically close after about two minutes; other
menus have to be closed manually.
1.1.2 Top level menus
There are two upper level menus: a Main menu and an Install
menu. The menus have functions that can be selected directly
or submenus for more detailed set-up.
– To access the Main menu, press the menu/select button
(center) for less than 1 second. The Main menu appears on
the monitor. The Main menu allows you to select and set-
up the picture enhancement functions. If you are not happy
AM18-Q0661 | v1.0 | 2013.06 OSD Menu Bosch Security Systems
Page 5

FLEXIDOME corner 9000 IR Configuration | en 5
with your changes, you can always recall the default values
for the mode.
– The camera also has an Install menu in which the
installation settings can be set. To access the Install menu,
press the menu/select button (center) for longer than 2
seconds.
Bosch Security Systems OSD Menu AM18-Q0661 | v1.0 | 2013.06
Page 6

6 en | Configuration FLEXIDOME corner 9000 IR
1.2 Pre-defined modes
There are six pre-defined modes with settings to make
configuration easier. You can select one of the six pre-defined
modes in the Install/Mode submenu. The modes are defined as
follows;
1. 24-hour
Default installation mode to provide stable pictures over a
24-hour period. These settings are optimized for out-of-
the-box installation.
2. Traffic
Capture high-speed objects using default shutter in
variable lighting conditions.
3. Low light
Provide extra enhancement, such as AGC and SensUp to
make usable pictures in low-light conditions.
4. Smart BLC
Settings optimized to capture details in high contrast and
extremely bright-dark conditions.
5. Low noise
Enhancements are set to reduce picture noise. Useful for
conditional refresh DVR and IP storage systems because
reducing noise reduces the amount of storage required.
6. Vibrant
This mode has enhanced contrast, sharpness and
saturation.
AM18-Q0661 | v1.0 | 2013.06 OSD Menu Bosch Security Systems
Page 7

FLEXIDOME corner 9000 IR Configuration | en 7
1.3 Day/Night switching
The camera is equipped with a motorized IR filter. The
mechanical IR filter can be removed in low-light or IR
illuminated applications by software configuration settings.
If Auto switching mode is selected, the camera automatically
switches the filter depending on the observed light level. The
switching level is programmable. In Auto switching mode the
camera prioritizes motion (the camera gives sharp images
without motion blur as long as the light level permits) or color
(the camera gives color pictures as long as the light level
permits). The camera recognizes IR illuminated scenes to
prevent unwanted switching to color mode.
There are four different methods of controlling the IR filter:
– via Bilinx communication,
– automatically, based on the observed light levels, or
– as part of the programmable mode profile.
1.4 Camera control communication (Bilinx)
This camera is equipped with a coaxial communications
transceiver (also referred to as Bilinx). In combination with VPCFGSFT, the camera setting can be changed from any point
along the coaxial cable. All menus can be accessed remotely
giving full control of the camera. With this method of
communication it is also possible to disable the local keys on
the camera.To avoid loss of communication on an installed
camera, the Communication On/Off selection is not available
while using remote control. This function can only be accessed
with the camera buttons. Bilinx communications can only be
disabled using the buttons on the camera.
Disabled camera buttons
When the Bilinx communications link is active, the buttons on
the camera are disabled.
Bosch Security Systems OSD Menu AM18-Q0661 | v1.0 | 2013.06
Page 8

8 en | Configuration FLEXIDOME corner 9000 IR
1.5 Main menu structure
Item Selection Description
Mode Submenu Sets up operating modes 1 to 6
Exposure Submenu Exposure control
Day/Night Submenu Day/Night for color/mono operation
Enhance Submenu Picture enhancement and performance
Color Submenu White balance and color rendition
VMD Submenu Video motion detection
Image
Adjustment
Submenu Sets up digital zoom or digital image
stabilization
1.5.1 Mode submenu
Item Selection Description
Mode 1 to 6 Selects operating mode.
Mode ID Alphanumeric Mode name (11 characters maximum)
Copy active
mode
Mode
Defaults
EXIT Returns to main menu.
Available
mode
numbers
Submenu Restores camera to the factory default
Copies current mode settings to the
mode number selected.
settings.
AM18-Q0661 | v1.0 | 2013.06 OSD Menu Bosch Security Systems
Page 9

FLEXIDOME corner 9000 IR Configuration | en 9
1.5.2 Exposure submenu
Item Selection Description
ALC level -15 to +15 Selects the video level range. A
positive value is more useful for lowlight conditions; a negative value is
more useful for very bright
conditions.
Some ALC adjustment may improve
scene content when Smart BLC is
enabled.
ALC speed Slow, medium,
fast
Adjusts the speed of the video level
control loop. For most scenes it
should remain at the default value.
Shutter AES, FL, Fixed AES (auto-shutter) - the camera
automatically sets the optimum
shutter speed.
FL - flickerless mode avoids
interference from light sources.
FIXED - allows a user defined shutter
speed.
Default (AES)
shutter
or
Fixed shutter
1/50 (PAL)
1/60 (NTSC),
1/100 (PAL)
1/120 (NTSC),
1/250,
1/500,
In DEFAULT (AES) mode, the camera
tries to maintain the selected
shutter speed as long as the light
level of the scene is high enough.
In Fixed mode, selects shutter
speed.
1/1000,
1/2000,
1/4000,
1/10K,
1/100K
Bosch Security Systems OSD Menu AM18-Q0661 | v1.0 | 2013.06
Page 10

10 en | Configuration FLEXIDOME corner 9000 IR
Item Selection Description
Actual shutter Displays the actual shutter value
from the camera to help compare
lighting levels and optimum shutter
speed during set-up.
Gain control On, Fixed On - the camera automatically sets
the gain to the lowest possible value
needed to maintain a good picture.
Fixed - sets Fixed AGC value.
Maximum AGC
or
Fixed AGC
0 to 40 dB Selects the maximum value the gain
can have during AGC operation.
Selects the gain setting for Fixed
gain operation (0 is no gain).
Actual AGC Displays the actual AGC value from
the camera to help compare gain
level with lighting levels and picture
performance.
Sens Up
Dynamic
Off, 2x,
3x, …, 10x
Selects the factor by which the
sensitivity of the camera is
increased.
When active, some noise or spots
may appear in the picture. This is
normal camera behavior. It may also
cause motion blur on moving
objects.
EXIT Returns to main menu.
AM18-Q0661 | v1.0 | 2013.06 OSD Menu Bosch Security Systems
Page 11

FLEXIDOME corner 9000 IR Configuration | en 11
1.5.3 Day/Night submenu
Item Selection Description
Day/Night Auto, Color,
Monochrome
Auto - the camera switches the IR cutoff filter on and off depending on the
scene illumination level.
Color - the camera always produces a
color signal regardless of light levels.
Monochrome - the IR cut-off filter is
removed, giving full IR sensitivity.
Switch level -15 to +15 Sets the video level in Auto mode at
which the camera switches to
monochrome operation.
A low (negative) value means that the
camera switches to monochrome at a
lower light level. A high (positive) value
means that the camera switches to
monochrome at a higher light level.
Switch delay 1, 2, 3, 5, 10,
20, 30, 60,
Sets the evaluation time in Auto mode
for day to night transitions.
120, 240 s
Priority Motion, Color In AUTO mode:
Color - the camera gives a color image
as long as the light level permits.
Motion - the camera avoids motion blur
as long as the light level permits (it
switches to monochrome earlier than it
would with Color priority).
Bosch Security Systems OSD Menu AM18-Q0661 | v1.0 | 2013.06
Page 12

12 en | Configuration FLEXIDOME corner 9000 IR
Item Selection Description
IR contrast
(mono)
Enhanced,
Normal
Enhanced - the camera optimizes
contrast in applications with high IR
illumination levels. Select this mode
for IR (730 to 940 nm) light sources
and for scenes with grass and green
foliage.
Normal - the camera optimizes contrast
in mono applications with visible light
illumination.
IR
illumination
(mono)
0 to +15 Enter the strength of the external IR
illumination to determine the night to
day transition moment. 0 is no IR
illuminator; +15 is very strong
illumination.
Color burst
(mono)
On, Off Off - the color burst in the video signal
is switched Off in monochrome mode.
On - the color burst remains active
even in monochrome mode (required
by some DVRs and IP encoders).
EXIT Returns to main menu.
AM18-Q0661 | v1.0 | 2013.06 OSD Menu Bosch Security Systems
Page 13

FLEXIDOME corner 9000 IR Configuration | en 13
1.5.4 Enhance / Dynamic Engine submenu
Item Selection Description
Dynamic
Engine
Contrast
Enhancement
Off,
XF DYNAMIC,
HDR,
Smart BLC
Low,
Medium,
High
Off: - turns off all automatic scene
detail and enhancements (only
recommended for testing).
XF DYNAMIC: - extra internal
processing is enabled for enhancing
the visibilty.
HDR: - adds dual sensor exposure to
the XF DYNAMIC features. In harsh
lighting conditions, pixels from each
exposure are mixed to give a more
detailed image.
Smart BLC: - BLC window and
weighting factor are automatically
defined. Camera dynamically adjusts
these for changing light conditions.
Increases the contrast at medium
brightness levels.
Select Low for high contrast scenes.
Select High for low contrast scenes
(e.g. fog).
Sharpness -15 to +15 Adjusts the sharpness of the picture. 0
corresponds to the default position.
A low (negative) value makes the
picture less sharp. Increasing
sharpness brings out more detail.
Extra sharpness can enhance the
details of license plates, facial features
and the edges of certain surfaces.
Bosch Security Systems OSD Menu AM18-Q0661 | v1.0 | 2013.06
Page 14

14 en | Configuration FLEXIDOME corner 9000 IR
Item Selection Description
3D-NR Off,
Low,
Medium,
High
2D-NR Off,
Low,
Medium,
High
Peak White
On, Off Use Peak White Invert to reduce glare
Invert
Automatically reduces the noise in the
picture.
This may cause some motion blur on
exceptionally fast moving objects
immediately in front of the camera.
This can be corrected by widening the
field of view or lowering the selection
value.
Automatically reduces the noise in the
picture.
A high selection may cause blur.
A lower selection improves sharpness
at the cost of more noise
from the CRT/LCD display.
Use in ANPR/LPR applications to
reduce headlight glare.
(Test on-site to ensure that it does
benefit the application and is not
distracting for operators of the security
system.)
EXIT Returns to main menu.
AM18-Q0661 | v1.0 | 2013.06 OSD Menu Bosch Security Systems
Page 15

FLEXIDOME corner 9000 IR Configuration | en 15
1.5.5 Color submenu
Item Selection Description
White balance ATW indoor,
ATW Outdoor,
ATW hold,
Manual
ATW - Auto tracking white balance
allows the camera to constantly
adjust for optimal color
reproduction.
ATW hold - Puts the ATW on hold and
saves the color settings.
Manual - the Red and Blue gain can
be manually set to a desired position.
Speed Fast,
Medium,
Adjusts the speed of the white
balance control loop.
Slow
Red gain -50 to +50 Manual and ATW hold - adjusts the
Red gain.
Blue gain -50 to +50 Manual and ATW hold - adjusts the
Blue gain.
Saturation -15 to +15 Adjusts the color saturation. -15
gives a monochrome image; 0 gives
the default saturation; +15 gives the
most saturation.
EXIT Returns to main menu.
Bosch Security Systems OSD Menu AM18-Q0661 | v1.0 | 2013.06
Page 16

16 en | Configuration FLEXIDOME corner 9000 IR
1.5.6 VMD submenu
Item Selection Description
VMD area Submenu Select 1 of the 4 areas to enter the
area set-up menu to define the
detection area.
VMD mode Off, Silent,
OSD
Off - Video Motion Detection (VMD) is
off.
Silent - video motion generates silent
alarm.
OSD - video motion generates onscreen text message alarm.
VMD
sensitivity
0 to 127 Sets the sensitivity for motion to the
desired level. The longer the white bar,
the more motion is required to acitvate
the VMD alarm. Motion above this level
activates alarm.
OSD alarm
text
Alphanumeric Text for on-screen display alarm (16
characters maximum).
EXIT Returns to main menu.
Selecting an area for VMD masking
To set-up an area for VMD masking, access the area menu by
selecting the VMD Area option from the VMD menu. Upon
entering the Area menu, the current area is displayed with the
upper left corner flashing. The flashing corner of the image can
be moved with the Up, Down, Left, Right arrow keys. Pressing
the Select key moves the flashing cursor to the opposite corner,
which can now be moved. Pressing Select again freezes the
area and exits the area menu.
AM18-Q0661 | v1.0 | 2013.06 OSD Menu Bosch Security Systems
Page 17

FLEXIDOME corner 9000 IR Configuration | en 17
1.5.7 Image Adjustment submenu
Item Selection Description
Digital Zoom x1, x2, x4, x8,
Select the zoom factor
x16
DIS Off, On Select On to stabilize the image.
EXIT Returns to main menu.
Bosch Security Systems OSD Menu AM18-Q0661 | v1.0 | 2013.06
Page 18

18 en | Configuration FLEXIDOME corner 9000 IR
1.6 Install menu structure
Item Selection Description
Language Submenu Select on-screen display (OSD)
language
Synchronization
Alarm I/O Submenu Program the alarm input and output
Connections Submenu Connection parameters
Test signals Submenu Test patterns and texts
Camera ID Submenu Select to access ID submenu
Privacy
masking
Flip Submenu Selects flip submenu
Default ALL Submenu Returns all settings for all modes to
Submenu Sets synchronization parameters
functionality.
Submenu Sets up a masking area
factory defaults
AM18-Q0661 | v1.0 | 2013.06 OSD Menu Bosch Security Systems
Page 19

FLEXIDOME corner 9000 IR Configuration | en 19
1.6.1 Language submenu
Item Selection Description
Language English
Spanish
Displays the menus on the OSD in the
chosen language.
French
German
Portuguese
Russian
Simplified
Chinese
EXIT Returns to Install menu.
Bosch Security Systems OSD Menu AM18-Q0661 | v1.0 | 2013.06
Page 20

20 en | Configuration FLEXIDOME corner 9000 IR
1.6.2 Synchronization submenu
Item Selection Description
Synchronization
Internal
Line lock
Internal - for free running camera
operation.
Line lock - to lock to the AC power
supply
Vertical phase 0, 1, … 359 Adjusts the vertical phase offset (when
in LINE LOCK mode and a valid power
supply frequency is detected).
EXIT Returns to Install menu.
AM18-Q0661 | v1.0 | 2013.06 OSD Menu Bosch Security Systems
Page 21

FLEXIDOME corner 9000 IR Configuration | en 21
1.6.3 Alarm I/O submenu
Item Selection Description
Input None, high,
low
Input action None,
Mode 1 to 6,
Night mode
Output Normally
open,
Normally
closed
Output action VMD,
Ext. device,
Night mode,
Filter toggle
Select none to disable the alarm input.
Select active-high or active-low for the
alarm input connector.
Selects the operating mode of the
camera when the alarm input is active.
Selects the alarm output mode.
VMD: - alarm output closes on VMD
alarms.
External device: - make the alarm
output available to remote
communication devices.
Night mode: - alarm output closes
when camera is in monochrome mode.
Filter toggle: - alarm output closes just
before the IR filter starts moving and
opens when video level has stabilized
(2 to 3 seconds)
EXIT Returns to Install menu.
Bosch Security Systems OSD Menu AM18-Q0661 | v1.0 | 2013.06
Page 22

22 en | Configuration FLEXIDOME corner 9000 IR
1.6.4 Connections submenu
Item Selection Description
Bilinx Comms. On, Off If Off, Bilinx communications is
disabled.
EXIT Returns to Install menu.
1.6.5 Test signal submenu
Item Selection Description
Show camera IDOff, On Select On to overlay the camera ID on
the video test signal.
Test pattern Color bars,
Raster,
Impulse,
Cross
Impulse,
Crosshatch
EXIT Returns to Install menu.
Select the desired test pattern to help
installation and fault-finding.
1.6.6 Camera ID submenu
Item Selection Description
Camera ID Enter a 17-character camera name. Use
Left/Right to change position in the
string; use up/down to select
character. Use Select to exit.
Display ID pos. Off, Top left,
Top right,
Bottom left,
Bottom right
Select the screen position of the
camera ID.
AM18-Q0661 | v1.0 | 2013.06 OSD Menu Bosch Security Systems
Page 23

FLEXIDOME corner 9000 IR Configuration | en 23
Item Selection Description
Camera ID
border
On, Off Displays a grey border behind the
camera ID to make it easier to read.
MAC address Shows MAC address (factory set,
cannot be changed).
Ticker bars On, Off The ticker bar moves continuously to
show that the image is live and not
frozen or played back.
Mode ID pos. Off, Top left,
Top right,
Camera mode is displayed on the
screen in the selected position.
Bottom left,
Bottom right
EXIT Returns to Install menu.
Bosch Security Systems OSD Menu AM18-Q0661 | v1.0 | 2013.06
Page 24

24 en | Configuration FLEXIDOME corner 9000 IR
1.6.7 Privacy masking submenu
Item Selection Description
Mask 1 to 15 15 different areas can be masked.
Pattern Black, Grey,
White, Noise
Active On, Off Turns each of the masks on or off.
Mosaic On, Off Turns mosaic on or off.
Window Submenu Select to open a window in which to
Selecting an area for privacy masking
To set-up an area for privacy masking, access the area menu by
selecting the Area option from the privacy masking menu. Upon
entering the Area menu, the current area is displayed with the
upper left corner flashing. The flashing corner of the image can
be moved with the Up, Down, Left, Right arrow keys. Pressing
the Select key moves the flashing cursor to the opposite corner,
which can now be moved. Pressing Select again freezes the
area and exits the area menu.
Selects pattern for all masks.
define the mask area.
1.6.8 Flip submenu
Item Selection Description
Flip Off
horizontal
Vertical
Both
EXIT Returns to Install menu.
AM18-Q0661 | v1.0 | 2013.06 OSD Menu Bosch Security Systems
Selects the flip mode.
Page 25

FLEXIDOME corner 9000 IR Configuration | en 25
1.6.9 Defaults submenu
Item Selection Description
Restore All No, Yes Restores all settings of the six modes
to their default (factory) values. Select
YES then press the Menu/Select
button to restore all values.
When completed the message
RESTORED! is shown.
Bosch Security Systems OSD Menu AM18-Q0661 | v1.0 | 2013.06
Page 26

26 en | Configuration FLEXIDOME corner 9000 IR
AM18-Q0661 | v1.0 | 2013.06 OSD Menu Bosch Security Systems
Page 27

Page 28

Bosch Security Systems
www.boschsecurity.com
© Bosch Security Systems , 2013
 Loading...