


7 709 003 736
Bosch 7 709 003 736, 7 709 003 737, 7 709 003 747, 7 709 003 756, 7 736 500 569 Installation Instructions Manual
Installation Instructions
7 709 003 736 / 7 709 003 737 / 7 709 003 747
7 709 003 756 / 7 736 500 569
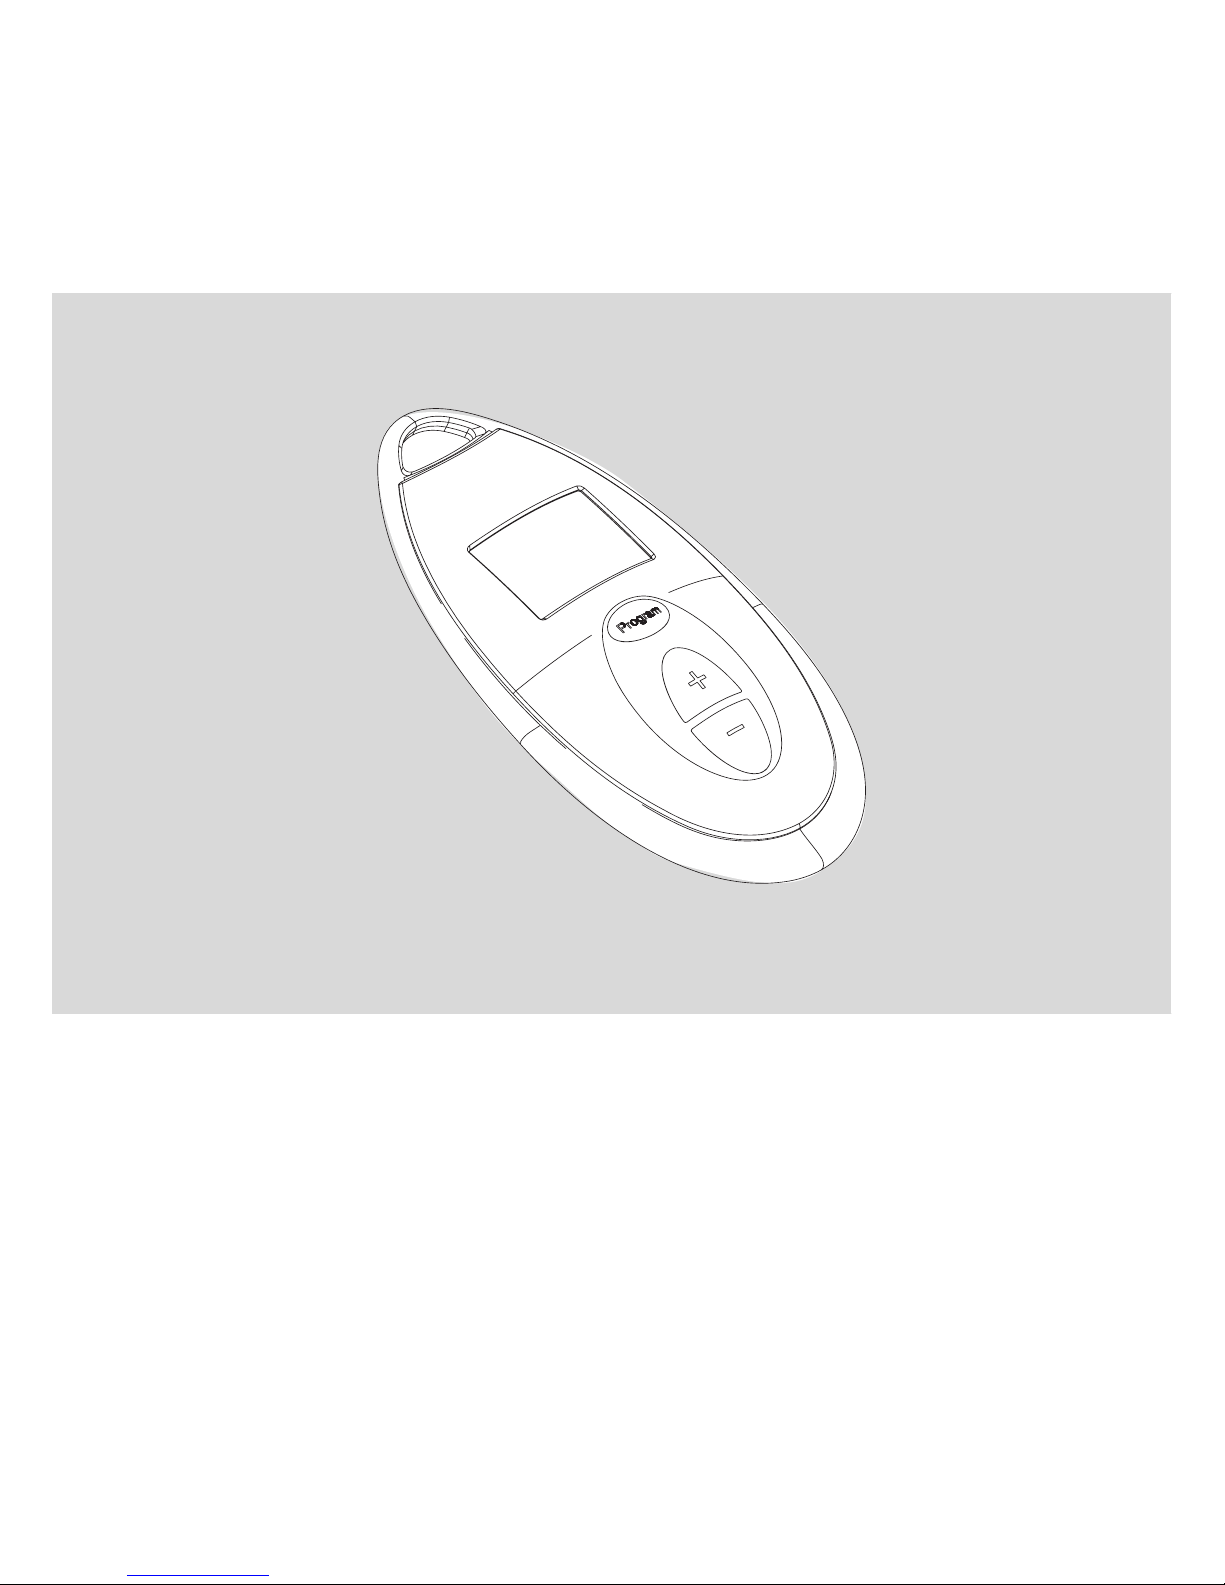
Remote Control
6720606990-00.1JS
it 2
en 11
es 20
fr 30
pt 39
ua 48
pl 56
tr 66
6 720 680 078 (2011/09) DIV
Istruzioni di sicurezza e dichiarazione di conformità
6 720 680 078 (2011/09)
2
1 Istruzioni di sicurezza e dichiarazione di
conformità
1.1 Dichiarazione di conformità
Questo dispositivo soddisfa i requisiti delle direttive
europee 1999/ 5/CEE (R&TTE) e corrisponde al
prototipo omoloý descritto nel relativo certificato CE.
1.2 Istruzioni di sicurezza
B Leggere attentamente le seguenti istruzioni in modo
da assicurare un corretto funzionamento
dell'apparecchio.
B Osservare le istruzioni di sicurezza.
ATTENZIONE:
il telecomando può essere utilizzato solo nei
seguenti Paesi: Italia, Francia, Germania,
Belgio, Olanda, Spagna e Portogallo.
ATTENZIONE:
eventuali modifiche o cambiamenti non
espressamente approvati dalla marcatura di
conformità CE, potrebbero invalidare
all'utente il diritto all'utilizzo
dell'apparecchiatura.
ATTENZIONE:
il telecomando è impermeabile e può essere
utilizzato anche sotto la doccia . Tuttavia, non deve essere immerso in acqua (per
esempio, in vasche da bagno) .
Informazioni sul telecomando
6 720 680 078 (2011/09)
3
2 Informazioni sul telecomando
Telecomando per la regolazione a distanza della
temperatura degli scaldabagni.
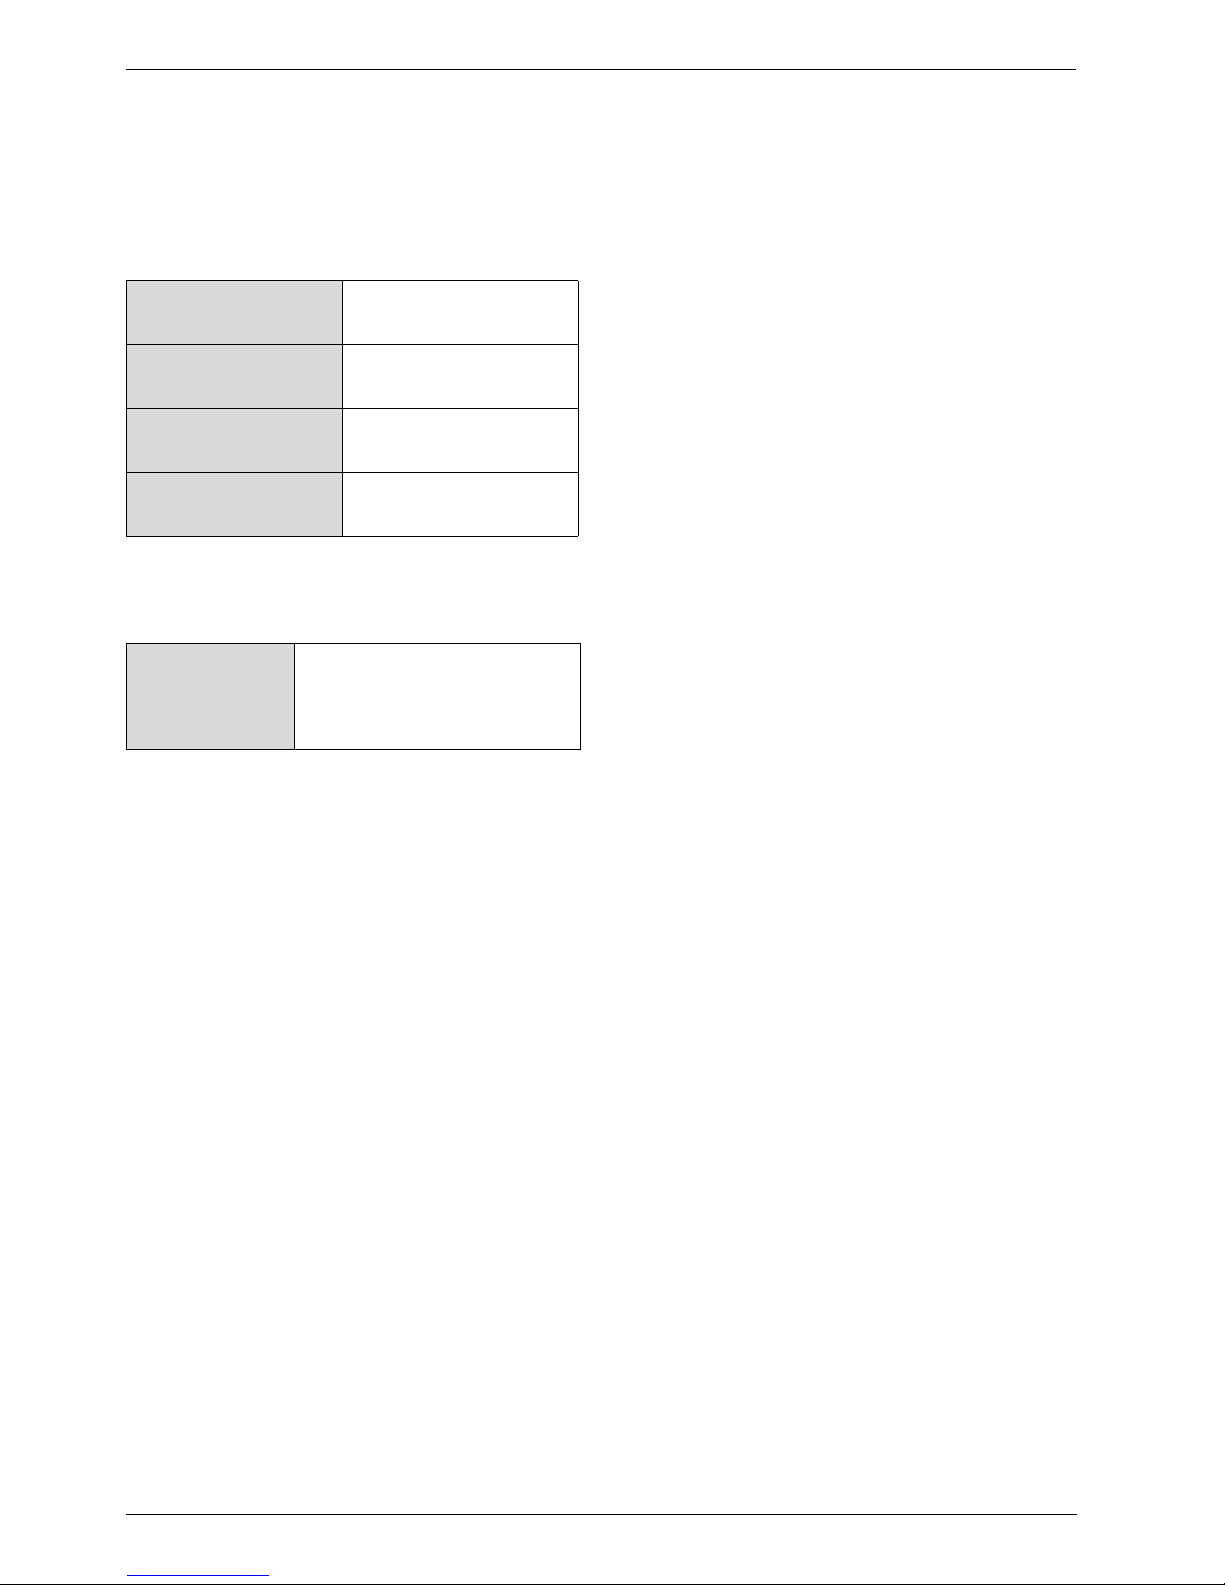
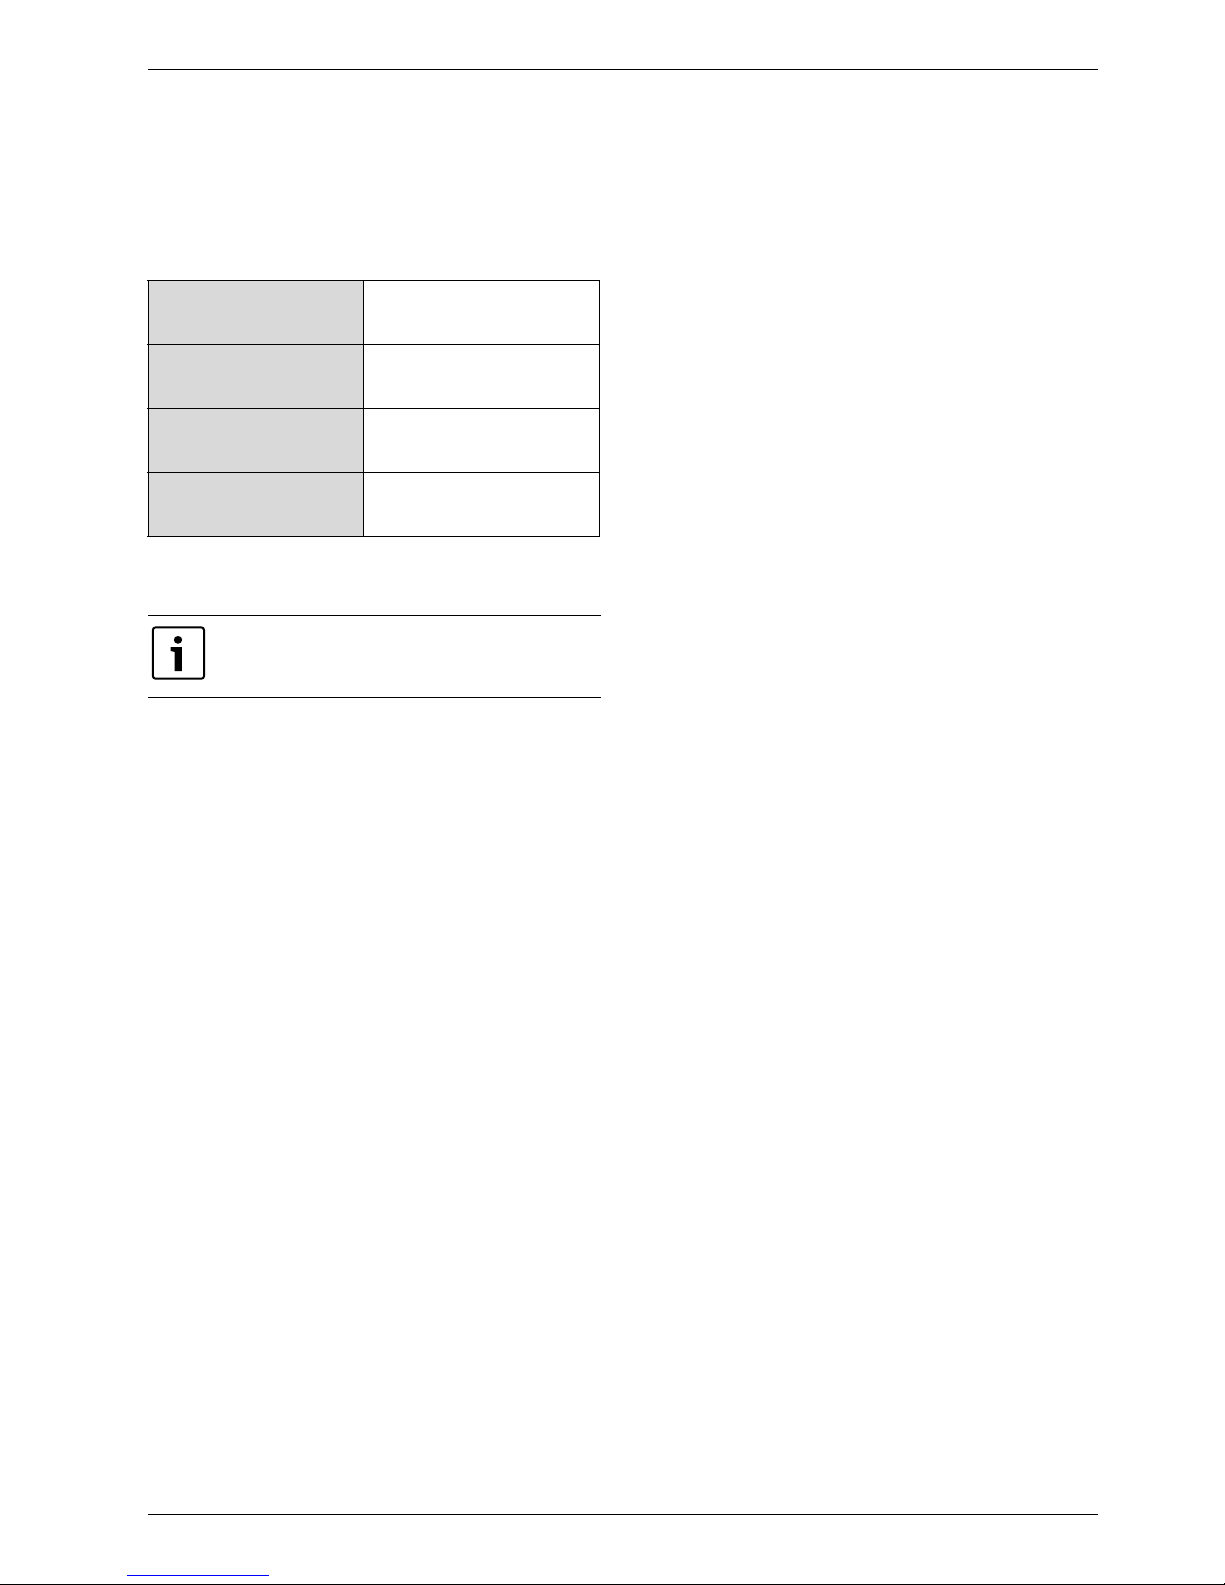
Dati tecnici
Informazioni addizionali
Tab. 1
Alimentazione Batterie alcaline AA LR 6
2 x 1.5V
Frequenza 868 MHz
Grado di protezione IP X6
Raggio di azione 30 m
Ad ogni scaldabagno possono essere abbinati fino a 6 telecomandi.

Kit telecomando
6 720 680 078 (2011/09)
4
3 Kit telecomando
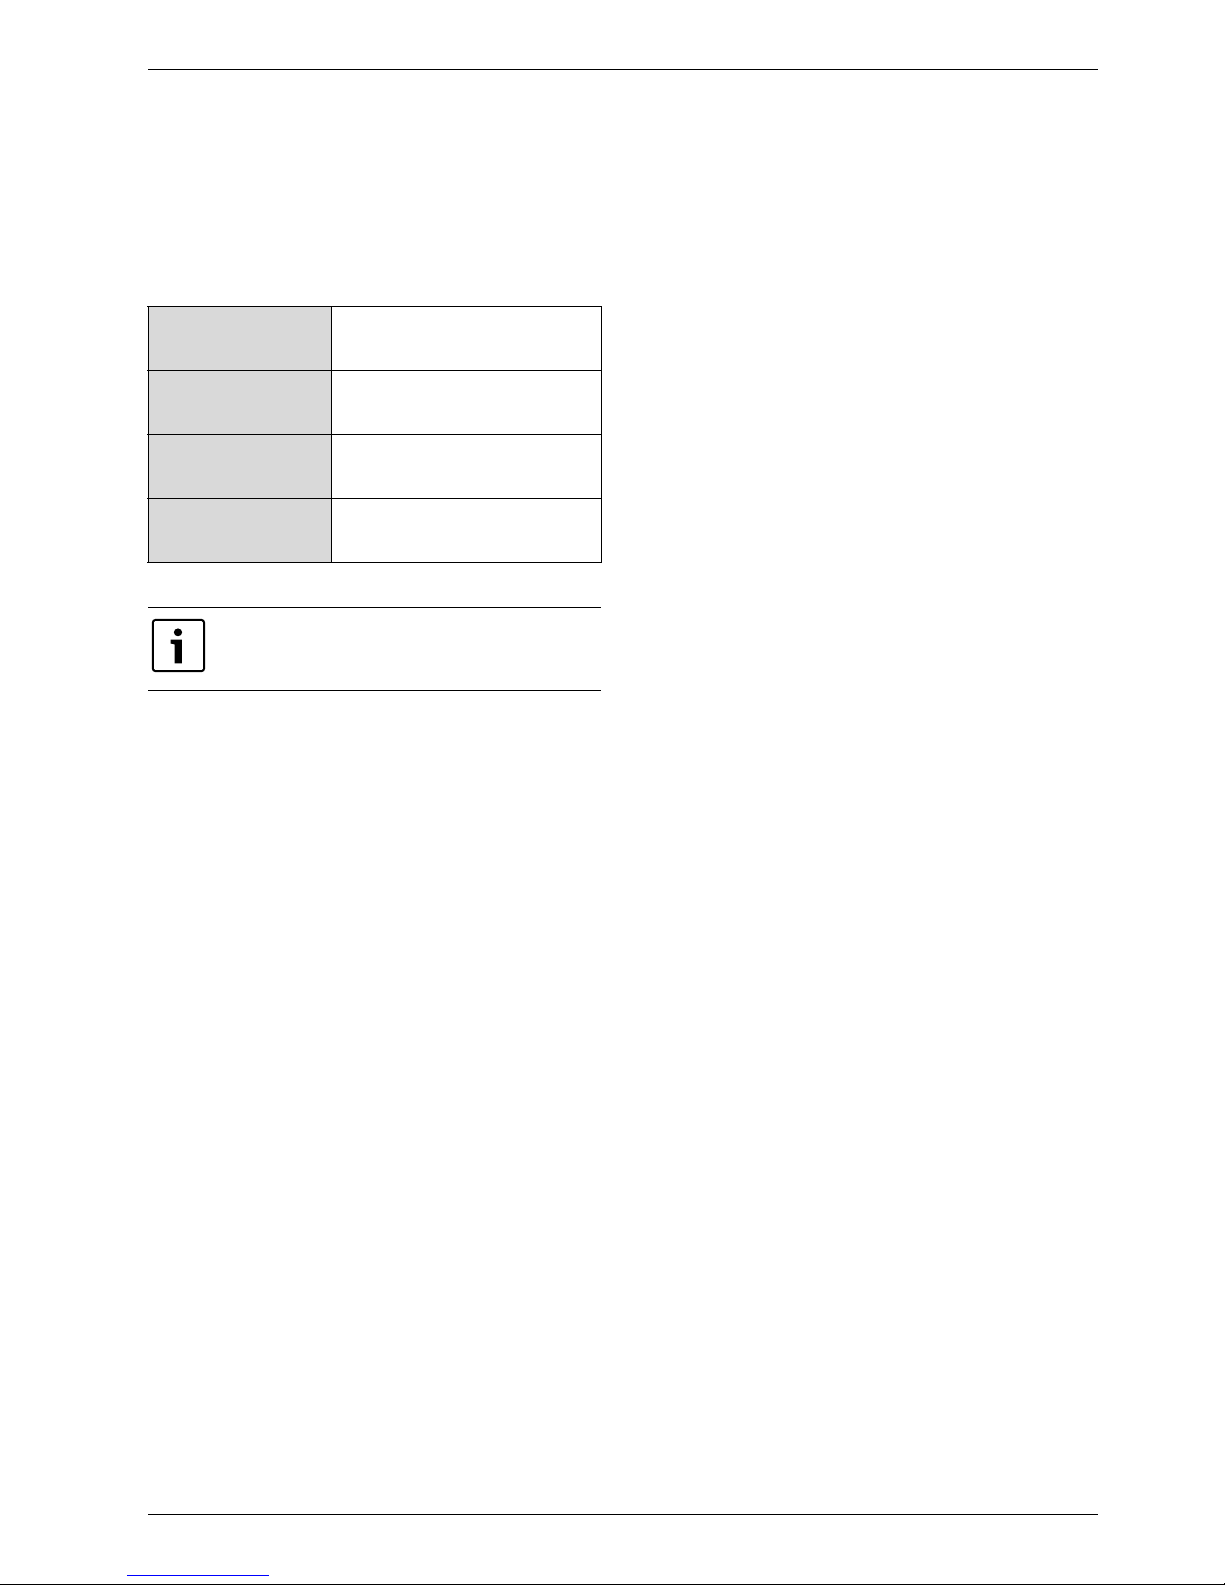
3.1 Accessori in dotazione
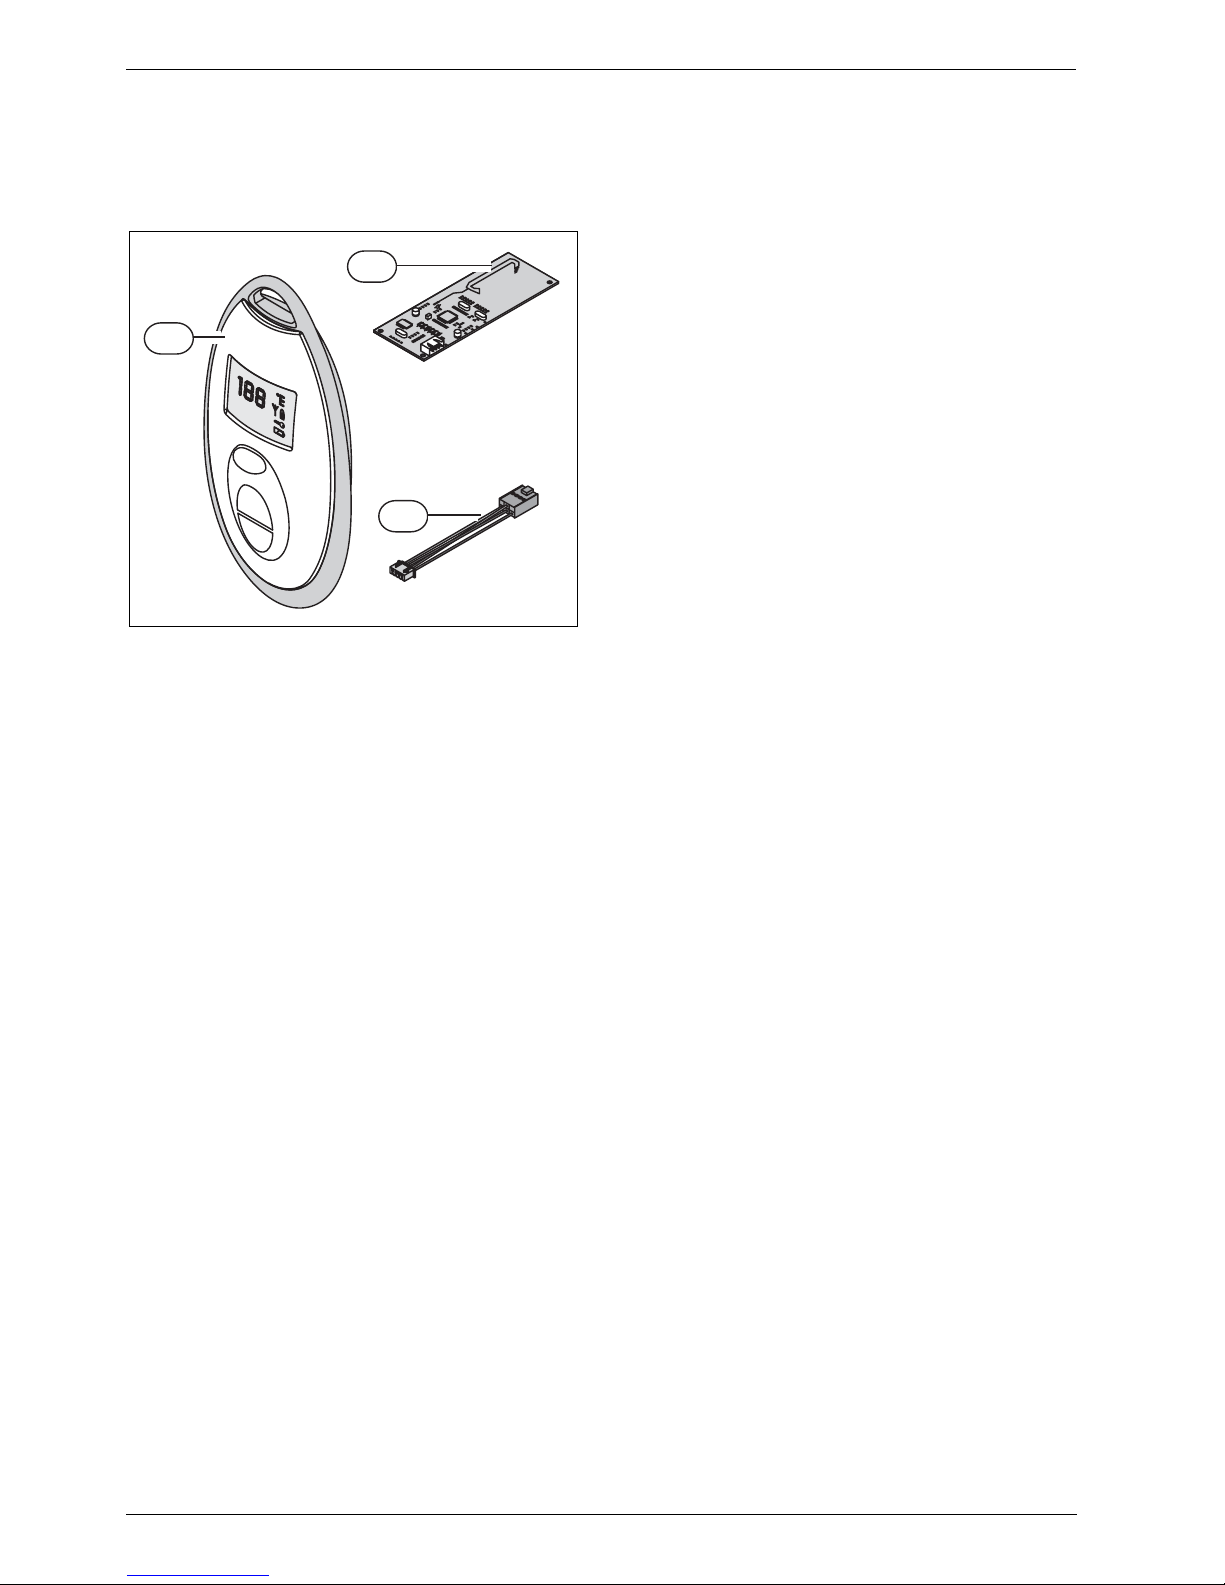
Fig. 1 Accessori
1 Telecomando
2 Scheda PCB ricetrasmittente del telecomando
3 Cavo di collegamento PCB
1
2
3
6720680078 -01.1JS
Operazioni per il funzionamento del telecomando
6 720 680 078 (2011/09)
5
4 Operazioni per il funzionamento del telecomando
4.1 Installazione della scheda PCB
ricetrasmittente del telecomando
Apertura della centralina di controllo (pannello
comandi)
B Per rimuovere il mantello, svitare le due viti a croce
reperibili presso la parte inferiore del mantello
(vedere le esatte indicazioni presso il manuale
d'installazione).
B Rimuovere quindi il mantello.
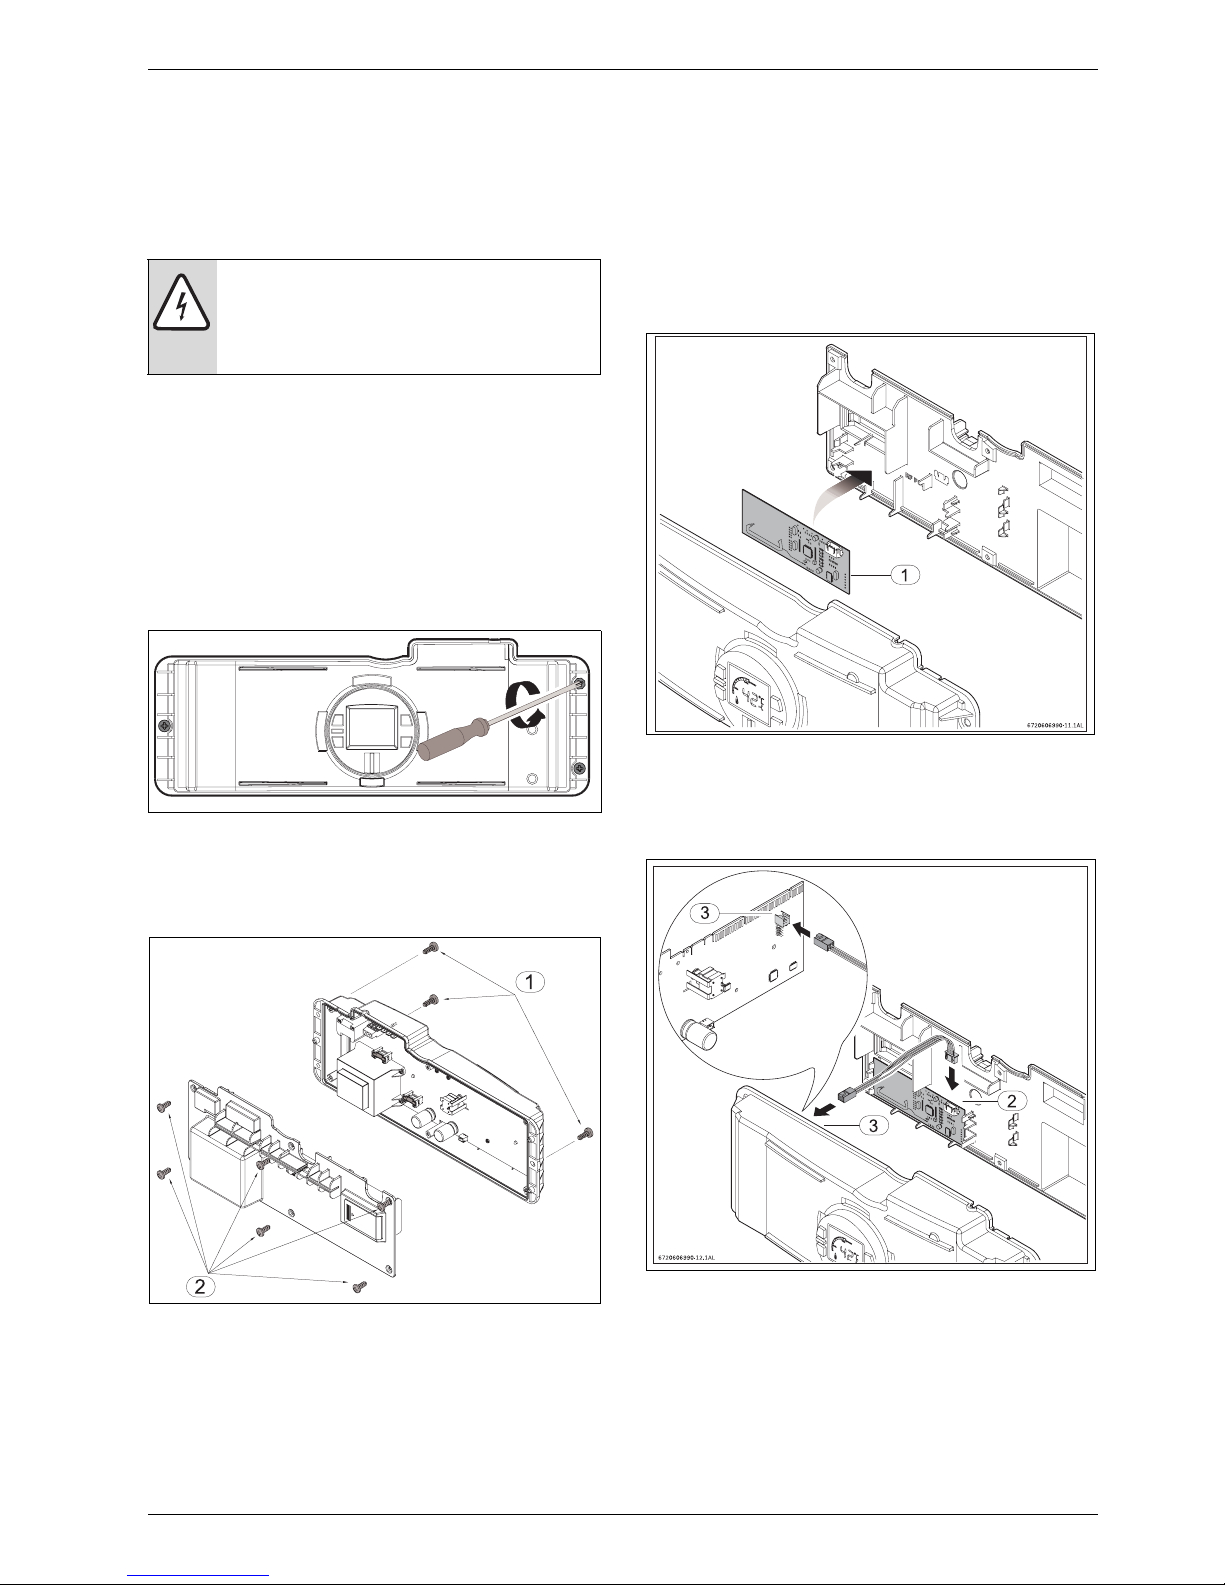
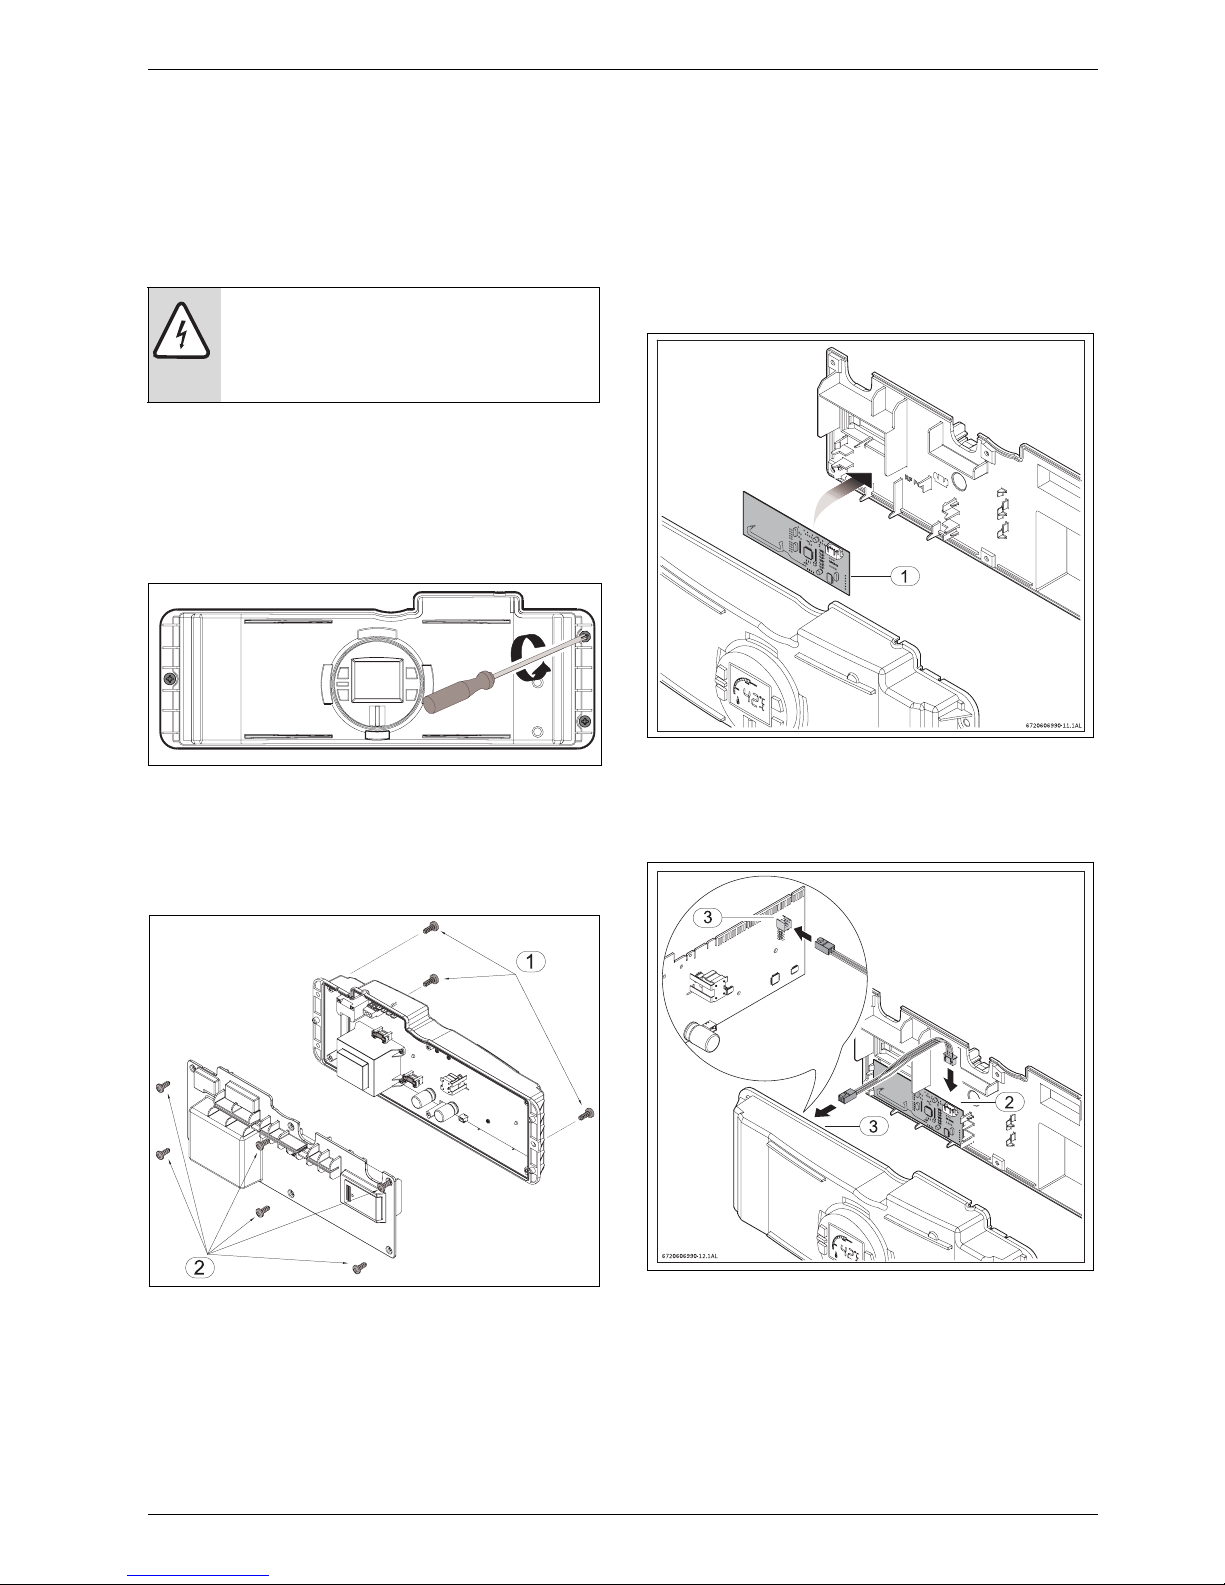
B Svitare le tre viti dalla centralina di controllo (Fig. 2,
Fig. 3, pos.1).
Fig. 2
B Per poter inserire la scheda ricetrasmittente (PCB),
rimuovere le 6 viti dal coperchio posteriore della
centralina di controllo (Fig. 3, pos.2).
Fig. 3
Installazione della scheda PCB ricetrasmittente del
telecomando
B Inserire la scheda PCB del telecomando, nell'apposita
sede, presso il coperchio posteriore della centralina,
come illustrato nella Fig. 4.
Fig. 4
B Collegare il cavo in dotazione tra la scheda PCB della
centralina e la scheda PCB del telecomando, come
illustrato nella Fig. 5.
Fig. 5
B Rimontare tutti componenti in ordine inverso.
AVVERTENZA:
per motivi di sicurezza, scollegare il cavo di
alimentazione elettrica dello scaldabagno
prima di procedere all'installazione.
6720608920-38.1Av
6720606990-10.1AL
Operazioni per il funzionamento del telecomando
6 720 680 078 (2011/09)
6
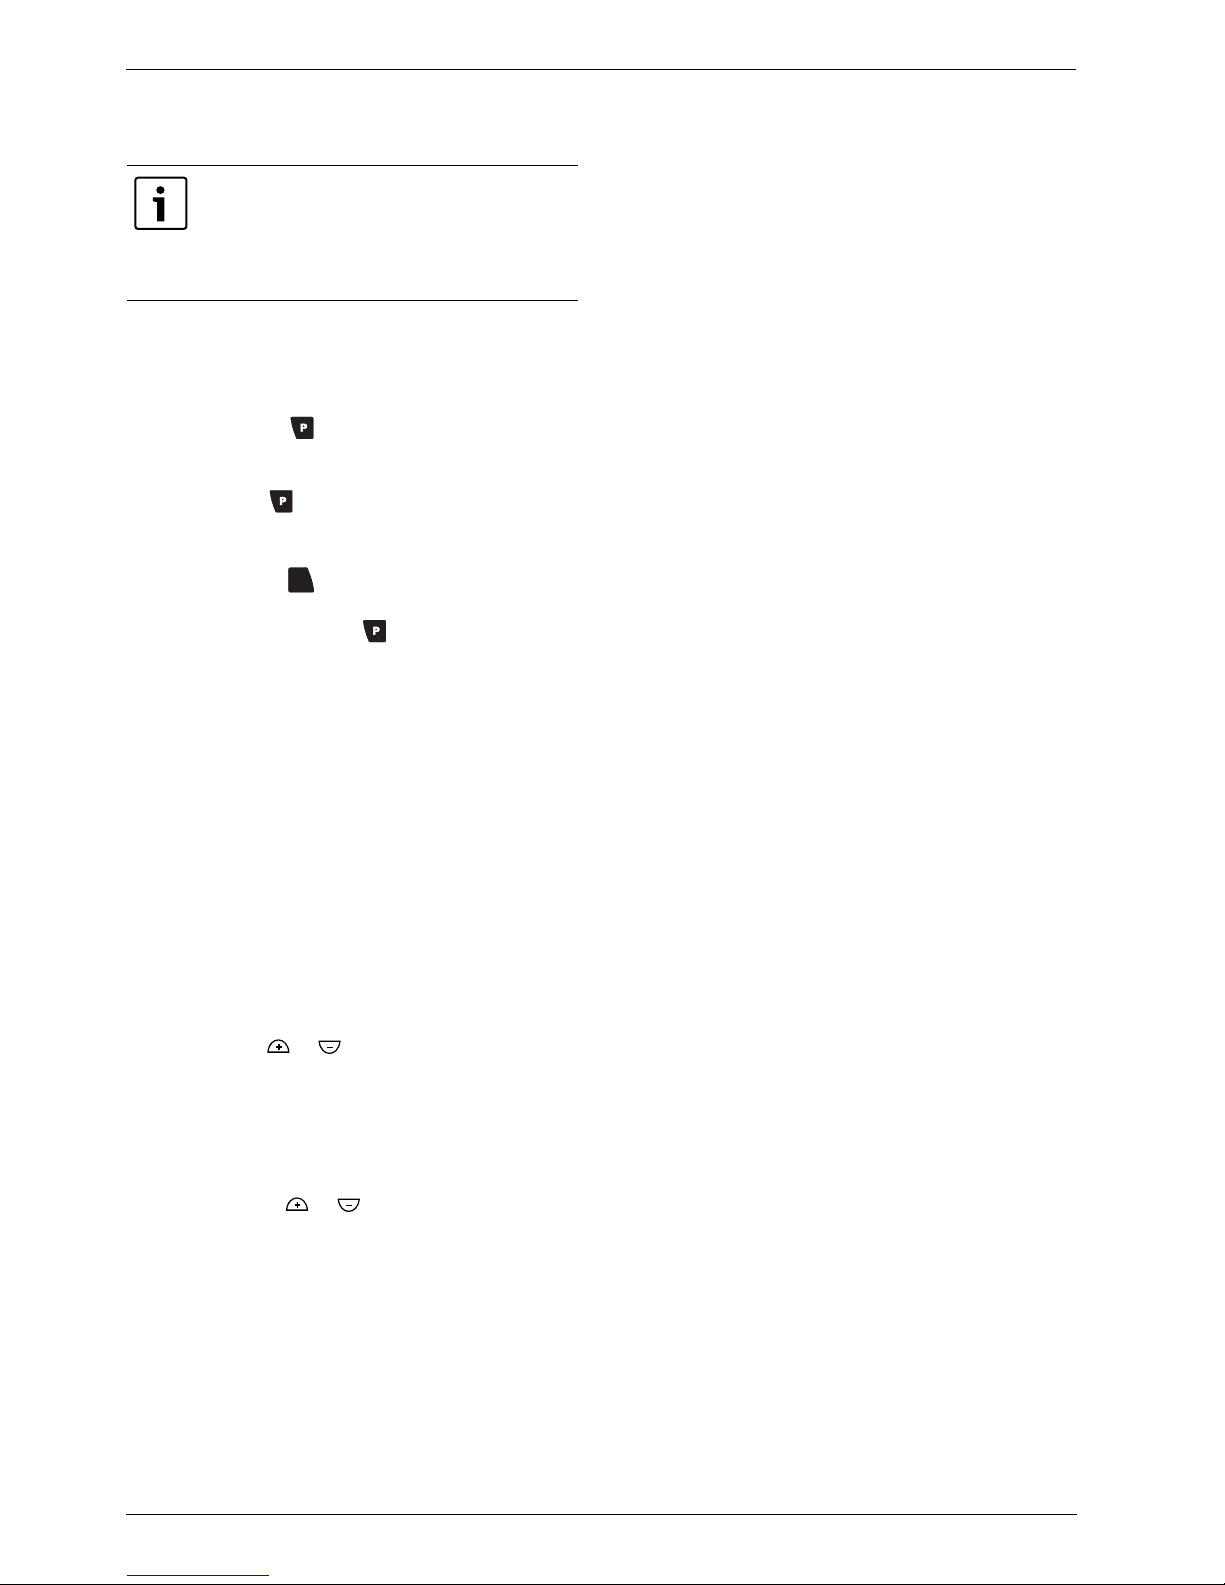
4.2 Attivazione del telecomando
B Collegare lo scaldabagno all'alimentazione elettrica.
B Premere l'interruttore principale dell'apparecchio su
OFF.
B Sul pannello di comando dello scaldabagno, tenere
premuto il tasto e, contemporaneamente, premere l'interruttore principale dell'apparecchio su ON.
Quando il display LCD visualizza i numeri "188'", rilasciare il tasto , il display visualizza ora il codice
"P2".
In caso negativo, ripetere il passo precedente.
B Premere il tasto sul pannello di controllo dello
scaldabagno, fino a far visualizzare il codice "P3".
B Premere di nuovo il tasto e tenerlo premuto per
circa 1 sec.
Sul display verrà visualizzato un numero ed una cifra
rotante. In caso negativo, ripetere il passo
precedente.
Il numero rappresenta il telecomando da attivare. Il
primo telecomando verrà attivato con il numero di
memoria "0", l'eventuale isecondo telecomando, con il
numero "1" e così di seguito. La cifra rotante significa
che l'elettronica interna della centralina sta eseguendo
la memorizzazione. Qualora sul display LCD non dovesse
apparire un numero ed una cifra rotante, dopo diversi
tentativi, ricontrollare i collegamenti elettrici specificati
nel capitolo 4.1.
B Posizionare il telecomando di fronte al pannello di
comando dell'apparecchio e premere contemporaneamente i tasti e fino a visualizzare “00” sul
display del telecomando.
B Premere l'interruttore principale dell'apparecchio su
OFF.
B Premere ora nuovamente per riportarlo in posizione
ON.
B Premere il tasto o fino a raggiungere la tem-
peratura desiderata.
Il telecomando è ora attivato e memorizzato.
Per il funzionamento del telecomando, è
necessaria la sua attivazione, seguendo le
indicazioni sotto descritte. Per la
procedura, è necessario che l'utente operi
posizionato di fronte all'apparecchio.
+
Telecomando
6 720 680 078 (2011/09)
7
5 Telecomando
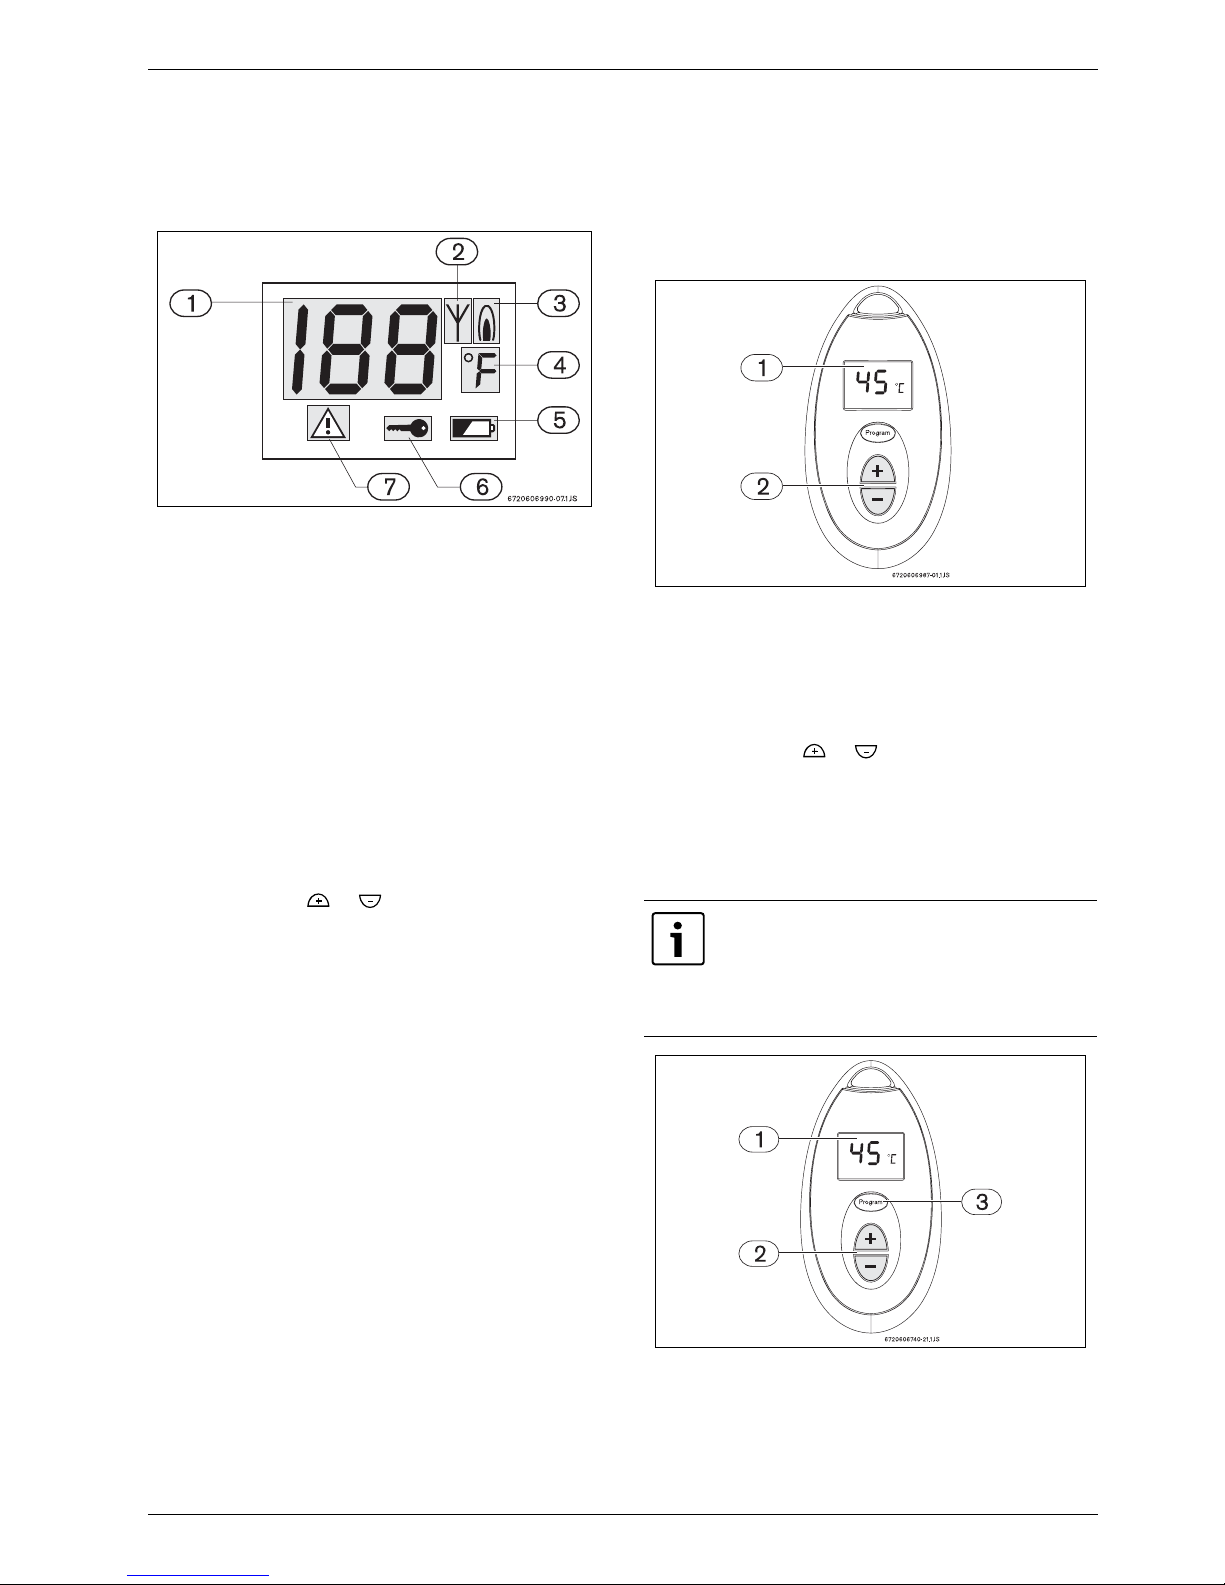
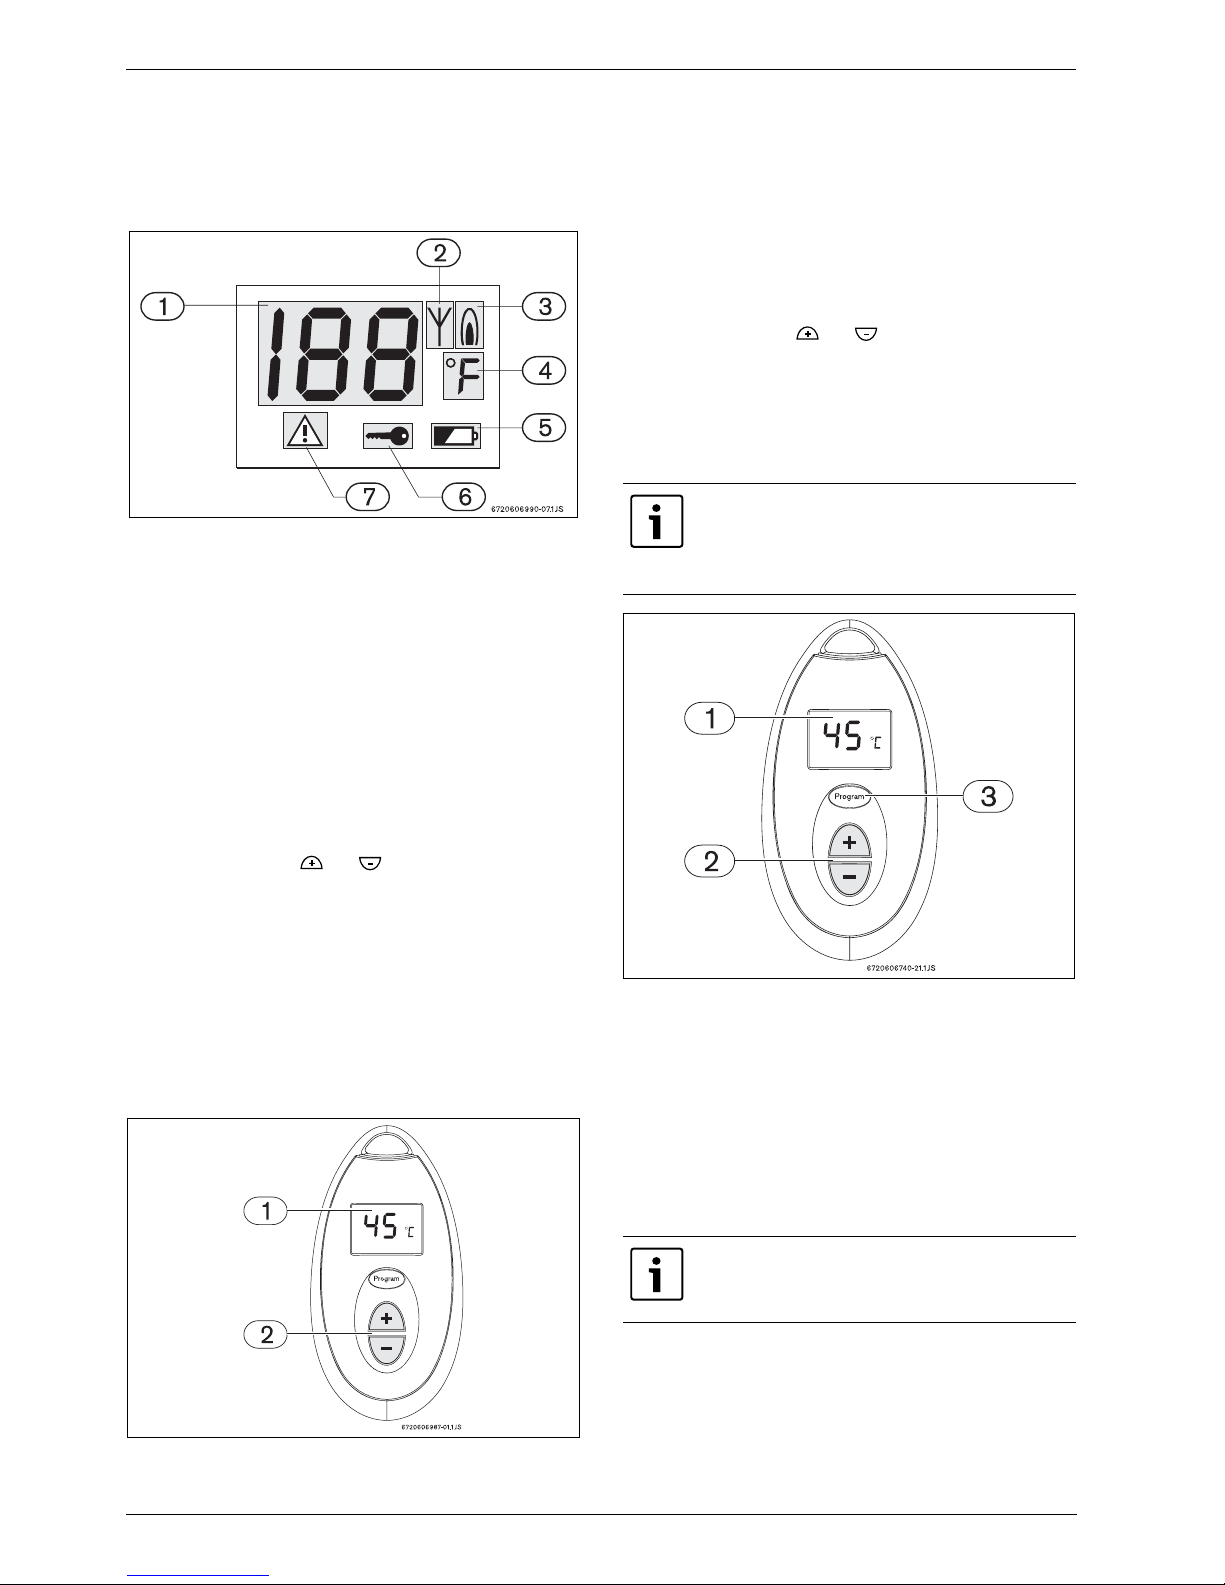
5.1 Descrizione del display LCD
Fig. 6 Display LCD multifunzione, dello scaldabagno
1 Permette di visualizzare la temperatura, i codici di errore e
le funzioni
2 Indicazione "telecomando attivato"
3 Apparecchio in funzione (con bruciatore acceso)
4 Simbolo della temperatura (possibile in °C e °F)
5 Indicazione del livello di carica delle batterie del
telecomando
6 Funzione di "Priorità" (impedisce che un alto utente
modifichi la temperatura dell'acqua programmata
dall'utente che sta usando l'acqua calda
7 Simbolo di "Blocco di sicurezza"
5.2 Regolazione della temperatura
dell'acqua calda tramite il
telecomando
B Premere il tasto o sul telecomando (Fig. 7,
pos. 2) fino a visualizzare la temperatura desiderata
sul display del telecomando (Fig. 7, pos. 1).
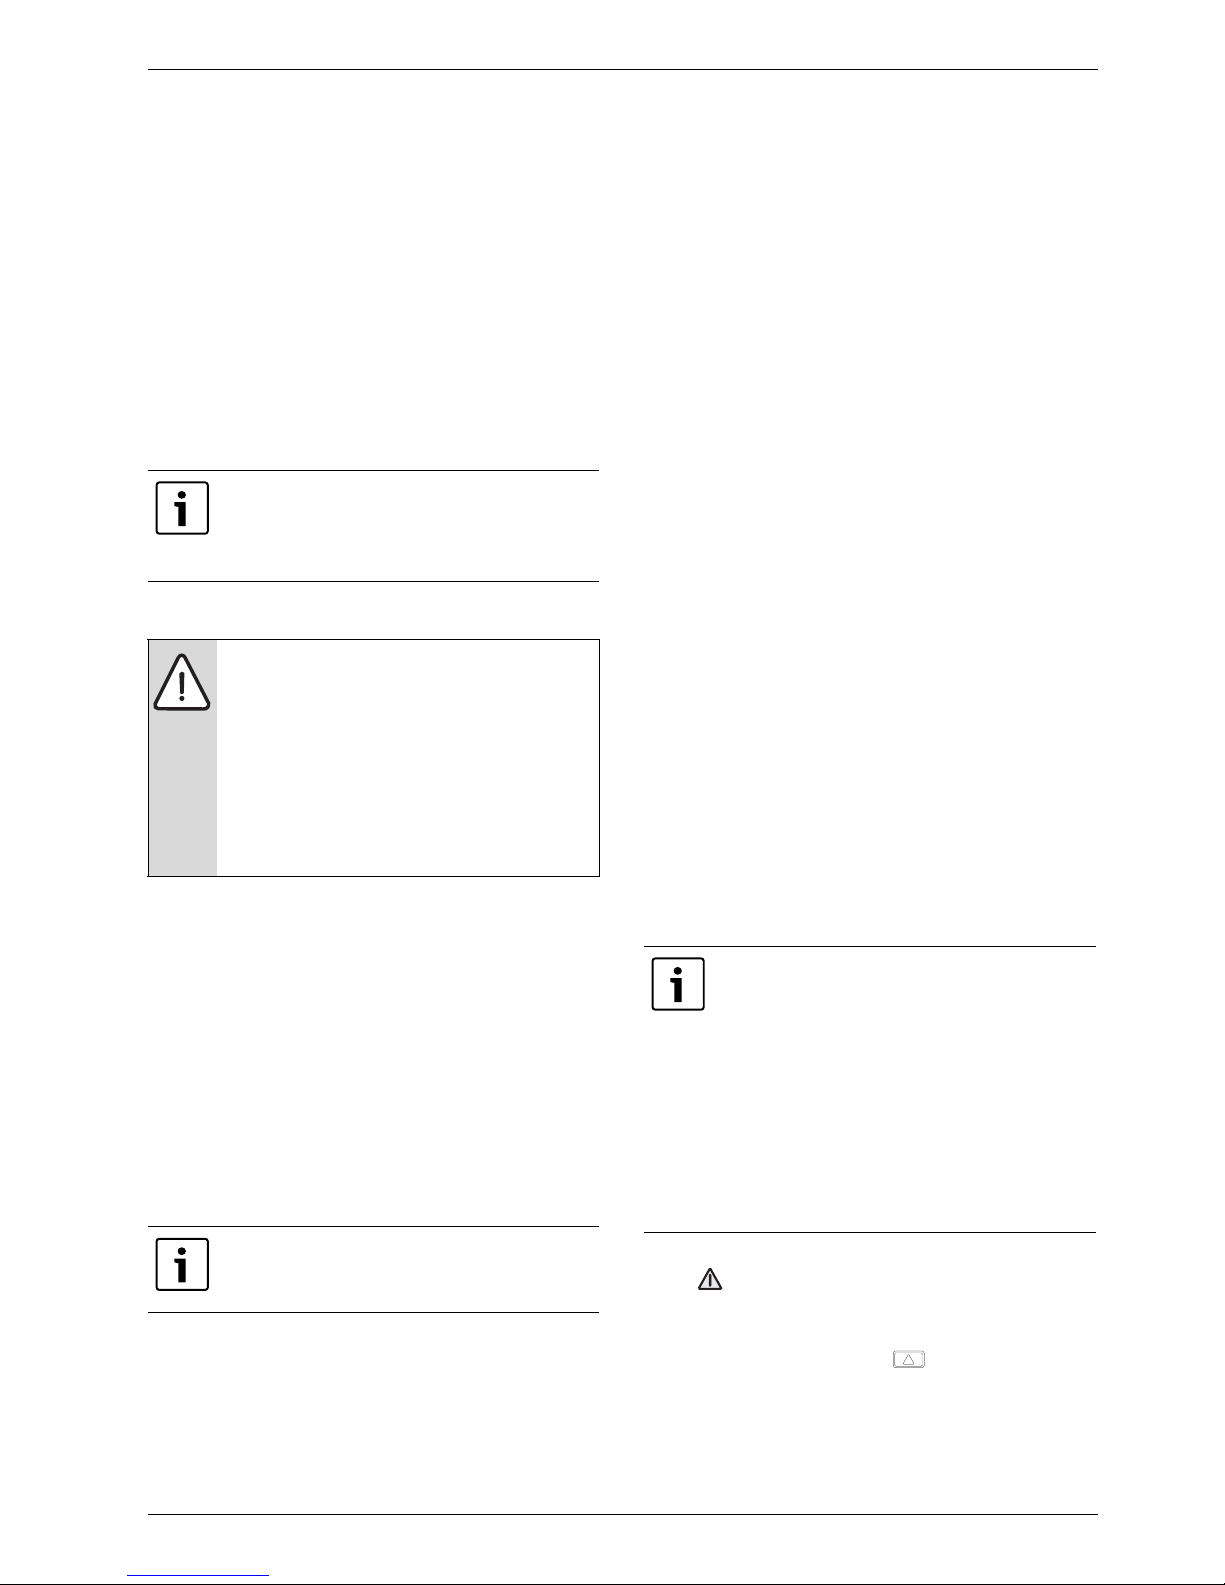
B Quando la temperatura desiderata appare sul display,
aprire il rubinetto dell'acqua calda.
B La temperatura selezionata appare intermittente sul
display del telecomando.
B L'intermittenza si ferma quando viene raggiunta la
temperatura selezionata (margine di tolleranza di +/5°F (+/- 2°C) rispetto alla temperatura impostata).
Fig. 7 Regolazione della temperatura
5.3 Tasto "Program" sul telecomando
Memorizzazione della temperatura dell'acqua con il
tasto "Program" del telecomando
B Premere il tasto o sul telecomando (Fig. 8,
pos. 2) fino a visualizzare la temperatura desiderata
sul display del telecomando (Fig. 8, pos. 1).
B Per memorizzare la temperatura selezionata, premere
il tasto "Program" sul telecomando (Fig. 8, pos. 3) per
circa 3 secondi.
Fig. 8 Memorizzazione della temperatura dell'acqua
B Ogni ulteriore telecomando permette di memorizzare
nelle sue funzioni una sola temperatura tramite il
tasto "Program" del telecomando.
Nota: quando si preme il tasto "Program", il
display visualizza l'ultima temperatura
memorizzata. Quando il display visualizza il
codice "PR" l'ultimo valore di temperatura
impostato, viene memorizzato.

Telecomando
6 720 680 078 (2011/09)
8
B A questo punto, la temperatura memorizzata viene
visualizzata sul display del telecomando.
Quando si aprirà il rubinetto dell'acqua calda, lo
scaldabagno erogherà l'acqua alla temperatura
memorizzata sul telecomando.
Uso del tasto "Program" (funzionamento con
temperatura memorizzata nel telecomando)
Affinché lo scaldabagno funzioni con la temperatura
precedentemente memorizzata:
B Premere il tasto "Program" sul telecomando.
L'ultima temperatura memorizzata appare sui display del
telecomando e dell'apparecchio. Quando si aprirà il
rubinetto dell'acqua calda, lo scaldabagno erogherà
l'acqua alla temperatura memorizzata (dopo alcuni
secondi).
5.4 Funzione di "Priorità"
Il telecomando non ha un'impostazione predefinita della
temperatura, per cui non dispone di alcuna funzione di
"Priorità" predefinita. La "Priorità" verrà attribuita automaticamente al primo utente che seleziona o memorizza
la temperatura (sul telecomando o sul pannello di
comando dello scaldabagno) da utilizzare successivamente (per es. doccia).
Quindi, quando si usa l'acqua calda (per esempio doccia), sui display dello scaldabagno e degli altri telecomandi appare il simbolo " ".
La temperatura può essere modificata solo con gli stessi
tasti (del pannello di comando oppure del telecomando)
con i quali è stata impostata. Il simbolo " " non apparirà sul telecomando a cui e stata attribuita la priorità.
Per sbloccare un telecomando che presenta il simbolo
" " (quando l'acqua calda non è in uso):
B Premere contemporaneamente i tasti " ” e “ "
sul telecomando per circa 5 secondi.
La funzione di "priorità" termina:
• 5 minuti dopo l'ultimo utilizzo dell'acqua calda,
ritornando all'impostazione iniziale.
• 2 minuti dopo aver selezionato la temperatura senza
che nessun prelievo successivo sia stato effettuato.
Acquisizione della "Priorità"
Qualunque utente può acquisire la "Priorità" per
l'impostazione della temperatura dell'acqua procedendo
nel modo seguente:
B Premere l'interruttore principale dello scaldabagno su
ON.
B Tenere premuto il tasto " ” o “ " per selezionare
la temperatura desiderata (sul telecomando).
B Tenere premuto il tasto "Program" fino a visualizzare
il simbolo "Pr” sul display del telecomando.
B Utilizzare l'acqua calda nei primi due minuti dopo aver
acquisito la "Priorità".
5.5 Segnalazioni di guasti
Il telecomando è munito di un sistema di segnalazione di
guasti. Eventuali guasti provenienti dallo scaldabagno
verranno visualizzati sul display LCD sotto forma di
codici di errore (Fig. 6, pos. 1) e con il simbolo di "blocco
di sicurezza" (Fig. 6, pos. 7). Il telecomando funzionerà
solo dopo aver premuto il tasto di riarmo sullo
scaldabagno ed aver eliminato l'errore.
Consultare il manuale di installazione dello scaldabagno
per identificare/eliminare il tipo di errore.
Per uno scaldabagno, possono essere
attivati fino a 6 telelecomandi, ognuno dei
quali con una propria temperatura
memorizzata.
La temperatura non può essere
memorizzata né modificata dal pannello di
comando o da un altro telecomando
durante l'erogazione di acqua calda (per
esempio, mentre è in uso una doccia).
Durante l'uso dell'acqua calda, la funzione
di "priorità" si attiverà automaticamente
per impedire che la temperatura venga
modificata da un altro utente durante l'uso
dell'acqua calda.
La "Priorità" non può essere acquisita
mentre l'acqua calda è in uso.
Risoluzione di guasti
6 720 680 078 (2011/09)
9
6 Risoluzione di guasti
6.1 Sostituzione delle batterie
Quando il livello di carica delle batterie è basso, il
simbolo di batteria scarica (Fig. 6, pos. 5) appare sul
display.
B Rimuovere le due viti dalla parte posteriore del
telecomando.
B Aprire il vano batterie.
B Sostituire le batterie scariche con batterie AA 1.5V
nuove, assicurandosi che siano inserite
correttamente.
B Richiudere il telecomando con le due viti.
6.2 Pulizia
Utilizzare un panno leggermente umido per pulire il
telecomando. Non utilizzare solventi né detergenti
abrasivi.
6.3 Risoluzione di guasti
1. Le indicazioni sul display si affievoliscono o non si
visualizzano
B Controllare che le batterie non siano scariche o
esaurite (vedere capitolo 6.1).
1.1 Telecomando in modalità "veglia" (Sleep)
B Premere un tasto qualsiasi del telecomando per
riaccendere il display.
2. Il telecomando non funziona/non appare alcun
numero con la cifra rotante
B Verificare che il telecomando sia orientato
direttamente verso lo scaldabagno.
B Accertarsi che nella zona non vi sia alcun dispositivo
(per esempio, un telefono senza fili) funzionante con
la stessa frequenza del telecomando (868 MHz) in
grado di provocare interferenze.
B Ricontrollare i collegamenti elettrici specificati nel
capitolo 4.1. Prestare particolare attenzione al cavo
che collega la scheda PCB del telecomando alla
scheda PCB principale dello scaldabagno.
3. Sul display del telecomando appare solo
il simbolo "- -"
B Verificare che l'interruttore principale dello
scaldabagno sia posizionato su ON. Se sul display
dello scaldabagno continua a non apparire nulla,
accertarsi che lo scaldabagno sia correttamente
colleý ad una presa elettrica 230VAC/50Hz con
regolare impianto di massa a terra.
B Verificare che la tensione collegata allo scaldabagno
sia uguale a quella di rete (230VAC/50Hz).
B Verificare che il telecomando si trovi entro la distanza
massima di 30 metri dallo scaldabagno.
B Accertarsi che nella zona non vi sia alcun dispositivo
(per esempio, un telefono senza fili) funzionante con
la stessa frequenza del telecomando (868 MHz) in
grado di provocare interferenze.
4. Non è possibile eliminare Il codice di errore ed il simbolo “ ” dal telecomando
• I codici di errore non possono essere eliminati tramite
il telecomando. Tutti i codici di errore vanno eliminati
premendo il tasto di riarmo sul pannello di
comando dello scaldabagno.
• Qualora dovesse apparire un codice di errore subito
dopo aver inserito nella centralina di comando la
Accertarsi che la guarnizione di tenuta in
gomma venga collocata correttamente tra
la parte anteriore e posteriore del
telecomando.
AVVERTENZA:
le batterie esaurite devono essere
sostituite. Il fabbricante non si assume
alcuna responsabilità per eventuali guasti o
danni causati dall'utilizzo di batterie
esaurite.
Depositare le batterie esaurite negli
appositi contenitori dedicati allo
smaltimento.
Se nessun tasto è premuto per alcuni
minuti, il display del telecomando si
spegne per non consumare le batterie.
Il segnale del telecomando può essere
ostacolato dalla presenza di grandi
quantità di metallo o cemento nell'edificio.
Ciò potrebbe diminuire la distanza
massima tollerabile del raggio di azione
del telecomando.
B Posizionarsi in un luogo dove lo scalda-
bagno sia direttamente visibile e verificare nuovamente che il segnale del
telecomando venga ricevuto dallo scaldabagno.

Risoluzione di guasti
6 720 680 078 (2011/09)
10
scheda PCB ricetrasmittente del telecomando,
accertarsi che i due connettori elettrici siano
correttamente inseriti nella scheda PCB principale.
• È possibile che un codice di errore non sia eliminabile.
Consultare il manuale di installazione dello
scaldabagno per ulteriori informazioni al capitolo 10.
5. Il telecomando non memorizza l'impostazione della
temperatura desiderata
B Tenere premuto il tasto di programmazione fino a
visualizzare il simbolo "Pr" sul display del
telecomando.
6. Non è possibile rimuovere il simbolo " " di "Prio-
rita"
B Accertarsi che l'acqua calda non sia in uso mentre si
cerca di rimuovere la funzione di "Priorità".
B Quando l'acqua calda non è in uso, tenere premuto il
tasto “ ” o “ ” dell'apparecchio bloccato (telecomando o scaldabagno) per circa 5 secondi fino a
quando il simbolo " " (Fig. 6, Pos. 6) non viene più
visualizzato dal display.
B Non usare l'acqua calda per almeno 5 minuti. La
funzione di "Priorità" termina generalmente dopo
questo periodo di tempo.
La temperatura selezionata viene
memorizzata solo dal telecomando con il
quale è stata impostata inizialmente. Per
modificare l'impostazione della
temperatura memorizzata, è necessario
usare il telecomando con cui è stata
programmata.
Safety information and symbology
6 720 680 078 (2011/09)
11
1 Safety information and symbology
1.1 Declaration of conformity
This appliance fulfills European directive requirements
1999/ 5/CEE (R&TTE) and corresponds to the
specifications described in the corresponding EEC
certificate of proof.
1.2 Safety instructions
B Read the following instructions very carefully to
ensure correct operation.
B Follow safety instructions.
CAUTION:
Any changes or modifications not expressly
approved by the party responsible for compliance could void the user’s authority to
operate the equipment.
CAUTION:
the remote control is water resistant and
can also be used in the shower . Nevertheless, it is not waterproof and must not
be immersed in water, for instance in the
bathtub .
Remote control data
6 720 680 078 (2011/09)
12
2 Remote control data
Remote control for temperature adjustment of water
heaters.
Technical Data:
Further Information:
Battery power supply Alkaline AA LR 6
2 x 1.5V
Frequency 868 MHz
Type of protection IP X6
User range 30 m (98 ft)
Tab. 1
Remote control Up to 6 remote controls can be
programmed for one single
appliance.
Tab. 2

Remote control Kit
6 720 680 078 (2011/09)
13
3 Remote control Kit
3.1 Parts supplied
Fig. 1 Parts
1 Remote control
2 Remote control transceiver PCB
3 PCB connection cable
1
2
3
6720680078 -01.1JS

Remote control installation
6 720 680 078 (2011/09)
14
4 Remote control installation
4.1 Remote control transceiver PCB
installation
Pre-installation preparation
B Loosen the two Philips head screws located on bot-
tom rear of cover.
B Lift front cover upward and remove.
B Remove the three screws from the control unit (Fig. 2,
pos.1).
Fig. 2
B Remove the 6 screws from the back cover of the con-
trol unit, to access the electronic board (PCB) (Fig. 3,
pos.2).
Fig. 3
Remote control transceiver PCB installation
B Place the remote control PCB in the back cover of the
control unit as shown in Fig. 4.
Fig. 4
B Connect the supplied cable between the main PCB
and the remote control PCB as shown in Fig. 5.
Fig. 5
B Reassemble all parts in the reverse order.
WARNING: Electrical discharge!
B For safety reasons, disconnect the pow-
er supply to the water heater before performing installation.
6720608920-38.1Av
6720606990-10.1AL
Remote control installation
6 720 680 078 (2011/09)
15
4.2 Remote control activation
B Connect power to heater.
B Press ON / OFF button on the appliance to OFF.
B On heater control panel, press and hold Program key
while pressing the ON/OFF button to ON.
Release program key when LCD displays "188".
LCD shows “P2”. If not, repeat previous step.
B Press the button on the heater to select "P3".
B Press and hold Program key again for 1 sec.
LCD shows one number and one rotating digit. If
not, repeat previous step.
The number represents the remote control which is
to be registered, the first remote control will be registered with number “0”, the second with number
“1” and so on.
The rotating digit shows that the electronics is
expecting a registration. If the LCD fails to show a
number and rotating digit after repeated attempts,
double check the wire connections.
B Hold remote control in front of the control panel on
the heater and simultaneously press remote control
buttons and until the temperature indication
is shown on the remote control LCD.
B Press ON / OFF button on the appliance to OFF
position and then back ON.
B Press buttons or to reach desired tempera-
ture.
New remote control is programmed.
Before the remote control will work, it
must be activated using the procedure
described below with the operator
standing in front of the appliance.
+
Remote control
6 720 680 078 (2011/09)
16
5 Remote control
5.1 Description of the LCD
Fig. 6 Multifunctional LCD
1 Displays temperature, error codes and functions
2 "Remote control in operation" indication (signal arriving at
remote control)
3 Device in operation (with burner on)
4 Temperature measurement unit (possible in °C and °F)
5 Remote control battery level indication (weak signal coming
from the remote control)
6 Priority function (temperature cannot be modified by other
user when water is running)
7 "Error code" symbol
5.2 Hot water temperature adjustment by
remote control
B Press the buttons or on the remote control
(Fig. 7, pos. 2) until the required temperature appears
on the remote control display (Fig. 7, pos. 1).
B When the required temperature is displayed, turn on
the hot water tap.
B The required temperature will flash on the remote
control display.
B The flashing will stop when the required temperature
is reached (tolerance from selected set point +/-5°F
(+/- 2°C).
Fig. 7 Temperature adjustment
5.3 "Program" button on the remote control
Memorizing the water temperature with the remote
control "Program" button
B Press the buttons or on the remote control
(Fig. 8, pos. 2), until the required temperature
appears on the remote control display (Fig. 8, pos. 1).
B You will now be able to memorize this temperature by
pressing the "Program" button on the remote control
(Fig. 8, pos. 3) for 3 seconds.
Fig. 8 Memorizing water temperature
B Only one temperature per remote control can be
memorized using the "Program" button on the remote
control.
B At this point the remote control will display the mem-
orized temperature.
When the hot water tap is turned on, the water heater
will supply hot water at the temperature memorized
on the remote control.
Using the "Program" button (operation with memorized temperature)
To operate the equipment with a previously memorized temperature:
Note: Previously saved temperature may
show on the display when first pushing the
program button. Once "PR" shows on the
display, the desired setting will be saved.
Up to six addition remote controls can be
used to memorize a temperature for each
remote control.

Remote control
6 720 680 078 (2011/09)
17
B Press the "Program" button on the remote control.
The remote control display and heater display will now
show the previously memorized temperature. When
the hot water tap is turned on, the water heater will
supply hot water after a few seconds, at the memorized temperature.
5.4 "Priority" function
The remote control does not have a default temperature
setting and therefore has no default "Priority" function.The "priority" will be attributed automatically by the
first user who selects or memorizes (on the remote control or on the heater’s control panel) a temperature for
subsequent use (e.g. a shower).
Then, when the hot water is used (e.g. for a shower), the
heater's display and additional remote control displays
will show the symbol " ".
The temperature may only be modified using the same
buttons that set it (depending on whether the control
panel or the remote control was used). The priority
device will not have the symbol " ".
To clear a device that is locked out with the " " symbol (with no hot water running) simply:
B press and hold both the " ” and “ " buttons on
that device for 5 seconds.
The "Priority" function ends:
• 5 minutes after the last use of the hot water (return to
basic set up).
• 2 minutes after selecting/memorizing the temperature if no hot water is used immediately afterwards
Acquiring "priority”
Any user can acquire "priority" for subsequent use of hot
water, as follows:
B Move the heater's main switch to the ON position (I).
B Press and hold " ” or “ " to select the desired
temperature.
B Press and hold the "Program" button until the symbol
"Pr" appears on the remote control display.
B Use the hot water within two minutes of acquiring
"priority”.
5.5 Error messages
This device has an error message system. Any errors that
the heater generates will be indicated by an error code
that will appear on the display (Fig. 6, pos. 1) and by a
symbol indicating a "safety block" (Fig. 6, pos. 7). The
remote control will be operative only after pressing the
reset button on the heater and clearing the error.
To identify the type of error or if the error will not clear,
consult the heater installation manual.
Temperature cannot be memorized or
changed using the heater's control panel
buttons or a second remote control when
hot water is in use (e.g. during a shower)
The "Priority" function will automatically
activate to stop another user from modifying the temperature when hot water is in
use.
"Priority" cannot be acquired while the hot
water tap is open.

Troubleshooting
6 720 680 078 (2011/09)
18
6 Troubleshooting
6.1 Replacing batteries
When batteries are weak, the low battery symbol (Fig. 6,
pos. 5) will appear on the display.
B Remove the two screws on the back of the remote
control.
B Open the battery housing and remove the batteries,
then replace with new AA 1.5V batteries, ensuring
they are inserted correctly.
B Close the battery housing using the two screws.
6.2 Cleaning
Use a damp cloth to clean parts of the remote control.
Do not use abrasive or solvent-based detergents.
6.3 Troubleshooting
1. No display on remote control
B Check for weak or dead batteries.
Remote control in sleep mode.
B Simply press any button on the remote to bring up the
display.
2. Remote control will not activate / no number with
rotating digit
B Ensure that you are standing directly in front of the
water heater when attempting to activate.
B Ensure that no other device in the area, such as a
cordless phone, is operating on a frequency similar to
the remote (868 MHz) and causing interference.
B Double check all wire connections of the remote con-
trol manual. Pay close attention to the wire connecting the remote's PCB to the heater's main PCB.
3. Remote display shows "- -" only
B Verify the water heater's ON/OFF switch is turned to
the ON (I) position. If the water heater's display is still
blank, verify the heater is plugged properly grounded
outlet.
B Verify there is proper voltage to the water heater.
B Verify the remote is within the maximum distance
from the water heater of 30 meter (98 ft).
B Ensure that no other device in the area, such as a
cordless phone, is operating on a frequency similar to
the remote (868 MHz) and causing interference
4. Error code and “ ” symbol will not clear from
remote
• Error codes cannot be reset by using the remote. All
errors must be cleared by using the reset button
on the water heater's control panel.
• If an error code is gen erated immediately after the
installation of the remote control transceiver PCB,
ensure that the two large electrical connectors ( Fig.
5) on the main PCB are properly seated.
• Error code may not be resettable. Consult water
heater's installation manual.
5. Remote will not memorize desired temperature set-
ting
B Verify that the remote control "program" button is
depressed until the remote display reads "Pr".
6. Priority " " symbol will not clear
B Verify no hot water is being used when trying to clear
"priority" function.
B With no hot water running, press and hold the “ ”
or “ ” buttons for 5 seconds on the locked out
device (remote or water heater) until the " " symbol (Fig. 6, Pos. 6) disappears.
Verify that the rubber seal is correctly fitted
between both plastic housing parts.
WARNING:
Dead batteries must be replaced. Consequently, the manufacturer is not liable for
any faults or damage caused by dead batteries.
Dispose of the dead batteries properly.
If not used for a few minutes, the remote's
display will go blank to save the batteries.
Large amounts of metal or concrete in the
structure may have a blocking effect on the
remote's signal. This may alter the maximum distance allowable from the water
heater.
B Move within direct line of sight of the
water heater to see if signal will reconnect.
Memorization of a selected temperature
only saves to the device on which it was
originally programmed. To retrieve a memorized temperature setting, you must use
the device with which it was programmed.

Troubleshooting
6 720 680 078 (2011/09)
19
B Do not use any hot water for at least 5 minutes. The
priority function should automatically clear after this
time period.
Instrucciones de seguridad/ Declaración de conformidad
6 720 680 078 (2011/09)
20
1 Instrucciones de seguridad/ Declaración de conformidad
1.1 Declaración de conformidad
Este aparato reúne los requisitos de las Directivas Europeas 1999/ 5/CEE (R&TTE) y manifiesta el cumplimiento
de la prueba de homologación de tipo realizada a una
muestra en el correspondiente certificado de prueba de
la CE.
1.2 Instrucciones de seguridad
B Lea las siguientes instrucciones con mucho deteni-
miento para asegurar una correcta utilización.
B Siga las instrucciones de seguridad.
ATENCIÓN:
Todo cambio o modificación que no haya
sido expresamente aprobado por la parte
responsable del cumplimiento podría invalidar la autorización que posee el usuario
para manejar el equipo.
ATENCIÓN:
El mando a distancia es resistente al agua y
también puede usarse en duchas .
Sin embargo, no es un aparato impermeable y no debe sumergirse en medios con
agua, como por ejemplo en bañeras .
Información sobre el mando a distancia
6 720 680 078 (2011/09)
21
2 Información sobre el mando a distancia
Mando a distancia para la regulación de la temperatura
de los calentadores de agua.
Datos técnicos:
Suministro de energía
mediante pilas
Alkaline AA LR 6
2 x 1.5V
Frecuencia 868 MHz
Tipo de protección IP X6
Alcance 30 m
Tab. 1
Pueden programarse hasta 6 mandos a distancia para un solo aparato.
Kit del mando a distancia
6 720 680 078 (2011/09)
22
3 Kit del mando a distancia
3.1 Componentes que se facilitan
Fig. 1 Componentes
1 Mando a distancia
2 Circuito Impreso (PCB) del transmisor-receptor para el
mando a distancia
3 Cable de conexión del PCB
1
2
3
6720680078 -01.1JS
Instalación del mando a distancia
6 720 680 078 (2011/09)
23
4 Instalación del mando a distancia
4.1 Instalación del Circuito Impreso (PCB)
del transmisor-receptor para el mando a
distancia
Preparación para la preinstalación:
B Afloje los dos tornillos de cabeza Phillips situados en
la parte trasera inferior de la cubierta.
B Levante la cubierta frontal y extráigala.
B Extraiga los tres tornillos de la unidad de control (Fig.
2, pos.1).
Fig. 2
B Extraiga los 6 tornillos situados en la parte posterior
de la cubierta de la unidad de control para poder
tener acceso a la tarjeta electrónica (PCB) (Fig. 3,
pos.2).
Fig. 3
Instalación del Circuito Impreso (PCB) del transmisorreceptor
B Coloque el PCB para el mando a distancia en la
cubierta posterior de la unidad de control, tal como se
muestra en la Fig. 4.
Fig. 4
B Conecte el cable que se suministra entre el PCB prin-
cipal y el PCB del mando a distancia, tal como se
muestra en la Fig. 5.
Fig. 5
B Proceda al reensamblaje de todos los componentes
en orden inverso.
ADVERTENCIA:
B Por razones de seguridad, interrumpa el
suministro eléctrico del calentador de
agua antes de realizar la instalación.
6720608920-38.1Av
6720606990-10.1AL
 Loading...