


RP-N54
2.4G 5G
Fast. Easy. Setup!
RP-N54 Quick Start Guide
2
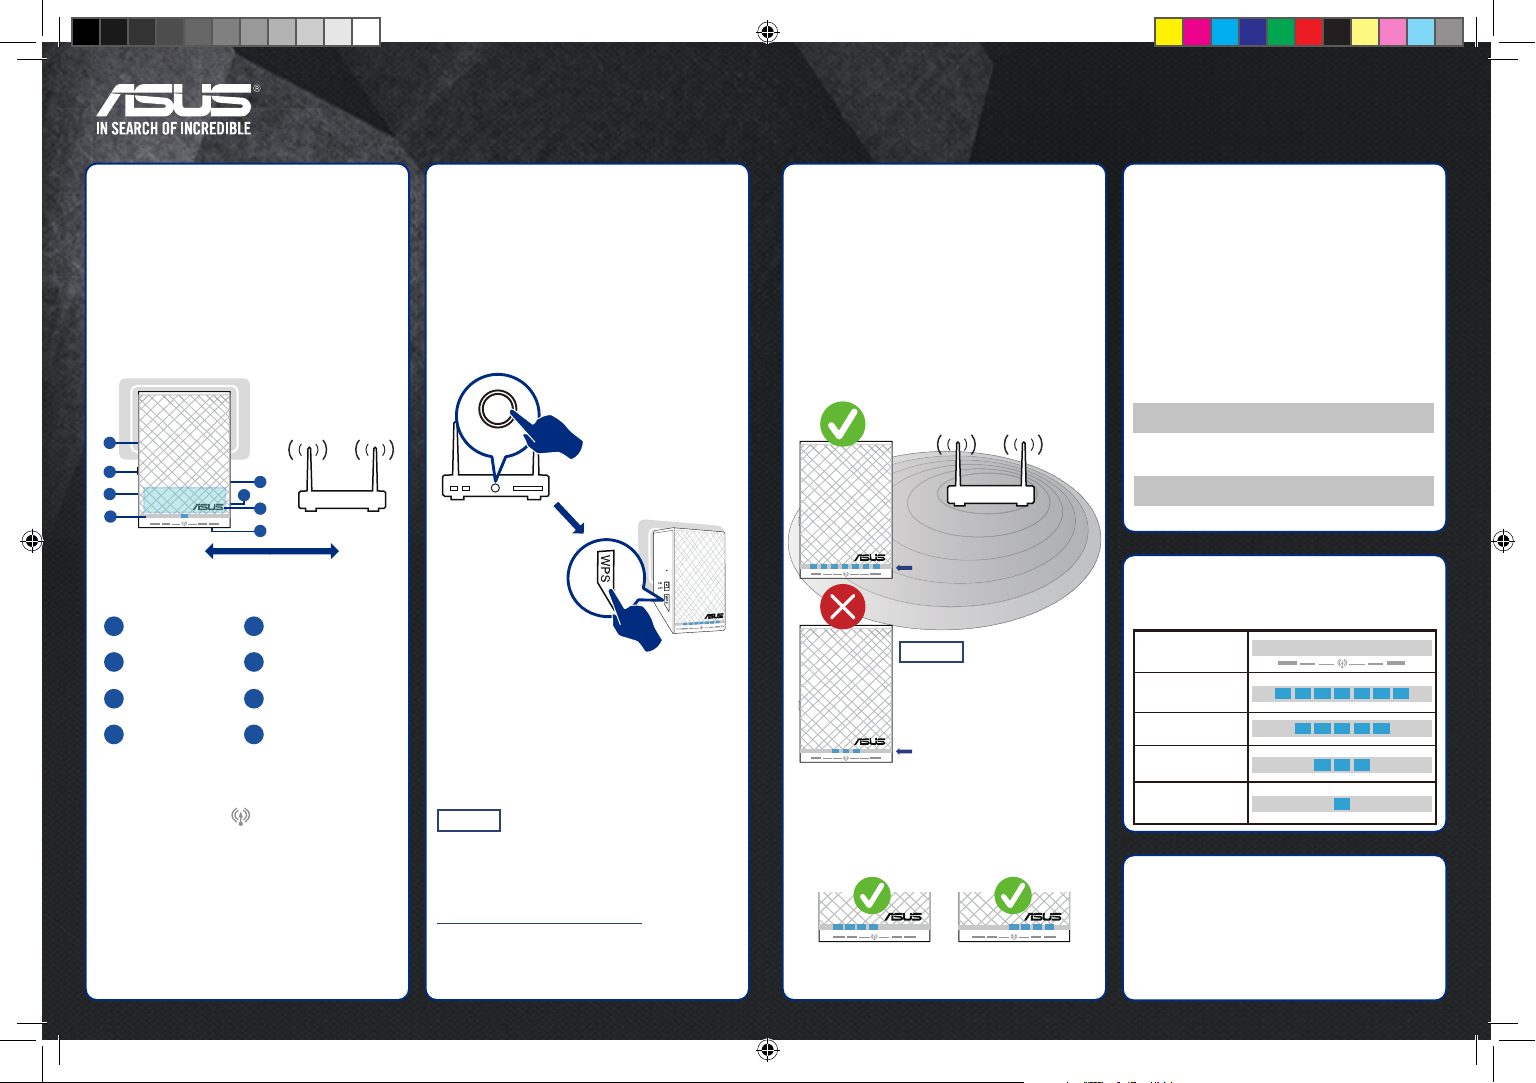
Connect via
WPS
1
Power on
3
Find the best
spot
For setup, plug the RP-N54 into a
power outlet within 6 feet of your
router/AP.
The Power LED should light up
once the RP-N54 is plugged in.
Wait up to 1 minute for the Power
LED to turn solid blue.
The Wi-Fi LED indicates signal
strength to/from the router/AP for
both 2.4 and 5 GHz bands.
On your router/AP, press and
hold the WPS button for at least 3
seconds.
Quickly go to the RP-N54, then
press and hold the WPS button
for at least 3 seconds. When the
connection is made, the Wi-Fi
LEDs will change to solid blue.
To use both 2.4 and 5 GHz bands,
connect to Wi-Fi network: ASUS_
RPN54, then go to
http://repeater.asus.com to access
advanced settings. Use admin as
both username and password.
Move and plug in the RP-N54
to the farthest place where
signal strength is excellent or
good according to the Wi-Fi
performance LEDs.
When configured via WPS, either
the 2.4 or 5 GHz Wi-Fi LEDs will be
lit. Devices can still connect using
both bands.
NOTE
IP: 192.168.1.1
Excellent
Good
Poor
No connection
Performance
Wi-Fi network name: ASUS_RPN54
LED
2.4G 5G
1
2
3
8
5
6
4
7
1
2
5
6
7
8
3
4
Position within 6 feet.
Router/AP
LED Night light
WPS Touch controller
Reset Ethernet port
Power on/off Audio port
Login information
Wi-Fi performance LEDs
Signal strength between the router/AP and
RP-N54
Factory Default Setting
Your RP-N54 is
now set up!
RP-N54 Wi-Fi network name
Existing router network name_RPT
RP-N54 Wi-Fi password
Existing router network password
Your network info should be:
WPS
2.4G 5G
2.4G 5G
Best performance
Poor performance
If the LED indicates poor
signal, move the RP-N54
closer to the router/AP.
NOTE
2.4G 5G2.4G 5G
Only 2.4 GHz
Wi-Fi LED
Only 5 GHz
Wi-Fi LED
F10861_RP-N54_QSG.indb 1 2015-09-16 17:30:30
 Loading...