

Apple TV User Manual

Apple TV
User’s Guide

Apple Computer, Inc.
K
© 2007 Apple Computer, Inc. All rights reserved.
Under the copyright laws, this manual may not be
copied, in whole or in part, without the written consent
of Apple.
The Apple logo is a trademark of Apple Computer, Inc.,
registered in the U.S. and other countries. Use of the
“keyboard” Apple logo (Option-Shift-K) for commercial
purposes without the prior written consent of Apple
may constitute trademark infringement and unfair
competition in violation of federal and state laws.
Every effort has been made to ensure that the
information in this manual is accurate. Apple is not
responsible for printing or clerical errors.
Apple
1 Infinite Loop
Cupertino, CA 95014-2084
408-996-1010
www.apple.com
Apple, the Apple logo, AirPort, iLife, iPhoto, iTunes, Mac,
Macintosh, Mac OS, and QuickTime are trademarks of
Apple Computer, Inc., registered in the U.S. and other
countries.
Apple Store is a service mark of Apple Computer, Inc.,
registered in the U.S. and other countries.
iTunes Store is a service mark of Apple Computer, Inc.
Intel and Intel Core are trademarks of Intel Corp. in the
U.S. and other countries.
™
PowerPC
and the PowerPC logo™ are trademarks of
International Business Machines Corporation, used
under license therefrom.
Other company and product names mentioned herein
may be trademarks of their respective companies.
Mention of third-party products is for informational
purposes only and constitutes neither an endorsement
nor a recommendation. Apple assumes no responsibility
with regard to the performance or use of these
products.

Contents
5 Chapter 1: Welcome
6
Apple TV Components
7
What You Need to Set Up Apple TV
8
Apple TV at a Glance
11 Chapter 2: Getting Started
12
Setting Up Apple TV
17
Configuring Apple TV
19 Chapter 3: Managing Your Content
19
Importing Content into iTunes
20
Adding Movies, TV Shows, and Music
23
Adding Podcasts
24
Importing and Syncing Photos
27 Chapter 4: Using Apple TV
27
Using Your Apple Remote
30
Watching Video
33
Listening to Music, Audiobooks, and Podcasts
3

35
Viewing Photos
36
Changing Apple TV Settings
37
Using the Sources Menu
39 Chapter 5: Tips and Troubleshooting
43
Apple TV Status Light
45 Chapter 6: Learning More, Service, and Support
46
Finding Your Apple TV Serial Number
46
Important Care and Cleaning Information
4
Contents
1
Welcome
Congratulations on purchasing Apple TV. Read this section
to learn about the features of Apple TV and what you need
to set it up.
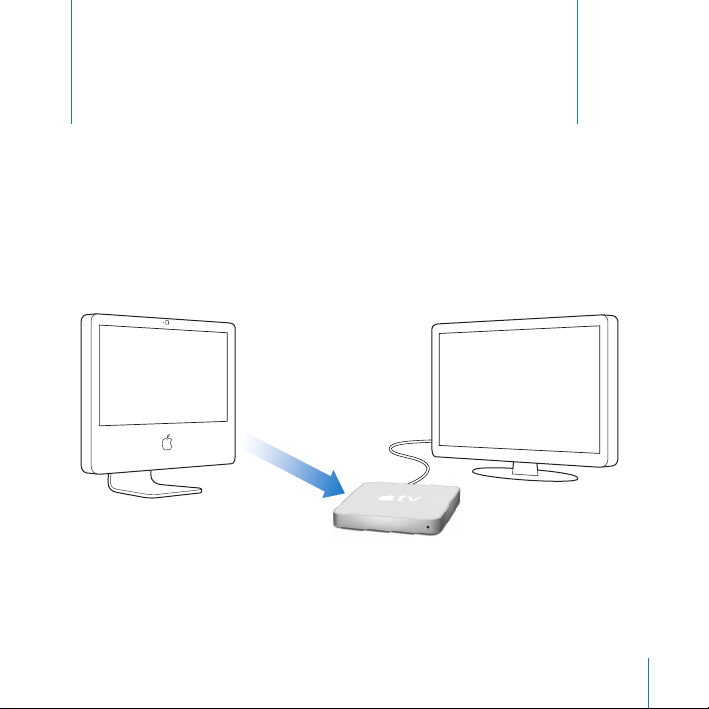
Buy movies, TV shows, music, and more from the iTunes Store, organize it all in your
iTunes library, and enjoy it on Apple TV.
1
5
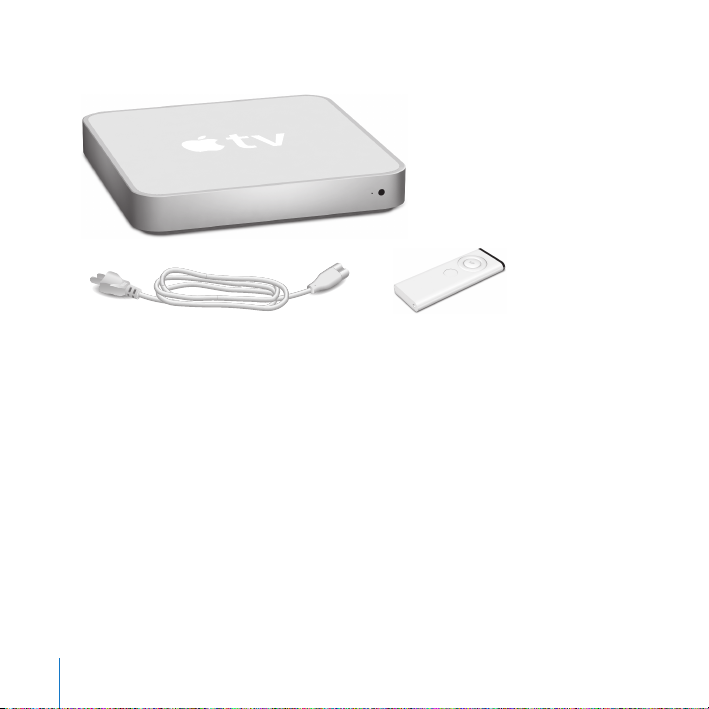
Apple TV Components
AC power cord Apple Remote
Note:
Your power cord may look different from the one pictured here.
6 Chapter 1
Welcome
M
E
NU

What You Need to Set Up Apple TV
Â
A Macintosh computer with:
Â
Mac OS X system software version 10.3.9, or 10.4.8 or later
Â
1 GHz Power PC G4 or G5, or an Intel processor
Â
QuickTime 7.1.5 or later
Â
256 MB RAM
Â
16 MB video RAM, or
Â
A Windows-based computer with:
Â
Windows XP (Home or Professional, with SP2)
Â
2.0 GHz Pentium processor or better
Â
QuickTime 7.1.5 or later (included with iTunes 7.1)
Â
512 MB RAM
Â
32 MB video RAM
Â
iTunes 7.1 or later, which you can download from www.apple.com/itunes/download
Â
A widescreen, enhanced definition (ED), or high definition (HD) TV with an HDMI, DVI,
or component video port and analog audio or optical digital audio ports
Â
An HDMI, HDMI-to-DVI, or component video cable and analog or optical digital audio
cables (see “Connecting the cables” on page 12)
Â
An Ethernet or wireless network and a broadband Internet connection
(DSL/Cable/LAN)
Â
An iTunes account and iTunes content, such as movies, TV shows, and music,
is recommended
Chapter 1
Welcome
7
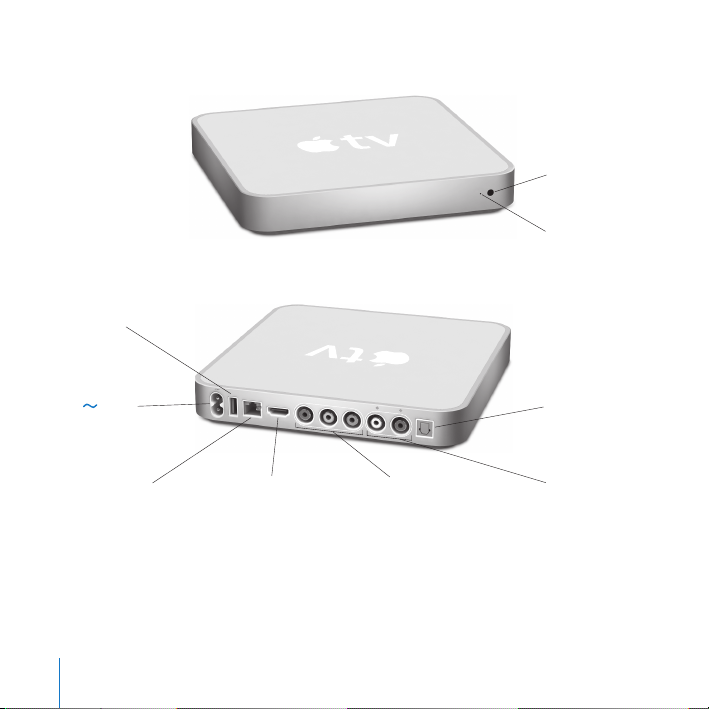
Apple TV at a Glance
USB
d
port
d
Power
port
G
IR receiver
Status light
£
v
i
d
e
o
L
au
d
io
R
optica
l
au
d
io
Optical digital
audio port
G
Ethernet
port
8 Chapter 1
Welcome
£
HDMI
port
Component
video ports
Analog
audio ports

Status light
The status light blinks amber when Apple TV starts up. When Apple TV is on, the status
light is solid white. For more information about the status light, see “Apple TV Status
Light” on page 43.
IR receiver
Use with the included Apple Remote to control Apple TV.
Power port
≤
Plug the included AC power cord into Apple TV.
USB port
d
For service and diagnostics.
Built-in WiFi/AirPort wireless
Z
Connect Apple TV to your wireless network.
Ethernet port
G
If you connect to your network using Ethernet, connect an Ethernet cable.
HDMI port
£
Connect Apple TV to a widescreen TV that has an HDMI port using an HDMI cable, or a
DVI port using an HDMI-to-DVI cable.
Component video ports
Connect Apple TV to a widescreen TV that has component video (Y, Pb, and Pr) ports,
using a component video cable with green, blue, and red connectors.
Analog audio ports
Connect Apple TV to a widescreen TV or home theater receiver with analog audio ports
(red and white), using an analog audio cable.
Optical digital audio port
Connect Apple TV to a home theater receiver that has an optical digital audio port, using
an optical digital audio (also called S/PDIF or TOSLINK) cable.
Chapter 1
Welcome
9


2
Getting Started
Use the information in this chapter to set up and
configure Apple TV.
To get started you need to:
Â
Connect audio and video cables to Apple TV and your widescreen TV or
home theater receiver
Â
Connect Apple TV to your wireless or Ethernet network
Â
Install the latest version of iTunes on your computer
Â
Sync the content of your iTunes library with Apple TV
You can connect Apple TV to a widescreen TV that has:
Â
An HDMI port using an HDMI cable for both video and audio
Â
Component video (Y, Pb, and Pr) ports using a component video cable with green,
blue, and red connectors, and an audio cable
Â
A DVI port using an HDMI-to-DVI cable for video and an audio cable
You can also connect Apple TV to a home theater receiver.
Important:
in the included
before you plug Apple TV into a power outlet.
Read all of the following installation instructions and the safety information
Apple TV Safety and Regulatory Compliance Information
booklet carefully
2
11
Setting Up Apple TV
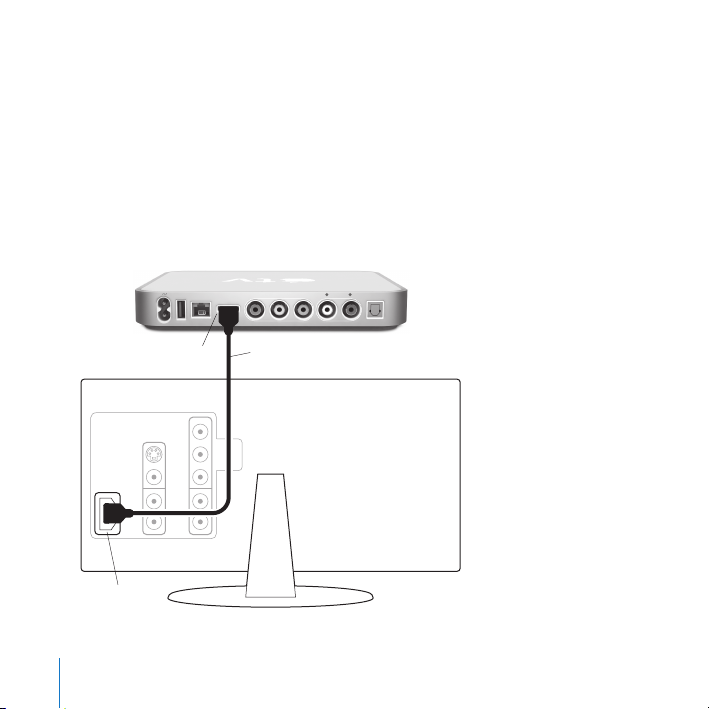
Before you begin, look at the back of your TV or receiver and find the audio and video
ports. Make sure you have the appropriate cables for your setup.
Step 1: Connecting the cables
Choose the setup that matches the ports on your TV or receiver.
To connect a widescreen TV with an HDMI port:
1
Connect one end of an HDMI cable to the back of your TV.
2
Connect the other end to the back of Apple TV.
optical
audiovideo
RL
audio
Apple TV
TV
HDMI port
12 Chapter 2
G
d
Getting Started
£
HDMI cableHDMI port
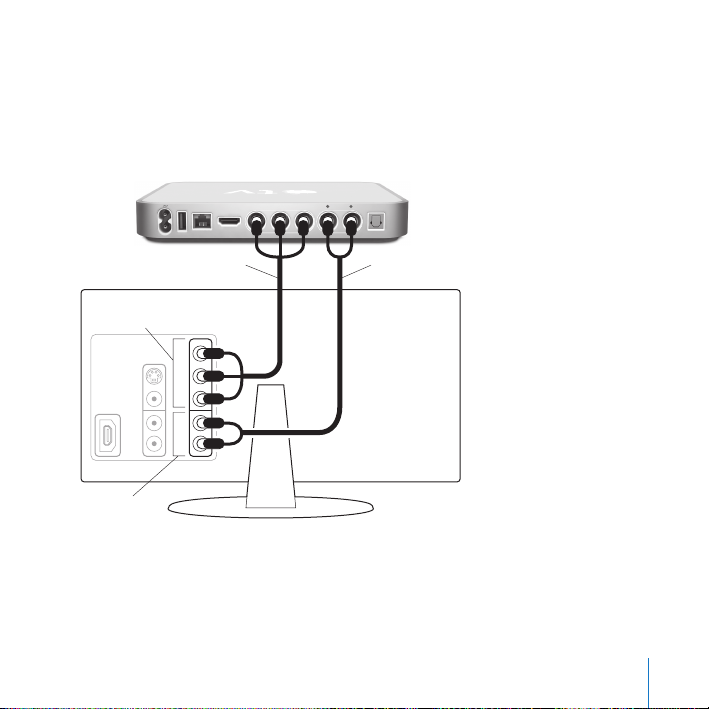
To connect a widescreen TV with component video and analog audio ports:
V
1
Connect the green, blue, and red connectors on one end of a component video cable
to the Y, Pb, and Pr ports on your TV and the connectors on the other end to Apple TV.
2
Connect an analog audio cable, with red and white connectors, between Apple TV and
your TV.
optical
audiovideo
£
G
d
Component video cable Analog audio cable
Component
video input
Y
Pb
Pr
L
AUDIO
R
Analog
audio input
RL
audio
Apple TV
T
Chapter 2
Getting Started
13
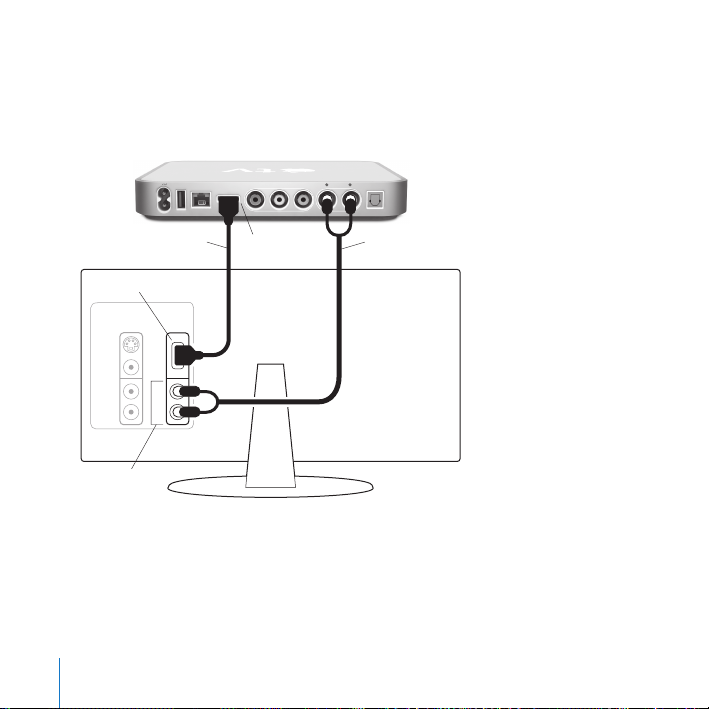
To connect a widescreen TV with a DVI video port
1
Connect an HDMI-to-DVI video cable to the DVI port on your TV and the HDMI port on
Apple TV.
2
Connect an optical digital or analog audio cable between your TV and Apple TV.
optical
audiovideo
RL
audio
Apple TV
Analog audio cable
DVI port
£
G
d
HDMI portHDMI-to-DVI cable
L
AUDIO
R
Analog
audio input
14 Chapter 2
TV
Getting Started
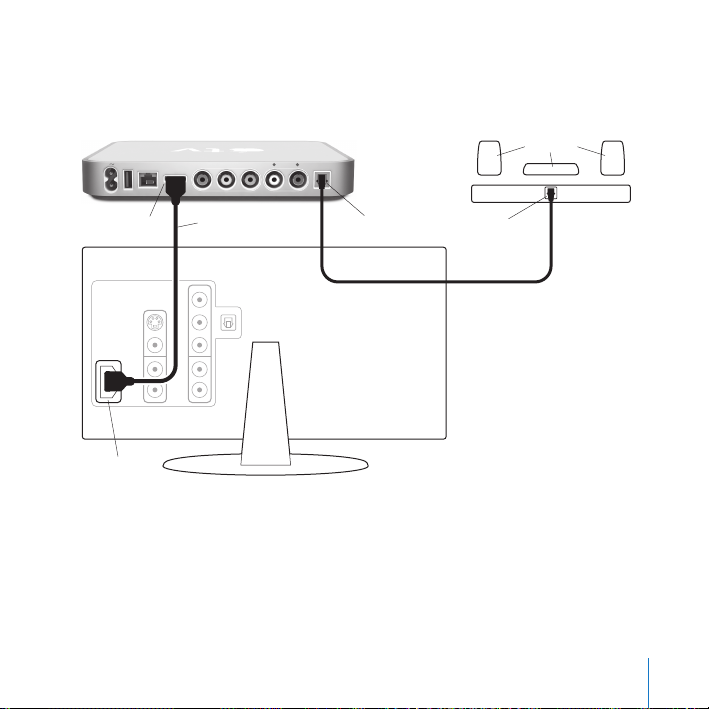
To connect a widescreen TV and a receiver:
1
Connect an HDMI or component video cable between your TV and Apple TV.
2
Connect an optical digital or analog audio cable to your receiver and Apple TV.
optical
audiovideo
£
G
d
RL
audio
Speakers
Apple TV
HDMI cableHDMI port
Optical digital audio port
TV
HDMI port
Note:
Alternatively, you can connect a video cable between Apple TV and your receiver
and then connect a video cable between your receiver and TV.
Chapter 2
Getting Started
Home
theater
receiver
15
 Loading...