


B9978-5
User manual |
Oven |

2 Contents
Thank you for choosing one of our high-quality products.
To ensure optimal and regular performance of your appliance please read this instruction manual carefully. It will enable you to navigate all processes perfectly and most efficiently. To refer to this manual any time you need to, we recommend you to keep it in a safe place. And please pass it to any future owner of the appliance.
We wish you much joy with your new appliance.
Contents
User Instructions |
3 |
Safety information |
3 |
General view |
4 |
Control panel |
5 |
Display |
5 |
Oven layout |
6 |
The electronic oven controls |
8 |
Menus and operation |
8 |
Auto Cooking |
8 |
Heating Functions |
10 |
Specials |
10 |
Basic Settings |
11 |
Cleaning Menu |
11 |
Additional Functions |
11 |
Operation |
12 |
Before using for the first time |
12 |
Switching on and off |
12 |
Auto cooking |
12 |
Conventional baking and roasting |
13 |
Meatprobe |
14 |
Setting the countdown timer |
15 |
Key Lock |
15 |
Switch-on lock |
15 |
Automatic switch-off of the oven |
15 |
Smell Filter |
16 |
Inserting the shelf, baking tray and drip |
|
pan |
16 |
|
Grill-Set |
17 |
|
option |
18 |
Tips, charts and information |
19 |
|
|
Auto Cooking |
19 |
|
Roasting |
21 |
|
Manual baking and roasting |
25 |
|
The outside of the appliance |
34 |
|
Oven interior |
34 |
|
Accessories |
34 |
|
Non-stick accessories |
34 |
|
Pyrolytic cleaning |
34 |
|
Cleaning Assistant |
35 |
|
Cleaning Reminder |
35 |
|
Oven shelf runners |
35 |
|
Oven light |
36 |
|
Oven door |
37 |
|
Oven door glass |
39 |
What to do if ... |
42 |
|
Disposal |
43 |
|
Electrical Connection |
44 |
|
Installation |
44 |
|
Guarantee/Customer Service |
48 |
|
|
GREAT BRITAIN & IRELAND |
48 |
European Guarantee |
49 |
|
www.electrolux.com |
50 |
|
Subject to change without notice

Safety information |
3 |
|
|
User Instructions
Safety information
Electrical safety
•This appliance must only be connected by a qualified electrician.
•In the event of a fault or damage to the appliance: Take the fuses out or switch the appliance off.
•Repairs to the appliance must only be carried out by qualified service engineers. Considerable danger may result from improper repairs. If repairs become necessary, please contact our Customer Care Department or your dealer.
Children's safety
•Never leave small children unattended while the appliance is in operation.
•To protect against unauthorised use the appliance is equipped with a switch-on lock.
Safety during use
•Persons (including children) who, due to their physical, sensory or mental capacity or their inexperience or lack of knowledge are unable to use the appliance safely should not operate this appliance without the supervision or instruction of a responsible person.
•This appliance should be used only for normal domestic cooking, roasting and baking of food.
•Be careful if connecting electrical appliances to sockets near to this appliance. Electrical leads must not be caught under the hot oven door.
WARNING!
WARNING: Risk of burns! The oven interior becomes hot when in use.
•If you use ingredients containing alcohol in the oven, a slightly flammable mixture of alcohol and air may ensue. In this case, be careful when opening the door. Do not handle any sources of heat, sparks or naked flames when doing so.
How to avoid damage to the appliance
•Do not line the oven with aluminium foil and do not place baking trays, pots, etc. on the oven floor, as the heat that builds up will damage the oven enamel.
•Fruit juices dripping from the baking tray will leave stains, which you will not be able to remove. For very moist cakes, use a deep tray.
•Do not put any strain on the oven door when open.
•Never pour water directly into the oven when it is hot. This could cause damage to and discoloration of the enamel.
•Rough handling, especially around the edges of the front panel, can cause the glass to break.
•Do not store any flammable materials inside the oven. These could ignite when the oven is switched on.
•Do not store any moist foods inside the oven. These could damage the oven enamel.
•Do not leave dishes uncovered in the oven after switching off the cooling fan. Moisture may form inside the oven or on the glass door and also get onto the units.

4
Note: Enamel coating
Changes in the colour of the oven's enamel surface as a result of use do not affect the oven's suitability for normal and correct use. They therefore do not constitute a defect in terms of warranty law.
General view
1Control panel
2Oven door
5
Control panel
Overview |
1ON/OFF-Button: to switch on, press and hold for longer
2Display
3Turning knob with OK button to select a menu option
4Additional functions key
5Sensor button to select a cooking category
Display
The information shown in the display varies according to the oven's operating status. If the oven has been switched off, the time of day is shown. If the oven is still hot, a bar appears in the display and shows the residual heat remaining in the oven.
When the oven is switched on, the display shows the menu and information about the oven's operating status.
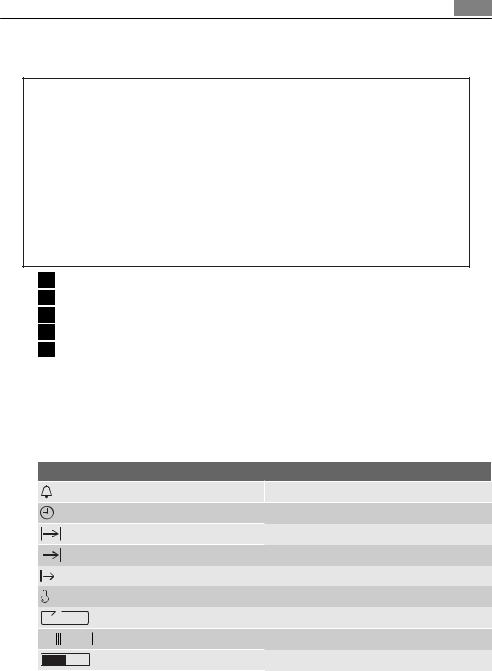
Symbols
Minute Minder
Time of Day
Duration
End Time
Running Time
Oven Temperature
Calculation
Rapid Heat Up
Temperature Display

6
Oven layout
1Top heat and grill elements
2Oven light
3Meat probe connector
4Oven light
5Ring heating element, fan
6Bottom oven element
7Side rails, removable
8Oven levels
9Rotary spit drive mechanism 10 Smell Filter
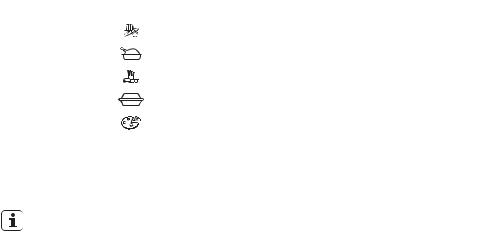
Oven accessories
Non-stick oven shelf
For cookware, cake tins, roasts and food to be grilled.
Drip pan
For baking and roasting or for use as a tray to catch fat.
Non-stick drip pan
For baking and roasting or as a tray to catch fat
|
10 |
1 |
|
9 |
|
2 |
|
8 |
5 |
||
3 |
|||
|
4 |
||
|
|
||
|
3 |
4 |
|
|
2 |
||
|
5 |
||
|
1 |
||
|
6 |
||
|
|
||
|
|
7 |
7
Grill shelf
Insert for the drip pan for roasting and grilling
Meat probe
For determining exactly how well done pieces of meat are during cooking.
Rotary spit with support
For roasting larger joints of meat and poultry.
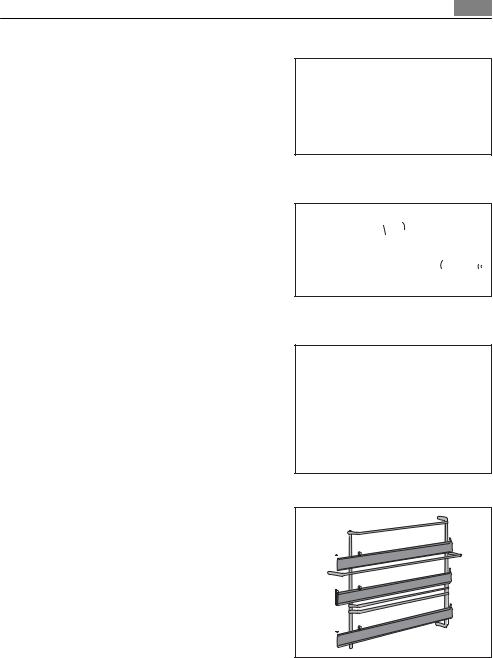
Triple oven shelf runners
2 Side rails with 3 telescopic runners
5 
4 
3
2
1 

8 The electronic oven controls
The electronic oven controls
Menus and operation
You use the menu to operate the oven. The Main Menu contains:
Main Menu
Auto Cooking
Heating Functions
Cleaning Menu
Basic Settings
Specials
Selecting the menu options
•Turn the knob clockwise to get to the next function.
•Turn the knob anti-clockwise to get to the previous menu option.
Opening the main menu
Press the On/Off button to get to the main menu. The Auto Cooking function is selected by default.
Opening the menu Auto Cooking
Press the On/Off button to get to the main menu. The Auto Cooking function is selected by default.
1.Press the sensor key for the category you want.
2.Use the knob to select the menu or subcategory you want.
3.Follow the instructions in the display.
Selecting a menu option in the menu
1.Select the menu option you want by turning the knob.
2.When the menu option you want is shown in the display, press the OK button to call it up.
"back" at the end of each menu takes you back to the previous menu
Auto Cooking
General
The menu "Auto Cooking" Is divided into five subcategories. Use these categories to select the optimum setting for a variety of dishes. Press the relevant sensor key. The categories are divided into various subcategories and dishes, which are then programmed with the appropriate settings.
Refer to the supplier quick guide for an overview of all the categories and dishes from the Auto Cooking menu. For help on how the dishes have been classified into the various categories, see the supplied Cooking and Baking Overview.
|
|
The electronic oven controls |
9 |
|
|
|
|
|
|
|
|
|
Symbol |
Category |
|
|
|
Baking |
|
|
|
|
|
|
|
Roasting |
|
|
|
|
|
|
|
|
|
|
|
Convenience |
|
|
|
|
|
|
|
Oven dishes |
|
|
|
|
|
|
|
Pan pizza |
|
|
|
|
|
Principle
With Auto Cooking , the oven calculates the cooked time needed.
Unlike conventional cooking, you do not need to set a type of heat or cooking time. Instead, you simply select the desired food type from the category menu.
" You can use Auto Cooking on one oven level only.
Only use the fat filter when roasting! Otherwise the oven cannot calculate an optimal cooking time.
To attain optimum results, you should use the recommended cookware and/or accessories. You can find further information in the section Tips, Charts and Advice.

10 The electronic oven controls
Heating Functions
To manually set Heating Functions and cooking temperature.
Heating Functions |
|
|
|
Fan Cooking |
For baking on up to three levels simultaneously. |
|
Set the oven temperatures 20 – 40° lower than |
|
Conventional Cooking |
Conventional Cooking |
For baking and roasting on one level |
|
|
Pizza Setting |
For baking on one oven level dishes that require |
|
more intensive browning and a crispy base. Set |
|
the oven temperatures 20 – 40° lower than Con- |
|
ventional Cooking |
Turbo Grill |
For roasting larger joints of meat or poultry on |
|
one level. Also suitable for gratinating and |
|
browning. |
Turbo Grill + Spit Roast |
Especially for poultry, temperature setting |
|
190-210°C |
|
|
Economy Grill |
For grilling flat foods which are placed in the |
|
middle of the rack and for toasting. |
|
|
Economy Grill + Spit Roast |
For grilling a chicken or small rolled roasts |
Dual Grill |
For grilling flat foods in large quantities and for |
|
toasting. |
|
|
Dual Grill + Spit Roast |
For grilling two chickens or one rolled roast |
Bottom Heat |
For baking cakes with crispy or crusty bases. |
Slow Cook |
For preparing particularly tender, succulent |
|
roasts |
|
|
Specials
For selecting additional heating functions
Special functions
Defrost
Drying
Keep Warm
Preserving
Plate Warming
The electronic oven controls |
11 |
|
|
Basic Settings
To change different oven Basic Settings.
|
Basic Settings |
|
|
|
|
Set Time of Day |
|
To set current time on the clock |
Time Indication |
|
When on, the time of day is displayed when the |
|
|
oven is switched off |
|
|
When off, the display switches itself off com- |
|
|
pletely |
Display Contrast |
|
Adjusts the display |
Display Brightness |
|
Adjusts the display |
|
|
|
Set Language |
|
|
|
|
|
Buzzer Volume |
|
|
Key Tones |
|
Switches key tones on or off |
Alarm/Error Tones |
|
Switches alarm tones on or off |
Smell Filter |
|
Smell Filter Activating or deactivating |
Calibration |
|
Adapts oven to the kitchen environment, e. g. |
|
|
after moving house |
Service |
|
Indicates the version of the software, the con- |
|
|
figuration and the period of operation |
Factory Settings |
|
Resets all basic settings to the original factory |
|
|
settings |
|
|
|
Cleaning Menu
Pyrolytic cleaning and other functions.
|
Cleaning menu |
|
Pyrolytic |
|
To clean the oven using pyrolytic cleaning |
Cleaning Assistant |
|
Reminds you of various points that should be |
|
|
noted prior to pyrolytic cleaning. Can be switch- |
|
|
ed on or off. |
Cleaning Reminder |
|
Recognises when pyrolytic cleaning is required |
|
|
and alerts the user to this fact. Can be switched |
|
|
on or off. |
|
|
|
Additional Functions
You can use the Additional Functions key
 to set the available Additional Functions.
Additional functions menu
Minute Minder
Key Lock
Duration / End Time
Meatprobe
12 Operation
Operation
Before using for the first time
Before using the oven, the language, then the display contrast, brightness and the current time must be set first.
When turning the oven on for the first time, " SET LANGUAGE" will appear on the display after a few seconds.
1.Use the turning knob to select the desired setting
2.Then press the OK button to confirm your selection. Select the additional required settings in the same way.
Calibration Adjusting to suit the environment
For optimal results using "Auto-Kochen" the oven must be adjusted to suit the surroundings. This process is called Kalibrierung and takes approximately 4 hours.
The oven does not need to be calibrated if you only want to use it for conventional cooking.
Please take note of the following points prior to Kalibrierung
•The Kalibrierung must take place at a room temperature below 35°C.
•For Kalibrierung, install the oven into its final location.
•For the Kalibrierung, connect the oven to the mains supply that will always be used.
•The grease filter must be removed before Kalibrierung.
•The supplied shelf runners must be mounted. (see instructions in the chapter "Cleaning and Care")
•If the oven location, electrical connection or other above mentioned aspect is changed, the oven must always be recalibrated so that the function "Auto-Kochen" delivers optimal results.
You will find calibration in the "Einstellungen", "Kalibrierung" menu.
After calibration, the appliance is ready for use as soon as it has cooled down.
Initial cleaning
The oven should be thoroughly cleaned prior to first use. Also wipe out all parts and the interior with a solution of water and washing-up liquid.
Do not use sharp or abrasive cleaning agents. These could damage the surface.
Switching on and off
– Press the ON/OFF button.
If the oven has been switched off, the time of day is shown. If the oven is still hot, a bar appears in the display and shows the residual heat remaining in the oven.
Auto cooking
1.Switch the oven on.
2.Select the main category you want by using the sensor buttons.
Operation 13
– The available dishes or sub-categories are shown.
3.Select the category you want or the dish directly.
4.Follow the instructions in the display.
Example: Calzone - frozen
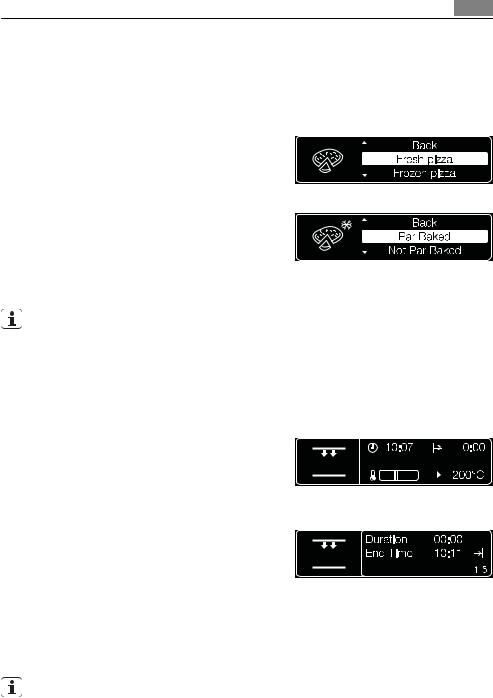
1.Switch the oven on.
2.Select the sensor field for Pizza.
– Four different types of pizza are shown.
3. Select Frozen Pizza by turning the knob. Then press the OK button to call up the
4. sub-category.
– You can choose from three different types of frozen pizza.
5. Select Calzone by turning the knob.
6.Then press the OK button to call up this dish.
7.Follow the instructions in the display.
When the calculated time for the dish has elapsed, you can prolong the cooking process for up to 5 minutes if it needs more time.
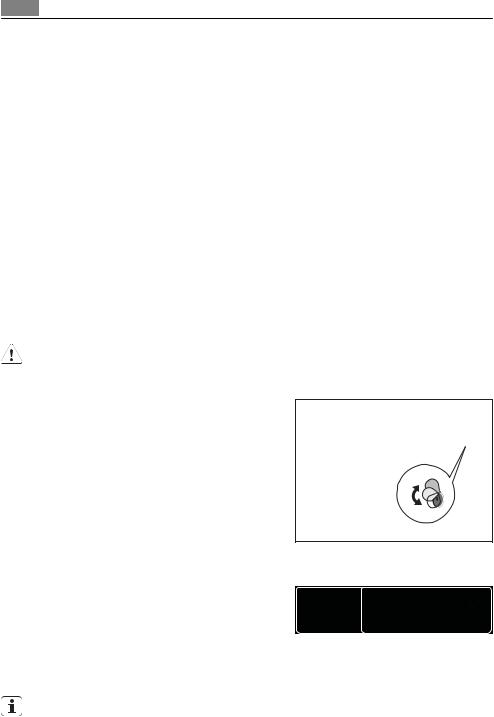
Conventional baking and roasting
1.Switch the oven on.
2.With the knob and the OK button, select Heating Functions.
– The oven functions are shown.
3.Select the function you want.
– A suggested temperature is shown in the display.
4. Turn the knob to change the temperature, if required.
5.Then press the OK button to confirm the oven temperature.
6.Press the additional functions button.
– The cooking time is shown in the display.
7.Turn the knob to set the cooking time.
8.Then press the OK button to confirm the cooking time.
–The end time indicator flashes.
9.Turn the knob to set the end time.
10.Then press the OK button to confirm the end time.
–The oven begins to heat or automatically turns itself on and off at the time you set.
When the set time has elapsed you can prolong the oven function with the set temperature for up to 5 minutes if it needs more time.
14 Operation
Changing the temperature during the cooking process
1.To change the temperature later on, turn the knob to the right.
2.The frame within the display only marks the right-hand section in which the current temperature is shown. Confirm by pressing OK.
3.The triangle next to the current temperature flashes. You can set the new temperature you want only by turning the knob.
4.Confirm the new temperature by pressing OK.
The set oven function continues at the new temperature.
Changing the oven function during the cooking process.
1.To change the oven function later on, turn the knob to the left.
2.The frame within the display only marks the left-hand section in which the current oven function is shown. Confirm by pressing OK.
3.Set the new oven function by turning the knob.
4.Confirm the new oven function by pressing OK.
The new oven function starts at the corresponding suggested temperature. You can change this temperature.
Meatprobe
When using the meat probe, the oven automatically switches itself off once it has reached the core temperature.
Caution: Only the meat probe supplied may be used! If replacing, please use only original spare parts
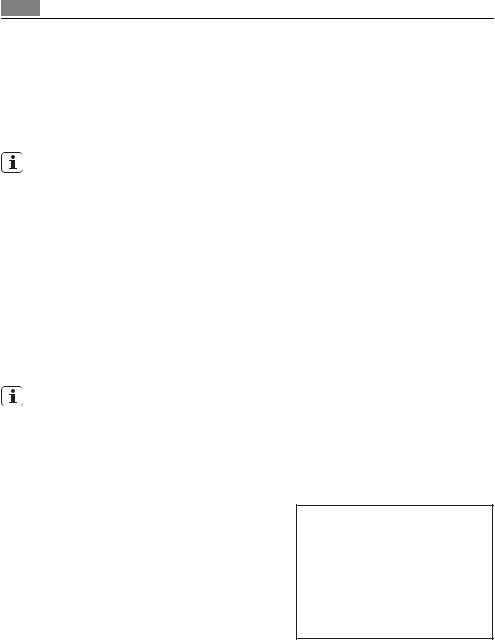
1.Switch the oven on.
2.Insert the meat probe into the meat. The tip of the meat probe must be placed in the middle of the piece of meat.
2 |
1 |
3.Insert the meat probe plug into the socket on the side wall of the oven as far as it will go.
–A suggestion for the core temperature appears in the display.
4.Set the core temperature you want by turning the knob.
5.Then press the OK button to confirm the temperature.
6.Set the oven function and the oven temperature you want.
The core temperature is displayed from 30°C
600C
Meatprobe
1/2
Operation 15
Within a few minutes, a provisional end time is calculated, at which the core temperature set will be reached. This time is constantly recalculated and updated in the display. For the system to work it is essential that the meat probe is in the meat and in the socket at the start of the cooking process and that it is not removed during the cooking process.
Changing the core temperature during the cooking process
–Repeatedly press the additional function button until the set core temperature appears in the display.
–If necessary, change the temperature using the knob.
Setting the countdown timer
You can set an alarm by using the function Minute Minder.
1.Press the additional functions button repeatedly until Countdown Timer appears in the display.
2.Turn the knob to set the time you want the alarm to sound.
3.Then press the OK button and the time will count down.
Press the OK button to switch off the alarm.
00:00:00 
Minute Minder
1/1
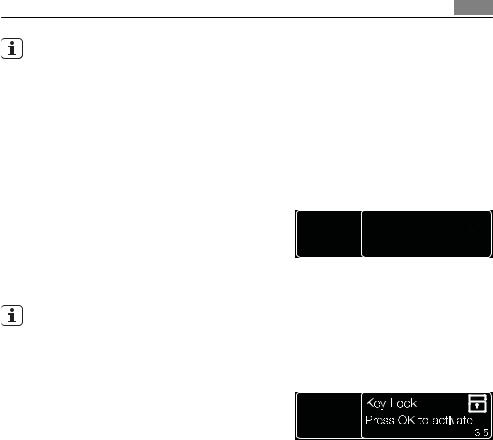
Key Lock
You can turn Key Lock on and off using the additional functions button. The activated key lock prevents inadvertent changing of settings.
1. Press the additional functions button repeatedly until KEY LOCK appears in the display.
2. Follow the instructions in the display.
Switch-on lock
The appliance can be locked using the "switch-on lock" function. This can prevent e. g. children switching on the appliance.
No function may be selected. Close the door if necessary.
Switching the switch-on lock on/off
• " Backen" Press  and Pizza
 together until you hear a signal. Appliance locked appears briefly in the display.
Automatic switch-off of the oven
If the oven not switched off after a certain time, or if the temperature is not modified, it switches off automatically.
The oven automatically switches itself off when the operating temperature is:
•30 - 120° C after 12.5 hours
•120 - 200° C after 8.5 hours
•200 - 250° C after 5.5 hours
•250 - max °C after 3.0 hours
16 Operation
Using the appliance after automatic switch-off
Press the OK button on the knob
Smell Filter
The Smell Filter is activated in the "Basic Settings" menu. If the Smell Filter is switched on, it will start automatically during baking and roasting. When the relevant process is complete, the Smell Filter automatically switches itself off again.
The filter is deactivated when the appliance is set to the factory settings. If the Smell Filter is switched on, the oven uses more energy.
Even if the Smell Filter is switched off, it will switch on after every 100 hours of operation during baking or roasting in order to clean itself.
The Smell Filter operates during pyrolytic cleaning of the oven, even if it is switched off at the time of cleaning.
1.Select "Basic Settings" from the Main menu.
2.Then press the OK key to call up this menu.
3.Use the Selector to select "Smell Filter".
4.Then press the OK key to make the changes.
5.Use the Selector to activate (ON) or deactivate (OFF) the filter.
6.Press the OK key to confirm the setting.
The setting is changed.
Inserting the shelf, baking tray and drip pan
To increase shelf runner safety/ all insertable components have a small curved indentation at the bottom of the right and left-hand edges.
Always insert insertable components so that this indentation is at the back of the oven interior. This indentation is also important for preventing the slide-in components from tipping up.
Insert the baking tray or drip pan:
Slide the baking tray or drip pan between the guide bars of the selected oven level.
Inserting the shelf:
Insert the shelf so that the feet point downwards.
Slide the shelf between the guide bars of the selected oven level.
 Loading...