


 Loading...
MultiSync EA244WMi
MultiSync EA273WMi
User’s Manual

Index
Warning, Caution.......................................................................................................................... |
English-1 |
Registration Information ............................................................................................................... |
English-2 |
Recommended use ...................................................................................................................... |
English-3 |
Contents ....................................................................................................................................... |
English-5 |
Quick Start.................................................................................................................................... |
English-6 |
Controls ........................................................................................................................................ |
English-11 |
Specifi cations - EA244WMi .......................................................................................................... |
English-17 |
Specifi cations - EA273WMi .......................................................................................................... |
English-18 |
Features ....................................................................................................................................... |
English-19 |
Troubleshooting............................................................................................................................ |
English-20 |
Using the Auto Brightness function .............................................................................................. |
English-22 |
ControlSync.................................................................................................................................. |
English-23 |
TCO Certifi ed Edge Displays 1.2 ................................................................................................. |
English-24 |
Manufacturer’s Recycling and Energy Information....................................................................... |
English-25 |
WARNING
TO PREVENT FIRE OR SHOCK HAZARDS, DO NOT EXPOSE THIS UNIT TO RAIN OR MOISTURE. ALSO, DO NOT USE THIS UNIT’S POLARIZED PLUG WITH AN EXTENSION CORD RECEPTACLE OR OTHER OUTLETS UNLESS THE PRONGS CAN BE FULLY INSERTED.
REFRAIN FROM OPENING THE CABINET AS THERE ARE HIGH VOLTAGE COMPONENTS INSIDE. REFER SERVICING TO QUALIFIED SERVICE PERSONNEL.
|
|
|
|
CAUTION |
|
|
|
|
|
|
|
|
|
|
|
|
|
|
||
CAUTION: |
TO REDUCE THE RISK OF ELECTRIC SHOCK, MAKE SURE POWER CORD IS UNPLUGGED |
|||||
|
|
|
FROM WALL SOCKET. TO FULLY DISENGAGE THE POWER TO THE UNIT, PLEASE DISCONNECT |
|||
|
|
|
THE POWER CORD FROM THE AC OUTLET.DO NOT REMOVE COVER (OR BACK). NO USER |
|||
|
|
|
SERVICEABLE PARTS INSIDE. REFER SERVICING TO QUALIFIED SERVICE PERSONNEL. |
|||
This symbol warns user that uninsulated voltage within the unit may have suffi cient magnitude to cause electric shock. Therefore, it is dangerous to make any kind of contact with any part inside this unit.
This symbol alerts the user that important literature concerning the operation and maintenance of this unit has been included. Therefore, it should be read carefully in order to avoid any problems.
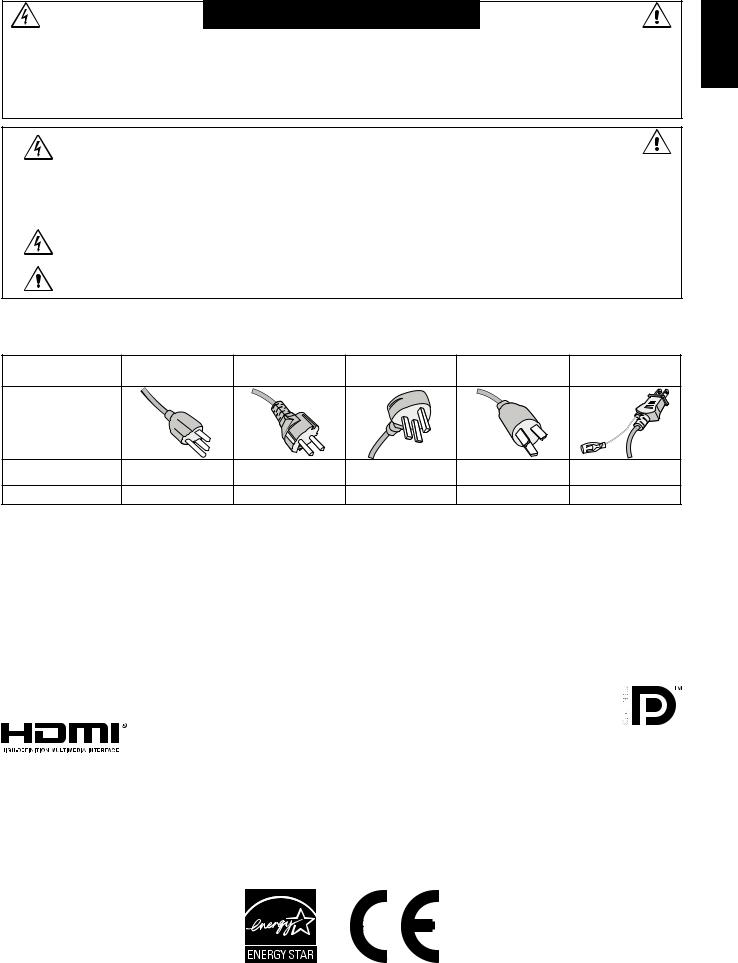
CAUTION: Please use the power cord provided with this display in accordance with the table below. If a power cord is not supplied with this equipment, please contact your supplier. For all other cases, please use a power cord that matches the AC voltage of the power outlet and has been approved by and complies with the safety standard of your particular country.
Plug Type |
North America |
European |
U.K. |
Chinese |
Japanese |
|
Continental |
||||||
|
|
|
|
|
||
Plug Shape |
|
|
|
|
|
|
Country |
U.S.A./Canada |
EU (except U.K.) |
U.K. |
China |
Japan |
|
Voltage |
120* |
230 |
230 |
220 |
100 |
*When operating the monitor with its AC 125-240V power supply, use a power supply cord that matches the power supply voltage of the AC power outlet being used.
NOTE: This product can only be serviced in the country where it was purchased.
Windows is a registered trademark of Microsoft Corporation. NEC is a registered trademark of NEC Corporation. ErgoDesign is a registered trademark of NEC Display Solutions, Ltd. in Austria, Benelux, Denmark, France, Germany, Italy, Norway, Spain, Sweden, U.K.
ENERGY STAR is a U.S. registered trademark.
All other brands and product names are trademarks or registered trademarks of their respective owners. As an ENERGY STAR® Partner, NEC Display Solutions of America, Inc. has determined that this product meets the ENERGY STAR guidelines for energy effi ciency. The ENERGY STAR emblem does not represent EPA endorsement of any product or service.
DisplayPort and DisplayPort Compliance Logo are trademarks owned by the Video Electronics Standards Association.
HDMI, the HDMI logo and High-Defi nition Multimedia Interface are trademarks or registered trademarks of HDMI Licensing LLC in the United States and other countries.
•The intended primary use of this product is as an Information Technical Equipment in an offi ce or domestic environment.
•The product is intended to be connected to a computer and is not intended for the display of television broadcast signals.
English
English-1
Registration Information
Canadian Department of Communications Compliance Statement
This Class B digital apparatus complies with Canadian ICES-003.
Cet appareil numerique de la classe B est conforme a la norme NMB-003 du Canada.
C-UL: Bears the C-UL Mark and is in compliance with Canadian Safety Regulations according to CAN/CSA C22.2 No. 60950-1.
FCC Information
1.Use the attached specifi ed cables with the MultiSync EA244WMi (L240UM)/MultiSync EA273WMi (L273UL) monitor so as not to interfere with radio and television reception.
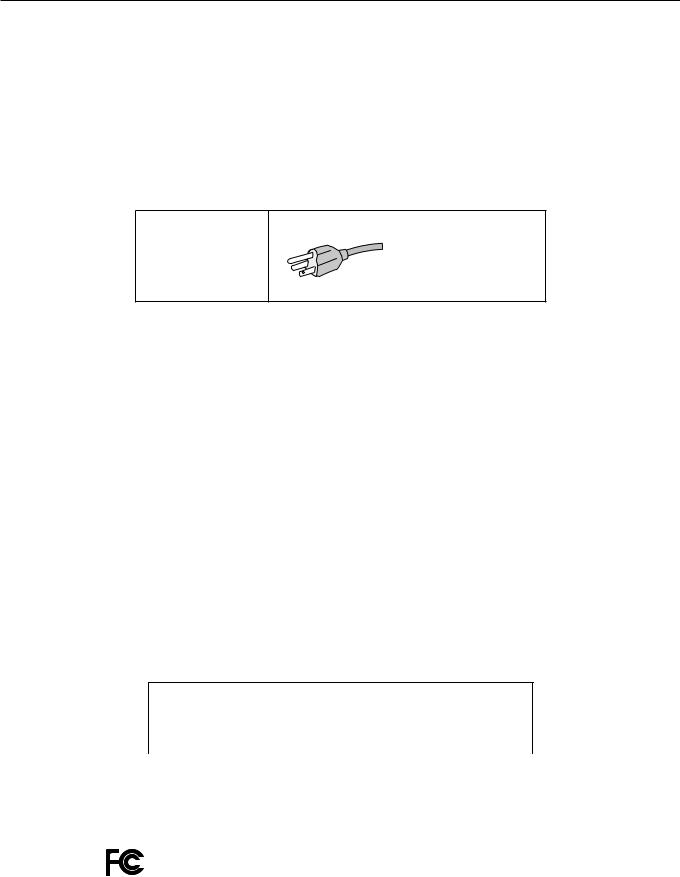
(1)The power supply cord you use must have been approved by and comply with the safety standards of U.S.A., and meet the following condition.
Power supply cord |
Non shield type, 3-conductor |
Length |
1.8 m |
Plug shape |
|
U.S.A
(2)Please use the supplied shielded video signal cable, 15-pin mini D-SUB to D-SUB cable or DVI-D to DVI-D cable. Use of other cables and adapters may cause interference with radio and television reception.
2.This equipment has been tested and found to comply with the limits for a Class B digital device, pursuant to part 15 of the FCC Rules. These limits are designed to provide reasonable protection against harmful interference in a residential installation. This equipment generates, uses, and can radiate radio frequency energy, and, if not installed and used
in accordance with the instructions, may cause harmful interference to radio communications. However, there is no guarantee that interference will not occur in a particular installation. If this equipment does cause harmful interference to radio or television reception, which can be determined by turning the equipment off and on, the user is encouraged to try to correct the interference by one or more of the following measures:
• Reorient or relocate the receiving antenna.
• Increase the separation between the equipment and receiver.
• Connect the equipment into an outlet on a circuit different from that to which the receiver is connected.
• Consult your dealer or an experienced radio/TV technician for help.
If necessary, the user should contact the dealer or an experienced radio/television technician for additional suggestions. The user may fi nd the following booklet, prepared by the Federal Communications Commission, helpful: “How to Identify and Resolve Radio-TV Interference Problems.” This booklet is available from the U.S. Government Printing Offi ce, Washington, D.C., 20402, Stock No. 004-000-00345-4.
Declaration of Conformity
This device complies with Part 15 of FCC Rules. Operation is subject to the following two conditions. (1) This device may not cause harmful interference, and (2) this device must accept any interference received, including interference that may cause undesired operation.
U.S. Responsible Party: NEC Display Solutions of America, Inc.
Address: |
500 Park Boulevard, Suite 1100 |
|
Itasca, Illinois 60143 |
Tel. No.: |
(630) 467-3000 |
|
|
Type of Product: |
Display Monitor |
Equipment Classifi cation: Class B Peripheral |
|
Model: |
MultiSync EA244WMi (L240UM) |
|
MultiSync EA273WMi (L273UL) |
We hereby declare that the equipment specified above conforms to the technical standards as specified in the FCC Rules.
English-2
Recommended use
Safety Precautions and Maintenance
FOR OPTIMUM PERFORMANCE, PLEASE NOTE
THE FOLLOWING WHEN SETTING UP AND
USING THE LCD COLOR MONITOR:
•DO NOT OPEN THE MONITOR. There are no user serviceable parts inside and opening or removing covers may expose you to dangerous shock hazards or other risks. Refer all servicing to qualifi ed service personnel.
•Do not spill any liquids into the cabinet or use your monitor near water.
•Do not insert objects of any kind into the cabinet slots, as they may touch dangerous voltage points, which can be harmful or fatal or may cause electric shock, fi re or equipment failure.
•Do not place any heavy objects on the power cord. Damage to the cord may cause shock or fi re.
•Do not place this product on a sloping or unstable cart, stand or table, as the monitor may fall, causing serious damage to the monitor.
•The power supply cord you use must have been approved by and comply with the safety standards of your country. (Type H05VV-F 3G 1mm2 should be used in Europe).
•In UK, use a BS-approved power cord with molded plug having a black (5A) fuse installed for use with this monitor.
•Do not place any objects onto the monitor and do not use the monitor outdoors.
•Do not bend power cord.
•Do not use monitor in high temperatured, humid, dusty, or oily areas.
•Do not cover vent on monitor.
•Vibration can damage the backlight. Do not install where the monitor will be exposed to continual vibration.
•If monitor or glass is broken, do not come in contact with the liquid crystal and handle with care.
•To prevent damage to the LCD monitor caused by tipping over due to earthquakes or other shocks, make sure to install the monitor in a stable location and take measures to prevent falling.
Immediately turn off the power, unplug your monitor from the wall outlet and move to a safe location then refer servicing to qualifi ed service personnel under the following conditions. If the monitor is used in this condition, the monitor may cause fall, fi re and electric shock:
•If the monitor stand has been cracked or peeled.
•If the monitor has been wobbled.
•If the monitor has an unusual odor.
•When the power supply cord or plug is damaged.
•If liquid has been spilled, or objects have fallen into the monitor.
•If the monitor has been exposed to rain or water.
•If the monitor has been dropped or the cabinet damaged.
•If the monitor does not operate normally by following operating instructions.
•Allow adequate ventilation around the monitor so that heat can properly dissipate. Do not block ventilated
openings or place the monitor near a radiator or other heat sources. Do not put anything on top of monitor.
CAUTION
• The power cable connector is the primary means of detaching the system from the power supply. The monitor should be installed close to a power outlet which is easily accessible.
•Handle with care when transporting. Save packaging for transporting.
•Do not touch LCD panel surface while transporting, mounting and setting. Applying pressure on the LCD panel can cause serious damage.
Image Persistence: Image persistence is when a residual or “ghost” image of a previous image remains visible on the screen. Unlike CRT monitors, LCD monitors’ image persistence is not permanent, but constant images being displayed for a long period of time should be avoided.
To alleviate image persistence, turn off the monitor for as long as the previous image was displayed. For example, if an image was on the monitor for one hour and a residual image remains, the monitor should be turned off for one hour to erase the image.
NOTE: As with all personal display devices, NEC DISPLAY SOLUTIONS recommends using a moving screen saver at regular intervals whenever the screen is idle or turning off the monitor when not in use.
English
English-3
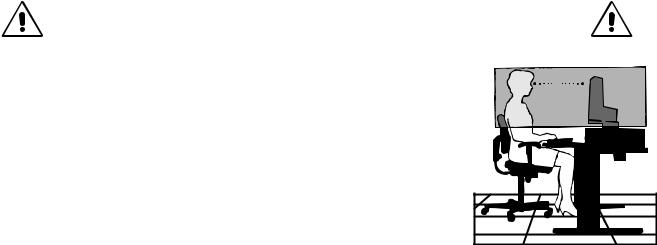
CORRECT PLACEMENT AND ADJUSTMENT OF THE MONITOR CAN
REDUCE EYE, SHOULDER AND NECK FATIGUE. CHECK THE
FOLLOWING WHEN YOU POSITION THE MONITOR:
•For optimum performance, allow 20 minutes for the display to warm up.
•Adjust the monitor height so that the top of the screen is at or slightly below eye level. Your eyes should look slightly downward when viewing the middle of the screen.
• Position your monitor no closer than 40 cm (15.75 inches) and no further away than 70 cm (27.56 inches) from your eyes. The optimal distance is 50 cm (19.69 inches).
• Rest your eyes periodically by focusing on an object at least 20 feet away. Blink often.
•Position the monitor at a 90° angle to windows and other light sources to minimize glare and refl ections. Adjust the monitor tilt so that ceiling lights do not refl ect on your screen.
•If refl ected light makes it hard for you to see your screen, use an anti-glare fi lter.
• Clean the LCD monitor surface with a lint-free, non-abrasive cloth. Avoid using any cleaning solution or glass cleaner!
•Adjust the monitor’s brightness and contrast controls to enhance readability.
•Use a document holder placed close to the screen.
•Position whatever you are looking at most of the time (the screen or reference material) directly in front of you to minimize turning your head while you are typing.
•Avoid displaying fi xed patterns on the monitor for long periods of time to avoid image persistence (after-image effects).
•Get regular eye checkups.
Ergonomics
To realize the maximum ergonomics benefi ts, we recommend the following:
•To avoid eye fatigue, adjust the brightness to a moderate setting. Place a sheet of white paper next to the LCD screen for luminance reference.
•Do not position the Contrast control to its maximum setting.
•Use the preset Size and Position controls with standard signals.
•Use the preset Color Setting.
•Use non-interlaced signals with a vertical refresh rate of 60 Hz.
•Do not use primary color blue on a dark background, as it is diffi cult to see and may produce eye fatigue due to insuffi cient contrast.
Cleaning the LCD Panel
•When the LCD is dusty, please gently wipe with a soft cloth.
•Please do not rub the LCD panel with hard or coarse material.
•Please do not apply pressure to the LCD surface.
•Please do not use OA cleaner as it will cause deterioration or discoloration on the LCD surface.
Cleaning the Cabinet
•Unplug the power supply
•Gently wipe the cabinet with a soft cloth
•To clean the cabinet, dampen the cloth with a neutral detergent and water, wipe the cabinet and follow with a dry cloth.
NOTE: Many plastics are used on the surface of the cabinet. DO NOT clean with benzene, thinner, alkaline detergent, alcoholic system detergent, glass cleaner, wax, polish cleaner, soap powder, or insecticide. Do not touch rubber or vinyl to the cabinet for a long time. These types of fl uids and fabrics can cause the paint to deteriorate, crack or peel.
For more detailed information on setting up a healthy work environment, write to the American National Standard for Human Factors Engineering of Computer Workstations - ANSI/HFES 100-2007 - The Human Factors Society, Inc. P.O. Box 1369, Santa Monica, California 90406.
English-4
Contents
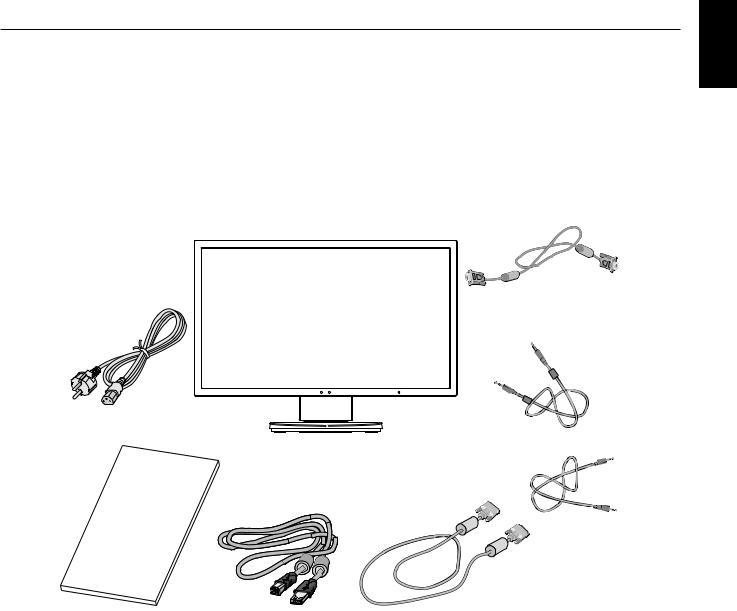
Your new NEC monitor box* should contain the following:
•MultiSync monitor with a tilt/swivel/pivot/height adjust stand
•Power Cord*1
•Video Signal Cable (DVI-D to DVI-D cable)
•Video Signal Cable (Mini D-SUB 15 pin to Mini D-SUB 15 pin)
•USB Cable
•Audio Cable (ø 3.5 stereo mini plug)
•ControlSync Cable (ø 2.5 stereo micro plug)
•Setup Manual
Mini D-SUB 15 pin to
Mini D-SUB 15 pin
Power Cord*1
Audio Cable
Setup Manual
ControlSync Cable
English
Setup Manual |
USB Cable |
DVI-D to DVI-D cable |
*Remember to save your original box and packing material to transport or ship the monitor.
*1 The type and number of power cords included will depend on the where the LCD monitor is to be shipped. When more than one power cord is included, please use the power cord that matches the AC voltage of the power outlet and has been approved by and complies with the safety standard of your particular country.
English-5

Quick Start
To connect the LCD monitor to your system, follow these instructions:
NOTE: Make sure to read “Recommended Use” (page 3) before installation.
1.Turn off the power of your computer.
2.For a PC or MAC with DVI digital output: Connect the DVI signal cable to the connector of the display card in your system (Figure A.1). Tighten all screws.
For a PC with Analog output: Connect a 15-pin mini D-SUB signal cable to the connector of the display card in your system (Figure A.2).
For a MAC: Connect a Macintosh cable adapter (not included) to the computer, then attach the 15-pin mini D-SUB signal cable to the Macintosh cable adapter (Figure A.3).
NOTE: Some Macintosh systems do not require any Macintosh cable adapter.
For a PC with DisplayPort output: Connect the DisplayPort cable to the connector of the display card in your system (Figure A.4).
|
|
|
|
|
|
|
|
|
Macintosh Cable |
Figure A.3 |
DisplayPort cable |
Figure A.4 |
|
Figure A.1 |
|
Figure A.2 Adapter |
(not included) |
|||
|
|
(not included) |
|
|
|
|
NOTE: 1. Please use a DisplayPort cable with DisplayPort logo.
2.When removing the DisplayPort cable, hold down the top button to release the lock.
3.Place hands on each side of the monitor to tilt the LCD panel 30-degree angle and lift up to the highest position.
4.Connect all cables to the appropriate connectors (Figure C.1). When using the USB cable, connect the B type connector to the USB upstream port on the right back side of the monitor and the A type connector to the downstream port on the computer (Figure C.1a). If using the cord from a USB device, plug into one of the downstream ports of the monitor.
NOTE: Incorrect cable connections may cause abnormal operation, damage display quality/components of LCD module and/ or shorten the module’s life.
30° Tilt
A Type
A Type
USB Downstream
B Type
Headphone
Highest
Stand
Position
B Type
Figure C.1a
|
Audio Input |
|
D-SUB |
ControlSync IN/OUT* |
USB Upstream |
DisplayPort |
DVI HDMI |
USB Downstream |
Power cord
Figure C.1
*: See page 23
English-6
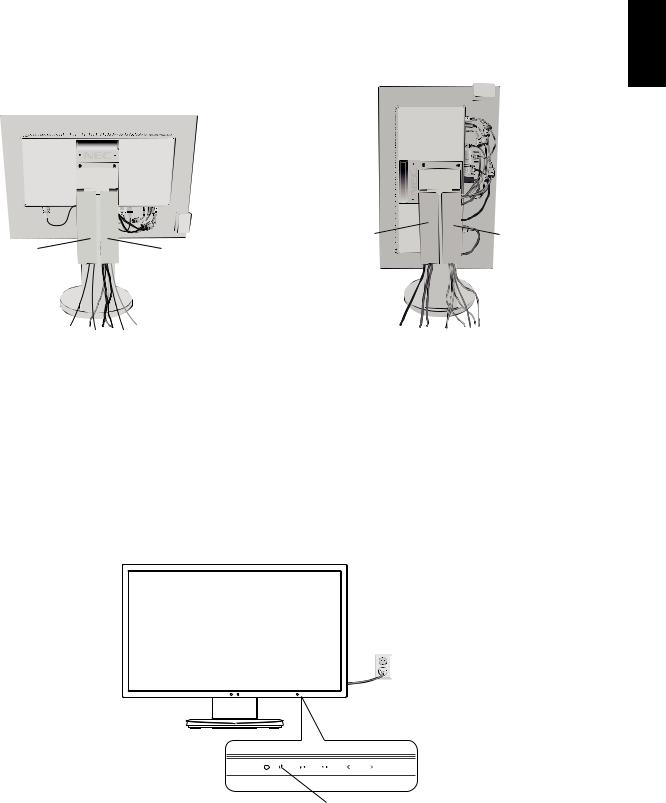
5.To keep the cables neatly organized, place them into the cable management system that is built into the stand. Place the cables in the hooks fi rmly and evenly (Figure C.2 and Figure C.3).
NOTE: Cable cover is not removable.
6. Please check that you can still rotate, raise and lower the monitor screen after you have installed the cables.
English
|
|
Power Cord |
DVI Cable |
Power Cord |
DVI Cable |
DisplayPort Cable* |
HDMI Cable* |
DisplayPort Cable* |
HDMI Cable* |
D-SUB Cable |
Audio Cable |
D-SUB Cable |
Audio Cable |
|
ControlSync Cables |
|
ControlSync Cables |
|
USB Cables |
|
USB Cables |
|
|
Figure C.2 |
Figure C.3 |
* Cable not included. |
|
7. Connect one end of the power cord to the AC inlet on the back of the monitor and the other end to the power outlet.
NOTE: Please refer to Caution section of this manual for proper selection of AC power cord.
8.Turn on the computer, then turn on the monitor by pressing the power sign on the front bezel (Figure E.1).
9.No Touch Auto Adjust automatically adjusts the monitor to optimal settings upon initial setup. For further adjustments, use the following OSD controls:
•AUTO CONTRAST (Analog input only)
•AUTO ADJUST (Analog input only)
Refer to the Controls section of this User’s Manual for a full description of these OSD controls.
NOTE: If you have any problems, please refer to the Troubleshooting section of this User’s Manual.
Power Sign
Figure E.1
English-7
Loading...