


ZyXEL ES-3100 Series
(ES-3124/ES-3124PWR/ES-3148)
Ethernet Switch
Support Notes
Version 3.60
March 2006

ES-3100 Series Switch Support Notes
INDEX
How to manage & maintain your Switch?
Firmware Upgrade
Restore a Configuration File
Backing Up a Configuration File
Load Factory Defaults
Physical Switch connection
Connecting two switches via Fiber Channel
General Networking
DHCP option 82 (Relay Agent Information Option)
Separating a physical network into many virtual networks
Introduction to Virtual LAN
Port Based Virtual LAN
Setting up Port Based VLAN
IEEE 802.1Q Tag-based VLAN
Setting up Tag-based VLAN
Setting up VLAN Trunking
How to configure GVRP
IP Multicasting
IGMP Snooping
Multicast VLAN Registration (MVR)
To ring a network by building reducdent links and connections between Switch
Introduction to Spanning Tree Protocol How does Spanning Tree Protocol Work?
Switching security
MAC freeze
Setting up 802.1x Radius Authentication
Classifier & Policy Rule (ACL)
Centralized Management
Introduction of SNMPc and NetAtlas
*NetAtlas v1.00 supported ES-3124 / ES-3124PWR
*NetAtlas v1.03 and newer releases will support ES-3148 and some new features with ES-3124/ ES-3124PWR
Cluster Management -- iStacking Remote Monitoring (RMON)
FAQ
What is the default setting of the IP parameters?
What is the default login Name and Password of the Web
Configuration?
How to access the Switch through the console port?
2
All contents copyright (c) 2006 ZyXEL Communications Corporation.

ES-3100 Series Switch Support Notes
What is default login password of the console, telnet, and FTP? How to change the password?
How to access the Command Line Interface?
If I forgot the Switch password, how can I reset the password to default?
How do I configure an IP address?
Is Online Help available on the Web GUI? How to restart device from Web?
How to check the current running firmware version? Is the mini GBIC transceiver hot-swappable?
What is so called "Dual-Personality interface" in Ethernet Switching?
Remaining:
Some demonstration in this support note may not use the exact model that you are using. However, their functions and settings work the same way.
3
All contents copyright (c) 2006 ZyXEL Communications Corporation.
ES-3100 Series Switch Support Notes
How to manage & maintain your Switch?
Firmware Upgrade
From Web GUI:
1.Download (and unzipped) the correct model firmware to your computer.
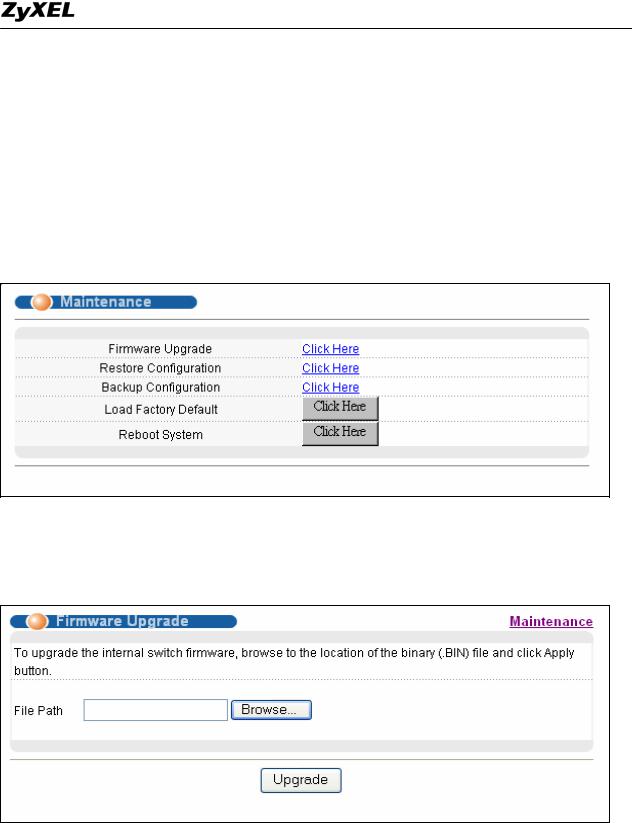
2.Click Management and then Maintenance in the navigator panel to bring up the following screen.
3.Click on the “Click Here” link of the Firmware Upgrade to bring up the following screen.
4.Browse the firmware located or type in the path into the “File Path” field.
5.Click on the Upgrade button.
4
All contents copyright (c) 2006 ZyXEL Communications Corporation.

ES-3100 Series Switch Support Notes
From Console Port:
1.Download (and unzipped) the correct model firmware to your computer.
2.Connect to the console port and open the Terminal Emulation Software.
3.Restarting the switch to enter the debug mode via the terminal.
4.Enter “ATUR”.
5.Use X-modem protocol to transfer (Send File) the firmware.
6.Enter “ATGO” to restart the switch after done uploading the firmware.
From Command Line FTP:
1.Download (and unzipped) the correct model firmware to your computer.
2.Launch the FTP client on your PC to login to Switch. (From the command prompt, type “ftp <Switch IP>”
3.Press “Enter” for the User name
4.Enter password to get the ftp prompt.
5.Enter “bin” to set transfer mode to binary.
6.Use “put” to transfer the firmware from the computer to the switch, for example: “put firmware.bin ras” transfers the firmware on your computer (firmware.bin) to the switch and renames it “ras”.
7.Enter “quit” to exit the ftp prompt.
5
All contents copyright (c) 2006 ZyXEL Communications Corporation.
ES-3100 Series Switch Support Notes
Restore a Configuration File
From Web GUI:
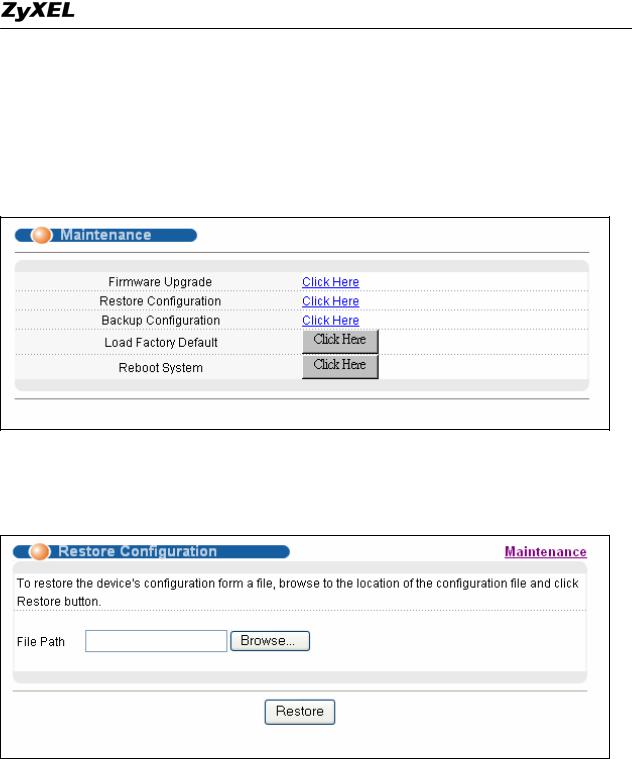
1.Click Management and then Maintenance in the navigator panel to bring up the following screen.
2.Click on the “Click Here” link of the Restore Configuration to bring up the following screen.
3.Browse to locate the file with the file name or type in the path and the file name into the “File Path” field.
4.Click on the Restore button.
From Console Port:
1.Connect to the console port and open the Terminal Emulation Software.
6
All contents copyright (c) 2006 ZyXEL Communications Corporation.

ES-3100 Series Switch Support Notes
2.Restarting the Switch to enter the debug mode via the terminal.
3.Enter “ATLC”
4.Use X-modem protocol to transfer (Send File) the firmware.
5.Enter “ATGO” to restart the Switch after done uploading the configuration file.
From Command Line FTP:
1.Download (and unzipped) the correct model firmware to your computer.
2.Launch the FTP client on your PC to login to Switch. (From the command prompt, type “ftp <Switch IP>”.
3.Press “Enter” for the User name
4.Enter password to get the ftp prompt.
5.Enter “bin” to set transfer mode to binary.
6.Use “put” to transfer the the configuration file from the computer to the switch, for example: “put comfig.rom rom-0” transfers the firmware on your computer (config.rom) to the switch and renames it “rom-0”.
7.Enter “quit” to exit the ftp prompt.
7
All contents copyright (c) 2006 ZyXEL Communications Corporation.
ES-3100 Series Switch Support Notes
Backing Up a Configuration File
From Web GUI:
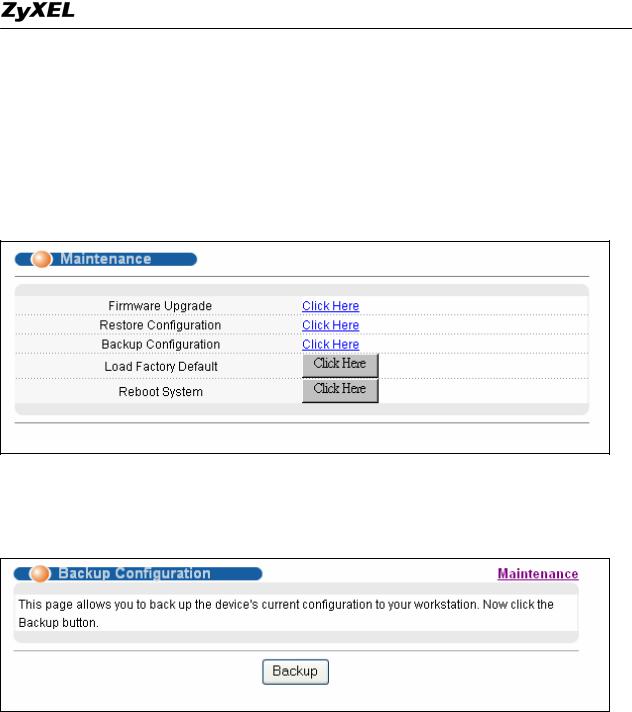
1.Click Management and then Maintenance in the navigator panel to bring up the following screen.
2.Click on the “Click Here” link of the Backup Configuration to bring up the following screen.
3.Click on the “Backup” button to bring up the File Download dialog. Then, clicking on the Save button to backup the configuration rom file to a proper location.
From Console Port:
1.Connect to the console port and open the Terminal Emulation Software.
2.Restarting the Switch to enter the debug mode via the terminal.
3.Enter “ATTD”
8
All contents copyright (c) 2006 ZyXEL Communications Corporation.

ES-3100 Series Switch Support Notes
4.Use X-modem protocol to transfer (Receive File) the firmware.
5.Enter “ATGO” to restart the Switch after done uploading the configuration file.
From Command Line FTP:
1.Download (and unzipped) the correct model firmware to your computer.
2.Launch the FTP client on your PC to login Switch. (From the command prompt, type “ftp <Switch IP>”
3.Press “Enter” for the User name
4.Enter password to get the ftp prompt.
5.Enter “bin” to set transfer mode to binary.
6.Use “get” to transfer the firmware from the computer to the switch, for example: “get rom-0 config.rom” transfers the firmware on your computer (config.rom) to the switch and renames it “config.rom”.
7.Enter “quit” to exit the ftp prompt.
9
All contents copyright (c) 2006 ZyXEL Communications Corporation.

ES-3100 Series Switch Support Notes
Load Factory Defaults
From Web GUI:
1.Click Management and then Maintenance in the navigator panel to bring up the following screen.
2.Click on the “Click Here” button of the Load Factory Defaults to bring up the following screen.
3.A dialog pops up with the message “Are you sure you want to load factory defaults?”.
4.Click OK to go to the following dialog.
5.Click on the OK button. Now, all switch configurations has been reset to the factory defaults and the system will be restarted.
6.Please note that the switch IP address is now 192.168.1.1.
From Console Port:
1.Connect to the console port and open the Terminal Emulation Software.
2.Type in the correct password to bring up the prompt. Type “erase run” to load the factory default configurations.
10
All contents copyright (c) 2006 ZyXEL Communications Corporation.
ES-3100 Series Switch Support Notes
Physical Switch connection
How to connect two switches via Fiber Channel
Your Switch may come with one or many mini-Gb ports. ZyXEL offers Small Form-factor Pluggable (SFP) transceivers for Gigabit Ethernet and Fiber Channel applications. These small, modular optical interface transceivers offer a convenient and cost effective solution for the adoption of Gigabit Ethernet and Fiber Channel in data center, campus, metropolitan area access, ring networks, and storage area networks. It supports full duplex Gigabit speeds and hot-pluggable feature.
Scenario
In this scenario, two Switch with mini-Gb port connected together via its mini-GB Port with a LC/LC Fiber cable (62.5/125MM). PC “Alpha” is connected to the Switch on the left and another PC “Delta” is connected to the Switch on the right via the RJ45 Port (Cat 5 cable).
What you need here to complete this scenario:
z |
ZyXEL Switch with Mini-GB port |
x2 |
|
||
|
(note: Each ES-3100 Series Switch comes with 2 Mini-GB Port) |
||||
z |
SFP-SX Transceiver |
x2 |
|||
z |
LC/LC Fiber Cable (62.5/125MM) |
x1 |
|
|
|
11
All contents copyright (c) 2006 ZyXEL Communications Corporation.
ES-3100 Series Switch Support Notes
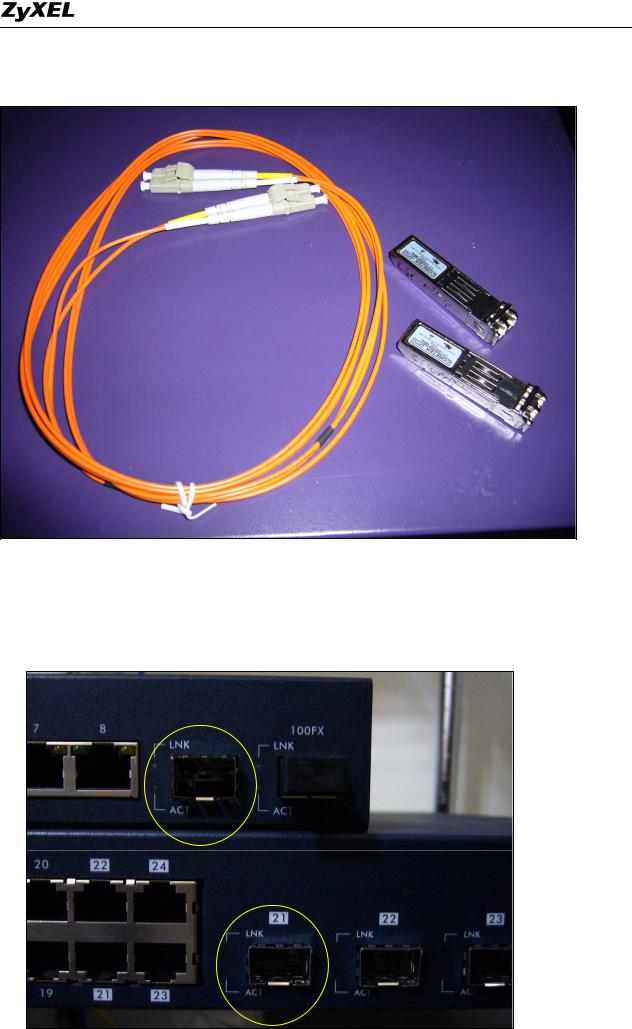
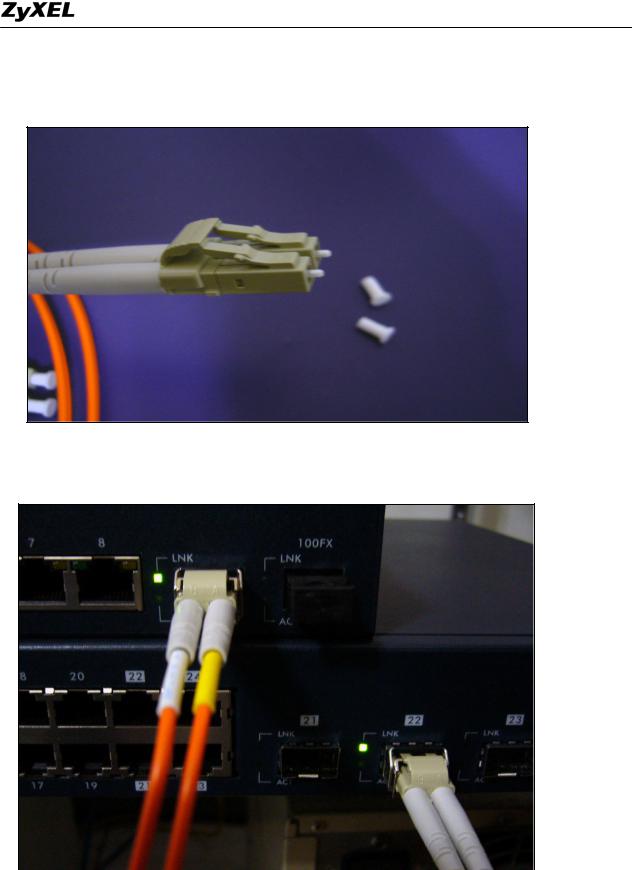
Here is the photo of the SFP-SX Transceiver & the LC/LC Fiber Cable.
Steps to complete this scenario
1. Find both Mini-GB ports on your Switch first.
12
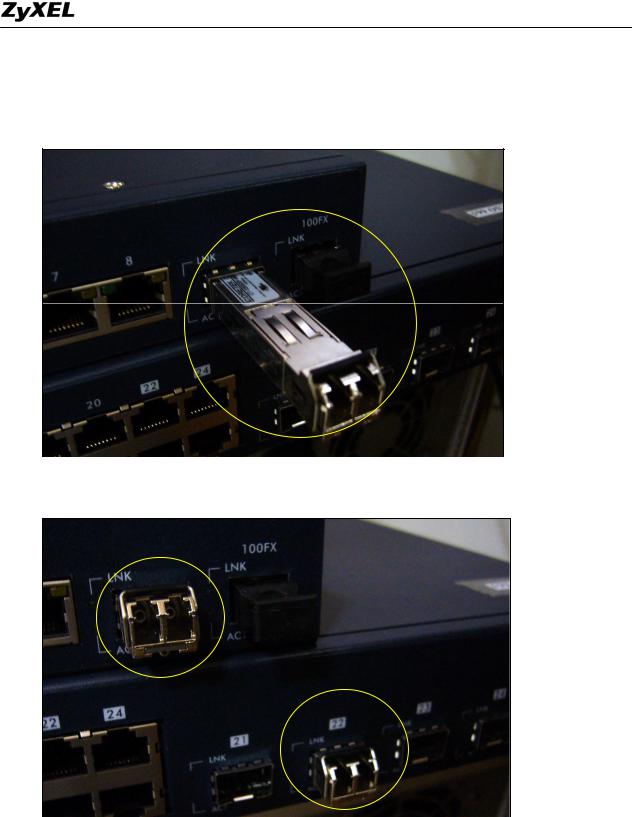
ES-3100 Series Switch Support Notes
2. Get one transceiver and plug it into the Mini-GB Port of your Switch
3. Plug another transceiver into the Mini-GB Port of the other Switch
13
All contents copyright (c) 2006 ZyXEL Communications Corporation.
ES-3100 Series Switch Support Notes
4. Remove both side of the protection cap from the LC/LC Fiber Cable.
5. Plug the LC/LC Fiber Cable into the transceivers on both Switch.
If you connected the cable correctly, the LED of the “LINK” will light up.
14
All contents copyright (c) 2006 ZyXEL Communications Corporation.
ES-3100 Series Switch Support Notes
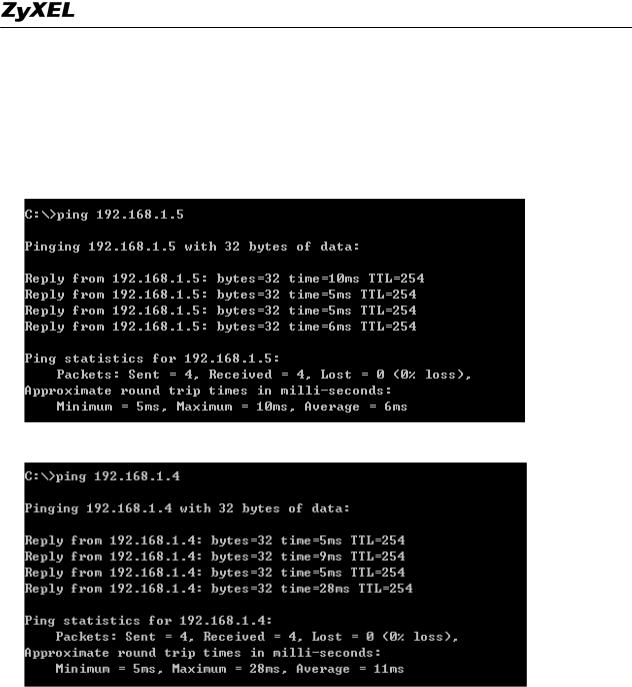
6.Now, connect the first PC “Alpha” to the Switch on the left and the second PC “Delta” to the Switch on the right via the regular Ethernet cable.
7.Set the NICs in both computers to the same IP Domain.
(ex, PC “Alpha” :192.168.1.4/24; PC “Delta” : 192.168.1.5/24) 8. From PC “Alpha”, PING PC “Delta” at 192.168.1.5
9. From PC “Delta”, PING PC” Alpha” at 192.168.1.4
10.Now you can confirm that the network connection between these two Switch is up and running.
15
All contents copyright (c) 2006 ZyXEL Communications Corporation.

ES-3100 Series Switch Support Notes
General Networking
DHCP Relay Option 82 Application
ISP may want to limit the number of IP address or deliver some specific IP addresses according to certain Switch port, VLAN ID and option 82 string. They can easily to achieve this with DHCP Relay Option 82 feature and a DHCP server supporting Option 82 function.
Network
DHCP
Server 192.168.1.99
Ethernet Port
Port 25
DHCP Client
16
All contents copyright (c) 2006 ZyXEL Communications Corporation.
ES-3100 Series Switch Support Notes
How to set up DHCP Relay Option 82 Environment
Here, we will set up an environment to allow a PC to get DHCP IP address in specific IP pool according to its Switch port, VLAN ID and the option 82 string. In this case, we are using GS-3012 for the demonstration. PC is behind 25th Switch port and the option 82 string is a string “GS-3012”. We use the IP Commander as DHCP server. Its IP is 192.168.1.99 and the IP pool is between 192.168.1.201 and 192.168.1.203 for VID=1, Switch port=25 and the option 82 string is “GS-3012”.
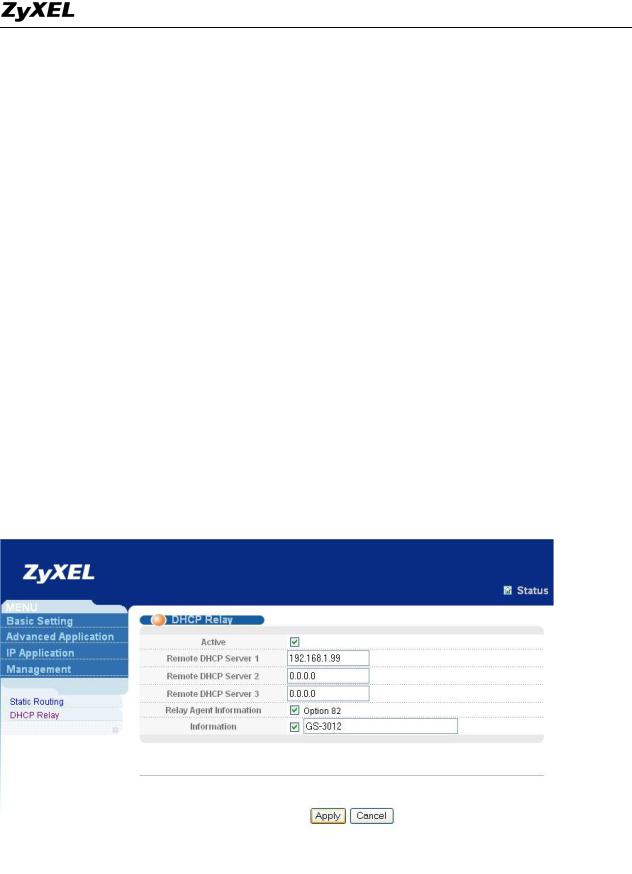
1. Switch (GS-3012) settings
Click IP Application, DHCP Relay in the navigation panel to display configuration screen as shown. You will see the DHCP Relay setup page. Active the DHCP relay and Option 82 function. Also, click Information to make “GS-3012” as the Option 82 string. Information is READ ONLY here and it is the same as the host name of the Switch.
Now we can connect PC to the 25th SWITCH port. Please see former applications for detailed settings.
17
All contents copyright (c) 2006 ZyXEL Communications Corporation.
ES-3100 Series Switch Support Notes
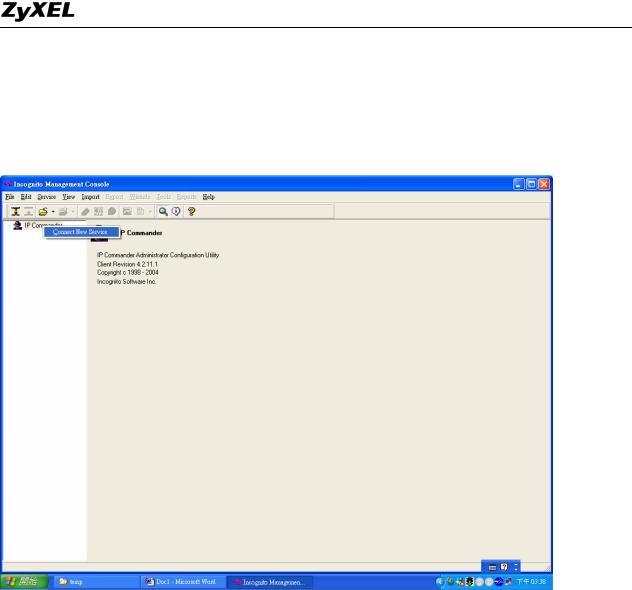
3. IP Commander settings
Open IP Commander. Right click “IP commander and then click “connect new server”.
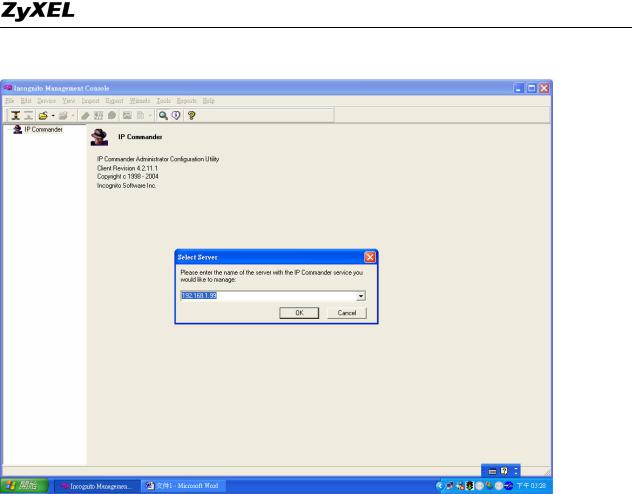
Input the DHCP IP address or domain name and click “ok”. Our IP is 192.168.1.99.
18
All contents copyright (c) 2006 ZyXEL Communications Corporation.
ES-3100 Series Switch Support Notes
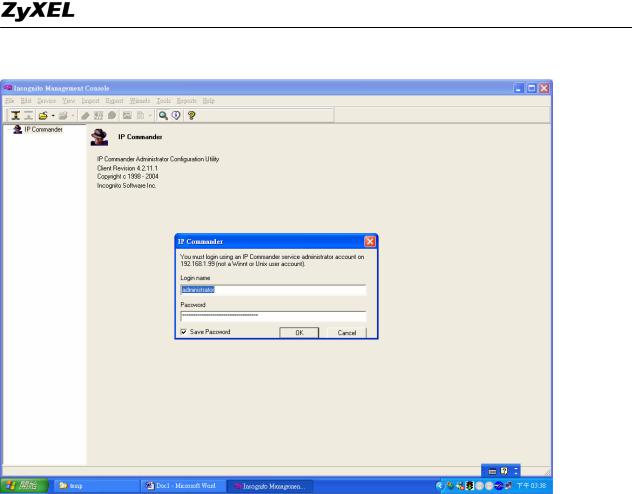
Input user name and password. The default user name is “administrator” and password is “incognito”.
19
All contents copyright (c) 2006 ZyXEL Communications Corporation.
ES-3100 Series Switch Support Notes
It will bring up the following screen, please make sure that your DHCP is in
“online” status. Then click “wizard” in the top tool bars and select “rule wizard”.
20
All contents copyright (c) 2006 ZyXEL Communications Corporation.
ES-3100 Series Switch Support Notes
Give a name and description to the new rule.
21
All contents copyright (c) 2006 ZyXEL Communications Corporation.
ES-3100 Series Switch Support Notes
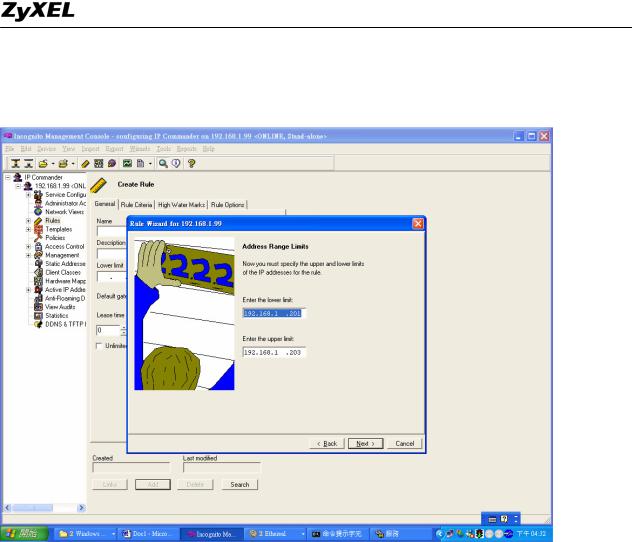
Assign a range of IP addresses or just one IP address to this rule. In our case, we set the IP pool from 192.168.1.201 to 192.168.1.203.
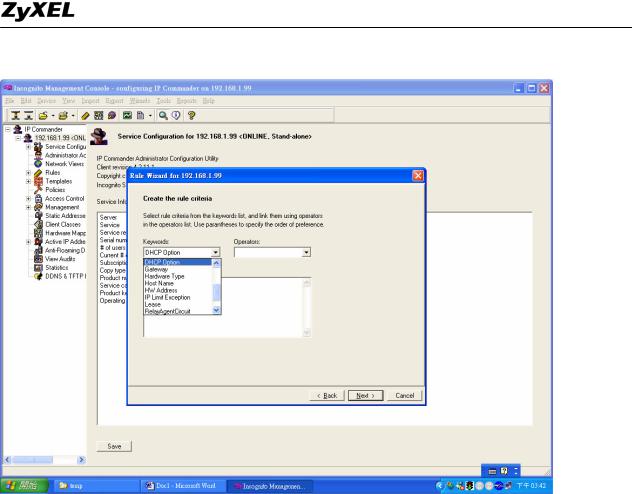
After input IP pool, we select “DHCP Option” in Keywords combobox.
22
All contents copyright (c) 2006 ZyXEL Communications Corporation.
ES-3100 Series Switch Support Notes
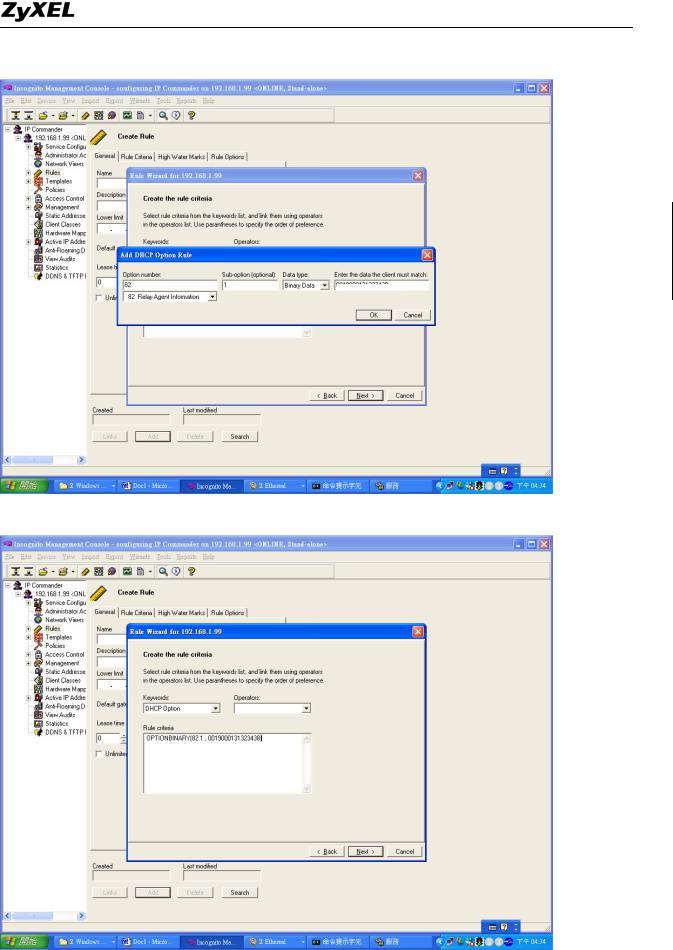
After select the “DHCP Option”, it will pop up “Add DHCP Option Rule” dialog. Select “option 82 Relay Agent Information”, sub-option 1, binary data. For port 25, VLAN 1, “GS-3012”, please key in “0019000147532d33303132” as the key value and click OK. Please note that the first 2 bytes define port number, the second 2 bytes is VLAN ID and the other bytes are the Option 82 string.
23
All contents copyright (c) 2006 ZyXEL Communications Corporation.
ES-3100 Series Switch Support Notes
After you finish above step, you will see the following figure.
24
All contents copyright (c) 2006 ZyXEL Communications Corporation.
ES-3100 Series Switch Support Notes
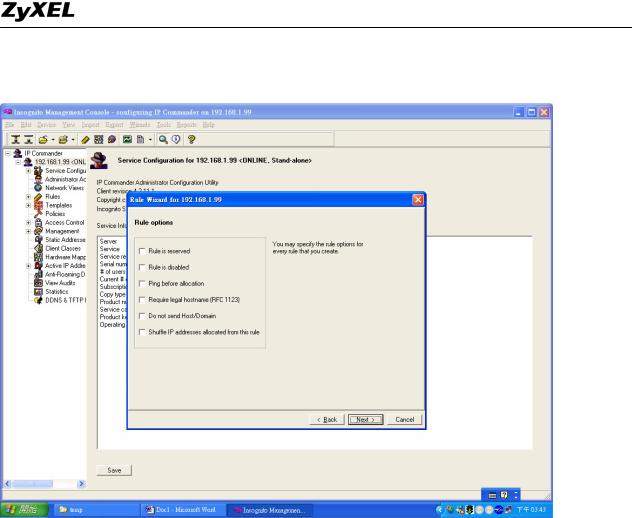
Then pop up the following screen and you can just press Next button.
Then you can add DHCP template (option) such as gateway, DNS server and so on.
25
All contents copyright (c) 2006 ZyXEL Communications Corporation.

ES-3100 Series Switch Support Notes
Here we use “192.168.1.1” as gateway IP address of DHCP client PC.
26
All contents copyright (c) 2006 ZyXEL Communications Corporation.

ES-3100 Series Switch Support Notes
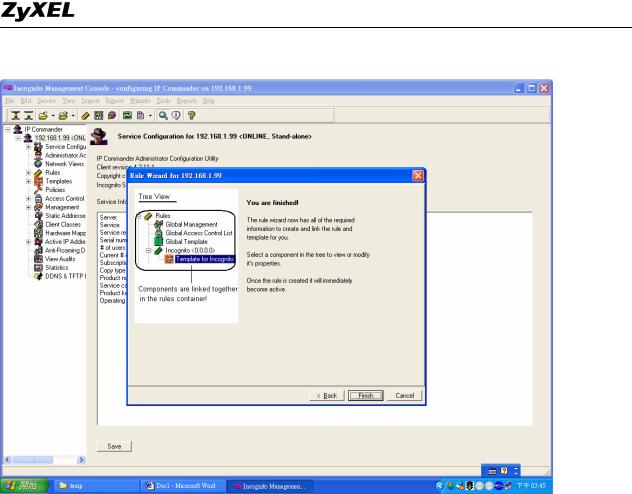
You can apply DDNS service to DHCP server or not.
The rule creation has been finished.
27
All contents copyright (c) 2006 ZyXEL Communications Corporation.
ES-3100 Series Switch Support Notes
After finishing all above procedures, your PC will get the IP address 192.168.1.201 when you send a DHCP request.
28
All contents copyright (c) 2006 ZyXEL Communications Corporation.

ES-3100 Series Switch Support Notes
Separating a physical network into many virtual networks
What is Virtual LAN?
• VLAN Overview
A VLAN (Virtual Local Area Network) allows a physical network to be partitioned into multiple logical networks. Stations on a logical network belong to one group called VLAN Group. A station can belong to more than one group. The stations on the same VLAN group can communicate with each other. With VLAN, a station cannot directly talk to or hear from stations that are not in the same VLAN group(s); the traffic must first go through a router.
In MTU or IP-DSLAM applications, VLAN is vital in providing isolation and security among the subscribers. When properly configured, VLAN prevents one subscriber from accessing the network resources of another on the same LAN, thus a user will not see the printers and hard disks of another user in the same building.
VLAN also increases network performance by limiting broadcasts to a smaller and more manageable logical broadcast domain. A VLAN group is a broadcast domain. In traditional Layer-2 switched environments, all broadcast packets go to each and every individual port. With VLAN, all broadcasts are confined to a specific broadcast domain.
There are two most popular VLAN implementations, Port-based VLAN and IEEE 802.1q Tagged VLAN. ES-3100 series supports both VLAN implementations. The most difference between both VLAN implementations is Tagged VLAN can across Layer-2 switch but Port-based VLAN cannot.
• Port-based VLAN
Port-based VLANs are VLANs where the packet forwarding decision is based on the destination MAC address and its associated port.
29
All contents copyright (c) 2006 ZyXEL Communications Corporation.

ES-3100 Series Switch Support Notes
outgoing ports allowed for each port when using port-based VLANs. Note that VLAN only governs the outgoing traffic, in the other word, it is unidirectional. Therefore, if you wish to allow two subscriber ports to talk to each other, e.g., between conference rooms in a hotel, you must define the egress (outgoing port) for both ports. An egress port is an outgoing port, that is, a port through which a data packet leaves.
There are 5 hosts (Host A, B, C, D and E) connected to a 5-port layer-2 switch which supported port-based VLAN.
Case 1: Host A and Host B can talk to each other, because they are in the same VLAN group. But Host A and Host B can't talk to Host C, D, and E.
Port-based VLAN definition:
•Egress port for port 1: port 2
•Egress port for port 2: port 1
Case 2: There are 3 VLAN groups in the physical network. Host A and Host B can talk to each other; they are in the same VLAN group 1. Host B and Host C are in VLAN group 2. Host A, Host D and Host E are in VLAN group 3.
30
All contents copyright (c) 2006 ZyXEL Communications Corporation.
 Loading...