


3-100-392-31(1)
HDMI CONTROL
Guide
Operating Instructions
©2007 Sony Corporation

Using the HDMI CONTROL Function for ‘BRAVIA’ Theatre Sync
To use ‘BRAVIA’ Theatre Sync, set the HDMI CONTROL function as explained below.
By connecting Sony components that are compatible with the HDMI CONTROL function with an HDMI cord (not supplied), operation is simplified as below:
–One-Touch Play: By pressing only H on the unit or remote, the TV turns on and is set for DVD input mode automatically.
–System Audio Control: While watching TV, you can switch the sound to come out of either the TV or this system’s speakers.
–System Power Off: When you turn the TV off by using the POWER button on the TV’s remote, the system turns off automatically.
HDMI CONTROL is a mutual control function standard used by HDMI CEC (Consumer Electronics Control) for HDMI (high-definition multimedia interface).
The HDMI CONTROL function will not operate in the following cases:
–When you connect this system to a component which is not correspond with Sony’s HDMI CONTROL function.
–A component does not have a HDMI terminal.
We recommend that you connect this system to products featuring ‘BRAVIA’ Theatre Sync.
Note
•Do not use the THEATRE SYNC button on the remote while the HDMI CONTROL function is active. For details, see the operating instructions of the system.
•Depending on the connected component, the HDMI CONTROL function may not work. Refer to the operating instructions supplied with the component.
•When [HDMI CONTROL] is set to [ON] without being connected by the HDMI cord (not supplied), you can not switch to the TV input mode even if connected by SCART (EURO AV) cord. In this case, turn [HDMI CONTROL] to [OFF] (European models only).
Preparing for the HDMI CONTROL function
To use the HDMI CONTROL function, make sure that this system is connected to your TV (which should be correspond with HDMI CONTROL) by a HDMI cord (not supplied). Turn on the system and your TV, and then switch the input selector on your TV so that the signal from the system appears on the TV screen. Then set the respective HDMI CONTROL functions to on.
The following explanation is for this system. For details on TV setting, refer to the operating instructions supplied with the TV.
Note
• Displayed items vary depending on the country model.
1 Press "/1.
The system turns on.
2GB
2 Press  DISPLAY when the system is in stop mode.
The Control Menu display appears.
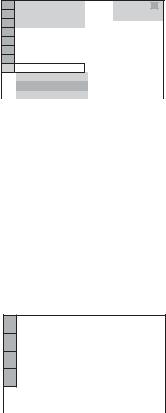
3 Press X/x to select  [SETUP], then press
  .
.
The options for [SETUP] appear.
4
5
6
7
8
1 2 ( 2 7 ) |
|
|
1 8 ( 3 4 ) |
DVD VIDEO |
|
T |
0 : 0 0 : 0 2 |
|
QUICK |
|
|
QUICK |
|
|
CUSTOM |
|
|
RESET |
|
|
BNR |
|
|
Press X/x to select [CUSTOM], then press  .
.
The Setup Display appears.
|
LANGUAGE SETUP |
|
|
|
|
OSD: |
ENGLISH |
|
|
MENU: |
ENGLISH |
|
|
AUDIO: |
ORIGINAL |
|
|
SUBTITLE: |
AUDIO FOLLOW |
|
|
|
|
|
|
|
|
|
|
|
|
Press X/x to select [CUSTOM SETUP], then press  .
.
The Setup item is selected.
CUSTOM SETUP
|
|
HDMI CONTROL: |
OFF |
|
|
PAUSE MODE: |
AUTO |
|
|
TRACK SELECTION: |
OFF |
|
|
MULTI-DISC RESUME: |
ON |
|
|
AUDIO DRC: |
OFF |
|
|
AUDIO (HDMI): |
OFF |
|
|
|
|
Press X/x to select [HDMI CONTROL], then press  . Press X/x to select the setting.
The default setting is underlined.
•[OFF]: sets the [HDMI CONTROL] function to off.
•[ON]: sets the [HDMI CONTROL] function to on.
Press  .
.
3GB
 Loading...