


 Loading...
Samsung HT-F450BK, HT-F450RK, HT-F453BK, HT-F453RK, HT-F453HBK User manual
...HT-F450BK /HT-F450RK
HT-F453BK/ HT-F453RK
HT-F453HBK/ HT-F453HRK
HT-F455BK /HT-F455RK
Digital Home
Entertainment System
user manual
imagine the possibilities
Thank you for purchasing this Samsung product. To receive more complete service,
please register your product at
www.samsung.com/register

Safety Information
Safety Warnings
TO REDUCE THE RISK OF ELECTRIC SHOCK, DO NOT REMOVE THE COVER(OR BACK).
NO USER-SERVICEABLE PARTS ARE INSIDE. REFER SERVICING TO QUALIFIED SERVICE PERSONNEL.
|
|
|
|
|
|
|
CAUTION |
|
|
|
|
RISK OF ELECTRIC SHOCK |
|
|
|
|
DO NOT OPEN |
|
|
|
|
|
|
|
This symbol indicates “dangerous |
CAUTION: TO PREVENT ELECTRIC |
This symbol indicates important |
||
voltage” inside the product that |
SHOCK, MATCH WIDE BLADE |
instructions accompanying the |
||
presents a risk of electric shock or |
OF PLUG TO WIDE SLOT, FULLY |
product. |
||
personal injury. |
INSERT. |
|
||
|
|
|
|
|
WARNING
•To reduce the risk of fire or electric shock, do not expose this appliance to rain or moisture.
CAUTION
•Apparatus shall not be exposed to dripping or splashing and no objects filled with liquids, such as vases, shall be placed on the apparatus.
•The Mains plug is used as a disconnect device and shall stay readily operable at any time.
•This apparatus shall always be connected to an AC outlet with a protective grounding connection.
•To disconnect the apparatus from the mains, the plug must be pulled out from the mains socket, therefore the mains plug shall be readily operable.
CLASS 1 |
LASER PRODUCT |
KLASSE 1 |
LASER PRODUKT |
LUOKAN 1 |
LASER LAITE |
KLASS 1 |
LASER APPARAT |
PRODUCTO |
LÁSER CLASE 1 |
CLASS 1 LASER PRODUCT
This Compact Disc player is classified as a CLASS 1 LASER product.
Use of controls, adjustments or performance of procedures other than those specified herein may result in hazardous radiation exposure.
CAUTION
•INVISIBLE LASER RADIATION WHEN OPEN AND INTERLOCKS DEFEATED, AVOID EXPOSURE TO BEAM.
| 2 English

Disc Storage & Management
• Holding Discs
- Fingerprints or scratches on a disc may reduce sound and
picture quality or cause skipping.
-Avoid touching the surface of a disc where data has been recorded.
-Hold the disc by the edges so that fingerprints will not get on the surface.
-Do not stick paper or tape on the disc.
• Cleaning Discs
- If you get fingerprints or dirt on a disc, clean it with a mild detergent diluted in water and wipe with a soft cloth.
-When cleaning, wipe gently from the inside to the outside of the disc.
-Disc Storage
Do not keep in direct sunlight.
Keep in a cool ventilated area.
Keep in a clean protection jacket and store vertically.
Licence
•Manufactured under license from Dolby Laboratories. Dolby and the double-D symbol are trademarks of Dolby Laboratories.
•HDMI, the HDMI Logo, and High-Definition Multimedia Interface are trademarks or registered trademarks of HDMI Licensing LLC in the United States and other countries.
•This item incorporates copy protection technology that is protected by U.S. patents and other intellectual property rights of Rovi Corporation. Reverse engineering and disassembly are prohibited.
•This product uses some software programs which are distributed under the Independent JPEG Group.
•This product uses some software programs which are distributed under the OpenSSL Project.
Copyright
© 2014 Samsung Electronics Co., Ltd. All rights reserved.
Copy Protection
•ABOUT DIVX VIDEO: DivX® is a digital video format created by DivX,LLC,a subsidiary of Rovi Corporation. This is an official DivX Certified® device that plays DivX video. Visit divx.com for more information and software tools to convert your files into DivX videos.
•ABOUT DIVX VIDEO-ON-DEMAND: This DivX Certified® device must be registered in order to play purchased DivX Video-on-Demand (VOD) movies. To obtain your registration code, locate the DivX VOD section in your device setup menu. Go to vod.divx. com for more information on how to complete your registration.
•DivX Certified® to play DivX® video, including premium content.
•DivX®, DivX Certified® and associated logos are trademarks of Rovi Corporation or its subsidiaries and are used under license.
•Covered by one or more of the following U.S. patents : 7,295,673; 7,460,668; 7,515,710; 7,519,274.
Many DVD discs are encoded with copy protection. Because of this, you should only connect your product directly to your TV, not to a VCR. Connecting to a VCR results in a distorted picture from copy-protected DVD discs.
<![endif]>Information Safety 01
English 3 |

Contents
SAFETY INFORMATION
2Safety Warnings
3Disc Storage & Management
3Licence
3Copyright
3Copy Protection
GETTING STARTED
5 Disk and Format Compatibility
6Notes on the USB connection
6Accessories
7Front Panel
7Rear Panel
8Remote control
CONNECTIONS
10 Connecting the Speakers
13Connecting to a TV
14Connecting to External Devices
15Connecting Microphone
SETTINGS
16 The Initial Settings Procedure
16 Accessing the Settings Screen
16 Display
16 TV Aspect
16BD Wise
17Resolution
17HDMI Format
17Video Out Signal(option)
17Audio
17Simple Setup
17Speaker Setting
17DRC (Dynamic Range Compression)
17AUDIO SYNC
17Speaker Selection
18User EQ
18 Karaoke Scoring(option)
18 Audio Return Ch.
18 System
18 Initial Settings
18 DivX(R) Registration
18 DivX(R) Deactivation
18 Language
18 Security
18 Parental Rating
18 Change Password
18 Support
18 Product Information
BASIC FUNCTIONS
19 Disc Playback
19 Audio CD(CD-DA)/MP3/WMA Playback
19 JPEG File Playback
19 Using the Playback Function
21Using the Special Remote Control
Buttons
22Listening to Radio
23USB Function
23USB Recording
24Using Bluetooth(option)
OTHER INFORMATION
26Troubleshooting
27Specifications
29OpenSSL License
Figures and illustrations in this User Manual are provided for reference only and may differ from actual product appearance.
An administration fee may be charged if either
a.an engineer is called out at your request and there is no defect in the product (i.e. where you have failed to read this user manual)
b.you bring the unit to a repair centre and there is no defect in the product (i.e. where you have failed to read this user manual).
The amount of such administration charge will be advised to you before any work or home visit is carried out.
| 4 English
Getting Started
Disk and Format Compatibility
Disc types and contents your product can play
Media |
Term |
Disc Type |
|
DVD |
DVD-Video or DVD±R/±RW |
|
discs |
|
|
|
|
|
|
|
VIDEO |
CD |
Data CD (CD DA, CD-R/- |
|
RW) |
|
|
|
|
|
|
|
|
DivX |
DVD±R/±RW, CD-R/-RW |
|
|
|
MUSIC |
MP3 |
CD-R/-RW |
|
|
|
PHOTO |
JPEG |
CD-R/-RW |
|
|
|
Disc types your product cannot play
• LD, CD-G/-I/-ROM, DVD-ROM/-RAM
|NOTE |
DVD discs purchased abroad may not play on this product.
This product may not respond to all operating commands because some DVD, and CD discs allow specific or limited operation and provide only certain features during playback. Please note that this is not a defect in the product.
Samsung cannot guarantee that this product will play every disc bearing the DVD or CD logo because disc formats evolve, and problems and errors may occur during the creation of DVD, and CD software and/or the manufacture of discs.
Please contact the SAMSUNG Customer Care Centre, if you have questions or encounter difficulty when playing DVD, or CD discs in this product. Also, refer to rest of this user manual for additional information on playback restrictions.
Some commercial discs and DVD discs purchased outside your region may not play on this product.
This product does not support DTS sound.
Supported Formats
Video File Support
Format |
Supported Versions |
AVI |
DivX3.11~DivX6.8 |
WMV |
V1/V2/V3/V7 |
Music File Support
Format |
Bit Rate |
Sampling |
|
Frequency |
|||
|
|
||
MP3 |
80~320kbps |
44.1khz |
|
WMA |
56~128kbps |
||
|
|||
AC3 |
128~384kbps |
44.1/48khz |
•Aspect Ratio : This product supports up to 720x576 pixels. TV screen resolutions higher than 800 will not be supported.
•When you play a disc whose sampling frequency is higher than 48khz or 320kbps, you may experience shaking on the screen during playback.
•Sections with a high frame rate might not be played while playing a DivX file.
•Since this product only provides encoding formats authorized by DivX Networks, Inc., a DivX file created by the user might not play.
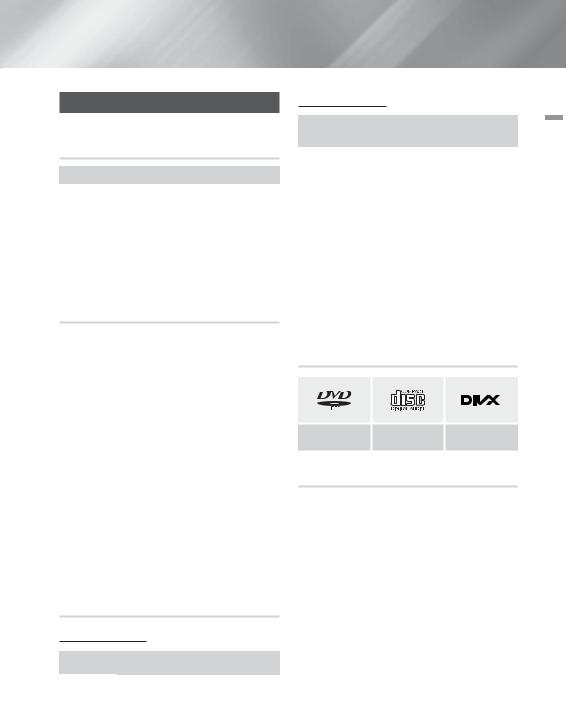
Logos of Discs the product can play
DVD-VIDEO |
AUDIO-CD |
DivX |
Region Code
Both products and discs are coded by region. These regional codes must match for a disc to play. If the codes do not match, the disc will not play. The Region Number for this product is displayed on the rear panel of the product.
<![endif]>Started Getting 02
English 5 |

Getting Started
Disc Type |
Region |
Area |
Code |
||
|
1 |
The U.S., U.S. territories and |
|
Canada |
|
|
2 |
Europe, Japan, the Middle |
|
East, Egypt, Africa, Greenland |
|
|
3 |
Taiwan, Korea, the Philippines, |
|
Indonesia, Hong Kong |
|
DVD-VIDEO |
|
Mexico, South America, |
4 |
Central America, Australia, |
|
|
New Zealand, Pacific Islands, |
|
|
|
Caribbean |
|
5 |
Russia, Eastern Europe, India, |
|
North Korea, Mongolia |
|
|
6 |
China |
|
|
|NOTE |
If the Region number of a DVDs does not correspond to the Region number of this product, the product cannot play the disc.
•The maximum current supported by the USB port for an external device is 500 mA (at 5V DC).
•Supported file formats
Format |
Still |
Music |
|
Movie |
|||
Picture |
|
||||||
|
|
|
|
|
|
||
|
|
|
|
|
|
|
|
File name |
JPG |
MP3 |
WMA |
WMV |
|
DivX |
|
|
|
|
|
|
|
|
|
File |
JPG .JPEG |
.MP3 |
.WMA |
.WMV |
|
.AVI |
|
extension |
|
||||||
|
|
|
|
|
|
||
|
|
|
|
|
|
|
|
Bit rate |
– |
80~320 |
56~128 |
4Mbps |
|
4Mbps |
|
kbps |
kbps |
|
|||||
|
|
|
|
|
|||
|
|
|
|
|
|
|
|
Version |
– |
– |
V8 |
V1,V2, |
|
DivX3.11~ |
|
V3,V7 |
|
DivX6.8 |
|||||
|
|
|
|
|
|||
|
|
|
|
|
|
|
|
Pixel |
640x480 |
– |
– |
|
720x576 |
||
|
|
|
|
|
|
|
|
Sampling |
– |
44.1kHz |
44.1kHz |
44.1KHz~ 48KHz |
|||
Frequency |
|||||||
|
|
|
|
|
|
||
|
|
|
|
|
|
|
|
|NOTE |
Playing back a JPEG file whose image resolution is higher than that of DVD may result in degraded image
quality when displayed.
Accessories
Check for the supplied accessories below.
Notes on the USB connection
•Supported devices: USB storage media, MP3 player, digital camera.
•If a folder or file name is longer than 10 characters, it may not properly display or operate.
•A subtitle file bigger than 300KB may not be properly displayed.
•A certain USB/digital camera device, USB card reader is not supported.
•FAT16 and FAT32 file systems are supported.
•Connect directly to the product's USB port. Connecting through another cable may raise problems with USB compatibility.
•Inserting more than one memory device to a multi-card reader may not operate properly.
•PTP protocol for digital camera is not supported.
•Do not disconnect USB device during a "Reading" process.
•Bigger the image resolution, the longer the delay to displaying.DRM applied MP3/WMA or video files downloaded from a commercial site are not played back.
•External HDD device is not supported.
Video Cable |
FM Cable |
|||
|
1 |
2 |
3 |
|
|
4 |
5 |
6 |
|
|
7 |
8 |
9 |
|
|
|
0 |
|
|
|
VOL |
|
|
|
User manual |
Remote Control/Batteries |
|||
(AAA size) |
||||
|
||||
HDMI Cable(option)
| 6 English

Front Panel
DISC TRAY |
DISPLAY |
STOP ( |
) VOLUME CONTROL ( , ) |
||||||||
|
|
* AUX IN 1 |
|
OPEN/CLOSE ( |
) |
PLAY/PAUSE ( ) |
|
|
|||
|
|
CONNECTOR |
|
|
|||||||
|
|
|
|
|
|
|
|
|
|
|
|
|
|
|
|
|
|
|
|
|
|
|
|
|
|
|
|
|
|
|
|
|
|
|
|
|
|
|
|
|
|
|
|
|
|
|
|
|
|
|
|
|
|
|
|
|
|
|
|
|
|
|
|
|
|
|
|
|
|
|
|
MIC 1 |
5V 500mA |
AUX IN 1 |
|
MIC 2 |
|
MIC JACKS USB HOST FUNCTION ( |
) REMOTE CONTROL POWER ( ) |
|
SENSOR |
*Connecting Audio from External Components
Connect an Audio cable (not supplied) from the AUX IN 1 jack on the front of the product to the Audio Out jack on your MP3 player. Select the AUX 1 mode.
Rear Panel
|
SPEAKER OUTPUT |
EXTERNAL DIGITAL |
|
FA NET |
CONNECTORS |
AUDIO IN (OPTICAL) |
|
AUX IN 2 |
|
||
(Only for Service) |
COOLING FAN |
VIDEO OUT * FM ANTENNA HDMI OUT |
|
|
|||
|
SPEAKERS OUT |
|
VIDEO |
|
|
AUX IN 2 |
|
|
|
OUT |
|
FA NET |
|
|
FM ANT HDMI OUT |
(Only For Service) |
|
|
|
|
|
|
OPTICAL |
|
|
|
DIGITAL |
|
SURROUND SUBWOOFER SURROUND |
|
AUDIO IN |
* Connecting the FM Antenna
1 . Connect the FM antenna supplied to the FM ANTENNA Jack.
2 . Slowly move the antenna wire around until you find a location where reception is good, then fasten it to a wall or other rigid surface.
|NOTE |
Ensure a minimum of 10 cm of clear space on all sides of the home cinema to ensure adequate ventilation. Do not obstruct the cooling fan or ventilation holes.
This product does not receive AM broadcasts.
<![endif]>Started Getting 02
English 7 |

Getting Started
Remote Control
Tour of the Remote Control
Turn the product on and off.
If you want to change to TV mode, press the TV button.
If you want to change to Home Theater, press the DVD button.
Press numeric buttons to operate options.
|
|
|
|
|
|
|
|
FUNCTION |
|
|
|
This is mode selection button. |
||
|
|
|
|
|
|
|
|
TV |
|
|
|
or |
||
|
|
|
|
|
|
|
|
SOURCE |
|
|
|
|
|
|
|
|
|
|
|
|
|
|
|
|
|
|
|
|
Press to select TV's video mode. |
|
|
|
|
|
|
|
|
|
|
|
|
|
||
|
|
|
|
|
|
|
|
|
|
|
|
|
|
To select the football mode. |
|
RECEIVER |
|
FOOTBALL |
|
|
|||||||||
|
|
|
|
|
||||||||||
|
|
DVD |
TV |
|
|
|
|
|
|
To open and close the disc tray. |
||||
|
|
|
|
|
|
|
|
|||||||
|
|
|
|
|
|
|
2 |
|
|
|
|
|
|
|
1 |
3 |
|
|
|
|
|||||||||
|
|
|
|
|
|
|||||||||
|
|
4 |
5 |
6 |
|
|
|
|
|
|
||||
|
|
|
|
|
|
|
||||||||
|
|
7 |
|
8 |
9 |
|
|
|
|
|
|
||||||||
|
|
|
V-SURROUND |
|
DSP/EQ |
|
Select the desired DSP/EQ audio |
||||||||||||
Press Virtual Surround to select On/ |
|
|
|
|
|
|
0 |
|
|
|
|
|
|
|
|||||
|
|
|
|
|
|
|
|
|
|
|
|
||||||||
Off. |
|
|
|
|
|
|
|
|
|
|
|
|
|
|
|
|
|
mode. |
|
Press to skip backwards or |
|
|
|
|
|
|
|
|
|
|
|
|
|
|
|
|
|
Press to search backwards or |
|
|
|
|
|
|
|
|
|
|
|
|
|
|
|
|
|
|
forwards. |
||
forwards. |
|
|
|
|
|
|
|
|
|
|
|
|
|
|
|
|
|
||
|
|
|
|
|
|
|
|
|
|
|
|
|
|
|
|
|
|
||
Press to stop/play a disc. |
|
|
|
|
|
|
|
|
|
|
|
|
|
|
|
|
|
Press to pause a disc. |
|
|
|
|
|
|
|
|
|
|
|
|
|
|
|
|
|
||||
|
|
|
|
|
|
|
|
|
|
|
|
|
|
|
|
|
|||
Cut off the sound temporarily. |
|
|
|
|
|
|
|
|
MUTE |
|
|
|
|
|
|
|
Search for active FM stations and |
||
|
|
|
|
|
|
|
|
|
|
|
|
|
|
|
|
|
|
|
|
|
|
|
|
|
|
|
|
|
|
|
|
MIC VOL + |
|
change channels. |
|||||
Adjust the volume. |
|
|
|
VOL |
TV SOUND TUNING |
|
|
or |
|||||||||||
|
|
|
|
|
|
|
/ CH |
|
|||||||||||
|
|
|
|
|
|
|
|
|
|
|
|
MIC VOL |
|
Adjust the microphone's volume. |
|||||
|
|
|
|
|
|
|
|
|
|
|
|
|
|
|
|
|
|
|
|
|
|
|
|
|
|
|
|
|
|
|
|
|
|
|
|
|
|
||
Brings up the product's setup menu. |
DISC MENU |
|
HOME |
TITLE MENU |
|
Audio signal can output to Home |
|||||||||||||
|
|
Theater Speaker or TV Speaker. |
|||||||||||||||||
|
|
|
|
||||||||||||||||
Press to check the disc menu. |
|
|
|
|
|
|
|
|
|
|
|
|
|
|
|
|
|
||
|
|
|
|
|
|
|
|
|
|
|
|
|
|
|
|
|
Use this to enter the Title menu. |
||
|
|
|
|
|
|
|
|
|
|
|
|
|
|
|
|
|
|||
Used to change the audio/subtitle |
|
|
|
|
|
|
|
|
|
|
|
|
|
|
|
|
|
||
|
|
|
|
|
|
|
|
|
|
|
|
|
|
|
|
|
Display current disc(file) status. |
||
language, angle etc. |
|
|
|
|
|
|
|
|
|
|
|
|
|
|
|
|
|
||
|
|
|
|
|
|
|
|
|
|
|
|
|
|
|
|
|
|
||
Select on-screen menu items and |
|
|
|
|
|
|
|
|
|
|
|
|
|
|
|
|
|
|
|
change menu value.or |
|
|
|
|
|
b |
|
|
|
# |
|
|
|
|
|
|
|
||
|
|
|
|
|
|
|
|
|
|
|
|
|
|
|
|||||
Press the Key Control(# ,b) to |
|
|
|
|
|
|
|
|
|
|
|
|
|
|
|
|
|
|
|
decrease or increase the key value. |
|
|
|
|
|
|
|
|
|
|
|
|
|
|
|
|
|
Press this to exit the menu. |
|
Return to the previous menu. |
|
|
|
|
|
|
|
|
|
|
|
|
|
|
|
|
|
||
|
|
|
|
|
|
|
|
|
|
|
|
|
|
|
|
|
|||
|
|
|
|
|
|
|
|
|
|
|
|
|
|
|
|
|
Used to start USB recording. |
||
Allow access to common functions |
|
|
|
|
|
|
|
|
|
|
|
|
|
|
|
|
|
||
|
|
|
|
|
|
|
|
|
|
|
|
|
|
|
|
|
Used to adjust the level of the |
||
of the DVD Home Theater such as |
|
|
|
|
|
|
|
|
|
USB REC |
S/W LEVEL |
|
|||||||
navigating the Photo List. |
|
|
|
A |
B |
C |
|
D |
|
subwoofer. |
|||||||||
Adjust the brightness of Display. |
|
|
DIMMER |
|
|
|
S.VOL |
P.BASS |
|
Select the desired P.BASS. |
|||||||||
|
|
|
|
|
|
|
GIGA |
|
|
|
|
|
|
|
|
Regulate and stabilize the volume |
|||
Used to turn on/off GIGA Sound |
|
|
|
|
|
|
TUNER |
MYKARAOKE |
REPEAT |
|
|||||||||
|
|
|
|
|
|
|
level against a drastic volume change. |
||||||||||||
function. |
|
SLEEP MEMORY |
|
||||||||||||||||
|
ECHO |
KEYCON |
MO/ST |
|
|
|
|
|
|
|
|
||||||||
Set a Sleep time to shut off the |
|
|
|
|
|
|
|
|
|
|
|
|
|
|
|
|
|
Allows you to repeat a title, chapter, |
|
Product. or |
|
|
|
|
|
|
|
|
|
|
|
|
|
|
|
|
|
track or disc. |
|
Adjust the echo level of the microphone. |
|
|
|
|
|
|
|
|
|
|
|
|
|
|
|
|
|
Select MONO or STEREO for radio |
|
Press to preset FM stations. |
|
|
|
|
|
|
|
|
|
|
|
|
|
|
|
|
|
||
|
|
|
|
|
|
|
|
|
|
|
|
|
|
|
|
|
broadcasting. |
||
or |
|
|
|
|
|
|
|
|
|
|
|
|
|
|
|
|
|
or |
|
Press KEYCON button to Select the |
|
|
|
|
|
|
|
|
|
|
|
|
|
|
|
|
|
Voice remover. |
|
Key Control bar. |
|
|
|
|
|
|
|
|
|
|
|
|
|
|
|
|
|
|
|
| 8 English
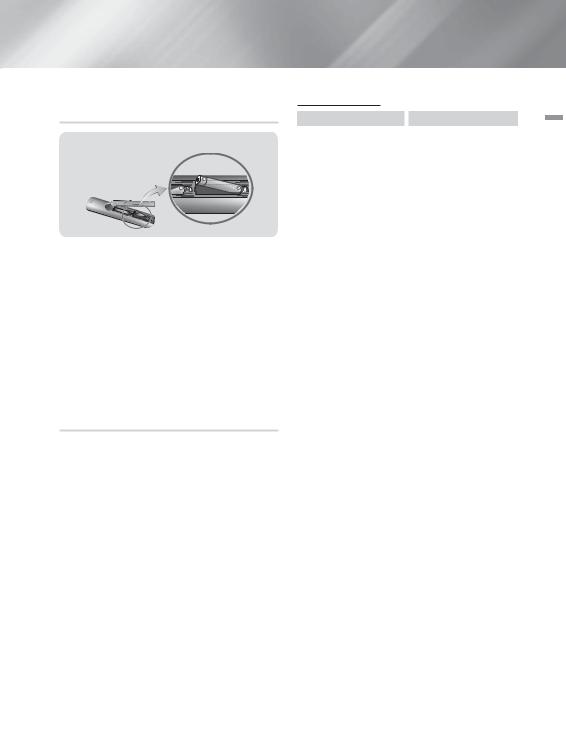
Installing batteries in the Remote
Control
Battery size: AAA
|NOTE |
Make sure to match the “+” and “–” ends of the batteries with the diagram inside the compartment.
Assuming typical TV usage, the batteries last for about one year.
The remote control can be used up to approximately 7 meters from the product in a straight line.
Do not dispose of batteries in the general household trash.
Do not dispose of batteries in a fire.
Do not short circuit, disassemble or overheat the batteries.
Danger of explosion if battery is incorrectly replaced. Replace only with the same or equivalent type.
Setting the Remote Control
You can control certain functions of your TV with this remote control.
When operating a TV with the remote control
Press the TV button to set the remote control to TV mode.
Press the POWER button to turn on the TV. While holding down the POWER button, enter the code corresponding to your brand of TV.
•If there is more than one code listed for your TV in the table, enter one at a time to determine which code works.
•Example : For a Samsung TV
While holding down the POWER button, use the number buttons to enter 00, 15, 16, 17 and 40.
If the TV turns off, the setting is complete.
•You can use the TV POWER, VOLUME, CHANNEL, and Numeric buttons (0~9).
|NOTE |
The remote control may not work or some operations may not be possible with some brands of TVs.
The remote control will work on a Samsung TV by default.
TV Control Codes
Brand |
Code |
|
Admiral |
56, 57, 58 |
|
(M.Wards) |
||
|
||
A Mark |
01, 15 |
|
Anam |
01, 02, 03, 04, 05, 06, |
|
07, 08, 09, 10, 11, 12, |
||
|
13, 14 |
|
AOC |
01, 18, 40, 48 |
|
Bell & Howell |
57, 58, 81 |
|
(M.Wards) |
||
|
||
Brocsonic |
59, 60 |
|
|
|
|
Candle |
18 |
|
Cetronic |
03 |
|
|
|
|
Citizen |
03, 18, 25 |
|
|
|
|
Cinema |
97 |
|
Classic |
03 |
|
Concerto |
18 |
|
Contec |
46 |
|
Coronado |
15 |
|
Craig |
03, 05, 61, 82, 83, 84 |
|
|
|
|
Croslex |
62 |
|
Crown |
03 |
|
Curtis Mates |
59, 61, 63 |
|
|
|
|
CXC |
03 |
|
|
02, 03, 04, 15, 16, 17, |
|
Daewoo |
18, 19, 20, 21, 22, 23, |
|
24, 25, 26, 27, 28, 29, |
||
|
30, 32, 34, 35, 36, 48, |
|
|
59, 90 |
|
Daytron |
40 |
|
Dynasty |
03 |
|
Emerson |
03, 15, 40, 46, 59, 61, |
|
64, 82, 83, 84, 85 |
||
|
||
Fisher |
19, 65 |
|
Funai |
03 |
|
Futuretech |
03 |
|
General Electric |
06, 40, 56, 59, 66, 67, |
|
(GE) |
68 |
|
Hall Mark |
40 |
|
Hitachi |
15, 18, 50, 59, 69 |
|
Inkel |
45 |
|
JC Penny |
56, 59, 67, 86 |
|
JVC |
70 |
|
KTV |
59, 61, 87, 88 |
|
KEC |
03, 15, 40 |
|
KMC |
15 |
|
LG (Goldstar) |
01, 15, 16, 17, 37, 38, |
|
39, 40, 41, 42, 43, 44 |
||
|
||
|
|
|
Luxman |
18 |
|
|
|
|
LXI (Sears) |
19, 54, 56, 59, 60, 62, |
|
63, 65, 71 |
||
|
||
Magnavox |
15, 17, 18, 48, 54, 59, |
|
60, 62, 72, 89 |
||
|
||
Marantz |
40, 54 |
|
Matsui |
54 |
|
MGA |
18, 40 |
|
Mitsubishi/MGA |
18, 40, 59, 60, 75 |
Brand |
Code |
|
MTC |
18 |
|
|
|
|
NEC |
18, 19, 20, 40, 59, 60 |
|
Nikei |
03 |
|
|
|
|
Onking |
03 |
|
Onwa |
03 |
|
|
|
|
Panasonic |
06, 07, 08, 09, 54, 66, |
|
67, 73, 74 |
||
|
||
Penney |
18 |
|
Philco |
03, 15, 17, 18, 48, 54, |
|
59, 62, 69, 90 |
||
|
||
Philips |
15, 17, 18, 40, 48, 54, |
|
62, 72 |
||
|
||
Pioneer |
63, 66, 80, 91 |
|
Portland |
15, 18, 59 |
|
Proton |
40 |
|
Quasar |
06, 66, 67 |
|
Radio Shack |
17, 48, 56, 60, 61, 75 |
|
RCA/Proscan |
18, 59, 67, 76, 77, 78, |
|
92, 93, 94 |
||
|
||
Realistic |
03, 19 |
|
Sampo |
40 |
|
Samsung |
00, 15, 16, 17, 40, 43, |
|
46, 47, 48, 49, |
||
|
||
Sanyo |
19, 61, 65 |
|
Scott |
03, 40, 60, 61 |
|
|
|
|
Sears |
15, 18, 19 |
|
Sharp |
15, 57, 64 |
|
Signature 2000 |
57, 58 |
|
(M.Wards) |
||
|
||
Sony |
50, 51, 52, 53, 55 |
|
Soundesign |
03, 40 |
|
Spectricon |
01 |
|
SSS |
18 |
|
|
|
|
Sylvania |
18, 40, 48, 54, 59, 60, 62 |
|
Symphonic |
61, 95, 96 |
|
Tatung |
06 |
|
Techwood |
18 |
|
Teknika |
03, 15, 18, 25 |
|
TMK |
18, 40 |
|
Toshiba |
19, 57, 63, 71 |
|
Vidtech |
18 |
|
Videch |
59, 60, 69 |
|
|
|
|
Wards |
15, 17, 18, 40, 48, 54, |
|
60, 64 |
||
|
||
Yamaha |
18 |
|
|
|
|
York |
40 |
|
|
|
|
Yupiteru |
03 |
|
Zenith |
58, 79 |
|
Zonda |
01 |
|
Dongyang |
03, 54 |
<![endif]>Started Getting 02
English 9 |
Loading...