


10003229
Saeco 10003229, 10003228, 10003167, 10003158, 10003154 Operating Instructions Manual
...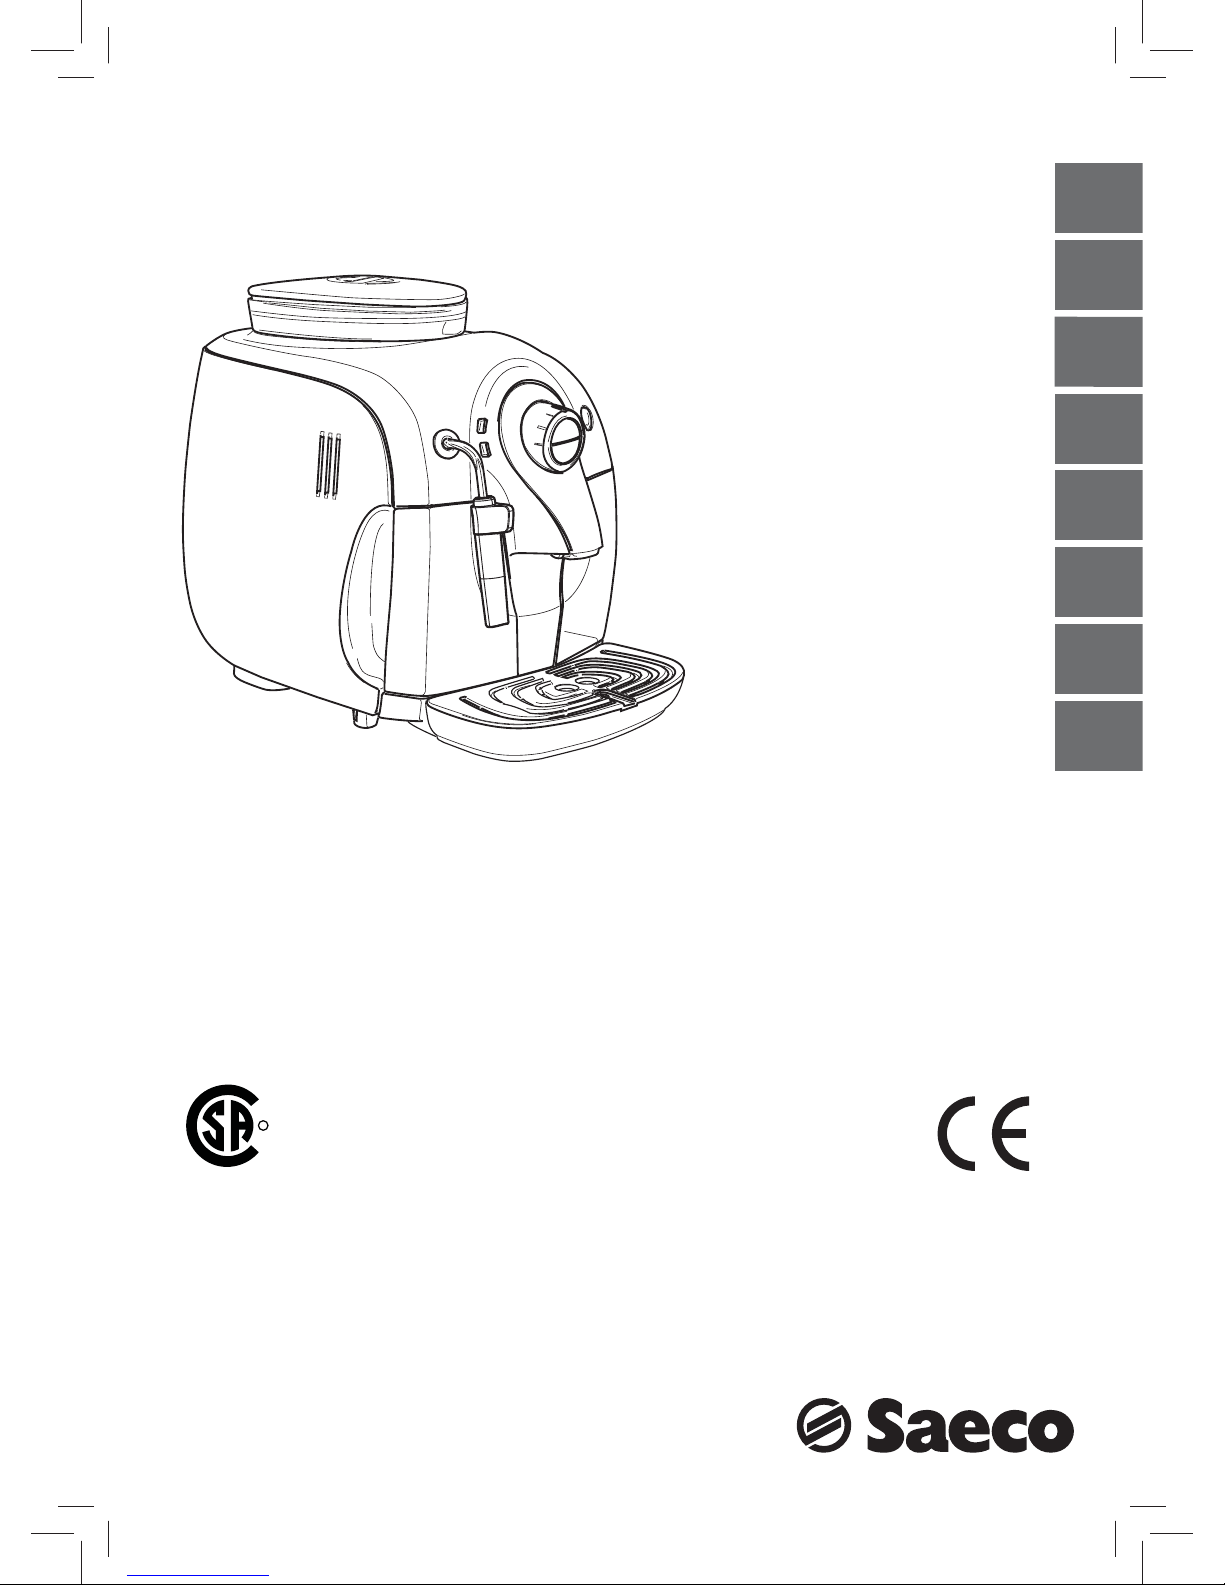
Type Sup 033R
C
U
S
R
FOR HOUSEHOLD USE ONLY
USAGE DOMESTIQUE SEULEMENT
Xsmall
ItalianoEnglishDeutschFrançaisEspañolPortugalNederlandsPolski
ISTRUZIONI PER L'USO
OPERATING INSTRUCTIONS
MODE D’EMPLOI
BEDIENUNGSANLEITUNG
INSTRUÇÕES PARA O USO
INSTRUCCIONES PARA EL USO
GEBRUIKSAANWIJZING
INSTRUKCJE OBSŁUGI
LEGGERE ATTENTAMENTE QUESTE ISTRUZIONI D'USO PRIMA DI UTILIZZARE LA MACCHINA.
READ THESE OPERATING INSTRUCTIONS CAREFULLY BEFORE USING THE MACHINE.
LIRE ATTENTIVEMENT CES INSTRUCTIONS AVANT D’UTILISER LA MACHINE.
DIESE BEDIENUNGSANLEITUNG IST VOR DEM ERSTEN GEBRAUCH DER MASCHINE AUFMERKSAM ZU LESEN.
LER ATENTAMENTE ESTAS INSTRUÇÕES PARA O USO ANTES DE USAR A MÁQUINA.
LÉANSE ATENTAMENTE LAS SIGUIENTES INSTRUCCIONES DE USO ANTES DE UTILIZAR LA MÁQUINA.
LEES DEZE INSTRUCTIES AANDACHTIG DOOR VOORDAT U HET APPARAAT IN GEBRUIK NEEMT.
PRZECZYTAĆ UWAŻNIE NINIEJSZE INSTRUKCJE OBSŁUGI PRZED UŻYTKOWANIEM URZĄDZENIA.
• 2 •
GENERALITÀ
La macchina da ca è è indicata per la preparazione di ca è espresso impiegando ca è in grani;
è dotata di un dispositivo per l’erogazione del vapore e di acqua calda. Il corpo della macchina
dall’elegante design è stato progettato per uso domestico e non è indicato per un funzionamento continuo di tipo professionale.
Conservare queste istruzioni per l’uso in un luogo sicuro ed allegarle alla macchina
per ca è qualora un’altra persona dovesse utilizzarla.
Per ulteriori informazioni o nel caso di problemi, non trattati del tutto o soltanto insu cientemente nelle presenti istruzioni, rivolgetevi ai Centri di Assistenza Autorizzati.
Attenzione. Non si assumono responsabilità per eventuali danni in caso di:
• impiego errato e non conforme agli scopi previsti;
• riparazioni non eseguite presso i centri d’assistenza autorizzati;
• manomissione del cavo di alimentazione;
• manomissione di qualsiasi componente della macchina;
• stoccaggio o uso della macchina a temperature diverse dalle condizioni di utilizzo
(tra i 15°C e i 45 °C)
• impiego di pezzi di ricambio ed accessori non originali.
In questi casi viene a decadere la garanzia.
NORME DI SICUREZZA
Mai mettere a contatto dell’acqua le parti sotto corrente: pericolo di cortocircu-
ito! Il vapore e l’acqua calda possono provocare scottature! Mai dirigere il getto
di vapore o dell’acqua calda verso parti del corpo; toccare con precauzione il beccuccio
vapore / acqua calda prendendolo per l’apposita presa: pericolo di scottature!
Destinazione d’uso
La macchina per ca è è prevista esclu si va men te per l’impiego do me sti co. È vietato apportare
modi che tec ni che e ogni impiego illecito, a causa dei rischi che essi com por ta no! L’apparecchio
non è destinato ad essere utilizzato da persone (compresi i bambini) con ridotte capacità siche,
mentali o sensoriali o con esperienza e/o competenze insu cienti, a meno che non siano sotto
la supervisione di una persona responsabile della loro sicurezza o non vengano da essa istruite
sull’uso dell’apparecchio.
Alimentazione di corrente - Cavo d’alimentazione
Allacciare la macchina per ca è soltanto ad una presa di corrente adeguata.
La tensione deve corrispondere a quella indicata sulla targhetta dell’apparecchio, situata all’interno dello sportello.
Mai usare la macchina per ca è se il cavo d’alimentazione è difettoso.
Se il cavo d’alimentazione è danneggiato, deve essere cambiato dal produttore o dal suo servizio assistenza clienti. Non far passare il cavo d’alimentazione per angoli e su spigoli vivi, sopra
oggetti molto caldi e proteggerlo dall’olio. Non portare o tirare la macchina per ca è tenendola
per il cavo.
Non estrarre la spina tirandola per il cavo oppure toccarla con le mani bagnate. Evitare che il
cavo d’alimentazione cada liberamente da tavoli o sca ali.
Protezione d’altre persone
Tenere i bambini sotto supervisione, per evitare che giochino con l’apparecchio. I bambini non si
rendono conto del pericolo connesso agli elettrodomestici. Non lasciare alla portata dei bam bi ni
i ma te ria li utilizzati per im bal la re la mac chi na.

• 3 •
Italiano
Pericolo d’ustioni
Evitare di dirigere contro se stessi e/o altri il getto di vapore e/o d’acqua calda: pericolo di
scottature! Usare sempre le apposite maniglie o manopole.
Ubicazione - Spazio per l’uso e la ma nu ten zio ne
Per una corretta gestione si consiglia di:
• Scegliere un piano d’appoggio sicuro, ben livellato, dove nessuno può rovesciarla o venirne
ferito.
• Scegliere un ambiente su cientemente illuminato, igienico e con presa di corrente facilmen-
te accessibile;
• Prevedere una distanza minima dalle pareti della macchina come indicato in gura;
• Duante le fasi d’accensione e spegnimento della macchina, consigliamo di posizionare un
bicchiere vuoto sotto all’erogatore.
Non tenere la macchina a temperatura inferiore a 0°C; c’è il pericolo che il gelo possa danneggiare la macchina. Non usare la macchina per ca è al l’aper to. Non posare la macchina su
su per fi ci mol to calde e nelle vicinanze di fiamme libere per evitare che la carcassa fonda o
co mun que si danneggi.
Custodia della macchina - Pulizia
Prima di pulire la macchina, è in di spensa bi le spegnere la macchina con il tasto ON/OFF e poi
staccare la spina dalla presa di corrente.
Inoltre, aspettare che la macchina si ra red di.
Mai immergere la mac chi na nel l’ac qua!
È severamente vietato cercare d’in ter ve ni re all’interno della macchina.
Non utilizzare, per scopi alimentari, l’acqua rimasta nel serbatoio per alcuni giorni, lavare il
serbatoio e riempirlo con acqua fresca potabile.
Se la macchina dovrà rimanere inutilizzata per un periodo prolungato, erogare acqua dal tubo
vapore e lavare con cura il pannarello (se presente); successivamente spegnerla e staccare la
spina dalla presa. Custodirla in luogo asciutto e non accessibile ai bambini. Proteggerla dalla
polvere e dallo sporco.
Riparazioni / Manutenzione
Nel caso di guasti, difetti o sospetto di difetto dopo una caduta, staccare subito la spina dalla
presa. Mai mettere in funzione una macchina difettosa.
Soltanto i Centri di Assistenza Autorizzati possono e ettuare interventi e riparazioni.Nel caso di
interventi non eseguiti a regola d’arte, si declina ogni responsabilità per eventuali danni.
Antincendio
In caso di incendio utilizzare estintori ad anidride carbonica (CO2). Non utilizzare acqua o estintori a polvere.

• 4 •
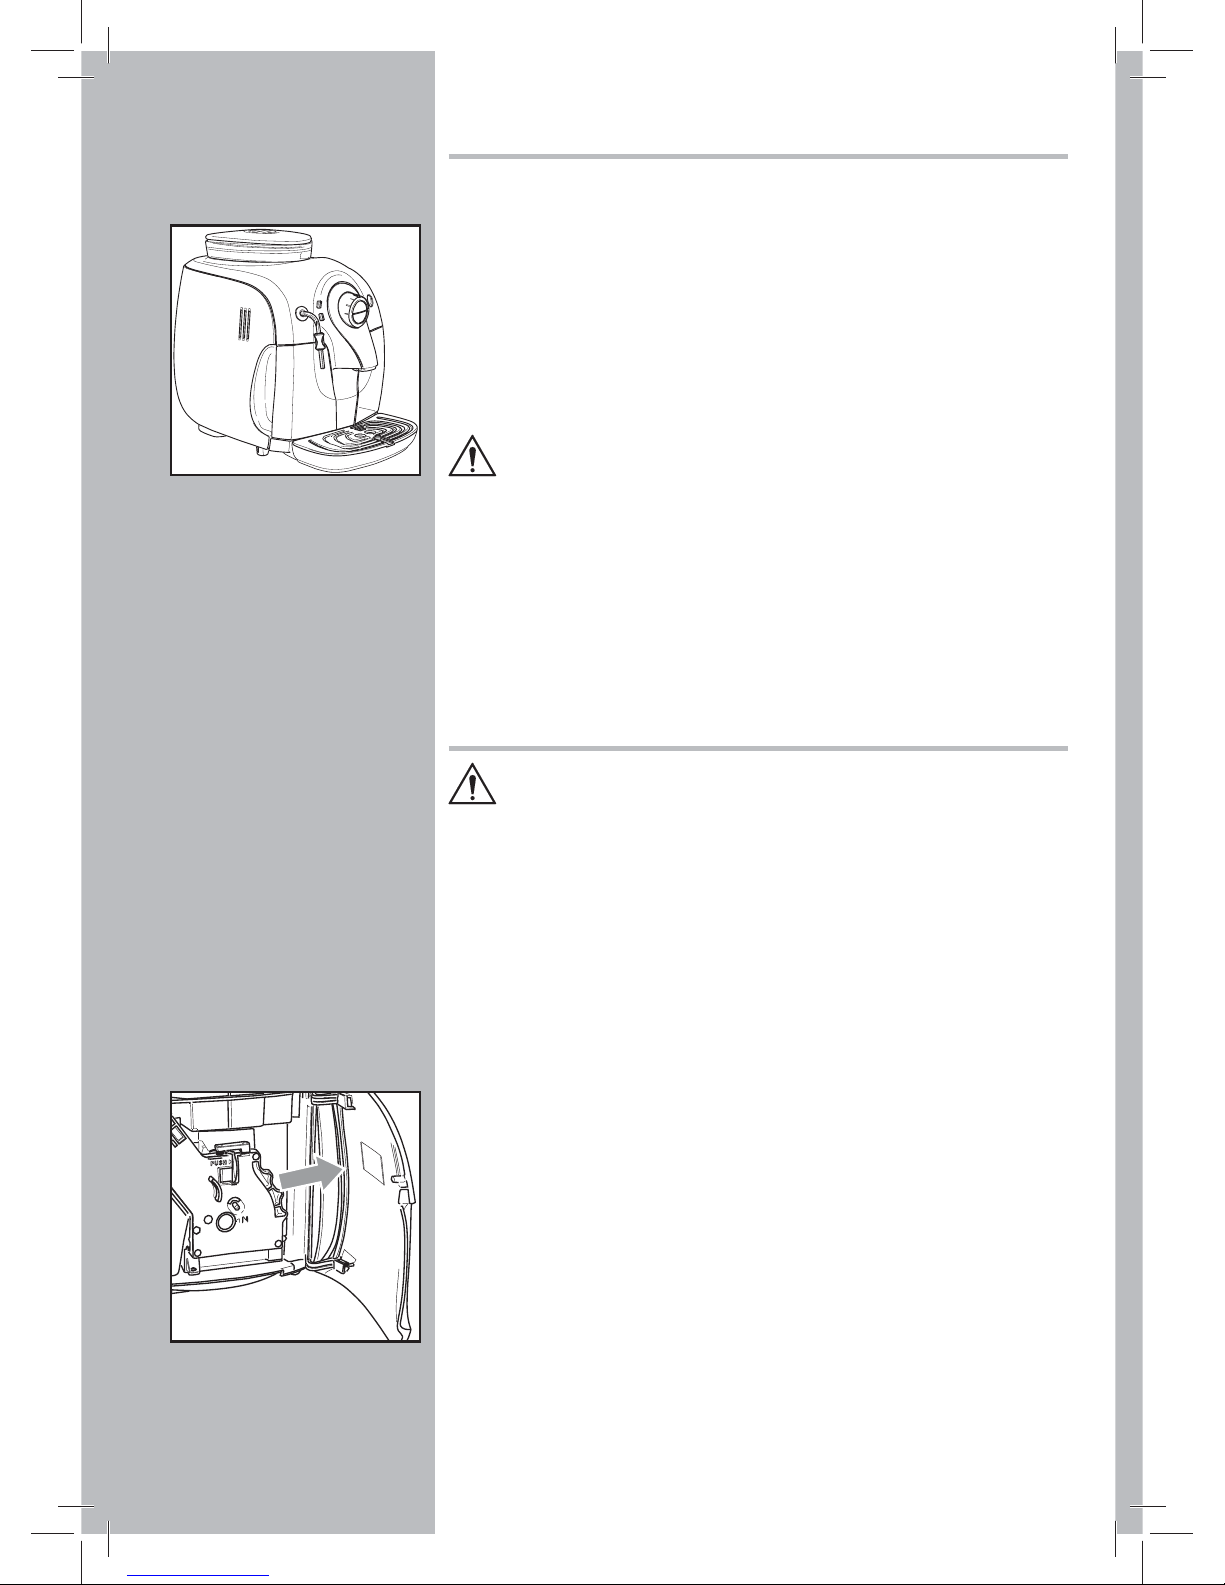
Coperchio contenitore ca è in grani
Chiave per regolazione
macinatura
Cavo alimentazione
Grasso per Gruppo Ca è
Led Doppio ca è e programmazione
lunghezza ca è in tazza
Led Temperatura
Led livello acqua
nel serbatoio
Led Allarmi
Tasto erogazione ca è corto
Tasto erogazione ca è lungo
Selettore ca è / acqua calda / vapore.
Tasto ON/OFF
Pannarello (opzionale - presente solo
su alcuni modelli)
Gruppo ca è
Cassetto raccogli fondi
Sportello di servizio
Contenitore ca è in grani
Erogatore ca è
Griglia appoggia tazze
Indicatore vasca
raccogli gocce piena
Vasca raccogli gocce
Serbatoio acqua
Tubo erogazione acqua calda / vapore
Protezione per tubo erogazione
Pannello comandi
• 5 •
Italiano
INSTALLAZIONE
Per la propria sicurezza e quella di
terzi attenersi scrupolosamente alle
istruzioni riportate nel capitolo “Norme di sicurezza”.
Imballaggio
L’imballo originale è stato progettato e realizzato per proteggere la macchina durante
la spedizione. Si consiglia di conservarlo
per un eventuale trasporto futuro.
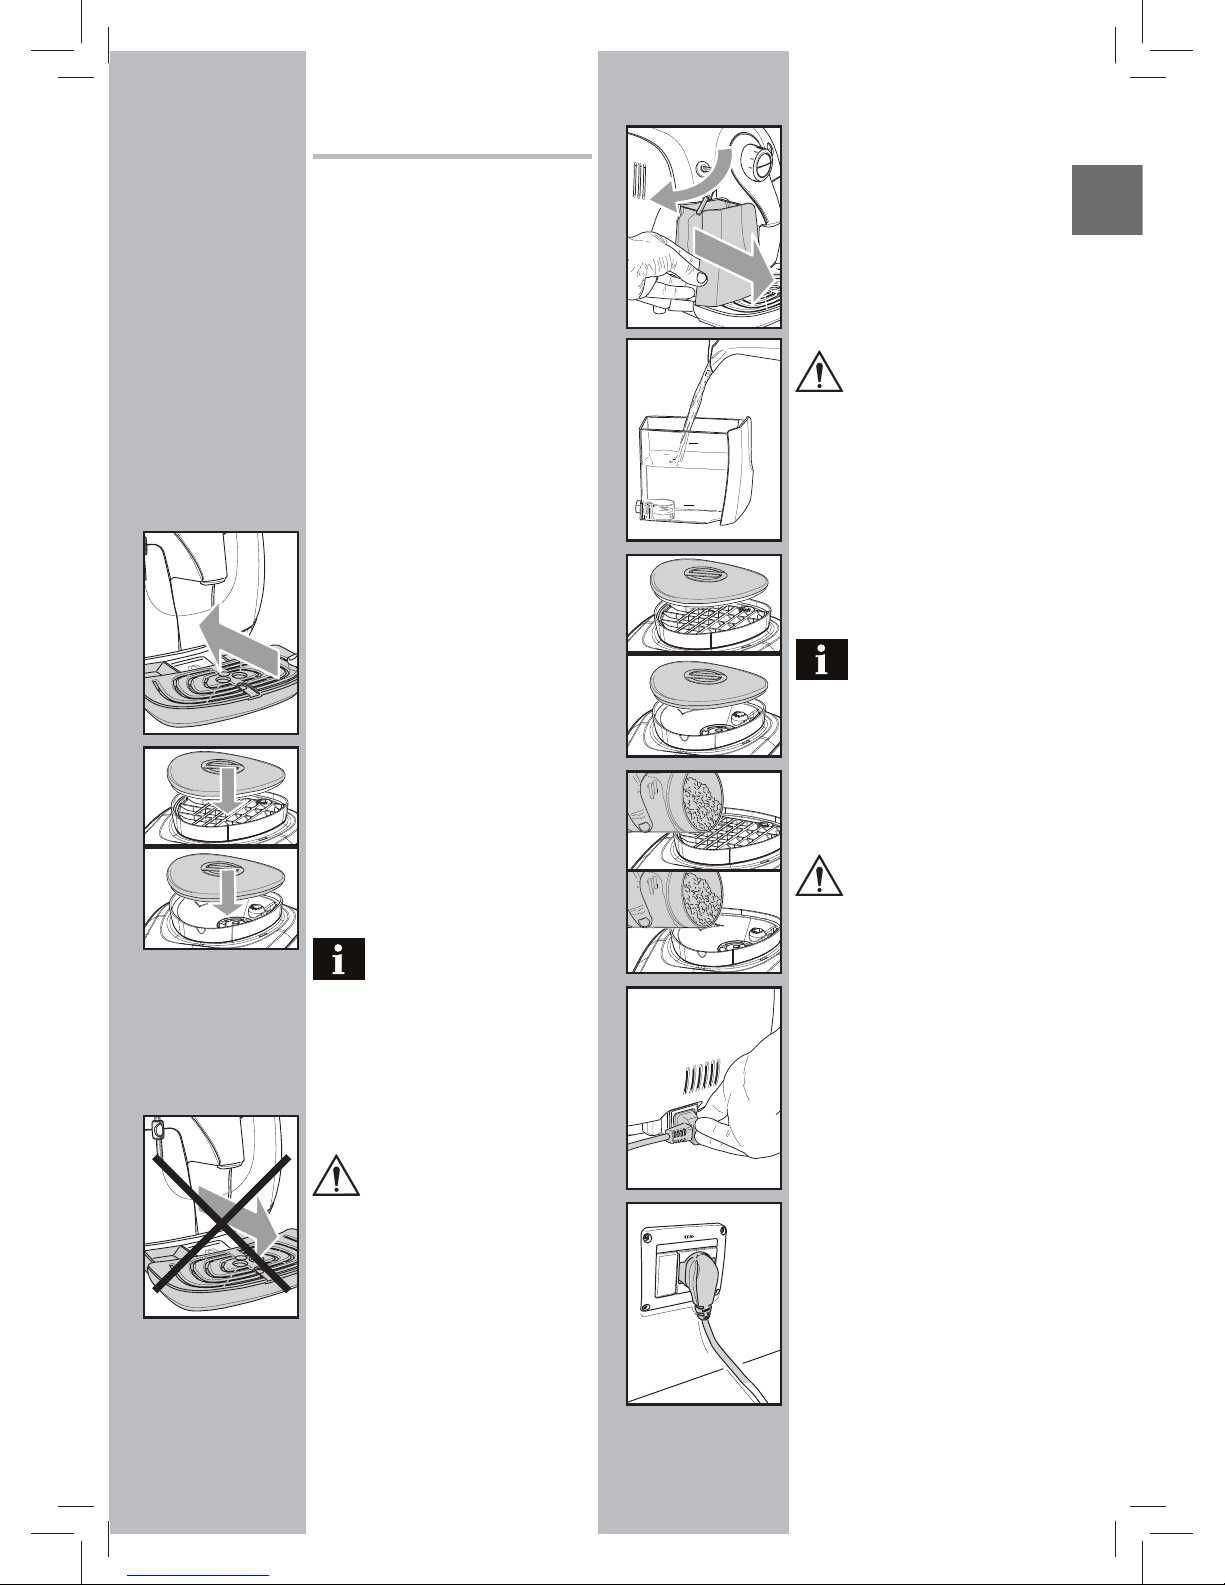
Operazioni preliminari
• Dall’imballo, prelevare il coperchio contenitore ca è e la vasca raccogli gocce
con griglia.
• Prelevare, dall’imballo, la macchina da
ca è e posizionarla in un luogo idoneo
rispondente ai requisiti richiesti e descritti nelle norme di sicurezza.
• Inserire la vasca raccogligocce con la griglia nell’apposita sede sulla macchina,
accertandosi che la vaschetta arrivi no
a battuta.
• Inserire il coperchio sul contenitore
ca è.
• Prima d’inserire la spina nella presa di
corrente, assicurarsi d’aver eseguito tutte
le operazioni riportate nel pararagrafo
"Prima accensione".
Nota importante: É importan-
te leggere quanto riportato
nel Capitolo “Spie pannello comandi”,
ove viene spiegato in dettaglio il
significato di tutte le segnalazioni
che la macchina fornisce all’utilizzatore, mediante i leds posizionati sul
pannello comandi.
Non togliere MAI la vaschetta
raccogligocce a macchina accesa. Aspettare un paio di minuti dopo
l’accensione e/o lo spegnimento in
quanto la macchina esegue un ciclo di
risciacquo/autopulizia (vedi paragrafo
“Ciclo di risciacquo/autopulizia”).
MAX
MIN
Prima accensione
• Estrarre il serbatoio acqua dalla sua
sede.
• Sciacquarlo e riempirlo con acqua
fresca; non superare il livello (MAX)
riportato nel serbatoio. Reinserire il
serbatoio nella sede apposita fino a
completa battuta.
Immettere nel serbatoio sem-
pre e soltanto acqua fresca
non gassata. Acqua calda nonché altri
liquidi possono danneggiare il serbatoio e/o la macchina. Non mettere in
funzione la macchina senza acqua:
accertarsi che ve ne sia a su cienza
all’interno del serbatoio.
• Togliere il coperchio dal contenitore
ca è.
Nota: il contenitore può
essere provvisto di un differente sistema di sicurezza in base
alle norme del paese d’utilizzo della
macchina.
• Versare lentamente il ca è in grani nel
contenitore.
Immettere nel contenito-
re sempre e soltanto caffè
in grani. Caffè macinato, solubile,
nonché altri oggetti danneggiano
la macchina.
• Riposizionare il coperchio sul contenitore
ca è .
• Inserire la spina nella presa di corrente
sul retro della macchina.
• Inserire la spina dell’altro capo del
cavo in una presa di corrente a parete
di tensione adeguata.
• 6 •
• Assicurarsi che il selettore sia in posizione “
”; se necessario, ruotarlo no
a portarlo nella posizione indicata.
• Per accendere la macchina è su ciente
premere il tasto ON/OFF ; il led “
“
comincia a lampeggiare velocemente
indicando che è necessario procedere
al caricamento del circuito.
Nota: Prima di procedere alla
prima messa in funzione è ne-
cessario caricare il circuito idraulico.
Caricamento circuito
• Per caricare il circuito inserire un contenitore sotto al tubo vapore (pannarello,
se presente);
• Ruotare il selettore in senso orario no
al punto “
” ed attendere.
Quando esce acqua in modo regolare
ed il led “
“ lampeggerà lentamente,
richiedendo la chiusura del selettore,
ruotare il selettore in senso antiorario
no a riportalo nella posizione “
”.
• A questo punto il led “
“ inizia a lampeggiare lentamente, indicando la fase
di riscaldamento.
Terminato il riscaldamento,
la macchina esegue un ciclo
di risciacquo dei circuiti interni.
• Terminate le operazioni di cui sopra,
veri care che il led “
“ sia acceso in
modo sso. A questo punto la macchina
è pronta per l’uso.
• Per erogare ca è, acqua calda o vapore,
ed utilizzare correttamente la macchina, seguire attentamente le istruzioni
che seguono.
Ciclo di risciacquo/autopulizia
Il ciclo consente di risciacquare i circuiti
ca è interni con acqua fresca.
Questo ciclo viene eseguito:
• all’avvio della macchina (con caldaia
fredda)
• dopo aver caricato il circuito (con caldaia fredda)
• durante la fase di preparazione dello
Stand-by (qualora sia stato erogato un
prodotto ca è)
+
Lampeggianti
• durante la fase di spegnimento dopo
aver premuto il tasto ON/OFF (qualora
sia stato erogato un prodotto ca è).
Nota: quando si è presenti,
prima che inizi l’erogazione,
si consiglia di posizionare un contenitore sotto l’erogatore.
Viene erogata una piccola quantità d’acqua che risciacqua e riscalda tutti i componenti; in questa fase i led lampeggiano
ciclicamente in senso antiorario.
Attendere che questo ciclo venga portato
a termine automaticamente; si può interrompere l’erogazione premendo uno dei
due tasti ca è.
REGOLAZIONI
La macchina che avete acquistato consente di e ettuare alcune regolazioni che vi
permetteranno di utilizzarla al meglio.
Saeco Adapting System
Il caffè è un prodotto naturale e le sue
caratteristiche possono cambiare in funzione dell’origine, della miscela e della
tostatura. La macchina da caffè Saeco è
dotata di un sistema di auto-regolazione
che consente d’utilizzare tutti i tipi di
ca è in grani esistenti in commercio (non
caramellati).
• La macchina si regola automaticamente
per ottimizzare l'estrazione del ca è,
assicurando la perfetta compattazione
della pastiglia per ottenere un ca è
espresso cremoso, in grado di sprigionare tutti gli aromi, indipendentemente dal tipo di ca è utilizzato.
• il processo di ottimizzazione è un
processo di apprendimento che richiede
l’erogazione di un certo numero di ca è
per permettere alla macchina di regolare la compattazione della polvere.
• attenzione ci possono essere delle
miscele particolari, che richiedono una
regolazione delle macine per ottimizare
l'estrazione del ca è - (vedi par. "Regolazione macinaca è").
Fissa
• 7 •
Italiano
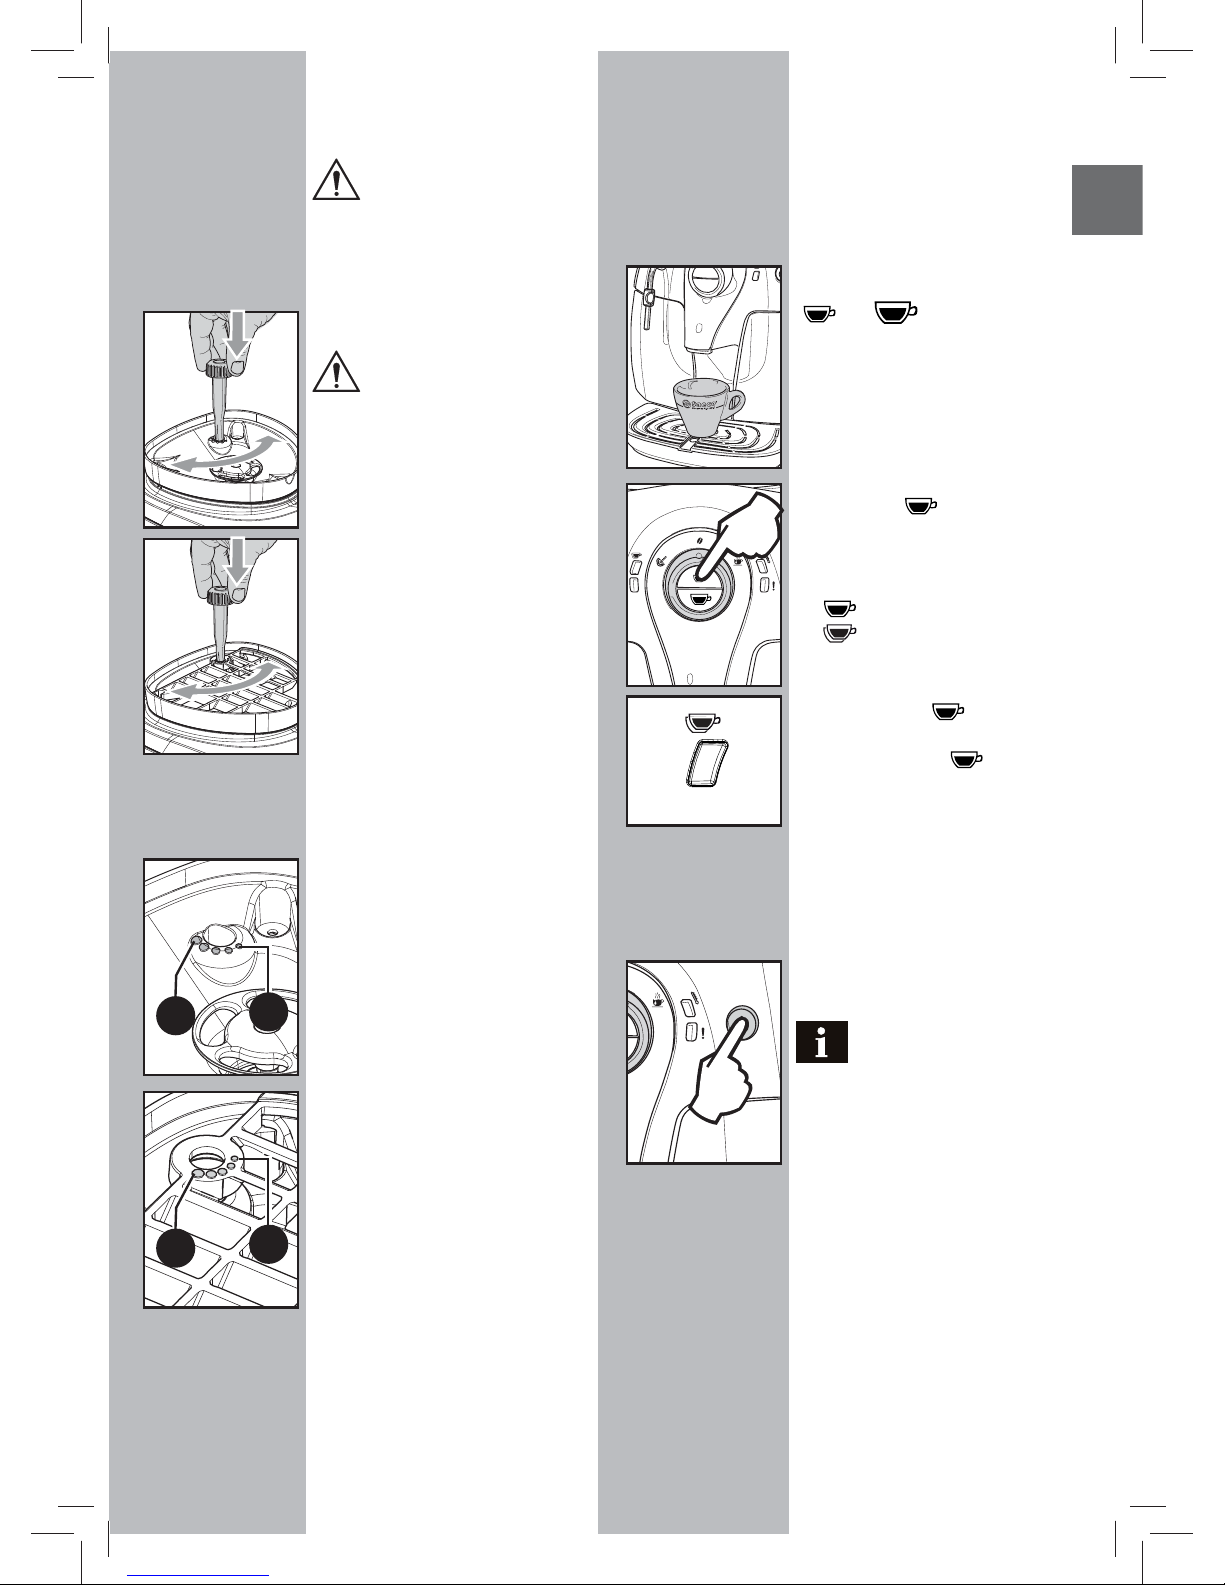
Regolazione macinacaff è
Attenzione! La manopola di
regolazione della macinatura,
posta all’interno del contenitore ca è,
deve essere ruotata solo quando il
macinaca è è in funzione. Non inserire caffè macinato e/o solubile nel
contenitore ca è in grani.
È vietato introdurre qualsiasi
materiale che non sia ca è in
grani. Il macinacaffè contiene componenti in movimento che possono
essere pericolosi; vietato introdurre
le dita e/o altri oggetti. É consentito
solo regolare il grado di macinatura
mediante l’apposita chiave. Prima
di intervenire, per qualsiasi motivo,
all’interno del contenitore caffè,
spegnere la macchina premendo il
tasto ON/OFF e staccare la spina dalla
presa di corrente. Non immettere
ca è in grani quando il macinaca è
è in funzione.
La macchina permette di effettuare una
leggera regolazione del grado di macinatura del ca è per adattarlo al tipo di ca è
utilizzato.
La regolazione deve essere effettuata
agendo sul perno presente all’interno del
contenitore ca è; questo deve essere premuto e ruotato solo con la chiave fornita
in dotazione.
Premere e ruotare il perno di un solo scatto
alla volta ed erogare 2-3 ca è; solo in questo modo si può notare la variazione del
grado di macinatura.
I riferimenti posti all’interno del contenitore indicano il grado di macinatura
impostato; si possono impostare 5 gradi
di macinatura differente con i seguenti
riferimenti:
1 - Macinatura Grossa
2 - Macinatura Fine
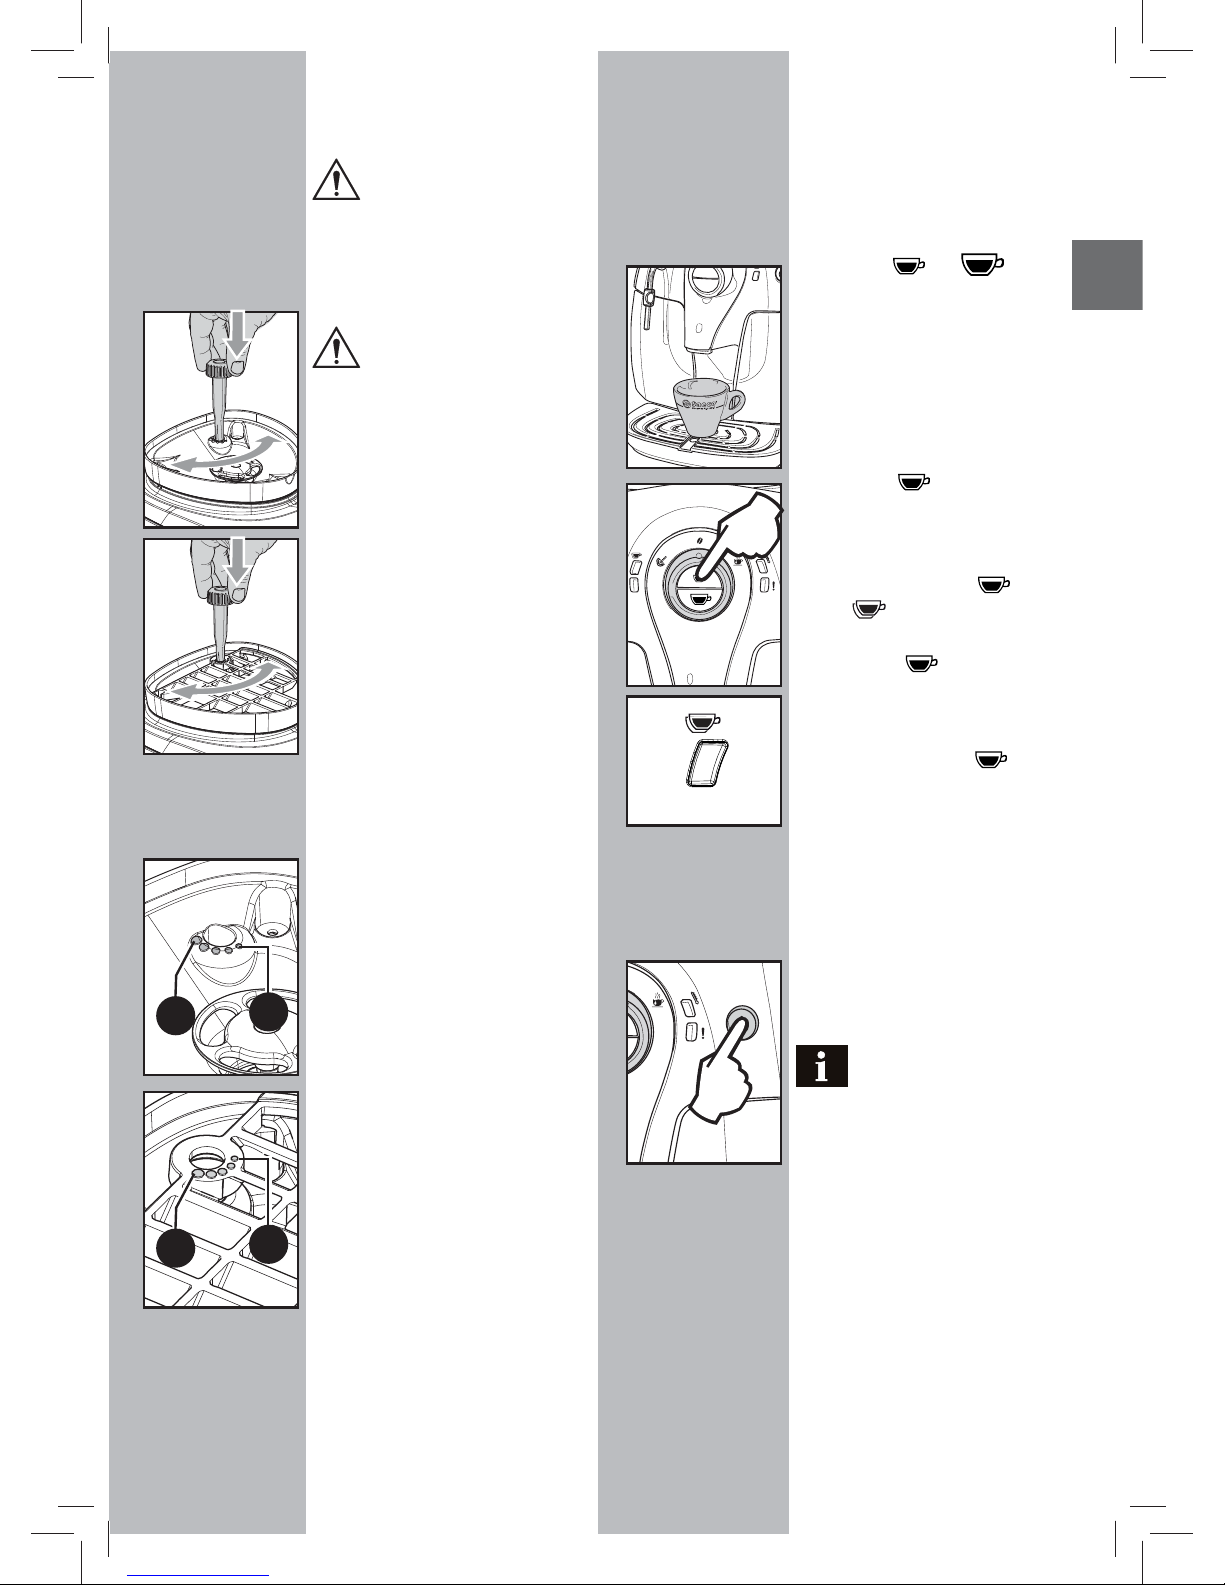
Regolazione caff è in tazza
La macchina permette di regolare la
quantità di ca è erogato secondo i vostri
gusti e/o alle dimensioni delle vostre tazze/tazzine.
Ad ogni pressione e rilascio del tasto
“
“ o “ “ la macchina eroga
una quantità programmata di ca è. Questa quantità può essere ri-programmata
a piacimento. Ad ogni tasto è associata
un’erogazione di ca è; questa avviene in
modo indipendente.
Come esempio, si descrive la programmazione del tasto “
“ a cui, di norma, è
associato il ca è espresso.
• Porre una tazzina sotto all’erogatore.
• Premere e mantenere premuto il tasto
“
“; durante questa fase il led
“
“ lampeggia.
• Quando, nella tazzina, è stato raggiun-
to il quantitativo di caffè desiderato,
rilasciare il tasto “
“.
A questo punto il tasto “
“ è programmato; ad ogni pressione e rilascio, la macchina, provvede ad erogare la medesima
quantità appena programmata.
Stand-by
La macchina è predisposta per il risparmio
energetico.
Dopo 60 minuti dall’ultimo utilizzo, la
macchina si spegne automaticamente.
Nota: durante la fase di
spegnimento la macchina
esegue un ciclo di risciacquo , qualora
sia stato erogato un prodotto ca è.
Per riavviare la macchina è sufficiente
premere il tasto ON/OFF; in questo caso la
macchina eseguirà il risciacquo solo se la
caldaia si è ra reddata.
1
1
2
2
Lampeggiante
• 8 •
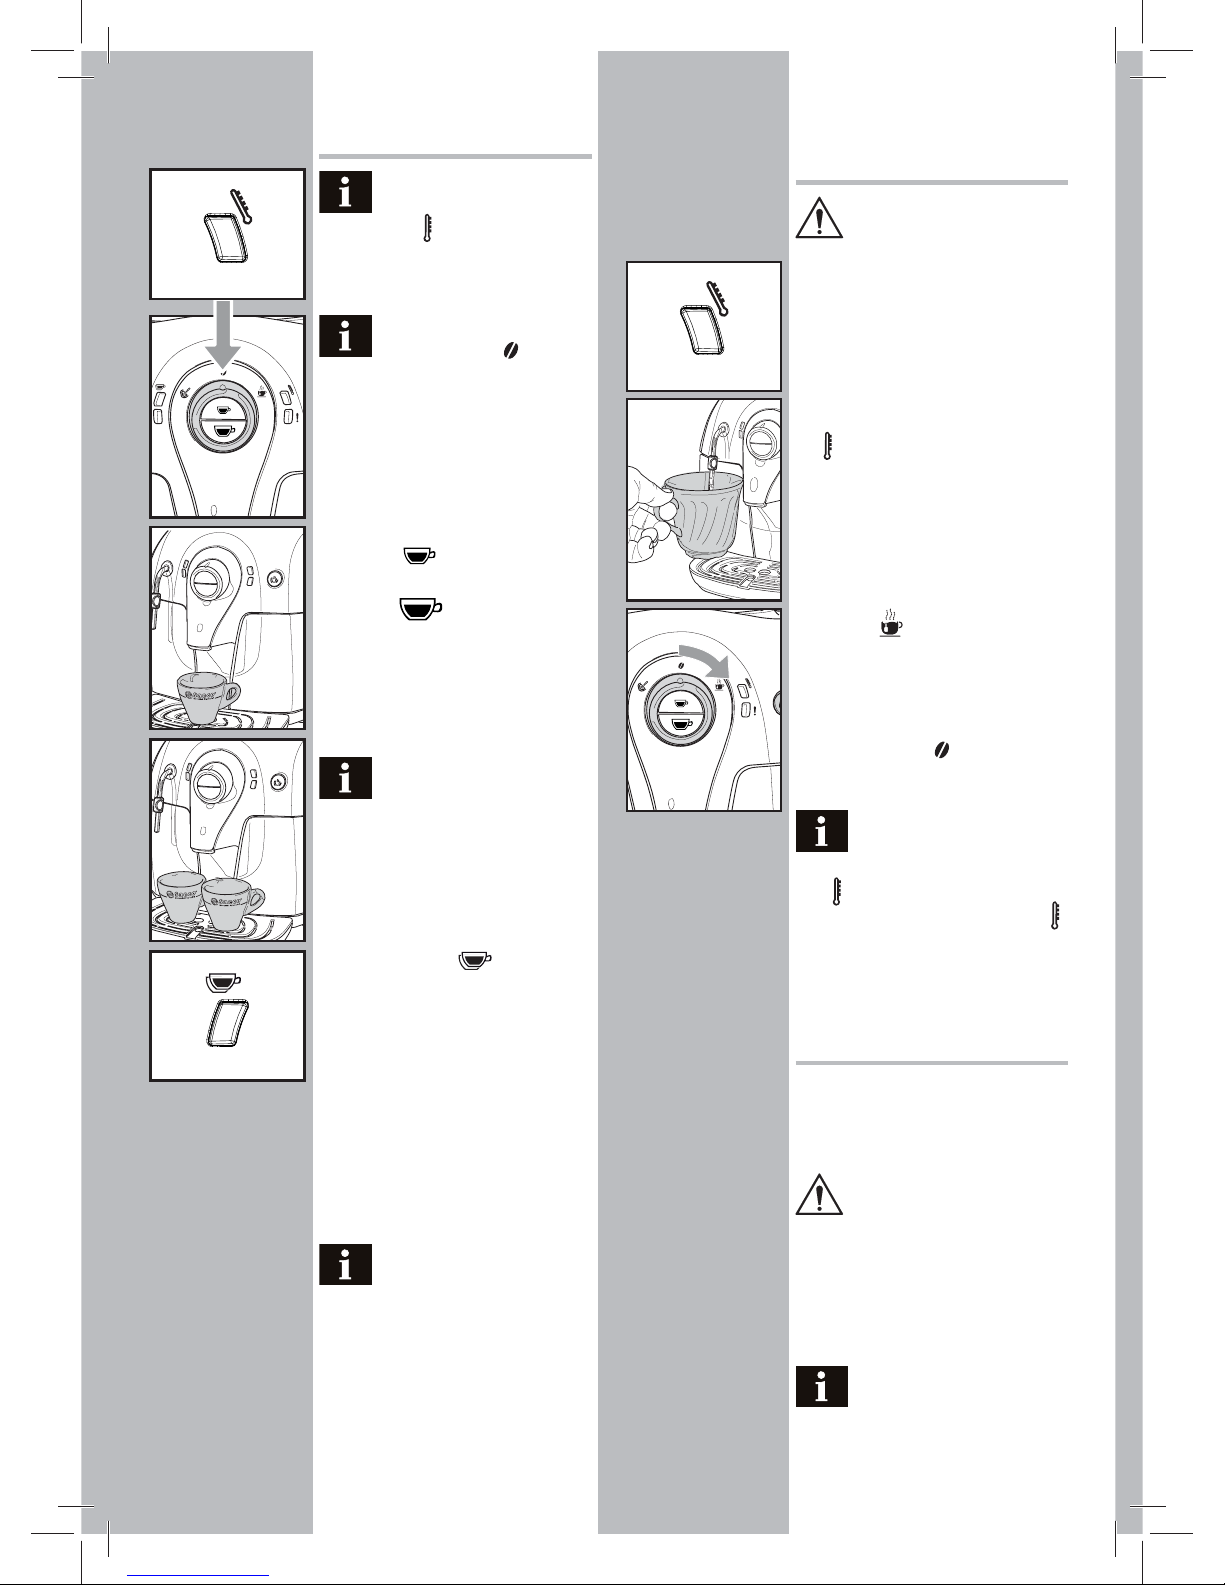
EROGAZIONE CAFFÉ
Prima di erogare ca è veri care che il led verde di pronto
temperatura “
“ sia acceso sso, che il
serbatoio acqua e il contenitore ca è
siano pieni.
Mantenere il selettore in
posizione ca è “
” durante
la fase di erogazione.
• Posizionare 1 o 2 tazze/tazzine sotto ai
beccucci dell’erogatore in corrispondenza dei fori sulla griglia.
• Per erogare il ca è occorre premere e
rilasciare:
il tasto “
“ per ottenere un ca è
espresso;
il tasto “
“ per un ca è lungo.
• Successivamente si avvia il ciclo di
erogazione: per erogare 1 ca è premere
una sola volta il tasto; per erogare 2 caffè premere 2 volte di seguito il tasto.
In questa modalità di funzio-
namento, la macchina provvede automaticamente a macinare e
dosare la giusta quantità di ca è. La
preparazione di due ca è richiedere
due cicli di macinatura e due cicli di
erogazione gestiti automaticamente
dalla macchina; questa opzione viene
segnalata dal led “
“ acceso sso.
• Dopo aver compiuto il ciclo di prein-
fusione, il ca è comincia a fuoriuscire
dall’erogatore.
• L’erogazione del caffè si ferma auto-
maticamente quando viene raggiunto
il livello impostato; è comunque possibile interrompere l’erogazione del
caffè premendo il tasto azionato in
precedenza.
La macchina è regolata per
preparare un vero espresso
all’italiana. Questa caratteristica
potrebbe allungare leggermente i
tempi d’erogazione a tutto vantaggio
del gusto intenso del ca è.
EROGAZIONE ACQUA
CALDA
Attenzione: all’inizio possono
verificarsi brevi spruzzi di
acqua calda: pericolo di scottature. Il
tubo di erogazione dell’acqua calda
può raggiungere temperature elevate: evitare di toccarlo direttamente
con le mani.
• Prima d’erogare acqua calda veri care
che il led verde di pronto temperatura
“
“ sia acceso in modo sso.
Con la macchina pronta per l’erogazione
del ca è, procedere nel seguente modo:
• Inserire un contenitore sotto al tubo
vapore (pannarello, se presente);
• Ruotare il selettore in senso orario no
al punto “
” .
• Prelevare la quantità desiderata di
acqua calda; per fermare l’erogazione dell’acqua calda ruotare in senso
antiorario il selettore no a riportarlo
nella posizione “
”. La macchina si
riporta in pronto ca è.
In qualche caso può succedere
che dopo la rotazione del
selettore, non esca l’acqua calda e il
led “
“ lampeggi lentamente. Sarà
su ciente attendere che il led “
“
diventi sso, per ottenere un usso
di acqua calda.
EROGAZIONE VAPORE /
CAPPUCCINO
Il vapore può essere utilizzato per montare il latte, per il cappuccino ma anche per
il riscaldamento delle bevande.
Pericolo di scottature! All’ini-
zio dell’erogazione possono
verificarsi brevi spruzzi di acqua
calda. Il tubo di erogazione può
raggiungere temperature elevate:
evitare di toccarlo direttamente con
le mani.
Nota importante: subito dopo
aver utilizzato il vapore per
montare il latte, procedere con la
Fissa
Fissa
Fisso

• 9 •
Italiano
pulizia del tubo vapore (o pannarello
ove presente). Con la macchina pronta,
erogare una piccola quantità di acqua
calda dentro ad un bicchiere e pulire
esternamente il tubo vapore (o pannarello ove presente). Questo garantirà
una perfetta pulizia di tutte le parti
dagli eventuali residui di latte.
• Inserire un contenitore sotto al tubo
vapore (pannarello, se presente).
• Con la macchina pronta per erogare caffè, ruotare il selettore in senso antiorario
no al punto “
”; l’acqua residua può
uscire dal tubo vapore (pannarello, se
presente).
• La macchina necessita di un tempo di
preriscaldamento, in questa fase il led
“
“ lampeggia.
• Quando il led verde “ “ si accende
in modo fisso, inizia l’erogazione; in
breve tempo comincerà ad uscire solo
vapore.
• Ruotare il selettore in senso orario e riportarlo nella posizione “
” per fermare
l’erogazione del vapore.
• Riempire con latte freddo 1/3 del contenitore che si desidera utilizzare per
preparare il cappuccino.
Per garantire un miglior risul-
tato nella preparazione del
cappuccino, il latte utilizzato deve
essere freddo.
• Immergere nel tubo vapore (pannarello,
se presente) il latte da riscaldare e ruotare il selettore in senso antiorario no al
punto “
”; far ruotare il recipiente con
lenti movimenti dal basso verso l’alto
per rendere uniforme la formazione di
schiuma.
• Dopo aver utilizzato il vapore per il
tempo desiderato, ruotare il selettore in
senso orario e riportarlo nella posizione
“
” per fermare l’erogazione del vapo-
re.
• Lo stesso sistema può essere utilizzato
per il riscaldamento di altre bevande.
Dopo aver utilizzato il tubo vapore (pannarello, se presente), lavarlo come descritto
nel capitolo “Pulizia e Manutenzione”.
Dopo aver utilizzato il vapore
per preparare la bevanda;
Per erogare un ca è: eseguire le proce-
dure descritte nel paragrafo “Passaggio da
vapore a ca è” per riportare la macchina
alla temperatura di erogazione del ca è.
Per erogare acqua calda: eseguire le
procedure descritte nel paragrafo “Erogazione acqua calda”.
Lasciando il selettore in posi-
zione centrale, la macchina si
riporta automaticamente alla temperatura per l’erogazione del ca è per
evitare inutili sprechi di energia.
Passaggio da vapore a caff è
• Dopo aver erogato vapore, premendo
il tasto ca è “
“ o “ “, il led
“
“ lampeggia velocemente indicando
che la macchina è in sovratemperatura
e non può erogare ca è.
• Per potere erogare ca è, è necessario
scaricare una certa quantità di acqua.
Inserire un contenitore sotto al tubo va-
pore (pannarello, se presente) e ruotare
il selettore in senso orario no al punto
“
”. Attendere no a quando, il led di
pronto temperatura “
“, rimane acceso
in modo sso.
Successivamente, ruotare il selettore in
senso antiorario e riportarlo nella posizione “
” per fermare l’erogazione.
• A questo punto, erogare il ca è come
descritto nel paragrafo “Erogazione
ca è”.
PULIZIA E MANUTEN
ZIONE
Pulizia generica
• Ogni giorno, a macchina accesa, vuotare e pulire il cassetto raccoglifondi.
• Le altre operazioni di manutenzione
e pulizia possono essere effettuate
soltanto quando la macchina è fredda
e scollegata dalla rete elettrica.
• Non immergere la macchina nell’acqua.
• Non inserire in lavastoviglie i componenti removibili.
Fissa
Lampeggia
Lampeggiante veloce

• 10 •
• Non utilizzare oggetti acuminati o
prodotti chimici aggressivi (solventi)
per la pulizia.
• Per la pulizia dell’apparecchio utilizzare un panno morbido inumidito con
acqua.
• Non asciugare la macchina e/o i suoi
componenti utilizzando un forno a microonde e/o un forno convenzionale.
Al termine della preparazio-
ne delle bevande con latte,
erogare acqua calda dal tubo vapore
(pannarello se presente), per un’e cace pulizia.
• Giornalmente, dopo aver riscaldato il
lat te, smontare la parte esterna del
pannarello (se presente) e lavarla con
acqua potabile fresca.
• Settimanalmente si deve pulire il tubo
vapore. Per eseguire questa operazione, si deve:
- rimuovere la parte esterna del
pannarello (per la regolare pulizia);
- s lare la parte superiore del pannarello
dal tubo vapore;
- lavare la parte superiore del pannarello con acqua fresca potabile;
- lavare il tubo vapore con un panno
umido e rimuovere eventuali residui
di latte;
- riposizionare la parte superiore
nel tubo vapore (assicurarsi che sia
completamente inserita).
Rimontare la parte esterna del panna-
rello.
• Si consiglia di pulire quotidianamente
il serbatoio dell’acqua:
- Estrarre il ltrino bianco posto all’in-
terno del serbatoio e pulirlo con
acqua corrente potabile.
- Riposizionare il filtrino bianco nel
suo alloggiamento esercitando una
leggera pressione combinata ad una
leggera rotazione.
- R iempire il serbatoio con acqua fresca
potabile.
• Giornalmente vuotare e lavare la vasca
raccogli gocce; questa operazione
deve essere eseguita anche quando il
galleggiante si solleva.
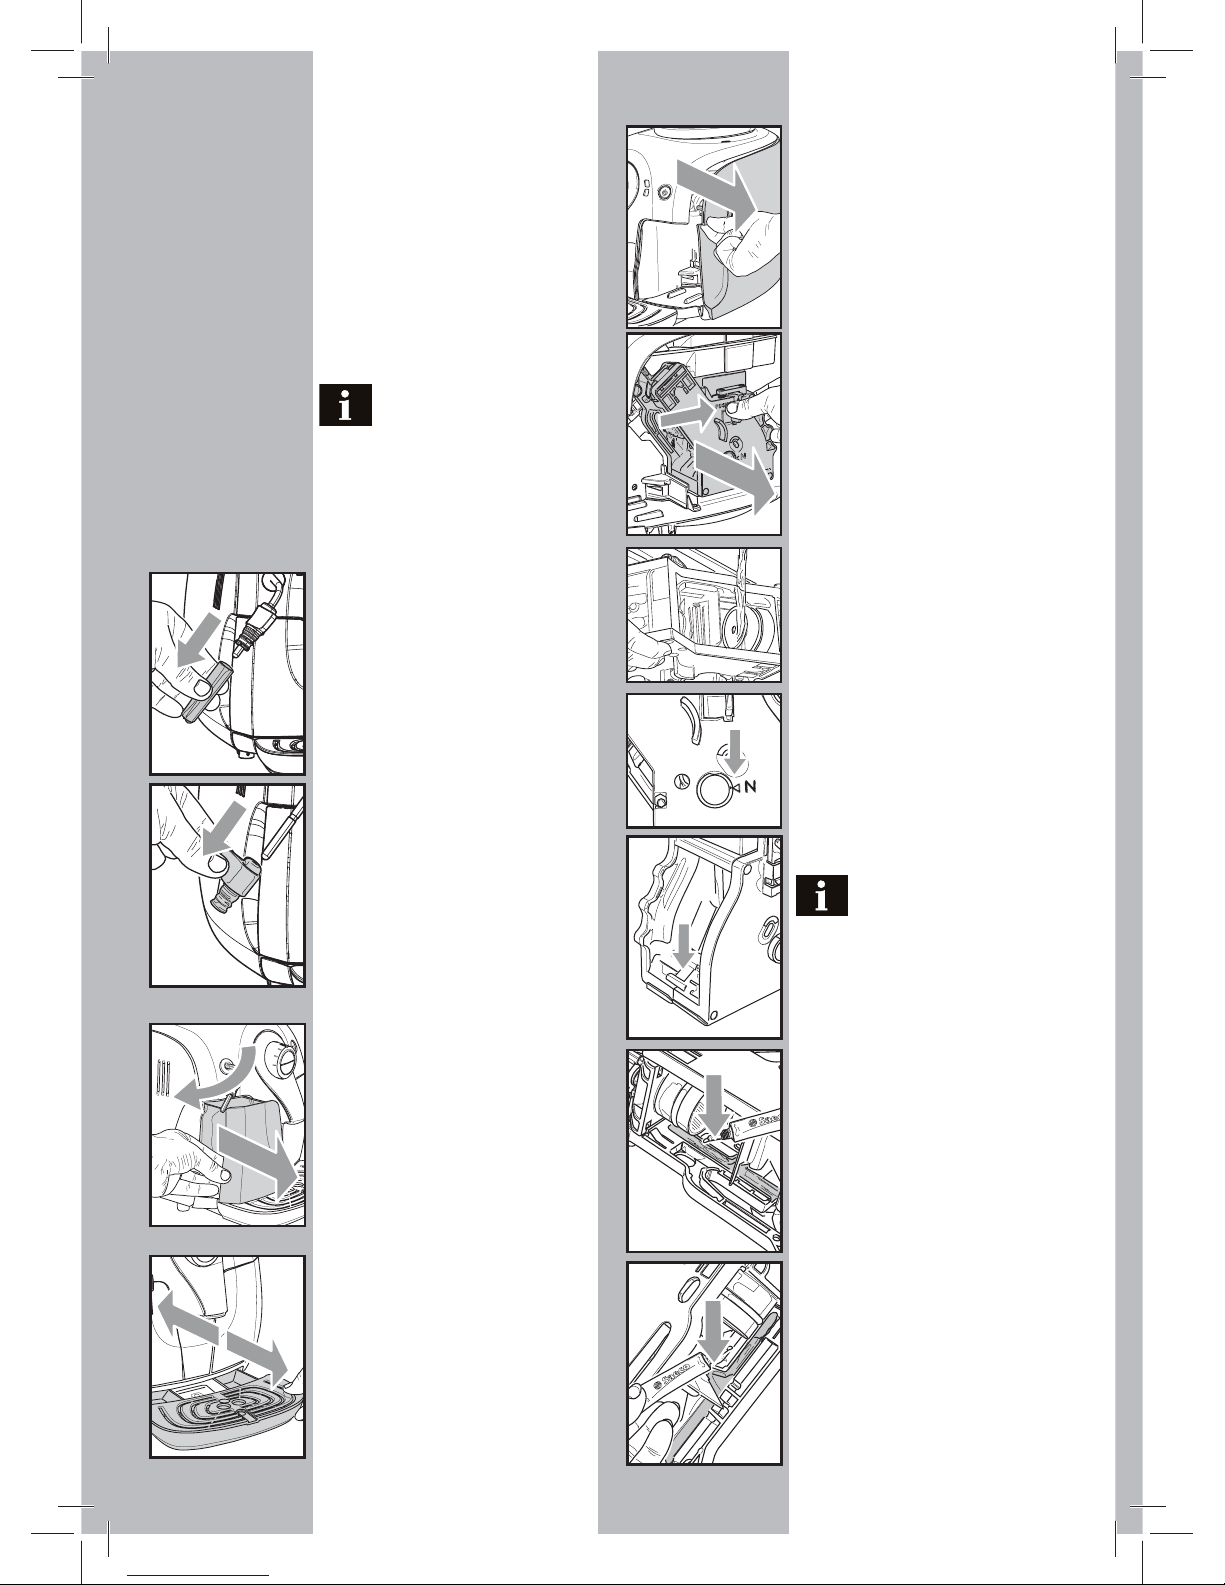
Gruppo caff è
• Il Gruppo Ca è deve essere pulito ogni
volta che si riempie il contenitore di
ca è in grani o, in ogni caso, almeno
una volta alla settimana.
• Spegnere la macchina premendo
l’interruttore ed estrarre la spina dalla
presa di corrente.
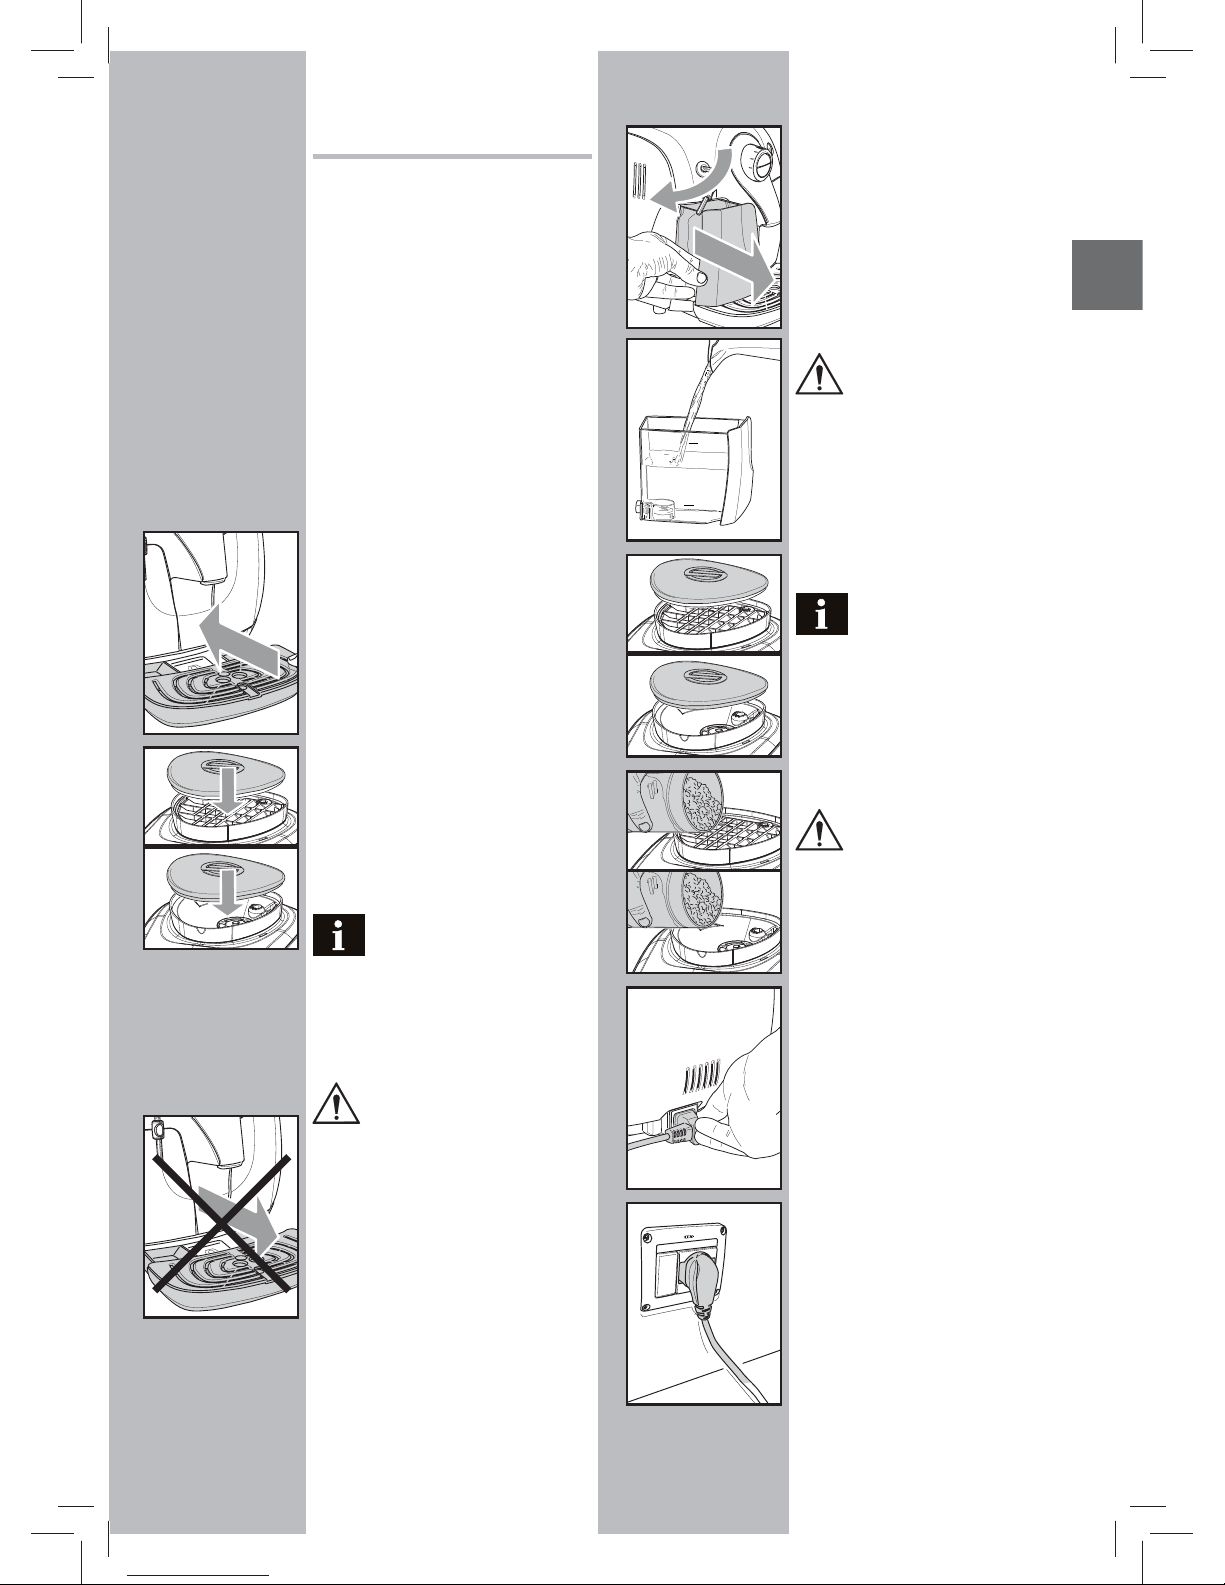
• Togliere il cassetto raccoglifondi. Aprire
lo sportello di servizio.
• Estrarre il Gruppo Caffè tenendolo
per l’apposita maniglia e premendo
sul tasto «PUSH». Il Gruppo Ca è può
essere lavato solo con acqua tiepida
senza detergente.
• Lavare il Gruppo Ca è con acqua tiepida; lavare con cura il ltro superiore.
• Lavare ed asciugare accuratamente
tutte le parti del Gruppo Ca è.
• Pulire accuratamente il vano interno
della macchina
• Veri care che i due riferimenti coincidano.
• Verificare che la leva sia a contatto
con la base del Gruppo Ca è. Premere
il tasto “PUSH” per assicurarsi che il
Gruppo Ca è sia in posizione idonea.
Lubrificare il Gruppo Caffè
dopo circa 500 erogazioni. Il
grasso per la lubri cazione del Gruppo Ca è è acquistabile presso i centri
d’assistenza autorizzati.
• Solo con il grasso fornito in dotazione,
lubri care le guide del gruppo.
• Distribuire il grasso uniformemente
sulle due guide laterali.
• Introdurre di nuovo il Gruppo Caffè
nell’apposito vano no ad ottenerne
l’aggancio SENZA premere sul tasto
“PUSH” .
• Inserire il cassetto raccogli fondi.
Chiudere lo sportello di servizio.
• 11 •
Italiano
DECALCIFICAZIONE
La formazione del calcare è naturale conseguenza dell’uso dell’apparecchio; la decalcificazione è necessaria ogni 1-2 mesi
o quando si osserva una riduzione della
portata dell’acqua.
Usare il prodotto decalci cante
Saeco. E’ stato formulato speci catamente per mantenere al meglio
la performance e la funzionalità della
macchina per tutta la sua vita, nonchè
per evitare, se correttamente usato,
ogni alterazione del prodotto erogato.
Attenzione! Non utilizzare
in nessun caso l’aceto come
decalci cante.
Prima d’eseguire la decalci cazione rimuovere il pannarello (se presente) dal tubo
vapore come descritto nel capitolo “Pulizia
e Manutenzione”.
• Accendere la macchina con il tasto ON/
OFF. Attendere che la macchina
termini il processo di risciacquo e
riscaldamento.
• Miscelare il decalcificante con acqua
come speci cato sulla confezione del
prodotto decalcificante e riempire il
serbatoio dell’acqua.
• Inserire un contenitore sotto al tubo
vapore;
• Prelevare ad intervalli (una tazza per
volta) l’intero contenuto del serbatoio
dell’acqua ruotando il selettore in senso
orario no al punto “
”; per fermare
l’erogazione ruotare il selettore in
senso antiorario no a riportarlo nella
posizione “
”.
• Durante i singoli intervalli si deve lasciare agire, la soluzione decalci cante,
per circa 10-15 minuti, scollegando la
macchina con il tasto ON/OFF. Vuotare il
contenitore.
• Ripetere le operazioni no a terminare
la soluzione decalci cante all’interno del
serbatoio.
• Terminata la soluzione decalci cante,
sciacquare il serbatoio dell’acqua e
riempirlo con acqua fresca.
• Accendere la macchina con il tasto ON/
OFF.
• Vuotare il contenuto del serbatoio
dell’acqua ruotando il selettore in
senso orario no al punto “
”; per
fermare l’erogazione ruotare il selettore in senso antiorario no a riportarlo
nella posizione “
” .
Terminata la decalcificazione inserire il
pannarello (pannarello, se presente) nel
tubo vapore come descritto nel capitolo
“Pulizia e Manutenzione”.
La soluzione decalcificante
deve essere smaltita secondo quanto previsto dal costruttore
e/o dalle norme vigenti nel Paese
d’utilizzo.
SMALTIMENTO
Ai sensi dell’art. 13 del Decreto Legislativo 25 luglio 2005, n. 151”Attuazione delle Direttive 2002/95/CE,
2002/96/CE e 2003/108/CE, relative
alla riduzione dell’uso di sostanze
pericolose nelle apparecchiature
elettriche ed elettroniche, nonché
allo smaltimento dei ri uti”
Il simbolo del cassonetto barrato riportato
sull’apparecchiatura o sulla sua confezione indica che il prodotto alla fine della
propria vita utile deve essere raccolto
separatamente dagli altri ri uti. L’utente
dovrà, pertanto, conferire l’apparecchiatura giunta a ne vita agli idonei centri di
raccolta di erenziata dei ri uti elettronici
ed elettrotecnici, oppure riconsegnarla al
rivenditore al momento dell’acquisto di
una nuova apparecchiatura di tipo equivalente, in ragione di uno a uno. L’adeguata raccolta differenziata per l’avvio
successivo dell’apparecchiatura dismessa
al riciclaggio, al trattamento e allo smaltimento ambientalmente compatibile
contribuisce ad evitare possibili effetti
negativi sull’ambiente e sulla salute e
favorisce il reimpiego e/o riciclo dei materiali di cui è composta l’apparecchiatura.
Lo smaltimento abusivo del prodotto da
parte dell’utente comporta l’applicazione
delle sanzioni amministrative previste
dalla normativa vigente.
MAX
MIN

• 12 •
Segnalazioni Cause Rimedi
Fissa
Macchina in temperatura pronta:
- per l’erogazione del ca è;
- per l’erogazione dell’acqua calda;
- per l'erogazione del vapore
Lampeggiante
lento
Macchina in fase di riscaldamento per l’erogazione
ca è, acqua calda e vapore.
Lampeggiante
veloce
Macchina in sovratemperatura; in questa modalità la
macchina non può erogare ca è.
È necessario scaricare dell’acqua in un contenitore ruotando il selettore
in senso orario n o al punto
“ ”, no a quando il led verde di pronto
temperatura “ “ rimane acceso in modo sso. Successivamente
fermare l'erogazione dell'acqua.
Lampeggiante
lento
Indica macchina in fase di programmazione della
quantità di ca è in tazza (vedi paragrafo “Regolazione
ca è in tazza”).
Fisso
Macchina in fase d'erogazione di un doppio ca è.
Fisso
Livello dell’acqua basso. Riempire il serbatoio con acqua fresca potabile. Dopo il ripristino
dell’acqua nel serbatoio, la spia si spegne.
Fissa
Serbatoio ca è vuoto. Riempire il serbatoio con ca è in grani ed iniziare nuovamente la
procedura.
Cassetto raccogli fondi pieno Con la macchina accesa svuotare il cassetto raccogli fondi.
Questa operazione viene comunque sempre richiesta dopo
l'erogazione di 8 ca è.
Se il cassetto viene svuotato prima della segnalazione, questa
operazione non azzera il contatore fondi.
Lampeggiante
veloce
Circuito acqua scarico. Riempire il serbatoio con acqua fresca potabile e caricare il
circuito acqua della macchina come descritto nel paragrafo “Prima
accensione”.
Lampeggiante
lento
Gruppo ca è assente - Cassetto fondi assente
Sportello di servizio aperto - Rubinetto in posizione
NON corretta per il funzionamento della macchina.
Per spegnere la luce rossa lampeggiante, verificare che tutti i
componenti siano inseriti o chiusi in modo corretto.
+
Lampeggianti in senso
antiorario (ciclicamente)
La macchina sta eseguendo il ciclo di risciacquo/
autopulizia
La macchina termina il ciclo automaticamente.
Si può arrestare il ciclo premendo uno dei due testi ca è.
Lampeggianti
in modo
alternato
Il gruppo ca è ha eseguito un'operazione anomala. Riprovare ad eseguire un nuovo ciclo di erogazione del ca è.
+
Lampeggianti
contemporaneamente
La macchina è in una condizione anomala e non
permette l'erogazione del caffè, dell'acqua o del
vapore.
Spegnere e dopo 30 secondi riaccendere la macchina.
Provare 2 o 3 volte.
Se la macchina NON si avvia, contattare il centro assistenza.
SPIE PANNELLO COMANDI
• 13 •
Italiano
Comportamenti Cause Rimedi
La macchina non si accende. La macchina non è collegata alla rete elettrica. Collegare la macchina alla rete elettrica.
Il ca è non è abbastanza caldo Le tazzine sono fredde. Scaldare le tazzine con acqua calda.
Non fuoriesce acqua calda o vapore. Il foro del tubo vapore è otturato. Pulire il foro del tubo vapore con uno spillo.
Prima d'e ettuare questa operazione assicurarsi che la
macchina sia spenta e fredda.
Pannarello sporco (se presente). Pulire il pannarello.
Il ca è ha poca crema.
(Vedere nota)
La miscela non è adatta o il ca è non è fresco di torrefazione oppure è macinato troppo grosso.
Cambiare miscela di caffè o regolare la macinatura come al
paragrafo “Regolazione macinaca è”.
La macchina impiega troppo tempo per scaldarsi
o la quantità di acqua che fuoriesce dal tubo è
limitata.
Il circuito della macchina è intasata dal calcare. Decalci care la macchina.
Il Gruppo Ca è non può essere estratto. Gruppo Ca è fuori posizione. Accen dere la macchin a. Chiudere lo sportello di servizio. Il
gruppo erogatore ritorna automaticamente nella posizione
iniziale.
Cassetto raccoglifondi inserito. Estrarre il cassetto raccogli fondi prima di estrarre il gruppo di
erogazione.
Macchina macina ma il ca è non fuoriesce.
(Vedere nota)
Gruppo Ca è sporco. Pulire il Gruppo Ca è (paragrafo “Gruppo ca è”).
Circuito non carico. Ricaricare il circuito (paragrafo “Prima accensione).
Evento estremo che avviene quando la macchina sta
regolando automaticamente la dose.
Erogare alcuni ca è come descritto nel paragrafo “Saeco Adapting System”.
Erogatore sporco. Pulire l'erogatore.
Ca è troppo acquoso.
(Vedere nota)
Evento estremo che avviene quando la macchina sta
regolando automaticamente la dose.
Erogare alcuni ca è come descritto nel paragrafo “Saeco Adapting System”.
Ca è fuoriesce lentamente.
(Vedere nota)
Ca è troppo ne. Cambiare miscela di caffè o regolare la macinatura come al
paragrafo “Regolazione macinaca è”.
Circuito non carico. Ricaricare il circuito (paragrafo “Prima accensione”).
Gruppo Ca è sporco. Pulire il Gruppo Ca è (paragrafo “Gruppo ca è”).
Nota: questi problemi possono essere normali se è stata modi cata la miscela del ca è o nel caso in cui si stia e ettuando la prima installazione;
in questo caso attendere che la macchina proceda ad una autoregolazione come descritto nel par paragrafo “Saeco Adapting System”.
Per i guasti non contemplati dalla suddetta tabella o in caso che i rimedi suggeriti non li risolvano, rivolgersi ad un centro assistenza.
RISOLUZIONE PROBLEMI
DATI TECNICI
Il costruttore si riserva il diritto di modi care le caratteristiche tecniche del prodotto.
Tensione nominale - Potenza nominale - Alimentazione . . . . . . . . . . . . . . . . . . . . . . . . . . . . . . . . . . . . . . . . . . . . Vedi targhetta posta all’interno dello sportello
Materiale corpo . . . . . . . . . . . . . . . . . . . . . . . . . . . . . . . . . . . . . . . . . . . . . . . . . . . . . . . . . . . . . . . . . . . . . . . . . . . . . . . . . . . . . . . . . . . . . . . . . . . . . . . . . . Termoplastico
Dimensioni (l x a x p) (mm) . . . . . . . . . . . . . . . . . . . . . . . . . . . . . . . . . . . . . . . . . . . . . . . . . . . . . . . . . . . . . . . . . . . . . . . . . . . . . . . . . . . . . . . . . . . . . . . . 295 x 325 x 420
Peso . . . . . . . . . . . . . . . . . . . . . . . . . . . . . . . . . . . . . . . . . . . . . . . . . . . . . . . . . . . . . . . . . . . . . . . . . . . . . . . . . . . . . . . . . . . . . . . . . . . . . . . . . . . . . . . . . . . . . . . . . . . 6,9 Kg
Lunghezza cavo . . . . . . . . . . . . . . . . . . . . . . . . . . . . . . . . . . . . . . . . . . . . . . . . . . . . . . . . . . . . . . . . . . . . . . . . . . . . . . . . . . . . . . . . . . . . . . . . . . . . . . . . . . . . . . . . . .1,2 m
Pannello di comando . . . . . . . . . . . . . . . . . . . . . . . . . . . . . . . . . . . . . . . . . . . . . . . . . . . . . . . . . . . . . . . . . . . . . . . . . . . . . . . . . . . . . . . . . . . . . . . . . .Sulla par te frontale
Pannarello (presente solo su alcuni modelli) . . . . . . . . . . . . . . . . . . . . . . . . . . . . . . . . . . . . . . . . . . . . . . . . . . . . . . . . . . . . . . . . . . . . . . . . . . Speciale per cappuccini
Serbatoio acqua . . . . . . . . . . . . . . . . . . . . . . . . . . . . . . . . . . . . . . . . . . . . . . . . . . . . . . . . . . . . . . . . . . . . . . . . . . . . . . . . . . . . . . . . . . . . . . . . . . . . . . .1,0 litri - Estraibile
Capacità contenitore ca è (gr) . . . . . . . . . . . . . . . . . . . . . . . . . . . . . . . . . . . . . . . . . . . . . . . . . . . . . . . . . . . . . . . . . . . . . . . . . . . . . . . . . . . . . . . . . . . . . . . . . . . . . . . 170
Capacità contenitore fondi . . . . . . . . . . . . . . . . . . . . . . . . . . . . . . . . . . . . . . . . . . . . . . . . . . . . . . . . . . . . . . . . . . . . . . . . . . . . . . . . . . . . . . . . . . . . . . . . . . . . . . . . . . . . 8
Pressione pompa . . . . . . . . . . . . . . . . . . . . . . . . . . . . . . . . . . . . . . . . . . . . . . . . . . . . . . . . . . . . . . . . . . . . . . . . . . . . . . . . . . . . . . . . . . . . . . . . . . . . . . . . . . . . . . . . 15 bar
Caldaia . . . . . . . . . . . . . . . . . . . . . . . . . . . . . . . . . . . . . . . . . . . . . . . . . . . . . . . . . . . . . . . . . . . . . . . . . . . . . . . . . . . . . . . . . . . . . . . . . . . . . . . . . . . . . . . . . . . . . . . . . . .Inox
Dispositivi di sicurezza . . . . . . . . . . . . . . . . . . . . . . . . . . . . . . . . . . . . . . . . . . . . . . . . . . . . . . . . . . . . . . . . . . . . . . . . . . . . . . . . . . . . . . . . . . . . . . . . . . . . . .Termofusibile

• 14 •
IMPORTANT SAFEGUARDS
When using electrical appliances, basic safety precautions should always be
followed, including the following:
1. Read all instructions.
2. Do not touch hot surfaces. Use handles or knobs.
3. To protect against fire, electric shock and injury to persons do not immerse
cord, plugs, or appliance in water or other liquid.
4. Close supervision is necessary when the appliance is used by or near
children.
5. Unplug from outlet when not in use and before cleaning. Allow to cool
before putting on or taking off parts, and before cleaning the appliance.
6. Do not operate any appliance with a damaged cord or plug or after the
appliance malfunctions, or has been damaged in any manner. Return
appliance to the nearest authorized service facility for examination, repair
or adjustment.
7. The use of accessory attachments not recommended by the appliance
manufacturer may result in fire, electric shock or injury to persons.
8. Do not use outdoors.
9. Do not let cord hang over edge of table or counter, or touch hot
surfaces.
10. Do not place on or near a hot gas or electric burner, or in a heated
oven.
11. Always attach plug to appliance first, then plug cord into wall outlet. To
disconnect, turn any control to “off”, then remove plug from wall outlet.
12. Do not use appliance other than for intended use.
13. Save these instructions.
SAVE THESE INSTRUCTIONS

• 15 •
English
CAUTION
This appliance is for household use only. Any servicing, other than cleaning
and user maintenance, should be performed by an authorized service center.
Do not immerse machine in water. To reduce the risk of fire or electric shock,
do not disassemble the machine. There are no parts inside the machine
serviceable by the user. Repair should be done by authorized service personnel
only.
1 Check voltage to be sure that the voltage indicated on the nameplate
corresponds with your voltage.
2 Never use warm or hot water to fill the water tank. Use cold water only.
3 Keep your hands and the cord away from hot parts of the appliance during
operation.
4 Never clean with scrubbing powders or harsh cleaners. Simply use a soft
cloth dampened with water.
5 For optimal taste of your coffee, use purified or bottled water. Periodic
descaling is still recommended every 2-3 months.
6 Do not use caramelized or flavored coffee beans.
INSTRUCTIONS FOR THE POWER
SUPPLY CORD
A. A short power-supply cord (or detachable power-supply cord) is to be
provided to reduce risks resulting from becoming entangled in or tripping
over a longer cord.
B. Longer detachable power-supply cords or extension cords are available
and may used if care is exercised in their use.
C. If a long detachable power-supply cord or extension cord is used,
1. The marker electrical rating of the detachable power-supply cord or extension
cord should be at least as great as the electrical rating of the appliance
2. If the appliance is of the grounded type, the extension cord should be a
grounding-type 3-wire cord, and
3. The longer cord should be arranged so that it will not drape over the counter top
or table top where it can be pulled on by children or tripped over.
• 16 •
GENERAL INFORMATION
The co ee machine is suitable for preparing espresso co ees using whole co ee beans and is
equipped with a device to dispense steam and hot water.
The machine is designed for domestic use and is not suitable for heavy or professional use.
Keep these operating instructions in a safe place and make them available to anyone
who may use the co ee machine.
For further information or in case of problems that are not included or not completely explained in these instructions, please contact the Saeco customer service or an authorized service
center.
Warning. No liability is assumed for damage caused by:
• Incorrect use not in accordance with the intended uses;
• Repairs not carried out by authorized service centers;
• Tampering with the power cord;
• Tampering with any part of the machine;
• Storage or use of the machine at a temperature outside the operating temperature
range (+15°C / +45°C);
• Use of non-original spare parts and accessories.
In these cases, the warranty shall be deemed null and void.
SAFETY REGULATIONS
Never allow water to come into contact with any of the electrical parts of the
machine: Danger of short circuit! Steam and hot water may cause scalding! Do
not direct the steam or hot water jet towards body parts. Carefully handle the steam/
hot water spout by means of the special handle: Danger of scalding!
Intended Use
The co ee machine is intended for domestic use only. Do not make any technical changes or use
the machine for unauthorized purposes since this would create serious hazards! The appliance is
not to be used by persons (including children) with reduced physical, mental or sensory abilities
or with limited experience and/or expertise, unless they are supervised by a person responsible
for their safety, or they are instructed by this person on how to properly use the machine.
Power Supply - Power Cord
Only connect the co ee machine to a suitable power socket.
The voltage must correspond to the indication on the machine label located on the inside of
service door.
Never use the co ee machine if the power cord is defective or damaged.
If damaged, the power cord must be replaced by the manufacturer or an authorized service
center. Do not pass the power cord around corners, over sharp edges or over hot objects and
keep it away from oil. Do not use the power cord to carry or pull the co ee machine.
Do not pull out the plug by the power cord or touch it with wet hands. Do not let the power cord
hang freely from tables or shelves.
For the Safety of Others
Keep children under control to prevent them from playing with the product. Children are not
aware of the risks related to electric household appliances. Do not leave the machine packaging
materials within the reach of children.

• 17 •
English
Danger of Burns
Never direct the jet of hot steam and/or hot water towards yourself or others: Danger of scalding! Always use the handles or knobs provided.
Machine Location - Suitable Location for Operation and Maintenance
For best use, it is recommended to:
• Choose a safe, level surface, where there will be no danger of overturning it or being inju-
red.
• Choose a location that is su ciently well-lit, clean and near an easily reachable socket.
• Allow for a minimum distance from the sides of the machine as shown in the illustration;
• During machine turning on/o , it is recommended to place an empty glass under the di-
spensing spout.
Do not keep the machine at a temperature below 0°C (32°F). Frost may damage the machine.
Do not use the co ee machine outdoors. In order to prevent its housing from melting or being
damaged, do not place the machine on very hot surfaces or close to open ames.
Storing the Machine - Cleaning
Before cleaning the machine, turn it o by pressing the ON/OFF button, then remove the plug
from the socket.
Wait for the machine to cool down.
Never immerse the machine in water!
It is strictly forbidden to tamper with the internal parts of the machine.
Water left in the tank for several days should not be consumed. Wash the tank and ll it with
fresh drinking water.
If the machine is to remain inactive for a long time, dispense water from the steam wand, and
carefully clean the Pannarello (if supplied), then turn it o and unplug it. Store it in a dry place,
out of the reach of children. Keep it protected from dust and dirt.
Repairs / Maintenance
In case of failure, problems or a suspected fault resulting from the falling of the machine, immediately remove the plug from the socket. Never attempt to operate a faulty machine.
Servicing and repairs may only be carried out by authorized service centers. All liability for
damages resulting from work not carried out by professionals is declined.
Fire Safety Precautions
In case of re, use carbon dioxide (CO2) extinguishers. Do not use water or dry powder extinguishers.

• 18 •
Co ee bean hopper lid
Grinder adjustment key
Power cord
Brew group lubricant
Double co ee light and brewed
co ee length setting
Temperature light
Water tank level
light
Warning light
Small co ee button
Large co ee button
Control dial
ON/OFF button
Pannarello (optional - only available
for certain models)
Brew group
Dregdrawer
Service door
Co ee bean hopper
Dispensing spout
Grill
Full drip tray indicator
Drip tray
Water tank
Hot water/steam wand
Protective handle
Control panel
• 19 •
English
INSTALLATION
For your safety and the safety of
others, carefully follow the instructions provided in the “Safety Regulations” section.
Machine Packaging
The original packaging has been designed
and constructed to protect the machine
during transport. We recommend keeping
the packaging material for possible future
transport.
Preliminary Operations
• Remove the co ee bean hopper lid and
the drip tray with grill from the packaging.
• Remove the co ee machine from the
packaging and position it in a place that
meets the requirements described in the
“Safety Regulations”.
• Place the drip tray with grill into its
appropriate seat on the machine. Make
sure it is fully inserted to its limit stop.
• Replace the co ee bean hopper lid.
• Before plugging the machine into the
socket, be sure that all steps outlined in
section “Using the Machine for the First
Time” have been completed.
Important Note: Carefully read
the explanations of all the
warnings displayed by the machine
to the user by means of the lights on
the control panel (see section “Control
Panel Lights”).
NEVER remove the drip tray
when the machine is turned on.
Wait a couple of minutes after turning
on/o , since the machine will carry out
a rinse/self-cleaning cycle (see section
“Rinse/Self-Cleaning Cycle”).
MAX
MIN
Using the Machine for the
First Time
• Remove the water tank.
• Rinse and ll it with fresh water making sure that it is not lled exceeding
the MAX level indicated in the water
tank. Put the water tank back in its
seat to its limit stop.
Use only fresh, non-sparkling
water to fill the tank. Hot
water or any other liquid may damage
the tank and/or the machine. Do not
turn on the machine when the tank
is empty: Make sure there is enough
water in the tank.
• Remove the co ee bean hopper lid.
Note: The hopper may be
fitted with different safety
features according to the regulations of the country of use of the
machine.
• Slowly pour the co ee beans into the
hopper.
Only co ee beans must be put
into the co ee bean hopper.
Ground coffee, instant coffee or
any other object may damage the
machine.
• Replace the lid on the co ee bean hop-
per.
• Insert the plug into the socket located
on the back of the machine.
• Insert the plug of the other end of the
power cord into a wall socket with
suitable power voltage.

• 20 •
• Make sure control dial is on “ ” position; if this is not the case, set it to that
position.
• Simply press the ON/OFF button to
turn the machine on; the “ “ light will
begin to blink rapidly indicating that
the water circuit must be primed.
Note: Before starting the
machine for the first time,
prime the water circuit.
Priming the Water Circuit
• To prime the water circuit, place a
container under the hot water / steam
wand.
• Turn the control dial clockwise to set it
to the “
” position and wait.
When water steadily comes out and the
“
“ light will blink slowly - indicating
that the knob can be turned o - rotate
the control dial counter-clockwise to set
it back to the “
” position.
• At this point the “
“ light begins to
blink slowly, indicating that the machine is in warm-up mode.
When warm-up is complete,
the machine performs a rinse
cycle of the internal circuits.
• When the above steps are complete,
check that the “
“ light is on steady.
The machine is now ready for use.
• To brew co ee, dispense hot water or
steam, and for a proper use of the machine, carefully follow the instructions
provided.
Rinse/Self-Cleaning Cycle
This cycle will rinse the internal circuits
with fresh water.
The cycle is carried out:
• At machine start (with cold boiler)
• After priming the water circuit (with
cold boiler)
• During the standby preparation phase
(if a co ee product has been brewed)
• During the turning off phase after
pressing the ON/OFF button (if a co ee
product has been brewed).
+
Blinking
Note: Before dispensing,
place a container beneath
the dispensing spout.
A small amount of water will be dispensed
which will rinse and heat all the machine
components; in this phase the indicator
lights ash counter-clockwise.
Wait for the cycle to nish automatically.
You can stop dispensing as well, by pressing either co ee button.
ADJUSTMENTS
The machine that you have bought allows
for certain adjustments that will permit
you to use it to its full potential.
Saeco Adapting System
Coffee is a natural product and its characteristics may change according to its
origin, blend and roast. The Saeco co ee
machine is equipped with a self-adjusting
system that allows the use of all types of
co ee beans available on the market (non
caramelized).
• The machine automatically adjusts
itself in order to optimize the extraction of the coffee, ensuring perfect
compression of the beans to obtain a
creamy espresso co ee that will release
all the aromas, regardless of the type of
co ee used.
• The optimization process is a learning
process that requires the brewing of a
certain number of co ees to allow the
machine to adjust the compactness of
the ground co ee.
• Attention should be given to special blends, which require grinder
adjustments in order to optimize the
extraction of the co ee (see section
“Co ee Grinder Adjustment”).
Steady on
• 21 •
English
Coff ee Grinder Adjustment
Warning! The grinder
adjustment knob, inside the
co ee bean hopper, must be turned
only when the grinder is working. Do
not pour ground and/or instant co ee
into the co ee bean hopper.
Do not insert any material
other than co ee beans into
the hopper. The grinder contains
moving parts that may be dangerous.
Therefore, do not insert ngers and/or
other objects. Only adjust the grinder
using the grinder adjustment key.
Turn o the machine by pressing the
ON/OFF button and remove the plug
from the socket before carrying out
any type of operation inside the co ee
bean hopper. Do not pour co ee beans
when the co ee grinder is working.
The machine lets you make slight
adjustments to the co ee grinder to adapt
it to the kind of co ee used.
This adjustment should be carried out by
adjusting the pin on the inside of the co ee
bean hopper; this pin must be pressed and
turned only with the grinder adjustment
key provided with the co ee machine.
Press and turn the pin one notch at a time.
You must brew 2-3 co ees before you will
taste a di erence.
The reference marks inside the co ee bean
hopper indicate the grind setting. There
are 5 different grind settings to choose
from with the following references:
1 - Coarse Grind
2 - Fine Grind
Adjusting the Brewed Coff ee
The machine allows you to adjust the
amount of brewed coffee according to
your taste and/or the size of your cups.
Each time the “
“ or “ “ buttons
are pressed and released, the machine
brews a pre-set amount of coffee. This
amount may be reprogrammed to your
taste. Each button may be individually
programmed for a speci c brew setting.
As an example, the following procedure
describes the programming of the small
coffee button “
“, which is normally
associated with espresso co ee.
• Place a cup under the dispensing
spout.
• Press and hold down the “
“ button;
the “
“ light blinks during this
phase.
• Release the “
“ button when the
amount of coffee in the cup reaches
the desired level.
At this point the button “
“ is programmed; each time it is pressed and
released, the machine will brew the same
amount of co ee that was just programmed.
Standby
The machine is designed for energy saving.
After 60 minutes of inactivity, the machines turns o automatically.
Note: During the turning o
phase, the machine performs
a rinse cycle, if a co ee product has
been brewed.
To turn the machine on again, simply
press the ON/OFF button; in this case the
machine will go through the rinse cycle
only if the boiler is cold.
1
1
2
2
Blinking

• 22 •
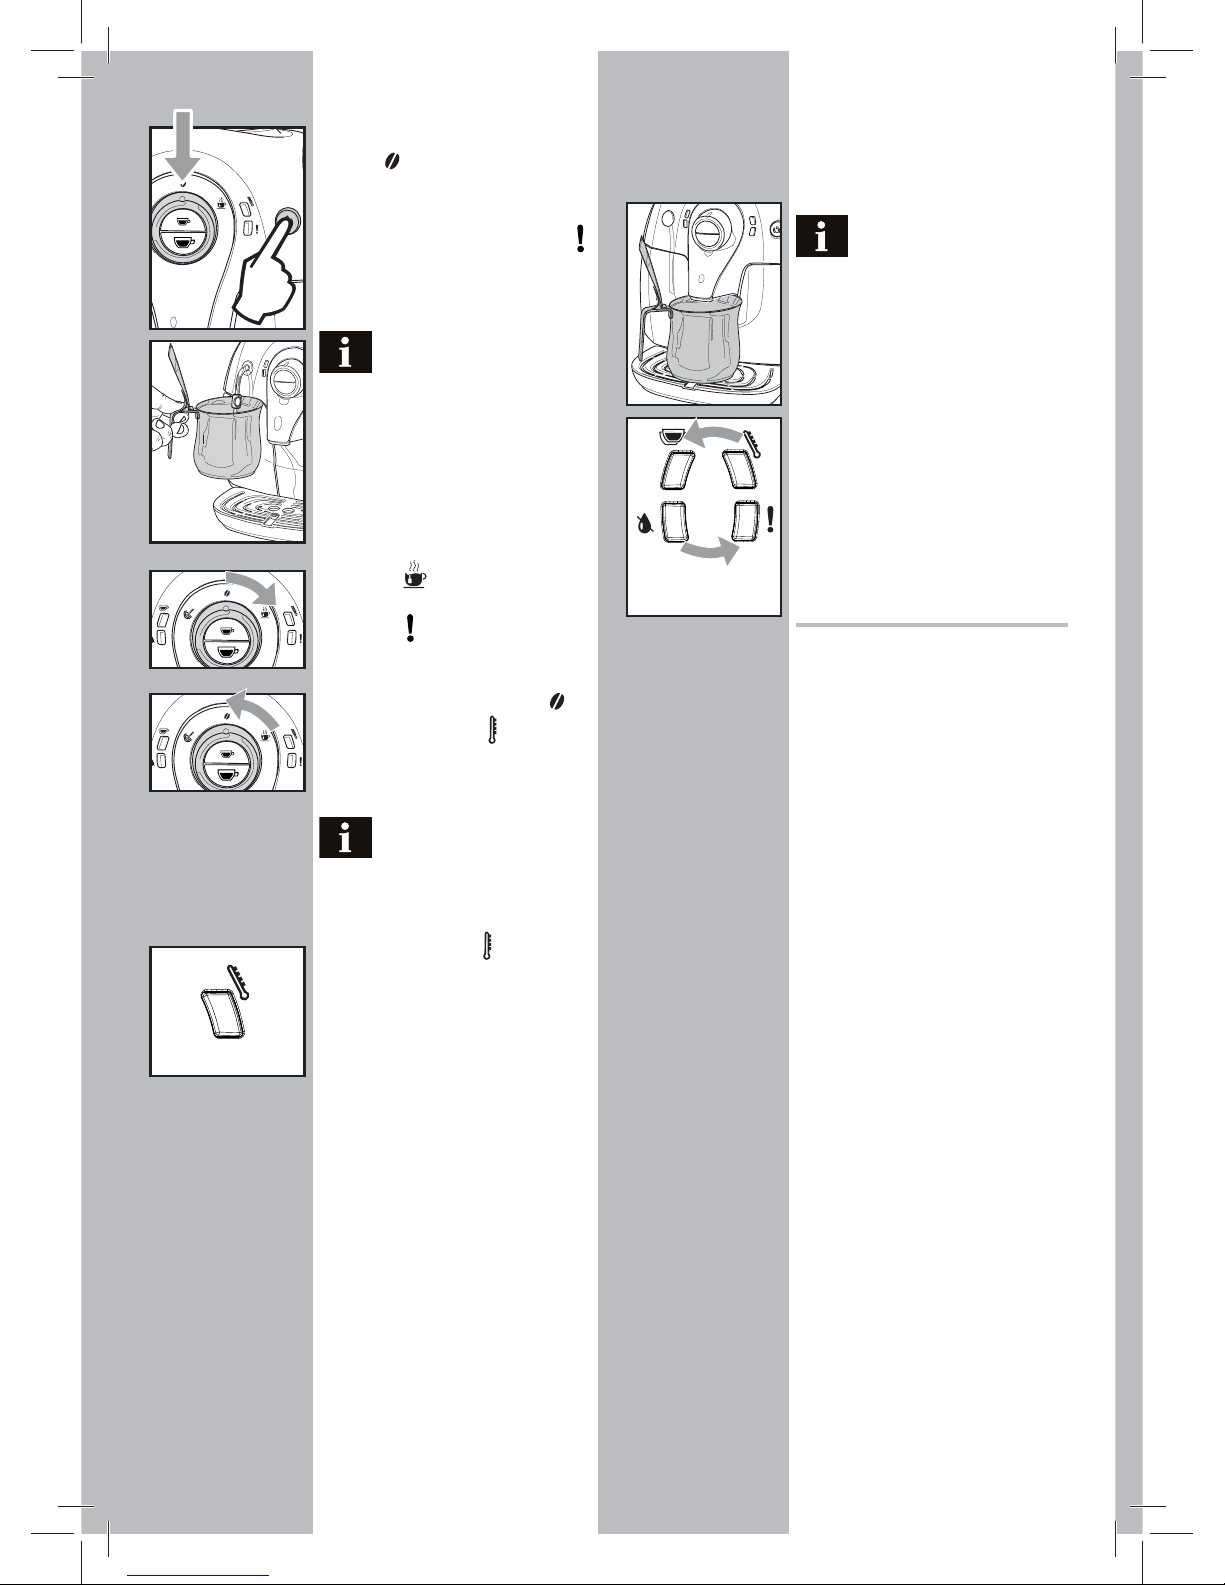
COFFEE BREWING
Before brewing co ee, make
sure that the green tem-
perature light “
“ is steady on and
that the water tank and the co ee
hopper are full.
Leave the control dial on the
coffee position “
” during
the dispensing phase.
• Place 1 or 2 cups under the dispensing
spout.
• To brew co ee, press and release:
the “
“ button for an espresso
co ee;
the “
“ button for a long co ee.
• To dispense 1 cup of co ee, press the
button once. To dispense 2 cups of
co ee, press the button twice.
In this operating mode,
the machine automatically
grinds and doses the correct amount
of coffee. Brewing two coffees requires two grinding cycles and two
brewing cycles, automatically carried
out by the machine; this option is
indicated by the “
“ light being
constantly on.
• After the prebrewing cycle, co ee be-
gins to dispense out of the dispensing
spout.
• Coffee brewing stops automatically
when the pre-programmed level is
reached; however, it is possible to interrupt co ee brewing by pressing the
button initially pressed.
The machine is adjusted to
brew a true Italian espresso
coffee. This feature may slightly
lengthen the brewing time, allowing
the intense flavor of the coffee to
develop fully.
DISPENSING HOT
WATER
Warning: Dispensing may be
preceded by short sprays of
hot water, and scalding is possible.
The hot water/steam wand may reach
high temperatures. Do not touch it
with bare hands; use the appropriate
handle only.
• Before dispensing hot water, check
that the green temperature “
“ light
is steady on.
When the machine is ready, proceed as
follows:
• Place a container under the hot water /
steam wand (Pannarello, if supplied);
• Turn the control dial clockwise to set it
to the “
” position.
• Fill the cup with hot water to the desi-
red level; to stop hot water dispensing,
turn control dial counter-clockwise
back to the “
” position. The machine
returns to the normal operating mode.
Occasionally, after turning
the control dial, hot water
may not be dispensed and the “
“
light may blink slowly. To obtain a
ow of hot water, simply wait until
the “
“ light stops blinking and re-
mains steady.
STEAM DISPENSING /
CAPPUCCINO BREWING
Steam may be used to froth milk for a
cappuccino, as well as to reheat other
beverages.
Warning: Dispensing may be
preceded by short sprays of
hot water, and scalding is possible.
The hot water/steam wand may reach
high temperatures. Do not touch it
with bare hands; use the appropriate
handle only.
Important Note: Immediately
after using the steam to froth
the milk, clean the steam wand (or
Pannarello when provided). When
the machine is ready, brew a small
Steady on
Steady on
Steady on

• 23 •
English
amount of hot water in a glass and
clean the wand (or Pannarello when
provided) externally. In this way, all
parts will be perfectly cleaned and
free of any milk residue.
• Place a container under the hot water /
steam wand (Pannarello, if supplied).
• When the machine is ready to brew
coffee, turn the control dial counterclockwise to set it onto the “
” position. Residual water may come out of
the wand (Pannarello, if supplied).
• The “
“ light blinks during the prehea-
ting time required by the machine.
• Steam dispensing will begin when the
green light “
“ remains steady on; soon
after only steam will begin to come
out.
• Turn the control dial clockwise and
set it back to the “
” position to stop
dispensing steam.
• Fill 1/3 of the container you wish to use
to prepare the cappuccino with cold
milk.
After using steam to prepare
a beverage;
To brew a coffee: Follow the procedu-
re described in section “Steam/Coffee
Switchover” to bring the machine back to
the co ee brewing temperature.
To dispense hot water: Follow the procedure described in section “Dispensing
Hot Water”.
If the control dial is left on the
central position, the machine,
in order to save energy, automatically
reaches the temperature needed to
dispense co ee.
Steam/Coff ee Switchover
• After dispensing steam and pressing
“
“ or “ “ co ee button, the
“
“ light blinks quickly to show that
the machine is overheated and cannot
brew co ee.
• To brew coffee, first drain a small
amount of water.
Place a container under the steam wand
(Pannarello, if supplied) and turn the
control dial clockwise to set it to the “
” position.
Wait for the temperature “ “ light to be
steady.
Then turn the control dial counter-
clockwise and set it back to the “
”
position to stop dispensing.
• Now follow the procedure described in
the “Coffee Brewing” section to brew
co ee.
CLEANING AND
MAINTENANCE
General Cleaning
• Empty and clean the dregdrawer daily,
with the machine turned on.
• Maintenance and cleaning operations
can only be carried out when the
machine is turned o and unplugged.
• Do not immerse the machine in water.
Steady on
Blinking
Blinking fast
Use cold milk for better results
when preparing a cappuc-
cino.
• Immerse the steam wand (Pannarello, if
supplied) in the milk to be heated and
turn the control dial counter-clockwise
to set it to the “
” position. Froth the
milk by gently swirling the cup and
moving it up and down.
• After dispensing steam for the desired
time, turn the control dial clockwise
and set it back to the “
” position to
stop dispensing steam.
• The same procedure can be used to heat
other beverages.
After using the steam wand (Pannarello, if
supplied), wash it as described in the “Cleaning and Maintenance” section.
• 24 •
• Do not wash any of its parts in the
dishwasher.
• Do not use alcohol, solvents, and/or
abrasive objects to clean the machine.
• Use a soft, dampened cloth to clean the
machine.
• Do not dry the machine and/or its
components using a microwave and/
or standard oven.
After brewing milk beve-
rages, dispense hot water
from the hot water / steam wand
(Pannarello, if supplied) to obtain a
thorough cleaning.
• Every day, after heating the milk, remo-
ve the external part of the Pannarello
(if supplied) and wash it with fresh
drinking water.
• Clean the hot water / steam wand we-
ekly. In order to do this, perform the
following operations:
- Remove the external part of the
Pannarello (for standard cleaning);
- Remove the upper part of the Pannarello from the wand;
- Wash the upper part of the Pannarello with fresh drinking water;
- Wash the wand with a wet cloth and
remove any milk residue;
- Replace the upper part in the wand
(make sure it is completely inserted).
Reassemble the external part of the
Pannarello.
• It is recommended to clean the water
tank daily:
- Remove the small white lter from
the water tank and wash it under
running drinking water.
- Reposition the small white lter in
its housing by gently pressing and
turning it at the same time.
- Fill the water tank with fresh drinking
water.
• Empty and clean the drip tray daily.
Perform this operation also when the
oat is raised.
Brew Group
• The brew group should be cleaned
every time the co ee bean hopper is
lled or at least once a week.
• Turn o the machine by pressing the
ON/OFF button and remove the plug
from the socket.
• Remove the dregdrawer. Open the
service door.
• To remove the brew group, pull it by the
handle and press the «PUSH» button.
The brew group must be washed only
with lukewarm water with no detergent/soap.
• Wash the brew group with lukewarm
water, carefully clean the upper lter
and dry.
• Thoroughly wash and dry all the parts
of the brew group.
• Thoroughly clean the inside of the
machine.
• Make sure that the two reference marks
match up.
• Make sure that the lever is in contact
with the brew group. Press the “PUSH”
button to make sure that the brew
group is in the correct position.
Lubricate the brew group
after approximately 500
brewing cycles. The brew group
lubricant may be purchased through
Saeco or authorized service centers.
• Lubricate the brew group guides using
the supplied lubricant only.
• Apply the lubricant evenly on both side
guides.
• Inser t the brew group in its seat until it
locks into place WITHOUT pressing the
“PUSH” button.
• Insert the dregdrawer. Close the service
door.

• 25 •
English
DESCALING
Limescale normally builds up with the
use of the appliance. Descaling should be
performed every 1-2 months, or when indicated by the machine.
Use the Saeco descaling so-
lution. Its formula has been
designed to ensure better machine
performance and operation for its
whole operating life. If correctly used,
it also avoids alterations in the brewed
product.
Warning! Never use vinegar as
a descaling solution.
Before descaling, remove the Pannarello (if
supplied) from the hot water / steam wand
as described in the “Cleaning and Maintenance” section.
• Turn the machine on by pressing the ON/
OFF button. Wait for the machine to
nish its rinse cycle and warm up.
• Mix the descaling solution with water as
speci ed on the package of the descaling
product and ll the water tank.
• Replace water tank back on machine.
• Place a container below the steam
wand.
• Dispense one cup of water at a time to
completely empty the water tank by
turning the control dial clockwise to the
“
” position. To stop dispensing, turn
the control dial counter-clockwise to set
it back to the “
” position.
• Between each interval, allow the
descaling solution to work for about
10-15 minutes and press the ON/OFF
button to turn the machine o . Empty
the container.
• Repeat this operation until the descaling
solution is nished and the water tank is
empty.
• When the descaling solution is nished,
rinse the water tank and ll it with fresh
water.
• Turn the machine on by pressing the ON/
OFF button.
• Empty the water tank by turning the
control dial clockwise to the “
” po-
sition. When the water tank is empty,
turn the control dial counter-clockwise
to set it to the “
” position.
When descaling is complete, insert the
Pannarello (if supplied) onto the hot
water / steam wand as described in the
“Cleaning and Maintenance” section.
The descaling solution is to
be disposed of according
to the manufacturer’s instructions
and/or regulations in force in the
country of use.
MACHINE DISPOSAL
- The packing materials can be re-
cycled.
- Appliance: unplug the appliance and
cut the power cord.
- D eliver the appliance and power cord to
a service center or public waste disposal
facility.
This product complies with eu directive
2002/96/ec.
The symbol
on the product or on
its packaging indicates that this product
may not be treated as household waste.
Instead it shall be handed over to the applicable collection point for the recycling
of electrical and electronic equipment.
By ensuring this product is disposed of
correctly, you will help prevent potential
negative consequences for the environment and human health, which could
otherwise be caused by inappropriate
waste handling of this product. For more
detailed information about recycling of
this product, please contact your local
city o ce, your household waste disposal
service or the shop where you purchased
the product.
MAX
MIN
• 26 •
Light Signals Causes Solutions
Steady on
The machine has reached the right temperature and
is now ready:
- For co ee brewing;
- For hot water dispensing;
- For steam dispensing
Slowly ashing
The machine is warming up to brew coffee and
dispense hot water or steam.
Quickly ashing
Machine is overheating. Co ee may not be brewed. T he wate r must be drained into a container by turning the
selector switch clockwise to the
“ ” position until the green
ready temperature light “ “ stays constantly on. After that, stop
dispensing water.
Slowly ashing
Indicates that the machine is programming the
amount of co ee to brew (see section “Adjusting the
Brewed Co ee”).
Steady on
The machine is brewing a double co ee
Steady on
Low water level. Fill the water tank with fresh drinking water. After re lling the water
tank, the indicator light turns o .
Steady on
The co ee bean hopper is empty. Fill the hopper with co ee beans and start the procedure again.
The dregdrawer is full With the machine turned on, empty the dregdrawer. The dregdrawer
must be emptied after every 8 co ee cycles. If the dregdrawer is
emptied with the machine turned o , or when the indicator light
is not illuminated, the count of co ee cycles is not reset. For this
reason, the indicator light to empty the dregdrawer may illuminate
even when it is not full.
Quickly ashing
The water circuit is empty. Fill the tank with fresh drinking water and prime the water circuit as
described in Section “Using the Machine for the First Time”.
Slowly ashing
Brew group not inserted. Dregdrawer not inserted.
Service door open. Control dial is not in correct position.
Make sure that all components have been correctly inserted and
closed. The blinking red light will now turn o .
+
Blinking in counter-
clockwise direction (cyclical)
The machine is performing the rinse/self-cleaning
cycle
The machine ends the cycle automatically.
You can interrupt the cycle by pressing either co ee button.
Flashing
alternately
A fault has occurred in the brew group. Try again to brew another co ee.
+
Flashing
simultaneously
A fault has occurred in the machine and hot water,
steam or co ee cannot be dispensed.
Turn the machine o . After 30-seconds, turn it back on.
Try this 2 or 3 times.
If the machine does NOT start, contact an authorized service center.
CONTROL PANEL LIGHTS
• 27 •
English
Problems Causes Solutions
The machine does not turn on. The machine is not connected to the power source. Connect the machine to the power source.
The co ee is not hot enough. The cups are cold. Preheat the cups with hot water.
Hot water or steam is not dispensed. The hole of the hot water / steam wand is clogged. Clean the hole of the hot water / steam wand using a pin.
Make sure that the machine is turned o and has cooled
before performing this operation.
Pannarello is dirty (if supplied). Clean the Pannarello.
The co ee is not creamy enough.
(See note)
The co ee blend is unsuitable, the co ee is not freshly
roasted or the grind is too coarse.
Change co ee blend or adjust the grinder as explained in section
“Co ee Grinder Adjustment”.
The machine takes a long time to warm up or
the amount of water dispensed from the wand
is too little.
The machine’s water circuit is obstructed by limescale
build-up
Descale the machine.
The brew group cannot be removed. The brew group is out of place. Turn the machine on. Close the service door. The brew group au-
tomatically returns to the correct position.
The dregdrawer is inserted. Remove the dregdrawer rst, then the brew group.
The machine grinds the co ee beans but no coffee comes out.
(See note)
The brew group is dirty. Clean the brew group (section “Brew Group”).
The circuit is not primed. Prime the circuit (section “Using the Machine for the First Time”).
Rare event that occurs when the machine is automati-
cally adjusting the dose.
Brew a few co ees as described in section “Saeco Adapting System”.
The dispensing spout is dirty. Clean the dispensing spout.
The co ee is too weak.
(See note)
Rare event that occurs when the machine is automatically adjusting the dose.
Brew a few co ees as described in section “Saeco Adapting System”.
Co ee is brewed slowly.
(See note)
The co ee grind is too ne. Change co ee blend or adjust the grind as explained in section
“Co ee Grinder Adjustment”.
The water circuit is not primed. Prime the circuit (section “Using the Machine for the First Time”).
The brew group is dirty. Clean the brew group (section “Brew Group”).
Note: These problems can be considered normal if the co ee blend has been changed or if the machine has just been installed. In this case
wait until the machine performs a self-adjusting operation as described in section “Saeco Adapting System”.
Please contact customer service for any problems not covered in the above table or when the suggested solutions do not solve the problem.
TROUBLESHOOTING
TECHNICAL SPECIFICATIONS
The manufacturer reserves the right to make changes to the technical speci cations of the product.
Nominal Voltage - Power Rating - Power Supply . . . . . . . . . . . . . . . . . . . . . . . . . . . . . . . . . . . . . . . . . . . . . . . . . . . . . . . See label on the inside of the service door
Housing material . . . . . . . . . . . . . . . . . . . . . . . . . . . . . . . . . . . . . . . . . . . . . . . . . . . . . . . . . . . . . . . . . . . . . . . . . . . . . . . . . . . . . . . . . . . . . . . . . . . . ABS - Thermoplastic
Size (w x h x d) . . . . . . . . . . . . . . . . . . . . . . . . . . . . . . . . . . . . . . . . . . . . . . . . . . . . . . . . . . . . . . . . . . . . . . . . . . . . . . . . . . . . . .295 x 325 x 420 mm - 11.5” x 13” x 16.5”
Weight . . . . . . . . . . . . . . . . . . . . . . . . . . . . . . . . . . . . . . . . . . . . . . . . . . . . . . . . . . . . . . . . . . . . . . . . . . . . . . . . . . . . . . . . . . . . . . . . . . . . . . . . . . . . . . . . . .6.9 kg - 15 lbs.
Power Cord Length . . . . . . . . . . . . . . . . . . . . . . . . . . . . . . . . . . . . . . . . . . . . . . . . . . . . . . . . . . . . . . . . . . . . . . . . . . . . . . . . . . . . . . . . . . . . . . . . . . . . . . . . . . . 1.2 m - 47”
Control Panel . . . . . . . . . . . . . . . . . . . . . . . . . . . . . . . . . . . . . . . . . . . . . . . . . . . . . . . . . . . . . . . . . . . . . . . . . . . . . . . . . . . . . . . . . . . . . . . . . . . . . . . . . . . . . . . . . . . . . Front
Pannarello (only available for certain models) . . . . . . . . . . . . . . . . . . . . . . . . . . . . . . . . . . . . . . . . . . . . . . . . . . . . . . . . . . . . . . . . . . . . . . . . . Special for cappuccinos
Water Tank . . . . . . . . . . . . . . . . . . . . . . . . . . . . . . . . . . . . . . . . . . . . . . . . . . . . . . . . . . . . . . . . . . . . . . . . . . . . . . . . . . . . . . . . . . . . . . . . 1.0 litres – 33 oz. / Removable
Co ee Bean Hopper Capacity. . . . . . . . . . . . . . . . . . . . . . . . . . . . . . . . . . . . . . . . . . . . . . . . . . . . . . . . . . . . . . . . . . . . . . . . . . . . . . . . . . . . . . . . . . . . . . . . . . 170 - 6.5 oz.
Dregdrawer Drawer Capacity . . . . . . . . . . . . . . . . . . . . . . . . . . . . . . . . . . . . . . . . . . . . . . . . . . . . . . . . . . . . . . . . . . . . . . . . . . . . . . . . . . . . . . . . . . . . . . . . . . . . . . . . . . 8
Pump pressure . . . . . . . . . . . . . . . . . . . . . . . . . . . . . . . . . . . . . . . . . . . . . . . . . . . . . . . . . . . . . . . . . . . . . . . . . . . . . . . . . . . . . . . . . . . . . . . . . . . . . . . . . . . . . . . . . . 15 bar
Boiler . . . . . . . . . . . . . . . . . . . . . . . . . . . . . . . . . . . . . . . . . . . . . . . . . . . . . . . . . . . . . . . . . . . . . . . . . . . . . . . . . . . . . . . . . . . . . . . . . . . . . . . . . . . . . . . . . . . Stainless steel
Safety mechanisms . . . . . . . . . . . . . . . . . . . . . . . . . . . . . . . . . . . . . . . . . . . . . . . . . . . . . . . . . . . . . . . . . . . . . . . . . . . . . . . . . . . . . . . . . . . . . . . . . . . . . . . . Thermal fuse

• 28 •
ALLGEMEINES
Die Ka eemaschine eignet sich für die Zubereitung von Espresso unter Verwendung von Bohnenka ee. Sie ist mit einer Vorrichtung für die Dampf- und die Heißwasserausgabe ausgestattet. Das Gehäuse der Maschine hat ein elegantes Design und ist für den Hausgebrauch konzipiert worden, nicht aber für den Dauergebrauch bei gewerblichen Anwendungen.
Bewahren Sie diese Bedienungsanleitung an einem sicheren Ort auf und legen Sie sie
der Maschine immer bei, wenn diese von anderen Personen benutzt wird.
Für weitere Fragen oder bei Problemen, die nicht oder nur unzureichend in der vorliegenden
Bedienungsanleitung beschrieben sind, wenden Sie sich bitte an die autorisierten Kundendienststellen.
Achtung. In folgenden Fällen wird für eventuelle Schäden keine Haftung
übernommen:
• Falsche und nicht den vorgesehenen Verwendungszwecken entsprechende Verwendung;
• Reparaturen, die nicht in autorisierten Kundendienststellen durchgeführt wurden;
• Veränderungen am Netzkabel;
• Veränderungen an beliebigen Bestandteilen der Maschine;
• Lagerung oder Betrieb der Maschine bei Temperaturen, die von den Betriebsbedingungen abweichen (zwischen 15°C und 45 °C)
• Verwendung von anderen als originalen Ersatz- und Zubehörteilen.
In diesen Fällen erlischt die Garantie.
SICHERHEITSVORSCHRIFTEN
Die unter Strom stehenden Teile dürfen keinesfalls mit Wasser in Berührung
kommen: Kurzschlussgefahr! Der Dampf und das heiße Wasser können
Verbrennungen verursachen! Den Dampf- oder Heißwasserstrahl keinesfalls auf
Körperteile richten. Die Düse für die Dampf-/Heißwasserausgabe vorsichtig und nur
am entsprechenden Gri anfassen: Verbrennungsgefahr!
Sachgemäßer Gebrauch
Die Ka eemaschine ist ausschließlich für den Betrieb in Haushalten vorgesehen. Technische Änderungen und unsachgemäßer Gebrauch sind wegen der damit verbundenen Risiken verboten!
Die Maschine ist nicht dazu bestimmt, von Personen (einschließlich Kindern) mit eingeschränkten körperlichen oder geistigen Fähigkeiten oder einer Beeinträchtigung der Sinnesorgane bzw.
von Personen ohne ausreichende Erfahrung oder Kompetenz verwendet zu werden, es sei denn,
sie werden von einer Person überwacht, die für ihre Sicherheit verantwortlich ist oder sie werden im Gebrauch der Maschine geschult.
Stromversorgung - Netzkabel
Die Ka eemaschine darf nur an eine geeignete Steckdose angeschlossen werden.
Die Spannung muss mit derjenigen übereinstimmen, die auf dem Typenschild des Geräts auf
der Innenseite der Klappe angegeben ist.
Die Ka eemaschine darf keinesfalls mit defektem Netzkabel betrieben werden.
Bei Schäden am Netzkabel muss dieses vom Hersteller oder von dessen Kundendienst ausgetauscht werden. Das Netzkabel darf nicht in Ecken, über scharfe Kanten oder auf sehr heißen
Gegenständen verlegt werden. Es sollte vor Öl geschützt werden. Die Ka eemaschine darf nicht
am Kabel getragen oder gezogen werden.
Der Stecker darf nicht durch Ziehen am Kabel herausgezogen werden. Er sollte nicht mit nassen
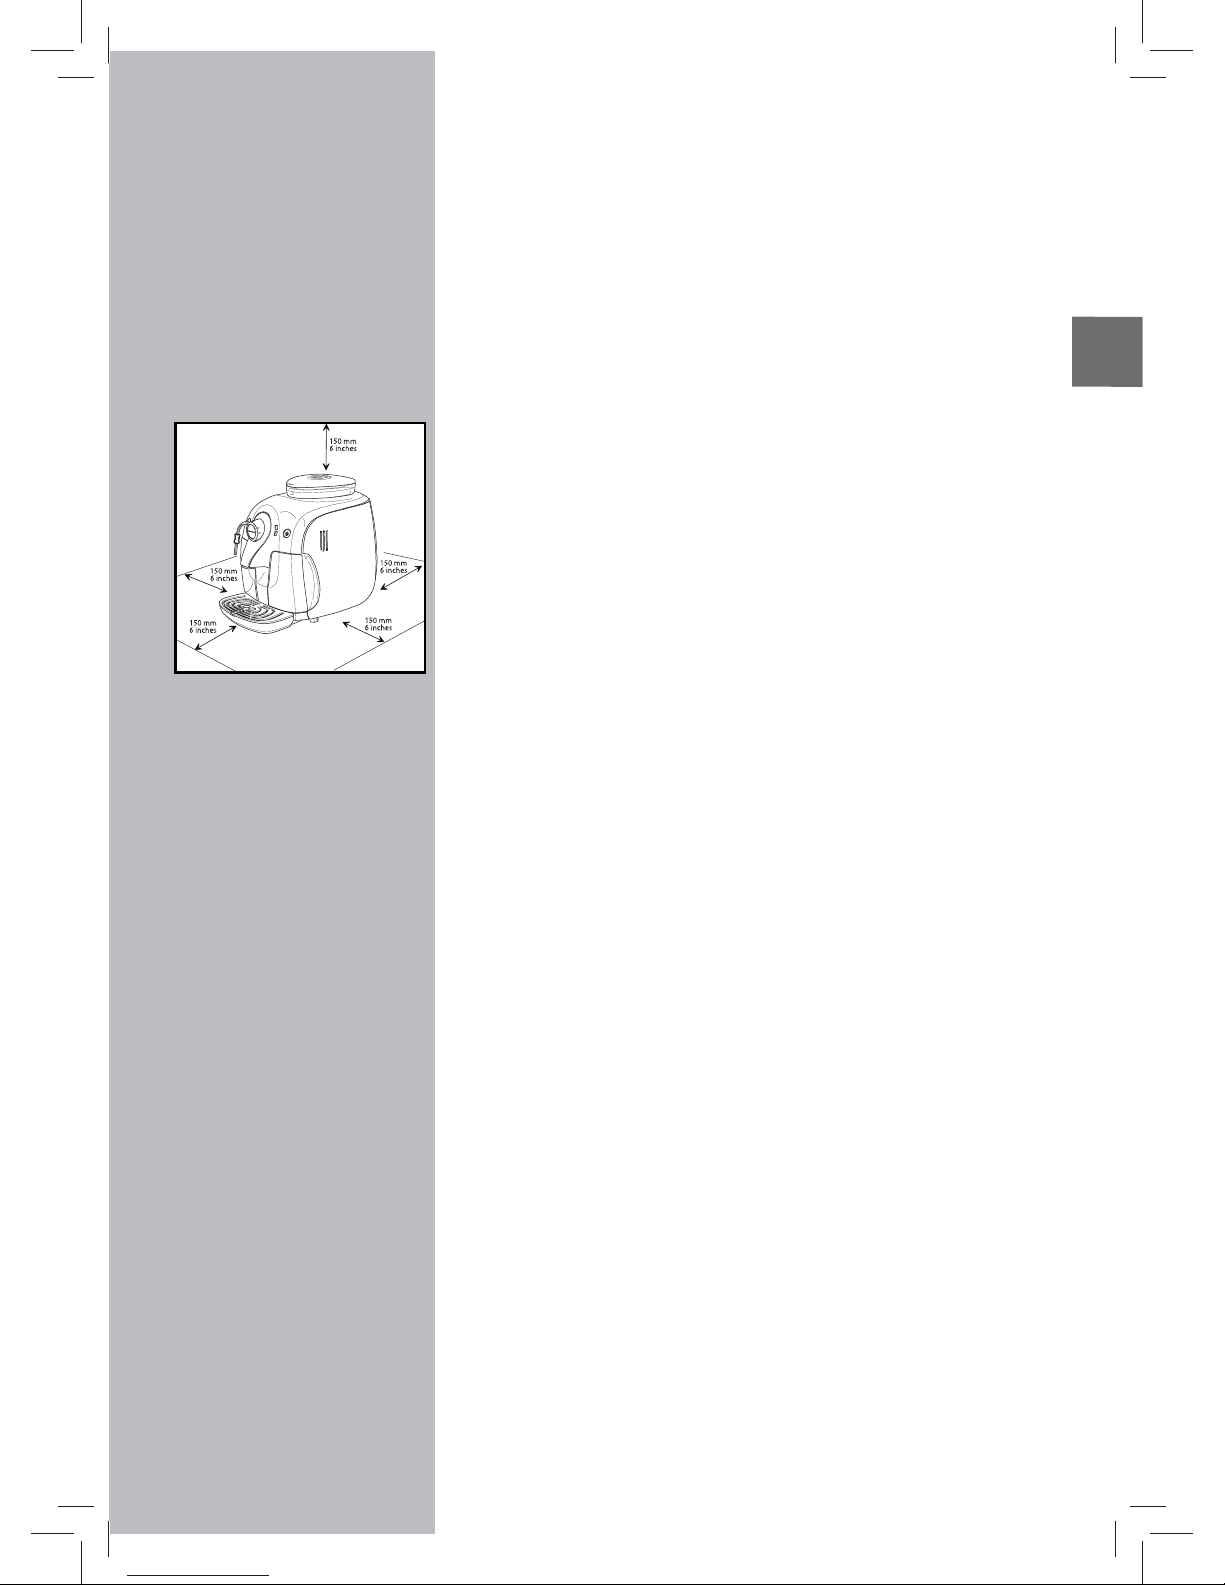
• 29 •
Deutsch
Händen berührt werden. Der freie Fall des Netzkabels von Tischen oder Regalen sollte vermieden werden.
Schutz anderer Personen
Kinder beaufsichtigen, damit sie nicht mit dem Gerät spielen. Kinder können die Gefahrensituationen, die durch Haushaltsgeräte entstehen können, nicht einschätzen. Die für die Verpakkung der Maschine benutzten Materialien sollten nicht in Reichweite von Kindern aufbewahrt
werden.
Verbrennungsgefahr
Den Heißwasser- oder Dampfstrahl keinesfalls auf sich selbst oder auf andere Personen richten:
Verbrennungsgefahr! Stets die entsprechenden Gri e benutzen.
Standort - Raumbedarf für den Betrieb und die Wartung
Für einen korrekten Betrieb wird folgendes empfohlen:
• Einen Standort mit sicherer und ebener Au age äche auswählen, an dem nicht die Gefahr
des Umkippens oder der Verletzung von Personen besteht.
• Der Raum sollte ausreichend beleuchtet und hygienisch unbedenklich sein und die Steckdose
muss leicht zugänglich sein.
• Gemäß den Angaben in der Abbildung einen Mindestabstand von den Maschinenwänden
berücksichtigen.;
• Es wird empfohlen, während der Ein- und Ausschaltphasen der Maschine ein leeres Glas
unter den Ka eeauslauf zu stellen.
Die Maschine keinen Temperaturen unter 0°C aussetzen. Es besteht die Gefahr, dass sie durch
gefrierendes Wasser beschädigt wird. Die Ka eemaschine darf nicht im Freien betrieben werden. Die Maschine nicht auf heißen Flächen oder in der Nähe von o enem Feuer aufstellen, da
das Gehäuse schmelzen oder auf andere Art beschädigt werden könnte.
Aufbewahrung der Maschine - Reinigung
Bevor die Maschine gereinigt wird, muss sie mit der Taste EIN/AUS ausgeschaltet und der Netzstecker gezogen sein.
Darüber hinaus abwarten, bis die Maschine abgekühlt ist.
Die Maschine keinesfalls in Wasser tauchen!
Der Versuch von Eingri en im Inneren der Maschine ist strengstens verboten.
Wasser, das einige Tage lang im Wassertank verblieben ist, darf nicht für Lebensmittelzwecke
genutzt oder getrunken werden. Den Tank reinigen und mit frischem Trinkwasser füllen.
Wird die Maschine für einen längeren Zeitraum nicht benutzt, Wasser aus der Dampfdüse ausgeben und den Pannarello (soweit vorhanden) sorgfältig reinigen. Nachfolgend die Maschine
ausschalten und den Netzstecker ziehen. Die Maschine an einem trockenen und für Kinder unzugänglichen Ort aufbewahren. Vor Staub und Schmutz schützen.
Reparaturen/Wartungsarbeiten
Die Maschine bei Störungen, Defekten oder dem Verdacht auf Defekte nach einem Sturz nicht
verwenden und unverzüglich den Netzstecker ziehen. Eine defekte Maschine keinesfalls in Betrieb setzen.
Eingri e und Reparaturen dürfen ausschließlich von autorisierten Kundendienststellen vorgenommen werden. Im Falle von nicht fachgerecht ausgeführten Eingri en wird jede Haftung für
eventuelle Schäden abgelehnt.
Brandschutz
Im Fall eines Brandes einen Kohlensäurelöscher (CO2) verwenden. Keinesfalls sind Wasser- oder
Pulverlöscher einzusetzen.

• 30 •
Bohnenbehälterdeckel
Schlüssel für Einstellung
Mahlgrad
Netzkabel
Fett für die Brühgruppe
LED Doppelter Ka ee und
Programmierung Ka eemenge in der Tasse
LED Temperatur
LED Füllstand
Wasser im Tank
LED Alarm
Ausgabetaste kleiner Ka ee
Ausgabetaste großer Ka ee
Wahlschalter
Ka ee/Heißwasser/Dampf.
Taste EIN/AUS
Pannarello (optional - nur auf einige
Modellen vorhanden)
Brühgruppe
Ka eesatzbehälter
Servicetür
Ka eebohnenbehälter
Ka eeauslauf
Tassenabstellrost
Anzeige
Abtropfschale voll
Abtropfschale
Wassertank
Heißwasser-/Dampfdüse
Schutz für Ausgabedüse
Bedienfeld
 Loading...