


 Loading...
Operating Instructions
High Definition Video Camera
Model No. HDC-SD900
HDC-SD909
HDC-TM900
HDC-HS900
Before use, please read these instructions completely.
VQT3K98

Information for Your Safety
∫ About the recording format for recording motion pictures
You can select from AVCHD, 1080/50p or iFrame recording formats to record motion pictures using this unit. (l 48, 59)
AVCHD:
You can record high definition quality images with this format. It is suitable for viewing on a large format TV or for saving to disc.
1080/50p:
This is a 1080/50p (1920k1080/50 progressive) recording mode that can record in maximum quality*. The scenes recorded in 1080/50p can be saved or played back by this unit or the HD Writer AE 3.0.
*This means the highest quality for this unit.
iFrame:
This is a recording format suitable for playing back or editing on Mac (iMovie’11). Using iMovie’11, iFrame motion pictures can be imported faster than AVCHD motion pictures. Also, the imported file size of iFrame motion pictures will be smaller than that of AVCHD motion pictures.
≥It is not compatible with motion picture recorded in AVCHD or 1080/50p format.
∫ Indemnity about recorded content
Panasonic does not accept any responsibility for damages directly or indirectly due to any type of problems that result in loss of recording or edited content, and does not guarantee any content if recording or editing does not work properly. Likewise, the above also applies in a case where any type of repair is made to the unit (including any other non-built-in memory/ HDD related component).
∫ Handling of built-in memory
[HDC-TM900]
This unit is equipped with the built-in memory. When using this component, pay attention to the following points.
Back up data periodically.
The built-in memory is temporary storage. In order to avoid erasing data due to static electricity, electromagnetic waves, breakage, and failures, back up the data to a PC or DVD disc. (l 108, 121)
≥Access lamp [ACCESS] (l 6) illuminates while the SD card or built-in memory is being accessed (initialization, recording, playback, deleting etc.). Do not perform the following operations when the lamp illuminates. It may damage the built-in memory or cause a malfunction in the unit. jTurn the unit off (remove the battery)
jInsert and remove the USB cable
jExpose the unit to vibrations or shock
≥About disposing of or giving away this unit. (l 147)
∫ Handling of HDD [HDC-HS900]
This unit is equipped with the built-in HDD. While the HDD is capable of storing a large amount of data, there are a few things to look out for. When using this component, pay attention to the following points.
Do not expose the HDD to vibrations and shocks.
Due to the environment and handling conditions, the HDD may be subject to partial damages or may not be able to read, record, and play back data. Do not expose the unit to vibrations or shock, and do not turn off the unit during recording or playback.
If the unit is used in a place with loud sounds, such as a club or venue, the recording may stop due to sound vibrations. Recording data on an SD card is recommended in these places.
- 2 -

Back up data periodically.
The HDD is temporary storage. In order to avoid erasing data due to static electricity, electromagnetic waves, breakage, and failures, back up the data to a PC or DVD disc. (l 108, 121)
If the HDD experiences any abnormality, back up data immediately.
Failure in the HDD may produce continuous noise or choppy sound during recording or playing back. Continuous use will cause further deterioration, and may eventually disable the HDD. If these phenomena are observed, copy the data on the HDD to a PC, a DVD disc etc. immediately and contact your dealer.
Once the HDD is out of order, data cannot be restored.
Operation may stop in hot or cold environments.
The unit is disabled in order to protect the HDD.
Do not use the unit in low atmospheric pressures.
The HDD may fail if it is used at altitudes of 3000 m or higher above sea level.
Transportation
When the unit is transported, turn off the unit and be careful not to shake, fall, or impact the unit.
Falling detection
[  ] is indicated on the screen when it detects a falling state (a weightless state). If the falling state is detected repeatedly, the unit may stop the recording or playback operation in order to protect the HDD.
≥HDD access lamp [ACCESS HDD] (l 9) illuminates while the HDD is being accessed (initialization, recording, playback, deleting etc.). Do not perform the following operations when the lamp illuminates. It may damage the HDD or cause a malfunction in the unit.
jTurn the unit off (remove the battery) jInsert and remove the USB cable
jExpose the unit to vibrations or shock
≥About disposing of or giving away this unit. (l 147)
∫Cards that you can use with this unit
SD Memory Card, SDHC Memory Card
and SDXC Memory Card
≥4 GB or more Memory Cards that do not have the SDHC logo or 48 GB or more Memory Cards that do not have the SDXC logo are not based on SD Memory Card Specifications.
≥Refer to page 15 for more details on SD cards.
∫ For the purposes of these operating instructions
≥SD Memory Card, SDHC Memory Card and SDXC Memory Card are referred to as the “SD card”.
≥Functions that can be used for motion
picture recording mode: 
Functions that can be used for still picture recording mode: 
≥Functions that can be used for motion
picture playback mode: 


 Functions that can be used for still picture playback mode:


≥Pages for reference are indicated by an arrow, for example: l 00
These operating instructions are designed for use with models HDC-SD900 ,
HDC-SD909 , HDC-TM900 and
HDC-HS900 . Pictures may be slightly different from the original.
≥The illustrations used in these operating instructions show model HDC-SD900 , however, parts of the explanation refer to different models.
≥Depending on the model, some functions are not available.
≥Features may vary, so please read carefully.
≥Not all models may be available depending on the region of purchase.
- 3 -

Contents |
|
Information for Your Safety...................... |
2 |
Preparation |
|
Parts identification and handling ............ |
6 |
Power supply........................................... |
10 |
Inserting/removing the battery........... |
10 |
Charging the battery ......................... |
11 |
Charging and recording time............. |
12 |
Recording to a card ................................ |
15 |
Cards that you can use |
|
with this unit ...................................... |
15 |
Inserting/removing an SD card.......... |
16 |
Turning the unit on/off............................ |
17 |
Turning the unit on and off |
|
with the power button........................ |
17 |
Turning the unit on and off |
|
with the LCD monitor/viewfinder ....... |
17 |
Selecting a mode .................................... |
18 |
How to use the touch screen ................. |
19 |
About the touch menu....................... |
20 |
Setting date and time.............................. |
21 |
Basic |
|
Before recording..................................... |
22 |
Selecting a media to record |
|
[HDC-TM900/HDC-HS900] ...................... |
24 |
Recording motion pictures .................... |
25 |
Recording still pictures.......................... |
27 |
Recording still pictures in |
|
motion picture recording mode.......... |
28 |
Intelligent auto mode.............................. |
29 |
Motion picture/Still picture playback .... |
31 |
Using the menu screen .......................... |
34 |
Using the quick menu ....................... |
35 |
Using the Setup Menu ............................ |
36 |
Using with the remote control ............... |
44 |
Operation of direction buttons/ |
|
OK button.......................................... |
45 |
Advanced (Recording) |
|
Zoom in/out function.............................. |
46 |
About the zoom speed...................... |
46 |
Ring zoom......................................... |
46 |
Extra optical zoom ............................ |
46 |
Image stabilizer function........................ |
47 |
1080/50p recording................................. |
48 |
Recording with the Touch function....... |
49 |
Touch function icons ......................... |
49 |
Recording functions of |
|
operation icons....................................... |
52 |
Operation icons................................. |
52 |
Recording functions of menus.............. |
58 |
Manual recording.................................... |
75 |
White balance ................................... |
76 |
Manual shutter speed/ |
|
iris adjustment................................... |
77 |
Recording with manual focus............ |
78 |
Recording 3D video................................ |
79 |
Functions not available during |
|
3D recording ..................................... |
81 |
Advanced (Playback) |
|
Playback operations............................... |
82 |
Motion picture playback using |
|
operation icon ................................... |
82 |
Creating still picture from |
|
motion picture ................................... |
83 |
Highlight&Time frame index.............. |
83 |
Repeat playback ............................... |
84 |
Resuming the previous playback...... |
84 |
Zooming in on a still picture |
|
during playback (Playback zoom)..... |
85 |
Various playback functions ................... |
86 |
Playing back motion pictures/ |
|
still pictures by date .......................... |
86 |
Highlight playback............................. |
87 |
Changing the playback settings and |
|
playing back the slide show .............. |
89 |
- 4 -

Deleting scenes/still pictures ................ |
91 |
Dividing a scene |
|
(AVCHD, 1080/50p) .......................... |
92 |
Dividing a scene to partially delete |
|
(iFrame) ............................................ |
93 |
Deleting personal information ........... |
94 |
Protecting scenes/still pictures.......... |
94 |
DPOF setting ........................................... |
95 |
Relay scene combining |
|
[HDC-TM900] ........................................... |
96 |
Watching Video/Pictures on your TV .... |
98 |
Connecting with |
|
a HDMI mini cable........................... |
101 |
Listening in 5.1 channel sound |
|
(AVCHD, 1080/50p) ........................ |
101 |
Connecting with |
|
the AV multi cable ........................... |
101 |
Playback using VIERA Link ................. |
102 |
3D video playback................................. |
104 |
Functions not available during |
|
3D playback .................................... |
105 |
Copy/Dubbing |
|
Copying between SD card and |
|
Built-in Memory/HDD |
|
[HDC-TM900/HDC-HS900] .................... |
106 |
Connecting a DVD burner to copy to/ |
|
play back a disc .................................... |
108 |
Preparing for copying/ |
|
playing back .................................... |
108 |
Copying to discs.............................. |
110 |
Playing back the copied disc........... |
112 |
Managing the copied disc ............... |
113 |
Dubbing with a Blu-ray disc recorder, |
|
video devices, etc. ................................ |
114 |
3D video storage................................... |
118 |
With a PC |
|
What you can do with a PC.................. |
121 |
End User License Agreement ......... |
123 |
Operating environment ........................ |
124 |
Installation............................................. |
127 |
Connecting to a PC .............................. |
129 |
About the PC display ...................... |
131 |
Starting HD Writer AE 3.0..................... |
132 |
Reading the operating instructions |
|
of the software applications ............ |
132 |
If using Mac........................................... |
133 |
Others |
|
Indications............................................. |
135 |
Messages .............................................. |
138 |
About recovery................................ |
139 |
Troubleshooting ................................... |
140 |
Cautions for use ................................... |
146 |
About copyright.................................... |
153 |
Recording modes/approximate |
|
recordable time..................................... |
154 |
Approximate number of recordable |
|
pictures.................................................. |
156 |
Optional accessories ........................... |
158 |
- 5 -
Preparation
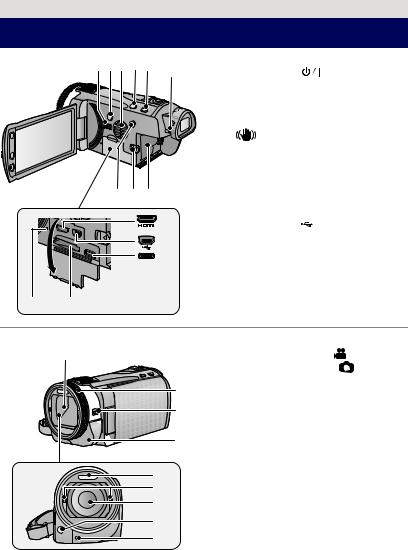
Parts identification and handling
1 2 3 4 5 |
6 |
1 |
Speaker |
|
||
2 |
Power button [ |
] (l 17) |
||||
|
|
|||||
|
|
3 |
Inlet (cooling fan) (l 22) |
|||
|
|
4 |
Intelligent auto/Manual button |
|||
|
|
|
[iA/MANUAL] (l 29, 75) |
|||
|
|
5 |
Optical image stabilizer button |
|||
|
|
|
[ |
O.I.S.] (l 47) |
||
|
|
6 |
Eyepiece corrector dial (l 23) |
|||
|
|
7 |
1080/50p button [1080/50p] (l 48) |
|||
|
|
8 |
Battery release lever [BATT] (l 10) |
|||
7 8 9 |
|
9 |
Battery holder (l 10) |
|||
|
10 |
HDMI mini connector [HDMI] |
||||
|
10 |
|
(l 98, 102) |
|
||
|
11 |
USB terminal [ |
] (l 109, 114, 129) |
|||
|
11 |
12 |
AV multi connector (l 98, 117) |
|||
|
12 |
≥ Use the AV multi cable (only the supplied |
||||
|
cable). |
|
|
|||
|
|
|
|
|||
|
|
13 |
Card slot (l 16) |
|
||
|
|
14 |
Access lamp [ACCESS] (l 16) |
|||
14 13
15 |
15 |
Lens cover |
|
|
≥ The lens cover opens in |
motion |
|||
|
picture recording mode or |
still picture |
||
16 |
recording mode. (l 18) |
|
||
16 |
Multi manual ring (l 75, 78) |
|||
17 |
17 |
Camera function button |
|
|
|
|
[CAMERA FUNCTION] (l 75) |
||
18 |
18 |
Remote control sensor (l 45) |
||
19 |
Built-in flash (l 55) |
|
||
|
20 |
3D Conversion Lens attachment part |
||
19 |
21 |
(concave) (l 79) |
|
|
20 |
Lens (LEICA DICOMAR) |
|
||
≥ Please refer to page 23 for details about |
||||
21 |
||||
attaching the lens hood. |
|
|||
22 |
|
|||
22 |
AF assist lamp (l 74) |
|
||
23 |
23 |
Recording lamp (l 39) |
|
|
- 6 -

24 LCD monitor (Touch screen) (l 19)
24 25
≥ It can open up to 90o.
26 27
≥ It can rotate up to 180o A towards the lens or 90o B towards the viewfinder.
Due to limitations in LCD production technology, there may be some tiny bright or dark spots on the LCD monitor screen. However, this is not a malfunction and does not affect the recorded picture.
25 Viewfinder (l 23)
Due to limitations in LCD production technology, there may be some tiny bright or dark spots on the viewfinder screen. However, this is not a malfunction and does not affect the recorded picture.
26 Zoom buttons (l 46)
27 Sub recording start/stop button (l 22)
≥ This button functions in the same manner as the recording start/stop button.
28 Tripod receptacle
≥ If you attach a tripod which has 5.5 mm screw or larger, it may damage this unit.
28
- 7 -

|
|
|
29 |
Microphone terminal [MIC] |
|
|
|
|
MIC |
≥ A compatible plug-in powered microphone |
|||
|
|
29 |
can be used as an external microphone. |
|||
|
|
30 |
≥ Audio will be stereo (2 ch) with the |
|
||
|
|
external microphone input. |
|
|
||
|
|
|
|
|
||
|
|
|
≥ |
(Microphone input level |
||
|
|
|
meter) is displayed when the external |
|||
313233 34 |
35 |
microphone is connected. (l 68) |
|
|||
≥ When the unit is connected with the AC |
||||||
|
|
|
adaptor, sometimes noise may be heard |
|||
|
|
|
depending on the microphone type. In this |
|||
|
|
|
case, please switch to the battery for the |
|||
|
|
|
power supply and the noise will stop. |
|||
|
|
|
30 |
Headphone terminal [ |
] (l 57) |
|
|
|
|
≥ Excessive sound pressure from |
|
||
|
|
|
earphones and headphones can cause |
|||
|
|
|
hearing loss. |
|
|
|
|
|
|
≥ Listening at full volume for long periods |
|||
|
|
|
may damage the user’s ears. |
|
||
|
|
|
31 |
Photoshot button [ |
] (l 27) |
|
|
|
|
32 |
Zoom lever [W/T] (In motion picture |
||
36 |
37 |
38 |
|
recording mode or still picture |
|
|
|
|
|
|
recording mode) (l 46) |
|
|
|
|
|
|
Thumbnail display switch [ |
/ ]/ |
|
|
|
|
|
Volume lever [sVOLr] (In playback |
||
|
|
|
|
mode) (l 32) |
|
|
|
|
|
33 |
Mode switch (l 18) |
|
|
|
|
|
34 |
Status indicator (l 17) |
|
|
|
|
|
35 |
Internal microphones |
|
|
|
|
|
36 |
Recording start/stop button (l 25) |
||
|
|
|
37 |
Shoulder strap fixture |
|
|
|
|
|
38 |
Grip belt |
|
|
|
|
|
Adjust the length of the grip belt so that it fits |
|||
|
|
|
your hand. |
|
|
|
1 Flip the belt.
2 Adjust the length.
3 Replace the belt.
- 8 -

HDC-SD900 / HDC-SD909 / HDC-TM900
39


 40
40  41
41
42
39Shoe adaptor mounting part (l 158)
40Shoe adaptor cover (l 158)
41Shoe adaptor release lever
[SHOE ADAPTOR RELEASE] (l 158)
42DC input terminal [DC IN] (l 11)
≥Do not use any other AC adaptors except the supplied one.
HDC-HS900
43 44
45
43HDD access lamp [ACCESS HDD]
44Accessory shoe (l 158)
45DC input terminal [DC IN] (l 11)
≥Do not use any other AC adaptors except the supplied one.
- 9 -
Preparation
Power supply
∫ About batteries that you can use with this unit
The battery that can be used with this unit is VW-VBN130/VW-VBN260.
≥The unit has a function for distinguishing batteries which can be used safely. The dedicated battery (VW-VBN130/VW-VBN260) supports this function. The only batteries suitable for use with this unit are genuine Panasonic products and batteries manufactured by other companies and certified by Panasonic. (Batteries which do not support this function cannot be used). Panasonic cannot in any way guarantee the quality, performance or safety of batteries which have been manufactured by other companies and are not genuine Panasonic products.
It has been found that counterfeit battery packs which look very similar to the genuine product are made available to purchase in some markets. Some of these battery packs are not adequately protected with internal protection to meet the requirements of appropriate safety standards. There is a possibility that these battery packs may lead to fire or explosion. Please be advised that we are not liable for any accident or failure occurring as a result of use of a counterfeit battery pack. To ensure that safe products are used we would recommend that a genuine Panasonic battery pack is used.
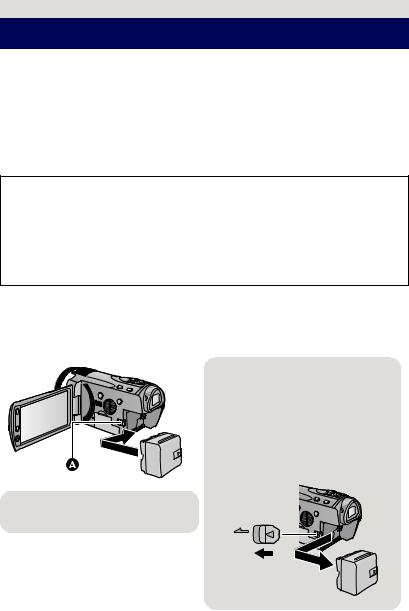
Inserting/removing the battery
≥ Press the power button to turn off the unit. (l 17)
Install the battery by inserting it in the direction shown in the figure.
Removing the battery
Be sure to hold down the power button until the status indicator goes off. Then remove the battery while supporting the unit to prevent it dropping.
Move the battery release lever in the direction indicated by the arrow and remove the battery when unlocked.
A Insert the battery until it clicks and locks.
BATT
- 10 -
Charging the battery
When this unit is purchased, the battery is not charged. Charge the battery fully before using this unit.
The unit is in the standby condition when the AC adaptor is connected. The primary circuit is always “live” as long as the AC adaptor is connected to an electrical outlet.
Important:
≥Use the supplied AC adaptor. Do not use the AC adaptor of another device.
≥Do not use the AC cable with any other equipment as it is designed only for this unit. Also, do not use the AC cable from other equipment with this unit.
≥The battery will not be charged if the unit is turned on.
≥It is recommended to charge the battery in a temperature between 10 °C to 30 °C. (The battery temperature should also be the same.)
A DC input terminal
≥ Insert the plugs as far as they will go.
1 Connect the AC adaptor to the DC input terminal.
2
≥The status indicator will flash red at an interval of 2 seconds, indicating that charging has begun.
It will turn off when the charging is completed.
∫ Connecting to the AC outlet
If you turn on the unit while connecting with the AC adaptor, you can use the unit with power supplied from the outlet.
≥If the status indicator flashes at a particularly fast or slow rate, refer to page 149.
≥We recommend using Panasonic batteries (l 12, 13).
≥If you use other batteries, we cannot guarantee the quality of this product.
≥Do not heat or expose to flame.
≥Do not leave the battery(ies) in an automobile exposed to direct sunlight for a long period of time with doors and windows closed.
-11 -

Charging and recording time
∫ Charging/Recording time
≥Temperature: 25 oC/humidity: 60%RH
≥When using the viewfinder (times in parentheses are when using the LCD monitor)
HDC-SD900/HDC-SD909
Battery model number |
Charging |
|
Recording |
Maximum |
Actual |
[Voltage/Capacity |
|
continuously |
recordable |
||
time |
|
mode |
|||
(minimum)] |
|
recordable time |
time |
||
|
|
|
|||
|
|
|
[1080/50p] |
1 h 35 min |
55 min |
|
|
|
(1 h 30 min) |
(55 min) |
|
Supplied battery/ |
|
|
|
||
|
|
[HA], [HG], |
1 h 40 min |
1 h |
|
VW-VBN130 (optional) |
2 h 30 min |
|
|||
|
[HX], [HE] |
(1 h 35 min) |
(1 h) |
||
[7.2 V/1250 mAh] |
|
|
|||
|
|
[iFrame] |
1 h 45 min |
1 h 5 min |
|
|
|
|
|||
|
|
|
(1 h 40 min) |
(1 h) |
|
|
|
|
|
||
|
|
|
[1080/50p] |
3 h 5 min |
1 h 50 min |
|
|
|
(2 h 55 min) |
(1 h 50 min) |
|
|
|
|
|
||
|
|
|
[HA], [HG], |
3 h 15 min |
|
VW-VBN260 (optional) |
4 h 30 min |
|
[HX] |
(3 h 5 min) |
2 h |
[7.2 V/2500 mAh] |
|
[HE] |
3 h 15 min |
(1 h 55 min) |
|
|
|
||||
|
|
|
(3 h 10 min) |
|
|
|
|
|
|
|
|
|
|
|
[iFrame] |
3 h 25 min |
2 h 5 min |
|
|
|
(3 h 15 min) |
(2 h) |
|
|
|
|
|
||
|
|
|
|
|
|
|
|
HDC-TM900 |
|
|
|
Battery model number |
Charging |
|
Recording |
Maximum |
Actual |
[Voltage/Capacity |
|
continuously |
recordable |
||
time |
|
mode |
|||
(minimum)] |
|
recordable time |
time |
||
|
|
|
|||
|
|
|
[1080/50p] |
1 h 35 min |
55 min |
|
|
|
(1 h 30 min) |
(55 min) |
|
Supplied battery/ |
|
|
|
||
|
|
|
|
|
|
|
|
[HA], [HG], |
1 h 40 min |
1 h |
|
VW-VBN130 (optional) |
2 h 30 min |
|
|||
|
[HX], [HE] |
(1 h 35 min) |
(1 h) |
||
[7.2 V/1250 mAh] |
|
|
|||
|
|
|
|
|
|
|
|
|
[iFrame] |
1 h 45 min |
1 h 5 min |
|
|
|
(1 h 40 min) |
(1 h) |
|
|
|
|
|
||
|
|
|
[1080/50p] |
3 h 5 min |
1 h 50 min |
|
|
|
(2 h 55 min) |
(1 h 50 min) |
|
|
|
|
|
||
|
|
|
|
|
|
|
|
|
[HA], [HG], |
3 h 15 min |
|
VW-VBN260 (optional) |
4 h 30 min |
|
[HX] |
(3 h 5 min) |
2 h |
[7.2 V/2500 mAh] |
|
[HE] |
3 h 15 min |
(1 h 55 min) |
|
|
|
||||
|
|
|
(3 h 10 min) |
|
|
|
|
|
|
|
|
|
|
|
|
|
|
|
|
|
[iFrame] |
3 h 25 min |
2 h 5 min |
|
|
|
(3 h 15 min) |
(2 h) |
|
|
|
|
|
||
|
|
|
|
|
|
- 12 -

HDC-HS900
Battery model |
|
|
|
Maximum |
Actual |
|
number |
Charging |
Recording |
Recording |
continuously |
||
recordable |
||||||
[Voltage/Capacity |
time |
destination |
mode |
recordable |
||
time |
||||||
(minimum)] |
|
|
|
time |
||
|
|
|
|
|||
|
|
|
[1080/50p] |
1 h 15 min |
45 min |
|
|
|
|
(1 h 15 min) |
(45 min) |
||
|
|
|
|
|||
|
|
|
|
|
|
|
|
|
|
[HA] |
|
50 min |
|
|
|
|
1 h 20 min |
(45 min) |
||
|
|
HDD |
|
|||
|
|
|
|
|||
|
|
[HG], [HX], |
(1 h 20 min) |
|
||
|
|
|
|
|||
|
|
|
|
|
||
Supplied battery/ |
|
|
[HE] |
|
50 min |
|
|
|
|
|
|||
|
|
|
1 h 25 min |
(50 min) |
||
VW-VBN130 |
2 h 30 min |
|
[iFrame] |
|||
|
|
|||||
(optional) |
|
(1 h 20 min) |
|
|||
|
|
|
|
|||
[7.2 V/1250 mAh] |
|
|
|
|
|
|
|
|
[1080/50p] |
1 h 20 min |
50 min |
||
|
|
|
||||
|
|
|
(1 h 15 min) |
(45 min) |
||
|
|
|
|
|||
|
|
|
|
|
|
|
|
|
SD |
[HA], [HG], |
1 h 25 min |
50 min |
|
|
|
[HX], [HE] |
(1 h 20 min) |
(50 min) |
||
|
|
|
||||
|
|
|
|
|
|
|
|
|
|
[iFrame] |
1 h 25 min |
55 min |
|
|
|
|
(1 h 25 min) |
(50 min) |
||
|
|
|
|
|||
|
|
|
[1080/50p] |
2 h 30 min |
1 h 30 min |
|
|
|
|
(2 h 25 min) |
(1 h 30 min) |
||
|
|
|
|
|||
|
|
|
|
|
|
|
|
|
HDD |
[HA], [HG], |
2 h 40 min |
1 h 40 min |
|
|
|
[HX], [HE] |
(2 h 35 min) |
(1 h 35 min) |
||
|
|
|
||||
|
|
|
|
|
|
|
|
|
|
[iFrame] |
2 h 45 min |
1 h 40 min |
|
|
|
|
(2 h 40 min) |
(1 h 40 min) |
||
|
|
|
|
|||
VW-VBN260 |
|
|
|
|
|
|
|
|
|
2 h 35 min |
1 h 35 min |
||
(optional) |
4 h 30 min |
|
[1080/50p] |
|||
|
(2 h 30 min) |
(1 h 30 min) |
||||
[7.2 V/2500 mAh] |
|
|
|
|||
|
|
|
|
|
||
|
|
|
[HA] |
2 h 45 min |
|
|
|
|
|
(2 h 35 min) |
1 h 40 min |
||
|
|
SD |
|
|||
|
|
|
|
|||
|
|
[HG], [HX], |
2 h 45 min |
(1 h 35 min) |
||
|
|
|
||||
|
|
|
|
|||
|
|
|
[HE] |
(2 h 40 min) |
|
|
|
|
|
|
|
|
|
|
|
|
[iFrame] |
2 h 50 min |
1 h 45 min |
|
|
|
|
(2 h 45 min) |
(1 h 40 min) |
||
|
|
|
|
|||
|
|
|
|
|
|
- 13 -

≥These times are approximations.
≥The indicated charging time is for when the battery has been discharged completely. Charging time and recordable time vary depending on the usage conditions such as high/low temperature.
≥Recordable time of 3D recording mode is the same. (During 3D recording mode, 1080/50p and iFrame recording mode can not be used.)
≥The actual recordable time refers to the recordable time when repeatedly starting/stopping recording, turning the unit on/off, moving the zoom lever etc.
≥The batteries heat up after use or charging. This is not a malfunction.
Battery capacity indication
≥ The display changes as the battery capacity reduces.
 #
# #
# #
# #
#
If there is less than 3 minutes remaining, then  will become red. If the battery discharges, then
  will flash.
≥The remaining battery capacity is displayed when using the Panasonic battery that you can use for this unit. The actual time can vary depending on your actual use.
≥When using the AC adaptor or batteries made by other companies, the remaining battery capacity will not be shown.
- 14 -

Preparation
Recording to a card
The unit can record still pictures or motion pictures to an SD card, built-in memory or HDD. To record to an SD card, read the following.
This unit (an SDXC compatible device) is compatible with SD Memory Cards, SDHC Memory Cards and SDXC Memory Cards. When using an SDHC memory card/SDXC memory card with other equipment, check the equipment is compatible with these memory cards.
Cards that you can use with this unit
Use SD cards conforming to Class 4 or higher of the SD Speed Class Rating* for motion picture recording.
Card type |
Capacity |
Motion picture recording |
Still picture |
|
recording |
||||
|
|
|
||
|
8 MB/16 MB/ |
Cannot be used. |
Cannot be |
|
SD |
32 MB |
|
guaranteed in |
|
64 MB/128 MB/ |
|
|||
Cannot be guaranteed in operation. |
operation. |
|||
Memory |
||||
256 MB |
||||
|
||||
Card |
|
|
|
|
|
512 MB/1 GB/ |
|
|
|
|
2 GB |
|
|
|
SDHC |
4 GB/6 GB/8 GB/ |
|
|
|
Memory |
12 GB/16 GB/ |
Can be used. |
Can be used. |
|
Card |
24 GB/32 GB |
|
|
|
SDXC |
|
|
|
|
Memory |
48 GB/64 GB |
|
|
|
Card |
|
|
|
|
|
|
|
|
* SD Speed Class Rating is the speed |
e.g.: |
|
standard regarding continuous writing. |
||
|
||
Check via the label on the card, etc. |
|
≥Please confirm the latest information about SD Memory Cards/SDHC Memory Cards/SDXC Memory Cards that can be used for motion picture recording on the following website.
http://panasonic.jp/support/global/cs/e_cam
(This website is in English only.)
≥4 GB or more Memory Cards that do not have the SDHC logo or 48 GB or more Memory Cards that do not have the SDXC logo are not based on SD Memory Card Specifications.
≥When the write-protect switch A on SD card is locked, no recording,
deletion or editing will be possible on the card. ≥ Keep the Memory Card out of reach of children to prevent swallowing.
32
- 15 -

Inserting/removing an SD card
When using an SD card not from Panasonic, or one previously used on other equipment, for the first time on this unit, format the SD card. (l 41) When the SD card is formatted, all of the recorded data is deleted. Once the data is deleted, it cannot be restored.
Caution:
Check that the access lamp has gone off.
Access lamp [ACCESS] A
≥ When this unit is accessing the SD card or built-in memory, the access lamp lights up.
1
2


Open the LCD monitor.
Open the SD card/terminal cover and insert (remove) the SD card into (from) the card slot.
≥ Face the label side B in the direction shown in the illustration and press it straight in as far as it will go.
≥ Press the centre of the SD card and then pull it straight out.
|
3 Securely close the SD card/ |
|
|
|
terminal cover. |
|
≥ Securely close it until it clicks. |
≥Do not touch the terminals on the back of the SD card.
≥Do not apply strong shocks, bend, or drop the SD card.
≥Electrical noise, static electricity or the failure of this unit or the SD card may damage or erase the data stored on the SD card.
≥When the card access lamp is lit, do not: jRemove the SD card
jTurn the unit off
jInsert and remove the USB cable
jExpose the unit to vibrations or shock Performing the above while the lamp is on may result in damage to data/SD card or this unit.
≥Do not expose the terminals of the SD card to water, garbage or dust.
≥Do not place SD cards in the following areas:
jIn direct sunlight
jIn very dusty or humid areas jNear a heater
jLocations susceptible to significant difference in temperature (condensation can occur.)
jWhere static electricity or electromagnetic waves occur
≥To protect SD cards, return them to their cases when you are not using them.
≥About disposing of or giving away the SD card. (l 150)
- 16 -

Preparation
Turning the unit on/off
You can turn the unit on and off using the power button, the LCD monitor or the viewfinder.
A clicking sound is heard when the unit is shaken.
≥This is the sound of the lens moving and is not a defect.
This sound will no longer be heard when the unit is turned on and change the mode to
 or
or  .
.
Turning the unit on and off with the power button
Press the power button to turn on the unit.
|
To turn off the unit |
|
|
Hold down the power button |
|
until the status indicator |
||
|
||
|
goes off. |
A The status indicator lights.
Turning the unit on and off with the LCD monitor/ viewfinder
Opening the LCD monitor or extending the viewfinder turns on the unit. Closing the LCD monitor/viewfinder turns off the unit.
During general use, you may find it convenient to turn the unit on/off using the LCD monitor or viewfinder.
∫ To turn on the unit |
∫ To turn off the unit |


A The status indicator lights. |
B The status indicator goes off. |
- 17 -

≥The unit will not turn off unless the LCD monitor is closed and the viewfinder is retracted.
≥The unit will not turn off while recording motion pictures even if the LCD monitor is closed and the viewfinder is retracted.
≥In the following cases, opening the LCD monitor or extending the viewfinder does not turn on the unit. Press the power button to turn on the unit.
jWhen the unit is purchased
jWhen you have turned off the unit using the power button Preparation
Selecting a mode
Change the mode to recording or playback.
Operate the mode switch to change the mode to  ,
,  or
or  .
.
Motion picture recording mode (l 25)
Still picture recording mode (l 27)
Playback mode (l 31, 82)
- 18 -

Preparation
How to use the touch screen
You can operate by directly touching the LCD monitor (touch screen) with your finger.
It is easier to use the stylus pen (supplied) for detailed operation or if it is hard to operate with your fingers.
∫ Touch
Touch and release the touch screen to select icon or picture.
≥ Touch the centre of the icon. ≥ Touching the touch screen will not operate while
you are touching another part of the touch screen.
∫ Slide while touching
Move your finger while pressing on the touch screen.
∫ About the operation icons
 /
/ /
/ /
/ :
:
These icons are used to switch the menu and thumbnail display page, for item selection and setting etc.
 :
:
Touch to return to the previous screen such as when setting menus.
- 19 -

About the touch menu
Touch  (left side)/
  (right side) of


 on the touch menu to switch the operation icons.
Touch  (left side)/
  (right side) of
  on the touch menu.
≥It is also possible to switch the operation icons by sliding the touch menu right or left while touching it.
A Touch menu
Recording mode |
Playback mode |
|
|
MENU |
|
IRIS |
MENU |
|
B Touch these icons to switch pages upward or downward. C Displayed only during the manual mode.
∫ To display the touch menu
The touch menu will disappear when no function is performed for a specific period of time during recording mode. To display it again, touch  .
.
≥Do not touch on the LCD monitor with hard pointed tips, such as ball point pens.
≥Perform the touch screen calibration when the touch is not recognised or wrong location is recognised. (l 43)
-20 -
Preparation
Setting date and time
When the unit is turned on for the first time, a message asking you to set the date and time will appear.
Select [YES] and perform steps 2 to 3 below to set the date and time.
1 Select the menu. (l 34)
MENU : [SETUP] # [CLOCK SET]
2 Touch the date or time to be set, then set the desired value using  /
/
 .
.
ADisplaying the World time setting (l 36):
 [HOME]/
  [DESTINATION]
≥The year can be set between 2000 and 2039.
≥The 24-hour system is used to display the time.
3 Touch [ENTER].
≥A message prompting for world time setting may be
displayed. Perform the world time setting by touching the screen. (l 36)
≥Touch [EXIT] to complete the setting.
≥The date and time function is driven by a built-in lithium battery.
≥When this unit is purchased, the clock is set. If the time display becomes [- -], the built-in lithium battery needs to be charged. To recharge the built-in lithium battery, connect the AC adaptor or attach the battery to this unit. Leave the unit as it is for approx. 24 hours and the battery will maintain the date and time for approx. 6 months. (The battery is still being recharged even if the unit is off.)
- 21 -

Basic
Before recording
∫ Basic camera positioning
1 Hold the unit with both hands.
2 Put your hand through the grip belt.
3It is convenient to use sub recording start/stop button A when holding the unit around your waist.
≥When recording, make sure your footing is stable and there is no danger of colliding with another person or object.
≥When you are outdoors, record pictures with the sunlight behind you. If the subject is backlit, it will become dark in the recording.
≥Keep your arms near your body and separate your legs for better balance.
≥Do not cover the microphones or the cooling fan inlet with your hand etc.
∫ Basic motion picture recording
≥The unit should normally be held steady when recording.
≥If you move the unit when recording, do so slowly, maintaining a constant speed.
≥The zoom operation is useful for recording subjects you cannot get close to, but overuse of zoom in and zoom out can make the resulting motion picture less enjoyable to watch.
- 22 -

∫ To adjust the image in the viewfinder
Adjust to make the image clear by rotating the eyepiece corrector dial.
≥ Extend the viewfinder and close the LCD monitor to turn on the viewfinder.
∫ To record showing the contents to a partner
Extend the viewfinder and rotate the LCD monitor towards the lens side.
≥ LCD monitor and viewfinder are turned on during the face-to- face recording when the viewfinder is extended.
≥ The image is horizontally flipped as if you see a mirror image. (However the image recorded is the same as a normal recording.)
≥Record by viewing the image in the viewfinder during the face-to-face recording.
≥Only some indications will appear on the screen. When 

 appears, return the direction of the LCD monitor to normal position and check the warning/alarm indication. (l 138)
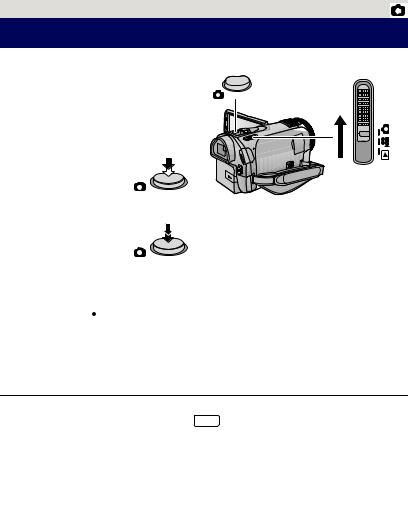
∫ Attaching/Removing the lens hood
This will reduce the extra light entering the lens in bright sunlight or backlight etc., making it possible to take clearer pictures.
|
|
|
|
||
|
|
|
A Attaching the lens hood
B Removing the lens hood
≥If you use the Filter kit (optional), the conversion lens (optional) or the 3D Conversion Lens (optional), remove the lens hood.
- 23 -

Basic
Selecting a media to record [HDC-TM900/
HDC-HS900]
The card, built-in memory, and HDD media can be selected separately to record motion pictures or still pictures.
1 Change the mode to  or
or  .
.
2 Select the menu. (l 34)
MENU : [MEDIA SELECT]
3 Touch the media to record motion pictures or still pictures.
HDC-TM900 |
|
|
|
|||||
|
|
|
|
|
|
|
|
A [VIDEO/SD CARD] |
|
|
|
|
|
|
|
|
|
|
|
|
|
|
|
|
B [VIDEO/Built-inMemory] |
|
|
|
|
|
|
|
|
C [PICTURE/SD CARD] |
|
|
|
|
|
|
|
|
|
D [PICTURE/Built-inMemory] |
|
|
|
|
|
|
|
|
|
HDC-HS900 |
|
|
|
|||||
|
|
|
|
|
|
|
|
E [VIDEO/SD CARD] |
|
|
|
|
|
|
|
|
|
|
|
|
|
|
|
|
F [VIDEO/HDD] |
|
|
|
|
|
|
G [PICTURE/SD CARD] |
|||
|
|
|
|
|
|
|
|
H [PICTURE/HDD] |
|
|
|
|
|
|
|
|
|
≥ The media is selected separately to motion pictures or still pictures is highlighted in yellow.
4 Touch [ENTER].
- 24 -

Basic
Recording motion pictures
1 Change the mode to  .
.
2 Open the LCD monitor or extend the viewfinder.
3 Press the recording start/stop button to start recording.
A When you begin recording, ; changes to ¥.
4 Press the recording start/stop button again to pause recording.
∫ Screen indications in the motion picture recording mode
0h00m00s

 R 1h20m
≥Screen display will disappear when no function is performed for a specific period of time. To display it again, touch the screen. (It will not display when AF/ AE tracking is used.)
A Recording mode
BRecording time elapsed
Each time the unit is put into recording pause, the counter display will be reset to 0h00m00s.
(“h” is an abbreviation for hour, “m” for
minute and “s” for second.)
CApproximate remaining recordable time
(When the remaining time is less than 1 minute, R 0h00m flashes red.)
- 25 -

≥ There are 3 recording formats that can be used with this unit: AVCHD that records high-definition motion pictures, 1080/50p that records motion pictures in maximum quality for this unit and iFrame that records motion pictures suitable for playback and editing on Mac (iMovie’11). To change the recording format, change the recording mode (l 59) or press and hold the 1080/50p button. (l 48)
≥ Still pictures can be recorded while recording the motion picture. (l 28)
≥ The images recorded between pressing the recording start/stop button to start recording and pressing it again to pause recording become one scene.
When you record with the [REC MODE] set to [iFrame], the scenes longer than approximately 20 minutes will be automatically divided. (Recording will continue.)
≥ (Maximum recordable scenes of a single SD card, built-in memory or HDD)
Recording formats |
[HA]/[HG]/[HX]/[HE] |
[1080/50p] |
[iFrame] |
Recordable scenes |
Approx. 3900 |
Approx. 3900 |
Approx. 89100 |
Different dates (l 86) |
Approx. 200 |
Approx. 200 |
Approx. 900 |
|
|
|
|
≥ Maximum number of recordable scenes and maximum number of different dates will be less than above table when there are both AVCHD scenes and 1080/50p scenes recorded on an SD card, built-in memory or HDD.
≥ Maximum number of recordable scenes and maximum number of different dates will be less than above table when there are both iFrame scenes and still pictures recorded on an SD card, built-in memory or HDD.
≥ While recording is in progress, the recording will not stop even if the LCD monitor is closed and the viewfinder is retracted.
≥ Put the unit in pause mode when connecting or disconnecting an external microphone with the MIC terminal.
≥ Please refer to page 154 for detail about the approximate recordable time.
About the compatibility of the recorded |
|
|
|
Please refer to page 48 about |
|
motion pictures |
|
1080/50p |
When motion picture is recorded in AVCHD format |
|
|
≥Only motion pictures recorded with the recording format set to AVCHD are supported by AVCHD compatible equipment. Images cannot be played with equipment that does not support AVCHD (ordinary DVD recorders). Confirm that your equipment supports AVCHD by referring to the operating instructions.
≥It is not always possible to play back motion pictures recorded with the recording format set to AVCHD on AVCHD compatible equipment. In such a case, play back on this unit instead.
When motion picture is recorded in iFrame format
≥You can play back on Mac (iMovie’11).
≥It is not compatible with motion pictures recorded in AVCHD format.
-26 -
Basic
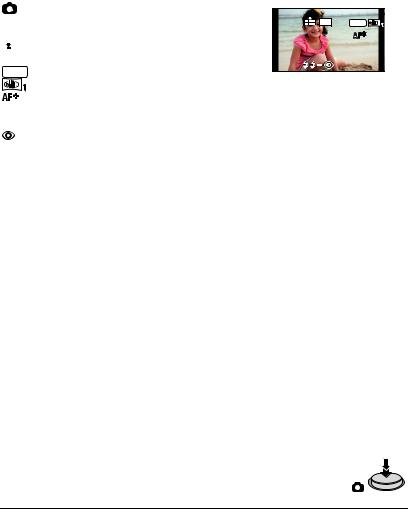
Recording still pictures
1 Change the mode to  .
.
2 Open the LCD monitor or extend the viewfinder.
3 Press the  button halfway. (For auto focus only)
4 Press the  button fully.
Focus indication:
|
|
|
|
|
|
|
|
|
|
|
|
A Focus indication |
|
|
|
|
|
|
|
|
|
|
|
|
± (The white lamp flashes.): |
|
|
|
|
|
|
|
|
|
|
|
Focusing |
|
|
|
|
|
|
|
|
|
|
|
|
||
|
|
|
|
|
|
|
|
|
|
|
¥ (The green lamp lights up.): |
|
|
|
|
|
|
|
|
|
|
|
|||
|
|
|
|
|
|
|
|
|
|
|
|
When in focus |
|
|
|
|
|
|
|
|
|
|
|
|
No mark: |
|
|
|
|
|
|
|
|
|
|
|
|
|
|
|
|
|
|
|
|
|
|
|
|
|
When focusing is unsuccessful. |
BFocus area (area inside brackets)
≥If you set the optical image stabilizer function (l 47) to  ([MODE1]), then the image stabilizer function will be more effective. ( MEGA (MEGA optical image stabilizer) will be displayed when the
  button is pressed halfway.)
≥The AF assist lamp lights in dark places.
≥Focus indication will change to registered focus icon when [FACE RECOG.] is set to [ON]. (l 63)
≥It is recommended using a flash or tripod when recording still pictures in dark places because the shutter speed becomes slow.
≥The screen will become darker when the  button is pressed halfway if the shutter speed is 1/25 or slower.
≥You can also take a picture just by touching the subject to focus. (Touch shutter: l 51)
≥To print a picture, save the picture to the SD card (l 106) and print using a PC or a printer.
-27 -
∫ About the screen indications in still picture recording
: |
Still picture operation indicator (l 135) |
|||||||
R3000: |
Remaining number of still pictures |
|||||||
|
|
|
|
|
|
|
|
(Flashes in red when [0] appears.) |
|
|
|
|
|
|
: |
Quality of still pictures (l 72) |
|
|
|
: |
Size of still pictures (l 71) |
|||||
|
14.2M |
|||||||
|
MEGA : |
MEGA optical image stabilizer (l 27) |
||||||
: |
Optical image stabilizer (l 47) |
|||||||
: |
AF assist lamp (l 74) |
|||||||
ß: |
|
|
|
|
Flash (l 55) |
|||
ßj: |
Flash level (l 55) |
|||||||
: |
Red eye reduction (l 55) |
|||||||
 R3000
R3000
14.2M |
MEGA |
≥Screen display will disappear when no function is performed for a specific period of time. To display it again, touch the screen. (It will not display when AF/AE tracking or touch shutter is used.)
∫ About the focus indication
≥ The focus indication indicates the status of the auto focus. ≥ The focus indication does not appear in manual focus mode.
≥ The focus indication does not appear or has difficulty focusing in the following cases. jWhen close subjects and far subjects are included in the same scene
jWhen the scene is dark
jWhen there is a bright part in the scene
jWhen the scene is filled with only horizontal lines
∫ About the focusing area
When there is a contrasting object ahead or behind the subject in the focus area, the subject may not be focused. If so, move the contrasting object out of the focus area.
≥Focus area is not displayed in the following conditions. jWhen the intelligent auto mode (portrait) is used
jWhen AF/AE tracking is used
jWhen the Extra optical zoom is used
jWhen the unit determines that the AF assist lamp is necessary
Recording still pictures in motion picture recording mode
You can record still pictures even in motion picture recording mode.
¬ Change the mode to  .
.
Press the  button fully (press to the bottom) to take the picture.
≥ It is possible to record still pictures while recording motion pictures.
(Simultaneous recording) ≥ Remaining number of recordable pictures is displayed while still pictures
are being recorded.
≥Built-in flash, Red eye reduction, Self-timer (l 56) do not work.
≥While recording motion pictures or during the PRE-REC operation, image quality is different from ordinary still pictures so that motion picture recording takes preference over still picture recording.
≥If simultaneous recording is used while recording a motion picture, the recordable time remaining will shorten. If the unit is turned off or the mode switch operated, the recordable time remaining may lengthen.
-28 -

Basic
Intelligent auto mode
The following modes appropriate for the condition are set just by pointing the unit to what you want to record.
/MANUAL
|
|
|
Intelligent auto/Manual |
|
|
|
button |
|
|
|
Press this button to switch |
|
|
|
intelligent auto mode/manual |
|
|
|
mode. |
|
|
|
≥ Please refer to page 75 about |
|
|
|
manual mode. |
|
Mode |
Scene |
Effect |
|
Portrait |
When the object is a |
Faces are detected and focused |
|
|
person |
automatically, and the brightness is |
|
|
|
adjusted so it is recorded clearly. |
|
Scenery |
Recording outdoors |
The whole landscape will be recorded |
|
|
|
vividly without whiting out the |
|
|
|
background sky, which may be very |
|
|
|
bright. |
*1 |
Spotlight |
Under a spotlight |
Very bright object is recorded clearly. |
*1 |
Low light |
Dark room or twilight |
It can record very clearly even in a dark |
|
|
|
room or twilight. |
*2 |
Night portrait |
Recording night |
A person and the background are |
|
|
portrait |
recorded with near real-life brightness. |
*2 |
Night scenery |
Recording night |
You can record night scenery vividly by |
|
|
scenery |
slowing the shutter speed. |
*2 |
Macro |
Recording zooming in |
This allows recording while going near to |
|
|
on a flower etc. |
the object of recording. |
*1 |
Normal |
Other situations |
Contrast is adjusted automatically for |
*2 |
|
|
clear image. |
*1 In motion picture recording mode only
*2 In still picture recording mode only
≥Depending on the recording conditions, the unit may not enter the desired mode.
≥In the portrait, spotlight and low light mode, the face will be surrounded by white frame when detected. In the portrait mode, a subject that is bigger and close to centre of the screen will be surrounded by an orange frame. (l 64)
≥It is recommended using a tripod in night portrait and night scenery mode.
-29 -

≥Faces cannot be detected depending on the recording conditions, such as when faces are of certain sizes or at certain tilts or when digital zoom is used.
≥[MIC SETUP] is set to [SURROUND] in the Intelligent Auto Mode. Also, when [REC MODE] is set to [iFrame] in the intelligent auto mode, [MIC SETUP] will be set to [STEREO MIC]. (l 67)
∫ Intelligent auto mode
When switching to intelligent auto mode, the auto white balance and auto focus operate and automatically adjust the colour balance and focusing.
Depending on the brightness of the subject etc., the aperture and shutter speed are automatically adjusted for an optimum brightness.
≥Colour balance and focus may not be adjusted automatically depending on light sources or scenes. If so, manually adjust these settings. (l 76, 78)
Automatic white balance
The illustration shows the range over which automatic white balance functions.
1) |
The effective range of automatic white balance |
10 000K |
2) |
|
|
adjustment on this unit |
9 000K |
|
|
2) |
Blue sky |
8 000K |
3) |
|
7 000K |
||||
3) |
Cloudy sky (rain) |
6 000K |
|
|
4) |
Sunlight |
5 000K |
4) |
|
|
||||
5) |
White fluorescent lamp |
1) |
5) |
|
6) |
Halogen light bulb |
4 000K |
|
|
|
|
|||
7) |
Incandescent light bulb |
3 000K |
6) |
|
8) |
Sunrise or sunset |
|
||
|
|
|||
9) |
Candlelight |
|
7) |
|
If the automatic white balance is not functioning normally, |
2 000K |
8) |
||
adjust the white balance manually. (l 76) |
||||
|
|
|||
Auto focus |
|
9) |
||
1 000K |
|
|||
The unit focuses automatically. |
|
|||
|
|
|||
≥Auto focus does not work correctly in the following situations. Record pictures in the manual focus mode. (l 78)
jRecording distant and close-up objects at the same time jRecording a subject behind dirty or dusty window
jRecording a subject that is surrounded by objects with glossy surfaces or by highly reflective objects
- 30 -
Loading...