


 Loading...
B ENGINE
SECTION LU
ENGINE LUBRICATION SYSTEM
A
LU
C
D
CONTENTS
E
CR |
|
PRECAUTIONS ......................................................... |
3 |
Precautions For Liquid Gasket ................................ |
3 |
REMOVAL OF LIQUID GASKET SEALING ......... |
3 |
LIQUID GASKET APPLICATION PROCEDURE..... |
3 |
PREPARATION .......................................................... |
4 |
Special Service Tools .............................................. |
4 |
Commercial Service Tool ........................................ |
4 |
LUBRICATION SYSTEM ........................................... |
5 |
Lubrication Circuit ................................................... |
5 |
ENGINE OIL .............................................................. |
6 |
Inspection ................................................................ |
6 |
OIL LEVEL AND CONTAMINATION .................... |
6 |
OIL LEAK ............................................................. |
6 |
OIL PRESSURE CHECK ..................................... |
6 |
Changing Engine Oil ............................................... |
7 |
OIL FILTER ................................................................ |
9 |
Removal and Installation ......................................... |
9 |
REMOVAL ............................................................ |
9 |
INSTALLATION .................................................... |
9 |
INSPECTION AFTER INSTALLATION ................ |
9 |
OIL PUMP ................................................................ |
10 |
Removal and Installation ....................................... |
10 |
REMOVAL .......................................................... |
10 |
INSTALLATION .................................................. |
10 |
Disassembly and Assembly .................................. |
10 |
DISASSEMBLY .................................................. |
10 |
INSPECTION AFTER DISASSEMBLY .............. |
10 |
ASSEMBLY ......................................................... |
11 |
SERVICE DATA AND SPECIFICATIONS (SDS) ...... |
12 |
Standard and Limit ................................................ |
12 |
OIL PRESSURE ................................................. |
12 |
OIL PUMP .......................................................... |
12 |
OIL CAPACITY ................................................... |
12 |
TIGHTENING TORQUE ..................................... |
12 |
HR |
|
PRECAUTIONS ....................................................... |
13 |
Precautions for Liquid Gasket ............................... |
13 |
REMOVAL OF LIQUID GASKET SEALING ....... |
13 |
LIQUID GASKET APPLICATION PROCEDURE... |
13 |
PREPARATION ........................................................ |
14 |
Special Service Tools ............................................ |
14 |
Commercial Service Tool ....................................... |
14 |
LUBRICATION SYSTEM ......................................... |
15 |
Lubrication Circuit .................................................. |
15 |
ENGINE OIL ............................................................. |
16 |
Inspection .............................................................. |
16 |
OIL LEVEL AND CONTAMINATION .................. |
16 |
ENGINE OIL LEAKAGE ..................................... |
16 |
OIL PRESSURE CHECK ................................... |
16 |
Changing Engine Oil .............................................. |
17 |
OIL FILTER .............................................................. |
19 |
Removal and Installation ....................................... |
19 |
REMOVAL .......................................................... |
19 |
INSTALLATION .................................................. |
19 |
INSPECTION AFTER INSTALLATION ............... |
19 |
SERVICE DATA AND SPECIFICATIONS (SDS) ..... |
20 |
Standard and Limit ................................................. |
20 |
OIL PRESSURE ................................................. |
20 |
OIL CAPACITY (APPROXIMATE) ...................... |
20 |
TIGHTENING TORQUE ..................................... |
20 |
K9K |
|
APPLICATION NOTICE ........................................... |
21 |
How to Check Vehicle Type ................................... |
21 |
PRECAUTIONS ....................................................... |
22 |
Precautions For Liquid Gasket .............................. |
22 |
REMOVAL OF LIQUID GASKET ........................ |
22 |
LIQUID GASKET APPLICATION PROCEDURE... |
22 |
PREPARATION ........................................................ |
23 |
Special Service Tools ............................................ |
23 |
ENGINE OIL ............................................................. |
24 |
Inspection .............................................................. |
24 |
OIL LEVEL AND MUDDINESS .......................... |
24 |
F
G
H
I
J
K
L
M
LU-1

OIL LEAKAGE .................................................... |
24 |
OIL PRESSURE CHECK ................................... |
24 |
Changing Engine Oil .............................................. |
25 |
OIL FILTER .............................................................. |
26 |
Removal and Installation ....................................... |
26 |
REMOVAL .......................................................... |
26 |
INSTALLATION ................................................... |
26 |
OIL PUMP ................................................................. |
27 |
Removal and Installation ........................................ |
27 |
REMOVAL ........................................................... |
27 |
INSTALLATION ................................................... |
27 |
OIL COOLER ............................................................ |
28 |
Removal and Installation ........................................ |
28 |
REMOVAL ........................................................... |
28 |
INSPECTION ...................................................... |
28 |
INSTALLATION ................................................... |
28 |
LU-2

PRECAUTIONS
PRECAUTIONS
Precautions For Liquid Gasket
REMOVAL OF LIQUID GASKET SEALING
●After removing the mounting bolts and nuts, separate the mating surface using a seal cutter and remove the liquid gasket.
CAUTION:
Be careful not to damage the mating surfaces.
●In areas where the seal cutter is difficult to use, use a plastic hammer to lightly tap the gasket area.
CAUTION:
If for some unavoidable reason a tool such as a flat-bladed screwdriver is used, be careful not to damage the mating surfaces.
LIQUID GASKET APPLICATION PROCEDURE
1.Using a scraper, remove the old liquid gasket adhering to the gasket application surface and the mating surface.
●Remove the liquid gasket completely from the groove of the gasket application surface, mounting bolts and bolt holes.
2.Wipe the gasket application surface and the mating surface with white gasoline (lighting and heating use) to remove adhering moisture, grease and foreign materials.
3.Attach the liquid gasket to the tube presser.
Use Genuine Liquid Gasket or equivalent.
4.Apply the gasket without breaks to the specified location with the specified dimensions.
●If there is a groove for the liquid gasket application, apply the gasket to the groove.
●As for the bolt holes, normally apply the gasket inside the holes. Occasionally, it should be applied outside the holes. Make sure to read the instruction in this manual.
●Within five minutes of gasket application, install the mating component.
●If the liquid gasket protrudes, wipe it off immediately.
●Do not retighten after the installation.
●After 30 minutes or more have passed from the installation, fill the engine oil and coolant.
CAUTION:
If there are additional instructions in this manual, observe them.
[CR]
PFP:00001
A
EBS01JAS
LU
C
D
PBIC0275E E
F
G
H
PBIC0003E
I
J
K
L
EMA0622D
M
SEM164F
LU-3
|
PREPARATION |
|
|
[CR] |
|
|
|
|
PREPARATION |
PFP:00002 |
|
Special Service Tools |
EBS00OIH |
|
|
|
|
Tool number |
Description |
|
Tool name |
||
|
||
|
|
|
ST25051001 |
Measuring oil pressure |
|
Oil pressure gauge |
Maximum measuring range: |
|
|
2,452 kPa (24.5 bar, 25 kg/cm2 , 356 psi) |
|
S-NT050 |
|
|
ST25052000 |
Adapting oil pressure gauge to cylinder block |
Hose |
|
|
S-NT559 |
|
|
KV10115801 |
Removing oil filter |
Oil filter wrench |
|
|
S-NT772 |
|
|
WS39930000 |
Pressing the tube of liquid gasket |
Tube presser |
|
|
S-NT052 |
|
|
Commercial Service Tool |
EBS01JAV |
|
|
Tool name |
Description |
|
|
Deep socket |
Removing and installing oil pressure switch |
|
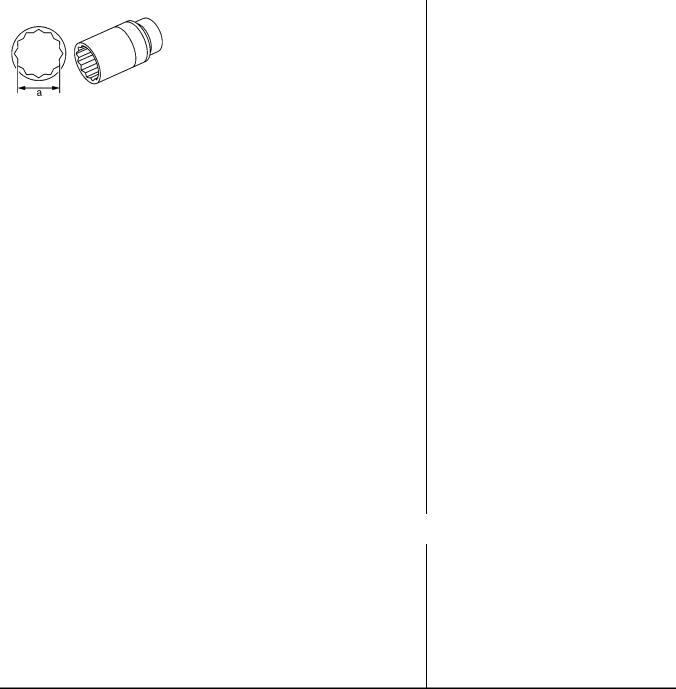
a: 24 mm (0.94 in) |
PBIC2072E
LU-4

|
|
LUBRICATION SYSTEM |
|||
|
|
[CR] |
|||
|
|
|
|
|
|
LUBRICATION SYSTEM |
PFP:15010 |
||||
Lubrication Circuit |
|
|
|
A |
|
EBS00OII |
|||||
|
|
|
|
|
|
|
|
|
|
|
|
|
|
|
|
|
LU |
|
|
|
|
|
|
|
|
|
|
|
C |
|
|
|
|
|
D |
|
|
|
|
|
E |
|
|
|
|
|
F |
|
|
|
|
|
G |
|
|
|
|
|
H |
|
|
|
|
|
I |
|
|
|
|
|
J |
|
|
|
|
|
K |
|
|
|
|
|
L |
|
|
|
|
|
M |
PBIC1465E
LU-5

|
ENGINE OIL |
|
[CR] |
|
|
ENGINE OIL |
PFP:KLA92 |
Inspection |
EBS00OIJ |
OIL LEVEL AND CONTAMINATION |
|
●Before starting the engine, put vehicle horizontally and check the oil level. If the engine is already started, stop it and allow 10 minutes before checking.
●Check that the oil level is within the range shown in the figure.
●If oil level is outside the range, adjust level.
●Check the oil for white turbidity or remarkable contamination.
●If the oil becomes turbid and white, it is highly probable that it is contaminated with coolant. Find the cause and repair.
●When oil level gauge is inserted in guide, apply engine oil to rubber seal of grip.
PBIC1466E
OIL LEAK
Check the following parts for engine oil leaks.
●Oil pan
●Oil pan drain plug
●Oil pressure switch
●Oil filter
●Front cover
●Cylinder head front cover
●Mating surfaces of cylinder block and cylinder head
●Mating surfaces of cylinder head and rocker cover
●Crankshaft oil seals (front and rear)
OIL PRESSURE CHECK
WARNING:
●Be careful not to burn yourself, as the engine oil is hot.
●Oil pressure check should be done in P or N (A/T), Neutral (M/T) position.
1.Check the engine oil level. Refer to LU-6, "OIL LEVEL AND CONTAMINATION"
2.Remove oil filter. Refer to LU-9, "OIL FILTER" .
3.Remove oil pressure switch using a deep socket (commercial service tool).
PBIC1467E
LU-6
ENGINE OIL
[CR]
4.Install oil pressure gauge and hose (SST).
5.Install oil filter. Refer to LU-9, "OIL FILTER" .
6.After warming up the engine, check that oil pressure corresponding to the engine speed is produced.
NOTE:
Low oil temperature creates high pressure.
|
|
|
|
SLC926-A |
|
Engine oil pressure [When oil temperature is 80 °C (176 °F)] |
|
|
|||
|
|
|
|
|
|
Engine speed (rpm) |
Idle speed |
2,000 |
|
6,000 |
|
|
|
|
|
|
|
Engine oil pressure |
Approx. 44.1 (0.441, 0.45, 6.4) or |
Approx. 265 (2.65, 2.7, 38) or |
Approx. 373 (3.73, 3.8, 54) or |
||
kPa (bar, kg/cm2 , psi) |
more |
more |
more |
|
|
If difference is extreme, check oil passage and oil pump for oil leaks.
A
LU
C
D
E
7.After checking the oil pressure, install oil pressure switch as follows:
a.Remove old liquid gasket on the switch and engine.
b.Apply liquid gasket and tighten oil pressure switch to specification.
Use Genuine Liquid Gasket or equivalent.
 : 18.7 - 20.5 N·m (1.9 - 2.0 kg-m, 14 - 15 ft-lb)
CAUTION:
Be careful not to get burned when engine or engine oil is heated.
Changing Engine Oil |
EBS00OIK |
WARNING:
●Be careful not to burn yourself, as the engine oil is hot.
●Prolonged and repeated contact with used engine oil may cause skin cancer: try to avoid direct skin contact with used oil. If skin contact is made, wash thoroughly with soap or hand cleaner as soon as possible.
1.Warm up engine, and check for oil leakage from engine components. Refer to LU-6, "OIL LEAK" .
2.Stop engine and wait for 10 minutes.
3.Remove oil filler cap, and remove drain plug.
4.Drain engine oil.
5.Install drain plug with new washer. Refer to EM-26, "OIL PAN AND OIL STRAINER" .
CAUTION:
● Be sure to clean drain plug and install with new washer.
Oil pan drain plug:
 : 29.4 - 39.2 N·m (3.0 - 3.9 kg-m, 22 - 28 ft-lb)
●Engine oil specification and viscosity:
Refer to MA-35, "RECOMMENDED FLUIDS AND LUBRICANTS".
6.Refill with new engine oil.
F
G
H
I
J
K
L
M
LU-7

ENGINE OIL
[CR]
Oil capacity (Approximate):
|
|
|
Unit: (Imp qt) |
|
|
|
|
|
|
Drain and refill |
With oil filter change |
3.4 |
(3) |
|
|
|
|
||
Without oil filter change |
3.2 |
(2-7/8) |
||
|
||||
|
|
|
|
|
Dry engine (engine overhaul) |
3.9 |
(3-3/8) |
||
|
|
|
|
|
CAUTION:
●The refill capacity depends on the oil temperature and drain time. Use these specifications for reference only.
●Always use oil level gauge to determine the proper amount of oil is in the engine.
7.Warm up engine and check area around drain plug and oil filter for oil leakage.
8.Stop engine and wait for 10 minutes.
9.Check oil level. Refer to LU-6, "OIL LEVEL AND CONTAMINATION" .
LU-8

OIL FILTER |
[CR] |
|
|
|
|
OIL FILTER |
PFP:15208 |
Removal and Installation |
EBS00OIL |
REMOVAL |
|
Using an oil filter wrench (special service tool), remove oil filter. |
|
|
|
CAUTION: |
|
● Oil filter is provided with relief valve. Use genuine NISSAN |
|
oil filter or equivalent. |
|
● Be careful not to get burned when the engine and engine oil |
|
are hot. |
|
● When removing, prepare a shop cloth to absorb any oil |
|
leakage or spillage. |
|
● Do not allow engine oil to adhere to the drive belts. |
|
● Completely wipe off any oil that adheres to the engine and |
PBIC1469E |
vehicle. |
|
|
INSTALLATION
1.Remove foreign materials adhering to the oil filter installation surface.
2.Apply engine oil to the oil seal circumference of the new oil filter.
CAUTION:
● Use genuine NISSAN oil filter or the equivalent.
SMA010
3.Screw the oil filter manually until it touches the installation surface, then tighten it by 2/3 turn.
Oil filter:
 :11 - 14 N·m (1.2 - 1.4 kg-m, 9 - 10 ft-lb)
SMA229B
INSPECTION AFTER INSTALLATION
1.Check the engine oil level. Refer to LU-6, "OIL LEVEL AND CONTAMINATION" .
2.After warming up the engine, check for engine oil leakage.
3.Stop engine and wait for 10 minutes.
4.Check the engine oil level. Refer to LU-6, "OIL LEVEL AND CONTAMINATION"
A
LU
C
D
E
F
G
H
I
J
K
L
M
LU-9
Loading...