


Air Copy
Quickstart Guide
English ( 2 – 7 )
Guía de inicio rápido
Español ( 8 – 12 )
Guide d'utilisation rapide
Français ( 13 – 19 )
Guida rapida
Italiano ( 20 – 25 )
Kurzanleitung
Deutsch ( 26 – 31 )
Snelstartgids
Nederlands ( 32 – 37 )

Quickstart Guide (English)
Box Contents
Check to ensure the following items are included in your packaging:
•Air Copy
•Mini-USB cable
•Protective photo sleeve
•Calibration paper
•Cleaning paper
•Cleaning strip
•Quickstart Guide
•Safety & Warranty Manual
Minimum System Requirements
•An iTunes Store, Google Play Store, or Windows Store account (for Air Copy App download).
•Internet access (for Air Copy App download).
Supported operating systems (at time of writing):
•iOS 5.0 – 6.1.2
•Android OS 2.33 – 4.2.2
•Mac OS X 10.7 – 10.8.2 (64-bit)
•Windows 7, Windows 8, Windows 8 Pro, Windows RT, Windows Phone 8
*For a complete, current list of supported operating systems and devices, visit www.ionaudio.com/aircopy.
Important Note: For iOS 6 users, when saving scans for the first time you will need to give permission for the app to access the camera roll. Press “OK” in order to save the image to your Photos library.
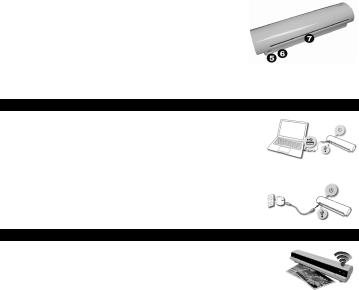
Features
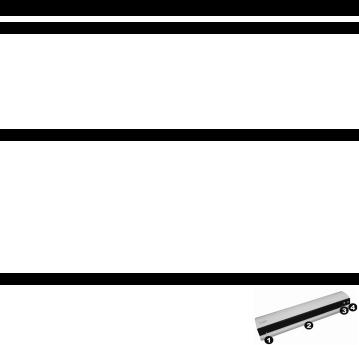
1.PAPER GUIDE – Adjust this piece to help guide the paper into Air Copy.
2.FEED SLOT – Insert your paper or photo into this slot (facing upward, against the right edge of the slot).
3.WIRELESS INDICATOR – Displays the state of the wireless connection. The LED will blink for about 16-20 seconds when powering on Air Copy and will be solidly lit when your device is connected to Air Copy over its wireless network.
4.POWER – Press and hold the POWER button for 2 seconds to turn on Air Copy. To turn off the power, press the POWER button for 4 seconds until the Power LED indicator turns off.
2
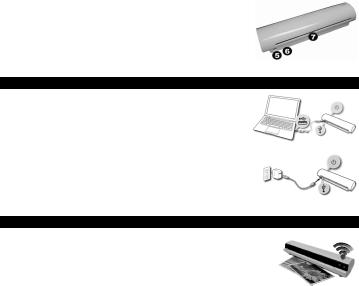
5.MINI-USB PORT – Use the included mini-USB cable to connect this port to a USB power adapter (sold separately, see specifications on last page of manual), or to a computer USB port to charge Air Copy. You can operate Air Copy using either wall power or from the internal battery.
6.RESET – If Air Copy is working abnormally, shutdown the unit by placing a pin into the RESET pin-hole located on the back of Air Copy, and gently push until the unit turns off. Try this only after you have first attempted to reboot Air Copy using the power button.
7.PAPER EXIT SLOT – Outputs the paper or photo after scanning.
Charging the Battery
1.Turn off Air Copy.
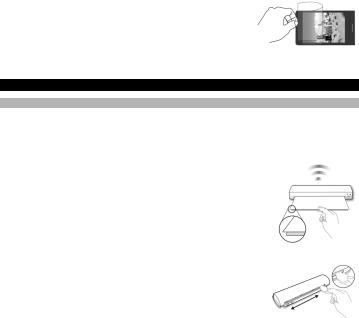
2.Use the USB cable to connect Air Copy to one of the following:
A.the USB port of a computer, which is powered on
B.a USB power adapter (not included) connected to a power source
3.Charge Air Copy for approximately 4 hours or until the red Power LED light turns off.
Notes:
•The Power LED on Air Copy will blink green when the battery needs to be recharged.
•Air Copy will not charge when powered on. Ensure Air Copy is powered off to charge the battery.
Installing the Air Copy App
Note: Ensure that your device has internet access via your service provider or wireless connection.
1.On your device, go to the respective Apple App Store, Google Play Store, or Microsoft Windows Store.
2.Search for the Air Copy app. Follow the on-screen instructions to download and install the app.
3.Once downloaded, the Air Copy app will appear on your device’s home screen.
For Windows 7 users to obtain the Air Copy app, visit ionaudio.com/aircopy. In the Documents and Downloads section, download the Windows 7 software. Open the downloaded .zip folder and run the Setup file. Follow the on-screen instructions to install the software.
3

Connecting to Wi-Fi
1.Turn on Air Copy and wait approximately 16-20 seconds until the wireless indicator blinks.
2.Search for the Direct-xxxxxx-AirCopy network.
Note: “xxxxxx” is a 6-digit random number assigned to the network.
3.Input the 8 digit passcode, “12345678”.
Important Notes:
•The wireless indicator on Air Copy will become a solid blue light when connected to a wireless network.
•Ensure Air Copy is within 60-100 feet of your device.
•Up to 8 people can be connected at once to a device.
•Every time you power on, you will need to direct your device to Air Copy’s Wi-Fi network.
Scanning and Saving Images
•Make sure your document is thin enough to fit in the FEED SLOT or the included photo sleeve. Acceptable scan thickness is 0.08~0.6mm (using the supplied photo sleeve).
•Do not scan more than one page at a time; otherwise the extra pages may not feed properly.
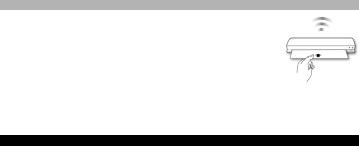
1.Prepare your image or document for scanning:
•Paper/Photo: Place the paper into the FEED SLOT with the surface to be scanned facing up. Adjust the PAPER GUIDE so it rests against the left edge of the paper.
2.Adjust the scan resolution:
•For iPad, iPhone, iPod touch and Mac computers, press the
Settings option in the app to set the scan resolution, Standard (300 dpi) or Fine (600 dpi), then press the SCAN button. The photo or document will be pulled through the scanner. Preview your scan in the app and then press SAVE to save your results to your photo library or press CANCEL to re-scan.
•For Android devices, press either the Settings icon or Menu button to set the Resolution (Standard or Fine), and then set the Save to location (Internal Memory or SD Card).
•For Windows devices, swipe in from the right side or move the cursor to the upper-right or lower-right of your device’s screen to reveal the menu bar, then set the Resolution (Standard or Fine).
•For Mac and Windows, choose the file format (JPEG or PDF) you want to save.
4
Using the Photo Sleeve
Use the photo sleeve if your photo is fragile or small--or to prevent it from getting stuck in the FEED SLOT.
Note: Do not use the photo sleeve with laminated photos.
1.Remove the plastic foil on the photo sleeve, place the photo inside of it, and insert the tab into the slot at the open end.
2.Insert the sealed end of the photo sleeve facing up into the FEED
SLOT; adjust the PAPER GUIDE, then follow the Scanning and Saving Images procedure to start scanning.
Care Instructions
Cleaning
For the best scanning quality, please follow these steps to clean the scanner.
Notes:
•Make sure there is no dust or dirt on the cleaning paper or cleaning strip.
•Do not use any solvent to clean the sensor.
Using the Cleaning Paper
1.Make sure that Air Copy is powered on.
2.Click the top right corner in the Air Copy app to reveal the “cogwheel” (Settings menu).
3.Tap the cogwheel to go into the Settings menu.
4.Insert the supplied cleaning paper into the scanner's FEED SLOT with the sponge side facing DOWN and toward you as if you were going to scan it.
5.Press the Clean menu button in the app. On the next screen that appears, press the Clean button to begin cleaning. If necessary, perform the cleaning multiple times until the image quality is improved.
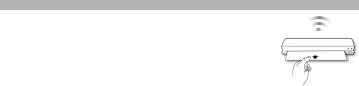
Using the Cleaning Strip
1.Power off the scanner.
2.Hold the grip handle of the cleaning strip with the sponge side facing DOWN.
3.Insert the cleaning strip firmly into the exit slot with the fabric side facing UP.
4.Push the cleaning strip all the way to the end of the exit slot.
5.Move the cleaning strip from one side to the other slightly a few times, and then remove it.
5
Calibration
If you find the scanned image quality is poor, follow the calibration steps below. If you still experience poor image quality, see the Troubleshooting section for more recommendations.
Note: Make sure that Air Copy is powered on before starting the following calibration steps.
1.Click the top right corner in the Air Copy app to reveal the cogwheel. (Settings menu)
2.Tap the cogwheel to go into the Settings menu.
3.Remove thin plastic layers on both sides the calibration paper. Insert the calibration paper (with the printing side facing UP) into the FEED SLOT.
4.Press the Calibrate menu button in the app.
5.Press the Calibrate button to begin the calibration process.
Troubleshooting
Air Copy does not turn on.
•Make sure the POWER button is turned on.
•Make sure that Air Copy's internal battery is charged or that Air Copy is properly connected to wall power with the included mini-USB cable and a USB power adapter (sold separately).
Air Copy cannot connect to your device.
•Try moving Air Copy closer to your device. The effective wireless transmission range is 60~100 feet (18~30m) unobstructed.
•Make sure the Wi-Fi LED indicator of Air Copy is flashing blue.
•Make sure the network name on your device is matched to Air Copy.
•Make sure no more than 8 users are connected to Air Copy.
No output from Air Copy.
•Make sure your device is connected to Air Copy's Wi-Fi network. Try disconnecting from and reconnecting to the network.
•Check if any Wi-Fi connection and/or communication errors occurred while scanning. Restart Air Copy and re-connect it.
Air Copy behaves abnormally
•Please shut down Air Copy by placing a pin into the RESET pin-hole located on the back of Air Copy and gently push until Air Copy turns off. Turn it back on, and try connecting and scanning again.
6
Cannot save scan results to your device.
•Make sure there is enough storage space on your device.
•Make sure your "Privacy" settings on your Apple iOS device have not changed.
•Make sure both Air Copy and your device are charged or powered by wall power.
Scan result is poor.
•Use the included cleaning paper and cleaning strip to clean Air Copy.
•If the cleaning procedures did not help to improve image quality, use the included calibration paper to recalibrate Air Copy.
•Do not use the photo sleeve when the photo is laminated.
Cannot feed the document into the feed slot.
•Make sure the document is gripped and slightly pulled into the feed slot prior to scanning.
•Remove the document from the feed slot and insert it again.
•Make sure your document is thin enough to fit in the feed slot or the included photo sleeve. Acceptable scan thickness is 0.08~0.6mm (using the supplied photo sleeve).
•Do not scan more than one page at a time.
7
Guía de Inicio Rápido (Español)
Contenido de la Caja
Compruebe si están incluidos en el embalaje los siguientes artículos:
•Air Copy
•Cable mini-USB
•Funda protectora de fotos
•Calibración Papel
•Limpieza papel
•Tira de limpieza
•Guía de inicio rápido
•Folleto de información sobre la seguridad y la garantía manual
Requisitos Mínimos de Sistema
•Una cuenta en iTunes® Store, Google Play Store, o Windows Store (para descarga de la aplicación Air Copy).
•Acceso a Internet (para descarga de la aplicación Air Copy).
•Sistemas operativos compatibles (al momento de redacción):
•iOS 5.0 – 6.1.2
•Android OS 2.33 – 4.2.2
•Mac OS X 10.7 – 10.8.2 (64-bit)
•Windows 7, Windows 8, Windows 8 Pro, Windows RT, Windows Phone 8
Para obtener una lista completa de los sistemas operativos y dispositivos compatibles, visite www.ionaudio.com/aircopy.
Nota importante: Para usuarios de iOS 6 —cuando guarden los escaneos por primera vez deberán dar permiso para que la aplicación acceda al rollo de la cámara. Pulse “OK” (Aceptar) a fin de guardar la imagen en su biblioteca de fotos.
Características
1.GUÍA DEL PAPEL – Ajuste esta pieza para ayudar a guiar el papel hacia dentro del Air Copy.
2.RANURA DE ALIMENTACIÓN – Inserte su papel o foto en esta ranura (boca arriba, contra el borde derecho de la ranura).
3.INDICADOR DE CONEXIÓN INALÁMBRICA – El LED parpadea durante 16 a 20 segundos cuando se enciende el Air Copy y se enciende con luz permanente cuando su dispositivo se conecta al Air Copy por su red inalámbrica.
4.ENCENDIDO – Pulse y mantenga pulsado el botón POWER 2 segundos para encender el Air Copy. Para apagarlo, pulse el botón POWER durante 4 segundos hasta que se apague el LED indicador de encendido.
8
5.PUERTO MINI-USB – Use el cable mini-USB incluido para conectar este puerto a un adaptador de alimentación USB de (que se vende por separado, consulte las especificaciones en la última página del manual) o un puerto USB de una computadora para cargar el Air Copy. Es posible operar el Air Copy con la alimentación del tomacorriente de pared o con la batería interna.
6.REINICIO – Si el Air Copy está funcionando incorrectamente, apague la unidad introduciendo erar el Air Copy con la alimentación del tomacorriente de pared o con la batería interna un pasador en el orificio RESET ubicado en la parte trasera del Air Copy y empujando
delicadamente hasta que se apague la unidad. Intente esto solo después de haber intentado primero volver a iniciar el Air Copy usando el botón de encendido.
7.RANURA DE SALIDA DEL PAPEL – Lugar de salida del papel o la foto después del escaneo.
Cómo Cargar la Batería
1.Apague el Air Copy.
2.Use el cable USB para conectar el Air Copy a uno de los siguientes:
A.el puerto USB de una computadora que esté encendida
B.un adaptador de alimentación USB (no incluido) conectado al suministro eléctrico
3.Cargue el Air Copy durante aproximadamente 4 horas o hasta que se apague
la luz roja del LED Power.
Notas:
•El LED Power del Air Copy parpadea en verde cuando debe recargarse la batería.
•El Air Copy no se carga cuando está encendido. Asegúrese de que el Air Copy está apagado para cargar la batería.
Cómo Instalar la Aplicación de Air Copy
Nota: Asegúrese de que dispositivo tenga acceso a Internet por medio de su proveedor del servicio o la conexión inalámbrica.
1.En su dispositivo, vaya a Apple App Store, Google Play Store, o Microsoft Windows Store según corresponda.
2.Busque la aplicación de Air Copy. Siga las instrucciones de la pantalla para descargar e instalar la aplicación.
3.Una vez descargada, la aplicación de Air Copy aparecerá en la pantalla de inicio de su dispositivo.
Los usuarios de Windows 7 pueden obtener la aplicación Air Copy visitando ionaudio.com/aircopy. En la sección Documentos y descargas, descargue el software Windows 7.
Abra la carpeta .zip descargada y ejecute el archivo Setup. Siga las instrucciones de la pantalla para instalar el software.
9

Cómo Conectarse al Wi-Fi
1.Encienda el Air Copy y espere aproximadamente 16-20 segundos hasta que parpadee el indicador de conexión inalámbrica.
2.Busque la red Direct-xxxxxx-AirCopy.
Nota: “xxxxxx” es un número aleatorio de 6 dígitos asignado a la red.
3.Ingrese la contraseña de 8 dígitos, “12345678”.
Notas importantes:
•El indicador de conexión inalámbrica del Air Copy se encenderá con luz azul permanente cuando esté conectado a una red inalámbrica.
•Asegúrese de que el Air Copy esté dentro de los 18-30 m (60-100 pies) de su dispositivo.
•Pueden conectarse hasta 8 personas a un dispositivo al mismo tiempo.
•Cada vez que lo encienda, deberá dirigir su dispositivo a la red Wi-Fi del Air Copy.
Cómo Escanear y Guardar Imágenes
•Asegúrese de que su documento sea lo suficientemente delgado para caber en la RANURA DE ALIMENTACIÓN o la funda para fotos incluida. Los espesores de escaneo aceptables son 0.08~0.6 mm (usando la funda para fotos provista).
•No escanee más de una página por vez. De lo contrario, las páginas adicionales pueden no alimentarse correctamente.
1.Prepare su imagen o documento para escanearlo:
•Papel/Fotografía: Coloque el papel en la RANURA DE ALIMENTACIÓN con la superficie a escanear hacia arriba. Ajuste la GUÍA DEL PAPEL de modo que se apoye contra el borde izquierdo del papel.
2.Ajuste la resolución del escáner:
•Para iPad®, iPhone®, iPod touch® y computadoras Mac, pulse la opción
Settings (Configuración) de la aplicación para ajustar la resolución del escáner, Standard (Estándar) (300 ppp) o Fine (Fina) (600 ppp) y luego pulse el botón SCAN. La foto o el documento serán impulsados a través del escáner. Realice una vista preliminar de su escaneo en la aplicación y luego pulse SAVE (Guardar) para guardar sus resultados en su biblioteca de fotografías o CANCEL (Cancelar) para repetir el escaneo.
•Para dispositivos Android, pulse ya sea el icono Settings (Configuración) o el botón Menu (Menú) para ajustar la Resolution (Resolución) (Standard (Estándar) o Fine) (Fina), y luego configure Save to location (Guardar en posición) (Internal Memory (Memoria interna) o SD Card (Tarjeta SD)).
•Para dispositivos Windows, muévase desde el lado derecho o mueva el cursor hacia la parte superior derecha o inferior derecha de la pantalla de su dispositivo para revelar la barra de menú y ajuste la Resolution (Resolución) (Standard (Estándar) o Fine (Fina)).
•Para Mac y Windows, elija el formato de archivo (JPEG o PDF) que desea guardar.
10
Cómo Usar la Funda Para Fotos
Use la funda para fotos si su fotografía es frágil o pequeña —o bien para evitar que quede atascada en la RANURA DE ALIMENTACIÓN.
Nota: No use la funda para foto con fotografías plastificadas.
1.Retire el forro plástico de la funda para fotos, coloque la fotografía dentro de ella e inserte la lengüeta en la ranura del extremo abierto.
2.Inserte el extremo sellado de la funda para fotos mirando hacia arriba en la RANURA DE ALIMENTACIÓN, ajuste la GUÍA DEL PAPEL y luego siga el procedimiento Cómo escanear y guardar imágenes para comenzar el escaneo.
Instrucciones Para el Cuidado
Limpieza
Para lograr un escaneo de la mejor calidad, siga estos pasos para limpiar el escáner.
Notas:
•Asegúrese de que no haya polvo ni suciedad en el papel para limpieza o en la tira papel para.
•No utilice ningún solvente para limpiar el sensor.
Cómo Usar el Papel de Limpieza
1.Asegúrese de que el Air Copy esté encendido.
2.Haga clic en la esquina superior derecha de la aplicación de Air Copy para revelar la “rueda dentada” (Menú Settings (de configuración)).
3.Toque la rueda dentada para entrar al menú Settings.
4.Inserte el papel para limpieza provisto en la RANURA DE ALIMENTACIÓN del escáner con el lado de la esponja hacia ABAJO y hacia usted, como si fuera a escanearlo.
5.Pulse el botón Clean (Limpiar) de la aplicación. En la siguiente pantalla que aparece, pulse el botón Clean para comenzar la limpieza. Si fuera necesario, realice la limpieza varias veces hasta que mejore la calidad de imagen.
Cómo Usar la Tira de Limpieza
1.Apague el escáner.
2.Sostenga la agarradera de la tira de limpieza con el lado de la esponja mirando hacia ABAJO.
3.Inserte la tira de limpieza firmemente en la ranura de salida con el lado de tela mirando hacia ARRIBA.
4.Empuje la tira de limpieza por todo el recorrido hasta el extremo de la ranura de salida.
5.Mueva ligeramente la tira de limpieza de un lado a otro unas cuantas veces y retírelo.
11
Calibración
Si observa que la calidad de la imagen escaneada es mala, siga los pasos de calibración que se indican a continuación. Si aún así experimenta una mala calidad de imagen, consulte la sección Solución de problemas para leer más recomendaciones.
Nota: Asegúrese de que el Air Copy esté encendido antes de comenzar los pasos siguientes de calibración.
1.Haga clic en la esquina superior derecha de la aplicación de Air Copy para revelar la rueda dentada. (Menú Settings)
2.Toque la rueda dentada para entrar al menú Settings.
3.Retire la capa plástica delgada de ambos lados del papel para calibración. Inserte el papel para calibración (con el lado de impresión mirando hacia ARRIBA) en la RANURA DE ALIMENTACIÓN.
4.Pulse el botón Calibrate (Calibrar) de la aplicación.
5.Pulse el botón Calibrate (Calibrar) para comenzar el proceso de calibración.
12
 Loading...