


NS-PNM5003-SV-C
Insignia NS-PNM5003-SV-C, NS-PNM5003-RD-C, NS-PNM5003-SV, NS-PNM5003-RD, NS-PNM5003-BK-C User Manual
...
Quick Setup Guide
|
NS-PNM5003-BK / NS-PNM5003-BK-C / NS-PNM5003-BU / NS-PNM5003-BU-C /
NS-PNM5003-SV / NS-PNM5003-SV-C / NS-PNM5003-RD / NS-PNM5003-RD-C
Wireless Optical Mouse
Package contents
• Wireless Optical Mouse
• Nano receiver
• AA battery (1)
• Quick Setup Guide
System requirements
• Windows® 8, Windows® 7, Windows Vista®, Windows® XP, or
Mac OS 10.X or higher
• One available USB port
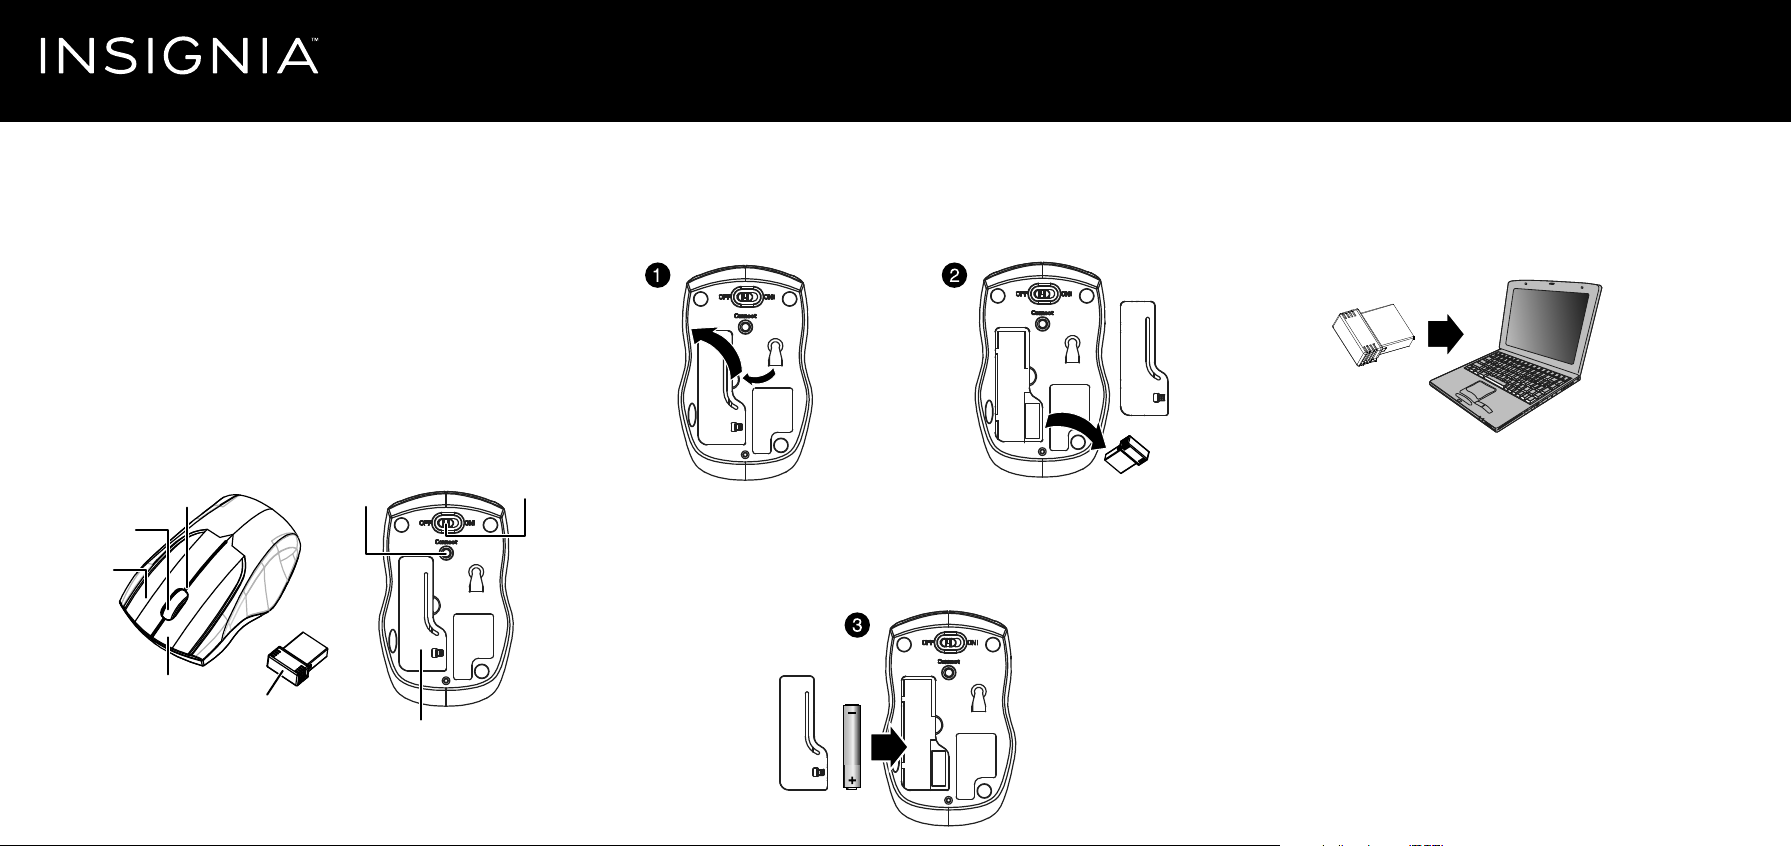
Features
Connect
LED indicator
Scroll wheel
Right button
Left button
Nano receiver
button
Battery cover
ON/OFF
switch
Installing the batteries and removing the nano
receiver
1 Take the battery cover o.
2 Remove the nano receiver.
Pull
3 Insert the included AA battery into the battery compartment. Make sure
that the + and - signs match the symbols in the compartment.
4 Replace the battery cover.
Tip: Store the nano receiver in the mouse when it is not in use.
Connecting your mouse to your computer
1 Plug the nano receiver into a USB port on your computer.
2 Slide the ON/OFF switch on your mouse to ON.
The computer automatically detects the mouse and you can
immediately begin using it.
If the mouse does not work:
• Move your mouse closer to your computer.
• Re-plug the nano receiver into the USB port on your computer, then
press the connect button on the mouse. The LED indicator on the
mouse ashes steadily while in pairing mode (10 seconds). After
pairing successfully, the LED indicator lights solid for 10 seconds,
then turns o.
• Check the battery in your mouse. The LED indicator blinks for
10 seconds when the battery is low.
Before using your new product, please read these instructions to prevent any damage.
AA battery
 Loading...