


HP Jetdirect 3000w
NFC/Wireless Accessory
ES Lea esto primero
A  B
B 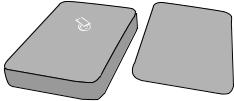

A B 
1

A |
A |
2 |
3 |
A |
A |
4 |
5 |
A |
A |
6 |
7 |
A |
A |
8 |
9 |
2

B |
B |
2 |
3 |
3
 2
2
 2
2
B |
B |
4 |
5 |
B
6
3

EN |
NOTE: To ensure printer compatibility and maintain regulatory |
FR |
REMARQUE : pour garantir la compatibilité de l’imprimante et |
|
compliance,pleaseupdatetheprinterfirmware: |
laconformitéréglementaire,mettezàjourlemicrologicielde |
|||
|
1. Ensure the Jetdirect 3000w accessory is disconnected from |
|
l’imprimante: |
|
|
|
1. Vérifiez que l’accessoire Jetdirect 3000w est déconnecté |
||
|
the printer. |
|
||
|
2. Go to www.hp.com/go/FutureSmart and select Upgradenow. |
|
|
de l’imprimante. |
|
3. Find your printer and select the Firmware Download link. |
|
2. Allez sur www.hp.com/go/FutureSmart et sélectionnez |
|
|
4. Follow the instructions for upgrading the printer firmware. |
|
|
Upgradenow (Mettre à niveau maintenant). |
|
5. Follow the instructions for installing the Jetdirect 3000w |
|
3. Recherchez votre imprimante et sélectionnez le lien |
|
|
accessory below. |
|
4. |
Téléchargement du micrologiciel. |
|
ToinstalltheHPJetdirect3000wNFC/WirelessAccessoryinto |
|
Suivez les instructions de mise à niveau du micrologiciel |
|
|
|
|
de l’imprimante. |
|
|
theHIP2pocket,usetheshortUSBcableandfollowSteps A1-A9. |
|
|
|
|
|
5. |
Suivez les instructions d’installation de l’accessoire Jetdirect |
|
|
SeefullA1-A9instructionsbelow. |
|
||
|
|
|
3000w ci-dessous. |
|
|
IftheHIP2pocketisalreadyfilledbyanotheraccessory,usethe |
|
|
|
|
|
Pourinstallerl’accessoiresansfil/NFCHPJetdirect3000w |
||
|
longUSBcableandtheaccessorycoverandfollowSteps B1-B6. |
|
danslemoduleHIP2,utilisezlecâbleUSBcourt,puissuivez |
|
|
SeefullB1-B6instructionsbelow. |
|
lesétapesA1-A9.ConsultezlesinstructionsA1-A9complètes |
|
|
Step A1 and B1: Turn OFF the power to the printer. |
|
ci-dessous. |
|
|
Step A2-A3: Locate and open the Hardware Integration Pocket |
|
SiunautreaccessoireestdéjàprésentdanslemoduleHIP2, |
|
|
|
utilisezlecâbleUSBlongetlecapotdel’accessoire,puissuivez |
||
|
(HIP2) on the printer. The HIP2 location may vary by printer. Refer to |
|
||
|
|
les étapesB1-B6.ConsultezlesinstructionsB1-B6complètes |
||
|
your printer user guide if needed. |
|
||
|
|
ci-dessous. |
||
|
The HIP2 is covered by a rectangular cover that is retained by clips |
|
||
|
along its short edges. Using a thin, flat-blade screwdriver along |
|
EtapesA1etB1 : éteignez l’imprimante. |
|
|
either short edge, gently pry the cover off. |
|
EtapesA2-A3 : recherchez et ouvrez le module d’intégration de |
|
|
Step A4: To install in the HIP2, connect the white connector on the |
|
matériel (HIP2) sur l’imprimante. L’emplacement du module HIP2 |
|
|
short USB cable to the HP Jetdirect 3000w. |
|
peut varier selon l’imprimante. Reportez-vous au manuel de |
|
|
Step A5: Connect the USB connector on the short USB cable to the |
|
l’utilisateur de l’imprimante si nécessaire. |
|
|
|
Le module HIP2 est doté d’un capot rectangulaire fixé par des clips |
||
|
socket in the printer’s HIP2. |
|
||
|
|
sur ses côtés courts. En faisant levier avec un tournevis plat très fin |
||
|
|
|
||
|
Step A6, A7: Insert the hook-shaped clips of the HP JetDirect 3000w |
|
sur une des largeurs, soulevez le capot. |
|
|
into the HIP2 recess. Then gently push the HP Jetdirect 3000w onto |
|
EtapeA4 : pour installer l’accessoire dans le module HIP2, |
|
|
the rounded clips so that it is held securely in place in the HIP2. |
|
branchez le connecteur blanc du câble USB court à l’accessoire |
|
HP Jetdirect 3000w.
Step B2: To install outside the printer, connect the white connector on the long USB cable to the HP Jetdirect 3000w.
Step B3: Push the long USB cable into the slot on the accessory cover, and then insert the hook-shaped clips of the HP JetDirect 3000w into the accessory cover. Press down to firmly attach the
3000w to the accessory cover.
Step B4: Attach the fastener strips (optional) to the bottom of the 3000w. Remove the backing paper in order to attach the bottom set of fastener strips to the top of the printer (Step B5). Place the 3000w on the printer. Connect the USB connector on the long USB cable to the USB accessory port, usually located at the back of the printer.
Step A9 and B6: TurnONthepowertotheprinter.PrintaConfiguration reporttoconfirmcorrectinstallation.AnHPJetdirect3000wentrywill be shown under the InstalledPersonalitiesandOptionssection of the printer’s Reports>Configuration/Statuspages. A wireless network icon will also appear on the printer’s control panel.
NOTE: See additional setup, configuration, and troubleshooting information at www.hp.com/support/jd3000w.
For more information on mobile printing, go to: www.hp.com/go/MobilePrinting www.hp.com/go/WirelessPrinting www.hp.com/support/jd3000w
EtapeA5 : branchez le connecteur USB du câble USB court au socket situé dans le module HIP2 de l’imprimante.
EtapesA6,A7: insérezlesclipsenformedecrochetdel’accessoire HPJetDirect3000wdanslerenfoncementdumoduleHIP2.Enclenchez délicatementl’accessoireHPJetdirect3000wsurlesclipsarrondisafin de le maintenir fermement en place dans le module HIP2.
EtapeB2 : pour installer l’accessoire en dehors de l’imprimante, branchez le connecteur blanc du câble USB long à l’accessoire HP Jetdirect 3000w.
EtapeB3: introduisezlecâbleUSBlongdanslelogementsurlecapot del’accessoire,puisinsérezlesclipsenformedecrochetdel’accessoire HPJetDirect3000wdanslecapotdel’accessoire.Appuyezsurle 3000wpourlefixerfermementaucapotdel’accessoire.
EtapeB4 : fixez les bandes auto-agrippantes (en option) sous le 3000w. Retirez le support papier pour fixer la partie inférieure des bandes auto-agrippantes sur le dessus de l’imprimante (EtapeB5). Remettez le 3000w sur l’imprimante. Branchez le connecteur USB du câble USB long au port USB de l’accessoire, généralement situé à l’arrière de l’imprimante.
EtapesA9etB6: mettezl’imprimantesoustension.Imprimez unrapportdeconfigurationpourvérifierquel’installations’est faitecorrectement.UneentréeHPJetdirect3000ws’affichedans la section Modes d’impression et options installés des pages
Rapports>Configuration/Etatde l’imprimante. Une icône de réseau sansfilapparaîtsurlepanneaudecommandedel’imprimante.
REMARQUE : consultez le site www.hp.com/support/jd3000w pour obtenir des informations supplémentaires concernant l’installation, la configuration et le dépannage.
Pour plus d’informations sur l’impression mobile, rendez-vous sur : www.hp.com/go/MobilePrinting
www.hp.com/go/WirelessPrinting www.hp.com/support/jd3000w
4

DE |
HINWEIS: ZurGewährleistungderDrucker-Kompatibilitätund |
IT |
NOTA: perassicurarelacompatibilitàdellastampante |
|
ErfüllungbehördlicherBestimmungenaktualisierenSiebittedie |
|
emantenerelaconformitàallenormeinvigore,aggiornare |
|
Drucker-Firmware: |
|
innanzituttoilfirmwaredellastampante: |
|
1. Stellen Sie sicher, dass das Jetdirect 3000w-Zubehör nicht mit |
|
1. Assicurarsi che l’accessorio Jetdirect 3000w sia scollegato dalla |
|
dem Drucker verbunden ist. |
|
stampante. |
|
2. Rufen Sie www.hp.com/go/FutureSmart auf und wählen Sie |
|
2. Accedere a www.hp.com/go/FutureSmart e selezionare |
|
Jetztaktualisieren. |
|
Upgradenow (Aggiorna ora). |
|
3. Suchen Sie Ihren Drucker und wählen Sie den Link Firmware |
|
3. Individuarelastampantenell’elencoeselezionareilcollegamento |
|
Download. |
|
al downloaddelfirmware. |
|
4. Befolgen Sie die Anweisungen zum Aktualisieren der Drucker- |
|
4. Attenersialleistruzioniperaggiornareilfirmwaredellastampante. |
|
Firmware. |
|
5. Attenersi alle istruzioni per installare l’accessorio Jetdirect |
|
5. Befolgen Sie folgende Anweisungen für die Installation des |
|
3000w di seguito. |
|
Jetdirect 3000w-Zubehörs. |
|
Perinstallarel’accessorioNFC/wirelessHPJetdirect3000w |
|
|
|
|
|
UmdasHPJetdirect3000wNFC-/Wireless-ZubehörimFachHIP2 |
|
nell’alloggiamentoperintegrazionehardwareHIP2 |
|
zuinstallieren,verwendenSiedaskurzeUSB-Kabelundverfolgen |
|
(HardwareIntegrationPocket),utilizzareilcavoUSBcortoed |
|
Schritte A1-A9.SiehevollständigeAnleitungzuA1-A9unten. |
|
eseguire i Passaggi A1-A9.Consultareleistruzionicomplete |
|
WenndasFachHIP2bereitsmitanderemZubehörbelegtist, |
|
A1-A9 di seguito. |
|
|
|
|
|
verwendenSiedaslangeUSB-KabelunddieAbdeckungdes |
|
Sel’alloggiamentoHIP2contienegiàunaltroaccessorio, |
|
ZubehörsundbefolgenSieSchritte B1-B6.Siehevollständige |
|
utilizzareilcavoUSBlungoeilcoperchiodell’accessorioed |
|
AnleitungzuB1-B6unten. |
|
eseguire i Passaggi B1-B6.Consultareleistruzionicomplete |
|
Schritt A1 und B1: Schalten Sie den Drucker AUS. |
|
B1-B6 di seguito. |
|
|
Passaggio A1 e B1: SPEGNERE la stampante. |
|
|
Schritt A2-A3: Suchen Sie das Hardware-Integrationsfach |
|
|
|
|
|
|
|
(Hardware Integration Pocket, HIP2) am Drucker. Die Position |
|
Passaggio A2-A3: individuare e aprire l’alloggiamento HIP2 sulla |
|
des HIP2 kann von Drucker zu Drucker variieren. Bei Bedarf finden |
|
stampante. La posizione dell’alloggiamento HIP2 può variare |
|
Sie Informationen darüber im Benutzerhandbuch des Druckers. |
|
a seconda della stampante. Se necessario, consultare la guida |
|
Das HIP2 ist mit einer rechteckigen Abdeckung geschlossen, die |
|
per l’utente della stampante. |
|
an den kurzen Seiten mit Klammern gehalten wird. Lösen Sie die |
|
Sull’alloggiamento HIP2 è presente un coperchio rettangolare, |
|
Abdeckung vorsichtig, indem Sie einen dünnen Schraubendreher |
|
mantenuto da fermi presenti sui lati corti. Usare un cacciavite sottile |
|
an den kurzen Kanten entlangführen. |
|
a punta piatta facendo leva su uno dei lati corti per rimuovere il |
|
Schritt A4: Um das HIP2 zu installieren, verbinden Sie den weißen |
|
coperchio. |
|
|
|
|
|
Anschluss am kurzen USB-Kabel mit dem HP Jetdirect 3000w. |
|
Passaggio A4: per eseguire l’installazione nell’alloggiamento HIP2, |
|
Schritt A5: Schließen Sie das kurze USB-Kabel an den USB- |
|
collegare il connettore bianco del cavo USB corto all’accessorio |
|
|
HP Jetdirect 3000w. |
|
|
Anschluss im HIP2 des Druckers an. |
|
|
|
|
Passaggio A5: collegare il connettore USB del cavo USB corto alla |
|
|
Schritt A6, A7: Setzen Sie die hakenförmigen Klammern des |
|
|
|
|
presa all’interno dell’alloggiamento HIP2 della stampante. |
|
|
HP JetDirect 3000w in der Vertiefung des HIP2 ein. Schieben Sie |
|
|
|
|
|
|
|
dann das HP Jetdirect 3000w vorsichtig auf die abgerundeten |
|
Passaggio A6, A7: inserire i fermi a forma di uncino dell’accessorio |
|
Klammern, so dass es sicher in der Vertiefung des HIP2 sitzt. |
|
HPJetDirect3000wnell’alloggiamentoHIP2.Premeredelicatamente |
|
|
|
l’accessorio HP Jetdirect 3000w sui fermi arrotondati in modo |
|
Schritt B2: UmesaußerhalbdesDruckerszuinstallieren,verbinden |
|
dafissarlosaldamenteinposizionenell’alloggiamentoHIP2. |
|
|
|
|
|
SiedenweißenAnschlussamlangenUSB-Kabelmitdem |
|
|
|
HPJetdirect3000w. |
|
Passaggio B2: per eseguire l’installazione all’esterno della |
|
Schritt B3: Drücken Sie das lange USB-Kabel in die Öffnung der |
|
stampante, collegare il connettore bianco del cavo USB lungo |
|
|
all’accessorio HP Jetdirect 3000w. |
|
|
Zubehörabdeckung und setzen Sie die hakenförmigen Klammern |
|
|
|
|
|
|
|
des HP JetDirect 3000w in die Zubehörabdeckung ein. Drücken Sie |
|
Passaggio B3: inserire il cavo USB lungo nell’alloggiamento sul |
|
es nach unten, um das 3000w fest an der Abdeckung des Zubehörs |
|
coperchio dell’accessorio, quindi inserire i fermi a forma di uncino |
|
anzubringen. |
|
dell’accessorio HP JetDirect 3000w nel coperchio dell’accessorio. |
|
Schritt B4: Befestigen Sie die Befestigungsstreifen (optional) an der |
|
Premere per fissare saldamente l’accessorio 3000w al coperchio |
|
|
dell’accessorio. |
|
|
Unterseite des 3000w. Entfernen Sie die Papierfolie, um die unteren |
|
|
|
|
|
|
|
Befestigungsstreifen an der Oberseite des Druckers anzubringen |
|
Passaggio B4: applicarelestrisceadesiveopzionalisullatoinferiore |
|
(Schritt B5). Setzen Sie das 3000w in den Drucker ein. Schließen |
|
dell’accessorio 3000w. Rimuovere la pellicola di carta per applicare le |
|
Sie das lange USB-Kabel an den USB-Anschluss des Zubehörs an – |
|
strisce adesive alla parte superiore della stampante (PassaggioB5). |
|
dieser befindet sich normalerweise auf der Rückseite des Druckers. |
|
Posizionarel’accessorio3000wsullastampante.Collegareil |
|
Schritte A9 and B6: Schalten Sie den Drucker EIN. Drucken Sie einen |
|
connettore USB del cavo USB lungo alla porta dell’accessorio USB, |
|
|
solitamenteposizionatasulretrodellastampante. |
|
|
Konfigurationsbericht, um die korrekte Installation zu bestätigen. |
|
|
|
|
|
|
|
Ein Eintrag zum HP Jetdirect 3000w wird im Abschnitt Installierte |
|
Passaggio A9 e B6: ACCENDERElastampante.Stampareunrapporto |
|
DruckersrprachenundOptionen unter Berichte>Konfigurations-/ |
|
diconfigurazioneperconfermarelacorrettainstallazione.Una |
|
Statusseiten im Drucker angezeigt. Zudem wird auf dem Bedienfeld |
|
voceHPJetdirect3000wvienevisualizzatanellasezioneOpzioni |
|
des Druckers ein WLAN-Netzwerksymbol angezeigt. |
|
elinguaggidistampainstallatiin Paginediconfigurazione/stato |
|
HINWEIS:ZusätzlicheInformationzurEinrichtung,Konfigurationund |
|
della stampante. Sul pannello di controllo della stampante viene |
|
|
visualizzataancheun’iconadellaretewireless. |
|
|
FehlerbehebungfindenSieunterwww.hp.com/support/jd3000w. |
|
|
|
|
NOTA: ulteriori informazioni su installazione, configurazione |
|
|
Weitere Informationen zu mobilem Drucken finden Sie unter: |
|
|
|
|
e risoluzione dei problemi sono disponibili all’indirizzo |
|
|
www.hp.com/go/MobilePrinting |
|
|
|
|
www.hp.com/support/jd3000w. |
|
|
www.hp.com/go/WirelessPrinting |
|
|
|
|
|
|
|
www.hp.com/support/jd3000w |
|
Per ulteriori informazioni sulla stampa mobile, visitare: |
|
|
|
www.hp.com/go/MobilePrinting |
|
|
|
www.hp.com/go/WirelessPrinting |
|
|
|
www.hp.com/support/jd3000w |
5

ES |
NOTA: Actualiceprimeroelfirmwaredelaimpresorapara |
|
garantizarsucompatibilidadycumplirlasnormativas: |
1. Asegúrese de que el accesorio Jetdirect 3000w está
desconectado de la impresora.
2.Visite www.hp.com/go/FutureSmart y seleccione Upgradenow
(Actualizar ahora).
3.Busque su impresora y seleccione el Enlace a la descarga defirmware.
4.Sigalasinstruccionesparaactualizarelfirmwaredelaimpresora.
5.Siga las instrucciones para instalar el accesorio
Jetdirect 3000w a continuación.
ParainstalarelaccesorioHPJetdirect3000wNFC/inalámbrico enelHIP2,utiliceelcableUSBcortoysigalospasos A1-A9. ConsultetodaslasinstruccionesA1-A9abajo.
SielHIP2yatieneotroaccesorioconectado,utiliceelcableUSB largo y la cubierta de accesorios y siga los pasos B1-B6.
ConsultetodaslasinstruccionesB1-B6abajo.
Paso A1 y B1: Desconecte la impresora de la corriente.
Pasos A2 y A3: Ubiqueyabraelpuertodeintegracióndehardware (HIP2)delaimpresora.LaubicacióndelHIP2puedevariarenfunción de la impresora. Consulte la guía del usuario de la impresora si es necesario.
ElHIP2estátapadoconunacubiertarectangularsujetaconpresillas alosextremoscortos.Saqueconcuidadolacubiertapasandoun destornilladorfinoyplanoporunodelosextremoscortos.
Paso A4: Para realizar la instalación en el HIP2, conecte el conector blanco del cable USB corto al HP Jetdirect 3000w.
Paso A5: Conecte el conector USB del cable USB corto al puerto del HIP2 de la impresora.
Pasos A6 y A7: Inserte las presillas en forma de gancho del
HP JetDirect 3000w en la ranura del HIP2. A continuación, presione con suavidad el HP Jetdirect 3000w sobre las presillas redondas para ajustarlo correctamente en el HIP2.
Paso B2: Para instalarlo fuera de la impresora, conecte el conector blanco del cable USB largo al HP Jetdirect 3000w.
Paso B3: Introduzca el cable USB largo en la ranura de la cubierta de accesorios y, a continuación, inserte las presillas en forma de gancho del HP JetDirect 3000w en la cubierta de accesorios.
Presione para fijar firmemente el 3000w a la cubierta de accesorios.
Paso B4: Fije las tiras de sujeción (opcional) a la parte inferior del 3000w. Retire el papel protector para fijar la parte inferior de las tiras de sujeción a la parte superior de la impresora (paso B5).
Coloque el 3000w en la impresora. Conecte el conector USB del cable USB largo al puerto USB accesorio, normalmente ubicado en la parte posterior de la impresora.
Pasos A9 y B6: Encienda la impresora. Imprima un informe
deconfiguraciónparaconfirmarquelainstalaciónseharealizado correctamente.SemostraráunaentradadeHPJetdirect3000wen lasecciónInstalledPersonalitiesandOptions(Usuariosyopciones instalados) en los Informesdelaimpresora>Páginasde Configuration/Status(Configuración/Estado).Tambiénaparecerá uniconoderedinalámbricaenelpaneldecontroldelaimpresora.
NOTA: Consulte información adicional sobre la configuración y la solución de problemas en www.hp.com/support/jd3000w.
Para obtener más información sobre la impresión móvil, visite: www.hp.com/go/MobilePrinting www.hp.com/go/WirelessPrinting www.hp.com/support/jd3000w
ZHCN
1. Jetdirect 3000w
2.www.hp.com/go/FutureSmart
5.Jetdirect 3000w
HP Jetdirect 3000wNFC/
HIP2 USBA1-A9 A1-A9
HIP2 USBB1-B6B1-B6
A1 B1
A2-A3 (HIP2) HIP2
HIP2
A4 HIP2 USBHP Jetdirect 3000w
A5 USB USBHIP2
A6 A7 HP JetDirect 3000wHIP2 HP Jetdirect 3000wHIP2
B2 USBHP Jetdirect 3000w
B3 USBHP JetDirect 3000w
3000w
B4 3000w
B5 3000w USB USB USB ——
A9 B6
> /
HP Jetdirect 3000w
问www.hp.com/support/jd3000w
www.hp.com/go/MobilePrinting www.hp.com/go/WirelessPrinting www.hp.com/support/jd3000w
6
 Loading...