


GU19WDVDPCX

GU19WDVDT/GU19WDVDPCX
WITH INBUILT DVD PLAYER / USB & SD CARD SLOT
Grundig Web Site: www.grundig.co.uk
ATV/DTV/DVD
CH.
VOL.
GUIDE
+10
EXIT
INFO INPUT
CH. LIST
MENU
1
4
7 8
9
0
5
6
2
3
OPEN/CL OSE STOP
PLAY/PA USE
SEARCH SKIP
I-II
DVD
SLEEP
DVD
SUBTITL E
SUBTITL E
USB/CAR D
TITLE
FAST TEXT
AUDIO
SETUP
ZOOM
DVD MENU
GO TO
1
LCD TV User Guide
Safety Instructions
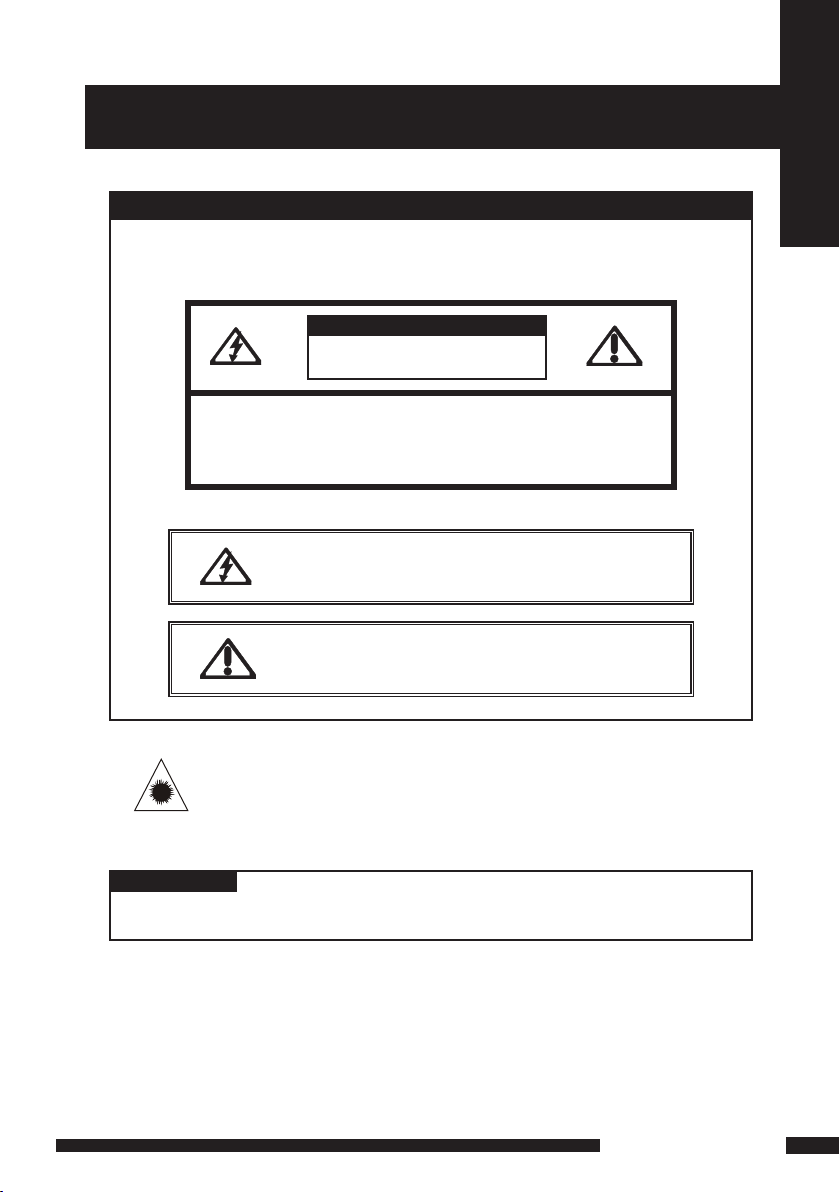
RISK OF ELECTRIC SHOCK
DO NOT OPEN
IMPORTANT SAFETY INSTRUCTIONS
To reduce the risk of fire or electric shock, do not
expose this equipment to rain or moisture.
This symbol is intended to alert the user to avoid the risk of
electric shock, do not disassemble this equipment by
anyone except a qualified service personnel.
This symbol is intended to alert the user to the presence
of important operating and maintenance instructions
in the literature accompanying the appliance.
CAUTION: TO AVOID THE RISK OF ELECTRIC SHOCK,
DO NOT REMOVE COVER (OR BACK).
NO USER-SERVICEABLE PARTS INSIDE.
REFER SERVICING TO QUALIFIED SERVICE PERSONNEL.
Use of controls or adjustments or performance of procedures other than thos e
specified herein may result in hazardous radiation exp os ur e.
CAUTION
CAUTION
Invisible laser radiation when open and inter locks
defeated.
avoid exposure to beam.
CAUTION
WARNING
2
LCD TV User Guide
Safety Instructions
MAINS PLUG WIRING
Electrical Infor mation
The AC adaptor is fitted with a BS1363/A 13 amp plug. If it is not suitable for yo ur
supply sockets it must be removed and replaced with an appropriate plug. If the plug
becomes damaged and/or needs to be replaced please follow the wiring instru ct io ns
below. The plug removed must be disposed of immediately. It must not be plugged int o
a supply socket as this will be an electrical hazard. If the fuse needs to be replaced it
must be of the same rat in g an d AS TA approved to BS1362. If the plug is changed, a
fuse of the appropriate rating must be fitted in the plug, adapter or at th e di st ribu ti on
board. If the fuse in a moulded plug is replac ed , th e fu se c over mu st b e re fi tt ed b efore
the appliance can be used.
Wiring Instructions
The supply cabl e wi ll b e ei th er 2 -c or e or 3 -c or e. Follow the appropriate wiri ng
instructions given below. In both cases ensure that the outer sheath of the cabl e is
firm ly h el d by the cabl e cl am p.
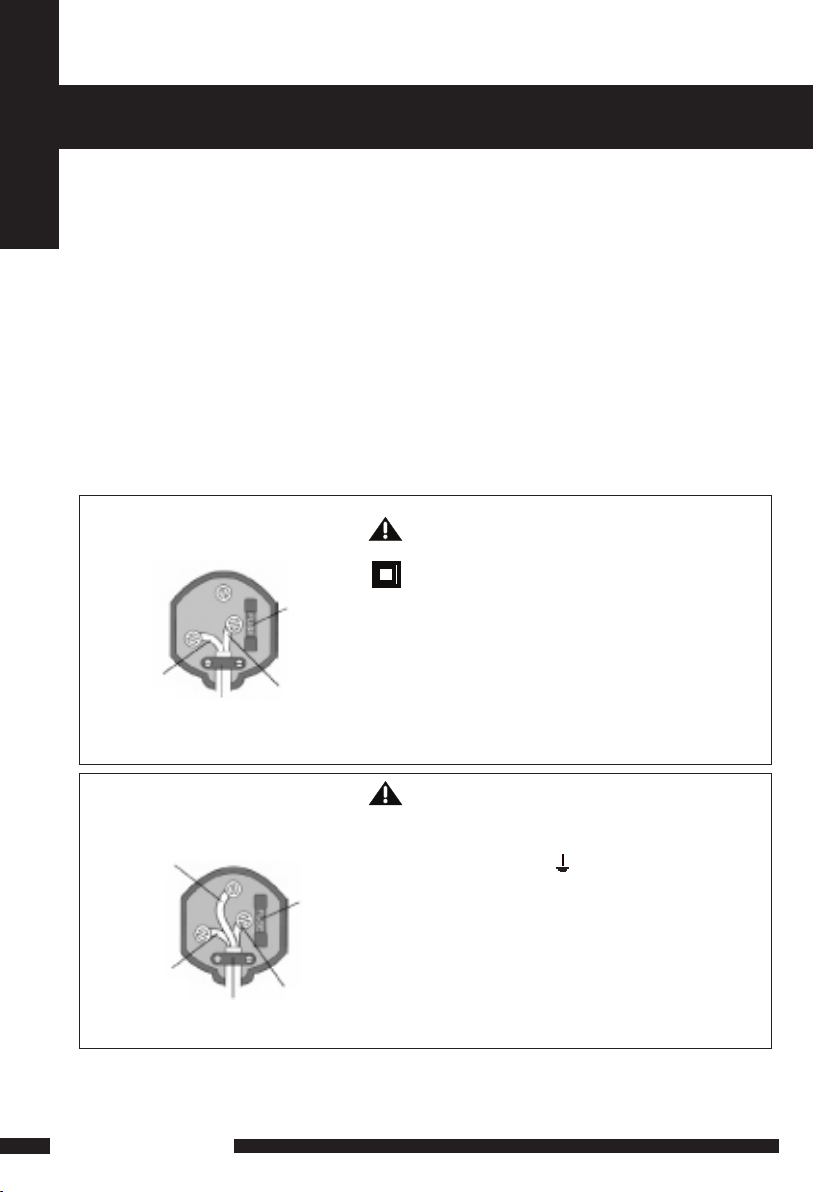
WARNING! Do not connect either wire to
the earth terminal.
This symbol indicates that this 2-core appliance
is Class II and does not require an earth
connection.
2- CORE
BLUE
(Neutral)
Cable
clamp
BROWN
(Live)
Fuse
The wire coloured blu e must be connected to the
term in al m ar ked with the letter N or coloured
bla ck.
The wire coloured brown m us t be c on nected to
the term in al m ar ked with the letter L or coloured
red.
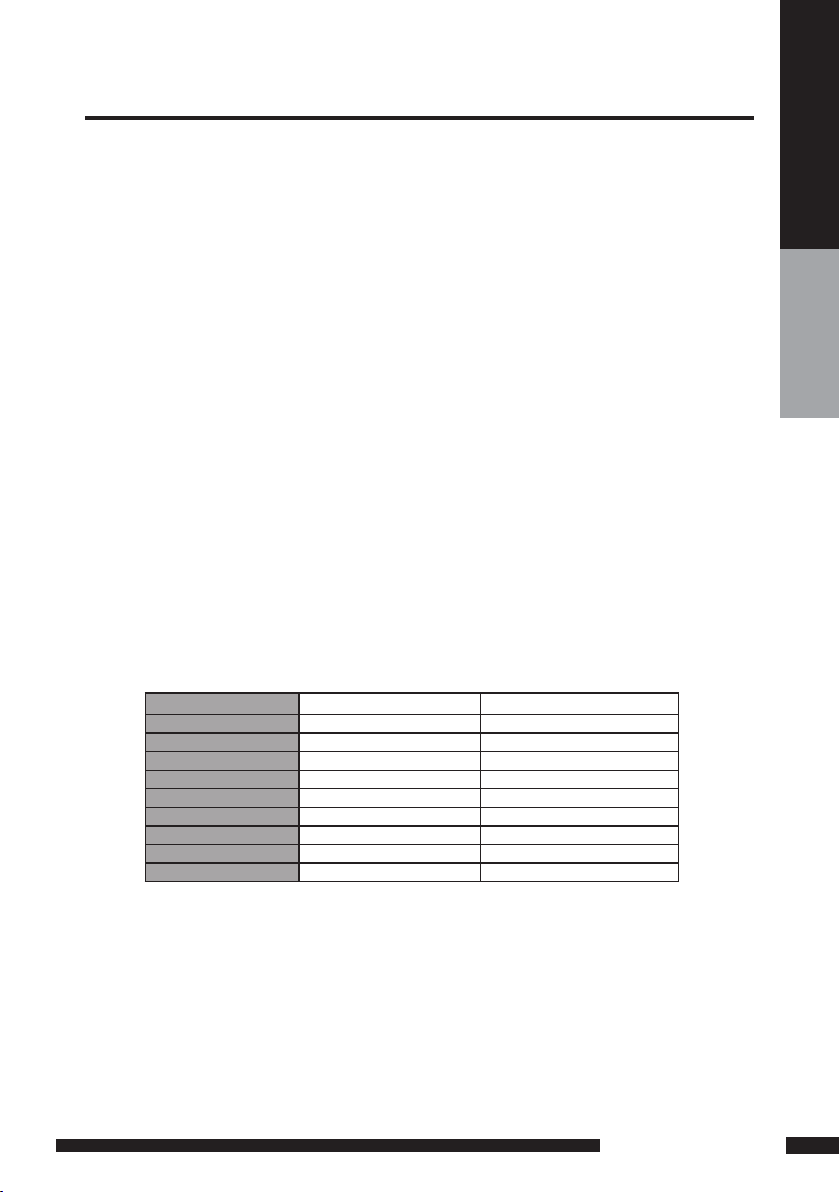
WARNING! This appliance must be eart he d.
The wire coloured green and yellow must be
connected to the ter mi na l ma rked with the letter E,
or by t he e ar th symbol, , or coloured green or
green and yellow.
The wire coloured blu e must be connected to the
term in al m ar ked with the letter N or coloured black .
The wire coloured brown m us t be c on nected to the
term in al m ar ked with the letter L or coloured red.
3- CORE
BLUE
(Neutral)
Cable
clamp
BROWN
(Live)
Fuse
GREEN and
YELLOW
(Earth)

3
LCD TV User Guide
Safety Instructions
WARNINGS
WEEE:
This appliance is labelled in accordance with European Directive 2002/96/EG
concer ni ng u se d el ec tr ical and electronic ap pl ia nc es (waste electri ca l an d el ec tr on ic
equipment - WEEE). The guideline determines the framewor k for the return and
recycling of used appliances as applicabl e th ro ug ho ut t he E U.
● Unqualified attempts to repair this TV are not allowed. Re fer repairs to this unit
to a qualified technician only.
● Do not disassembl e th is u ni t. There are dangerous-voltage par ts i ns id e th at m ay
cause electric shock even after power is disconnected.
● Store your unit in a clean, dry e nvironment, Unplug the unit immediately it gets
wet, and consult your servicing technician.
● Always u np lu g th e un it b efore cleaning it. Wipe dust off the cabinet of t he u ni t
with clean & dr y & so ft c lo th . Apply non-ammonia cleansing lotion onto the cloth,
not directly onto the screen.
● Do not place heavy objects on top of the unit.
● Avoid exp os in g your unit directly to sunlight or other heat sources.
● Put your unit in a well-ventilated area away from high humidity.
● Do not expose this TV to ra in o r mo is tu re, dr ip pi ng o r sp la sh ing.
Safety Ti ps
● If s mo ke, abnormal noise or odour comes out of your unit, unplug from the
mains supply immediately and call you r de al er.
● Never t ry to repair the you r un it o n your own. Al ways call your dealer
for repairs.
Note
This user’s manual contains for-refer en ce -o nl y graphics and info rmation that are
subject to change without notice.

4
LCD TV User Guide
CONTENT
CONTENT
PREPARTION
Key Features.............................................................................................................5
Package Contents.....................................................................................................6
Setting Up Your LCD TV ...........................................................................................7
Your LCD TV..............................................................................................................8
Remote Control........................................................................................................12
INSTALLATION
Connecting a TV Cable or Aerial..............................................................................14
Connecting a VCR & Video Camera.........................................................................17
Connecting a TV box and satellite Receiver ............................................................18
Connecting an Audio Receiver . ..............................................................................19
HDMI ........................................... ............................................................................20
USING THE FEATURES
OSD Menu Operation ............................................................................................ 21
The Video Settings...................................................................................................21
The Audio Settings...................................................................................................22
The Setup Settings...................................................................................................23
The Preference Settings.......................................................................................... 24
The Screen Settings.................................................................................................24
Using The Digital TV Features.............................................................................. ...25
Using The DVD Features.........................................................................................34
TROUBLESHOOTING........................................................................................................43
SPECIFICATIONS...............................................................................................................44
5
PREPARATION
PREPARTION
DISPLAY MODES
The screen resolution has been optimized during production for the display modes listed below.
If the signal from the system equals the standard signal mode, the screen adjusts automatically. If the
signal from the system is not equal to the standard signal mode, adjust the screen resolution by referring to your video
card user guide, otherwise there may be no video.
Video signal: (VGA Standard)
Resoluti on (Dot X Line) Vertical Freq uency(Hz) Horizontal Fre quency(kHz)
640 x 480 59.94 31.46
72.80 37.86
75.00 37.50
800 x 600 60.31 37.87
72.18 48.07
75.00 46.87
1024 x 768 60.00 48.36
70.06 56.47
75.02 60.02
Various Audio/Video terminals for external equipment connection
▪ 1 set of composite A/V input terminals
▪ 1 SCART input terminals
▪ 1 set of component Video input terminals
▪ 1 VGA/ Audio input terminal
▪ 1 HDMI/Audio input terminals
▪ 1 Headphone terminal
High Definition Multimedia Interface (HDMI)
▪ High Definition Multimedia Interface (HDMI) is a small, user-friendly interconnect that can carry up to 5 Gbps of
combined video and audio in a single cable. This system eliminates the cost, complexity and confusion of multiple
cables used to connect current A/V systems.
HDTV Component Video Inputs
▪ Offers the best video quality for DVD(480p) and digital set-top-box (HD1080i, 720p) connections.
WSS(Wide Screen Scale) Function
▪ This function can automatically convert and display any aspect ration (4:3 / Wide) TV
broadcast signal.
Built-in ATV and DTV Tuners
▪ The built-in DTV tuner allows the reception of DVB-T broadcasting without the addition of a set-top
box.
Key Features
6
PREPARATION
PREPARTION
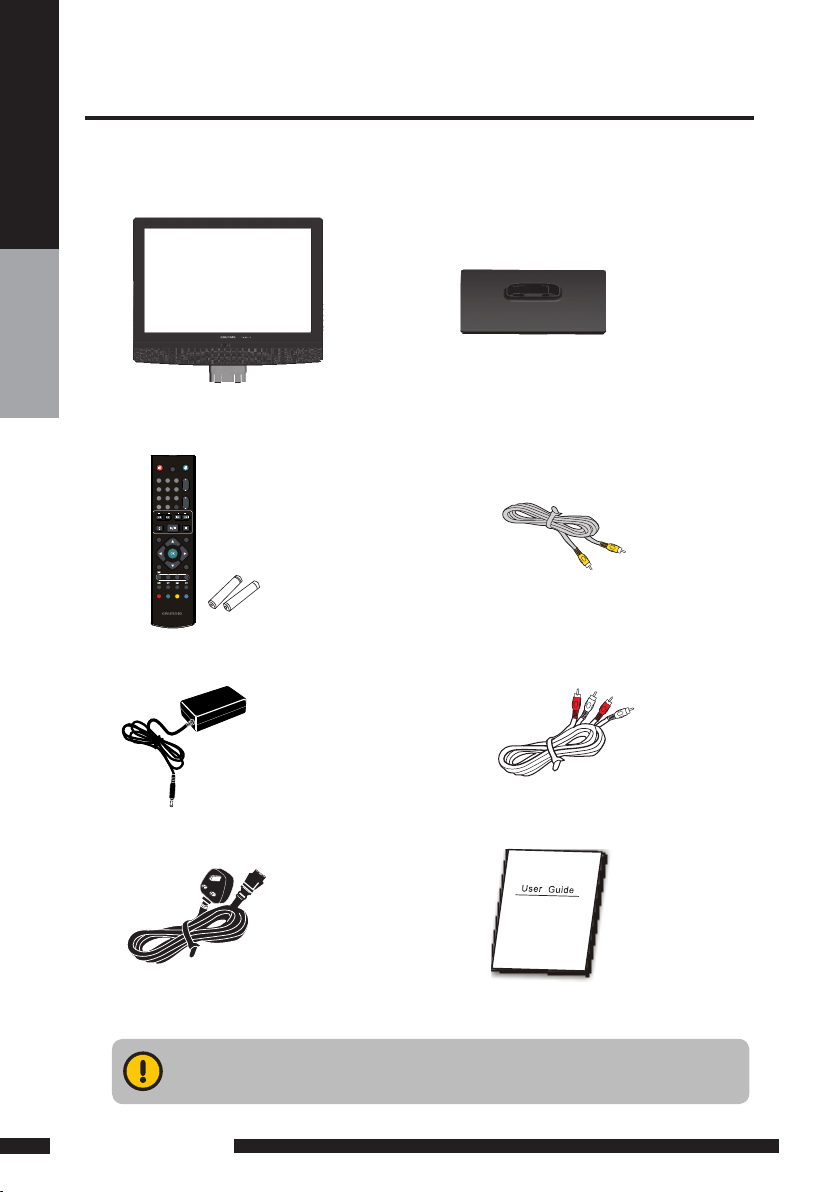
Make sure all of the above contents are included in the package. If any items are
missing please contact your dealer.
LCD TV
Make sure all of the following contents are included.
These items are all you need to set up and operate the LCD TV in its basic configuration.
Package Contents
VIDEO Cable Remote Control/
AAA Batteries x 2
Power Cord
AUDIO Cable
Power Adapter
ATV/DTV/DVD
CH.
VOL.
GUIDE
+10
EXIT
INFO INPUT
CH.LIST
MENU
1
4
7
8
9
0
5
6
2
3
OPEN/CLOSE STOP
PLAY/PAUSE
SEARCH SKIP
I-II
DVD
SLEEP
DVD
SUBTITLE
SUBTITLE
USB/CARD
TITLE
FASTTEXT
AUDIO
SETUP
ZOOM
DVDMENU
GOTO
STAND
User’s Manual
7
PREPARATION
PREPARTION
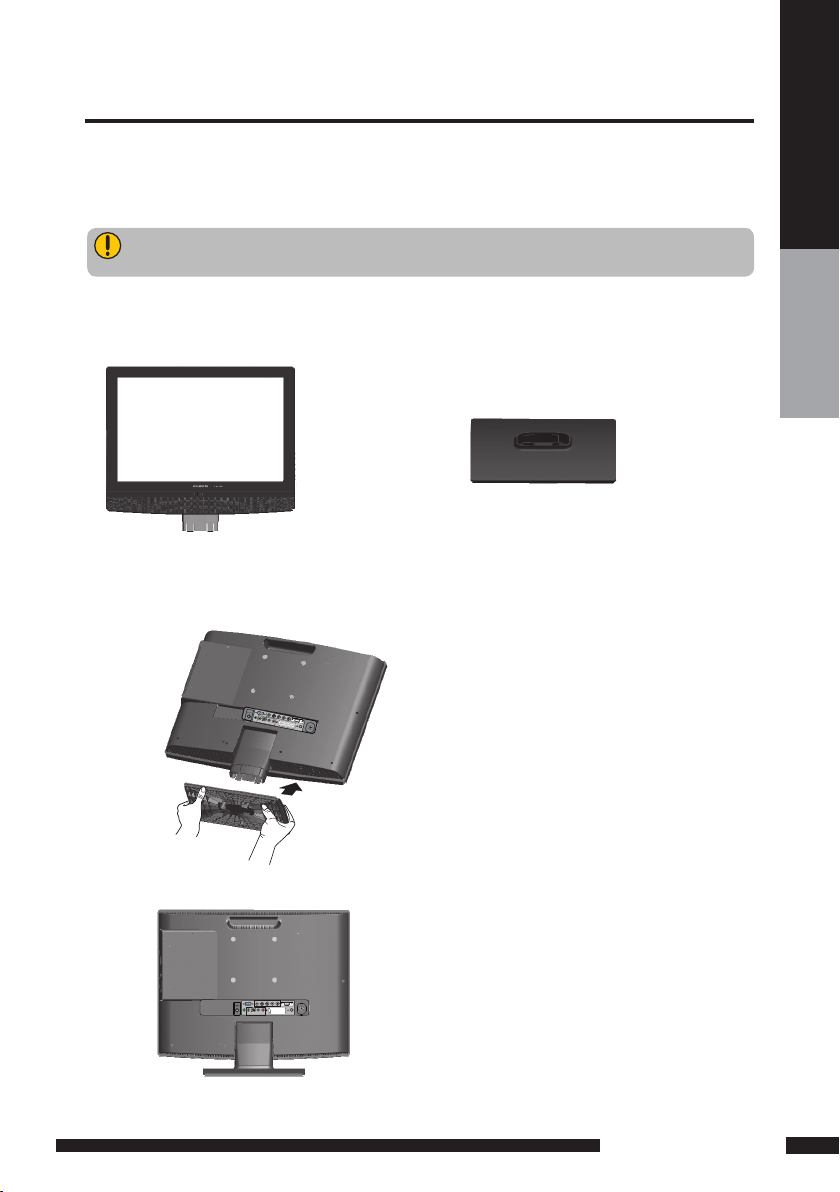
Setting Up Your LCD TV
If you prefer to mount your new TV on a wall instead of attaching it to the stand, please reference the
instructions included in the wall mounting kit (not included).
Ensure the TV stand is still attached with the bottom foam packaging material in the package.
Read all instructions before continuing with the stand installation.
a. Open the box, and make sure all necessary parts are in the box. The package contains:
b. Cover an even stable surface with a soft cloth. Place the LCD TV unit face-down on the cloth. Fit the
stand onto the bottom of the LCD TV unit as shown:
c. Then push until stand into the LCD TV’s stand socket.
LCD TV STAND
S
V
I
D
E
O
-
A
U
D
I
O
I
N
Y
P
b
P
r
L
R
P
C
V
G
A
I
N
/
H
D
M
I
P
C
A
U
D
I
O
I
N
V
I
D
E
O
A
U
D
I
O
I
N
L
R
S
C
A
R
T
VHF/UHF IN
DC 12V IN
DIGITAL OUT
SVIDEO
-
AUDIOIN
Y
Pb
Pr L R
PCVGAIN
/
HDMI
PCAUDIOIN
VIDEO
AUDIOIN
L R
SCART
VHF/UHF IN
DC 12V IN
DIGITAL OUT
8
PREPARATION
PREPARTION
How to setup the TV
Connect an existing TV aerial to the aerial input socket on the rear of the TV.
Connect the DC plug of the AC-DC power adapter to the DC 12V IN socket at the back of the
TV. Connect the AC adaptor to a 230VAC mains socket.
Insert the 2 batteries supplied in remote control.
1
2
3
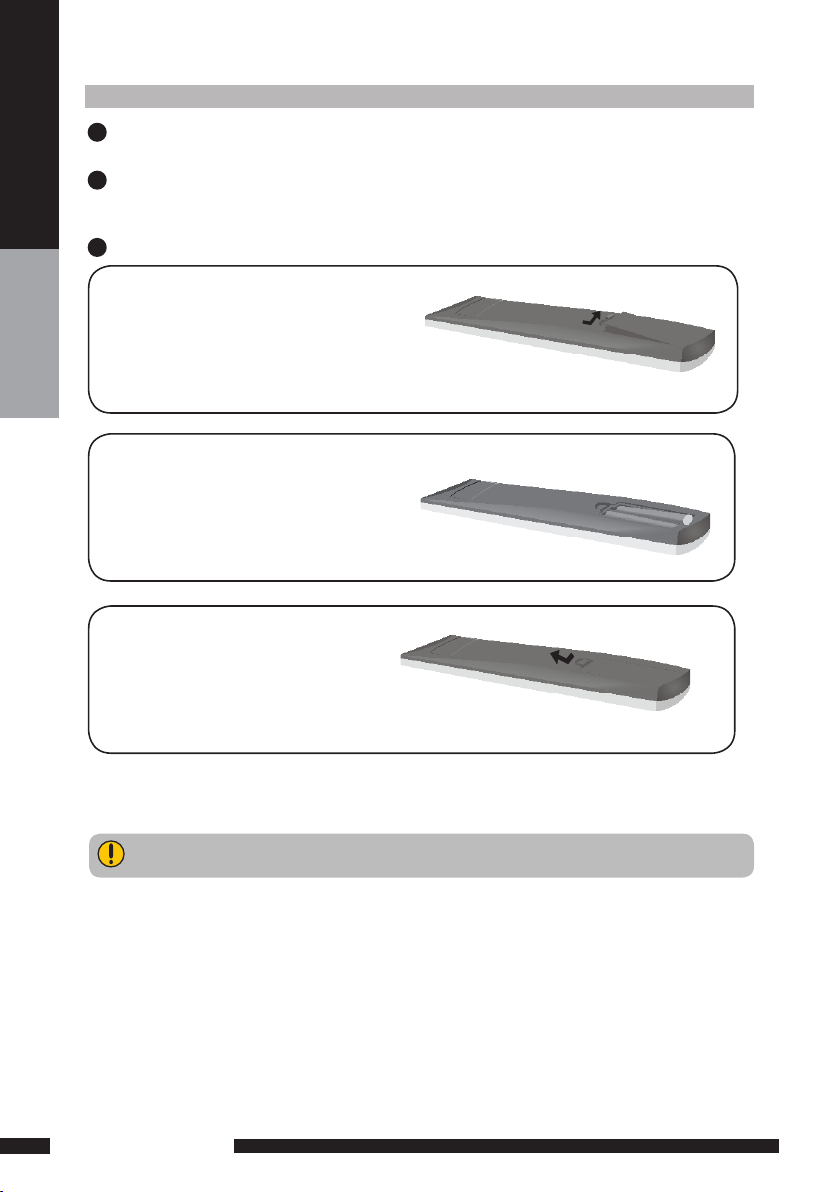
Do not use caustic cleaners (porcelain, stainless steel, toilet, or oven cleaner etc.) on the
remote, as it may suffer damage.
Pull the tab of the back cover and pull up on
the cover to open the battery compartment
of the remote control.
Insert two AAA size batteries.
Make sure to match the (+) and (-) ends of
the batteries with the (+) and (-) ends indicated
in the battery compartment.
Align the lower tabs of the back cover to the
remote control and squeeze the cover into
place.

Front View / Side View
Note:
INPUT button on the TV, has the same function of OK button on the remote control,can be
used as confirm button.
Connects to the external earphone for
private listening.
LED
The LED light indicates when the LCD TV is activated
(Red = standby, Green On).
IR
Infrared
Receiver
POWER
Turns the LCD TV on and into standby mode.
MENU
Presses once to display the OSD (on screen
display), presses again to turn the OSD off.
VOLUME + / -
Adjusts the volume up and down.
Selects the main-menu item and change
values for items when in the OSD mode.
CHANNEL.▲ / ▼
Changes TV channels. Selects menu
item when in the OSD mode.
INPUT
Chooses from different input signal sources.
SVIDEO
-
AUDIOIN
Y
Pb
Pr L R
PCVGA IN
/
HDMI
PCAUDIOIN
VIDEO
AUDIOIN
L R
SCART
VHF/UHF IN
DC 12V IN
DIGITAL OUT
9
PREPARATION
PREPARTION
Your LCD TV
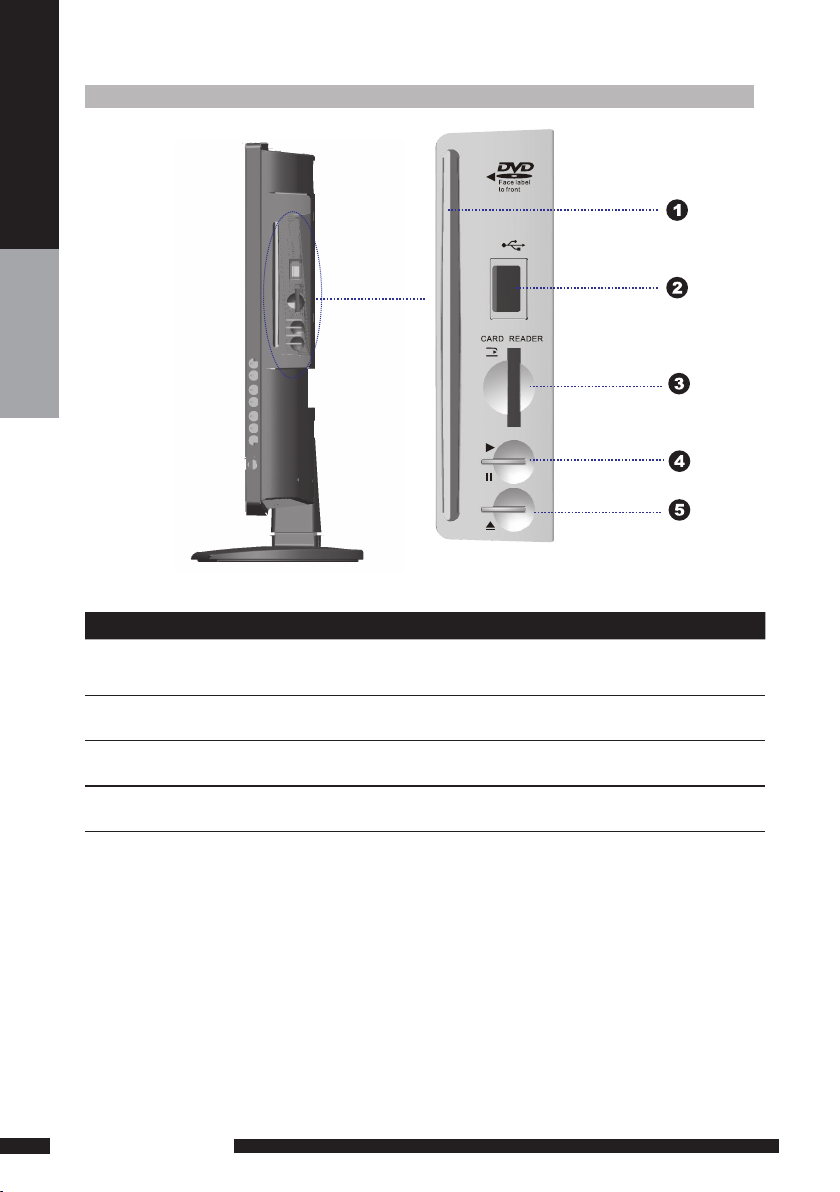
ITEM DESCRIPTION
1. SLOT-TYPE DVD
PLAYER
Any of the following disc types are playable on the DVD player:
CD-R, CD-RW, DVD-R, DVDRW, VCD, SVCD,DVD+R, and DVD+RW. (
DVD mode )
2. USB
Allow the insertion of a USB disk, You can view digital images or movie
playout on your TV. ( DVD mode )
3. CARD READER
Allow the insertion of a SD/MMC card. You can view digital images or
movie playout for MPEG1/MPEG2 on your TV. ( DVD mode )
4. PLAY/PAUSE Press to start play back or pause. ( DVD mode )
5. OPEN/CLOSE Press to open and close the disc tray. ( DVD mode )
To View USB or SD/M MC card you must select DVD mode then attach/ inser t USB/SD Card. Using the
remote control to navigate and to select the file shown on the TV screen within the SD/MMC Card or USB
memory disk/stick. Use the arrow/navigation buttons to rotate any JPEG / MPEG1 / MPEG2 / MPEG4
pictures.
10
PREPARATION
PREPARTION
Rear View and Sockets

9
Rear View and Sockets
5
3
4
2 8
1 DC 12V IN Co nn ec ts t o a w al l outl et via th e su pp li ed 12 V power a da ptor.
2 AV1
SCART
Connect to external equipment with scart socket. This
scart input allows audio and CVBS/YC/RGB+ CVBS.
RGB,S-VIDEO from an external devise to be shown on
your TV.
3 AV2
S-VIDEO/AUDIO
(L/ R)
Connects to the S- VIDEO output sockets and Audio
output sockets on your video equipment.
4 AV3
VIDEO/AUDIO (L/ R)
Connects to the composite A /V output sockets on your
video equipment.
5 AV4
Y, Pb, Pr /AUDIO(L /R)
Connects to the component ( Y, Pb, Pr ) video sockets
and audio ( L/R ) sockets of your DVD player, HDTV, or
video equipment.
6 AV5
VGA IN/PC AUDIO IN
Connects to a PC or other devices with a VGA interface.
7 AV6
HDMI IN
Connects to devices with a HDMI interface.
8 DIGITAL OUT
Connects to digital out socket on external digital
audioequipment.(Only for DVB-T / DVD input sources)
9 VHF/UHF IN Connect TV aerial here.
ITEM DESCRIPTION
S-VIDEO and Video have a common aud io input, if b oth devices are being used at t he same time
audio from both will be heard at same time. On ly switch on th e required device to stop the m ixing
of audio.
6
7
S VIDEO
-
AUDIO IN
Y
Pb
Pr L R
PC VGA IN
/
HDMI
PC A UDIO IN
VIDEO
AUDIO IN
L R
SCART
VHF/UHF IN
DC 12V IN
DIGITAL OUT
11
PREPARATION
PREPARTION
SVIDEO
-
AUDIOIN
Y
Pb
Pr L R
PCVGA IN
/
HDMI
PCAUDIOIN
VIDEO
AUDIOIN
L R
SCART
VHF/UHF IN
DC 12V IN
DIGITAL OUT

12
PREPARATION
PREPARTION
Your Remote Control
ATV/ DTV/DVD
CH.
VOL.
GUID E
+10
EXIT
INFO INPU T
CH. LIST
MENU
1
4
7
8
9
0
5
6
2
3
OPEN /CLO SE STOP
PLAY /PAU SE
SEAR CH SKIP
I-II
DVD
SLEE P
DVD
SUBT ITLE
SUBT ITLE
USB/ CARD
TITL E
FAST TEXT
AUDI O
SETU P
ZOOM
DVD MENU
GO TO
9
8
1
7
13
6
2
3
4
14
12
11
5
10
1
2
3
4
5
6
7
8
9
10
11
Turn the LCD TV on and into standby
mode.
Mute and restore your LCD TV sound.
ATV/DTV/DVD
Press enter ATV / DTV or DVD Mode
.
0-9
Select and switch to a channel by
using 0-9 buttons.
GUIDE/ +10
Press this button displays the electronic program guide
on the screen.(For DVD model)
Press this button twice to select song number
when the number over 9. ( For DTV mode )
CH. +/-
Change the TV channels up and down.
VOL. +/-
Increase and decrease volume.
SLEEP
Set the LCD TV sleep time.
- Press the SLEEP Button to select the number of
minutes, followed by 15, 30, 60 minutes and off.
The timer begins to count down from the number
of minutes selected.
- To check the remaining sleep time, press the
SLEEP Button once.
- To cancel the sleep time, repeatedly press the
SLEEP Button until the display off appears.
- If you turn the set off after setting the sleep
timer, the setting will be erased.
Press to skip to the beginning of the currently
played chapter or track. ( DVD mode )
Press to skip to the beginning of the next
chapter or track. ( DVD mode )
Use to advance or reverse playback rapidly.
(DVD mode )
/
Press to start playback or pause.
( DVD mode )
//
SKIP
SEARCH
PLAY/PAUSE
13
12
14
Press to open and close the disc
tray. ( DVD mode )
EXIT
Exits the OSD ( On Screen Display ) menu.
Press to stop playback. ( DVD mode )
OPEN/C LOSE
STOP

13
PREPARATION
PREPARTION
ATV/ DTV/DVD
CH.
VOL.
GUID E
+10
EXIT
INFO INPUT
CH. LIST
MENU
1
4
7
8
9
0
5
6
2
3
OPEN /CLO SE STOP
PLAY /PAU SE
SEAR CH SKIP
I-II
DVD
SLEE P
DVD
SUBT ITLE
SUBT ITLE
USB/ CARD
TITL E
FAST TEXT
AUDI O
SETU P
ZOOM
DVD MENU
GO T O
21
Access the TELETEXT items or
corresponding pages.
DVD SUBTITLE
Press to activate and change the subtitling
feature.(DVD MODE)
TITLE
Press the button to display the DVD title
content. (DVD MODE)
SETUP
Press to call up setup menu screen. (DVD
MODE)
DVD MENU
Press the button to display the DVD disc
menu. (DVD MODE)
16
17
18
20
15
19
MENU
Displays the OSD ( On Screen Display ) menu.
INFO
Press once displays a variety of information such as the current
channel and the input source.
Browse the disc’s information. ( DVD mode )
In DTV mode brings up Info Bar to show programme Information.
OK
INPUT
Cycle among the different input signal sources:
TV DVD AV1(SCART) AV2(S-VIDEO) AV3(CVBS) AV4(YPbPr) AV5(VGA) AV6(HDMI) DTV
Allow you to move, select, and set up
the OSD options.
/ USB / CARD
Display the main index in Teletext mode.
Press this button to switch between DVD,
Card Reader, and USB memory disk/stick.
( DVD mode )
/AUDIO
Reveal hidden information such as the answer to a
quiz in Teletext mode.
Change the audio language or audio channel.
( DVD mode )
/ZOOM
Freeze a multi-page passage on screen in Teletext
mode.
Zoom in/zoom out the displayed frame. ( DVD mode )
/GO TO
Display the top, bottom or all of page, to easily
read in Teletext mode.
Play from the desired location. ( DVD mode )
Turn on and off the Teletext function.
I-II ( NICAM )
Cycle through the TV Sound options:
MONO / DUAL / STEREO.
CH.LIST
Display all channel list&name.
SUBTITLE
Press the SUBTITLE key to display the subtitle which
is broadcast with the program on the screen.
 Loading...