


GUSR91DAB
DAB Radio With PLL FM Tuner
User Guide
IMPORTANT: Please read all instructions carefully before use and keep for future use
Introduction
Thank you for choosing this Grundig DAB Radio with Touch Screen Control Panel.
Not only can it receive DAB radio stations, but you can also tune into FM radio stations or connect an auxiliary device to it. Throughout this User Guide the DAB Radio with Touch Screen Control Panel will be referred to as the DAB Radio
Safety is important
Use of any electrical equipment should be undertaken with care. Please read the safety section on page 17 and 18 before using your DAB Radio. This appliance is for household use only.
1
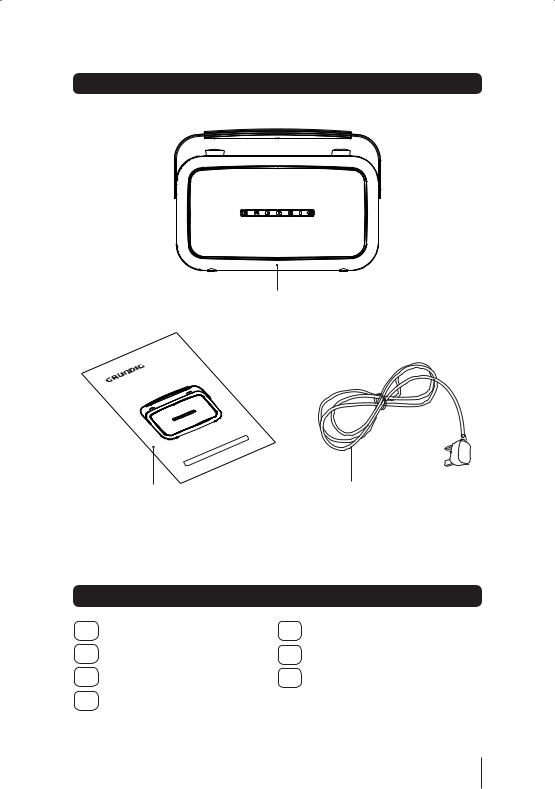
What’s in the box?
DAB Radio
|
|
|
|
|
er |
|
|
|
|
|
|
un |
|
|
|
|
|
|
T |
|
|
B |
|
|
LFM |
|
|
|
|
|
L |
|
||
|
A |
|
|
P |
|
|
D |
|
h |
|
|
||
1 |
|
|
it |
|
|
|
|
ioW |
|
|
|
||
GUSR9Rad |
ide |
|
|
|
||
DABerGu |
|
|
|
|
||
Us |
|
|
|
|
|
|
|
|
|
|
|
e |
|
|
|
|
|
|
ureus |
|
|
|
|
|
|
forfut |
|
|
|
|
|
|
dkeep |
|
|
|
|
|
|
usean |
|
|
|
|
|
|
fore |
|
|
|
|
|
|
llybe |
|
|
|
|
|
|
scarefu |
|
|
|
|
|
|
ction |
|
|
|
|
|
|
instru |
|
|
|
|
|
|
dall |
|
|
|
|
|
|
erea |
|
|
|
|
|
|
:Pleas |
|
|
|
|
|
|
TANT |
|
|
|
|
|
|
IMPOR |
|
This User Guide |
AC Power Cord |
|||||
|
||||||
Contents
01 |
Your DAB Radio ........................ |
3 |
05 |
Specifications .......................... |
16 |
02 |
Get going .................................. |
4 |
06 |
Warnings ................................. |
17 |
03 |
Daily use ................................... |
5 |
07 |
Guarantee ................................ |
19 |
04 |
Trouble Shooting .................... |
15 |
|
|
|
2

01 Your DAB Radio
BBS button
Standby button
Volume control knob
Mute button
Scan button
Standby |
BBS |
10:00:00 |
Display |
Preset |
|
|
|
|
|
Mute |
Scan |
23-7-2009 |
Mode |
Menu |
AUX In Socket
PHONE Socket
Rod Antenna
Display button
Preset button
Select/Scroll up/ down
Menu button
Mode button
LCD Display
AC Power Socket
ON/OFF switch
3
Get going |
02 |
|
1 |
Connect the small end of the mains lead to the AC input socket on the rear of the unit. |
|
|
Connect the 3 pin plug to a suitable wall socket. |
|
2 |
Turn the power switch on the rear of the unit to the ON position. |
3 |
Using Headphones |
|
A pair of headphones (not supplied) with a 3.5mm diameter stereo plug and 8-32 ohm |
|
impedance is required. Plug the headphones into the Headphone Socket on the side of |
|
the DAB Radio. |
|
When headphones are connected, the sound to the speakers is automatically turned |
|
off. |
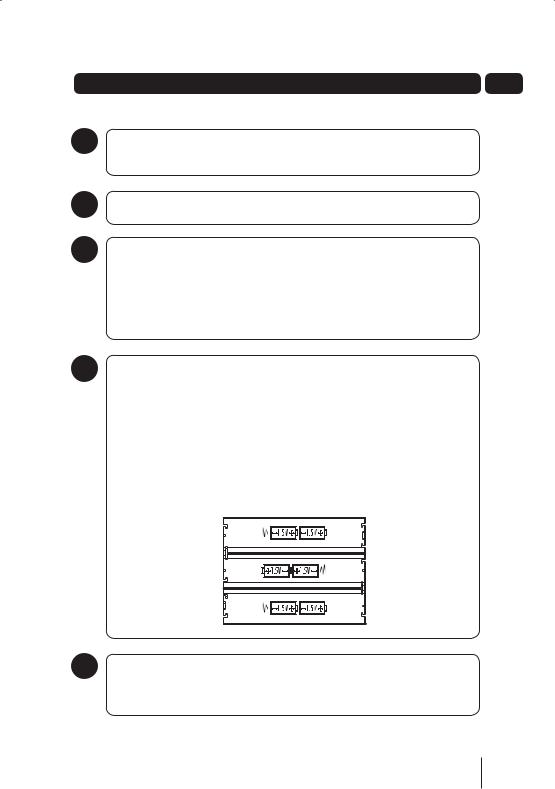
4 |
Using the DAB Radio with Batteries |
|
The DAB Radio can be powered by 6 “C” types Batteries. This allows the |
|
DAB Radio to be used outside or away from wall sockets. |
To remove the Battery Compartment Cover, press the 2 retaining clips firmly and pull away from the DAB Radio.
Insert 6 “C” type batteries into the battery compartment, following the polarity diagram on the inside.
Replace the Battery Compartment Cover.
5 Using AUX IN
Connect an audio cable (not supplied) to the AUX IN socket on the side of the DAB Radio. Connect the other end to a suitable output socket on your auxiliary device.
4
03 Daily Use
Switching On
1To turn on the DAB Radio, ensure the power switch on the rear of the unit is set to the ON position.
2Press the STANDBY button on the touch panel.
3To turn the DAB Radio off press the STANDBY button again.
Adjusting the Volume
1To increase the volume, turn the volume control knob clockwise.
2To decrease the volume, turn the volume control knob anti-clockwise.
3You can also press the MUTE button to turn the sound off. To turn the sound back on, press the MUTE button again.
BBS function
The bass sounds can be enhanced by selecting the bass boost system.
1Press the BBS button to enhance the bass frequencies
2To turn off the bass boost system, press the BBS button again.
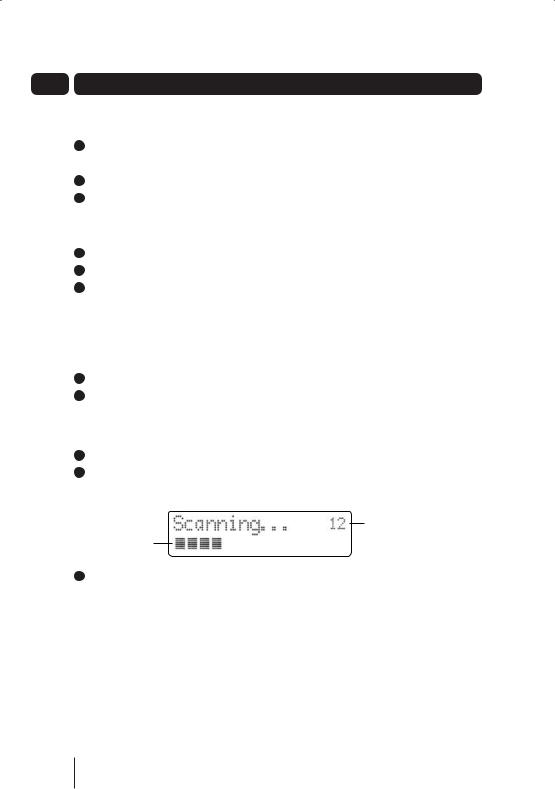
Listening to Radio
1Press the STANDBY button to turn the DAB Radio on.
2The following screen will be displayed. A bar graph indicates the progress of the search - the number of stations found increases as the scan progresses.
Number of stations found
Progress bar
3When the scan is complete, the DAB Radio will then select the first available station - stations are listed in numerical then alphabetic order. The station list is retained in memory so the next time you switch the DAB Radio on, the station search does not take place. If there are no stations found, check that adequate DAB coverage exists in your area.
5
Daily Use |
03 |
Changing DAB Stations
1Rotate the Scroll Up/Down knob to scroll through the stations in the station list.
2Press the Scroll Up/Down button to select a new station from the list. Push the SELECT button to confirm. The radio will tune to the new station.
DON’T FORGET!
If no new station is selected the DAB Radio will display the currently playing station after 15 seconds.
From time to time new DAB stations may be added to the DAB station list.
If you wish to see if any new stations have been added, press the SCAN button to activate a full scan.
Storing DAB Presets
You can preset up to 10 DAB stations for easy access as follows:
1Tune to the station you wish to preset (see Changing DAB Stations).
2Press and hold the PRESET button, preset position 1 will show in the display.
3Rotate the SELECT/Scroll Up/Down button to select the required preset memory position.
4Push the SELECT button to save the current station into the specified preset location.
Selecting a Preset Station
1Press the PRESET button briefly, preset position 1 will show in the display.
2Rotate the SELECT/Scroll Up/Down button to select the desired preset.
3Push the SELECT button to confirm.
DON’T FORGET!
If you select a preset location that has not been programmed with a station, "Preset empty" will be displayed.
The DAB Radio will return to the previously selected station after a few seconds.
6
 Loading...