


GDP 7700

DVD-PLAYER
GDP 7700

CONTENTS ___________________________________________
4-5 GDP 7700 DVD player
4 Special features of your DVD player
4 Packing contents
5 HDMI transmission
5 Disc formats
6 Set-up and safety
7-9 Overview
7 Operating controls and connections of the DVD player
8-9 The remote control
10-15 Connection and preparation
10 Setting up the DVD player
10 Attaching the DVD player to the wall
11 Connecting the television with an HDMI cable
12 Connecting the television with an HDMI adapter cable to DVI
13 Connecting a digital multi-channel amplifier or digital two-channel audio
system
14 Connecting the television with the audio/video adapter
14 Connecting an audio system with analogue two-channel stereo sound
15 Connecting the power supply unit
15 Activating the remote control battery
15 Changing the remote control battery
16-18 Initial setup
16 Switching on the DVD player
16 Selecting the language of the screen menus
16-18 Adapting the DVD player to the television set
19 Before playback
19 Preparation
19 Inserting disc/removing discs
20-25 DVD playback
20 DVD features
20 Special DVD features
21 Playing back a title
21 Viewing information
21 Selecting titles and chapters with the DVD menu
22 Selecting a title or chapter
22 Selecting chapters in steps (SKIP)
22 Pausing and resuming playback
22 Ending playback
23-24 Additional playback functions
25 Selecting and playing scenes
25 Repeat functions
26-27 S-VCD/VCD playback
26 S-VCD/VCD features
26 PBC (playback control)
26-27 Switching PBC (playback control) on and off
27 Playing a track
27 Selecting a track
27 Forward search
2

CONTENTS
___________________________________________
28-36 Playing audio/video files
28 File format features
28 Nero Digital
™ CDs
28 MP4 video CDs
28-29 MP3 CDs
29 JPEG CDs
29 KODAK Picture CDs
29 Audio CDs
30 Operation with external data equipment
31 The file browser
31 Main menu of the file browser
31 Selecting the data medium/file browser
32 Playback basic functions
32-33 Additional playback functions
34 Picture CD playback
34 Additional picture playback functions
35 Repeat functions
35 Random playback (Shuffle)
36 Audio CD playback
36 Playlists
37 Parental control
37 Authorising the content of a DVD
37 Changing the password
38 Picture settings
38 Setting picture parameters for the television
38 Selecting the viewing time for a JPEG picture
39-43 Audio settings
39 Audio settings for analogue audio output
40 Audio settings for digital audio output
41 Dolby settings
42 Equalizer settings
43 3D sound settings
43 HDCD settings
44-46 Custom settings
44 Language settings
45 Viewing camera angles
45 Switching the screen saver on and off
45 Last playback position
46 Automatic data disc playback
46 Resetting the DVD player to original condition
46 Viewing software information
47 Television remote control
48-50 Information
48 Technical data
48 General information on laser devices
49 Troubleshooting
49 Cleaning discs
49 Software information
49 Environmental note
50 Additional Information for units sold in the UK.
3
ENGLISH
Special features of your DVD player
Your DVD player provides you with perfect digital video playback in
studio quality.
It also provides superb cinema quality audio playback – in stereo or
with digital multi-channel sound – depending on the type of DVD and
audio system or stereo television.
Other features of DVD video include the choice of audio channel and
language, choice of subtitle language, and various camera recording
angles. Your DVD player is suitable for DVDs with regional code 2.
In addition to DVDs it can play MP4 video CDs, Nero Digital™ CDs,
MP3 CDs, JPEG encoded (photo) CDs, KODAK picture CDs, video
CDs, S-Video CDs and audio CDs.
The file formats can also be played via the USB input – from a memory stick or a digital camera.
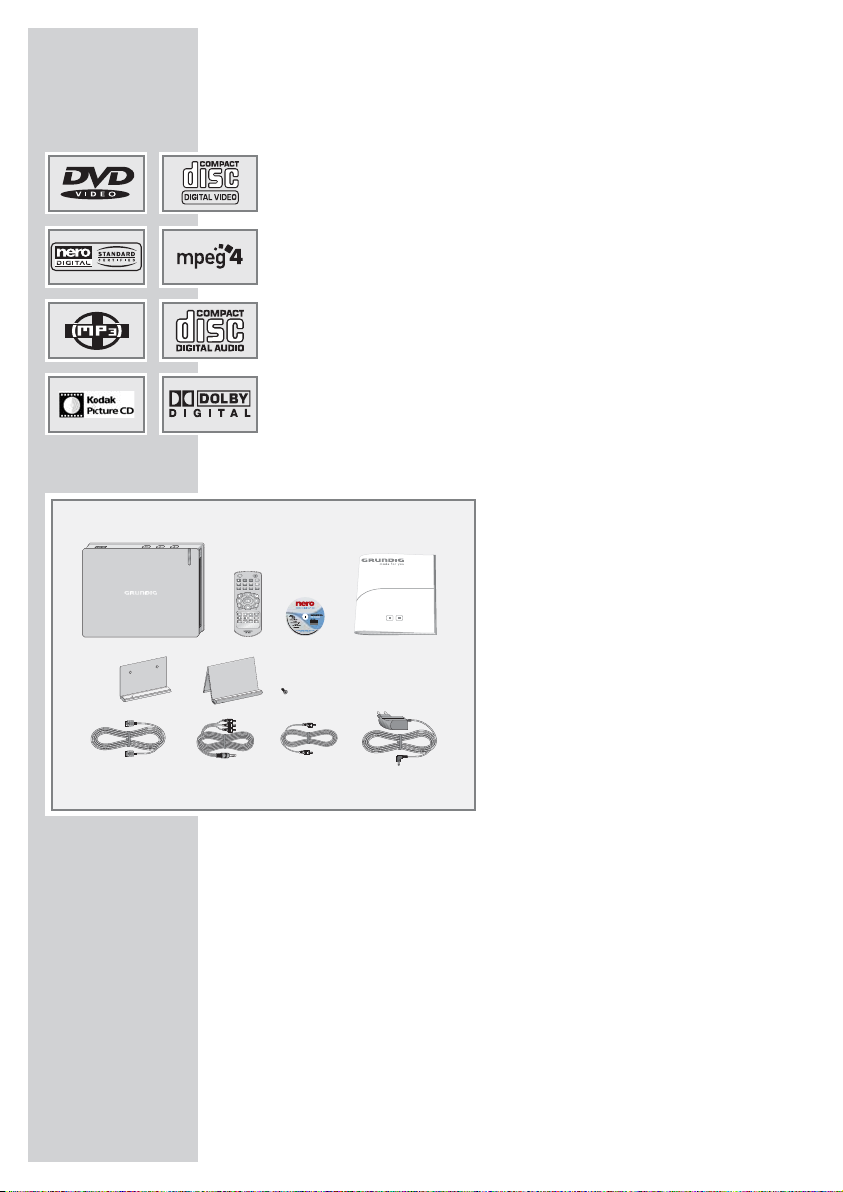
Packing contents
1 GDP 7700 DVD player
2 Remote control
3 Operating manual
4 Wall bracket
5 Stand
6 Fastening screw for wall bracket
or stand
7 HDMI cable
8 Audio/video adapter AV Out
9 Audio adapter digital Audio Out
10 Power supply unit
GDP 7700 DVD PLAYER
_____________________
4
4
123
56
78910

GDP 7700 DVD PLAYER
_____________________
HDMI transmission
HDMI (High Definition Multimedia Interface) transfers digital audio
and video data via a cable without additional file compression. This
means there is no loss in quality.
The bandwidth for video data is up to 165 MHz.
Audio data is transmitted at frequencies of up to 192 kHz with word
widths of up to 24 bits on up to 8 channels.
The data is transferred at a speed of up to 5 gigabytes per second.
Even with complex pictures and fast movements, there are no artefacts
caused by transmission.
If your television has a DVI (Digital Visual Interface) input, this is not a
problem. This is because HDMI is based on DVI and is downwards
compatible with it.
This means that DVI signals can be transferred via the HDMI interface
(using a DVI-HDMI adapter cable), albeit without audio signals. You
can feed the audio signal to the television using the »
DIGITAL AUDIO
OUT
« (digital audio signal) socket.
Compatibility is also ensured by HDMI using the same copy protection method as DVI.
Digital copies cannot be made using HDMI.
This is prevented by the HDCP system (High-bandwidth Digital Content
Protection).
Disc formats
Your DVD player can play back CD-R, CD-RW, VCD 2,0, Super-VCD,
DVD R, DVD RW discs.
Due to the difference in quality of the recording media and the quality
of the recording itself, it can occasionally occur that a home-made DVD
or CD cannot be read. This does not indicate a malfunction of the DVD
player.
You have to finalise your own CD-R/RW recordings.
Please remember that to create CD-Rs or CD-RWs the settings in your
burning program must conform to the ISO 9660 standard.
When MP4 video, Nero Digital
™, MP3 or JPEG CDs are played back,
individual tracks/pictures may be skipped or incorrectly played back
and displayed. This can be due to the disc configuration, the encoder
software or the hardware used for the recording.
Audio CDs (CD-DA) meet the appropriate specification and bear the
corresponding logo. Copy-protected CDs do not meet this specification and do not bear the logo. These CDs can cause playback errors.
5
ENGLISH

SET-UP AND SAFETY
___________________________
This DVD player is designed to play back video and audio signals from
compact discs (DVDs and CDs).
Any other use is expressly prohibited.
If the DVD player is subject to a sudden change in temperature, for example if it is brought in from the cold to a warm room, connect it to the mains
supply and let it stand for at least two hours before you insert a DVD.
The DVD player is designed for use in dry rooms. If you do use it outdoors,
make absolutely sure it and the power supply unit are protected from
moisture, such as dripping or splashing water.
Place the DVD player on a hard, level surface. Do not place any objects
such as newspapers on the DVD player, or any cloth or similar items underneath it.
Do not place the DVD player directly on top of an AV receiver or a subwoofer. The laser optics are sensitive to temperature and shocks.
Do not place the DVD player close to heating units or in direct sunlight, as
this will impair cooling.
When setting up the DVD player, note that furniture is often coated with
various types of varnish and plastic, which often contain chemical additives.
These additives may cause corrosion to the feet of the unit. This may leave
stains on the surface of the furniture which can be difficult or impossible to
remove.
Do not insert foreign objects in the disc compartment of the DVD player.
Never open the DVD player casing under any circumstances. No warranty
claims are accepted for damage caused by incorrect handling.
Do not place any vessels filled with liquid, such as vases, on the DVD player,
as they may spill liquid, thus presenting a safety risk.
Do not place any objects such as burning candles on the DVD player.
Thunderstorms are a danger to all electrical devices. Even if the DVD player
is switched off, it can be damaged by a lightning strike to the mains. Always
remove the power plug during a thunder storm.
If the DVD player cannot scan DVDs or CDs perfectly, use a commercially
available cleaning-CD to clean the laser optics. Other cleaning methods
may damage the laser optics.
Always keep the disc compartment closed to prevent dust from collecting
on the laser optics.
Note:
Make sure the power plug is freely accessible.
6

Operating controls and connections of the
DVD player
Disc compartment.
Display, lights up blue in standby, light blue during operation.
.
Ejects the CD.
7
Press once to activate the RESUME function;
press twice to switch to STOP;
press and hold down to switch DVD player to standby.
8
! Starts disc playback;
switches to pause during playback;
press and hold down to switch DVD player from standby.
USB interface for connecting an external data medium.
HDMI OUT Video/audio output socket (digital signal) for connecting a
television or projector.
AV OUT Video/audio output socket (analogue signal) for connect-
ing to a television or AV receiver and a audio system with
RCA sockets.
DIGITAL
Audio outputs (coaxial) for PCM/Dolby Digital/
AUDIO OUT
DTS signals for connecting a digital multi-channel audio
video amplifier or AV receiver.
DC IN 12V
Socket for the power supply unit cable.
Caution:
The device is connected to the mains with the power supply unit. Pull out the
power supply unit when you want to completely disconnect the device from
the mains.
Do not connect any devices while the DVD player is switched on. Switch off
the other device as well, before connecting it.
Never touch the inside of the sockets and plugs of the connecting cables.
Electrostatic discharge can damage the DVD player.
B
(
A
OVERVIEW
___________________________________________
7
ENGLISH
A
B
OVERVIEW
___________________________________________
Note:
You can operate your DVD player with the remote control supplied, as well as with a GRUNDIG system remote control,
which you can switch on at the DVD level.
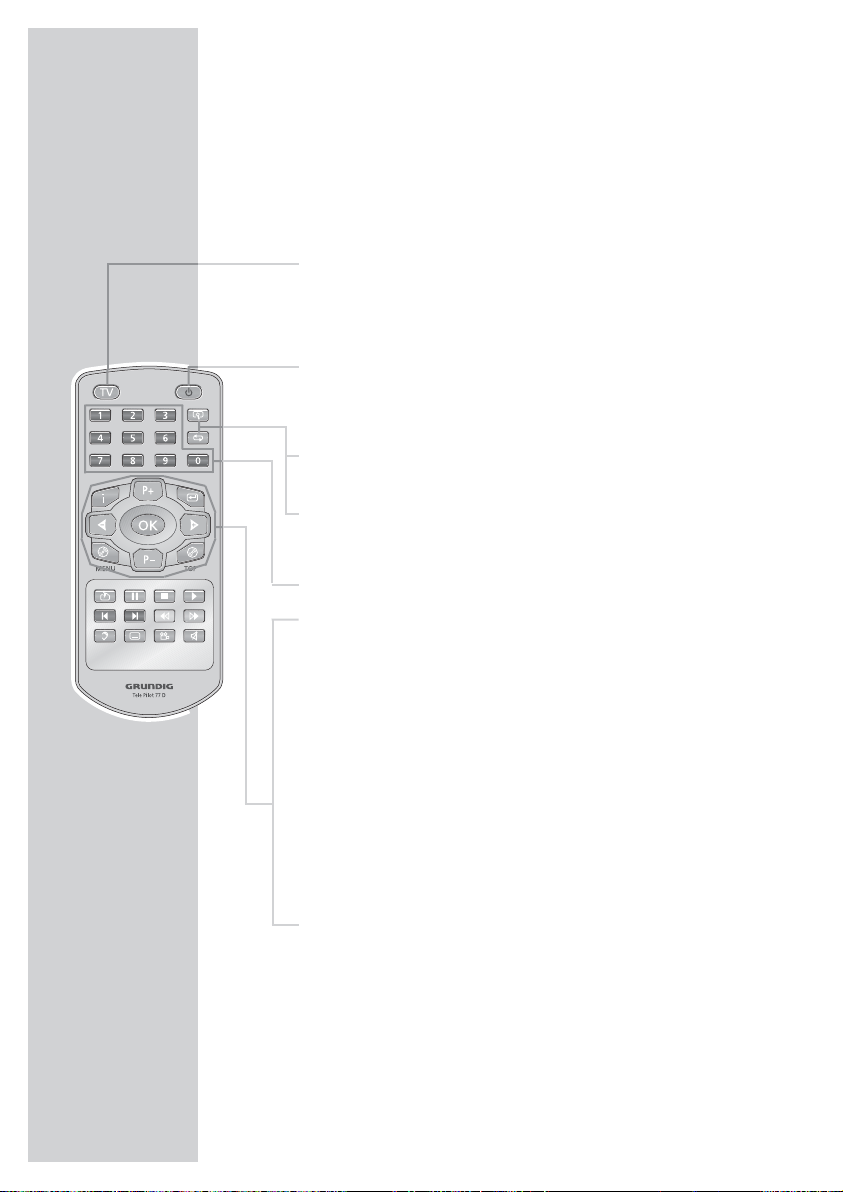
The remote control
TV Switches the remote control between controlling
your DVD player and controlling your GRUNDIG
television. The options for this are described on
page 47.
8 Switches the DVD player out of and back into
standby mode.
In standby, the blue indicator on the DVD player
lights up.
v Zooms in on scenes during playback.
b For selecting and repeating sections on DVDs and
video CDs or tracks on MP4 video CDs, Nero
Digital™ CDs, audio CDs, MP3 or video CDs.
1 … 0 Numerical buttons for various data .
i Opens the main menu (player menu) on the DVD
player.
4 P+ P– 3 Selects various functions in the menus.
OK Displays various information on the television
screen during playback, such as the track or chapter number and playing time.
Confirms selected functions in the menus.
x Switches up one menu level* for DVDs.
.MENU Opens up the disc menu* of a DVD during play-
back. Switches the playback control (PBC) on and
off (VCD/S-VCD).
. TOP Opens the title menu* of the DVD during playback.
* Depends on the DVD in use
8
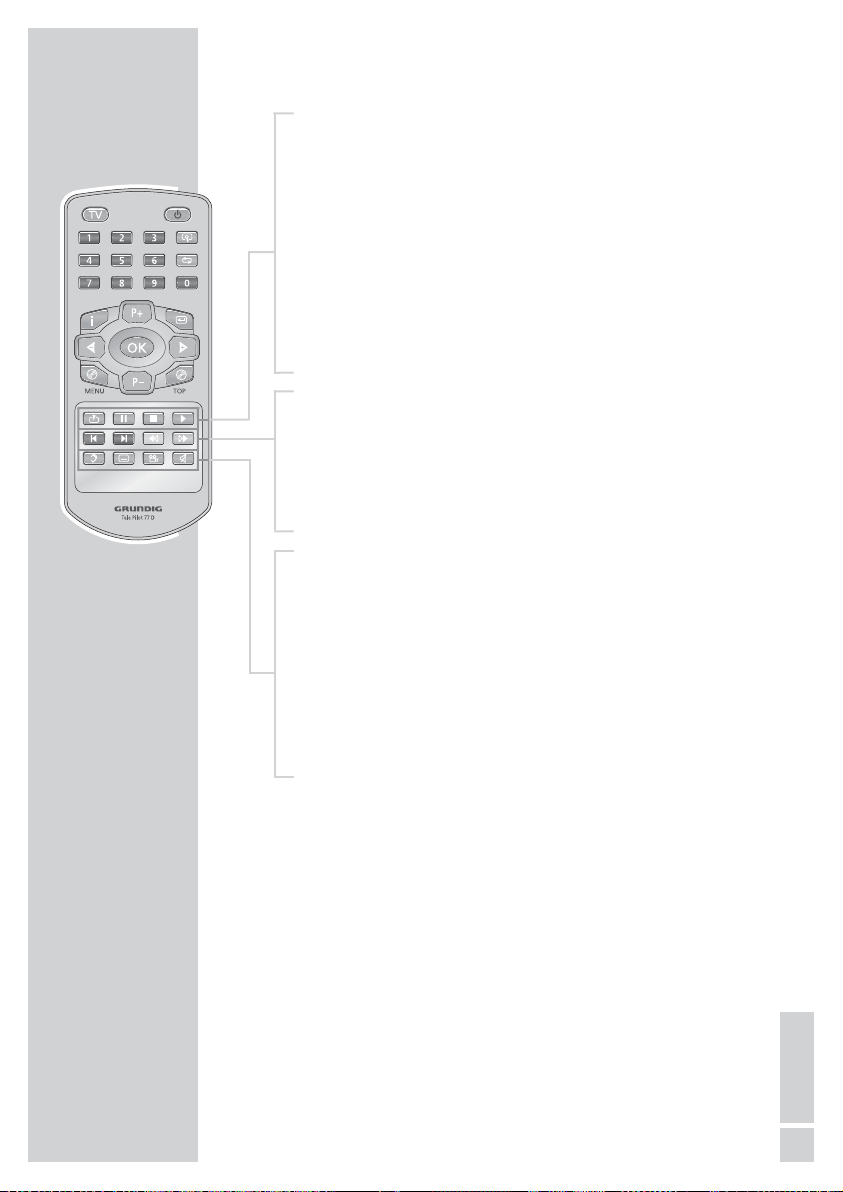
c Opens the bookmark function (marks scenes).
! Press once for freeze-frame on DVDs, video CDs, MP4
video CDs and Nero Digital
™ CDs;
pauses audio CDs and MP3 CDs;
press
3 to advance the scene frame by frame, press 4 to
reverse.
Press once for slow motion, press
m or , to select the
slow motion speed (DVD).
7 Press once to activate the “RESUME” function;
press twice to switch to “STOP”.
8 Starts playback.
5 Selects the previous track or section during playback.
6 Selects the next track or section during playback.
m Switches to the reverse picture search at various speeds,
selects the reverse slow motion speed.
, Switches to the forwards picture search at various speeds
during playback, selects the forwards slow motion speed.
d Switches between the original and the dubbed language*
during DVD playback.
Switches between the various sound formats.
y For selecting and displaying subtitles* of the DVD during
playback.
n Selects various camera angles* for certain scenes or
passages on the DVD during playback.
Selects the RANDOM PLAY function in stop mode.
d
Mutes the sound on a GRUNDIG television.
OVERVIEW
___________________________________________
* Depends on the DVD in use
9
ENGLISH

Setting up the DVD player
1 Put the DVD player in the stand supplied (A).
2 Fasten the stand onto the DVD player with the screw (B).
Attaching the DVD player to the wall
1 Mark the holes for the wall bracket on the wall.
2 Drill the holes in the wall, insert the wall plugs and screw
in the standard screw hooks.
3 Put the DVD player in the wall bracket supplied (A).
4 Fasten the wall bracket onto the DVD player with the screw
(
B).
Note:
Please note the following instructions when setting up your
DVD player.
CONNECTION AND PREPARATION
__
10
A
B
A
B
Note:
Do not connect any other equipment while the device is switched
on. Switch off the other equipment as well before connecting it.
Only plug the device into the mains socket after you have connected the external devices.
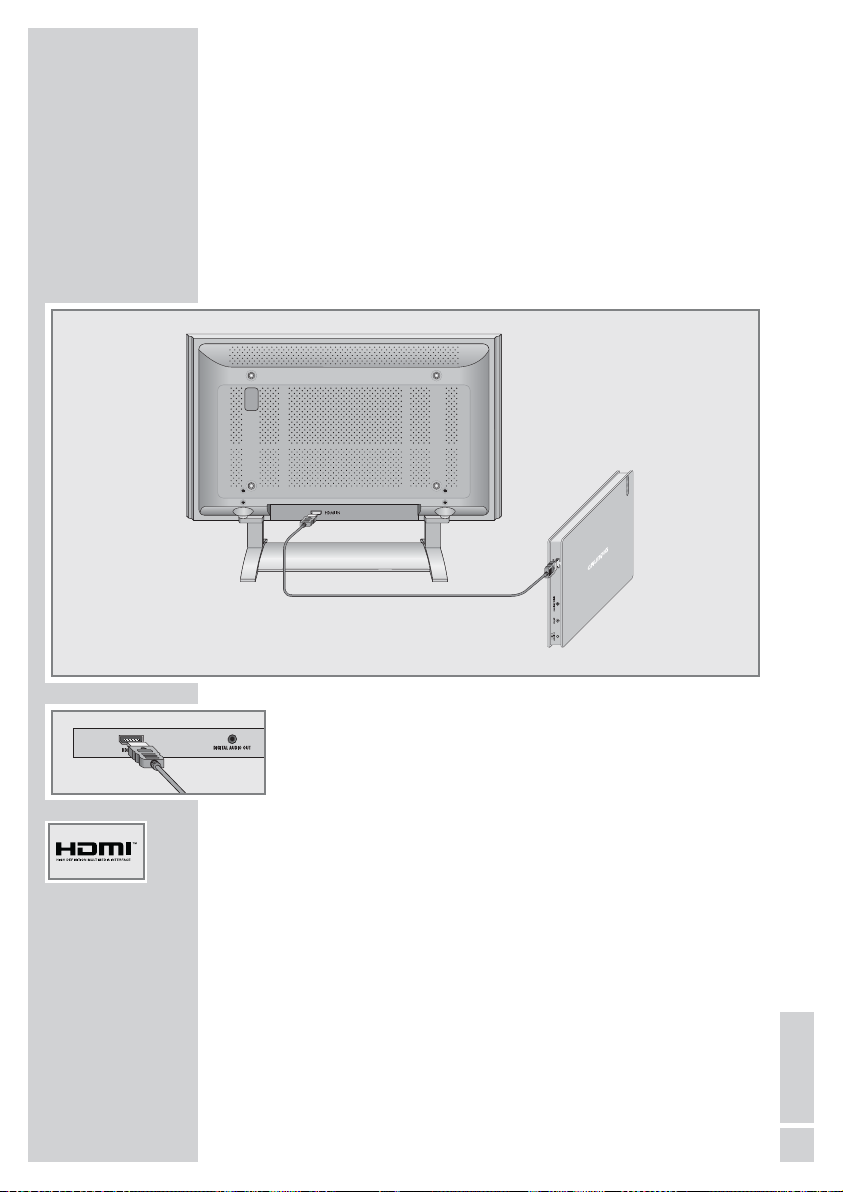
Connecting the television with an HDMI
cable*(digital audio/video signal)
1 Plug the HDMI cable supplied into the »HDMI OUT« socket
on the DVD player and the socket on the television (video/
audio signal).
Notes:
If you connect the DVD player to the television using an HDMI
cable and set the HDMI resolution to 576p (see the chapter on
setting the HDMI resolution on page 16), a signal (CVBS) is
also emitted at the »
AV OUT« socket on the DVD player.
However, if you set 720p or 1080i, this signal is deactivated.
Many televisions do not have a decoder for AC3 or DTS. In this
case, set the digital output of the DVD player to »PCM« in the
»Audio settings« menu. The settings are described on page 40.
*HDMI, the HDMI logo and High-Definition Multimedia Interface are trade-
marks of HDMI Licensing LLC.
CONNECTION AND PREPARATION
__
11
ENGLISH

Connecting the television with an HDMI adapter
cable to DVI (digital video/audio signal)
1 Plug a standard adapter cable into the »HDMI OUT« socket
on the DVD player and the corresponding socket on the television (digital video signal).
2 Plug the adapter cable supplied into the »DIGITAL AUDIO
OUT
« socket on the DVD player and the corresponding socket
on the television (digital audio signal);
or
plug the audio/video adapter cable supplied into the »AV
OUT
« socket on the DVD player and the corresponding socket
(AUDIO IN) on the television (analogue audio signal).
CONNECTION AND PREPARATION
__
12
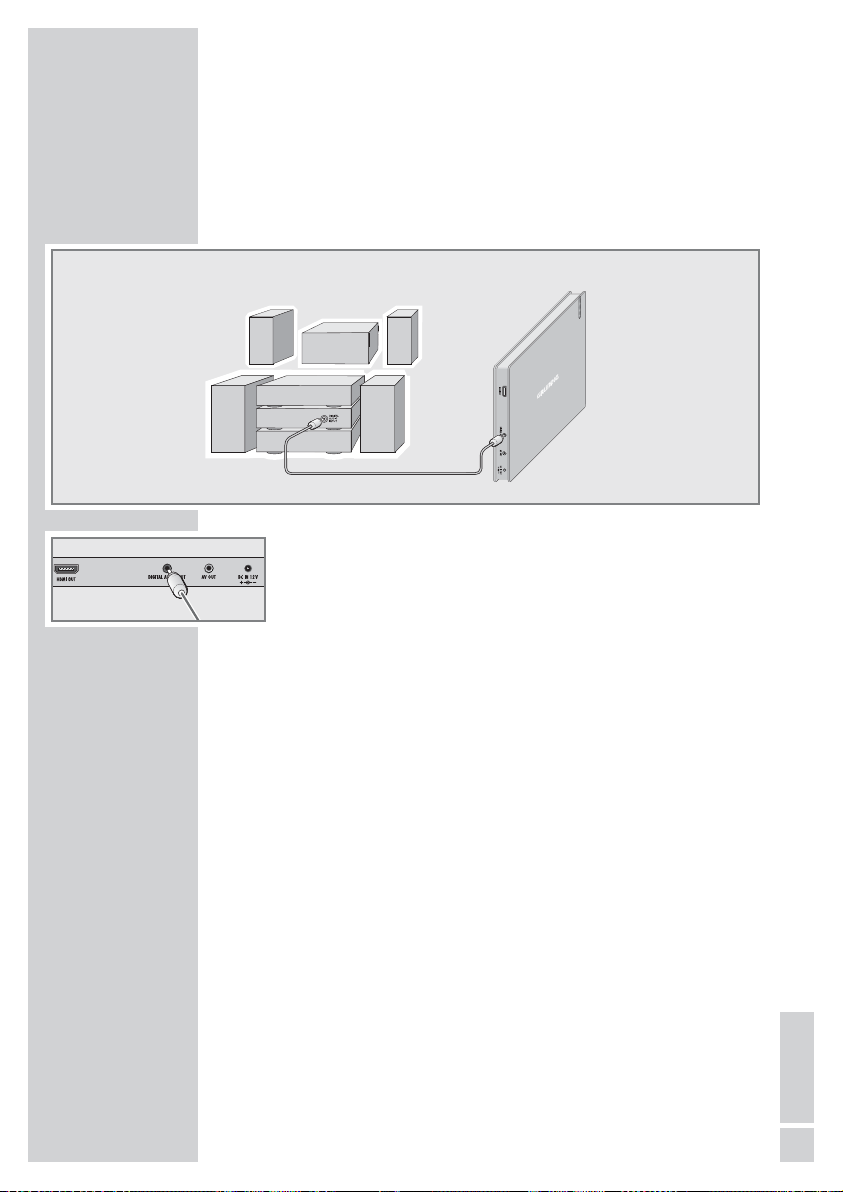
Connecting a digital multi-channel amplifier or
digital two-channel audio system
The digital multi-channel sound of a DVD can best be decoded and
played back with a multi-channel audio/video amplifier (Dolby*
digital decoder or DTS**).
1 Plug the adapter cable supplied into the »DIGITAL AUDIO
OUT
« socket on the DVD player and the corresponding socket
on the digital multi-channel amplifier (digital audio signal).
Note:
Even if you are using a digital connection, you should still make
an analogue audio connection as it is possible, depending on
the disc type, that the signal cannot be output via the »
DIGI-
TAL AUDIO OUT
« socket (see page 14 for connection).
CONNECTION AND PREPARATION
__
13
ENGLISH
* Manufactured under licence from Dolby Laboratories Licensing Corporation.
“Dolby” and the double-D symbol “
g “ are trademarks of the Dolby Labora-
tories Licensing Corporation. Copyright 1992 Dolby Laboratories, Inc. All
rights reserved.
** DTS and DTS Digital Out are trademarks of Digital Theater Systems, Inc. All
rights reserved.
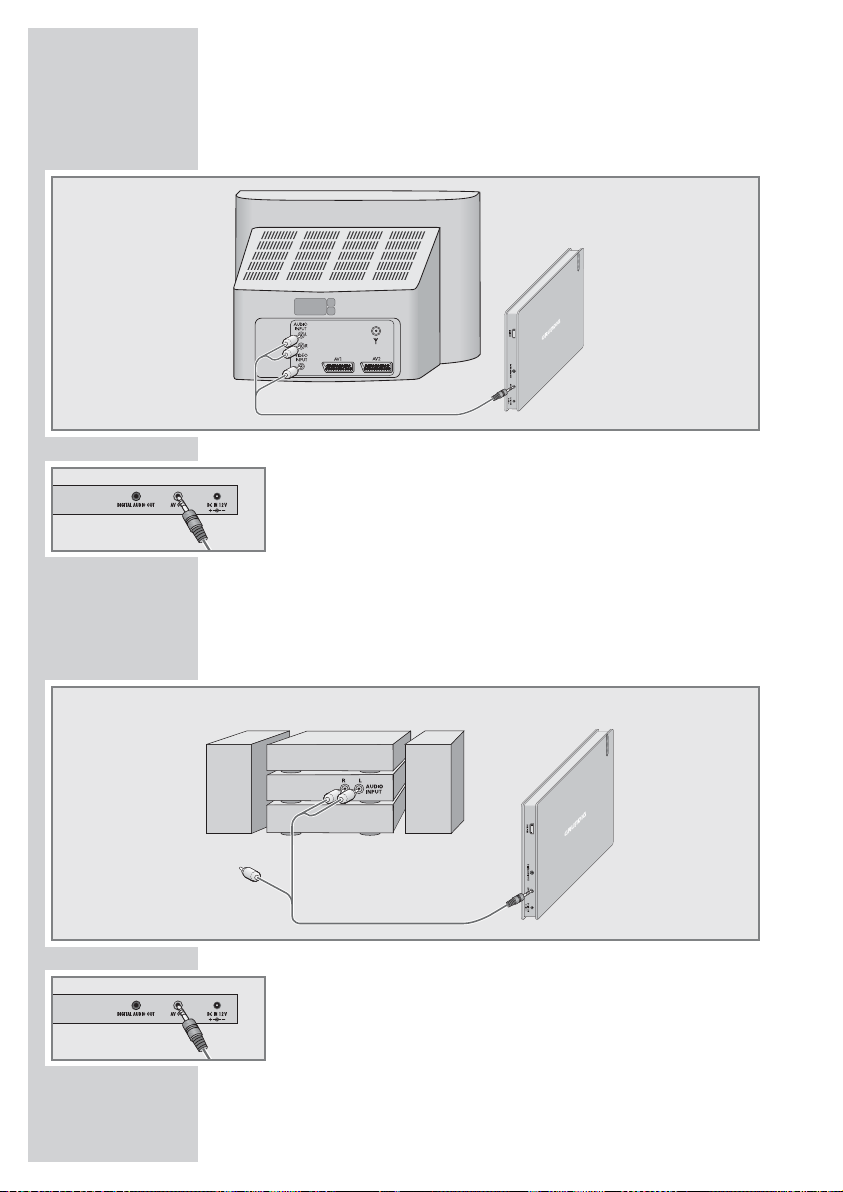
Connecting the television with the audio/video
adapter (analogue video/audio signal)
1 Plug the audio/video adapter supplied into the »AV OUT«
socket of the DVD player and into the corresponding socket
(VIDEO IN and AUDIO IN) of the television.
Note:
The »AV OUT« socket always emits a signal, even if HDMI is
switched off.
Connecting an audio system with analogue
two-channel stereo sound
1 Plug the audio/video adapter supplied into the »AV OUT«
socket of the DVD player and into the corresponding socket of
the audio system.
Caution:
Do not connect the »AV OUT« socket on the DVD player to
the PHONO (record player) input on the audio system.
CONNECTION AND PREPARATION
__
14
CONNECTION AND PREPARATION
__
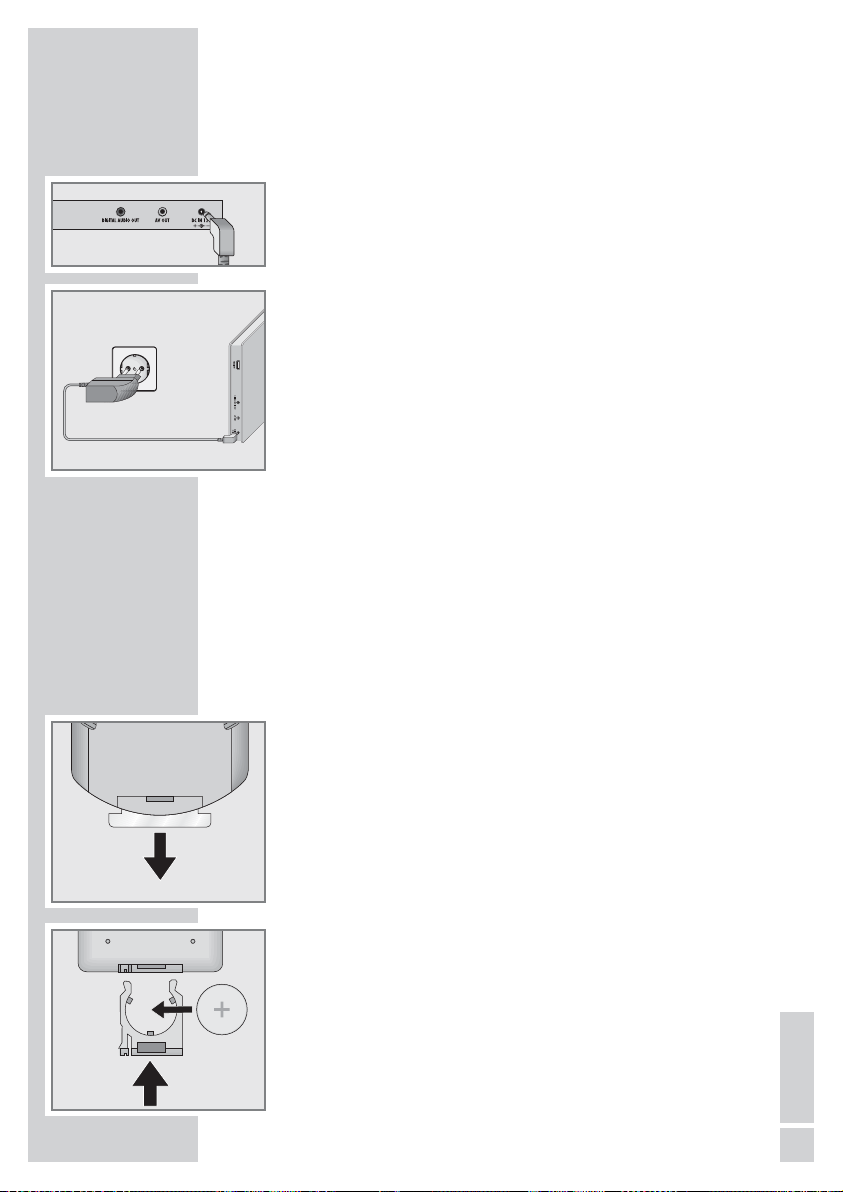
Connecting the power supply unit
(SYS 1308-2412-W2E)
Note:
Always switch off the DVD player before connecting to or disconnecting from the mains.
Only use the power unit supplied. Using another power supply
unit could lead to malfunction and damage.
Unplug the power supply unit if you are not using it.
1 Plug the power supply unit into the »
DC IN 12V
« socket of the
DVD player.
2 Plug the power supply unit into the wall socket.
Note:
The only way to disconnect the device from the mains supply
is to unplug the adapter.
Activating the remote control battery
1 When using it for the first time, activate the remote control bat-
tery by pulling out the film protruding from the battery holder.
Note:
Do not expose the remote control and the battery to extreme
heat.
Changing the remote control battery
1 Pull out the battery holder.
2 When inserting the battery (3 V, lithium), make sure the positive
terminal (+) is facing upwards.
3 Push the battery holder back into the remote control until it
latches into place.
Note:
If the DVD player no longer reacts properly to remote control
commands, the battery may be flat. Always remove used batteries. The manufacturer accepts no liability for damage
caused by leaking batteries.
There is a risk of explosion if the battery is not replaced
properly. Only use the same type of battery or an equivalent.
Environmental note:
Batteries, including those which do not contain heavy metal,
should not be disposed of with household waste. Please dispose of used batteries in an environmentally sound manner.
Find out about the legal regulations which apply in your area.
15
ENGLISH
INITIAL SETUP
______________________________________
Switching on the DVD player
1 Switch on the DVD player by pressing »9« on the remote
control.
– The indicator on the DVD player is light blue.
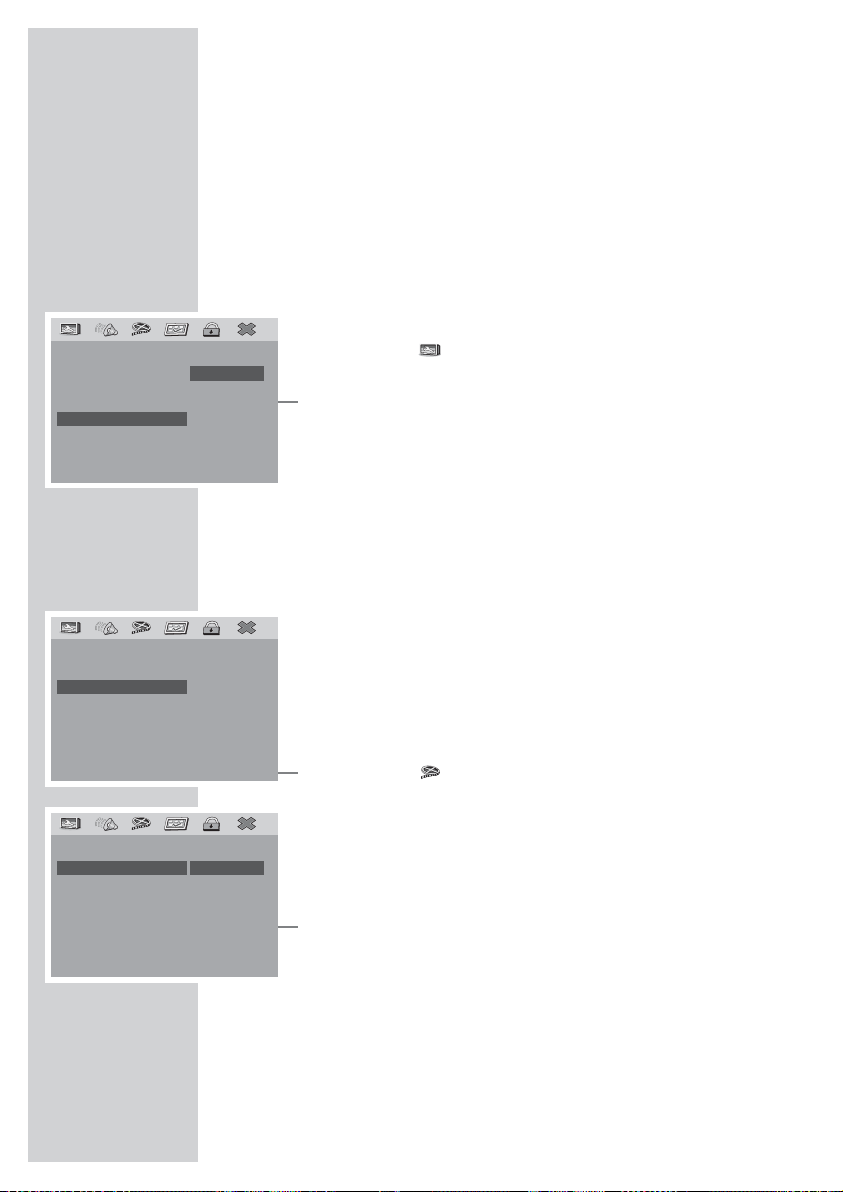
Selecting the language of the screen menus
This sets the language of the DVD player’s screen menus. You can
choose between several languages.
1 Press »i« to open the main menu.
2 Select the » « menu item (Other settings) by pressing »4«
or »
3« and activate with »OK«.
3 Select the »OSD language« by pressing »P+« or »P–« and
activate by pressing »
OK«.
4 Select your language using »P+« or »P–« and press »OK« to
confirm.
5 Press »i« to close the menu.
Adapting the DVD player to the television set
Switching the HDMI signal on and off
The video output of your DVD player has been set at the factory to
»HDMI On«.
If you connect up your DVD player using an HDMI cable (»
HDMI
OUT
« socket on the DVD player) to the television or projector, you
must set the HDMI signal so that the video signal, and therefore
the picture, reaches the television.
1 Press »i« to open the main menu.
2 Select the » « menu item (Video settings) by pressing »4«
or »
3« and activate with »OK«.
3 Select the »HDMI output« by pressing »P+« or »P–« and ac-
tivate by pressing »
OK«.
4 Select the »HDMI« by pressing »P+« or »P–« and activate by
pressing »OK«.
5 Switch on (On) the HDMI signal by pressing »P+« or »P–«
and activate by pressing »OK«.
6 Press »i« to close the menu.
Setting the HDMI resolution
You can select the ideal setting here for the connected television or
projector. The abbreviation behind the number means: »p« = progressive, »i« = interlace.
You can only select this function if the video output is set to »HDMI
On«.
1 Press »i« to open the main menu.
16
–– Other settings – –
TV Format 16:9
Picture format Ori.
Camera angle On
OSD language EN
Screen saver On
Play position Off
Auto Play Off
English
French
German
1
Spanish
Portugués
Italien
Nederlands
–– HDMI output ––
HDMI On
Resolution
On
Off
1
–– Video settings ––
Picture adjust.
HDMI output
JPEG Interval 15 Sec
1
 Loading...