


 Loading...
Graco 16W884, 16W870, 16W871, 16W865, 16W887 User Manual
...Operation
GMAX™ 3400, GMAX™ II 3900/5900/7900, and |
332919C |
|
TexSpray 5900HD/7900HD Airless Sprayers |
||
EN |
For professional use only.
Not approved for use in European explosive atmosphere locations. For the application of architectural paints and coatings.
3300 psi (22.8 MPa, 228 bar) Maximum Working Pressure
Important Safety Instructions
Read all warnings and instructions in this manual and in gas engine manual. Save these instructions.
|
|
GMAX 3400 |
|
|
|
Model: |
Standard |
|
|
|
|
16W863 |
|
|
|
|
|
|
|
GMAX II 3900 |
|
|
|
Model: |
Standard |
ProContractor |
Lo-Boy |
RentalPro |
|
|
|
|
|
360G |
|
16W865 |
|
|
|
|
|
16W866 |
|
|
|
|
|
16W867 |
|
|
|
|
|
16W984 |
|
|
|
|
|
|
|
GMAX II 5900 |
|
|
|
Model: |
Standard |
ProContractor |
Lo-Boy |
Ironman |
Convertible |
16W869 |
|
|
|
|
|
16W870 |
|
|
|
|
|
16W871 |
|
|
|
|
|
16W881 |
|
|
|
|
|
16W873 |
|
|
|
|
|
|
|
GMAX II 7900 |
|
|
|
Model: |
Standard |
ProContractor |
Lo-Boy |
Ironman |
Roof Rig |
16W883 |
|
|
|
|
|
16W884 |
|
|
|
|
|
16W885 |
|
|
|
|
ti23055a |
16W887 |
|
|
|
|
|
16W987 |
|
|
|
|
|
|
|
TexSpray 5900HD |
|
|
|
Model: |
Standard |
ProContractor |
|
|
|
16W889 |
|
|
|
|
|
16W882 |
|
|
|
|
|
|
|
TexSpray 7900HD |
|
|
|
Model: |
Standard |
ProContractor |
Ironman |
|
|
16W890 |
|
|
|
|
|
16W888 |
|
|
|
|
|
16X949 |
|
|
|
|
|
Related Manuals:
Parts 332921
Table of Contents
Table of Contents
Table of Contents . . . . . . . . . . . . . . . . . . . . . . . . . . 2
Warning . . . . . . . . . . . . . . . . . . . . . . . . . . . . . . . . . . 3
Component Identification . . . . . . . . . . . . . . . . . . . . 5
Standard Models (3400, 3900, 5900, 5900HD,
7900, 7900HD) . . . . . . . . . . . . . . . . . . . . . . . 5
ProContractor Models (3900, 5900, 7900, 5900HD,
7900HD) . . . . . . . . . . . . . . . . . . . . . . . . . . . . 6
Ironman Models (5900, 7900, 7900HD) . . . . . . . 7
Lo-Boy Models (3900, 5900, 7900) . . . . . . . . . . . 8
Convertible Models (5900) . . . . . . . . . . . . . . . . . 9
Pressure Relief Procedure . . . . . . . . . . . . . . . . . . 10
Grounding . . . . . . . . . . . . . . . . . . . . . . . . . . . . . . . 10
Setup . . . . . . . . . . . . . . . . . . . . . . . . . . . . . . . . . . . . 11
Convertible Models Only: . . . . . . . . . . . . . . . . . 12
Startup . . . . . . . . . . . . . . . . . . . . . . . . . . . . . . . . . . 13
Switch Tip™ Guard Assembly . . . . . . . . . . . . . . 14
Spray . . . . . . . . . . . . . . . . . . . . . . . . . . . . . . . . . 14
Clearing Tip Clogs . . . . . . . . . . . . . . . . . . . . . . . 15
WatchDog™ Protection System (ProContractor and
Ironman units only) . . . . . . . . . . . . . . . . . . . . . 15
Hose Reel
(ProContractor units only) . . . . . . . . . . . . . . . 16
Digital Tracking System
(ProContractor and Ironman units) . . . . . . . . 17
. . . . . . . . . . . . . . . . . . . . . . . . . . . . . . . . . . . . . . 18
Cleanup . . . . . . . . . . . . . . . . . . . . . . . . . . . . . . . . . . 19
Maintenance . . . . . . . . . . . . . . . . . . . . . . . . . . . . . . 21
Pressure Relief Procedure . . . . . . . . . . . . . . . . 21
Troubleshooting . . . . . . . . . . . . . . . . . . . . . . . . . . . 22
Fluid Pump Runs Constantly . . . . . . . . . . . . . . . 24
Control Board Malfunction . . . . . . . . . . . . . . . . . 25
Control Board Malfunction (Steps) . . . . . . . . . . . 26
Convertible Electric Motor Will Not Run . . . . . . 27
Convertible Electric Motor Will Not Run (Steps) 28
Convertible Electric Motor Runs -
No AC Output to Sprayer Control Board . . . 29
Digital Display Messages . . . . . . . . . . . . . . . . . . . 31
Pinion Assembly/Clutch Armature/Clamp . . . . . . 32
Pinion Assembly/Clutch Armature Removal . . . 32
Installation . . . . . . . . . . . . . . . . . . . . . . . . . . . . . 33
Clamp Removal . . . . . . . . . . . . . . . . . . . . . . . . . 33
Clamp Installation . . . . . . . . . . . . . . . . . . . . . . . 33
Technical Data . . . . . . . . . . . . . . . . . . . . . . . . . . . . 34
Graco Standard Warranty . . . . . . . . . . . . . . . . . . . 38
2 |
332919C |
Warning
Warning
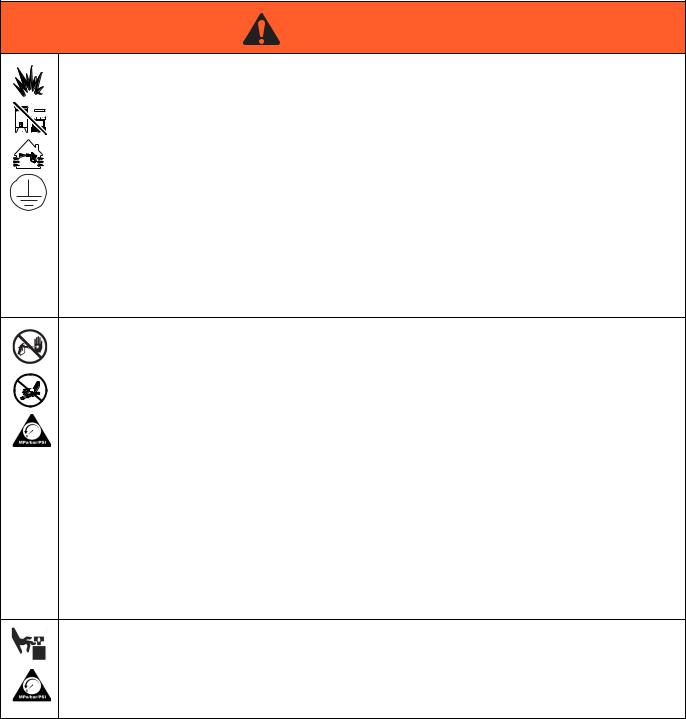
The following warnings are for the setup, use, grounding, maintenance, and repair of this equipment. The exclamation point symbol alerts you to a general warning and the hazard symbols refer to procedure-specific risks. When these symbols appear in the body of this manual or on warning labels, refer back to these Warnings. Product-specific hazard symbols and warnings not covered in this section may appear throughout the body of this manual where applicable.
WARNING
FIRE AND EXPLOSION HAZARD
Flammable fumes, such as solvent and paint fumes, in work area can ignite or explode. To help prevent fire and explosion:
• Use equipment only in well ventilated area.
• Do not fill fuel tank while engine is running or hot; shut off engine and let it cool. Fuel is flammable and can ignite or explode if spilled on hot surface.
• Eliminate all ignition sources; such as pilot lights, cigarettes, portable electric lamps, and plastic drop cloths (potential static arc).
•Keep work area free of debris, including solvent, rags and gasoline.
•Do not plug or unplug power cords, or turn power or light switches on or off when flammable fumes are present.
•Ground all equipment in the work area. See Grounding instructions.
•Use only grounded hoses.
•Hold gun firmly to side of grounded pail when triggering into pail. Do not use pail liners unless they are antistatic or conductive.
•Stop operation immediately if static sparking occurs or you feel a shock. Do not use equipment until you identify and correct the problem.
•Keep a working fire extinguisher in the work area.
SKIN INJECTION HAZARD
High-pressure spray is able to inject toxins into the body and cause serious bodily injury. In the event that injection occurs, get immediate surgical treatment.
•Do not aim the gun at, or spray any person or animal.
• Keep hands and other body parts away from the discharge. For example, do not try to stop leaks with any part of the body.
•Always use the nozzle tip guard. Do not spray without nozzle tip guard in place.
•Use Graco nozzle tips.
•Use caution when cleaning and changing nozzle tips. In the case where the nozzle tip clogs while spraying, follow the Pressure Relief Procedure for turning off the unit and relieving the pressure before removing the nozzle tip to clean.
•Do not leave the unit energized or under pressure while unattended. When the unit is not in use, turn off the unit and follow the Pressure Relief Procedure for turning off the unit.
•Check hoses and parts for signs of damage. Replace any damaged hoses or parts.
•This system is capable of producing 3300 psi (22.8 MPa, 228 bar). Use Graco replacement parts or accessories that are rated a minimum of 3300 psi (22.8 MPa, 228 bar).
•Always engage the trigger lock when not spraying. Verify the trigger lock is functioning properly.
•Verify that all connections are secure before operating the unit.
•Know how to stop the unit and bleed pressure quickly. Be thoroughly familiar with the controls.
MOVING PARTS HAZARD
Moving parts can pinch, cut or amputate fingers and other body parts.
•Keep clear of moving parts.
•Do not operate equipment with protective guards or covers removed.
•Pressurized equipment can start without warning. Before checking, moving, or servicing equipment, follow the Pressure Relief Procedure and disconnect all power sources.
332919C |
3 |
Warning
 WARNING
EQUIPMENT MISUSE HAZARD
Misuse can cause death or serious injury.
•Do not operate the unit when fatigued or under the influence of drugs or alcohol.
•Do not exceed the maximum working pressure or temperature rating of the lowest rated system component. See Technical Data in all equipment manuals.
•Use fluids and solvents that are compatible with equipment wetted parts. See Technical Data in all equipment manuals. Read fluid and solvent manufacturer’s warnings. For complete information about your material, request MSDS from distributor or retailer.
•Do not leave the work area while equipment is energized or under pressure.
•Turn off all equipment and follow the Pressure Relief Procedure when equipment is not in use.
•Check equipment daily. Repair or replace worn or damaged parts immediately with genuine manufacturer’s replacement parts only.
•Do not alter or modify equipment. Alterations or modifications may void agency approvals and create safety hazards.
•Make sure all equipment is rated and approved for the environment in which you are using it.
•Use equipment only for its intended purpose. Call your distributor for information.
•Route hoses and cables away from traffic areas, sharp edges, moving parts, and hot surfaces.
•Do not kink or over bend hoses or use hoses to pull equipment.
•Keep children and animals away from work area.
•Comply with all applicable safety regulations.
PRESSURIZED ALUMINUM PARTS HAZARD
Use of fluids that are incompatible with aluminum in pressurized equipment can cause serious chemical reaction and equipment rupture. Failure to follow this warning can result in death, serious injury, or property damage.
•Do not use 1,1,1-trichloroethane, methylene chloride, other halogenated hydrocarbon solvents or fluids containing such solvents.
•Many other fluids may contain chemicals that can react with aluminum. Contact your material supplier for compatibility.
CARBON MONOXIDE HAZARD
Exhaust contains poisonous carbon monoxide, which is colorless and odorless. Breathing carbon monoxide can cause death.
•Do not operate in an enclosed area.
TOXIC FLUID OR FUMES HAZARD
Toxic fluids or fumes can cause serious injury or death if splashed in the eyes or on skin, inhaled, or swallowed.
•Read MSDSs to know the specific hazards of the fluids you are using.
•Store hazardous fluid in approved containers, and dispose of it according to applicable guidelines.
BURN HAZARD
Equipment surfaces and fluid that is heated can become very hot during operation. To avoid severe burns:
• Do not touch hot fluid or equipment.
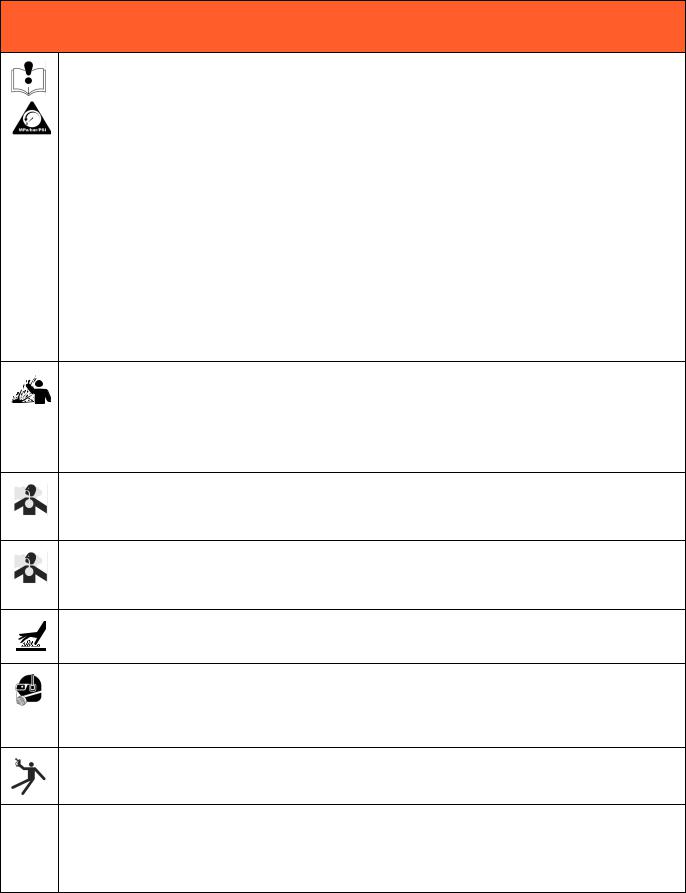
PERSONAL PROTECTIVE EQUIPMENT
Wear appropriate protective equipment when in the work area to help prevent serious injury, including eye injury, hearing loss, inhalation of toxic fumes, and burns. This protective equipment includes but is not limited to:
•Protective eyewear, and hearing protection.
•Respirators, protective clothing, and gloves as recommended by the fluid and solvent manufacturer.
RECOIL HAZARD
Gun may recoil when triggered. If you are not standing securely, you could fall and be seriously injured.
CALIFORNIA PROPOSITION 65
The engine exhaust from this product contains a chemical known to the State of California to cause cancer, birth defects or other reproductive harm.
This product contains a chemical known to the State of California to cause cancer, birth defects or other reproductive harm. Wash hands after handling.
4 |
332919C |
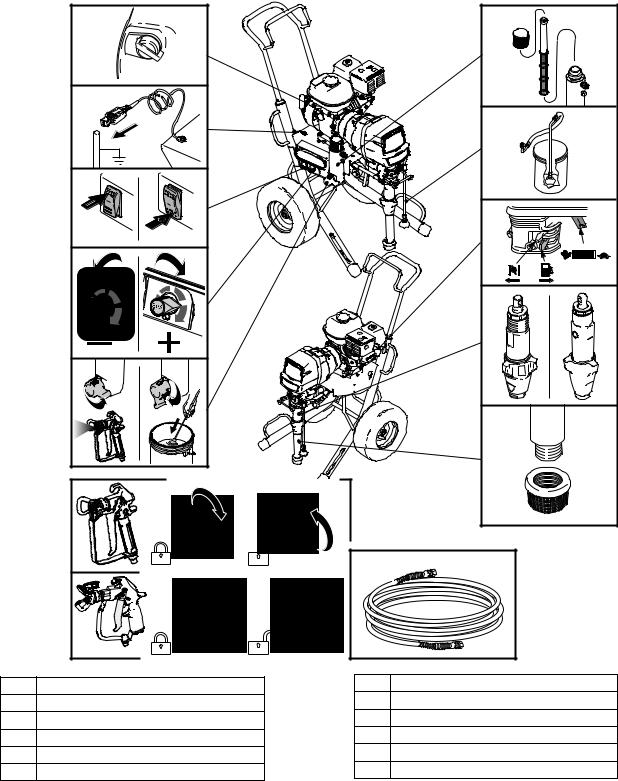
Component Identification
Component Identification
Standard Models (3400, 3900, 5900, 5900HD, 7900, 7900HD)
OFF |
A |
ON |
B |
ON |
C |
OFF |
D |
E |
F |
A |
Engine ON/OFF Switch |
B |
Grounding Clamp |
C |
Pump On/Off Switch |
D |
Pressure Control |
E |
Prime Valve |
F |
Gun Trigger Lock |
L
K
ti22694a
J
H
G
M
G |
Strainer |
H |
Pump |
J |
Engine Controls |
K |
Drain Hose |
L |
Easy Out Pump Filter |
M |
Hose |
332919C |
5 |

Component Identification
ProContractor Models (3900, 5900, 7900, 5900HD, 7900HD) |
||||
|
T |
S |
OFF |
|
|
|
|
||
A |
|
|
|
R |
|
|
|
ON |
|
|
|
|
|
|
B |
|
|
|
|
|
|
|
|
P |
C |
ON |
|
|
|
ti22742a |
|
|
||
|
|
|
||
|
OFF |
|
|
N |
|
|
|
|
|
D |
|
|
|
|
|
|
ti22742a |
|
M |
E |
|
|
|
|
|
|
|
|
L |
F |
|
|
|
K |
|
H |
|
J |
|
G |
A |
Grounding Coil |
B |
Smart Control 3.0 Display |
C |
Pump ON/OFF Switch |
D |
WatchDogTM Switch |
E |
Pressure Control |
F |
Prime Valve |
G |
Gun Trigger Lock |
H |
Strainer |
J |
Drain hose |
K |
Pump |
L |
Toolbox |
M |
Rod Pull Feature |
N |
Engine Controls |
P |
ProConnectTM II Pump Clamp |
R |
Filter |
S |
Engine ON/OFF Switch |
T |
Hose Reel |
6 |
332919C |
Component Identification
Ironman Models (5900, 7900, 7900HD) |
|
|
S |
|
OFF |
A |
R |
|
|
|
ON |
B |
P |
ON |
|
C |
|
OFF |
N |
|
|
D |
|
|
M |
E |
|
|
L |
ti22741a |
|
H |
J |
F |
K |
G |
A |
Grounding Coil |
B Smart Control 3.0 Display |
|
C |
Pump ON/OFF Switch |
D |
WatchDogTM Switch |
E |
Pressure Control |
F |
Prime Valve |
G |
Gun Trigger Lock |
H |
Heavy Duty Strainer |
J |
Drain Hose |
K |
MaxLife Pump |
L |
Rod Pull Feature |
M |
Engine Controls |
N |
ProConnectTM II Pump Clamp |
P |
Easy Out Pump Filter |
R |
Engine ON/OFF Switch |
S |
Hose |
332919C |
7 |

Component Identification |
|
|
Lo-Boy Models (3900, 5900, 7900) |
|
|
OFF |
|
|
A |
O |
|
ON |
||
|
||
B |
N |
|
|
||
ON |
|
|
C |
ti22737a |
|
|
||
OFF |
M |
|
|
||
D |
|
|
|
L |
|
E |
K |
|
G |
|
|
F |
J |
|
|
||
|
H |
A |
Engine ON/OFF Switch |
B |
Grounding Coil |
C |
Pump ON/OFF Switch |
D |
Pressure Control |
E |
Prime Valve |
F |
Gun Trigger Lock |
G |
Hose |
H |
Pump |
J |
Drain Hose |
K |
Rod Pull Feature |
L |
Strainer |
M |
Engine Controls |
N |
ProConnectTM II Pump Clamp |
O |
Easy Out Pump Filter |
8 |
332919C |

Component Identification
Convertible Models (5900)
OFF |
|
A |
|
ON |
M |
|
|
|
N |
B |
|
|
L |
ON |
|
C |
|
|
ti22696a |
OFF |
K |
D |
|
|
J |
E |
|
|
G |
|
H |
F |
|
A |
Engine ON/OFF Switch |
B |
Grounding Coil |
C |
Pump On/Off Switch |
D |
Pressure Control |
E |
Prime Valve |
F |
Gun Trigger Lock |
G |
Hose |
H |
Strainer |
J |
Pump |
K |
Engine Controls |
L |
Drain Hose |
M |
Easy Out Pump Filter |
N |
Power Pack |
332919C |
9 |

Pressure Relief Procedure
Pressure Relief Procedure Grounding
Follow the Pressure Relief Procedure whenever you see this symbol.
This equipment stays pressurized until pressure is manually relieved. To help prevent serious injury from pressurized fluid, such as skin injection, splashing fluid and moving parts, follow the Pressure Relief Procedure when you stop spraying and before cleaning, checking, or servicing the equipment.
1.Engage trigger lock.
2.Turn engine ON/OFF switch to OFF.
3.Move pump switch to OFF and turn pressure control knob fully counterclockwise.
4.Disengage trigger lock. Hold metal part of gun firmly to side of grounded metal pail, and trigger gun to relieve pressure.
5.Engage gun trigger lock.
6.Turn prime valve down to DRAIN position. Leave prime valve down until ready to spray again.
7.If you suspect the spray tip or hose is clogged or that pressure has not been fully relieved after following the steps above, VERY SLOWLY loosen tip guard retaining nut or hose end coupling to relieve pressure gradually, then loosen completely. Clear hose or tip obstruction.
The equipment must be grounded to reduce the risk of static sparking. Static sparking can cause fumes to ignite or explode. Grounding provides an escape wire for the electric current.
To ground sprayer: Attach sprayer grounding clamp to earth ground.
ti5787a
Air and fluid hoses: Use only electrically conductive hoses with a maximum of 500 ft. (150 m) combined hose length to ensure grounding continuity. Check electrical resistance of hoses. If total resistance to ground exceeds 29 megohms, replace hose immediately.
Spray gun: Ground through connection to a properly grounded fluid hose and pump.
Solvent pails used when flushing: Follow local code. Use only conductive metal pails, placed on a grounded surface. Do not place the pail on a nonconductive surface, such as paper or cardboard, which interrupts grounding continuity.
To maintain grounding continuity when flushing or relieving pressure: Hold metal part of the spray gun firmly to the side of a grounded metal pail, then trigger the gun.
10 |
332919C |
Setup
Setup
1.All sprayers except ProContractor: Connect appropriate Graco high-pressure hose to sprayer.
2.Select Units: Install whip hose to fluid inlet of spray gun and tighten securely.
ti22698a
3. Engage gun trigger lock.
ti22700a
4.When spraying texture, remove inlet strainer and filter bowl screen when spraying materials.
ti22701a
5.Fill throat packing nut with TSL to prevent premature packing wear. Do this each time you spray.
ti22743a
6.Check engine oil level. Add SAE 10W-30 (summer) or 5W-20 (winter), if necessary.
ti5952a
7. Fill fuel tank.
ti5953a
8. Attach sprayer grounding clamp to earth ground.
ti5787a
332919C |
11 |

Setup
Convertible Models Only:
Change Engine to Motor
1. Disconnect engine power cord.
ti5774a
2. Release tension bar.
ti5775a
3. Remove engine; tilt and slide back.
ti22702a
4. Install motor; drop in and push forward.
ti22703a
5.Look through side vent holes and ensure drive belt is in motor pulley.
ti5772a
6. Secure motor with tension bar.
ti5775a
7. Plug in pressure control power cord.
ti5779a
12 |
332919C |
Loading...