


Gateway HD2200 Owner's Manual

22-inch Widescreen LCD Monitor
USERGUIDE
®


Contents
Using Your Gateway Flat-Panel Monitor. . . . . . . . . . . . . . . . . . . . . . . . . . . . . 1
Connecting the monitor . . . . . . . . . . . . . . . . . . . . . . . . . . . . . . . . . . . . . . . . . . . . . . . . . . . . 2
Connecting video inputs . . . . . . . . . . . . . . . . . . . . . . . . . . . . . . . . . . . . . . . . . . . . . 2
Connecting power . . . . . . . . . . . . . . . . . . . . . . . . . . . . . . . . . . . . . . . . . . . . . . . . . . . 2
Connecting a security cable . . . . . . . . . . . . . . . . . . . . . . . . . . . . . . . . . . . . . . . . . . 3
Setting up the optional speaker bar . . . . . . . . . . . . . . . . . . . . . . . . . . . . . . . . . . . 3
Starting the monitor . . . . . . . . . . . . . . . . . . . . . . . . . . . . . . . . . . . . . . . . . . . . . . . . . . . . . . . 5
Adjusting monitor settings . . . . . . . . . . . . . . . . . . . . . . . . . . . . . . . . . . . . . . . . . . . . . . . . . . 6
Using the EzTouch menu buttons . . . . . . . . . . . . . . . . . . . . . . . . . . . . . . . . . . . . . 6
Using the shortcut menu . . . . . . . . . . . . . . . . . . . . . . . . . . . . . . . . . . . . . . . . . . . . . 6
Using the main menu . . . . . . . . . . . . . . . . . . . . . . . . . . . . . . . . . . . . . . . . . . . . . . . . 7
Using Picture-in-Picture (PIP) . . . . . . . . . . . . . . . . . . . . . . . . . . . . . . . . . . . . . . . . . 9
Changing Windows screen settings . . . . . . . . . . . . . . . . . . . . . . . . . . . . . . . . . . . . . . . . .10
Changing color depth and screen resolution . . . . . . . . . . . . . . . . . . . . . . . . . . 10
EzTune software . . . . . . . . . . . . . . . . . . . . . . . . . . . . . . . . . . . . . . . . . . . . . . . . . . .11
Power management . . . . . . . . . . . . . . . . . . . . . . . . . . . . . . . . . . . . . . . . . . . . . . . . . . . . . . 12
Energy declaration . . . . . . . . . . . . . . . . . . . . . . . . . . . . . . . . . . . . . . . . . . . . . . . . . 12
Maintaining . . . . . . . . . . . . . . . . . . . . . . . . . . . . . . . . . . . . . . . . . . . . . . . . . . . . . . . . . . . . . .12
Troubleshooting . . . . . . . . . . . . . . . . . . . . . . . . . . . . . . . . . . . . . . . . . . . . . . . . . . . . . . . . . .12
No power . . . . . . . . . . . . . . . . . . . . . . . . . . . . . . . . . . . . . . . . . . . . . . . . . . . . . . . . .12
No picture . . . . . . . . . . . . . . . . . . . . . . . . . . . . . . . . . . . . . . . . . . . . . . . . . . . . . . . . .13
Display colors are wrong . . . . . . . . . . . . . . . . . . . . . . . . . . . . . . . . . . . . . . . . . . . 13
Picture has shadows or “ghosts” . . . . . . . . . . . . . . . . . . . . . . . . . . . . . . . . . . . . . 13
Color is not uniform . . . . . . . . . . . . . . . . . . . . . . . . . . . . . . . . . . . . . . . . . . . . . . . .13
Image is not sized or centered correctly . . . . . . . . . . . . . . . . . . . . . . . . . . . . . . 14
The monitor has pixels that are alw ays dark or too bright . . . . . . . . . . . . .14
Configuring video settings . . . . . . . . . . . . . . . . . . . . . . . . . . . . . . . . . . . . . . . . . .14
Gaming . . . . . . . . . . . . . . . . . . . . . . . . . . . . . . . . . . . . . . . . . . . . . . . . . . . . . . . . . . . 15
Speaker bar does not work . . . . . . . . . . . . . . . . . . . . . . . . . . . . . . . . . . . . . . . . .15
HDCP . . . . . . . . . . . . . . . . . . . . . . . . . . . . . . . . . . . . . . . . . . . . . . . . . . . . . . . . . . . . . 16
DCDi by Faroudja . . . . . . . . . . . . . . . . . . . . . . . . . . . . . . . . . . . . . . . . . . . . . . . . . . .16
Specifications . . . . . . . . . . . . . . . . . . . . . . . . . . . . . . . . . . . . . . . . . . . . . . . . . . . . . . . . . . . . . 18
Video modes . . . . . . . . . . . . . . . . . . . . . . . . . . . . . . . . . . . . . . . . . . . . . . . . . . . . . . .19
Safety, Regulatory, and Legal Information. . . . . . . . . . . . . . . . . . . . . . . . . 21
Recycling . . . . . . . . . . . . . . . . . . . . . . . . . . . . . . . . . . . . . . . . . . . . . . . . . . . . . . . . . . 23
i

Contents
ii

Using Y our Gat ewa y
Flat -P anel Monitor
• Connecting t he monitor
• Starting the monitor
• Adjusting monitor settings
• Changing Windo ws s creen s et tings
• Power management
• Maintaining
• Troubleshooting
• Specifications
1

Using Your Gateway Flat-Pan el Monitor
Connec ting the monit or
To set up the monitor, first unpack the box, unwrap the components, then make your cable
connections.
Connec ting video inputs
To connect video sources to your monitor:
1 Position your computer and the monitor so you can reach the back of each.
2 If your computer has a digital video connector (DVI), connect a DVI video cable (not included)
to the white connector on the display.
- OR Connect the blue VGA video cable to the blue VGA video connector on thedisplay.
- OR Connect an HDMI cable to the HDMI port on the display, or connect component video cables
to the component video ports on the display.
Important
For best audio performance, if your video connection uses HDMI, the digital
audio is also conveyed along the same cable, and no additional audio connection is
required. You may need to set your video source’s audio mode to PCM or ANALOG
to hear the audio. See your source device’s user guide for more information.
3 Make sure that your computer is turned off, then connect the other end of the video cable
Connec ting pow er
To connect power:
1 Position y our monitor so you can reach the back, then connect the pow er cord to the power
2 Plug the power cord into a correctly grounded power outlet. We recommend using a surge
HDMI port
to the matching video port on the back of your computer.
connector under the back of the monitor.
protector to protect your monitor from voltage spikes.
DVI po r t
VGA po r t
Compo ne nt Pr
Compo ne nt Pb
Component Y
Power connector
2
3 To make sure that the monitor’s power is correctly connected, check the power button on
the front button panel. The power icon on the power button should be glowing purple. If
the power icon is not visible, power is not connected.
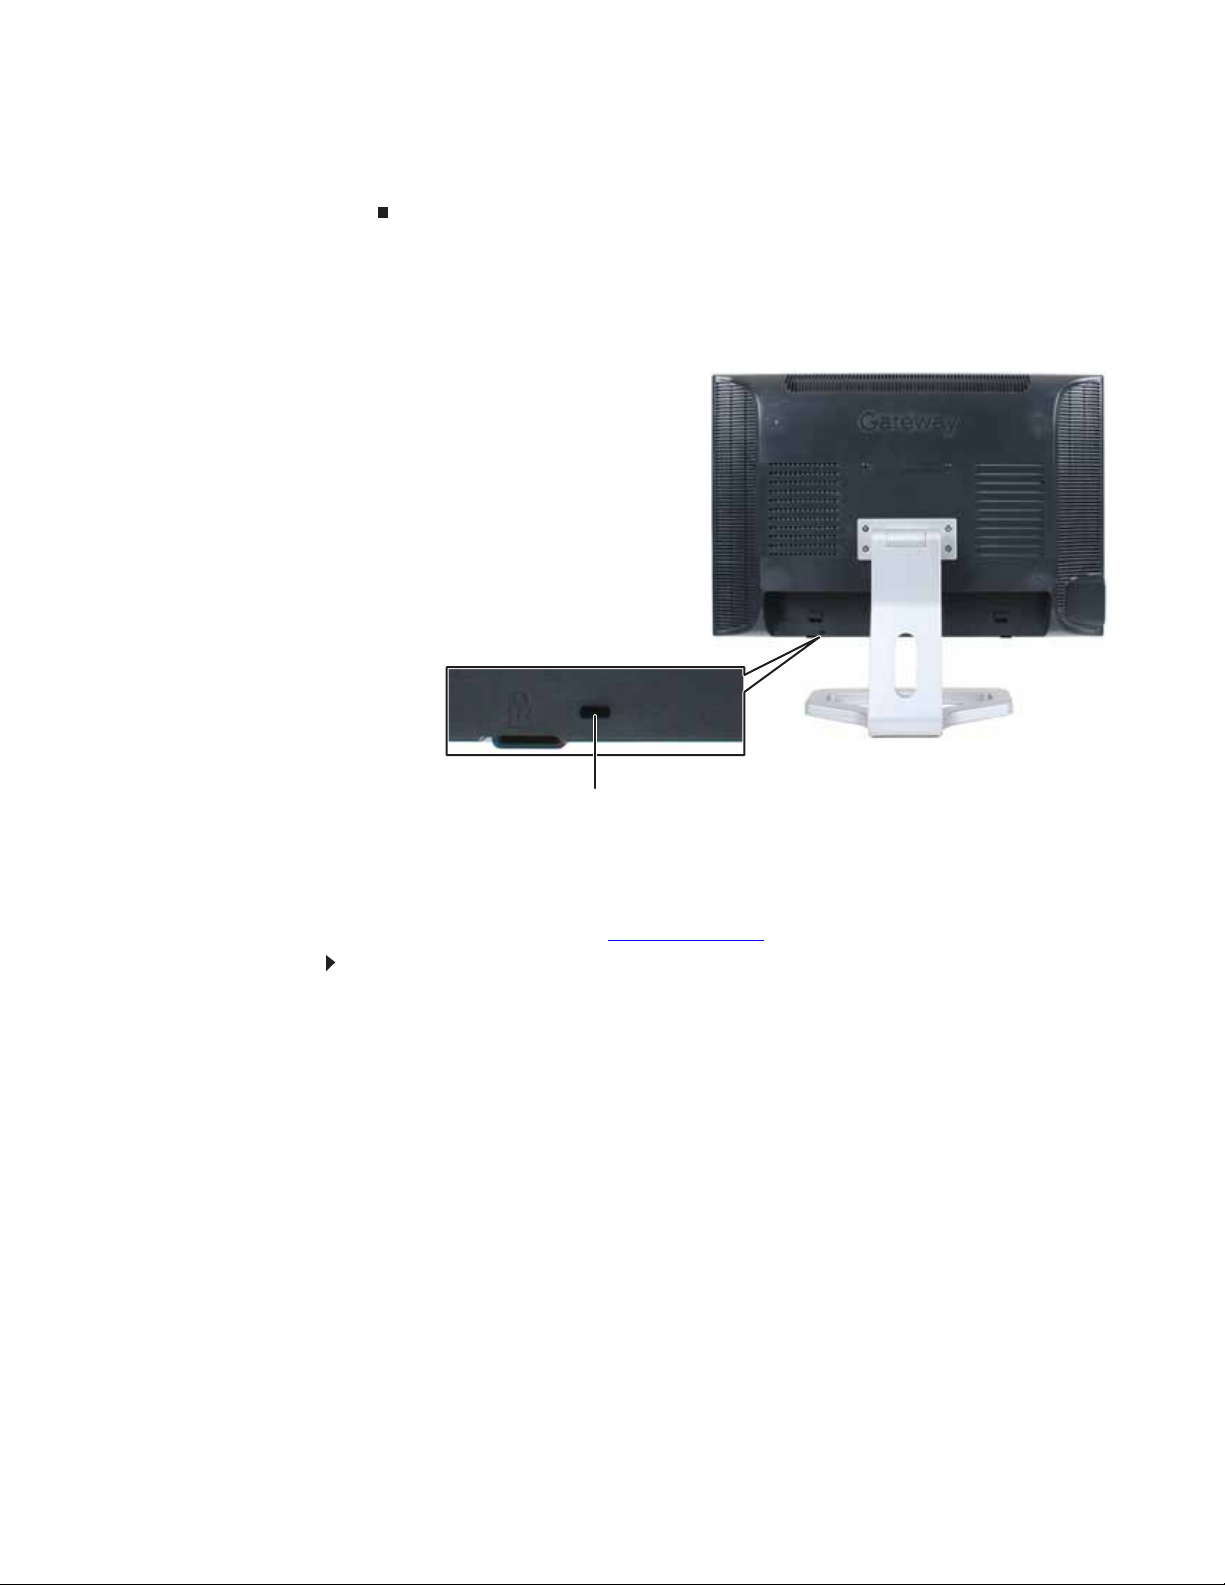
Connec ting a sec urity c able
Y ou can sec ure y our monit or t o y our computer de sk (or t o another hea vy objec t) with a cable lock.
To connect a cable lock, follow the cable lock’s instructions to connect it to the Kensington lock
slot on the back of your monitor (cable lock not included).
www.gateway.com
Kensington lock slot
Setting up the optional speaker bar
An optional speaker bar is available for mounting underneath your monitor. In the United States,
you can order a speaker bar from www.gateway.com.
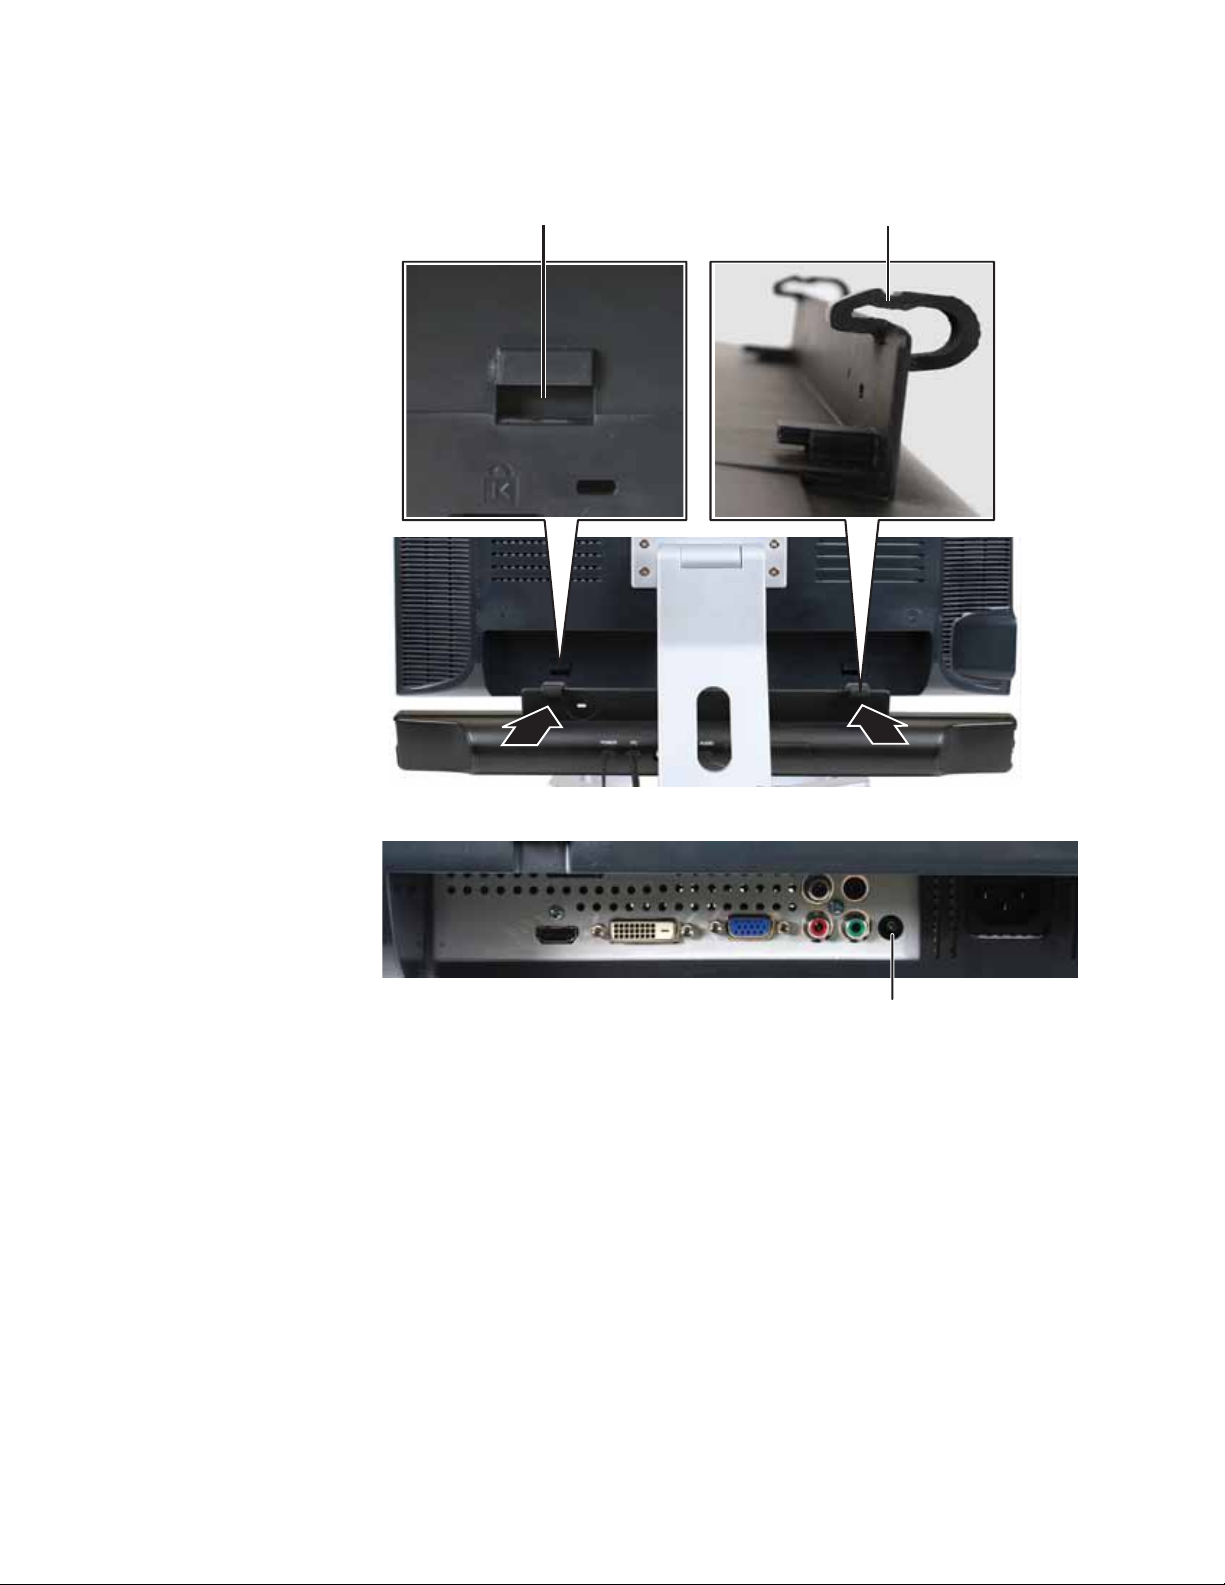
To install the speaker bar:
1 Tu rn of f t h e m o n i t o r.
2 Tilt the screen back, then match the mounting clips on each side of the speaker bar with
the mounting slots underneath the monitor.
3
Using Your Gateway Flat-Pan el Monitor
3 Sli de the spe ake r b ar onto th e b otto m of th e m on itor u nti l i t s nap s i nto p la ce. Ma ke su re
that it is secure by pulling it downward.
Mounting slot Mounting clip
4 Plug the speaker bar’s power plug into the power connector on the monitor.
Speaker bar power connector
4
www.gateway.com
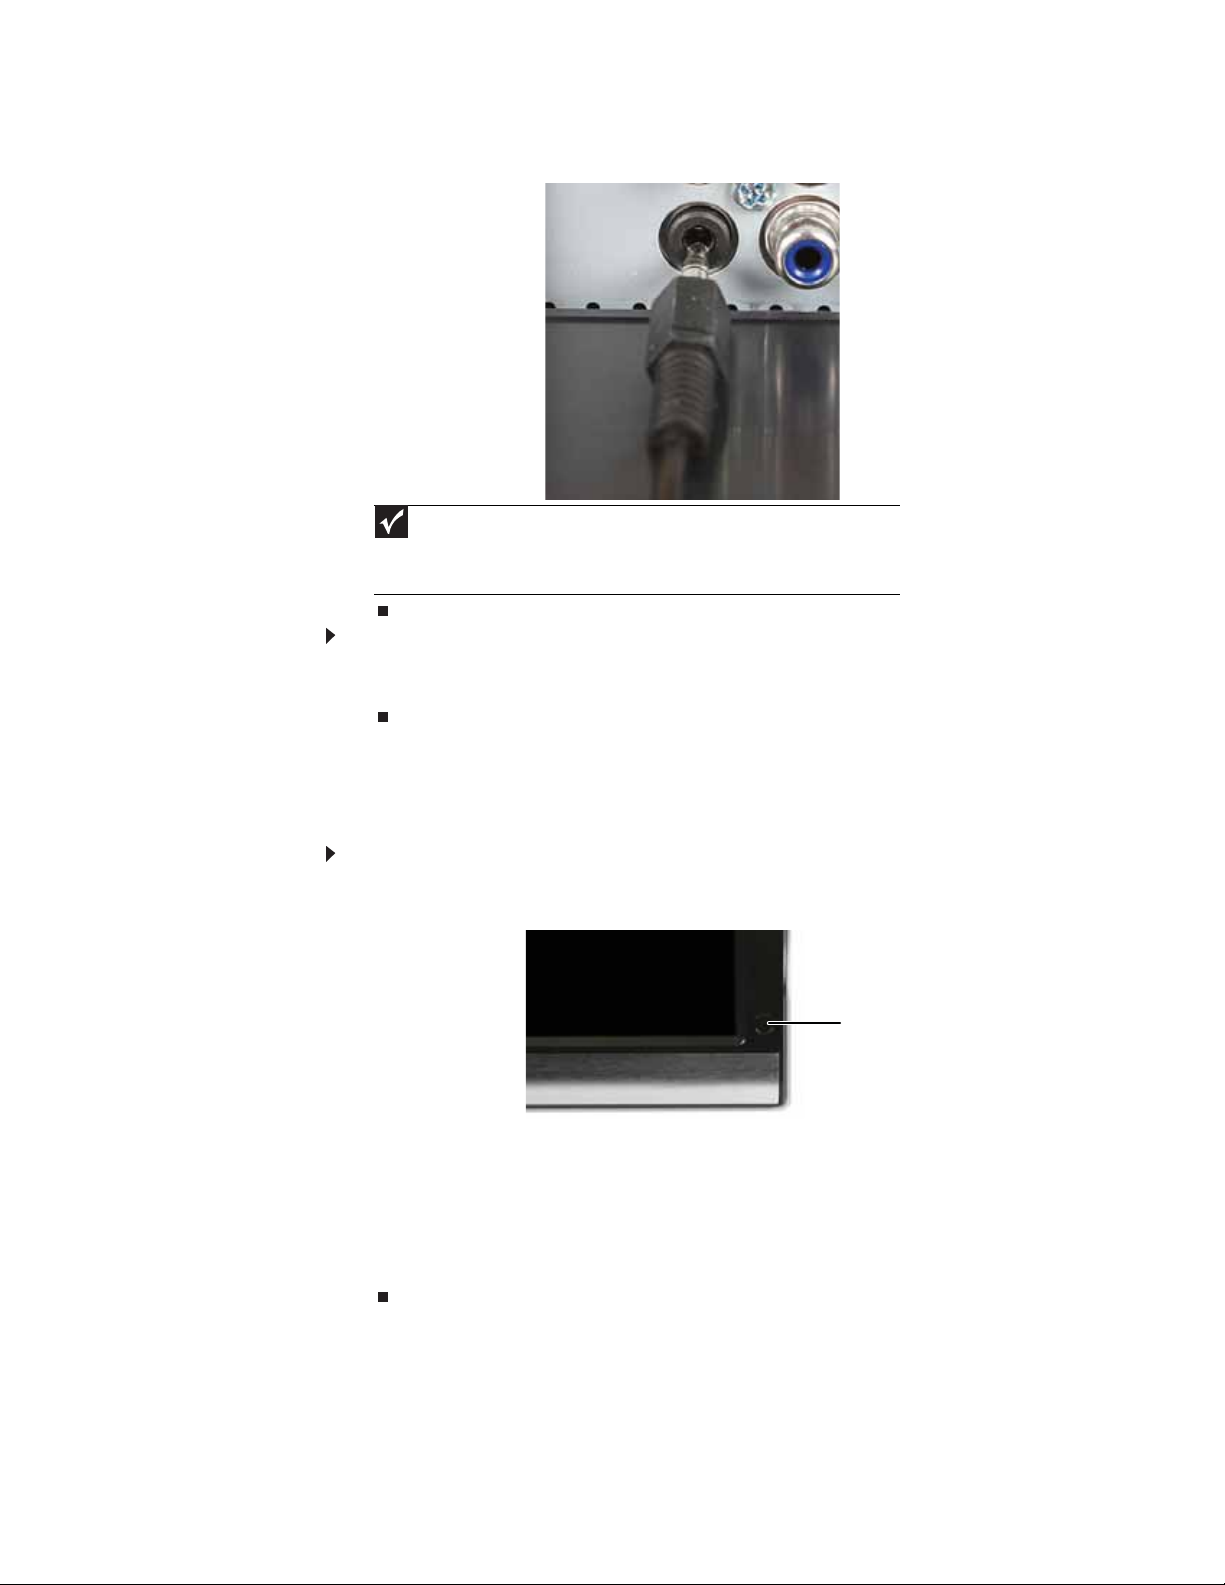
5 Plug the speaker bar’s audio plug into the audio jack on your monitor.
Important
For best audio performance, if your video connection uses HDMI, the digital
audio is also conveyed along the same cable, and no additional audio connection is
required. You may need to set your video source’s audio mode to PCM or ANALOG
to hear the audio. See your source device’s user guide for more information.
To remove the speaker bar:
1 Disconnect all audio and power cables from the speaker bar.
2 Press the two clips on the back of your monitor, then slide the speaker bar back.
Starting the monit or
To s t a rt t h e m o n i to r :
1 T ouch the power button on the fr ont of monitor . The power LED on the power button c hanges
from purple (off) to blue (on).
2 Turn on your computer. After your computer is running, the power LED on the monitor’s
power button should be blue. Allow about 10 second s for the display image to appear. If
the power LED is not blue or you do not see a display image, check the connections. For
more troubleshooting information, see “Troubleshooting” on page 12.
3 Adjust the tilt of the monitor for the best viewing angle.
4 Use the on-screen display (OSD) to adjust other monitor settings. For more information, see
“Adjusting monitor settings” on page6.
Powe r b ut ton
5
Using Your Gateway Flat-Pan el Monitor
Adjusting monit or set tings
Use the monitor controls (locat ed on the monit or itself) and computer control s (acces sible through
Windows) to adjust the display image. For more information about computer controls, see
“Changing Windows screen settings” on page 10.
Using the E zT ouc h menu butt ons
This monitor features an on-screen display (OSD) and EzTouch menu buttons that let you adjust
contrast, brightness, and other settings for the monitor. The monitor saves changes you make to
the settings, even if you turn off the monitor.
Your monitor has two levels of menus, and the functionality of the touch buttons depends on the
menu that is currently open:
• The shortcut menu lets you quickly change some of the most commonly accessed settings.
• The main menu l ets you precisely adjust a ll levels of settings.
Using the sh ort cut menu
To use the shortcut menu:
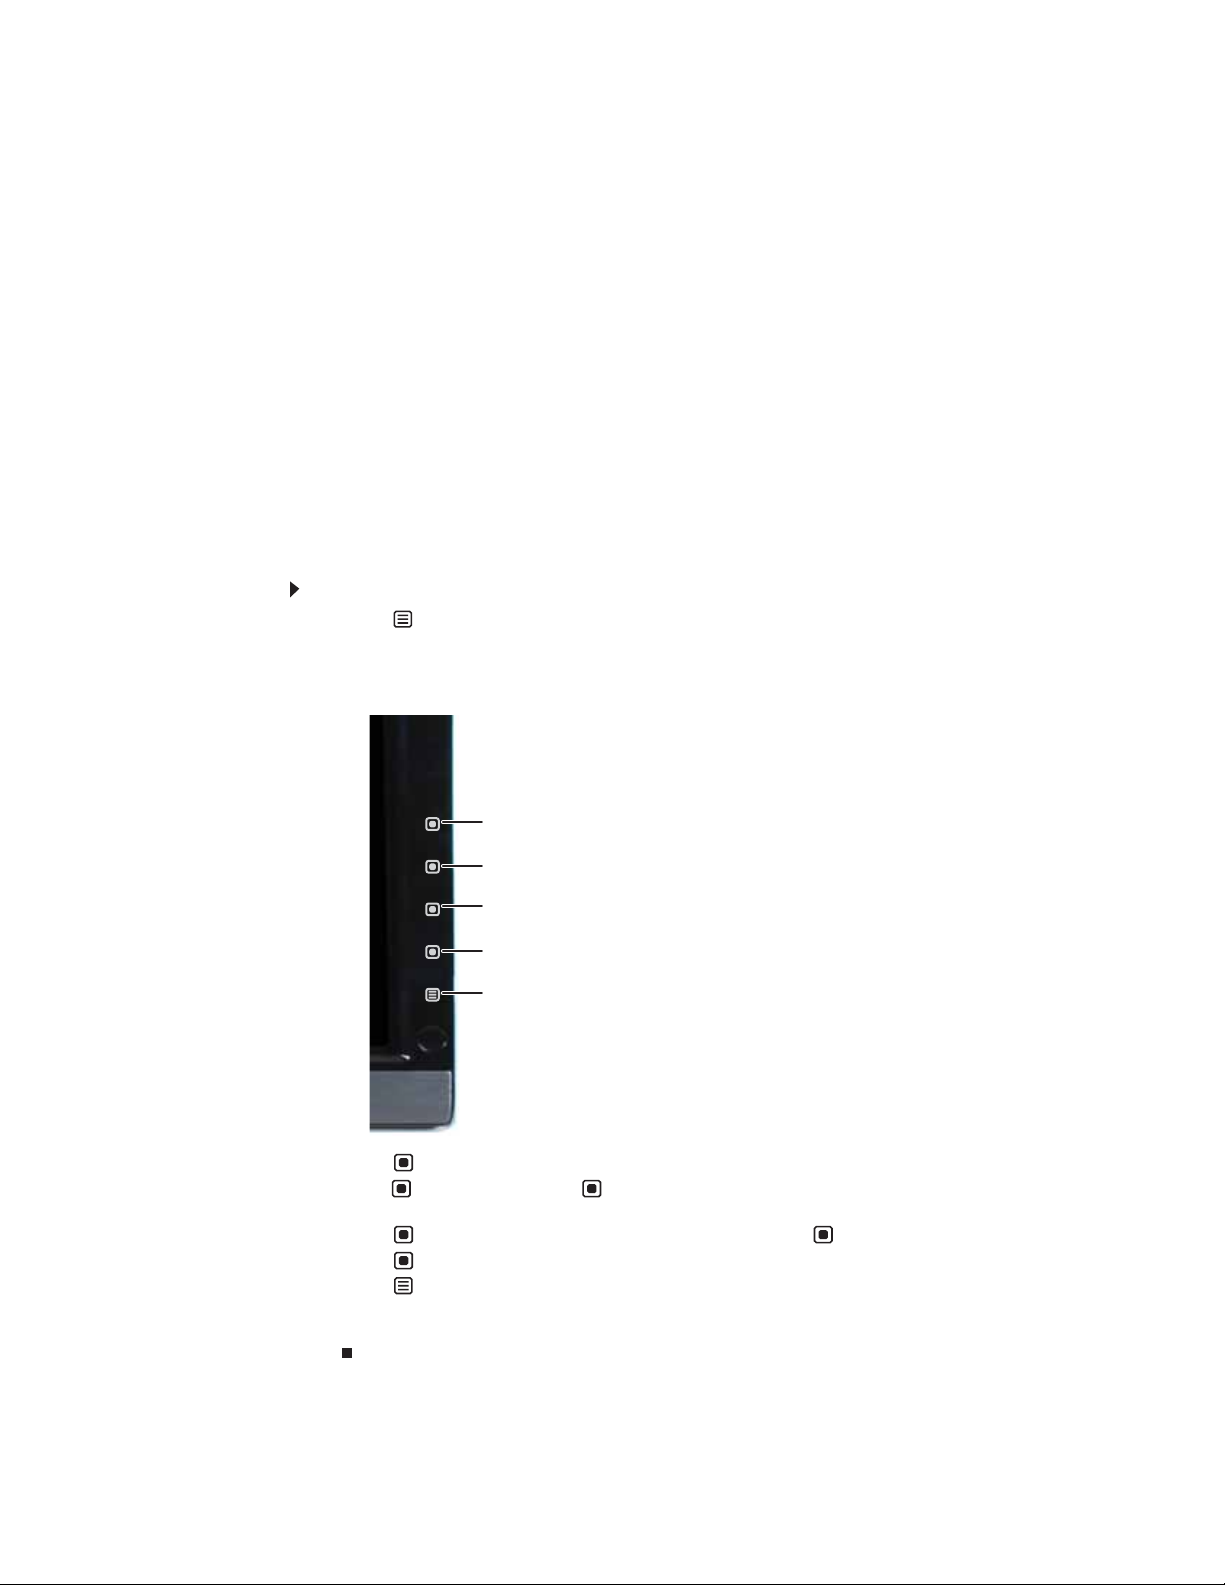
1 T ouch Menu on th e fro n t o f you r m on i to r. The res t of t he b u tto n i co n s li g h t up a n d th e
shortcut menu opens.
2 To use an EzTouch menu button, lightly touch its icon. For adjusting a setting’s values, you
can touch and hold touch buttons as you would conventional buttons.
Input Select
VGA m ode : A uto
DVI, HDMI, and Component mode: Video Adjust
PIP On/PIP Off
Cancel
Main Menu
• Touch Input Select to select an available video source.
• Touch Auto (V GA m od e) o r Video Adjust (DVI, HDMI, and component modes) to adjust
your display image to the idea l settings.
• Touch PIP On to turn on Picture-in -Picture, and touch PIP Off to tu rn it off.
• Touch Cancel to exit the shortcut menu.
• Touch Main Menu to open the main menu.
• To turn off the button icons and close the menu, wait about ten seconds without touching
a bu tton.
6
 Loading...