


ENGLISH
Guide
Solution Disk Version 30)
bundled on the Canon before connecting the
Connect the camera to the computer.
software programs and operating procedures.
without installing the software programs if you use certain operating system software (p. 82). (Excludes Windows 2000)
CDI-E303-010 |
xx04xxxx |
©Å2007ÅCANONÅINC. |
PRINTEDÅINÅJAPAN |
Windows/Macintosh
Windows
Macintosh
SAFETY PRECAUTIONS
TheÅprecautionsÅnotedÅwithinÅthisÅguideÅareÅ theÅproductsÅandÅtoÅpreventÅinjuriesÅorÅdamage readÅandÅensureÅthatÅyouÅunderstandÅthemÅ
 Warnings ThisÅsymbolÅindicatesÅ
ignoredÅorÅhandledÅ
•DoÅnotÅplayÅtheÅsuppliedÅCD-ROM(s)ÅinÅ ROMs.ÅPlayingÅtheÅCD-ROM(s)ÅinÅanÅaudio speakers.ÅItÅisÅalsoÅpossibleÅtoÅsufferÅfrom theÅloudÅsoundsÅofÅaÅCD-ROMÅplayedÅon
Disclaimer
•WhileÅeveryÅeffortÅhasÅbeenÅmadeÅtoÅ accurateÅandÅcomplete,ÅnoÅliabilityÅcanÅ reservesÅtheÅrightÅtoÅchangeÅtheÅspecifications hereinÅatÅanyÅtimeÅwithoutÅpriorÅnotice.
•NoÅpartÅofÅthisÅguideÅmayÅbeÅreproduced, system,ÅorÅtranslatedÅintoÅanyÅlanguageÅ writtenÅpermissionÅofÅCanon.
•CanonÅmakesÅnoÅwarrantiesÅforÅdamages mistakenÅoperationÅorÅmalfunctionÅofÅthe personalÅcomputers,ÅperipheralÅdevices,Å
Trademark Acknowledgments
•Windows,ÅWindowsÅVistaÅandÅtheÅWindows registeredÅinÅtheÅU.S.ÅandÅotherÅcountries.
•Macintosh,ÅtheÅMacÅlogo,ÅQuicktimeÅandÅ Inc.,ÅregisteredÅinÅtheÅU.S.ÅandÅotherÅcountries
Canon Customer Support
ForÅCanonÅCustomerÅSupportÅcontacts,Åplease camera.
CopyrightÅ©Å2007ÅCanonÅInc.ÅAllÅrightsÅ

1
Table of contents |
|
Read This First |
3 |
It’s so Simple! Make Prints Right at Home Like a Pro ...................... |
4 |
Unbounded Possibilities with Entertaining Software ..................... |
6 |
System Requirements ........................................................................ |
8 |
Programs and Compatible Operating Systems ................................ |
9 |
–
–
–
–
–
Downloading Images to the Computer .......................................... |
46 |
Printing Images ................................................................................ |
50 |

2 Table of contents |
|
Using the Software on the Macintosh Platform |
|
– Advanced Techniques |
52 |
The ImageBrowser Windows .......................................................... |
52 |
ImageBrowser Features ................................................................... |
58 |
Replaying Movies ............................................................................. |
61 |
Editing Movies ................................................................................. |
62 |
Operating the Shutter Remotely (Remote Shooting) .................... |
63 |
Merging Panoramic Images - PhotoStitch ...................................... |
66 |

3
Read This First
ThisÅchapterÅexplainsÅwhatÅyouÅcanÅaccomplishÅusingÅtheÅcameraÅwithÅtheÅsoftwareÅcontainedÅ onÅ
ItÅalso
• |
areÅ |
•

4Read This First
It’s so Simple! Make Prints Right at Home Like a Pro
Shoot the images
JustÅinstallÅtheÅsoftwareÅonceÅatÅtheÅbeginning.

5
 Connect the camera to the computer
PrecautionsÅforÅ
ConnectingÅtheÅ
WindowsÅ(p. 21)
MacintoshÅ(p. 50)

6Read This First
Unbounded Possibilities with Entertaining Software
Print a Variety of Layouts
PrintÅwithÅtheÅdiverseÅlayoutsÅavailableÅinÅZoomBrowserÅEXÅ(Windows)ÅandÅImageBrowserÅ (Macintosh).ÅTheÅexamplesÅshownÅareÅfromÅZoomBrowserÅEXÅ(Windows).
Stitch
Create
7
Send an Image as an E-mail Attachment
AttachÅanÅimageÅtoÅanÅe-mailÅmessageÅbyÅstartingÅyourÅmailÅsoftwareÅfromÅwithinÅ ZoomBrowserÅEXÅ(Windows)ÅorÅImageBrowserÅ(Macintosh).
|
|
|
|
|
|
|
|
|
|
|
|
|
|
|
|
|
|
|
|
|
|
|
|
|
|
|
|
|
|
|
|
|
|
|
|
|
|
|
|
|
|
|
|
|
|
|
|
|
|
|
|
|
|
|
|
|
|
|
|
|
|
|
|
|
|
|
|
|
|
|
|
YouÅ |
|
|
|
|
|
|
|
|
|
|
|
|
|
|
|
|
|
|
|
cameraÅ |
|||
shutter |
|
|
|
|
|
|
|
|
|
|
|
|
|
|
|
|
|
|
|
|
|||
Edit
YouÅcan computer,Å addingÅtext,ÅsuchÅasÅtitles,ÅaddingÅbackgroundÅmusicÅorÅapplyingÅvariousÅspecialÅeffects.Å
Extract Stills from Movies
YouÅcanÅextractÅaÅstillÅfromÅtheÅdisplayedÅmovieÅandÅsaveÅitÅasÅaÅnewÅimageÅfile.ÅYouÅcanÅalsoÅ specifyÅaÅrangeÅofÅframesÅandÅextractÅmultipleÅstills.ÅÅ

8Read This First
System Requirements
PleaseÅinstallÅtheÅsoftwareÅonÅaÅcomputerÅmeetingÅtheÅfollowingÅminimumÅrequirements.
Windows
OS |
WindowsÅ2000ÅServiceÅPackÅ4 |
|
|
USBÅ
CPU
RAM
Free
Space
M |
|
|
|
|
|
OS |
|
|
|
|
|
|
|
USBÅ |
|
|
|
CPU |
|
|
|
|
|
RAM |
|
|
|
|
|
|
|
|
Free Hard Disk |
•CanonÅUtilities |
|
Space |
-ÅImageBrowser:Å |
200ÅMBÅorÅmoreÅ |
|
-ÅPhotoStitch:Å |
40ÅMBÅorÅmore |
|
|
|
Display |
1,024ÅxÅ768Åpixels/32,000ÅColorsÅorÅbetter |
|
|
|
|
9
•A CD-ROM drive is required to install the software.
•Even when system requirements are met, not all computer functions can be guaranteed.
•A sound card is required to play movie file audio tracks under Windows.
•With Windows, QuickTime is required to save images merged with PhotoStitch as QuickTime VR images. It is also required to play and edit movies on the Windows 2000 platform.
•Macintosh software cannot be used on disks formatted in the UFS (Unix File System) format.
|
|
TheÅ |
Å |
contains |
|
W
Program
TWAIN
EOS
*1 Can
*2
*3
M
Program |
|
|
|
|
|
ImageBrowser |
|
Downloading,Ådisplaying,ÅorganizingÅandÅeditingÅimagesÅ |
|
|
|
PhotoStitch*1 |
|
MergingÅimagesÅtoÅmakeÅpanoramasÅ |
EOS Utility |
|
DownloadingÅimagesÅandÅotherÅfunctionsÅ |
|
forÅEOSÅDIGITALÅseriesÅcameras |
|
|
|
|
|
|
|
*1 CanÅbeÅstartedÅfromÅwithinÅImageBrowser.Å

10 Read This First
Before You Connect the Camera to the Computer
Ensure that you have installed the software from the supplied Canon Digital Camera Solution Disk before you connect the camera to the computer.
Precautions for Connecting the Camera to the Computer
• The |
ÅanÅ |
|||||
• The |
USBÅ |
|||||
mice |
|
|||||
• DoÅ |
|
|||||
• Never |
viaÅ |
|||||
the |
awakenÅ |
|||||
the |
Å |
|||||
your |
ÅtoÅ |
|||||
|
||||||
|
|
|
|
|
|
|
|
|
|
|
|
|
|
|
|
|
|
|
|
|
|
|
|
|
|
|
|
|
|
|
|
|
|
|

11
Using the Software on the Windows Platform – Preparations
ThisÅchapterÅexplainsÅtheÅbasicÅproceduresÅforÅinstallingÅtheÅsoftwareÅandÅconnectingÅtheÅ |
|
camera |
. |
Start
It
• Your
•
•
In
1
2Close any programs that are running.
12 Using the Software on the Windows Platform – Preparations
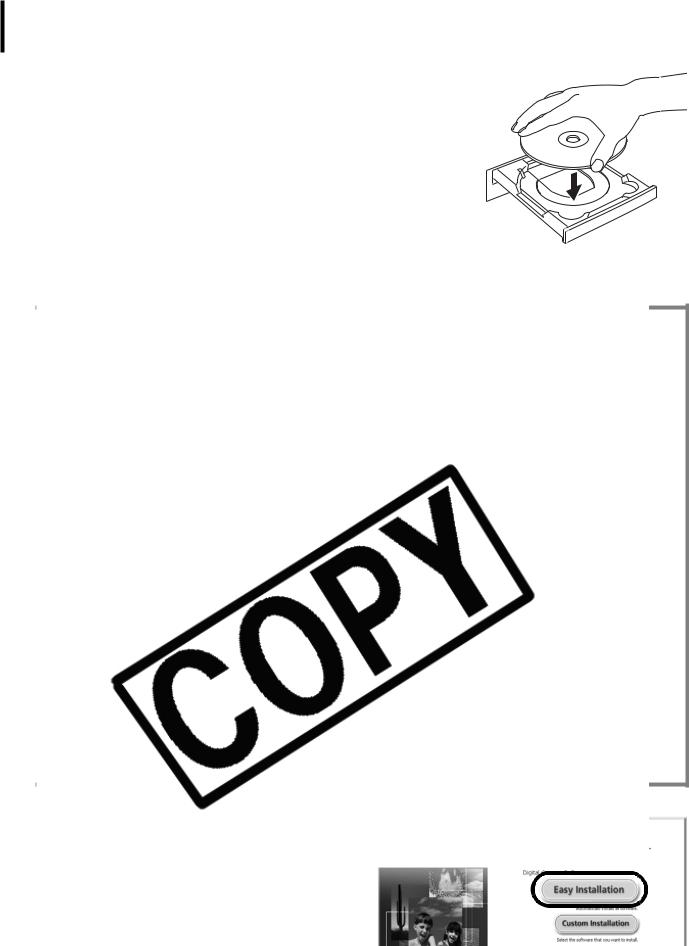
3Place the Canon Digital Camera Solution Disk in the computer’s CD-ROM drive.
IfÅtheÅ[UserÅAccountÅControl]ÅwindowÅappears,ÅfollowÅtheÅ on-screenÅinstructionsÅtoÅproceed.
IfÅtheÅinstallerÅpanelÅdoesÅnotÅappearÅautomatically,ÅuseÅtheÅ
followingÅprocedures.Å
ÅtoÅ
4
clickÅ[CustomÅInstallation].Å
Installer Panel

13
5If other software is running, close each program before clicking [OK].
6
the
7
14 Using the Software on the Windows Platform – Preparations
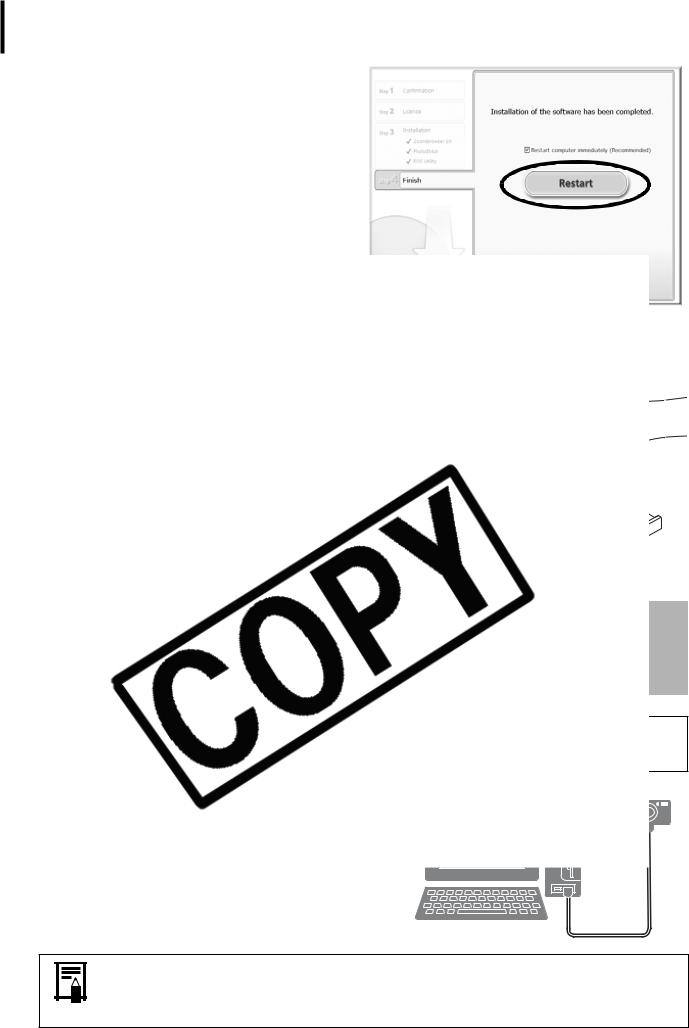
8When the installation is over, select [Restart computer immediately (Recommended)] and click [Restart].
AtÅthisÅstage,ÅdoÅNOTÅremoveÅtheÅSolutionÅ
DiskÅfromÅtheÅCD-ROMÅdriveÅyet.
Å
9
10
Procedures for attaching the camera to the computer and placing the camera in the correct mode for connecting vary between camera models. See the Camera User Guide.
15
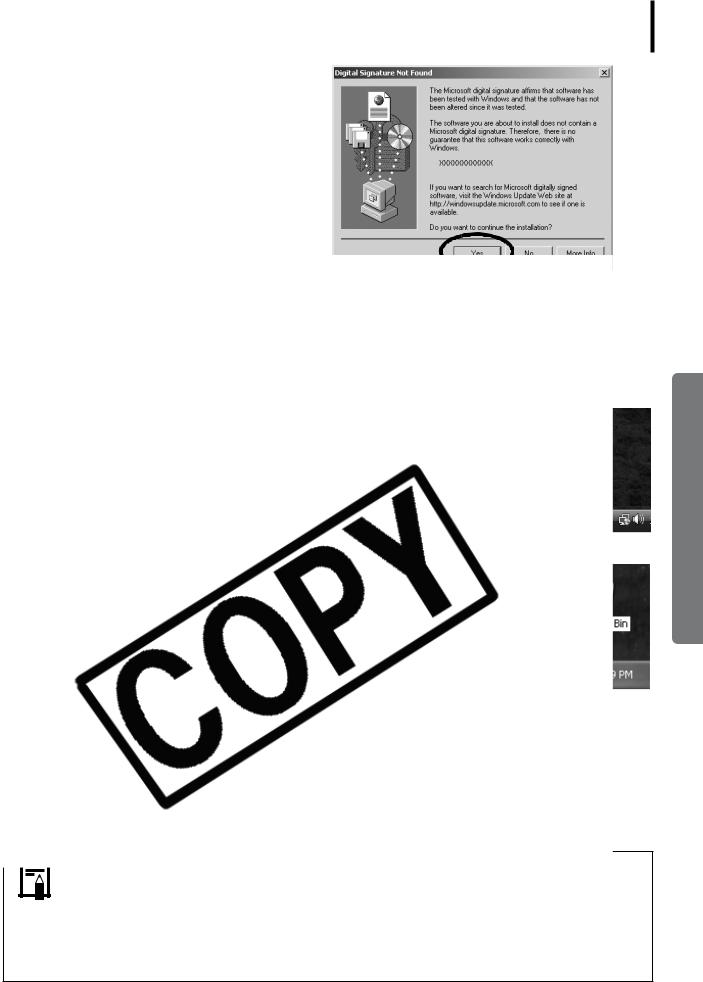
IfÅtheÅDigitalÅSignatureÅNotÅFoundÅwindowÅ appears,ÅclickÅ[Yes].
ÅtheÅ
isÅ
Å
Using
• If you experience problems installing the USB Driver, first uninstall it (p. 77) and then reinstall it. (Windows 2000)
•See Uninstalling the USB Driver (p. 73) to delete the USB driver installed with these procedures. (Windows 2000)
•See If You Were Using ZoomBrowser EX Version 2 or 3 (p. 81) if you were previously using either version.
ThisÅconcludesÅtheÅsoftwareÅandÅUSBÅdriverÅinstallationÅandÅtheÅproceduresÅforÅconnectingÅtheÅ
cameraÅtoÅtheÅcomputer.
YouÅmayÅnowÅdownloadÅcameraÅimagesÅtoÅtheÅcomputerÅ(p. 16).Å
16
Using the Software on the Windows Platform – The Basics
ThisÅchapterÅexplainsÅtheÅproceduresÅforÅusingÅZoomBrowserÅEXÅtoÅdownloadÅtheÅcamera'sÅ images
Read
Platform
|
|
|
Begin |
Å |
|
different |
ÅorÅ |
|
aÅ |
|
|
|
|
|
|
a |
|
|
the |
|
|
|
|
Ca
1
Camera Control Window
17
First Time Camera is Connected to a Computer
SetÅtheÅfollowingÅsettingsÅtheÅfirstÅtimeÅyouÅconnectÅtheÅcameraÅtoÅtheÅcomputer.ÅTheseÅ proceduresÅareÅnotÅrequiredÅfromÅtheÅsecondÅconnectionÅonward.
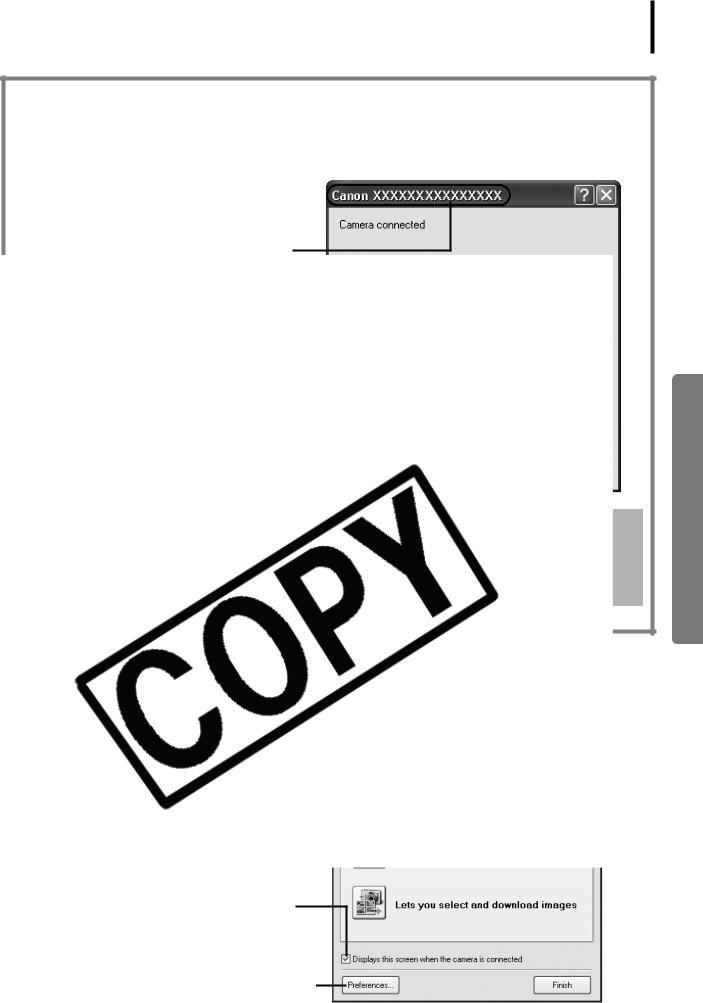
SelectÅ[CanonÅCameraWindow]ÅwhenÅaÅ dialogÅ(EventsÅdialog)ÅsimilarÅtoÅthatÅonÅ theÅrightÅdisplaysÅandÅclickÅ[OK].
Your camera model name or [Canon
2
Placing a check mark here causes this window to automatically open when the camera and computer are connected.
You can adjust the settings, such as the type of image downloaded and the destination folder, by clicking [Preferences].

18 Using the Software on the Windows Platform – The Basics
Using the Camera to Download Images (Direct Transfer Function)
• If the conditions are right for the Direct Transfer function, the Direct Transfer settings menu will appear in the LCD monitor. In addition, the  (Print/Share) button will light if your camera is equipped with one.
•See the Camera User Guide for instructions regarding Direct Transfer settings and procedures.
SetÅtheÅDirectÅTransferÅsettingsÅonÅtheÅ
Using
• By default, all the images that have yet to be downloaded will download to the [Pictures] or [My Pictures] folder.
•To download images that have had their transfer settings set with the camera, click [Preferences] and select [Images whose transfer settings were specified with the camera] as the image type to be downloaded.
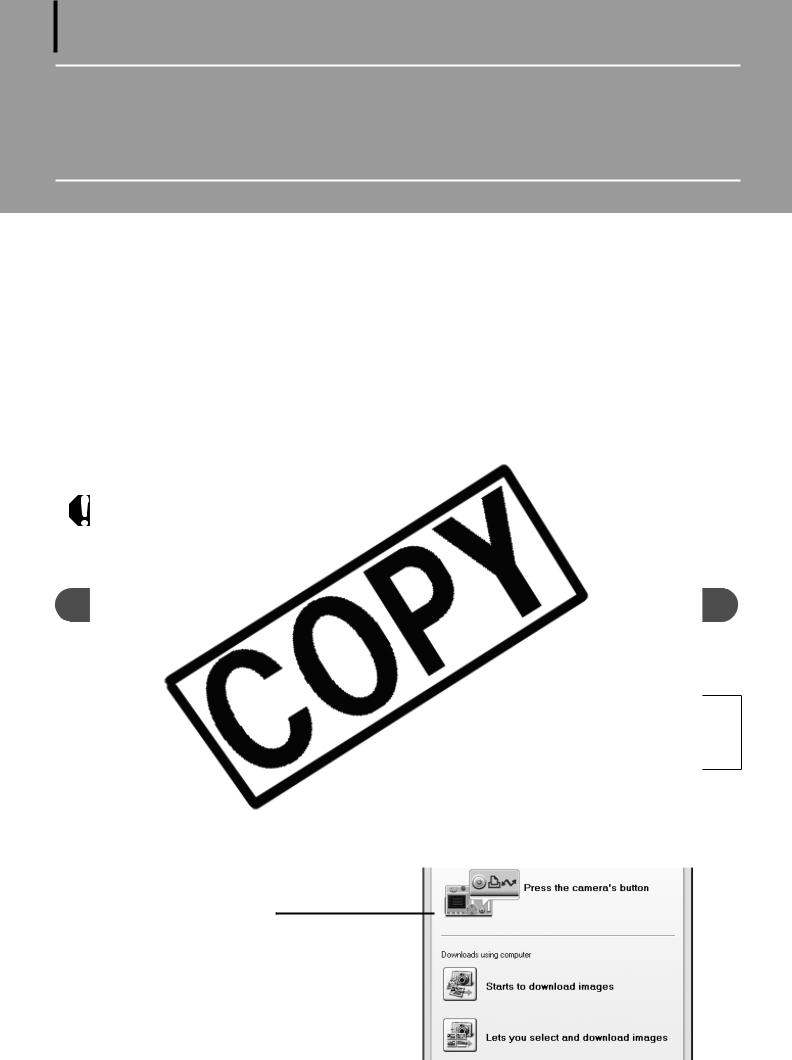
•Click [Lets you select and download images] to show the camera images in a list, check the images before downloading and download only selected images.

19
TheÅdownloadedÅimagesÅareÅsavedÅintoÅ foldersÅaccordingÅtoÅtheÅshootingÅdate.
AtÅtheÅsameÅtime,ÅtheyÅwillÅalsoÅappearÅ groupedÅbyÅdateÅinÅtheÅ[LastÅAcquiredÅ Images]ÅatÅtheÅtopÅofÅtheÅFolderÅArea.ÅÅ
[Last Acquired Images]
The last downloaded images will display according to their shooting dates.
images
Next,
M
1
.
2
If the dialog above fails to appear, click the [Start] menu and select [All Programs] or [Programs], followed by [Canon Utilities], [CameraWindow], [CameraWindowMC] and [CameraWindow], and proceed to Step 3.
20 Using the Software on the Windows Platform – The Basics
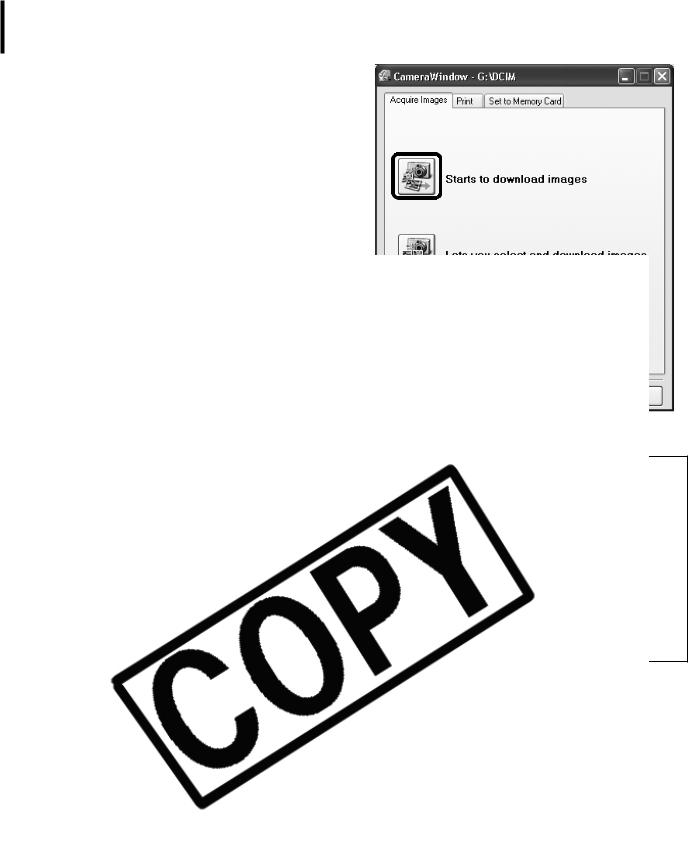
3Click [Starts to download images].
.
ÅatÅ
Next,
21
Printing Images
ThereÅareÅtwoÅwaysÅinÅwhichÅimagesÅmayÅbeÅprinted:ÅOneÅPhotoÅperÅPageÅPrintÅandÅIndexÅPrint.Å
ThisÅsectionÅexplainsÅtheÅOneÅPhotoÅperÅPageÅPrintÅmethod.Å
• Movies cannot be printed, but with Windows Vista and Windows XP you can print stills after they have been extracted from movies and saved to files.
• To use the Index Print option, click [Print] in the Main Window, followed by
O
ThisÅ |
Å |
||||
images, |
|
||||
1 |
|
|
|
|
Page |
|
|
|
|
|
|
|
|
|
|
|
|
|
|
|
|
|
|
|
|
|
|
|
|
If a window similar to it opens, read the Help menu for Easy-
PhotoPrint for instructions to proceed.
•To proceed to the ZoomBrowser EX printing window as shown in Step 2 when you select [One Photo per Page Print], click the [Tools] menu and select [Preferences], followed by the [Printing] tab. Select [Use the Print Function in ZoomBrowser EX].
22 Using the Software on the Windows Platform – The Basics
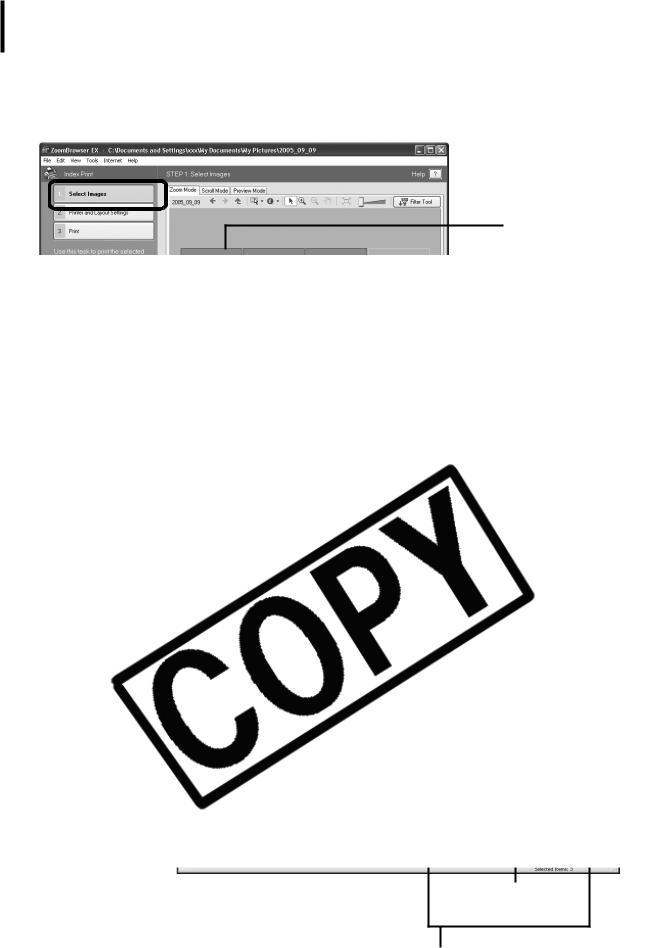
2After confirming that [1. Select Images] is selected, select images.
YouÅcanÅselectÅmultipleÅimagesÅbyÅholdingÅtheÅ[Ctrl]ÅdownÅwhileÅclickingÅonÅsuccessiveÅ images.
The background of selected images
3
Selects and etc.
Sets
Place here
images.
Sets the number of print copies
This button switches between images if multiple images were selected.
4Click [3. Print].
PrintingÅwillÅstart.

23
ThisÅchapterÅexplainedÅtheÅZoomBrowserÅEXÅbasics.Å OnceÅyouÅhaveÅmasteredÅthem,ÅtryÅtheÅadvancedÅtechniques.
Using the Software on the Windows Platform – Advanced TechniquesÅ(p. 24).Å
• A PDF-format manual for ZoomBrowser EX is also available. It provides further information about the program's features and procedures. See Using the PDF Manuals (p. 2).

24
Using the Software on the Windows Platform – Advanced Techniques
ThisÅchapterÅexplainsÅvariousÅZoomBrowserÅEXÅfeatures.Å |
ÅtheÅ |
Proceed |
|
Using |
|
|
|
|
|
The
ThisÅ |
Å |
Window |
|
M
ThisÅ
|
|
|
|
|
|
|
|
|
|
|
|
|
|
|
|
Browser Area (p. 25) |
|
Folders Area (p. 25) |
Switches between showing and hiding |
||||
|
|
|
the Task Area and Folders Area. |
||
25
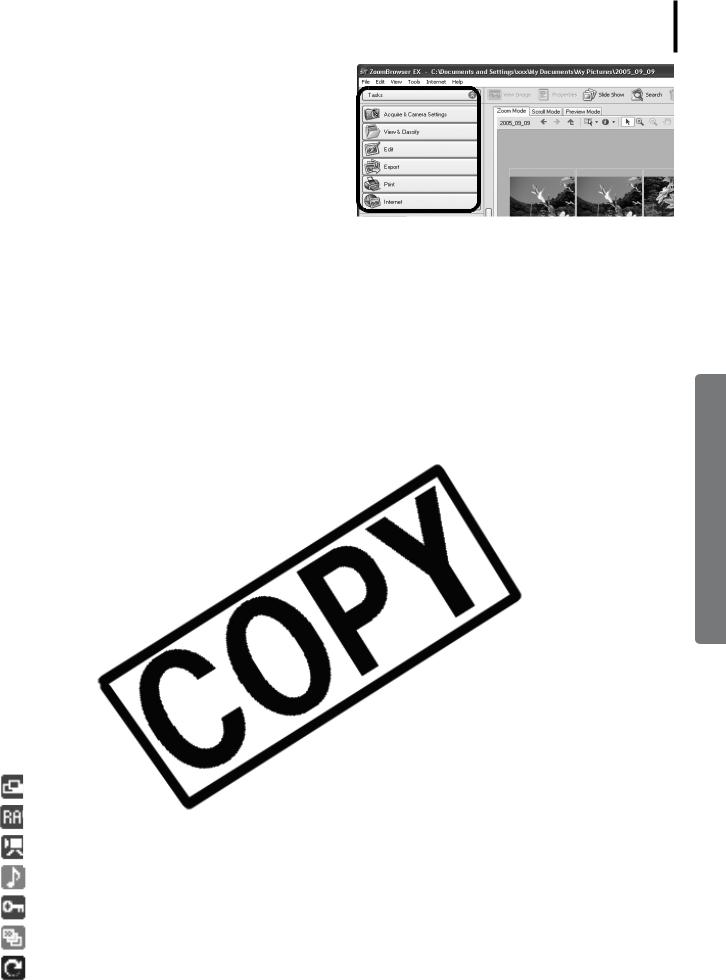
Task Area
•ZoomBrowserÅEX'sÅtasksÅareÅarrangedÅhereÅlikeÅ anÅindex.
•ClickÅaÅTaskÅbuttonÅtoÅcarryÅoutÅtheÅdesiredÅtask. TheseÅfeaturesÅareÅdescribedÅinÅZoomBrowser EX FeaturesÅ(p. 30)
Folders Area
• UseÅthisÅareaÅtoÅselectÅfolders.ÅTheÅimagesÅinÅtheÅselectedÅfolderÅdisplayÅinÅtheÅBrowserÅArea.
IfÅ |
Å |
• IfÅ |
ÅwillÅ |
|
• |
|
|
• |
|
|
• |
. |
|
|
|
• |
Å |
|
|
Area |
|
|
|
|
|
• |
Å |
|
• |
Å |
|
|
|
•The The
•You
•The
ImagesÅwithÅsoundÅmemoÅattachments
ProtectedÅimages
ImagesÅshotÅwithÅtheÅcamera'sÅAEBÅfunction
RotatedÅImagesÅ(InÅdisplayÅonly)
 Loading...