


DCP-365CN
Table of contents
 Loading...
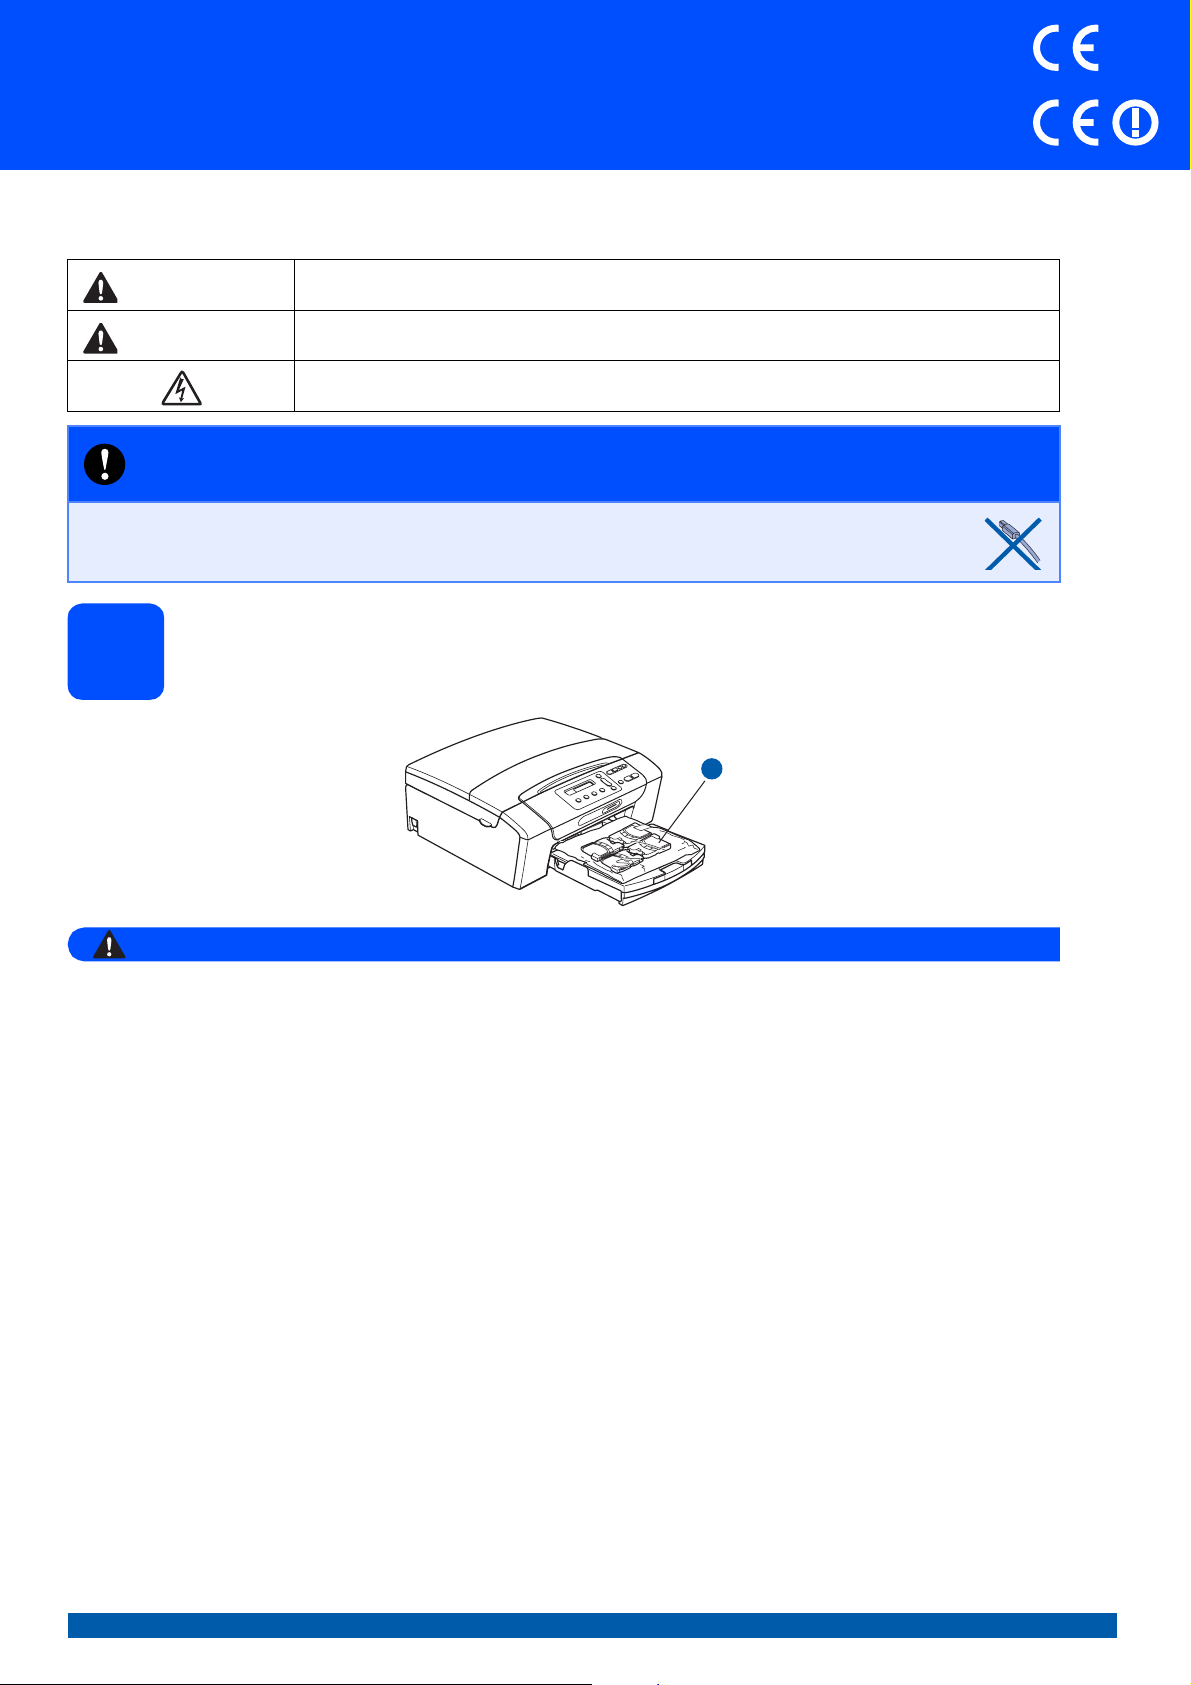
Quick Setup Guide
DCP-365CN
Start Here
Before you can use the machine, please read this Quick Setup Guide for the correct setup and installation.
WARNING
CAUTION
Warnings tell you what to do to prevent possible personal injury.
Cautions specify procedures you must follow or avoid to prevent possible minor injuries.
Electrical Hazard icons alert you to a possible electrical shock.
DCP-373CW DCP-375CW
DCP-377CW
IMPORTANT
DO NOT connect the USB cable yet (if you are using a USB
cable).
Unpack the machine and check the components
1
1
WARNING
Plastic bags are used in the packaging of your machine. To avoid danger of suffocation, please keep
these bags away from babies and children.
Most of the illustrations in this Quick Setup Guide show the DCP-375CW.
a Remove the protective tape and film covering the machine.
b Remove the plastic bag a containing the ink cartridges from on top of the paper tray.
CEE-ENG Version 0
1
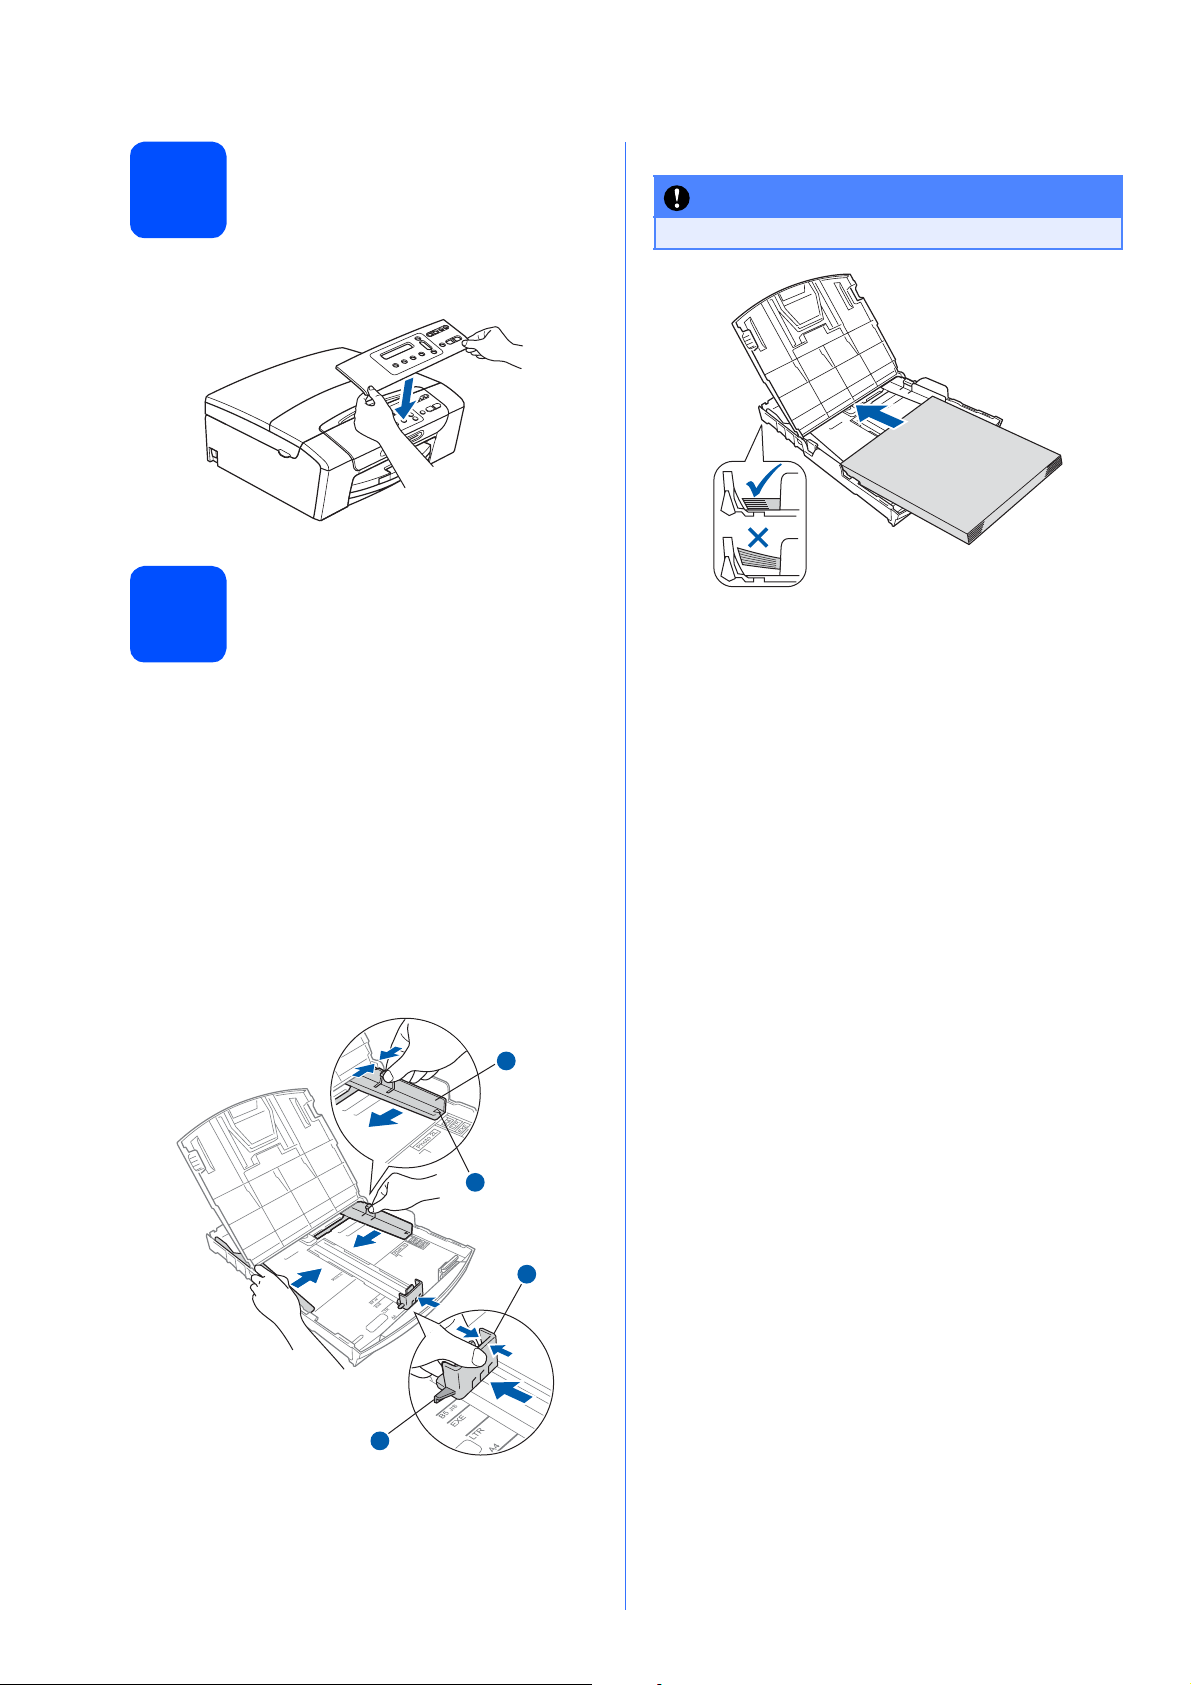
Attachment of the cover
2
of the control panel
a Attach the cover of the control panel to the
machine.
Load plain A4 paper
3
e Check that the paper is flat in the tray.
IMPORTANT
DO NOT push the paper in too far.
f Gently adjust the paper side guides to the
paper with both hands.
a Pull the paper tray completely out of the
machine.
b Lift the output paper tray cover.
c With both hands, gently press and slide the
paper side guides a and then the paper length
guide b to fit the paper size you are loading in
the tray.
Make sure that the triangular marks c on the
paper side guides a and paper length guide b
line up with the mark for the paper size you are
using.
1
3
g Close the output paper tray cover.
h Slowly push the paper tray completely into the
machine.
i While holding the paper tray in place, pull out
the paper support until it clicks, and then unfold
the paper support flap.
3
d Fan the stack of paper well to avoid paper jams
and misfeeds.
2
2
Connect the power cord
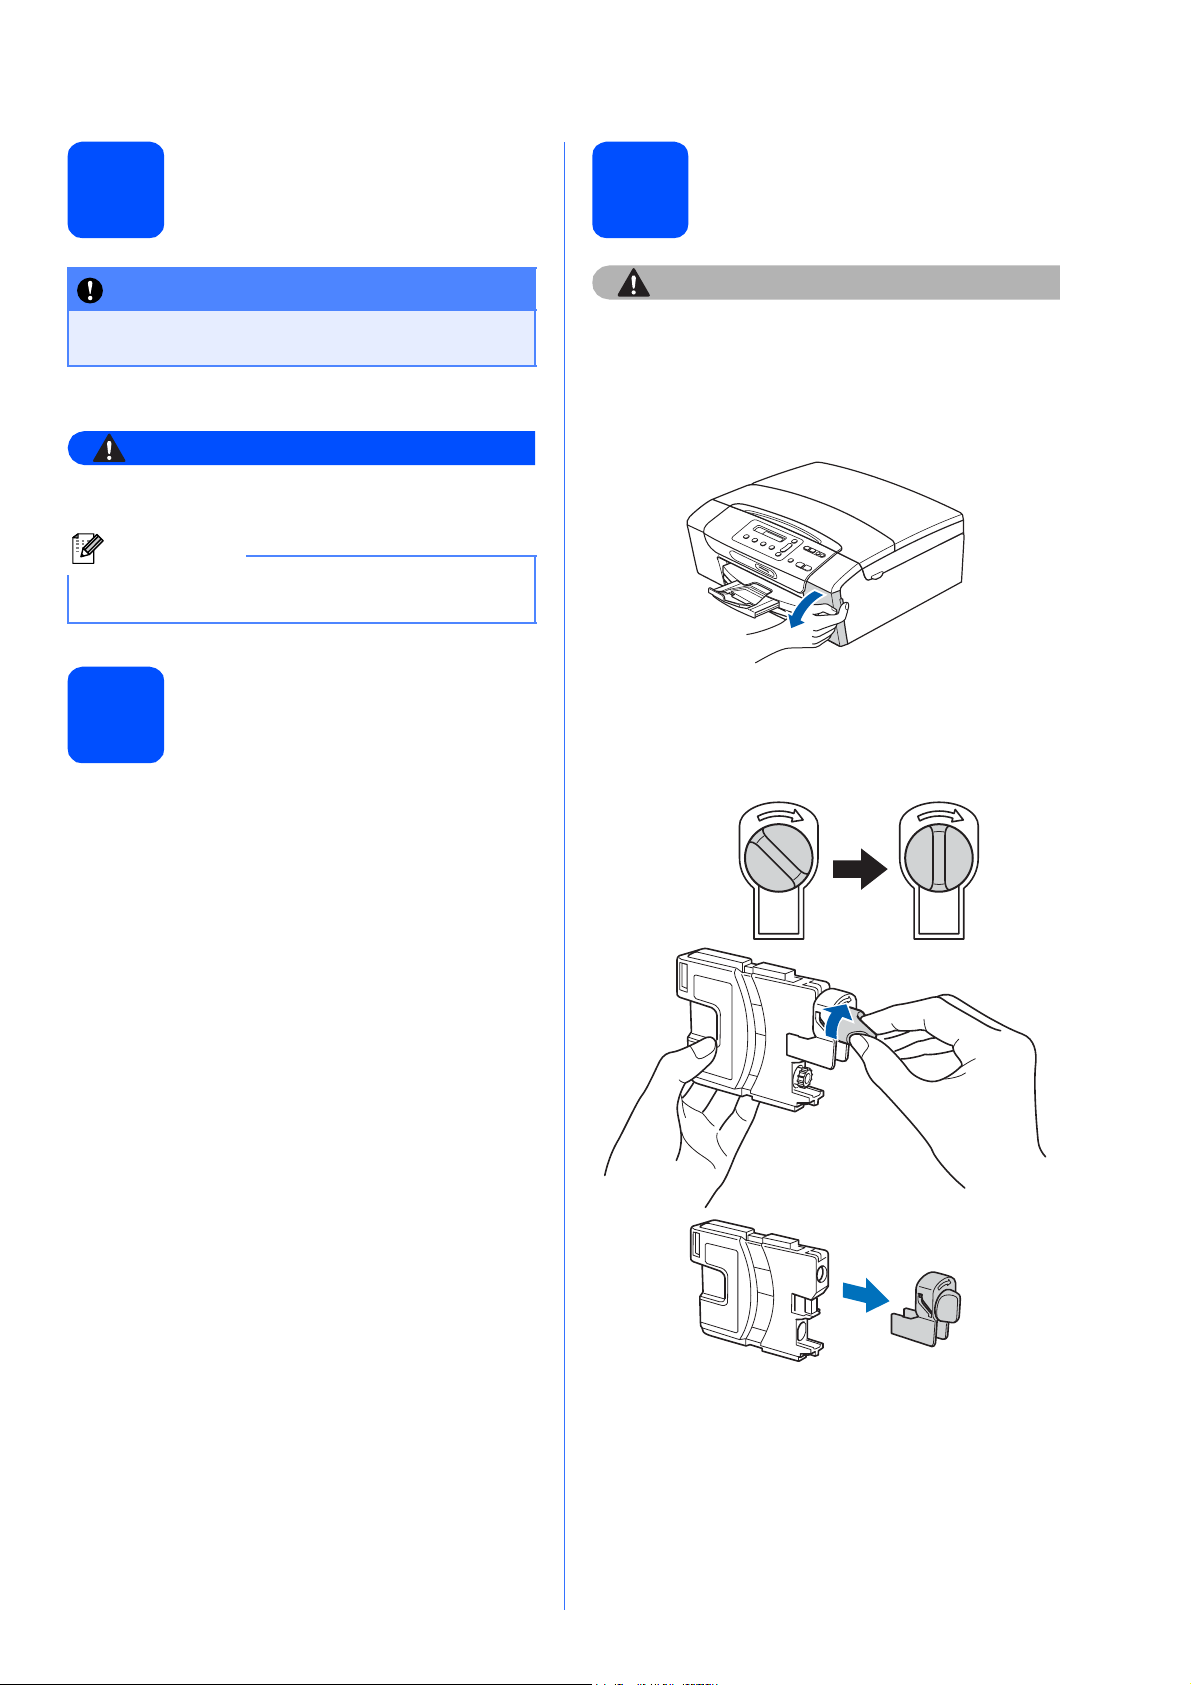
Install the ink cartridges
4
IMPORTANT
DO NOT connect the USB cable yet (if you are
using a USB cable).
a Connect the power cord.
WARNING
The machine must be fitted with an earthed
plug.
Note
The Warning LED on the control panel will stay on
until you have installed the ink cartridges.
Choose your language
5
a Press a or b to choose your language and
press OK.
6
CAUTION
If ink gets in your eyes, wash them out with water
at once, and if irritation occurs consult a doctor.
a Make sure that the power is turned on.
b Open the ink cartridge cover.
c Remove the green protective part.
d Unpack the ink cartridge.
e
b Press a (Yes) to confirm the language setting.
Take care to match the colour of the lever with
f
the cartridge colour.
g Install each ink cartridge in the direction of the
arrow on the label.
h
Gently push the ink cartridge until it clicks. After
all the ink cartridges are installed close the ink
cartridge cover.
3

Check the print quality
Set the date and time
7
a
Set Paper and
q
Press Start
Press Colour Start.
b Check the quality of the four colour blocks on
the sheet. (black/yellow/cyan/magenta)
c If all lines are clear and visible, press a (Yes) to
finish the quality check and go to step 8.
If you can see missing short lines, press b (No)
and go to d.
d The LCD asks you if the print quality is OK for
black and colour. Press a (Yes) or b (No).
e Press a (Yes), the machine will then start
cleaning the colours.
8
a Press Menu.
b Press a or b to choose 0.Initial Setup.
Press OK.
c Press a or b to choose 1.Date&Time.
Press OK.
d Press a or b to enter the last two digits of the
year, and then press OK.
e Repeat for Month and Day, and Hours and
Minutes in 24-hour format.
f Press Stop/Exit.
f After cleaning is finished, press Colour Start.
The machine starts printing the Print Quality
Check Sheet again. Go back to b.
4

9
Choose your connection type
Windows
For USB interface cable
Windows®, go to page 6
Macintosh, go to page 8
For Wired Network
Windows®, go to page 10
Macintosh, go to page 12
Note
For Windows Server® 2003/ 2008, see the Network User’s Guide on the CD-ROM.
®
USB Wired Network
Macintosh
Windows
®
Macintosh
For Wireless Network
(DCP-373CW/375CW/377CW only)
Windows® and Macintosh,
go to page 14
Wireless Network
5

USB
For USB interface users
(Windows
Windows Vista
®
2000 Professional/XP/XP Professional x64 Edition/
®
)
Windows
®
Before you install
10
a Make sure that your computer is ON and you
are logged on with Administrator rights.
Install MFL-Pro Suite
11
a Put the supplied CD-ROM into your CD-ROM
drive. Follow the on-screen instructions.
b The CD-ROM Top Menu will appear. Click
Install MFL-Pro Suite.
c Follow the on-screen instructions.
d Choose Local Connection, and then click
Next. The installation continues.
e When this screen appears, go to the next step.
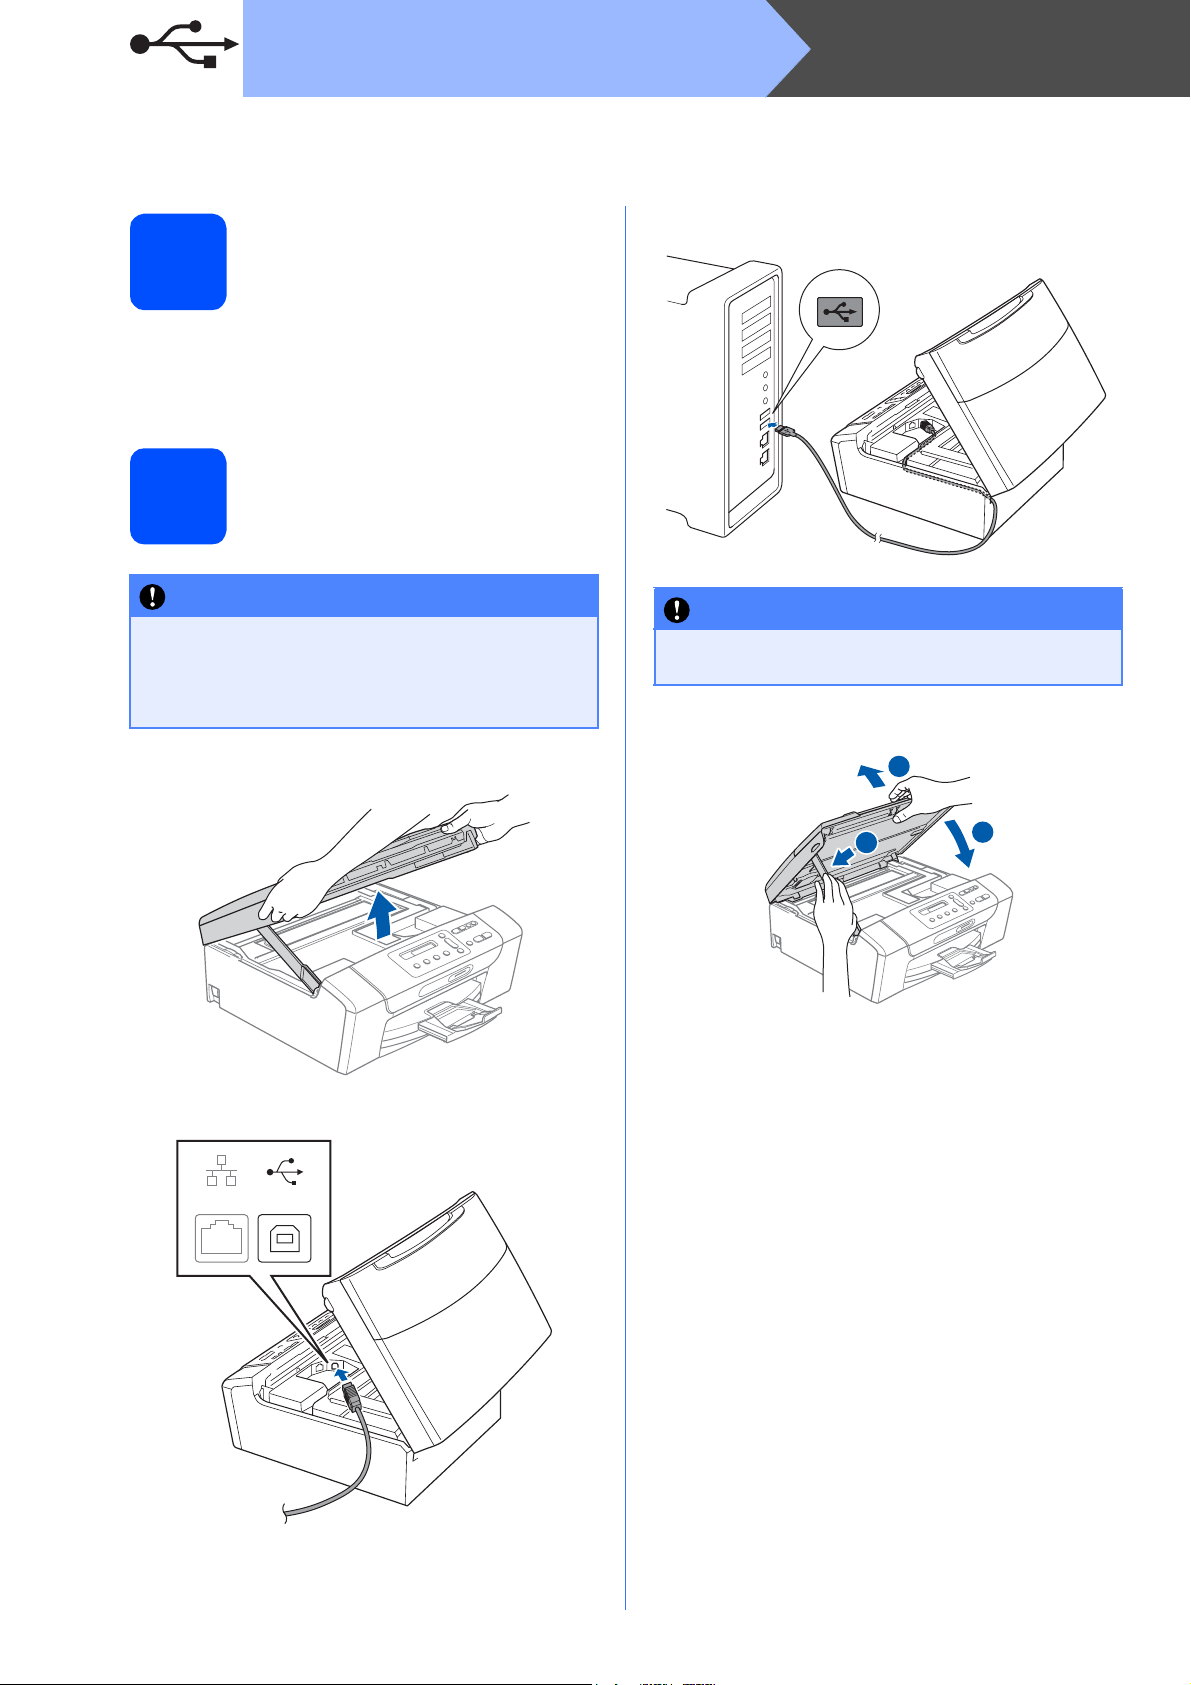
Connect the USB cable
12
a
b
LAN USB
6
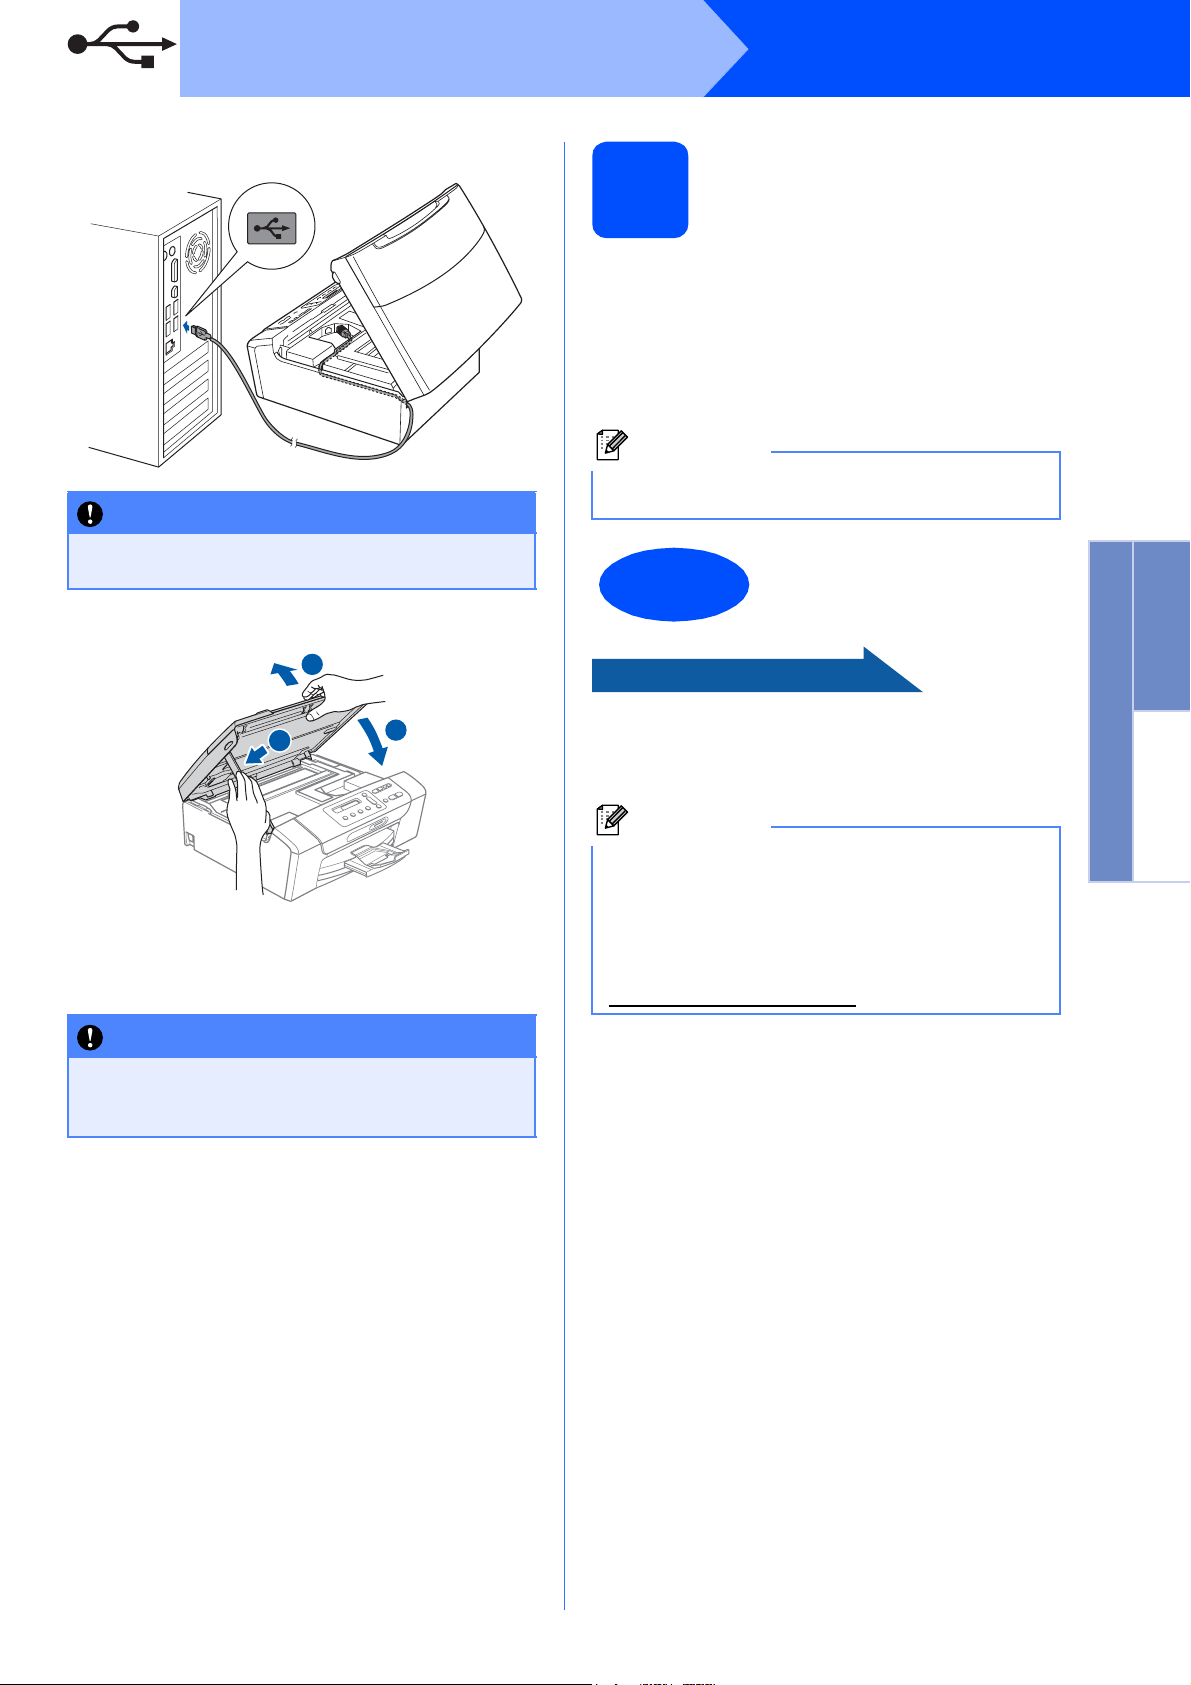
c
IMPORTANT
USB
Windows
®
Finish and restart
13
a Click Finish to restart your computer.
After restarting the computer, you must be
logged on with Administrator rights.
b In the Check for Firmware Updates screen,
choose the firmware update setting you want
and click OK.
Note
Internet access is required for the firmware
update.
Make sure that the cable does not restrict the
cover from closing, or an error may occur.
d
1
2
e
The installation will continue automatically.
The installation screens appear one after
another.
IMPORTANT
DO NOT cancel any of the screens during the
installation. It may take a few seconds for all
screens to appear.
3
The installation is now
Finish
Now go to
Proceed to Install Optional Applications on
page 20.
Note
XML Paper Specification Printer Driver
The XML Paper Specification Printer Driver is the
most suitable driver when printing from
applications that use the XML Paper Specification
documents. Please download the latest driver by
accessing the Brother Solutions Center at
http://solutions.brother.com/
complete.
.
Windows
®
USB
Macintosh
f When the On-Line Registration screen is
displayed, make your selection and follow the
on-screen instructions.
7
USB
Macintosh
For USB interface users (Mac OS X 10.3.9 - 10.4.x - 10.5.x)
c
Before you install
10
a Make sure your machine is connected to the
power and your Macintosh is ON. You must be
logged on with Administrator rights.
Connect the USB cable
11
IMPORTANT
• DO NOT connect the machine to a USB port
on a keyboard or a non-powered USB hub.
• Connect the machine directly to your
Macintosh.
a
b
IMPORTANT
Make sure that the cable does not restrict the
cover from closing, or an error may occur.
d
1
2
3
LAN USB
8

USB
Install MFL-Pro Suite
12
a Put the supplied CD-ROM into your CD-ROM
drive.
b Double-click the Start Here OSX icon to install.
c Choose Local Connection, and then click
Next. Follow the on-screen instructions.
(DCP-373CW/375CW/377CW only)
d Please wait, it will take a few seconds for the
software to install. After the installation, click
Restart to finish installing the software.
e The Brother software will search for the Brother
device.
Macintosh
Windows
f Choose the machine from the list, and then
click OK.
g When this screen appears, click OK.
The installation is now
Finish
complete.
®
USB
Macintosh
9
Loading...