


MultiQuick 7
Instructions |
MQ 777 |
|
MQ 735 |
||
Type 4199 |
MQ 727 |
|
MQ 725 |
||
www.braunhousehold.com |
||
|
|

IMPORTANT SAFEGUARDS
When using electrical appliances, basic safety precautions should always be followed to reduce the risk of fire, electric shock and/or injury to persons, including the following:
READ ALL INSTRUCTIONS.
1.Blades are sharp. Handle carefully when removing, inserting or cleaning. Exercise the same care when removing, inserting the chopping blade or disc for the food processor and chopper accessories. Always verify that the accessory enclosure is free of cracks or other damages.
2.The appliance is not intended for use by persons (including children) with reduced physical, sensory or mental capabilities, or lack of experience and knowledge, unless they have been given supervision or instructions concerning use of the appliance by a person responsible for their safety.
3.Remove any packaging materials and promotional labels before using the appliance for the first time.
4.Unplug from outlet when not in use, before putting on or taking off parts, and before cleaning. To unplug, grasp plug and pull from electrical outlet. Never pull cord.
5.To protect against electrical shock, do not put the motor part, cord or electrical plug of this hand blender in water or other liquids. Only the detachable blending shaft and other certain parts of this appliance have been designed for immersion into water or other liquids. Never submerge any other part of this unit. If hand blender falls into liquid, unplug first, then remove immediately. Do not reach into the liquid without unplugging the unit first.
6.The use of attachments/accessories not sold or recommended by Braun may cause fire, electrical shock or risk of injuries to persons.
7.Regularly inspect the power cord, power plug and actual appliance for any damage. Do not operate if damaged in any way or after the appliance malfunctions. Immediately cease use of the appliance and call Braun Customer Service for examination, repair or adjustment.
8.Avoid any contact with blades or moveable parts.
9.Do not use outdoors or for anything other than its intended purpose.
10.Keep hands and utensils out of the container while blending to prevent the possibility of severe injury to persons or damage to the unit. A scraper may be used, but must be used only when the unit is not running.
2

11.Detach blending shaft from the motor part before washing the blades or shaft.
12.When mixing liquids, especially hot liquids, use a tall container or make small quantities at a time to reduce spillage, splattering and possibility of injury from burning.
13.The metal blending shaft and whisk may scratch or mark non-stick coatings. Do not use in non-stick cookware.
14.Be certain the food processor attachment cover is securely locked in place before operating appliance. Do not attempt to remove cover until blade has stopped rotating.
15.Check work bowl for presence of foreign objects before using.
16.Do not let any cord hang over the edge of the table or counter. Do not let cord contact hot surfaces, including stovetop.
17.Maximum rating is based on the MQ 20 chopper «hc» that draws the greatest power and other recommended attachments may draw significantly less power.
18.Double-blade knife is sharp. Handle carefully. Use extreme care when removing or replacing knife blade.
19.Bowl must be in place before replacing knife blades.
20.The «hc» chopper is intended for processing small quantities of food for immediate consumption, and is especially recommended for preparing baby food. The appliance is not intended to prepare large quantites of food at one time.
21.Do not operate your appliance in an appliance garage or under a wall cabinet.
22.We suggest you save all packing materials in the event that future shipping of the machine is needed. Keep all plastic bags away from children.
23.This appliance has a polarized plug (one blade is wider than the other). To reduce the risk of electric shock, this plug will fit in a polarized outlet only one way. If the plug does not fit fully in the outlet, reverse the plug. If it still does not fit, contact a qualified electrician.
Do not modify the plug in any way.
SAVE THESE INSTRUCTIONS
FOR HOUSEHOLD USE ONLY
WARNING: RISK OF FIRE OR ELECTRIC SHOCK
3

1 |
6 |
7 |
8a |
9* |
10* |
|
|
|
a |
a |
|
2 |
|
|
|
||
|
|
|
|
||
|
|
|
8b |
|
b |
3 |
|
|
b |
|
|
|
|
|
|
4 |
|
|
|
c |
hc |
|
|
|
d |
|
|
|
|
|
|
|
|
5 |
|
|
|
c |
|
|
|
|
|
1.5-cup / 350 ml |
|
11* |
|
12* |
b |
c |
|
|
|
|
|
||
a |
|
|
|
(i) |
|
|
|
|
d |
|
|
b |
|
a |
|
(ii) |
|
|
|
|
e h |
|
|
|
|
|
|
(iii) |
|
c |
|
f |
|
i |
|
ca |
|
fp |
|
||
|
|
|
|||
d |
|
g |
|
j |
|
|
|
|
|
|
|
|
2-cup / 500 ml |
|
6-cup |
/ 1500 ml |
|
*certain models only
hc |
ca |
fp |
MQ 725
MQ 727
MQ 735
MQ 777
A |
|
|
1 |
|
|
2 |
|
|
2 |
2 |
2 |
4
B

 click!
|
1 |
|
1 |
2 |
2 |
C
1
click! |
2 |
click!
D
hc |
ca |
1.5-cup / 350 ml |
2-cup / 500 ml |
1
2 
click!
5
|
|
Parmesan |
|
|
|
Walnut |
Almond |
|
|
1cm |
1cm |
|
|
|
|
|
|
|
0.4 inch |
0.4 inch |
|
|
|
|
|
|
|
speed |
|
|
|
|
|
|
|
|
85 g |
80 g |
10 g |
50 g |
80 g |
80 g |
80 g |
|
hc |
max. |
|
|
|
7 |
|
|
|
3 oz |
2.8 oz |
0.3 oz |
1.8 oz |
2.8 oz 2.8 oz 2.8 oz |
||||
|
||||||||
|
300 g |
200 g |
30 g |
200 g |
200 g |
300 g |
300 g |
|
ca |
max. |
|
|
|
20 |
10.5 oz 10.5oz |
||
10.5 oz |
7 oz |
1 oz |
7 oz |
7 oz |
||||
E
fp
1
2
click!
click!
1
2 |
2 |
1
 1
1
6

|
|
|
|
|
|
|
2 |
|
|
|
|
1 |
2 |
|
|
|
|
1 |
|
|
|
|
|
|
|
|
|
||
|
|
Parmesan |
|
|
Walnut |
Almond |
|
|
|
|
1cm |
1cm |
|
|
|
|
|
|
|
|
0.4 inch |
0.4 inch |
|
|
|
|
|
|
|
speed |
|
|
|
|
|
|
|
|
|
max. |
700 g |
500 g |
30 g |
500 g |
500 g |
500 g |
400 g |
500 g |
500 g |
|
|
30 |
3.5 cups 5.5 cups 3.5 cups 2.5 cups 3.5 cups 4 cups |
||||||
|
3 cups |
3.3 cups |
1 oz |
||||||
F |
|
|
|
|
|
|
|
|
|
|
|
|
|
|
|
|
|
|
click! |
fp |
|
|
|
|
|
|
|
|
|
1 |
|
2 |
|
|
|
|
|
1 |
|
|
|
|
|
|
|
|
2 |
|
|
|
1 |
2 |
|
|
|
|
|
|
|
|
|
|
|
|
|
|
|
|
|
|
|
click! |
|
|
|
|
|
|
|
2 |
|
|
1 |
|
|
|
|
|
|
|
|
|
2 |
|
|
|
|
|
|
|
|
|
|
|
|
|
|
|
|
1 |
1 |
|
|
|
|
|
|
|
|
7
Parmesan |
|
|
speed |
|
|
G |
|
|
|
|
ca |
hc |
ca |
fp |
|
|
fp |
8

English |
10 |
Français |
19 |
Español |
28 |
De’Longhi Braun Household GmbH
Carl-Ulrich-Straße 4
63263 Neu-Isenburg/Germany
5722112974 / 09.17
MQ 725-727-735-777 USCA EN/FR/ES
9

English
Our products are engineered to meet the highest standards of quality, functionality and design. We hope you thoroughly enjoy your new Braun appliance.
Before Use
Please read instructions carefully and completely before using the appliance.
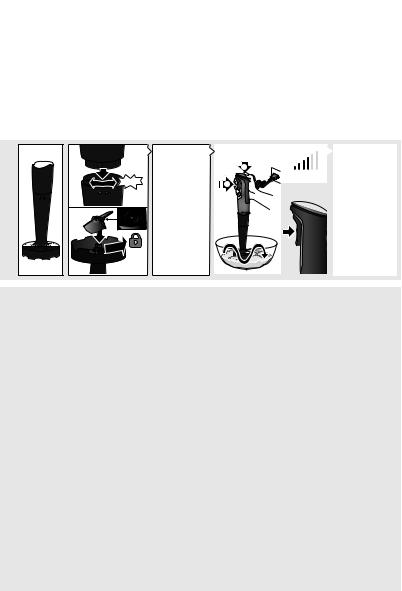
Parts and Accessories
1 Safety button 
2Pilot light
3Smart Speed switch
4Comfort grip handle and motor part housing
5 EasyClick release buttons
6Blender shaft
7Beaker
8Whisk accessory a Gearbox
b Whisk
9Puree accessory a Gearbox
b Puree shaft c Paddle
101.5-cup / 350 ml chopper accessory «hc»
a Lid
b Chopping blade c Chopper bowl
d Anti-slip rubber ring
112-cup / 500 ml chopper accessory «ca»
a Lid (with gear) b Chopping blade c Chopper bowl
d Anti-slip rubber ring
126-cup / 1500 ml food processor accessory «fp»
a Lid (with gear)
b Coupling for motor part c Pusher
d Feed tube
e Lid interlock
f Food processor bowl g Anti-slip rubber ring
h Chopping blade
iInsert holder
(i)Slicing insert
(ii)Shredding inserts (fine, coarse)
(iii)Julienne insert
jFrench fry disc
Clean all parts before using for the first time – refer to «Care and Cleaning».
Unpacking
Take the unit out of the carton. Remove all pieces of the packing. Remove any possibly extant labels on the unit (do not remove the rating plate).
Pilot Light
The pilot light (2) shows the status of the appliance, when it is connected to an electrical outlet.
Pilot light |
Appliance/Operating |
|
status |
Flashing red |
Appliance is ready for |
|
use |
Solid green |
Appliance is released |
|
(switch release button is |
|
pressed) and can be |
|
switched on |
How to Use the Appliance
Smart Speed Switch for
Variable Speeds
One squeeze, all speeds. The more you press, the higher the speed. The higher the speed, the faster and finer the blending and chopping results.
One handed operation: the Smart Speed switch (3) allows you to turn on the appliance and control the speed with one hand.
10
Operating your Hand Blender
First use: Remove the transportation lock from the motor body (4) by pulling it at the red strap.
Switching On (A)
The appliance comes equipped with an unlock button for releasing the Smart Speed switch. To safely turn it on, follow these points:
•Press the unlock button (1) with your thumb and hold. The pilot light will turn solid green.
•Immediately press the Smart Speed switch and adjust to the desired speed. Note: If the Smart Speed switch is not pressed within 2 seconds, the appliance cannot be switched on for safety reasons. The pilot light will flash red. To switch the appliance on, start again with first step.
•During operation you do not need to keep the unlock button pressed.
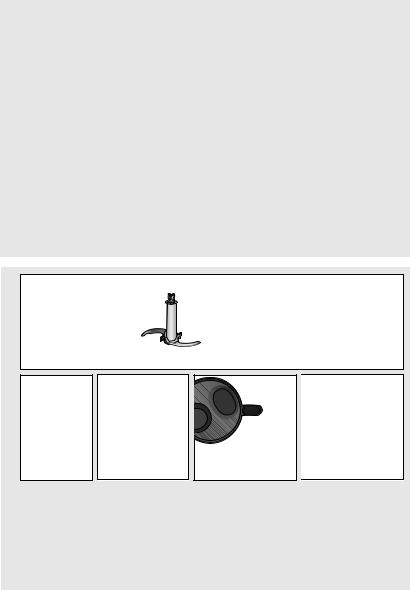
Blending Shaft (B)
The hand blender is perfectly suited for preparing dips, sauces, salad dressings, soups, baby food, as well as drinks, smoothies and milkshakes.
For best results, use the highest speed.
Assembly and Operation
•Attach the blending shaft (6) to the motor part until it clicks.
•Place the blending shaft into the mixture to be blended. Then switch the appliance on as described above.
•Blend ingredients to the desired consistency using a gentle up-and-down motion.
•After use, unplug the hand blender and press the EasyClick release buttons (5) to detach the blending shaft.
Caution
•If using the appliance to purée hot food in a saucepan or pot, remove the
saucepan or pot from the heat source and ensure the liquid is not boiling. Allow hot food to cool slightly to avoid risk of scalding.
•Do not let the hand blender sit in a hot pan on the cooktop when not in use.
Recipe Example: Mayonnaise
1.25 cups / 250 g oil (e.g. sunflower oil)
1 egg and 1 extra egg yolk 1–2 tbsp. vinegar
Salt and pepper to taste
•Place all ingredients (at room temperature) into the beaker in the order as above.
•Place the hand blender at the bottom of the beaker. Blend at maximum speed until the oil starts emulsifying.
•With the hand blender still running, slowly raise the shaft to the top of the mixture and back down to incorporate the rest of the oil. NOTE: Processing time: approx. 1 minute for salads and up to 2 minutes for a thicker mayonnaise (e.g. for dip).
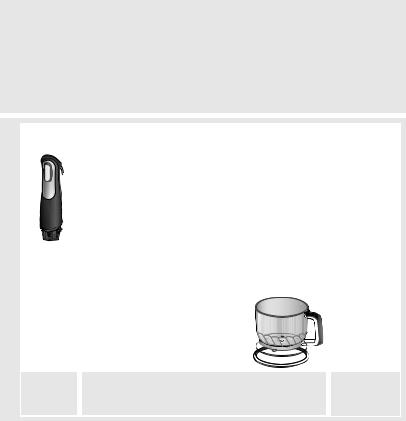
Whisk Accessory (B)
Use the whisk attachment only for whipping cream, beating egg whites, making sponge cakes and ready-mix desserts.
Assembly and Operation
•Attach the whisk (8b) to the gearbox (8a).
•Align the motor part with the assembled whisk attachment and push the pieces together until they click.
•After use, unplug and press the EasyClick release buttons to detach the motor part. Then pull the whisk out of the gearbox.
Tips for Best Results
•Move the whisk clockwise while holding it at a slight incline.
•To prevent splattering, use the whisk attachment in deep containers or pans.
11
 Loading...