


macintosh plus
Table of contents
 Loading...
Service Source
K
Macintosh Plus

Service Source
K
Basics
Macintosh Plus
Basics Overview - 1
Overview
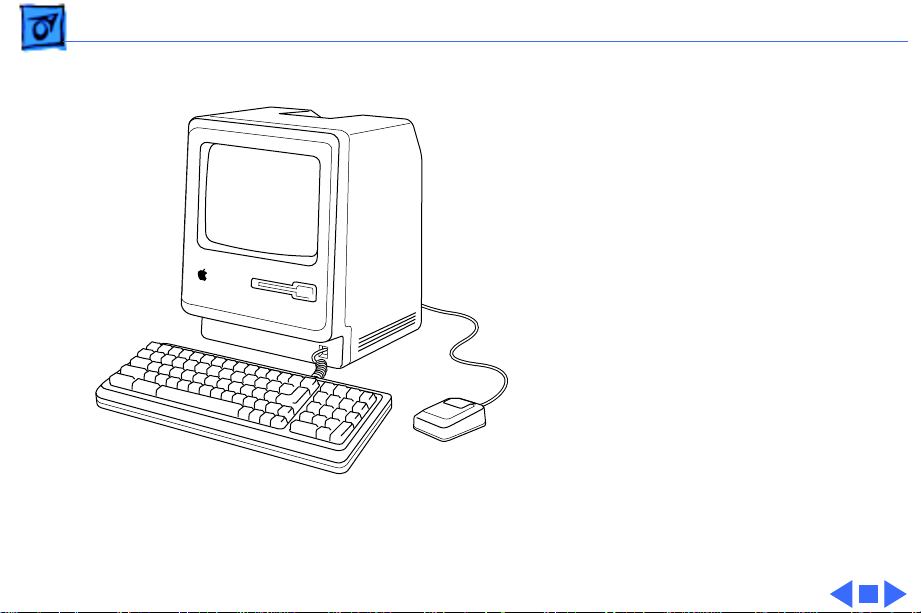
This manual contains
complete repair procedures
for the Macintosh Plus,
shown at left.
Figure: Macintosh Plus

Service Source
K
Specifications
Macintosh Plus

Specifications Introduction - 1
Introduction
Specifications information for this product can be found in this chapter and also in the
Spec Database, which you can access in one of three ways:
— Launch it directly by double-clicking the Apple Spec Database runtime alias at the top
level of the Main Service Source CD.
— Select "Apple Spec Database" from the Service Source drop-down main menu.
— Click the Acrobat toolbar icon for the database, which is near the right end of the
toolbar with the letters "SP."

Specifications Processor - 2
Processor
CPU
Motorola 68000 microprocessor
7.83 MHz
32-bit internal data bus

Specifications Memory - 3
Memory
RAM
1 MB, expandable to 4 MB (150 ns or faster SIMMs)
ROM
128K
PRAM
CMOS custom chip with 4.5 V, user-replaceable battery backup
(includes 256 bytes of memory; remembers system
parameters even with the machine switched off)

Specifications Disk Storage - 4
Disk Storage
Floppy Drive
Internal, double-sided drive: uses 3.5-in., hard-case floppy
disks—either double-sided, 800K capacity or single-sided,
400K capacity

Specifications I/O Interfaces - 5
I/O Interfaces
Floppy Drive
External drive port; DB-19 connector
SCSI
One SCSI parallel port; DB-25 connector
Mouse
Mouse port; DE-9 connector
Keyboard
Synchronous serial keyboard bus; RJ-11 connector
Serial
Two RS-422 serial ports; mini DIN-8 connectors

Specifications I/O Devices - 6
I/O Devices
Keyboard
78 keys, including numeric keypad and cursor keys; RJ-11
connector
Mouse
Mechanical tracking; optical shaft encoding at 3.54 pulses per mm
(90 pulses per in.) of travel; DE-9 connector

Specifications Sound and Video - 7
Sound and Video
Sound Generator
Four-voice sound with 8-bit digital/analog conversion, using
22-kHz sampling rate
Video Display
9-in. (diagonal) screen; 512 by 342 pixel, bit-mapped display

Specifications Electrical - 8
Electrical
Line V oltage
105–125 VAC
Frequency
50–60 Hz
Maximum Power
60 W

Specifications Physical - 9
Physical
Dimensions
Height: 13.6 in. (34.5 cm)
Width: 9.6 in. (24.4 cm)
Depth: 10.9 in. (27.6 cm)
Weight
16 lb. 8 oz. (7.5 kg)

Service Source
K
Troubleshooting
Macintosh Plus

Troubleshooting General - 1
General
The Symptom Charts included in this chapter will help you
diagnose specific symptoms related to your product. Because
cures are listed on the charts in the order of most likely solution,
try the first cure first. Verify whether or not the product
continues to exhibit the symptom. If the symptom persists, try
the next cure. (Note: If you have replaced a module, reinstall the
original module before you proceed to the next cure.)
If you are not sure what the problem is, or if the Symptom Charts
do not resolve the problem, refer to the Flowchart for the product
family.
For additional assistance, contact Apple Technical Support.

Troubleshooting Symptom Charts/Video - 2
Symptom Charts
Video
No video, but audio
tone is present and
drive operates
1 Turn contrast control fully clockwise.
2 Check video cable connections.
3 Replace power supply board.
4 Replace neck cable.
5 Replace logic board. Retain customer’s SIMMs.
Screen is bright and
audio is present, but
no video information
is present
1 Replace power supply board.
2 Replace logic board. Retain customer’s SIMMs.

Troubleshooting Symptom Charts/Drives - 3
Drives
Disk ejects; display
shows disk icon with
blinking “X”
1 Replace bad disk.
2 Replace floppy drive cable.
3 Replace floppy drive.
4 Replace logic board. Retain customer’s SIMMs.
Unable to insert disk
all the way
1 Insert paper clip into small hole beside drive slot, or switch
off system power and hold mouse button down while
switching system power back on to complete eject cycle.
Then insert disk with metal slot forward and write-protect tab
on bottom.
2 Replace floppy drive.

Troubleshooting Symptom Charts/Drives
(Continued)
- 4
Drives
(Continued)
Does not read disks
on internal drive
1 Replace bad disk.
2 Replace floppy drive cable.
3 Replace Mylar RFI shield.
4 Replace floppy drive.
5 Verify ROMs on the logic board.
6 Replace logic board. Retain customer’s SIMMs.
Does not read disks
on external drive
1 Replace bad disk.
2 Replace floppy drive cable.
3 Replace Mylar RFI shield.
4 Replace external drive.
5 Verify ROMs on the logic board.
6 Replace logic board. Retain customer’s SIMMs.

Troubleshooting Symptom Charts/Drives
(Continued)
- 5
Drives
(Continued)
Audio tone sounds at
power on, video is
present, but drive
does not operate
1 Replace floppy drive cable.
2 Replace floppy drive.
3 Replace logic board. Retain customer’s SIMMs.
Drive runs
continuously
1 Replace bad disk.
2 Replace floppy drive cable.
3 Replace floppy drive.
4 Replace logic board. Retain customer’s SIMMs.
400K drive does not
boot
1 If logic board has Rev. A ROMs and drive stepper motor is
serial number F518 or higher, upgrade to Rev. B ROMs.
2 Replace floppy drive.

Troubleshooting Symptom Charts/Peripherals - 6
Peripherals
Cursor does not move 1 Connect mouse.
2 Clean mouse.
3 Replace mouse.
4 Replace logic board. Retain customer’s SIMMs.
Cursor moves but
clicking mouse
produces no response
1 Replace mouse.
2 Replace logic board. Retain customer’s SIMMs.
No response to any
key on keyboard
1 Replace keyboard cable.
2 Replace keyboard.
3 Replace logic board. Retain customer’s SIMMs.
No response from a
particular key
1 Replace keyswitch.
2 Replace keyboard.
3 Replace logic board. Retain customer’s SIMMs.

Troubleshooting Symptom Charts/Peripherals
(Continued)
- 7
Peripherals
(Continued)
Known-good
ImageWriter or
ImageWriter II does
not print
1 Make sure that Chooser and Control Panel are set correctly.
2 Check that system software version is compatible. Replace
software with known-good.
3 Reset PRAM.
4 Replace interface cable.
5 Replace logic board. Retain customer’s SIMMs.
Known-good
LaserWriter does not
print
1 Make sure that Chooser and Control Panel are set correctly.
2 Check that system software version is compatible. Replace
software with known-good.
3 Reset PRAM.
Loading...