


 Loading...
Management
Software
AT-S106
Web Browser
User’s Guide
For the AT-GS950/48 Gigabit Ethernet Smart Switch
Version 1.0.0
613-001339 Rev. A
Copyright © 2010 Allied Telesis, Inc.
All rights reserved. No part of this publication may be reproduced without prior written permission from Allied Telesis, Inc.
Allied Telesis and the Allied Telesis logo are trademarks of Allied Telesis, Incorporated. All other product names, company names, logos or other designations mentioned herein are trademarks or registered trademarks of their respective owners

Contents
Preface ............................................................................................................................................................ |
11 |
Where to Find Web-based Product Information ............................................................................................... |
12 |
Contacting Allied Telesis .................................................................................................................................. |
13 |
Online Support ........................................................................................................................................... |
13 |
Email and Telephone Support.................................................................................................................... |
13 |
Warranty..................................................................................................................................................... |
13 |
Returning Products .................................................................................................................................... |
13 |
Sales or Corporate Information .................................................................................................................. |
13 |
Management Software Updates................................................................................................................. |
13 |
Chapter 1: Starting a Web Browser Management Session ............................................................................ |
15 |
Establishing a Remote Connection to the Web Browser Interface................................................................... |
16 |
Web Browser Tools .......................................................................................................................................... |
20 |
Quitting a Web Browser Management Session................................................................................................ |
21 |
Chapter 2: Basic Switch Parameters .............................................................................................................. |
23 |
Configuring an IP Address, Subnet Mask and Gateway Address .................................................................... |
24 |
Setting Up the IP Access List ........................................................................................................................... |
26 |
Creating an IP Access List ......................................................................................................................... |
26 |
Deleting an IP Address .............................................................................................................................. |
27 |
Enabling and Disabling the DHCP Client ......................................................................................................... |
28 |
Configuring System Management Information ................................................................................................. |
31 |
Configuring System Administration Information ............................................................................................... |
33 |
Adding System Administration Information ................................................................................................ |
33 |
Modifying Administration Information ......................................................................................................... |
34 |
Deleting Administration Information ........................................................................................................... |
35 |
Setting the User Interface Configuration .......................................................................................................... |
36 |
Viewing System Information ............................................................................................................................. |
37 |
Rebooting a Switch........................................................................................................................................... |
40 |
Pinging a Remote System ................................................................................................................................ |
42 |
Returning the AT-S106 Management Software to the Factory Default Values ................................................ |
44 |
Chapter 3: Virtual LANs .................................................................................................................................. |
45 |
VLAN Overview ................................................................................................................................................ |
46 |
Port-based VLAN Overview ....................................................................................................................... |
47 |
Tagged VLAN Overview............................................................................................................................. |
48 |
Displaying Ports and Assigning Ports to a VLAN ............................................................................................. |
50 |
Creating a Tagged VLAN ................................................................................................................................. |
51 |
Modifying a Tagged VLAN................................................................................................................................ |
53 |
Deleting a Tagged VLAN.................................................................................................................................. |
55 |
Creating a Port-Based VLAN............................................................................................................................ |
56 |
Modifying a Port-Based VLAN.......................................................................................................................... |
57 |
Deleting a Port-Based VLAN ............................................................................................................................ |
58 |
3
Contents |
|
Chapter 4: Quality of Service (QoS) ............................................................................................................... |
59 |
Overview ........................................................................................................................................................... |
60 |
Mapping CoS Priorities to Egress Queues ....................................................................................................... |
63 |
Configuring CoS................................................................................................................................................ |
65 |
Chapter 5: Port Configuration ......................................................................................................................... |
69 |
Overview ........................................................................................................................................................... |
70 |
Displaying and Configuring Ports Using the Port Configuration Page .............................................................. |
71 |
Chapter 6: Static Port Trunking ....................................................................................................................... |
75 |
Port Trunking Overview .................................................................................................................................... |
76 |
Static Port Trunk Overview......................................................................................................................... |
76 |
Creating a Port Trunk........................................................................................................................................ |
79 |
Modifying a Port Trunk...................................................................................................................................... |
81 |
Disabling a Port Trunk ...................................................................................................................................... |
83 |
Chapter 7: LACP Port Trunks ......................................................................................................................... |
85 |
LACP Overview................................................................................................................................................. |
86 |
LACP System Priority ....................................................................................................................................... |
90 |
Key Parameter .................................................................................................................................................. |
90 |
LACP Port Priority Value................................................................................................................................... |
90 |
Guidelines ......................................................................................................................................................... |
92 |
Displaying LACP Group Status......................................................................................................................... |
94 |
Selecting Port Priority ....................................................................................................................................... |
97 |
Chapter 8: Simple Network Management Protocol (SNMP) ........................................................................... |
99 |
SNMP Overview.............................................................................................................................................. |
100 |
Traps ........................................................................................................................................................ |
100 |
Community String Attributes ........................................................................................................................... |
102 |
Community String Name .......................................................................................................................... |
102 |
Access Mode ............................................................................................................................................ |
102 |
Operating Status....................................................................................................................................... |
102 |
Open or Closed Access Status................................................................................................................. |
102 |
Trap Receivers ......................................................................................................................................... |
102 |
Default SNMP Community Strings.................................................................................................................. |
104 |
Creating an SNMP Community....................................................................................................................... |
105 |
Modifying an SNMP Community ..................................................................................................................... |
106 |
Deleting an SNMP Community ....................................................................................................................... |
107 |
Creating a Host Table ..................................................................................................................................... |
108 |
Modifying a Host Table Entry.......................................................................................................................... |
109 |
Deleting a Host Table Entry ............................................................................................................................ |
110 |
Enabling or Disabling Traps............................................................................................................................ |
111 |
Modifying Traps .............................................................................................................................................. |
112 |
Deleting Traps................................................................................................................................................. |
113 |
Chapter 9: IGMP Snooping ........................................................................................................................... |
115 |
Overview ......................................................................................................................................................... |
116 |
Configuring IGMP Snooping ........................................................................................................................... |
118 |
4
|
AT-S79 Management Software User’s Guide |
Chapter 10: Bandwidth Control .................................................................................................................... |
121 |
Overview......................................................................................................................................................... |
122 |
Storm Control ........................................................................................................................................... |
122 |
Ingress Rate Limiting ............................................................................................................................... |
123 |
Egress Rate Limiting ................................................................................................................................ |
123 |
Setting Storm Control ..................................................................................................................................... |
124 |
Setting Ingress Rate Limiting.......................................................................................................................... |
126 |
Setting Egress Rate Limiting .......................................................................................................................... |
128 |
Chapter 11: Port Mirroring ............................................................................................................................ |
131 |
Overview......................................................................................................................................................... |
132 |
Configuring Port Mirroring .............................................................................................................................. |
133 |
Disabling Port Mirroring .................................................................................................................................. |
134 |
Chapter 12: Static Multicast MAC Address .................................................................................................. |
135 |
Overview......................................................................................................................................................... |
136 |
Setting a Static Multicast Address .................................................................................................................. |
138 |
Modifying a Static Multicast Address.............................................................................................................. |
140 |
Deleting a Static Multicast Address ................................................................................................................ |
141 |
Chapter 13: Spanning Tree and Rapid Spanning Tree Protocols ................................................................ |
143 |
Overview......................................................................................................................................................... |
144 |
Bridge Priority and the Root Bridge ................................................................................................................ |
145 |
Path Costs and Port Costs....................................................................................................................... |
146 |
Port Priority .............................................................................................................................................. |
146 |
Forwarding Delay and Topology Changes ..................................................................................................... |
148 |
Hello Time and Bridge Protocol Data Units (BPDU) ................................................................................ |
148 |
Point-to-Point and Edge Ports.................................................................................................................. |
149 |
Mixed STP and RSTP Networks .................................................................................................................... |
151 |
Spanning Tree and VLANs............................................................................................................................. |
152 |
Basic STP and RSTP Configuration............................................................................................................... |
154 |
Configuring RSTP Port Settings ..................................................................................................................... |
157 |
Configuring the Basic RSTP Port Settings............................................................................................... |
157 |
Configuring the Advanced RSTP Port Settings........................................................................................ |
159 |
Viewing the Spanning Tree Topology............................................................................................................. |
163 |
Chapter 14: 802.1x Port-based Network Access Control ............................................................................. |
165 |
Overview......................................................................................................................................................... |
166 |
Authentication Process ............................................................................................................................ |
167 |
Authenticator Ports................................................................................................................................... |
167 |
General Steps .......................................................................................................................................... |
169 |
Port-based Network Access Control Guidelines ...................................................................................... |
170 |
Guest VLANs.................................................................................................................................................. |
172 |
Configuring 802.1x Port-based Network Access Control ............................................................................... |
173 |
Displaying the Port Access Control Status ..................................................................................................... |
176 |
Chapter 15: RADIUS Authentication Protocol .............................................................................................. |
177 |
Overview......................................................................................................................................................... |
178 |
RADIUS Implementation Guidelines ........................................................................................................ |
178 |
Configuring the RADIUS Client .................................................................................................. |
.................... 179 |
Chapter 16: Dial-in User Configuration ......................................................................................................... |
181 |
Dial-in User Configuration Overview .............................................................................................................. |
182 |
Configuring a Dial-in User .............................................................................................................................. |
183 |
Add a Dial-in User .................................................................................................................................... |
183 |
Modify a Dial-in User................................................................................................................................ |
183 |
Delete a Dial-in User ................................................................................................................................ |
184 |
5
Contents |
|
Chapter 17: Destination MAC Filter .............................................................................................................. |
185 |
Overview ......................................................................................................................................................... |
186 |
Configuring a Destination MAC Filter.............................................................................................................. |
187 |
Deleting a Destination MAC Filter................................................................................................................... |
188 |
Chapter 18: Management Software Updates ................................................................................................ |
189 |
Overview ......................................................................................................................................................... |
190 |
Upgrading a Firmware Image Using HTTP..................................................................................................... |
191 |
Upgrading a Firmware Image Using TFTP ..................................................................................................... |
193 |
Downloading or Uploading a Configuration File via HTTP.............................................................................. |
195 |
Configuration File Upload ......................................................................................................................... |
195 |
Configuration File Download .................................................................................................................... |
196 |
Downloading or Uploading a Configuration File via TFTP .............................................................................. |
198 |
Configuration File Upload ......................................................................................................................... |
198 |
Configuration File Download .................................................................................................................... |
199 |
Chapter 19: Statistics .................................................................................................................................... |
201 |
Overview ......................................................................................................................................................... |
202 |
Displaying Traffic Comparison Statistics......................................................................................................... |
203 |
Displaying Error Group Statistics .................................................................................................................... |
207 |
Displaying Historical Status Charts................................................................................................................. |
209 |
Appendix A: AT-S106 Management Software Web Browser Default Parameters ....................................... |
213 |
Index.............................................................................................................................................................. |
223 |
6

List of Figures
Figure 1. |
Entering a Switch’s IP Address in the URL Field.................................................................................................. |
16 |
Figure 2. AT-S106 Login Dialog Box ................................................................................................................................... |
17 |
|
Figure 3. AT-GS950/48 Home Page.................................................................................................................................... |
18 |
|
Figure 4. AT-GS950/48 Front Panel Page........................................................................................................................... |
19 |
|
Figure 5. IP Setup Page ...................................................................................................................................................... |
24 |
|
Figure 6. |
IP Access List Page ............................................................................................................................................. |
26 |
Figure 7. Management Page ............................................................................................................................................... |
31 |
|
Figure 8. |
Administration Page ............................................................................................................................................. |
33 |
Figure 9. |
Modify Administration Page.................................................................................................................................. |
34 |
Figure 10. |
User Interface Page ........................................................................................................................................... |
36 |
Figure 11. |
Switch Information Page..................................................................................................................................... |
37 |
Figure 12. Reboot Page ...................................................................................................................................................... |
40 |
|
Figure 13. |
Ping Test Configuration Page............................................................................................................................. |
42 |
Figure 14. Ping Test Results Page...................................................................................................................................... |
43 |
|
Figure 15. VLAN Mode Page............................................................................................................................................... |
50 |
|
Figure 16. Tagged VLAN Page ........................................................................................................................................... |
51 |
|
Figure 17. Example of Tagged VLAN Page......................................................................................................................... |
52 |
|
Figure 18. Modify VLAN Page ............................................................................................................................................. |
53 |
|
Figure 19. Port-Based VLAN Page...................................................................................................................................... |
56 |
|
Figure 20. Modify Port-based VLAN.................................................................................................................................... |
57 |
|
Figure 21. CoS Page ........................................................................................................................................................... |
63 |
|
Figure 22. Default Port VLAN & CoS Page ......................................................................................................................... |
65 |
|
Figure 23. |
Physical Interface Page...................................................................................................................................... |
71 |
Figure 24. |
Static Port Trunk Example.................................................................................................................................. |
76 |
Figure 25. Trunking Page .................................................................................................................................................... |
79 |
|
Figure 26. |
Example of Multiple Aggregators for Multiple Aggregate Trunks ....................................................................... |
87 |
Figure 27. |
Example of a Single Aggregator with Multiple Trunks ........................................................................................ |
88 |
Figure 28. LACP Group Status Page .................................................................................................................................. |
94 |
|
Figure 29. LACP Group Status Page with No Cables Connected....................................................................................... |
95 |
|
Figure 30. LACP Group Status Page with Four Cables Connected .................................................................................... |
96 |
|
Figure 31. |
Port Priority Page ............................................................................................................................................... |
97 |
Figure 32. Community Table Page.................................................................................................................................... |
105 |
|
Figure 33. Host Table Page............................................................................................................................................... |
108 |
|
Figure 34. |
Trap Setting Page ............................................................................................................................................ |
111 |
Figure 35. IGMP Snooping Page....................................................................................................................................... |
118 |
|
Figure 36. IGMP Snooping Page with MAC Address ........................................................................................................ |
119 |
|
Figure 37. IGMP Snooping —Group Members Page ........................................................................................................ |
120 |
|
Figure 38. Storm Control Page.......................................................................................................................................... |
124 |
|
Figure 39. |
Ingress Rate Limiting Page .............................................................................................................................. |
126 |
Figure 40. |
Egress Rate Limiting Page............................................................................................................................... |
128 |
Figure 41. |
Mirroring Page.................................................................................................................................................. |
133 |
Figure 42. |
Static Multicast Address Table Page................................................................................................................ |
138 |
Figure 43. |
Modify Static Multicast Address Page .............................................................................................................. |
140 |
Figure 44. |
Point-to-Point Ports .......................................................................................................................................... |
149 |
Figure 45. Edge Port ......................................................................................................................................................... |
150 |
|
Figure 46. STP and VLAN Fragmentation with Untagged Ports........................................................................................ |
152 |
|
Figure 47. STP and VLAN Compatibility with Tagged Ports.............................................................................................. |
153 |
|
Figure 48. Rapid Spanning Tree Configuration Page........................................................................................................ |
154 |
|
Figure 49. RSTP Basic Port Configuration Page............................................................................................................... |
157 |
|
Figure 50. RSTP Advanced Port Configuration Page........................................................................................................ |
160 |
|
7
Figures |
|
|
Figure 51. |
Designated Topology Information Page ........................................................................................................... |
163 |
Figure 52. |
Example of the Authenticator Role ................................................................................................................... |
168 |
Figure 53. |
Port-based Authentication Across Multiple Switches........................................................................................ |
171 |
Figure 54. |
802.1x Access Control Configuration Page...................................................................................................... |
173 |
Figure 55. |
802.1x Access Control Configuration Page...................................................................................................... |
176 |
Figure 56. RADIUS Page................................................................................................................................................... |
179 |
|
Figure 57. |
Dial-In User Page ............................................................................................................................................. |
183 |
Figure 58. |
Destination MAC Filter Page ............................................................................................................................ |
187 |
Figure 59. |
Updated Destination MAC Filter Page.............................................................................................................. |
187 |
Figure 60. Firmware Upgrade via HTTP Page................................................................................................................... |
192 |
|
Figure 61. Firmware Upgrade via TFTP Page................................................................................................................... |
194 |
|
Figure 62. Configuration Upload/Download via HTTP Page.............................................................................................. |
195 |
|
Figure 63. File Download with HTTP ................................................................................................................................. |
196 |
|
Figure 64. Result Page ...................................................................................................................................................... |
197 |
|
Figure 65. Configuration Upload/Download via TFTP Page .............................................................................................. |
198 |
|
Figure 66. |
Traffic Comparison Page.................................................................................................................................. |
203 |
Figure 67. Error Group Chart Page.................................................................................................................................... |
207 |
|
Figure 68. |
Historical Status Chart Page............................................................................................................................. |
209 |
8

Tables
Table 1. |
Default Mappings of IEEE 802.1p Priority Levels to Egress Port Priority Queues |
...............................................61 |
Table 2. |
Multiple Aggregators ............................................................................................................................................. |
88 |
Table 3. |
Bridge Priority Value Increments ........................................................................................................................ |
145 |
Table 4. |
Valid Port Priority Values .................................................................................................................................... |
147 |
Table 5. |
RSTP Point-to-Point Status ................................................................................................................................ |
162 |
Table 6. |
Traffic Comparison Options ................................................................................................................................ |
204 |
Table 7. |
Historical Status Options .................................................................................................................................... |
210 |
Table 8. AT-S106 Management Software Default Settings .............................................................................................. |
213 |
|
9
List of Tables
10
Preface
This guide contains instructions on how to use the AT-S106 Management software to manage and monitor the AT-GS950/48 Gigabit Ethernet Smart Switch.
The AT-S106 Management software has a web browser interface that you can access from any management workstation on your network that has a web browser application.
This preface contains the following sections:
“Where to Find Web-based Product Information” on page 12
“Contacting Allied Telesis” on page 13
11

Preface
Where to Find Web-based Product Information
The installation and user guides are available for all Allied Telesis products in portable document format (PDF) on our web site. Management software updates are also available. Go to http://www.alliedtelesis.com/support/software/.
Enter your hardware product model in the Search by Product Name field; for example, enter AT-GS950/48. You can view the documents online or download them onto your local workstation or server.
12

AT-S106 Management Software Web Browser User’s Guide
Contacting Allied Telesis
Online Support
Email and
Telephone
Support
Warranty
Returning
Products
Sales or
Corporate
Information
Management
Software Updates
This section provides Allied Telesis contact information for technical support as well as sales and corporate information.
You can request technical support online by accessing the Allied Telesis Knowledge Base: www.alliedtelesis.com/support/kb.aspx. You can use the Knowledge Base to submit questions to our technical support staff and review answers to previously asked questions.
For Technical Support via email or telephone, refer to the Support & Services section of the Allied Telesis web site: www.alliedtelesis.com. Select your country from the list displayed on the website. then select the appropriate menu tab.
For hardware warranty information, refer to the Allied Telesis web site: www.alliedtelesis.com/support/warranty.
Products for return or repair must first be assigned a return materials authorization (RMA) number. A product sent to Allied Telesis without an RMA number will be returned to the sender at the sender’s expense.
To obtain an RMA number, contact the Allied Telesis Technical Support group at our web site: www.alliedtelesis.com/support/rma. Select your country from the list displayed on the website. Then select the appropriate menu tab.
You can contact Allied Telesis for sales or corporate information through our web site: www.alliedtelesis.com. To find the contact information for your country, select Contact Us -> Worldwide Contacts.
New releases of management software for our managed products are available on our Allied Telesis web site at http://www.alliedtelesis.com/support/software/.
Go to “Where to Find Web-based Product Information” on page 12 for instructions on navigating to this information.
13
Preface
14

Chapter 1
Starting a Web Browser Management
Session
This chapter contains the procedures for starting, using, and quitting a web browser management session on the AT-GS950/48 Gigabit Ethernet Smart Switch. This chapter includes the following sections:
“Establishing a Remote Connection to the Web Browser Interface” on page 16
“Web Browser Tools” on page 20
“Quitting a Web Browser Management Session” on page 21
15
Chapter 1: Starting a Web Browser Management Session
Establishing a Remote Connection to the Web Browser Interface
The AT-GS950/48 Gigabit Ethernet Smart Switch is shipped with a preassigned IP address of 192.168.1.1.
After your initial login, you may want to assign a new IP address to your switch. To manually assign an IP address to the switch, refer to “Configuring an IP Address, Subnet Mask and Gateway Address” on page 24. To configure the switch to obtain its IP configuration from a DHCP server, refer to “Enabling and Disabling the DHCP Client” on page 28.
Whether you use the pre-assigned IP address or assign a new one, you must set your local PC to the same subnet as the switch.
To start a web browser management session, do the following procedure:
1.Start your web browser.
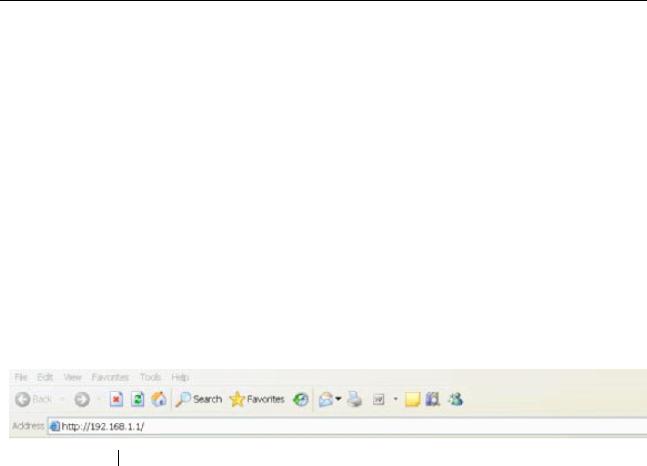
2.In the URL field of the browser, enter 192.168.1.1 which is the default IP address of the switch. See Figure 1.
Switch’s IP Address
Figure 1. Entering a Switch’s IP Address in the URL Field
16

AT-S106 Management Software Web Browser User’s Guide
The AT-S106 Management software displays the login dialog box, shown in Figure 2.
Figure 2. AT-S106 Login Dialog Box
3.Enter the AT-S106 management login user name and password.
The default user name is “manager” and the default password is “friend.”
4.Press OK.
The login name and password are case-sensitive.
The switch Home Page is displayed. See Figure 3 on page 18 for an example of the AT-GS950/48 Home Page
To change the user name and password, refer to “Configuring System Administration Information” on page 33.
17

Chapter 1: Starting a Web Browser Management Session
Figure 3. AT-GS950/48 Home Page
The main menu appears on the left side and is common for all of the management pages discussed in this manual. It consists of the following folders and web pages:
Switch Info.
Front Panel
System
Physical Interface
Bridge
SNMP
Security
Statistics Chart
Tools
Save Configuration
5.To see the front panel of the switch, select Front Panel from the main menu on the left side of the page.
18

AT-S106 Management Software Web Browser User’s Guide
The AT-S106 Management software displays the front of the switch. Ports that have a link to an end node are green. Ports without a link are grey. The AT-GS950/48 front panel page is shown in Figure 4.
Figure 4. AT-GS950/48 Front Panel Page
A web browser management session remains active even if you link to other sites. You can return to the management web pages anytime as long as you do not quit the browser.
19

Chapter 1: Starting a Web Browser Management Session
Web Browser Tools
You can use the web browser tools to move around the management pages. Selecting Back on your browser’s toolbar returns you to the previous display. You can also use the browser’s bookmark feature to save the link to the switch.
20
AT-S106 Management Software Web Browser User’s Guide
Quitting a Web Browser Management Session
To exit a web browser management session, close the web browser.
21
Chapter 1: Starting a Web Browser Management Session
22

Chapter 2
Basic Switch Parameters
This chapter provides procedures to perform basic switch activities such as reassigning the IP address, enabling the DHCP Client, configuring new user names and passwords, and rebooting the system.
This chapter contains the following sections:
“Configuring an IP Address, Subnet Mask and Gateway Address” on page 24
“Setting Up the IP Access List” on page 26
“Enabling and Disabling the DHCP Client” on page 28
“Configuring System Management Information” on page 31
“Configuring System Administration Information” on page 33
“Setting the User Interface Configuration” on page 36
“Viewing System Information” on page 37
“Rebooting a Switch” on page 40
“Pinging a Remote System” on page 42
“Returning the AT-S106 Management Software to the Factory Default Values” on page 44
Note
To permanently save your new settings or any changes to the configuration file, select Save Configuration to Flash from the main menu on the left side of the page.
23

Chapter 2: Basic Switch Parameters
Configuring an IP Address, Subnet Mask and Gateway Address
This procedure explains how to change the IP address, subnet mask, and gateway address of the switch. Before performing the procedure, note the following:
A gateway address is only required if you want to remotely manage the device from a management station that is separated from the switch by a router.
To configure the switch to automatically obtain its IP configuration from a DHCP server on your network, go to “Enabling and Disabling the DHCP Client” on page 28.
To change the switch’s IP configuration, do the following procedure:
1.From the main menu on the left side of the page, click the System folder.
The System folder expands.
2.From the System folder, select IP Setup. The IP Setup Page is displayed. See Figure 5.
Figure 5. IP Setup Page
24

AT-S106 Management Software Web Browser User’s Guide
3.Change the IP configuration parameters by entering new information in the following fields:
System MAC Address
This parameter displays the MAC address of the switch. You cannot change this parameter.
System IP Address
Displays the current IP address of the switch. To change the IP address, enter a new IP address.
System Subnet Mask
Displays the current subnet mask of the switch. To change the subnet mask, enter a new subnet mask.
System Default Gateway
Displays the default gateway of the switch. To change the default gateway, enter a new gateway.
DHCP Mode
For information about setting this parameter, refer to “Enabling and Disabling the DHCP Client” on page 28.
Caution
Before enabling DHCP Mode, record the MAC address of your switch. For more information, refer to “Enabling and Disabling the DHCP Client” on page 28.
4. Click Apply.
Note
Changing the IP address ends your management session. To resume managing the device, enter the new IP address of the switch in the web browser’s URL field, as shown in Figure 1 on page 16.
5.After you log on to the switch with the new IP address, select Save Configuration to Flash from the main menu on the left side of the page to save the new IP address to memory.
Caution
If you do not select Save Configuration to Flash, the IP address will revert to its default or original setting when you power cycle the switch.
25

Chapter 2: Basic Switch Parameters
Setting Up the IP Access List
Creating an IP
Access List
When the IP Access List feature is enabled, remote access to the management software is restricted to the IP addresses entered into the IP Access List. It does not restrict the management ping response activity, only web access to the management software.
Note
By default, the IP Access List feature is disabled.
The procedures in this section describe how to enable or disable the IP Access List feature and how to add or remove IP addresses from the list. See the following sections:
“Creating an IP Access List” on page 26
“Deleting an IP Address” on page 27
Note
You cannot modify an existing IP address.
To create a list of accessible IP addresses, do the following procedure:
1.From the main menu on the left side of the page, click the System folder.
The System folder expands.
2.From the System folder, select IP Access List. The IP Access List Page is displayed. See Figure 6.
.
Figure 6. IP Access List Page
26
Deleting an IP
Address
AT-S106 Management Software Web Browser User’s Guide
3.Enter an IP address in the IP Address field using a xxx.xxx.xxx.xxx format.
4.Click Add.
The IP address is added to the IP Access List Table.
5.To set the IP restriction status, select Disable or Enable in the pulldown menu next to the IP Restriction Status field.
By default, the IP Restriction Status field is set to Disable.
6.Click Apply.
7.From the main menu (not shown in Figure 6) on the left side of the page, select Save Configuration to Flash to permanently save your changes.
To delete an IP address from the IP Access List, do the following procedure:
1.From the main menu on the left side of the page, click the System folder.
The System folder expands.
2.From the System folder, select IP Access List.
The IP Access List Page is displayed. See Figure 6 on page 26.
3.Select delete next to the IP address that you want to remove.
The IP address is removed from the IP Access List Table. If you remove the last IP address from the table, the IP Restriction Status field is set to Disable.
4.From the main menu (not shown in Figure 6) on the left side of the page, select Save Configuration to Flash to permanently save your changes.
27

Chapter 2: Basic Switch Parameters
Enabling and Disabling the DHCP Client
Since the AT-GS950/48 Gigabit Ethernet Smart Switch only has a web management interface and does not have local console connections, you must be careful when you change the IP address of the switch by enabling the DHCP client. With DHCP enabled, the DHCP server automatically assigns the next available IP address to your switch from a range of unassigned IP addresses. This IP address is not be advertised over the network and as a consequence, you do not know which IP address has been assigned. Once the switch obtains a new IP address from the DHCP server, the switch becomes inaccessible and the MAC address can no longer be viewed with the AT-S106 Management software using the previous IP address.
To find the new IP address, you must look it up on your DHCP server which requires you to have the MAC address of your switch as a reference.
Before you enable the DHCP client, record the switch’s MAC address. You can view the MAC address on the System Information Page when you first log onto the switch. See “Viewing System Information” on page 37. Or, you can find the MAC address on the label affixed to the
switch. Provide this information to your system administrator for reference.
Note
The MAC address may also be obtained from the agency label that you can find on the bottom of the chassis.
If the switch power cycles or if you press the Reset button before you save the new configuration, the software reverts to the default IP address value. In either case, the IP address value reverts to 192.168.1.1.
This procedure explains how to activate and deactivate the DHCP client on the switch. When the client is activated, the switch obtains its IP configuration, its IP address and subnet mask, from a DHCP server on your network. Before performing the procedure, note the following:
By default, the DHCP client is disabled on the switch.
The DHCP client does not support BOOTP.
After you enable DHCP, you end the current management session. Log on with the new IP address (provided by your system administrator) using the procedure described in “Establishing a Remote Connection to the Web Browser Interface” on page 16.
28

AT-S106 Management Software Web Browser User’s Guide
Caution
Record the MAC address of your switch before you begin this procedure.
To activate or deactivate the DHCP client on the switch, do the following procedure:
1.From the main menu on the left side of the page, click the System folder.
The System folder expands.
2.From the System folder, select IP Setup.
The IP Setup Page is shown in Figure 5 on page 24.
3.From the pull-down menu next to the DHCP Mode field, select Enable or Disable.
By default, this field is set to Disable.
4.Click Apply.
If you enable the DHCP client, the web server connection to the switch will be lost.
Before you disable the DHCP client, you need to assign a new System IP Address value in “Configuring an IP Address, Subnet Mask and Gateway Address” on page 24. Record this value for future use.
Caution
Enabling or disabling DHCP ends your management session.
Caution
If you do not select Save Configuration to Flash, the DHCP mode and the IP Address reverts to the previous configuration when you power cycle the switch.
5.Log on to the switch with the new IP address and immediately save your configuration by selecting Save Configuration to Flash from the main menu on the left side of the page.
If you enable DHCP and then save your configuration, you save the IP address obtained from the DHCP server.
29
Chapter 2: Basic Switch Parameters
If you disable DHCP, enter a new IP address, and then save your configuration, you have saved the DHCP setting and the new IP address on the switch.
30
Loading...