


 Loading...
AT-FS970M Series
Fast Ethernet Switch
AT-FS970M/8
AT-FS970M/8PS
AT-FS970M/8PS-E
AT-FS970M/24C
AT-FS970M/24PS
AT-FS970M/48
AT-FS970M/48PS
AT-FS970M/16F8-LC
Management Software
Web Interface User’s Guide
AT-FS970M Series Version 2.3.1.0
613-001946 Rev. A
Copyright
Copyright © 2014, Allied Telesis, Inc. All rights reserved.
This product includes software licensed under the BSD License. As such, the following language applies for those portions of the software licensed under the BSD License:
Redistribution and use in source and binary forms, with or without modification, are permitted provided that the following conditions are met:
*Redistributions of source code must retain the above copyright notice, this list of conditions and the following disclaimer.
*Redistributions in binary form must reproduce the above copyright notice, this list of conditions and the following disclaimer in the documentation and/or other materials provided with the distribution.
*Neither the name of Allied Telesis, Inc. nor the names of the respective companies above may be used to endorse or promote products derived from this software without specific prior written permission.
THIS SOFTWARE IS PROVIDED BY THE COPYRIGHT HOLDERS AND CONTRIBUTORS "AS IS" AND ANY EXPRESS OR IMPLIED WARRANTIES, INCLUDING, BUT NOT LIMITED TO, THE IMPLIED WARRANTIES OF MERCHANTABILITY AND FITNESS FOR A PARTICULAR PURPOSE ARE DISCLAIMED. IN NO EVENT SHALL THE COPYRIGHT HOLDER OR CONTRIBUTORS BE LIABLE FOR ANY DIRECT, INDIRECT, INCIDENTAL, SPECIAL, EXEMPLARY, OR CONSEQUENTIAL DAMAGES (INCLUDING, BUT NOT LIMITED TO, PROCUREMENT OF SUBSTITUTE GOODS OR SERVICES; LOSS OF USE, DATA, OR PROFITS; OR BUSINESS INTERRUPTION) HOWEVER CAUSED AND ON ANY THEORY OF LIABILITY, WHETHER IN CONTRACT, STRICT LIABILITY, OR TORT (INCLUDING NEGLIGENCE OR OTHERWISE) ARISING IN ANY WAY OUT OF THE USE OF THIS SOFTWARE, EVEN IF ADVISED OF THE POSSIBILITY OF SUCH DAMAGE.
Copyright 1989, 1991, 1992 by Carnegie Mellon University. Derivative Work - 1996, 1998-2000. Copyright 1996, 19982000 by The Regents of the University of California - All rights reserved. Copyright (c) 2001-2003 by Networks Associates Technology, Inc. - All rights reserved. Copyright (c) 2001-2003 by Cambridge Broadband Ltd. - All rights reserved. Copyright (c) 2003 by Sun Microsystems, Inc. - All rights reserved. Copyright (c) 2003-2005 by Sparta, Inc. - All rights reserved. Copyright (c) 2004 by Cisco, Inc. and Information Network Center of Beijing University of Posts and Telecommunications. - All rights reserved. Copyright (c) 2003 by Fabasoft R&D Software GmbH & Co KG - All rights reserved. Copyright (c) 2004-2006 by Internet Systems Consortium, Inc. ("ISC") - All rights reserved. Copyright (c) 1995-2003 by Internet Software Consortium - All rights reserved. Copyright (c) 1992-2003 by David Mills - All rights reserved. Copyright (c) 1995 by Tatu Ylonen <ylo@cs.hut.fi>, Espoo, Finland - All rights reserved. Copyright (c) 1998 by CORE SDI S.A., Buenos Aires, Argentina - All rights reserved. Copyright 1995, 1996 by David Mazieres - All rights reserved. Copyright 1983, 1990, 1992, 1993, 1995 by The Regents of the University of California - All rights reserved. Copyright (c) 1995 Patrick Powell - All rights reserved. Copyright (c) 1998-2005 The OpenSSL Project - All rights reserved. Copyright (C) 1995-1998 Eric Young (eay@cryptsoft.com) - All rights reserved. Copyright (c) 2008, Henry Kwok - All rights reserved. Copyright (c) 1995, 1998, 1999, 2000, 2001 by Jef Poskanzer <jef@mail.acme.com>. - All rights reserved.
Some components of the SSH software are provided under a standard 2-term BSD license with the following names as copyright holders: Markus Friedl, Theo de Raadt, Niels Provos, Dug Song, Aaron Campbell, Damien Miller, Kevin Steves, Daniel Kouril, Wesley Griffin, Per Allansson, Nils Nordman, and Simon Wilkinson,
Portable OpenSSH includes code from the following copyright holders, also under the 2-term BSD license: Ben Lindstrom, Tim Rice, Andre Lucas, Chris Adams, Corinna Vinschen, Cray Inc., Denis Parker, Gert Doering, Jakob Schlyter, Jason Downs, Juha Yrjola, Michael Stone, Network Associates, Solar Designer, Todd C. Miller, Wayne Schroeder, William Jones, Darren Tucker, Sun Microsystems, The SCO Group.
Some Portable OpenSSH code is licensed under a 3-term BSD style license to the following copyright holders: Todd C. Miller, Theo de Raadt, Damien Miller, Eric P. Allman, The Regents of the University of California, and Constantin S. Svintsoff. Some Portable OpenSSH code is licensed under an ISC-style license to the following copyright holders: Internet Software Consortium, Todd C. Miller, Reyk Floeter, and Chad Mynhier. Some Portable OpenSSH code is licensed under a MIT-style license to the following copyright holder: Free Software Foundation, Inc.
This product also includes software licensed under the GNU General Public License available from: http://www.gnu.org/licenses/gpl2.html
Allied Telesis is committed to meeting the requirements of the open source licenses including the GNU General Public License (GPL) and will make all required source code available.
If you would like a copy of the GPL source code contained in this product, please send us a request by registered mail including a check for US$15 to cover production and shipping costs, and a CD with the GPL code will be mailed to you.
GPL Code Request
Allied Telesis, Inc. 3041 Orchard Parkway
San Jose, California 95134
No part of this publication may be reproduced without prior written permission from Allied Telesis, Inc.
Allied Telesis, AlliedWare Plus, and the Allied Telesis logo are trademarks of Allied Telesis, Incorporated. Microsoft and Internet Explorer are registered trademarks of Microsoft Corporation. All other product names, company names, logos or other designations mentioned herein are trademarks or registered trademarks of their respective owners.
Allied Telesis, Inc. reserves the right to make changes in specifications and other information contained in this document without prior written notice. The information provided herein is subject to change without notice. In no event shall Allied Telesis, Inc. be liable for any incidental, special, indirect, or consequential damages whatsoever, including but not limited to lost profits, arising out of or related to this manual or the information contained herein, even if Allied Telesis, Inc. has been advised of, known, or should have known, the possibility of such damages.

Contents
Preface ............................................................................................................................................................ |
15 |
Document Conventions .................................................................................................................................... |
16 |
Where to Find Web-based Guides ................................................................................................................... |
17 |
Contacting Allied Telesis .................................................................................................................................. |
18 |
Chapter 1: AT-FS970M Series Version 2.3.1.0 Web Browser Interface .................................................... |
19 |
Management Sessions ..................................................................................................................................... |
20 |
Web Manager Accounts ................................................................................................................................... |
21 |
Chapter 2: Starting a Management Session ............................................................................................... |
23 |
Non-secure HTTP and Secure HTTPS Modes................................................................................................. |
24 |
HTTP Mode................................................................................................................................................ |
24 |
HTTPS Mode ............................................................................................................................................. |
24 |
Starting the Initial Web Management Session.................................................................................................. |
25 |
Logging onto the Switch ................................................................................................................................... |
27 |
What to Configure First..................................................................................................................................... |
30 |
Changing the Login Password ................................................................................................................... |
30 |
Assigning a Name to the Switch ................................................................................................................ |
30 |
Changing a Management IP Address ........................................................................................................ |
30 |
Setting System Time.................................................................................................................................. |
31 |
Starting a Web Management Session .............................................................................................................. |
32 |
When You Do Not Know the IP Address of the Switch.............................................................................. |
32 |
When the Switch Does Not Display the Login Page .................................................................................. |
33 |
Logging onto the CLI through the Console Port......................................................................................... |
33 |
Checking for the IP Addresses of the Switch in the CLI............................................................................. |
34 |
Adding an IP Address to the Switch in the CLI .......................................................................................... |
34 |
Checking the Status of HTTP and HTTPS Services in the CLI.................................................................. |
34 |
Enabling HTTP or HTTPS Service in the CLI ............................................................................................ |
35 |
Saving your Changes in the CLI ................................................................................................................ |
36 |
Saving Your Changes....................................................................................................................................... |
37 |
Ending a Web Management Session ............................................................................................................... |
38 |
Chapter 3: Basic Switch Parameters ........................................................................................................... |
39 |
Setting the System Date and Time................................................................................................................... |
40 |
Configuring an SNTP or NTP Server ......................................................................................................... |
40 |
Setting System Time Manually................................................................................................................... |
43 |
Configuring a Telnet or SSH Server ................................................................................................................. |
45 |
Configuring a Remote Log Server .................................................................................................................... |
47 |
Setting the Switch Information.......................................................................................................................... |
48 |
Managing the Configuration File....................................................................................................................... |
50 |
Displaying the Configuration Files.............................................................................................................. |
50 |
Setting the Active Configuration File .......................................................................................................... |
51 |
Downloading a Configuration File onto Your PC........................................................................................ |
51 |
Deleting a Configuration............................................................................................................................. |
51 |
Managing Local User Accounts........................................................................................................................ |
52 |
Adding a New User Account ...................................................................................................................... |
52 |
Changing a User Password ....................................................................................................................... |
53 |
5
Contents |
|
Changing the User Privilege....................................................................................................................... |
54 |
Deleting a User Account............................................................................................................................. |
55 |
Rebooting a Switch ........................................................................................................................................... |
57 |
Upgrading the Software .................................................................................................................................... |
58 |
Displaying System Information ......................................................................................................................... |
61 |
Chapter 4: Setting Port Parameters ............................................................................................................. |
63 |
Port Numbers on the Switch ............................................................................................................................. |
64 |
Displaying the Port Parameters ........................................................................................................................ |
65 |
Changing the Port Settings ............................................................................................................................... |
67 |
Displaying the Storm Control Settings .............................................................................................................. |
71 |
Modifying the Storm Control Settings ............................................................................................................... |
73 |
Chapter 5: Setting Port Statistics ................................................................................................................. |
75 |
Displaying Port Statistics .................................................................................................................................. |
76 |
Displaying Transmit and Receive Port Statistics ........................................................................................ |
76 |
Displaying Receive Statistics...................................................................................................................... |
77 |
Displaying Transmit Statistics..................................................................................................................... |
79 |
Displaying Interface Statistics..................................................................................................................... |
80 |
Clearing Port Statistics...................................................................................................................................... |
82 |
Reloading Statistics .......................................................................................................................................... |
83 |
Chapter 6: Port Mirroring .............................................................................................................................. |
85 |
Overview ........................................................................................................................................................... |
86 |
Displaying Port Mirroring Settings..................................................................................................................... |
87 |
Assigning a Destination Port............................................................................................................................. |
88 |
Specifying Direction Type ................................................................................................................................. |
89 |
Deleting Port Mirroring Settings ........................................................................................................................ |
91 |
Chapter 7: Spanning Tree Protocol on a Port ............................................................................................. |
93 |
Overview ........................................................................................................................................................... |
94 |
Displaying Port Spanning Tree Protocol Settings ............................................................................................. |
95 |
Modifying Port Spanning Tree Protocol Settings .............................................................................................. |
97 |
Chapter 8: Setting the MAC Address ......................................................................................................... |
101 |
Displaying the Unicast MAC Addresses ......................................................................................................... |
102 |
Displaying the Multicast MAC Addresses ....................................................................................................... |
104 |
Assigning a Unicast MAC Address ................................................................................................................. |
105 |
Assigning a Multicast MAC Address ............................................................................................................... |
107 |
Deleting a Unicast MAC Address.................................................................................................................... |
109 |
Deleting a Multicast MAC Address ................................................................................................................. |
110 |
Chapter 9: Link Aggregation Control Protocol (LACP) ............................................................................ |
111 |
Overview ......................................................................................................................................................... |
112 |
Displaying LACP Trunks ................................................................................................................................. |
113 |
Adding an LACP Trunk ................................................................................................................................... |
115 |
Modifying an LACP Trunk ............................................................................................................................... |
117 |
Deleting an LACP Trunk ................................................................................................................................. |
119 |
Chapter 10: Setting Static Port Trunks ...................................................................................................... |
121 |
Overview ......................................................................................................................................................... |
122 |
Displaying Static Trunk Settings ..................................................................................................................... |
123 |
Adding Static Trunks....................................................................................................................................... |
125 |
Modifying the Static Trunk Settings ................................................................................................................ |
127 |
Deleting Static Trunks..................................................................................................................................... |
129 |
Chapter 11: Setting Port-based and Tagged VLANs ................................................................................ |
131 |
Overview ......................................................................................................................................................... |
132 |
Port-based VLANs.................................................................................................................................... |
132 |
6
AT-FS970M Series Version 2.3.1.0 Web Interface User’s Guide |
|
Port VLAN Identifier ................................................................................................................................. |
132 |
Tagged VLANs......................................................................................................................................... |
132 |
Tagged and Untagged Ports.................................................................................................................... |
133 |
Native VLAN............................................................................................................................................. |
133 |
Displaying VLANs........................................................................................................................................... |
134 |
Adding a VLAN ............................................................................................................................................... |
135 |
Modifying VLANs ............................................................................................................................................ |
137 |
Assigning a Native VLAN ............................................................................................................................... |
139 |
Removing an Untagged Port from a VLAN..................................................................................................... |
141 |
Deleting VLANs .............................................................................................................................................. |
142 |
Chapter 12: Spanning Tree Protocols on the Switch ............................................................................... |
143 |
Overview......................................................................................................................................................... |
144 |
Displaying and Modifying Spanning Tree Protocol Settings on the Switch .................................................... |
145 |
Chapter 13: Internet Group Management Protocol (IGMP) Snooping .................................................... |
149 |
Overview......................................................................................................................................................... |
150 |
Displaying and Modifying IGMP Snooping Configuration............................................................................... |
151 |
Disabling IGMP Snooping .............................................................................................................................. |
154 |
Displaying the Routers List............................................................................................................................. |
155 |
Clearing the Routers List ................................................................................................................................ |
156 |
Displaying the Hosts List ................................................................................................................................ |
157 |
Chapter 14: IGMP Snooping Querier ......................................................................................................... |
159 |
Overview......................................................................................................................................................... |
160 |
Assigning Multiple Queriers ..................................................................................................................... |
161 |
Guidelines....................................................................................................................................................... |
164 |
Displaying IGMP Snooping Querier................................................................................................................ |
165 |
Modifying IGMP Snooping Query Interval ...................................................................................................... |
167 |
Chapter 15: Power Over Ethernet (PoE) .................................................................................................... |
169 |
Overview......................................................................................................................................................... |
170 |
Power Sourcing Equipment (PSE) ........................................................................................................... |
170 |
Powered Device (PD)............................................................................................................................... |
170 |
PD Classes .............................................................................................................................................. |
170 |
Power Budget........................................................................................................................................... |
170 |
Port Prioritization...................................................................................................................................... |
171 |
Displaying PoE Port Settings.......................................................................................................................... |
172 |
Modifying PoE Settings Globally .................................................................................................................... |
175 |
Modifying PoE Settings on a Port................................................................................................................... |
176 |
Chapter 16: MAC Address-based Port Security ....................................................................................... |
179 |
Overview......................................................................................................................................................... |
180 |
Static Versus Dynamic Addresses ........................................................................................................... |
180 |
Intrusion Actions....................................................................................................................................... |
180 |
Guidelines ................................................................................................................................................ |
181 |
Displaying MAC Address-based Port Security Settings ................................................................................. |
182 |
Modifying MAC Address-based Port Security Settings .................................................................................. |
184 |
Disabling MAC Address-based Port Security Settings ................................................................................... |
186 |
Chapter 17: RADIUS and TACACS+ Clients .............................................................................................. |
187 |
Overview......................................................................................................................................................... |
188 |
Remote Manager Accounts...................................................................................................................... |
188 |
Accounting Information ............................................................................................................................ |
189 |
Configuring RADIUS and TACACS+ ....................................................................................................... |
189 |
Placing RADIUS and TACACS+ Servers in the Client’s List ................................................................... |
189 |
Configuring RADIUS for Remote Manager Authentication............................................................................. |
191 |
Configuring Remote Manager Authentication Using RADIUS ................................................................. |
191 |
7
Contents |
|
Adding a RADIUS Server ......................................................................................................................... |
193 |
Configuring TACACS+ for Remote Manager Authentication .......................................................................... |
195 |
Configuring Remote Manager Authentication Using TACACS+............................................................... |
195 |
Adding a TACACS+ Server ...................................................................................................................... |
198 |
Deleting an Authentication Server .................................................................................................................. |
200 |
Chapter 18: 802.1x Port-based Network Access ....................................................................................... |
201 |
Overview ......................................................................................................................................................... |
202 |
Port Roles................................................................................................................................................. |
202 |
Operating Modes ...................................................................................................................................... |
203 |
Dynamic VLAN Assignments.................................................................................................................... |
205 |
Guest VLAN.............................................................................................................................................. |
206 |
Enabling 802.1x Port-based Authentication on the Switch ............................................................................. |
207 |
Configuring 802.1x Port-based Authentication ............................................................................................... |
208 |
Disabling 802.1x Port-based Authentication on the Switch ............................................................................ |
213 |
Disabling 802.1x Port-based Authentication on a Port ................................................................................... |
214 |
Chapter 19: Setting IPv4 and IPv6 Addresses ........................................................................................... |
215 |
Overview ......................................................................................................................................................... |
216 |
IP Management Guidelines ...................................................................................................................... |
217 |
Displaying IPv4 Interfaces .............................................................................................................................. |
218 |
Adding an IPv4 Address ................................................................................................................................. |
219 |
Changing an IPv4 Address ............................................................................................................................. |
220 |
Deleting an IPv4 Address ............................................................................................................................... |
222 |
Displaying the IPv6 Interface .......................................................................................................................... |
223 |
Adding an IPv6 Address ................................................................................................................................. |
225 |
Changing IPv6 Addresses .............................................................................................................................. |
227 |
Deleting IPv6 Addresses................................................................................................................................. |
229 |
Chapter 20: Access Control Lists (ACL) .................................................................................................... |
231 |
Overview ......................................................................................................................................................... |
232 |
Classifier Number Ranges........................................................................................................................ |
232 |
Filtering Criteria ........................................................................................................................................ |
232 |
IPv4 Address and Mask............................................................................................................................ |
233 |
Actions...................................................................................................................................................... |
233 |
How Ingress Packets are Compared Against ACLs ................................................................................. |
233 |
Guidelines................................................................................................................................................. |
234 |
Creating an ACL ............................................................................................................................................. |
235 |
Assigning an ACL to Ports .............................................................................................................................. |
239 |
Displaying a List of ACLs ................................................................................................................................ |
241 |
Chapter 21: Setting Static Routes .............................................................................................................. |
243 |
Displaying Static Routes ................................................................................................................................. |
244 |
Adding a Static Route ..................................................................................................................................... |
245 |
Deleting a Static Route ................................................................................................................................... |
247 |
Displaying the Routing Table .......................................................................................................................... |
248 |
Chapter 22: Quality of Service (QoS) ......................................................................................................... |
251 |
Overview ......................................................................................................................................................... |
252 |
Class Information...................................................................................................................................... |
252 |
Priority Queue........................................................................................................................................... |
252 |
Classifier Number Ranges........................................................................................................................ |
252 |
Filtering Criteria ........................................................................................................................................ |
253 |
Actions...................................................................................................................................................... |
253 |
How Ingress Packets are Selected with Filtering Criteria......................................................................... |
253 |
Guidelines................................................................................................................................................. |
253 |
Creating a QoS Policy..................................................................................................................................... |
255 |
8
AT-FS970M Series Version 2.3.1.0 Web Interface User’s Guide |
|
Assigning a QoS Policy to Ports..................................................................................................................... |
260 |
Displaying a List of QoS Policies.................................................................................................................... |
262 |
Chapter 23: Setting Dynamic Routes Using RIP ...................................................................................... |
263 |
Overview......................................................................................................................................................... |
264 |
Enabling RIP ............................................................................................................................................ |
264 |
Displaying the RIP Configuration.................................................................................................................... |
265 |
Enabling RIP on a VLAN Interface ................................................................................................................. |
267 |
Changing the RIP Settings ............................................................................................................................. |
270 |
Removing a VLAN Interface from the RIP Configuration ............................................................................... |
271 |
Displaying RIP Statistics................................................................................................................................. |
272 |
Reloading RIP Statistics ................................................................................................................................. |
274 |
Chapter 24: Managing the ARP Table ........................................................................................................ |
275 |
Overview......................................................................................................................................................... |
276 |
ARP Table Management Guidelines........................................................................................................ |
276 |
Displaying the ARP Table............................................................................................................................... |
277 |
Adding a Static ARP Entry.............................................................................................................................. |
278 |
Deleting ARP Entries...................................................................................................................................... |
280 |
Chapter 25: LLDP and LLDP-MED ............................................................................................................. |
281 |
Overview......................................................................................................................................................... |
282 |
Enabling and Configuring LLDP on the Switch............................................................................................... |
284 |
Disabling LLDP on the Switch ........................................................................................................................ |
287 |
Configuring LLDP on a Port............................................................................................................................ |
288 |
Selecting LLDP TLVs on a Port...................................................................................................................... |
290 |
Setting a Location Entry for the LLDP-MED Location TLV............................................................................. |
294 |
Creating a Civic Location Entry................................................................................................................ |
294 |
Creating a Coordinate Location ............................................................................................................... |
298 |
Creating an Emergency Location Identification Number (ELIN) Location................................................ |
300 |
Assigning LLDP Locations to a Port ............................................................................................................... |
302 |
Selecting LLDP-MED TLVs on a Port............................................................................................................. |
304 |
Displaying LLDP Neighbor Information .......................................................................................................... |
307 |
Displaying LLDP Statistics.............................................................................................................................. |
309 |
Displaying Location Entries ............................................................................................................................ |
311 |
Displaying Civic Locations ....................................................................................................................... |
311 |
Displaying Coordinate Locations.............................................................................................................. |
312 |
Displaying ELIN Locations ....................................................................................................................... |
313 |
Displaying LLDP and LLDP-MED Settings..................................................................................................... |
314 |
Displaying the Basic LLDP Configuration ................................................................................................ |
314 |
Displaying LLDP Port Assignments ......................................................................................................... |
315 |
Displaying Port Locations......................................................................................................................... |
316 |
Displaying LLDP TLV ............................................................................................................................... |
316 |
Displaying LLDP-MED TLV...................................................................................................................... |
318 |
Chapter 26: sFlow ........................................................................................................................................ |
321 |
Overview......................................................................................................................................................... |
322 |
Ingress Packet Samples .......................................................................................................................... |
322 |
Packet Counters....................................................................................................................................... |
322 |
sFlow Collectors....................................................................................................................................... |
323 |
Guidelines ................................................................................................................................................ |
323 |
Specifying an sFlow Collector ........................................................................................................................ |
324 |
Configuring sFlow on a Port ........................................................................................................................... |
327 |
Enabling sFlow on the Switch......................................................................................................................... |
329 |
Displaying the sFlow Settings......................................................................................................................... |
330 |
9
Contents
10
Figures
Figure 1: Login Page ............................................................................................................................................................ |
26 |
Figure 2: Login Page with Entries......................................................................................................................................... |
27 |
Figure 3: Dashboard Page ................................................................................................................................................... |
28 |
Figure 4: AlliedWare Plus™ Command Line Prompt............................................................................................................ |
34 |
Figure 5: Displaying the IP Address ..................................................................................................................................... |
34 |
Figure 6: Displaying the Status of HTTP Service ................................................................................................................. |
35 |
Figure 7: Displaying the Status of HTTPS Service............................................................................................................... |
35 |
Figure 8: System Contact Information Page......................................................................................................................... |
37 |
Figure 9: System Settings Tab ............................................................................................................................................. |
41 |
Figure 10: System Time Settings Page ................................................................................................................................ |
41 |
Figure 11: System Time Settings Page with Network Time Settings Tab ............................................................................ |
42 |
Figure 12: Calendar Page .................................................................................................................................................... |
44 |
Figure 13: System Services Page ........................................................................................................................................ |
45 |
Figure 14: System Contact Information Page....................................................................................................................... |
48 |
Figure 15: Configuration Files Page ..................................................................................................................................... |
50 |
Figure 16: File Download Popup Window............................................................................................................................. |
51 |
Figure 17: User Management Page...................................................................................................................................... |
52 |
Figure 18: User Management Page with Change Password Tab......................................................................................... |
54 |
Figure 19: User Management Page with Change Privilege Tab........................................................................................... |
55 |
Figure 20: User Management Page with Delete User Tab................................................................................................... |
56 |
Figure 21: User Login Page on the Allied Telesis Website................................................................................................... |
58 |
Figure 22: System Upgrade Page ........................................................................................................................................ |
59 |
Figure 23: Port Number ........................................................................................................................................................ |
64 |
Figure 24: Switching Tab with Port Tab................................................................................................................................ |
65 |
Figure 25: Port Configuration Page ...................................................................................................................................... |
65 |
Figure 26: Port Configuration Modify Page........................................................................................................................... |
68 |
Figure 27: Storm Control List Page ...................................................................................................................................... |
71 |
Figure 28: Storm Control Settings Page............................................................................................................................... |
73 |
Figure 29: Port Statistics Page with Tx + Rx Tab ................................................................................................................. |
76 |
Figure 30: Port Statistics with the Receive Tab.................................................................................................................... |
78 |
Figure 31: Port Statistics with the Transmit Tab................................................................................................................... |
79 |
Figure 32: Port Statistics Page with Interface Tab................................................................................................................ |
81 |
Figure 33: Port Statistics Page with the Reload Page Button............................................................................................... |
83 |
Figure 34: Port Mirroring List Page....................................................................................................................................... |
87 |
Figure 35: Modify Port Mirroring Page.................................................................................................................................. |
89 |
Figure 36: Port Spanning Tree Settings Page...................................................................................................................... |
95 |
Figure 37: Modify Port Spanning Tree Settings Page .......................................................................................................... |
97 |
Figure 38: Switching Tab.................................................................................................................................................... |
102 |
Figure 39: Unicast MACs Page .......................................................................................................................................... |
102 |
Figure 40: Multicast MACs Page ........................................................................................................................................ |
104 |
Figure 41: Unicast MAC Address Page.............................................................................................................................. |
105 |
Figure 42: Multicast MAC Address Page............................................................................................................................ |
107 |
Figure 43: Switching Tab with Link Aggregation Selected.................................................................................................. |
113 |
Figure 44: LACP Trunks Page............................................................................................................................................ |
113 |
Figure 45: Add LACP Trunk Page ...................................................................................................................................... |
115 |
Figure 46: Modify LACP Trunk Page.................................................................................................................................. |
117 |
Figure 47: Switching Tab with Static Trunks....................................................................................................................... |
123 |
Figure 48: Static Trunks Page ............................................................................................................................................ |
123 |
Figure 49: Add Static Trunk Page ...................................................................................................................................... |
126 |
Figure 50: Modify Static Trunk Page .................................................................................................................................. |
127 |
11
Figures |
|
Figure 51: VLANs Page ...................................................................................................................................................... |
134 |
Figure 52: Add VLAN Page ................................................................................................................................................ |
135 |
Figure 53: Edit VLAN Page................................................................................................................................................. |
137 |
Figure 54: Native VLAN Page............................................................................................................................................. |
139 |
Figure 55: Spanning Tree Settings Page............................................................................................................................ |
145 |
Figure 56: Switching IGMP Tab.......................................................................................................................................... |
151 |
Figure 57: IGMP Snooping Page with Configuration Tab................................................................................................... |
152 |
Figure 58: IGMP Snooping Page with Routers List Tab ..................................................................................................... |
155 |
Figure 59: IGMP Snooping Page with Hosts List Tab......................................................................................................... |
157 |
Figure 60: IGMP Snooping Querier with One Querier ........................................................................................................ |
161 |
Figure 61: IGMP Snooping Querier with Two Queriers ...................................................................................................... |
162 |
Figure 62: Switching IGMP Tab.......................................................................................................................................... |
165 |
Figure 63: IGMP Snooping Querier Page ........................................................................................................................... |
165 |
Figure 64: Edit IGMP Snooping Querier Page.................................................................................................................... |
167 |
Figure 65: Switching Tab .................................................................................................................................................... |
172 |
Figure 66: PoE Port List Page ............................................................................................................................................ |
173 |
Figure 67: Modify Port PoE Settings Page ......................................................................................................................... |
176 |
Figure 68: Security Tab....................................................................................................................................................... |
182 |
Figure 69: MAC Based Port Security Page......................................................................................................................... |
182 |
Figure 70: Modify MAC Based Port Security Page............................................................................................................. |
184 |
Figure 71: Authentication Server Configuration Page with RADIUS Tab ........................................................................... |
191 |
Figure 72: RADIUS Server Add Page................................................................................................................................. |
193 |
Figure 73: Authentication Server Configuration Page with TACACS+ Tab ........................................................................ |
196 |
Figure 74: TACACS+ Server Add Page.............................................................................................................................. |
198 |
Figure 75: Example of Port Roles....................................................................................................................................... |
203 |
Figure 76: Single Host Mode .............................................................................................................................................. |
203 |
Figure 77: Multiple Host Operating Mode ........................................................................................................................... |
204 |
Figure 78: Multiple Supplicant Mode................................................................................................................................... |
205 |
Figure 79: 802.1x Authentication Page............................................................................................................................... |
207 |
Figure 80: Modify 802.1x Authentication Page ................................................................................................................... |
208 |
Figure 81: Modify 802.1x Authentication Page Expanded.................................................................................................. |
209 |
Figure 82: 802.1x Authentication Page with Status Enabled.............................................................................................. |
213 |
Figure 83: Layer 3 Tab ....................................................................................................................................................... |
218 |
Figure 84: IPv4 Interfaces Page ......................................................................................................................................... |
218 |
Figure 85: IP Address Configuration Page ......................................................................................................................... |
219 |
Figure 86: Edit IP Address Configuration Page .................................................................................................................. |
220 |
Figure 87: Layer 3 Tab ....................................................................................................................................................... |
223 |
Figure 88: IPv6 Interface Page ........................................................................................................................................... |
223 |
Figure 89: IPv6 Management Configuration Page.............................................................................................................. |
225 |
Figure 90: Edit IPv6 Management Configuration Page....................................................................................................... |
227 |
Figure 91: ACLs and QoS Tab............................................................................................................................................ |
235 |
Figure 92: Traffic Classifiers Page...................................................................................................................................... |
235 |
Figure 93: Traffic Classification Page ................................................................................................................................. |
236 |
Figure 94: Menu for Mirror to Port....................................................................................................................................... |
237 |
Figure 95: Policies/ACLs Page ........................................................................................................................................... |
239 |
Figure 96: Traffic Classifiers Page from Policies/ACLs Page............................................................................................. |
240 |
Figure 97: Traffic Classifiers Page...................................................................................................................................... |
241 |
Figure 98: Layer 3 Tab ....................................................................................................................................................... |
244 |
Figure 99: Static Routes Page............................................................................................................................................ |
244 |
Figure 100: Add Static Route Page .................................................................................................................................... |
245 |
Figure 101: Layer 3 Tab ..................................................................................................................................................... |
248 |
Figure 102: Routing Table Page......................................................................................................................................... |
248 |
Figure 103: ACLs and QoS Tab.......................................................................................................................................... |
255 |
Figure 104: Traffic Classifiers Page.................................................................................................................................... |
255 |
Figure 105: Traffic Classification Page ............................................................................................................................... |
256 |
Figure 106: Text Box for Priority Queue ............................................................................................................................. |
257 |
Figure 107: Text Box for DSCP .......................................................................................................................................... |
257 |
Figure 108: Text Box for CoS ............................................................................................................................................. |
258 |
Figure 109: Policies/ACLs Page ......................................................................................................................................... |
260 |
Figure 110: Traffic Classifier Page...................................................................................................................................... |
261 |
12
|
AT-FS970M Series Version 2.3.1.0 Web Interface User’s Guide |
Figure 111: Traffic Classifiers Page.................................................................................................................................... |
262 |
Figure 112: Layer 3 Tab ..................................................................................................................................................... |
265 |
Figure 113: RIP Configuration Page................................................................................................................................... |
265 |
Figure 114: Layer 3 Tab ..................................................................................................................................................... |
267 |
Figure 115: RIP Interface Page .......................................................................................................................................... |
268 |
Figure 116: Layer 3 Tab ..................................................................................................................................................... |
272 |
Figure 117: RIP Configuration Page................................................................................................................................... |
272 |
Figure 118: RIP Statistics Page with the Refresh Button ................................................................................................... |
274 |
Figure 119: Layer 3 Tab ..................................................................................................................................................... |
277 |
Figure 120: ARP Table Page.............................................................................................................................................. |
277 |
Figure 121: Add Static ARP Page ...................................................................................................................................... |
278 |
Figure 122: Discovery & Monitoring Tab ............................................................................................................................ |
284 |
Figure 123: LLDP Configuration Page................................................................................................................................ |
285 |
Figure 124: LLDP Port Config Page ................................................................................................................................... |
288 |
Figure 125: Modify LLDP Port Configuration Page............................................................................................................. |
289 |
Figure 126: LLDP TLV Tab................................................................................................................................................. |
290 |
Figure 127: LLDP TLV Page .............................................................................................................................................. |
291 |
Figure 128: Modify LLDP TLV Page................................................................................................................................... |
292 |
Figure 129: Locations Tab.................................................................................................................................................. |
295 |
Figure 130: LLDP Civic Location Page............................................................................................................................... |
295 |
Figure 131: LLDP Civic Location Page— Add.................................................................................................................... |
296 |
Figure 132: LLDP Coordinate Location List Page .............................................................................................................. |
298 |
Figure 133: LLDP Coordinate Location Page— Add.......................................................................................................... |
299 |
Figure 134: LLDP ELIN Location List Page........................................................................................................................ |
300 |
Figure 135: LLDP ELIN Location Page .............................................................................................................................. |
301 |
Figure 136: LLDP Port Location Page................................................................................................................................ |
302 |
Figure 137: Modify LLDP Port Location Page .................................................................................................................... |
303 |
Figure 138: LLDP-MED TLV Page ..................................................................................................................................... |
304 |
Figure 139: Modify LLDP-MED TLV Page.......................................................................................................................... |
305 |
Figure 140: LLDP Neighbors Information Page.................................................................................................................. |
307 |
Figure 141: LLDP Statistics Page with Port Statistics Tab ................................................................................................. |
309 |
Figure 142: LLDP Statistics Page with Summary Tab........................................................................................................ |
310 |
Figure 143: Discovery & Monitoring Tab ............................................................................................................................ |
324 |
Figure 144: sFlow Page with the Port Configurations Tab ................................................................................................. |
324 |
Figure 145: sFlow Page with Collectors Tab ...................................................................................................................... |
325 |
Figure 146: sFlow Collector Page....................................................................................................................................... |
325 |
Figure 147: sFlow Port Modify Page................................................................................................................................... |
328 |
13
Figures
14

Preface
This is the web interface user’s guide for the AT-FS970M Series of Fast Ethernet switches. The instructions in this guide explain how to start a management session, use the web interface of the AlliedWare Plus™ Management Software, and configure the features of the switch.
For hardware installation instructions, refer to the AT-FS970M Series Fast
Ethernet Switches Installation Guide.
This preface contains the following sections:
“Document Conventions” on page 16
“Where to Find Web-based Guides” on page 17
“Contacting Allied Telesis” on page 18
Caution
The software described in this document may contain certain encryption/security or cryptographic functionality and for exporting those products/software, USA export restrictions apply as per 15 C.F.R. Part 730-772 (particularly Part 740.17). At present, as per United States of America’s export regulations our products/software cannot be exported to Cuba, Iran, North Korea, North Sudan, or Syria. If you wish to transfer this software outside the United States or Canada, please refer to export regulations of USA.
15

Document Conventions
This document uses the following conventions:
Note
Notes provide additional information.
Caution
Cautions inform you that performing or omitting a specific action may result in equipment damage or loss of data.
Warning
Warnings inform you that performing or omitting a specific action may result in bodily injury.
16

AT-FS970M Series Version 2.3.1.0 Web Interface User’s Guide
Where to Find Web-based Guides
The installation and user guides for all of the Allied Telesis products are available for viewing in portable document format (PDF) from our web site at www.alliedtelesis.com/support/documentation.
17

Contacting Allied Telesis
If you need assistance with this product, you may contact Allied Telesis technical support by going to the Support & Services section of the Allied Telesis web site at www.alliedtelesis.com/support. You can find links for the following services on this page:
24/7 Online Support— Enter our interactive support center to search for answers to your product questions in our knowledge database, to check support tickets, to learn about RMAs, and to contact Allied Telesis experts.
USA and EMEA phone support— Select the phone number that best fits your location and customer type.
Hardware warranty information— Learn about Allied Telesis warranties and register your product online.
Replacement Services— Submit a Return Materials Authorization (RMA) request via our interactive support center.
Documentation— View the most recent installation and user guides, software release notes, white papers, and data sheets for your products.
Software Downloads— Download the latest software releases for your managed products.
For sales or corporate information, go to www.alliedtelesis.com/ purchase and select your region.
18

Chapter 1
AT-FS970M Series Version 2.3.1.0 Web
Browser Interface
This chapter describes the types of management sessions using the AT-FS970M Series management software and the web interface manager accounts. See the following sections:
“Management Sessions” on page 20
“Web Manager Accounts” on page 21
19

Chapter 1: AT-FS970M Series Version 2.3.1.0 Web Browser Interface
Management Sessions
The AT-FS970M Series switches provide two management interfaces: the web interface and Command Line Interface (CLI). This manual provides procedures that guide you through the web interface.
The initial management session of the switch can be from a management session, either through the web interface or the CLI. The switch is shipped from the factory with an IP address assigned and the web interface (HTTP service) enabled so that you can start the initial management session through the web interface. To start the initial web management session, see Chapter 2, “Starting a Management Session” on page 23.
The web interface allows access to a subset of the AlliedWare Plus features. For access to all of the AlliedWare Plus features, you must use the CLI.
Detailed feature descriptions are not provided in this guide. For thorough explanations of the features, see the AT-FS970M Series Version 2.3.1.0 Management Software Command Line Interface User’s Guide.
20
AT-FS970M Series Version 2.3.1.0 Web Interface User’s Guide
Web Manager Accounts
You must log on to manage the switch. This requires a valid username and password. The switch comes with one manager account with a username of “manager” and the default password of “friend.” Both the username and password are case-sensitive. This account gives you access to all management modes and commands.
In the web interface, you can create two additional remote manager accounts. For instructions, see “Managing Local User Accounts” on page 52. The switch supports up to three manager sessions at one time.
21
Chapter 1: AT-FS970M Series Version 2.3.1.0 Web Browser Interface
22

Chapter 2
Starting a Management Session
This chapter describes how to start a management session using the AlliedWare Plus™ web interface as well as how to select fields, save your changes, and end a management session. See the following sections:
“Non-secure HTTP and Secure HTTPS Modes” on page 24
“Starting the Initial Web Management Session” on page 25
“Logging onto the Switch” on page 27
“What to Configure First” on page 30
“Starting a Web Management Session” on page 32
“Saving Your Changes” on page 37
“Ending a Web Management Session” on page 38
For additional information about the web server, see the following chapters in the AT-FS970M Series Version 2.3.1.0 Management Software Command Line Interface User’s Guide:
Non-secure HTTP Web Browser Server
Non-secure HTTP Web Browser Server Commands
Secure HTTPS Web Browser Server
Secure HTTPS Web Browser Server Commands
Starting a Management Session
23

Chapter 2: Starting a Management Session
Non-secure HTTP and Secure HTTPS Modes
HTTP Mode
HTTPS Mode
The switch has a web server so that you can remotely manage the switch over the network from a web browser on your PC. The server can operate in either plain-text HTTP mode or encrypted HTTPS mode. To access the switch through a web browser on your PC, either HTTP service or HTTPS service must be enabled.
Web browser management sessions of the switch conducted in the HTTP mode are non-secure because the packets exchanged by the server on the switch and your management workstation are sent in clear text, leaving the packets vulnerable to snooping.
The switch shipped from the factory is configured with HTTP service enabled.
Web browser management sessions of the switch conducted in the HTTPS mode are protected against snooping because the packets exchanged between the switch and your management workstation are encrypted. Only the switch and the workstation are able to decipher the packets.
To access the switch in the HTTPS mode:
The switch must have an HTTPS certificate.
HTTPS service on the switch must be enabled.
Note
Either HTTPS or HTTP service can be enabled. To enable HTTPS service, HTTP must be disabled.
To configure the switch with an HTTPS certificate and enable HTTPS service, you must use the AlliedWare Plus™ Command Line Interface (CLI). See “Secure HTTPS Web Browser Server” chapter in AT-FS970M Series Version 2.3.1.0 Management Software Command Line Interface User’s Guide.
24

AT-FS970M Series Version 2.3.1.0 Web Interface User’s Guide
Starting the Initial Web Management Session
This section explains how to start a management session for the first time using the AT-FS970M web interface. The switch shipped from the factory is configured with an IP address assigned and the web interface (HTTP service) enabled.
The switch and your PC must be directly connected through a twisted-pair cable, and the IP addresses of the switch and your PC must be members of the same network. Because the switch is shipped from the factory with the IP address 169.254.1.1 and the subnet mask 16, you must assign your PC an IP address in the 169.254.0.0/16 network, except 169.254.1.1. In addition, your PC must have a web browser, such as Windows Internet Explorer, installed.
There are two ways to assign an IP address to your PC:
Manually assign any IP address in the 169.254.0.0/16 network (except 169.254.1.1) to your PC.
Disconnect your PC from a network and let your PC automatically set an IP address in the 169.254.0.0/16 network. When a PC is disconnected from a network and no longer connected to a DHCP server, Windows assigns a random IP address in the 169.254.0.0/16 network to the PC.
Note
Deleting the boot.cfg file and restarting the switch restores the switch to its default configuration with HTTP service disabled and no IP address assigned.
To start a web management session when the switch has lost the factory default settings, you must use the Command Line Interface (CLI) to assign an IP address and enable HTTP or HTTPS service. For more information about enabling HTTP or HTTPS service and assigning an management IP address, see “Starting a Web Management Session” on page 32.”
To start a web management session using a PC with an IP address in the 169.254.0.0/16 network, perform the following procedure:
1.Connect an RJ-45 plug on a straight-through twisted-pair cable to an Ethernet port on the switch.
2.Connect the other RJ-45 plug on the straight-through twisted-pair cable to an Ethernet port on the PC network interface card (NIC).
25

Chapter 2: Starting a Management Session
3.Open a web browser on the PC and enter the following: http://169.254.1.1
The AT-FS970M Login page is displayed as shown in Figure 1.
Figure 1. Login Page
26
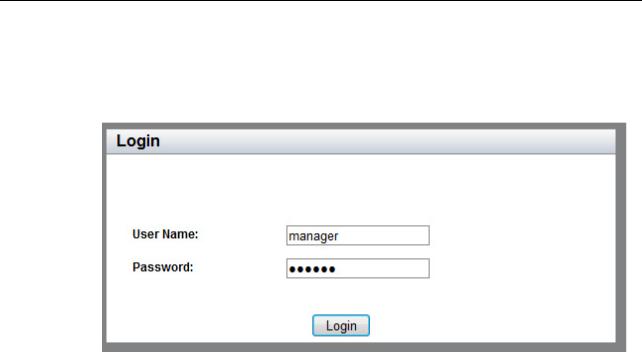
AT-FS970M Series Version 2.3.1.0 Web Interface User’s Guide
Logging onto the Switch
Once you start the web interface, the AT-FS970M Login page is displayed.
Enter “manager” in the User Name field and “friend” in the Password field as shown in Figure 2. Then click the Login button.
.
Figure 2. Login Page with Entries
The Dashboard page is displayed. See Figure 3 on page 28. The
Dashboard page is the home page of the switch.
27

Chapter 2: Starting a Management Session
Figure 3. Dashboard Page
The following fields are displayed:
Up Time— Length of time since the switch was last reset or power cycled in days, hours, minutes and seconds.
Note
Up Time is displayed on the top-right corner of the screen.
The System section displays the following information:
MAC Address— MAC address of the switch.
Serial No.— Unique serial number of the switch.
28
AT-FS970M Series Version 2.3.1.0 Web Interface User’s Guide
System Name— Name of the switch. To specify this field, see “Setting the Switch Information” on page 48.
Version— Software version number of the Management Software.
Contact— Contact person for the switch. To specify this field, see “Setting the Switch Information” on page 48.
Location—Location of the switch. To specify this field, see “Setting the Switch Information” on page 48.
The Services section displays the following information:
IPv6 Management— Indicates if IPv6 Management is enabled or disabled on the switch.
SNMP— SNMP setting of the switch.
HTTP— HTTP setting of the switch.
Telnet— Indicates if Telnet is enabled or disabled on the switch.
SSH— Indicates if SSH is enabled or disabled on the switch.
Remote Logging— Indicates if the remote logging is enabled or disabled on the switch.
Spanning Tree— Indicates if STP, RSTP, or MSTP is enabled on the switch. The default setting is “RSTP.”
QoS— Indicates if QoS is enabled or disabled on the switch.
LLDP— Indicates if LLDP is enabled or disabled on the switch.
sFLOW— Indicates if sFlow is enabled or disabled on the switch.
IGMP Snooping— Indicates if IGMP Snooping is enabled or disabled on the switch.
IGMP Snooping Querier— Indicates if IGMP Snooping Querier is enabled or disabled on the switch.
802.1x Port Authentication— Indicates if 802.1x Port Authentication is enabled or disabled on the switch.
RIP— Indicates if RIP is enabled or disabled on the switch.
The Administration Options section displays the following information:
System Upgrade— Select this field to upgrade your system software. See “Upgrading the Software” on page 58.
Reboot— Select this field to reboot the switch. For instructions, see “Rebooting a Switch” on page 57.
29

Chapter 2: Starting a Management Session
What to Configure First
Changing the
Login Password
Assigning a Name
to the Switch
Changing a
Management IP
Address
Here are a few suggestions on what to configure during your initial management session on the switch through the web interface. The initial management session can be performed through the Command Line Interface (CLI) as well as the web interface. For instructions on how to start a local management session through the CLI, refer to the ATFS970M Series Version 2.3.1.0 Management Software Command Line Interface User’s Guide.
To protect the switch from unauthorized access, change the password of the manager account. For instructions, see “Changing a User Password” on page 53.
Note
Write down the new password and keep it in a safe and secure location. If you forget the manager password, you cannot manage the switch if there are no other management accounts on the unit. In this case, contact Allied Telesis Technical Support for assistance.
For instructions on how to create additional management accounts, see “Adding a New User Account” on page 52.
The switch is easier to identify if you assign it a name. The switch’s name is displayed on the Dashboard page. To change the name of the switch, see “Setting the Switch Information” on page 48.
A name can be up to 39 alphanumeric characters. Special characters, except spaces and quotation marks, are allowed.
The switch shipped from the factory has the IP address 169.254.1.1 assigned. You must change the factory default IP address to an address in your network. To change the IP address, see “Changing an IPv4 Address” on page 220. Also, remember to change the IP address of your PC.
Note
When you change the management IP address of the switch, you lose the connection to the switch. After you change the IP address of your PC, start a management session again by opening a web browser on the PC and entering the new IP address of the switch.
Here are the requirements:
You can assign one IPv4 address per VLAN.
The switch can have up to 256 IPv4 addresses.
30
Loading...