


WARNING: To reduce the risk of fire or electric shock, do not expose this apparatus to rain or moisture.
CAUTION
RISK OF ELECTRIC SHOCK
DO NOT OPEN
ATTENTION: RISQUE DE CHOC ELECTRIQUE NE PAS OUVRIR
CAUTION: TO REDUCE THE RISK OF ELECTRIC SHOCK,
DO NOT REMOVE COVER (OR BACK).
NO USER-SERVICEABLE PARTS INSIDE.
REFER SERVICING TO QUALIFIED SERVICE PERSONNEL.
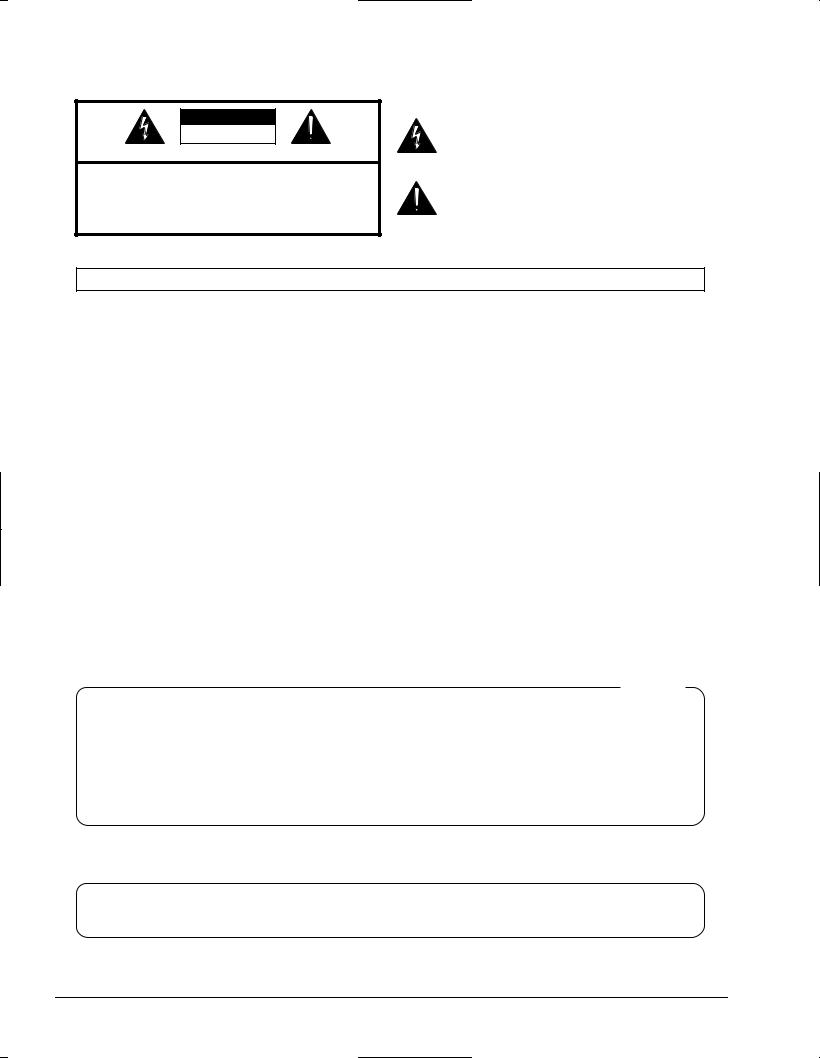
The lightning flash with arrowhead symbol, within an equilateral triangle, is intended to alert the user to the presence of uninsulated “dangerous voltage” within the product’s enclosure that may be of sufficient magnitude to constitute a risk of electric shock to persons.
The exclamation point within an equilateral triangle is intended to alert the user to the presence of important operating and maintenance (servicing) instructions in the literature accompanying the product.
INSTRUCTIONS PERTAINING TO A RISK OF FIRE, ELECTRIC SHOCK, OR INJURY TO PERSONS.
IMPORTANT SAFETY INSTRUCTIONS SAVE THESE INSTRUCTIONS
WARNING - When using electric products, basic precautions should always be followed, including the following:
1.Read these instructions.
2.Keep these instructions.
3.Heed all warnings.
4.Follow all instructions.
5.Do not use this apparatus near water.
6.Clean only with a dry cloth.
7.Do not block any of the ventilation openings. Install in accordance with the manufacturers instructions.
8.Do not install near any heat sources such as radiators, heat registers, stoves, or other apparatus (including amplifiers) that produce heat.
9.Do not defeat the safety purpose of the polarized or grounding-type plug. A polarized plug has two blades with one wider than the other. A grounding type plug has two blades and a third grounding prong. The wide blade or the third prong are provided for your safety. If the provided plug does not fit into your outlet, consult an electrician for replacement of the obsolete outlet.
10.Protect the power cord from being walked on or pinched particularly at plugs, convenience receptacles, and the point where they exit from the apparatus.
11.Only use attachments/accessories specified by the manufacturer.
12.Unplug this apparatus during lightning storms or when unused for long periods of time.
13.Refer all servicing to qualified service personnel. Servicing is required when the apparatus has been damaged in any way, such as power-supply cord or plug is damaged, liquid has been spilled or objects have fallen into the apparatus, the apparatus has been exposed to rain or moisture, does not operate normally, or has been dropped.
For the U.K.
WARNING: THIS APPARATUS MUST BE EARTHED
IMPORTANT: THE WIRES IN THIS MAINS LEAD ARE COLOURED IN ACCORDANCE WITH THE FOLLOWING CODE. GREEN-AND-YELLOW: EARTH, BLUE: NEUTRAL, BROWN: LIVE
As the colours of the wires in the mains lead of this apparatus may not correspond with the coloured markings identifying the terminals in your plug, proceed as follows:
The wire which is coloured GREEN-AND-YELLOW must be connected to the terminal in the plug which is marked by the letter E or by the safety earth symbol or coloured GREEN or GREEN-AND-YELLOW.
The wire which is coloured BLUE must be connected to the terminal which is marked with the letter N or coloured BLACK. The wire which is coloured BROWN must be connected to the terminal which is marked with the letter L or coloured RED.
CAUTION: Danger of explosion if battery is incorrectly replaced.
Replace only with same or equivalent type.
2 |
www.rolandus.com |
Roland VS-2480 Owner’s Manual |
USING THE UNIT SAFELY
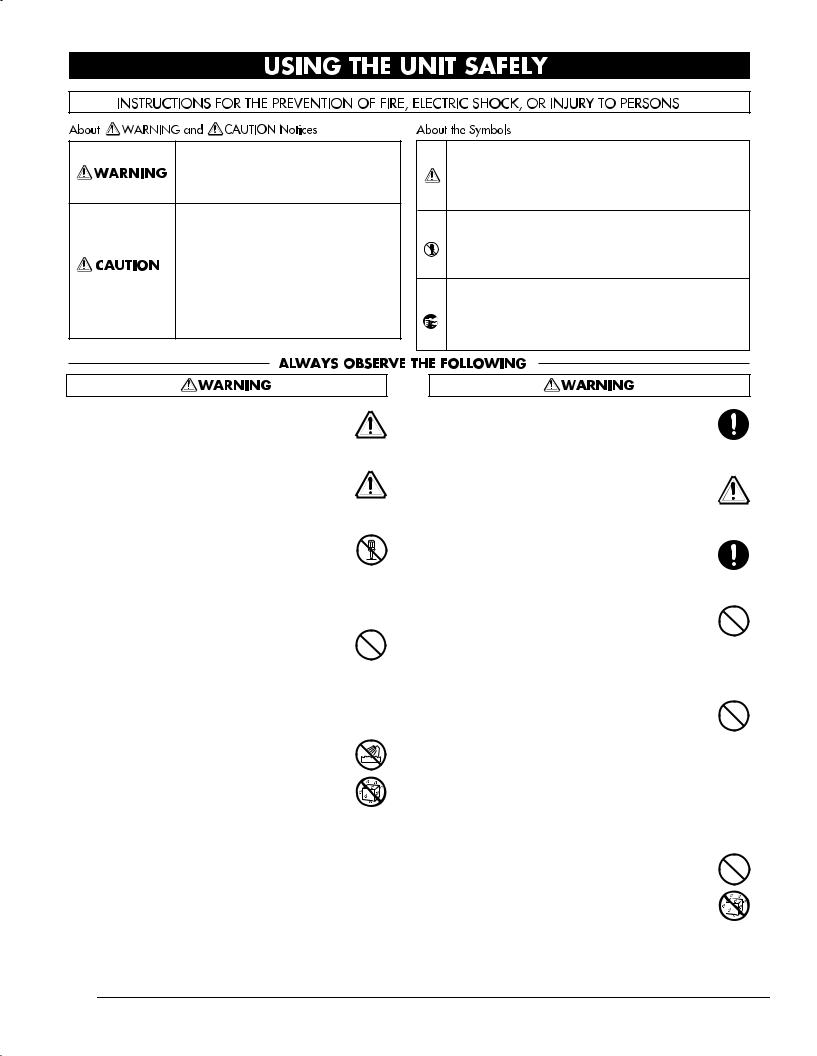
Used for instructions intended to alert the user to the risk of death or severe injury should the unit be used improperly.
Used for instructions intended to alert the user to the risk of injury or material damage should the unit be used improperly.
* Material damage refers to damage or other adverse effects caused with respect to the home and all its furnishings, as well to domestic animals or pets.
The symbol alerts the user to important instructions or warnings.The specific meaning of the symbol is determined by the design contained within the triangle. In the case of the symbol at left, it is used for general cautions, warnings, or alerts to danger.
The  symbol alerts the user to items that must never be carried out (are forbidden). The specific thing that must not be done is indicated by the design contained within the circle. In the case of the symbol at left, it means that the unit must never be disassembled.
The symbol alerts the user to things that must be carried out. The specific thing that must be done is indicated by the design contained within the circle. In the case of the symbol at left, it means that the powercord plug must be unplugged from the outlet.
001
• Before using this unit, make sure to read the instructions below, and the Owner’s Manual.
..........................................................................................................
001-50
•Connect mains plug of this model to a mains socket outlet with a protective earthing
connection.
..........................................................................................................
002b
• Do not open or perform any internal modifica-
tions on the unit. (The only exception would be where this manual provides specific instructions which should be followed in order to put in place user-installable options; see User Guide p. 12.)
..........................................................................................................
003
•Do not attempt to repair the unit, or replace parts within it (except when this manual provides specific instructions directing you to do so). Refer all servicing to your retailer, the nearest Roland Service Center, or an authorized Roland
distributor, as listed on the “Information” page.
..........................................................................................................
004
• Never use or store the unit in places that are:
• Subject to temperature extremes (e.g., direct sunlight in an enclosed vehicle, near a heating duct, on top of heat-generating equipment); or are
•Damp (e.g., baths, washrooms, on wet floors); or are
•Humid; or are
•Exposed to rain; or are
•Dusty; or are
•Subject to high levels of vibration.
..........................................................................................................
007
•Make sure you always have the unit placed so it is level and sure to remain stable. Never place it on
stands that could wobble, or on inclined surfaces.
..........................................................................................................
008a
•The unit should be connected to a power supply only of the type described in the operating instructions, or as marked on the rear side of unit.
..........................................................................................................
008e
• Use only the attached power-supply cord. Also, the supplied power cord must not be used with any other device.
..........................................................................................................
009
•Do not excessively twist or bend the power cord, nor place heavy objects on it. Doing so can damage the cord, producing severed elements
and short circuits. Damaged cords are fire and shock hazards!
..........................................................................................................
010
•This unit, either alone or in combination with an amplifier and headphones or speakers, may be capable of producing sound levels that could cause permanent hearing loss. Do not operate for a long period of time at a high volume level, or at a level that is uncomfortable. If you experience any hearing loss or ringing in the ears, you should
immediately stop using the unit, and consult an audiologist.
..........................................................................................................
011
•Do not allow any objects (e.g., flammable material, coins, pins); or liquids of any kind (water, soft drinks, etc.) to penetrate the unit.
..........................................................................................................
Roland VS-2480 Owner’s Manual |
www.rolandus.com |
3 |
012a
•Immediately turn the power off, remove the power cord from the outlet, and request servicing by your retailer, the nearest Roland Service Center, or an authorized Roland distributor, as listed on the “Information” page when:
•The power-supply cord, or the plug has been damaged; or
•If smoke or unusual odor occurs
•Objects have fallen into, or liquid has been spilled onto the unit; or
•The unit has been exposed to rain (or otherwise has become wet); or
•The unit does not appear to operate normally or exhibits a marked change in performance.
..........................................................................................................
013
•In households with small children, an adult should provide supervision until the child is capable of following all the rules essential for the safe operation of the unit.
..........................................................................................................
014
•Protect the unit from strong impact. (Do not drop it!)
..........................................................................................................
015
•Do not force the unit’s power-supply cord to share an outlet with an unreasonable number of other devices. Be especially careful when using extension cords—the total power used by all devices you have connected to the extension cord’s outlet must never exceed the power rating (watts/amperes) for the extension cord. Excessive
loads can cause the insulation on the cord to heat up and eventually melt through.
..........................................................................................................
016
•Before using the unit in a foreign country, consult with your retailer, the nearest Roland Service Center, or an authorized Roland distributor, as
listed on the “Information” page.
..........................................................................................................
020
• Keep lithium batteries out of reach of small children. If a child has accidentally swallowed a battery, see a doctor immediately.
..........................................................................................................
021
•Lithium batteries must never be recharged, heated, taken apart, or thrown into a fire or water.
..........................................................................................................
022a
• Always turn the unit off and unplug the power
cord before attempting installation of the circuit board (model no. VS8F-2; p. 379).
..........................................................................................................
023
•DO NOT play a CD-ROM disc on a conventional audio CD player. The resulting sound may be of a
level that could cause permanent hearing loss. Damage to speakers or other system components may result.
..........................................................................................................
026
•Do not put anything that contains water (e.g., flower vases) on this unit. Also, avoid the use of insecticides, perfumes, alcohol, nail polish, spray cans, etc., near the unit. Swiftly wipe away any
liquid that spills on the unit using a dry, soft cloth.
..........................................................................................................
4 |
www.rolandus.com |
Roland VS-2480 Owner’s Manual |
101a
•The unit should be located so that its location or position does not interfere with its proper venti-
lation.
..........................................................................................................
102b
• Always grasp only the plug on the power-supply
cord when plugging into, or unplugging from, an outlet or this unit.
..........................................................................................................
103a
•At regular intervals, you should unplug the power plug and clean it by using a dry cloth to wipe all dust and other accumulations away from its prongs. Also, disconnect the power plug from the power outlet whenever the unit is to remain unused for an extended period of time. Any accumulation of dust between the power plug and the power outlet can result in poor insulation
and lead to fire.
..........................................................................................................
104
•Try to prevent cords and cables from becoming entangled. Also, all cords and cables should be
placed so they are out of the reach of children.
..........................................................................................................
106
•Never climb on top of, nor place heavy objects on the unit.
..........................................................................................................
107b
• Never handle the power cord or its plugs with
wet hands when plugging into, or unplugging from, an outlet or this unit.
..........................................................................................................
108a
• Before moving the unit, disconnect the power
plug from the outlet, and pull out all cords from external devices.
..........................................................................................................
109a
• Before cleaning the unit, turn off the power and unplug the power cord from the outlet (p. 80).
..........................................................................................................
110a
• Whenever you suspect the possibility of lightning
in your area, pull the plug on the power cord out of the outlet.
..........................................................................................................
113
•Use only the specified type (model no. CR2032) of lithium battery (p. 382). Be sure to insert it as
directed (to ensure correct polarity).
..........................................................................................................
114
•Used lithium batteries must be disposed of in compliance with whatever regulations for their
safe disposal that may be observed in the region in which you live.
..........................................................................................................
115a
•Install only the specified circuit board(s) (model no. VS8F-2). Remove only the specified screws (p. 379).
..........................................................................................................
118c
•Keep any optical connector caps or screws you may remove and the included optical connector
caps or screws in a safe place out of children’s reach, so there is no chance of them being swallowed accidentally.
..........................................................................................................
120
•Always turn the phantom power off when connecting any device other than condenser microphones that require phantom power. You risk causing damage if you mistakenly supply phantom power to dynamic microphones, audio playback devices, or other devices that don’t require such power. Be sure to check the specifications of any microphone you intend to use by referring to the manual that came with it.
(This instrument’s phantom power: 48 V DC, 14 mA Max)
Roland VS-2480 Owner’s Manual |
www.rolandus.com |
5 |

Important Notes
291b
In addition to the items listed under “IMPORTANT SAFETY INSTRUCTIONS” and “USING THE UNIT SAFELY” on pages (p. 2) and (p. 3), please read and observe the following:
Power Supply
301
•Do not connect this unit to same electrical outlet that is being used by an electrical appliance that is controlled by an inverter (such as a refrigerator, washing machine, microwave oven, or air conditioner), or that contains a motor. Depending on the way in which the electrical appliance is used, power supply noise may cause this unit to malfunction or may produce audible noise. If it is not practical to use a separate electrical outlet, connect a power supply noise filter between this unit and the
electrical outlet.
307
•Before connecting this unit to other devices, turn off the power to all units. This will help prevent malfunctions
and/or damage to speakers or other devices.
308
•Although the LCD and LEDs are switched off when the POWER switch is switched off, this does not mean that the unit has been completely disconnected from the source of power. If you need to turn off the power completely, first turn off the POWER switch, then unplug the power cord from the power outlet. For this reason, the outlet into which you choose to connect the power cord’s plug should be one that is within easy reach and readily accessible.
Placement
352a
•This device may interfere with radio and television reception. Do not use this device in the vicinity of such
receivers.
352b
•Noise may be produced if wireless communications devices, such as cell phones, are operated in the vicinity of this unit. Such noise could occur when receiving or initiating a call, or while conversing. Should you experience such problems, you should relocate such wireless devices so they are at a greater distance from this unit, or switch
them off.
354a
•Do not expose the unit to direct sunlight, place it near devices that radiate heat, leave it inside an enclosed vehicle, or otherwise subject it to temperature extremes. Excessive heat can deform or discolor the unit.
355b
•When moved from one location to another where the temperature and/or humidity is very different, water droplets (condensation) may form inside the unit. Damage or malfunction may result if you attempt to use the unit in this condition. Therefore, before using the unit, you must allow it to stand for several hours, until the condensation has completely evaporated.
Maintenance
401a
•For everyday cleaning wipe the unit with a soft, dry cloth or one that has been slightly dampened with water. To remove stubborn dirt, use a cloth impregnated with a mild, non-abrasive detergent. Afterwards, be sure to wipe
the unit thoroughly with a soft, dry cloth.
402
•Never use benzine, thinners, alcohol or solvents of any kind, to avoid the possibility of discoloration and/or deformation.
Repairs and Data
452
•Please be aware that all data contained in the unit’s memory may be lost when the unit is sent for repairs. Important data should always be backed up on a storage device (e.g., CD-R/RW disc or Zip disk), or written down on paper (when possible). During repairs, due care is taken to avoid the loss of data. However, in certain cases (such as when circuitry related to memory itself is out of order), we regret that it may not be possible to restore the data, and Roland assumes no liability concerning such loss of data.
Memory Backup
501b
•This unit contains a battery which powers the unit’s memory circuits while the main power is off. When this battery becomes weak, the message shown below will appear in the display. Once you see this message, have the battery replaced with a fresh one as soon as possible to avoid the loss of all data in memory. To have the battery replaced, consult with your retailer, the nearest Roland Service Center, or an authorized Roland distributor, as listed on the “Information” page.
6 |
www.rolandus.com |
Roland VS-2480 Owner’s Manual |

Important Notes
Additional Precautions
551
•Please be aware that the contents of memory can be irretrievably lost as a result of a malfunction, or the improper operation of the unit. To protect yourself against the risk of loosing important data, we recommend that you periodically save a backup copy of important data you have stored in the unit’s memory on a storage device
(e.g., CD-R/RW disc or Zip disk).
552
•Unfortunately, it may be impossible to restore the contents of data that was stored on a storage device (e.g., CD-R/RW disc or Zip disk) once it has been lost. Roland Corporation assumes no liability concerning such loss of
data.
553
•Use a reasonable amount of care when using the unit’s buttons, sliders, or other controls; and when using its jacks
and connectors. Rough handling can lead to malfunctions.
554
• Never strike or apply strong pressure to the display.
556
•When connecting / disconnecting all cables, grasp the connector itself—never pull on the cable. This way you will avoid causing shorts, or damage to the cable’s
internal elements.
557
• A small amount of heat will radiate from the unit during normal operation.
558a
•To avoid disturbing your neighbors, try to keep the unit’s volume at reasonable levels. You may prefer to use headphones, so you do not need to be concerned about
those around you (especially when it is late at night).
559a
•When you need to transport the unit, package it in the box (including padding) that it came in, if possible. Otherwise,
you will need to use equivalent packaging materials.
562
•Use a cable from Roland to make the connection. If using some other make of connection cable, please note the following precautions.
•Some connection cables contain resistors. Do not use cables that incorporate resistors for connecting to this unit. The use of such cables can cause the sound level to be extremely low, or impossible to hear. For information on cable specifications, contact the manufacturer of the cable.
Handling Zip Disks
651
•Zip disks contain a plastic disk with a thin coating of magnetic storage medium. Microscopic precision is required to enable storage of large amounts of data on such a small surface area. To preserve their integrity, please observe the following when handling Zip disks:
•Never touch the magnetic medium inside the disk.
•Do not use or store Zip disks in dirty or dusty areas.
•Do not subject Zip disks to temperature extremes (e.g., direct sunlight in an enclosed vehicle). Recommended temperature range: -22 to 51˚C (-7.6 to 123.8˚F).
•Do not expose Zip disks to strong magnetic fields, such as those generated by loudspeakers.
653
•The identification label should be firmly affixed to the disk. Should the label come loose while the disk is in the
drive, it may be difficult to remove the disk.
654
•Store all disks in a safe place to avoid damaging them, and to protect them from dust, dirt, and other hazards. By using a dirty or dust-ridden disk, you risk damaging the disk, as well as causing the disk drive to malfunction.
Handling CD-ROMs
801
•Avoid touching or scratching the shiny underside (encoded surface) of the disc. Damaged or dirty CD-ROM discs may not be read properly. Keep your discs clean using a commercially available CD cleaner.
Handling Hard Disks
Important Performance and Image
Data
811
•Once a hard disk fails to function normally, all data that has been stored on it could be destroyed.
All hard disks eventually wear out. We recommend that you consider the hard disk not as a permanent storage site, but as a place to store data temporarily. We also recommend that you back up important performance and image data that cannot be recorded again onto the external media that is supported by your device. For instructions on how to make such backups, refer to the owner’s manual for your device.
Note that Roland assumes no liability whatsoever, including monetary compensation, for the loss of any recorded content in the event of the malfunction of, or physical damage to the hard disk, or for any direct or incidental damages resulting from the loss of such data.
Precautions Regarding Setup and Use
812
•Certain hard disk setup procedures and usage conditions may result in the corruption of recorded data, malfunctioning, or physical damage to the disk, so be sure to observe the following precautions.
•Do not subject the hard disk to vibration or shock, especially while the unit is in operation.
•Do not set up the unit in any location where it may be affected by vibration from external sources, or on any surface that is not stable and level.
•If the device includes a cooling fan, ensure that the fan and the side panel air vents remain unobstructed.
Roland VS-2480 Owner’s Manual |
www.rolandus.com |
7 |

Important Notes
•Do not leave the unit in any environment subject to temperature extremes; for example, in a closed automobile in summer or outdoors during winter.
•Do not use the unit in conditions of high temperature and humidity or in any location subject to rapid temperature changes.
•Do not unplug the power cord or switch off any circuit breakers in the circuit to which the unit is connected while the power is turned on.
•Do not move the unit while the power is turned on or immediately after turning off the power. When transporting the unit, first turn off the power and confirm that the display screen has gone off, disconnect the power plug, then wait at least two minutes before moving the device.
Emergency Procedures
813
*The following procedures are to be used as emergency measures only, and are not recommended for normal operation.
•If the device fails to respond to operational commands or does not complete operations, turn off the power. If the power does not shut off following normal shutdown procedures, disconnect the power plug.
If the unit does not operate normally when the power is turned on again, it may mean that the hard disk has been damaged. In such instances, consult your dealer or the nearest Roland Service Center. Note, however, that it may not be possible to recover any data from the hard disk once it has been lost.
If your device features drive check capabilities, use the drive check function to regularly confirm that there are no problems, even when the device is operating normally. For more detailed information on the shutdown and drive check procedures, refer to the Owner’s Manual.
Copyright
851
•Unauthorized recording, distribution, sale, lending, public performance, broadcasting, or the like, in whole or in part, of a work (musical composition, video, broadcast, public performance, or the like) whose copyright is held by a third party is prohibited by law.
852b
•When exchanging audio signals through a digital connection with an external instrument, this unit can perform recording without being subjected to some of the restrictions of the Serial Copy Management System (SCMS). This is because the unit is intended solely for musical production, and is designed not to be subject to restrictions as long as it is used to record works (such as your own compositions) that do not infringe on the copyrights of others. (SCMS is a feature that prohibits second-generation and later copying through a digital connection. It is built into MD recorders and other consumer digital-audio equipment as a
copyright-protection feature.)
853
•Do not use this unit for purposes that could infringe on a copyright held by a third party. We assume no responsibility whatsoever with regard to any infringements of third-party copyrights arising through your use of this unit.
8 |
www.rolandus.com |
Roland VS-2480 Owner’s Manual |

Table of Contents
Table of Contents
Step-by-Step Instruction Finder |
20 |
|
|
||
1—Welcome |
27 |
|
|
|
|
About this Manual |
.......................................................................................................................................................... |
|
|
|
27 |
How the VS-2480 Owner’s Manual is Organized ................................................................................................. |
27 |
||||
Names ........................................................................................................................................................................ |
|
|
|
|
28 |
Note, Tip, Glossary and Warning Icons |
............................................................................................................... |
|
28 |
||
Other Documents in the VS-2480 Box .......................................................................................................................... |
|
|
29 |
||
Getting More Help |
.......................................................................................................................................................... |
|
|
|
29 |
The Roland US Web site ......................................................................................................................................... |
|
|
29 |
||
The Roland US Faxback System ............................................................................................................................ |
|
|
29 |
||
Roland US Product Support ................................................................................................................................... |
|
|
29 |
||
2—Getting Around |
31 |
|
|
|
|
The Top Panel of the VS-2480 ........................................................................................................................................ |
|
|
31 |
||
Analog Input Jacks .................................................................................................................................................. |
|
|
|
31 |
|
Monitor/Display Controls ..................................................................................................................................... |
|
|
32 |
||
Channel Strips |
.......................................................................................................................................................... |
|
|
|
33 |
Display Area ............................................................................................................................................................. |
|
|
|
|
36 |
TRACK EDIT Area .................................................................................................................................................. |
|
|
|
37 |
|
EZ ROUTING, AUTOMIX, CD-RW/MASTERING .......................................................and MENU Buttons |
39 |
||||
General Controls ...................................................................................................................................................... |
|
|
|
41 |
|
SCRUB, PREVIEW and Transport Buttons .......................................................................................................... |
|
42 |
|||
LOCATOR/MARKER/SCENE Area ................................................................................................................... |
|
|
44 |
||
The Rear Panel of the VS-2480 ...................................................................................................................................... |
|
|
46 |
||
3—Introduction to the VS-2480 |
51 |
|
|
||
What’s Inside the VS-2480? |
............................................................................................................................................ |
|
|
51 |
|
Input Jacks and Connectors .................................................................................................................................... |
|
|
51 |
||
The Mixing Console ................................................................................................................................................. |
|
|
|
52 |
|
The Internal Effects .................................................................................................................................................. |
|
|
|
54 |
|
The Hard Disk Recorder ......................................................................................................................................... |
|
|
55 |
||
Output Jacks and Connectors ................................................................................................................................ |
|
|
55 |
||
Signal Flow ....................................................................................................................................................................... |
|
|
|
|
56 |
Projects .............................................................................................................................................................................. |
|
|
|
|
56 |
Busses in the VS-2480 ..................................................................................................................................................... |
|
|
|
57 |
|
What’s a Bus? ............................................................................................................................................................ |
|
|
|
|
57 |
Achieving Perfect Levels ................................................................................................................................................ |
|
|
|
58 |
|
What’s “Clipping?” ................................................................................................................................................. |
|
|
|
58 |
|
How Do I Get Good Levels? .................................................................................................................................. |
|
|
58 |
||
The Importance of Backing Up ..................................................................................................................................... |
|
|
59 |
||
4—Setting Up and Basic Operations |
61 |
|
|||
Things You’ll Need ......................................................................................................................................................... |
|
|
|
61 |
|
Roland VS-2480 Owner’s Manual |
www.rolandus.com |
9 |

Table of Contents
Power ......................................................................................................................................................................... |
61 |
A Way to Listen to the VS-2480 .............................................................................................................................. |
61 |
Getting Ready .................................................................................................................................................................. |
61 |
Powering Up .................................................................................................................................................................... |
63 |
What Happens During the VS-2480’s Power-Up ................................................................................................ |
63 |
Configuring the VS-2480 ................................................................................................................................................ |
64 |
Setting Up the VGA Monitor, Mouse and Keyboard .......................................................................................... |
64 |
Setting the VS-2480’s Clock ..................................................................................................................................... |
65 |
A Few Fundamental Concepts ...................................................................................................................................... |
65 |
Selection ..................................................................................................................................................................... |
65 |
Switches ..................................................................................................................................................................... |
66 |
Parameters and Values ............................................................................................................................................ |
66 |
Tools You’ll Use All the Time ........................................................................................................................................ |
66 |
The Cursor/ZOOM Buttons ................................................................................................................................... |
66 |
The F Buttons ............................................................................................................................................................ |
66 |
Pages .......................................................................................................................................................................... |
67 |
The TIME/VALUE Dial .......................................................................................................................................... |
67 |
The ENTER/YES and EXIT/NO Buttons ............................................................................................................. |
67 |
The SHIFT Button ..................................................................................................................................................... |
68 |
Using a Mouse .......................................................................................................................................................... |
68 |
Using an ASCII Keyboard ....................................................................................................................................... |
69 |
Using the VGA Info Display ................................................................................................................................... |
70 |
UNDO and REDO .................................................................................................................................................... |
72 |
Naming ...................................................................................................................................................................... |
73 |
Entering Numbers with the Numeric Keypad .................................................................................................... |
74 |
If You’re Using DS-90A or DS-50A Monitors .............................................................................................................. |
75 |
Setting Up for Roland’s DS-90A and DS-50A Digital Monitors ........................................................................ |
75 |
Adjusting Your Listening Level .................................................................................................................................... |
75 |
Playing the Factory Demos ............................................................................................................................................ |
76 |
“What You Don’t Know” ........................................................................................................................................ |
76 |
“Don’t Stop” .............................................................................................................................................................. |
80 |
Turning Off the VS-2480 ................................................................................................................................................. |
80 |
Turning Off the VS-2480 .......................................................................................................................................... |
80 |
5—Understanding Effects |
81 |
|
Harnessing the VS-2480’s Effects |
.................................................................................................................................. |
81 |
Dry and Wet .............................................................................................................................................................. |
|
81 |
Effect Routings ................................................................................................................................................................. |
|
81 |
Insert Effects .............................................................................................................................................................. |
|
82 |
Loop Effects ............................................................................................................................................................... |
|
82 |
Master Effects ................................................................................................................................................................... |
|
83 |
External Effects ................................................................................................................................................................ |
|
83 |
Getting the Most From Your Effect ...........................................................................................................Processors |
84 |
|
6—Understanding the Hard Disk Recorder |
85 |
VS-2480 Hard Disk Drives ............................................................................................................................................. |
85 |
What’s a Hard Drive? .............................................................................................................................................. |
85 |
How a VS-2480 Hard Drive Organizes Data ........................................................................................................ |
86 |
Preparing a Hard Drive for Use ............................................................................................................................. |
86 |
Using Other V-Studio Drives ................................................................................................................................. |
86 |
How Audio Is Recorded on a VS-2480 Hard Drive .................................................................................................... |
86 |
How Recordings Are Played Back ................................................................................................................................ |
87 |
10 |
www.rolandus.com |
Roland VS-2480 Owner’s Manual |
|
|
Table of Contents |
Random Access ........................................................................................................................................................ |
|
87 |
What’s Pointer-Based Playback? ........................................................................................................................... |
87 |
|
Non-Destructive, Pointer-Based Editing ..................................................................................................................... |
88 |
|
Pointer-Based Editing .............................................................................................................................................. |
|
88 |
What Is a VS-2480 Track? ............................................................................................................................................... |
|
89 |
The Power of V-Tracks ............................................................................................................................................ |
|
90 |
Track Editing Basics ........................................................................................................................................................ |
|
90 |
About Editing Phrases ............................................................................................................................................ |
|
90 |
About Editing Regions ............................................................................................................................................ |
|
91 |
7—Project and Drive Operations |
93 |
|
Navigating the PROJECT Menu Screens ..................................................................................................................... |
93 |
|
Working with the PROJECT LIST ......................................................................................................................... |
93 |
|
About “Store Current?” Messages ........................................................................................................................ |
94 |
|
Project Operations ........................................................................................................................................................... |
|
95 |
About F6 (MARK) .................................................................................................................................................... |
|
95 |
SELECT ...................................................................................................................................................................... |
|
95 |
NEW ........................................................................................................................................................................... |
|
96 |
NAME ........................................................................................................................................................................ |
|
99 |
PROTECT .................................................................................................................................................................. |
|
99 |
OPTIMIZE ............................................................................................................................................................... |
|
100 |
Destination Drive Selection .................................................................................................................................. |
101 |
|
COPY ....................................................................................................................................................................... |
|
101 |
ERASE ...................................................................................................................................................................... |
|
102 |
SPLIT ........................................................................................................................................................................ |
|
103 |
COMBINE ............................................................................................................................................................... |
|
104 |
BACKUP ................................................................................................................................................................. |
|
105 |
RECOVER ............................................................................................................................................................... |
|
107 |
IMPORT .................................................................................................................................................................. |
|
108 |
EXPORT ................................................................................................................................................................... |
|
109 |
Drive Operations ........................................................................................................................................................... |
|
111 |
Disk Maintenance .................................................................................................................................................. |
|
111 |
Fragmentation ........................................................................................................................................................ |
|
112 |
Format Drive .......................................................................................................................................................... |
|
113 |
Clear Partition ........................................................................................................................................................ |
|
115 |
Drive Check ............................................................................................................................................................ |
|
116 |
8—The Home Screen |
119 |
|
Elements of the Home Screen ...................................................................................................................................... |
|
119 |
Display Pop-Up Menu Button ............................................................................................................................. |
119 |
|
Current Channel Display ...................................................................................................................................... |
|
120 |
PAN/AUX SEND 1-8 Knob Display .................................................................................................................. |
120 |
|
Meters Display ....................................................................................................................................................... |
|
120 |
Position Bar ............................................................................................................................................................. |
|
122 |
The Playlist ............................................................................................................................................................. |
|
122 |
Meter Switches ....................................................................................................................................................... |
|
124 |
Input Peak Indicators ............................................................................................................................................ |
|
125 |
Current Time Location Display ........................................................................................................................... |
126 |
|
Clock, Calendar ...................................................................................................................................................... |
|
126 |
Using the Fader/Pan Display ..................................................................................................................................... |
|
127 |
The F/P Switches ................................................................................................................................................... |
|
127 |
About The ID Buttons .................................................................................................................................................. |
|
127 |
Roland VS-2480 Owner’s Manual |
www.rolandus.com |
11 |

Table of Contents
9—Working with Input Signals |
129 |
|
Analog Input Signals .................................................................................................................................................... |
|
129 |
Making Analog Connections ................................................................................................................................ |
|
129 |
Phantom Power ............................................................................................................................................................. |
|
130 |
Setting Analog Input Levels ................................................................................................................................. |
|
130 |
Digital Input Signals ..................................................................................................................................................... |
|
131 |
Digital Connections ................................................................................................................................................ |
|
131 |
Selecting the Desired Digital Inputs .................................................................................................................... |
|
131 |
Digital Considerations ........................................................................................................................................... |
|
132 |
The Master Clock .................................................................................................................................................... |
|
132 |
Recording S/P DIF-Format Digital Input Signals ............................................................................................. |
134 |
|
Routing Input Signals to Input Channels .................................................................................................................. |
|
135 |
Choosing an Input Patching Screen .................................................................................................................... |
|
135 |
How Input Connections Work ............................................................................................................................. |
|
136 |
Patching Input Connections ................................................................................................................................. |
|
136 |
10—Using the Digital Mixer |
137 |
|
Changing Channels ....................................................................................................................................................... |
|
137 |
Switching Between Input, Track, Aux and FX Channels ................................................................................. |
137 |
|
Channel Selection .......................................................................................................................................................... |
|
138 |
Selecting a Channel for Editing ............................................................................................................................ |
|
138 |
About the Channel Faders ........................................................................................................................................... |
|
138 |
Setting a Fader to Unity Gain and Centering its Panning ................................................................................ |
138 |
|
Using the PAN/AUX SEND 1-8 Knobs ..................................................................................................................... |
|
139 |
Adjusting Stereo Positioning ................................................................................................................................ |
|
139 |
Setting Dynamics and EQ Parameters for One Channel .................................................................................. |
139 |
|
The KNOB/FDR ASSIGN•AUX SEND 1-8 Button ................................................................................................. |
140 |
|
To Set What the KNOB/FADER ASSIGN Feature Controls ........................................................................... |
140 |
|
To Turn the KNOB/FADER ASSIGN Feature On and Off .............................................................................. |
141 |
|
Activating Knob or Fader Control of Aux Send Levels .................................................................................... |
141 |
|
Controlling a Parameter of Your Choice ............................................................................................................ |
141 |
|
The MASTER Fader ...................................................................................................................................................... |
|
142 |
Muting and Soloing Channel Signals ......................................................................................................................... |
|
142 |
Mute Mode .............................................................................................................................................................. |
|
143 |
Solo Mode ................................................................................................................................................................ |
|
143 |
Scenes .............................................................................................................................................................................. |
|
144 |
Basic Scene Operations .......................................................................................................................................... |
|
144 |
Editing Scenes ......................................................................................................................................................... |
|
145 |
Scenes in Safe Mode ............................................................................................................................................... |
|
146 |
Resetting Mixer Parameters ......................................................................................................................................... |
|
147 |
11—Input and Track Channel Tools |
149 |
Viewing a CH EDIT Screen .......................................................................................................................................... |
149 |
Introduction to the CH EDIT Screens ......................................................................................................................... |
149 |
How the CH EDIT Screens Are Organized ........................................................................................................ |
149 |
The CH EDIT Screens ................................................................................................................................................... |
150 |
The CH EDIT VIEW Screen .................................................................................................................................. |
150 |
The DYN Screen ..................................................................................................................................................... |
157 |
The EQ Screen ......................................................................................................................................................... |
162 |
The FX Ins Screen ................................................................................................................................................... |
166 |
The Surrnd Screen .................................................................................................................................................. |
166 |
The CH EDIT P.BAY Screen ................................................................................................................................. |
166 |
12 |
www.rolandus.com |
Roland VS-2480 Owner’s Manual |

|
|
|
Table of Contents |
The CH EDIT ASSIGN Screen ............................................................................................................................. |
|
|
167 |
Parameter View ...................................................................................................................................................... |
|
|
167 |
Assorted CH EDIT Tools ............................................................................................................................................. |
|
|
169 |
The CH EDIT VIEW CpyPRM Button ................................................................................................................ |
|
|
169 |
The DYN and EQ Screen RESET Buttons ........................................................................................................... |
|
|
169 |
12—Working with Input Channels |
171 |
|
|
Introduction to Input Channel Routing ............................................................................................................. |
|
|
171 |
Routing Linked Stereo Input Channels .............................................................................................................. |
|
|
171 |
Routing an Input Channel Signal to a Track ............................................................................................................. |
|
|
172 |
Quick-Routing Input Channels to Tracks .......................................................................................................... |
|
|
172 |
Input Signal Routing on the EZ ROUTING VIEW Screen |
............................................................................... 174 |
||
Input Channel Signals and the Main Mix .................................................................................................................. |
|
|
175 |
Removing Input Channel Signals from the Main Mix ..................................................................................... |
175 |
||
Adding an Input Channel’s Signal to the Main Mix |
........................................................................................ |
175 |
|
Routing an Input Channel Signal to a Direct Bus .................................................................................................... |
|
175 |
|
13—Operating the Hard Disk Recorder |
177 |
|
|
The Transport Buttons .................................................................................................................................................. |
|
|
177 |
The Main Transport Buttons ................................................................................................................................ |
|
|
177 |
Special Transport Buttons ..................................................................................................................................... |
|
|
177 |
The SHUTTLE Ring ............................................................................................................................................... |
|
|
178 |
The TRACK STATUS Buttons ..................................................................................................................................... |
|
|
178 |
How the TRACK STATUS Buttons Work .......................................................................................................... |
|
|
178 |
Recording ....................................................................................................................................................................... |
|
|
179 |
Before Recording a Track ...................................................................................................................................... |
|
|
179 |
Recording a New Track ........................................................................................................................................ |
|
|
179 |
Playback ......................................................................................................................................................................... |
|
|
180 |
Basic Playback Procedure ..................................................................................................................................... |
|
|
180 |
Moving Through a Project .................................................................................................................................... |
|
|
180 |
Using Jump ............................................................................................................................................................. |
|
|
180 |
Looped Playback .................................................................................................................................................... |
|
|
181 |
Vari Pitch Playback ................................................................................................................................................ |
|
|
182 |
Preview .................................................................................................................................................................... |
|
|
183 |
Scrub ........................................................................................................................................................................ |
|
|
184 |
Locators .......................................................................................................................................................................... |
|
|
185 |
Basic Locator Operations ...................................................................................................................................... |
|
|
186 |
Other Locator Operations ..................................................................................................................................... |
|
|
186 |
Switching Automatically to Locator Mode ........................................................................................................ |
|
|
187 |
Locators in Safe Mode ........................................................................................................................................... |
|
|
187 |
Markers ........................................................................................................................................................................... |
|
|
188 |
Placing a Marker .................................................................................................................................................... |
|
|
189 |
Moving the Timeline to a Marker ........................................................................................................................ |
|
|
189 |
Clearing Markers ................................................................................................................................................... |
|
|
190 |
Editing Markers ..................................................................................................................................................... |
|
|
190 |
Punching ......................................................................................................................................................................... |
|
|
191 |
Simple Monitoring ................................................................................................................................................. |
|
|
191 |
Before You Punch .................................................................................................................................................. |
|
|
191 |
Punching In and Out Manually ........................................................................................................................... |
|
|
192 |
Auto-Punching ....................................................................................................................................................... |
|
|
192 |
Roland VS-2480 Owner’s Manual |
www.rolandus.com |
13 |

Table of Contents
14—Working with Track Channels |
195 |
|
Bouncing ......................................................................................................................................................................... |
|
195 |
The Mechanics of Bouncing .................................................................................................................................. |
|
196 |
Mono and Stereo Bouncing ................................................................................................................................... |
|
196 |
First Things First ..................................................................................................................................................... |
|
196 |
Link the Destination Tracks For a Stereo Bounce .............................................................................................. |
197 |
|
Routing Tracks for a Bounce ................................................................................................................................. |
|
197 |
Listening as You Bounce ....................................................................................................................................... |
|
200 |
Mixing the Bounce ................................................................................................................................................. |
|
200 |
Performing the Bounce .......................................................................................................................................... |
|
201 |
Sending a Track Channel’s Signal to a Direct Bus .................................................................................................... |
202 |
|
Routing a Track to a Direct Bus ............................................................................................................................ |
|
202 |
Mixing ............................................................................................................................................................................. |
|
202 |
The Mechanics of Mixing ...................................................................................................................................... |
|
202 |
15—The Aux and Direct Busses |
205 |
Aux Busses ..................................................................................................................................................................... |
205 |
Aux Bus Overview ................................................................................................................................................. |
205 |
When Would You Use an Aux Bus? .................................................................................................................... |
205 |
Sending a Signal to an Aux Bus ........................................................................................................................... |
206 |
Stereo Aux Busses .................................................................................................................................................. |
206 |
Aux Bus Levels ....................................................................................................................................................... |
206 |
Configuring an Aux Bus ....................................................................................................................................... |
207 |
Direct Busses .................................................................................................................................................................. |
208 |
When Would You Use a Direct Bus? ................................................................................................................... |
208 |
Sending a Signal to a Direct Bus .......................................................................................................................... |
209 |
Direct Bus Levels .................................................................................................................................................... |
209 |
Configuring a Direct Bus ....................................................................................................................................... |
209 |
Aux Bus/Direct Bus Strategy ...................................................................................................................................... |
210 |
Sending Signals to Internal Effects ...................................................................................................................... |
210 |
Sending Signals to External Devices ................................................................................................................... |
210 |
Sending Signals to Tracks ..................................................................................................................................... |
210 |
Creating a Headphone Mix Using an Aux Bus |
......................................................................................................... 211 |
16—Using Effects |
213 |
|
Using Loop Effects ........................................................................................................................................................ |
|
213 |
Setting Up an Internal Loop Effect ...................................................................................................................... |
213 |
|
Setting Up an External Loop Effect ..................................................................................................................... |
215 |
|
Inserting an Effect .......................................................................................................................................................... |
|
216 |
About Insert Effects ................................................................................................................................................ |
|
216 |
Input and Track Channel Insert Effects .............................................................................................................. |
216 |
|
MASTER Bus Insert Effects ................................................................................................................................... |
219 |
|
Selecting, Editing and Saving Effect Patches ............................................................................................................. |
220 |
|
The EFFECT VIEW Screen .................................................................................................................................... |
220 |
|
The Algorithm View Screen .................................................................................................................................. |
221 |
|
Selecting Effect Patches ......................................................................................................................................... |
221 |
|
Editing Effect Patches |
............................................................................................................................................ |
223 |
Saving Effect Patches ............................................................................................................................................. |
|
224 |
Speaker Modeling .......................................................................................................................................................... |
|
225 |
Using Speaker Modeling ....................................................................................................................................... |
225 |
|
Microphone Modeling .................................................................................................................................................. |
|
226 |
14 |
www.rolandus.com |
Roland VS-2480 Owner’s Manual |

|
|
|
|
Table of Contents |
17—Working with FX Return Channels |
227 |
|
||
The FX Return Channel Fader ..................................................................................................................................... |
|
|
227 |
|
FX Return CH EDIT Tools |
........................................................................................................................................... |
|
|
227 |
The Main FX Return CH EDIT Screen ................................................................................................................ |
|
228 |
||
The FX Return Parameter View Screen .............................................................................................................. |
|
231 |
||
Routing Effects to Tracks ............................................................................................................................................. |
|
|
|
231 |
Quick Routing an FX Return ................................................................................................................Channel |
|
232 |
||
FX Return Routing on .......................................................................................the EZ Routing VIEW Screen |
233 |
|||
Adding Effects to a Headphone ..........................................................................................................................Mix |
|
|
234 |
|
18—Editing Tracks |
235 |
|
|
|
Editing Concepts and Overview ................................................................................................................................. |
|
|
235 |
|
Phrases and Regions .............................................................................................................................................. |
|
|
|
235 |
Edit Points ............................................................................................................................................................... |
|
|
|
236 |
Performing Edits ........................................................................................................................................................... |
|
|
|
237 |
The Appearance of Selected ..............................................................................Tracks, Phrases and Regions |
237 |
|||
Where Editing Takes Place ................................................................................................................................... |
|
|
238 |
|
Editing Methods ..................................................................................................................................................... |
|
|
|
239 |
Edit Messages ......................................................................................................................................................... |
|
|
|
240 |
Editing with a Mouse ............................................................................................................................................ |
|
|
|
241 |
Editing with the TRACK ..............................................................................................................EDIT Buttons |
|
247 |
||
Editing from the TRACK ...........................................................................................................................Menu |
|
|
249 |
|
19—Phrase Editing Operations |
255 |
|
|
|
COPY .............................................................................................................................................................................. |
|
|
|
255 |
MOVE ............................................................................................................................................................................. |
|
|
|
257 |
TRIM IN .......................................................................................................................................................................... |
|
|
|
257 |
TRIM OUT ...................................................................................................................................................................... |
|
|
|
258 |
DELETE .......................................................................................................................................................................... |
|
|
|
258 |
SPLIT ............................................................................................................................................................................... |
|
|
|
258 |
NEW ................................................................................................................................................................................ |
|
|
|
259 |
NORMALIZE ................................................................................................................................................................. |
|
|
|
260 |
DIVIDE ........................................................................................................................................................................... |
|
|
|
260 |
NAME ............................................................................................................................................................................. |
|
|
|
261 |
Take Mngr ...................................................................................................................................................................... |
|
|
|
262 |
20—Region Editing Operations |
263 |
|
|
|
COPY .............................................................................................................................................................................. |
|
|
|
263 |
MOVE ............................................................................................................................................................................. |
|
|
|
265 |
INSERT ........................................................................................................................................................................... |
|
|
|
265 |
CUT ................................................................................................................................................................................. |
|
|
|
266 |
ERASE ............................................................................................................................................................................. |
|
|
|
267 |
COMP/EXP. .................................................................................................................................................................. |
|
|
|
267 |
IMPORT .......................................................................................................................................................................... |
|
|
|
269 |
EXCHANGE .................................................................................................................................................................. |
|
|
|
270 |
ARRANGE ..................................................................................................................................................................... |
|
|
|
270 |
NAME ............................................................................................................................................................................. |
|
|
|
272 |
21—Using the Phrase Pads |
273 |
|
|
|
Understanding the Phrase ..................................................................................................................................Pads |
|
|
274 |
|
Roland VS-2480 Owner’s Manual |
www.rolandus.com |
15 |

Table of Contents
What a Phrase Pad Plays ....................................................................................................................................... |
274 |
Phrase Pad Setup .................................................................................................................................................... |
274 |
Activating Phrase Pad Mode ................................................................................................................................ |
275 |
Playing the Pads in Phrase Pad Mode ................................................................................................................ |
275 |
Sequencing a Phrase Pad Performance ...................................................................................................................... |
275 |
Activating Phrase Sequence Mode ...................................................................................................................... |
275 |
The PHRASE SEQ STATUS Buttons ................................................................................................................... |
275 |
Playing the Pads in Phrase Sequence Mode ....................................................................................................... |
275 |
The PHRASE SEQUENCE Screens ...................................................................................................................... |
276 |
What the Appearance of Sequenced Data Means ............................................................................................. |
277 |
The Phrase Sequencer Grid ................................................................................................................................... |
277 |
Phrase Sequencer Undo ......................................................................................................................................... |
277 |
Realtime Phrase Sequencing ................................................................................................................................. |
278 |
Step Entry ................................................................................................................................................................ |
279 |
Phrase Pad Button Summary ................................................................................................................................ |
280 |
Editing a Phrase Sequence ........................................................................................................................................... |
281 |
Phrase and Region Editing of Phrase Sequenced Data ..................................................................................... |
281 |
Phrase Sequence Editing Tools ............................................................................................................................ |
281 |
Controlling the Sound of Sequenced Tracks ............................................................................................................. |
285 |
Phrase Sequence Bouncing ........................................................................................................................................... |
285 |
22—Working with the VS-2480 Outputs |
287 |
The VS-2480 Outputs .................................................................................................................................................... |
287 |
Output Pairs ............................................................................................................................................................ |
287 |
Analog Output Jacks .............................................................................................................................................. |
287 |
Digital Output Connectors ................................................................................................................................... |
287 |
Output Signal Routing .................................................................................................................................................. |
288 |
Bus Routing ............................................................................................................................................................. |
288 |
Track Direct Outs ................................................................................................................................................... |
289 |
23—EZ Routing |
291 |
|
The EZ ROUTING Screens ........................................................................................................................................... |
291 |
|
Navigating the EZ ROUTING Screens ................................................................................................................ |
291 |
|
EZ ROUTING VIEW Screen ................................................................................................................................. |
292 |
|
The EZ ROUTING PATCH BAY Screen ............................................................................................................. |
292 |
|
The EZ ROUTING OUTPUT ASSIGN Screen ................................................................................................... |
293 |
|
The EZ ROUTING LOOP EFFECT ASSIGN Screen ......................................................................................... |
294 |
|
EZ Routing Tools |
........................................................................................................................................................... |
295 |
Saving and Loading EZ Routing Templates ............................................................................................................. |
296 |
|
Saving an EZ ..........................................................................................................................Routing Template |
296 |
|
Loading an EZ ........................................................................................................................Routing Template |
297 |
|
24—MIDI and Synchronization |
299 |
|
MIDI Operations ............................................................................................................................................................ |
|
299 |
VS-2480 MIDI Basics .............................................................................................................................................. |
|
299 |
V.Fader—The VS-2480 MIDI Control Surface ................................................................................................... |
300 |
|
Remote MIDI Control of the VS-2480 .................................................................................................................. |
|
301 |
Remote MIDI Storage of VS-2480 Settings ......................................................................................................... |
304 |
|
MIDI Metronome ................................................................................................................................................... |
|
305 |
Synchronization ............................................................................................................................................................. |
|
307 |
Why Sync the VS-2480? ......................................................................................................................................... |
|
307 |
Basic Synchronization Concepts .......................................................................................................................... |
|
307 |
16 |
www.rolandus.com |
Roland VS-2480 Owner’s Manual |

|
|
|
|
Table of Contents |
Working with a Sync Track .................................................................................................................................. |
|
|
311 |
|
Working with a Tempo Map ................................................................................................................................ |
|
|
312 |
|
Syncing an External Device to the VS-2480 ........................................................................................................ |
|
314 |
||
Syncing the VS-2480 to an External Device ........................................................................................................ |
|
315 |
||
Exchanging Digital Audio Data During Synchronization ............................................................................... |
317 |
|||
25—Surround |
319 |
|
|
|
What is Surround? |
........................................................................................................................................................ |
|
|
319 |
Surround Formats .................................................................................................................................................. |
|
|
319 |
|
How the VS-2480 Delivers .........................................................................................................................Surround |
|
|
320 |
|
Turning on Surround ........................................................................................................................................Mode |
|
|
321 |
|
Positioning a Signal ...............................................................................................................in the Surround Field |
|
|
322 |
|
Adjusting Master Surround .....................................................................................................................Bus Levels |
|
|
323 |
|
26—Automix |
325 |
|
|
|
The Benefits of Automix .............................................................................................................................................. |
|
|
325 |
|
How Automix Works ................................................................................................................................................... |
|
|
325 |
|
The AUTOMIX ..........................................................................................................................................Screen |
|
|
326 |
|
Activating Automix ....................................................................................................................................Mode |
|
|
327 |
|
The AUTOMIX ........................................................................................................................STATUS Buttons |
|
|
327 |
|
Recording Automix .............................................................................................................................................Data |
|
|
328 |
|
Realtime Automix ...............................................................................................................................Recording |
|
|
328 |
|
Realtime Punching ..................................................................................................................of Automix Data |
|
|
329 |
|
Snapshot Recording ..........................................................................................................of Parameter Values |
|
330 |
||
Playing Back Automix ........................................................................................................................................Data |
|
|
331 |
|
Editing Automix Data .................................................................................................................................................. |
|
|
331 |
|
Automix Editing ...................................................................................................................................Concepts |
|
|
331 |
|
Automix Editing ....................................................................................................................................Methods |
|
|
333 |
|
Automix Editing ................................................................................................................................Operations |
|
|
334 |
|
Micro-Editing Automix ...............................................................................................................................Data |
|
|
337 |
|
27—Mastering and CD-R/RW Operations |
339 |
|
||
Mastering ........................................................................................................................................................................ |
|
|
|
339 |
Mixing for Mastering ............................................................................................................................................ |
|
|
339 |
|
Important Mastering ............................................................................................................................Concepts |
|
|
339 |
|
Working in the ..........................................................................................................VS-2480 Mastering Room |
|
343 |
||
Editing Mastering ......................................................................................................................................Tracks |
|
|
346 |
|
Placing CD Track ...................................................................................................................................Markers |
|
|
347 |
|
CD-R/RW Operations .................................................................................................................................................. |
|
|
349 |
|
Creating an Audio ..........................................................................................................................................CD |
|
|
349 |
|
Erasing a CD-RW ..........................................................................................................................................Disk |
|
|
352 |
|
If You Encounter ....................................................................................Error Messages During CD Burning |
353 |
|||
The CD Player ..........................................................................................................................................Feature |
|
|
353 |
|
.WAV File Importing ............................................................................................................................................. |
|
|
354 |
|
Exporting Tracks ....................................................................................................and Phrases as .WAV Files |
|
356 |
||
28—Utility Menu Parameters |
359 |
|
|
|
The Main UTILITY ................................................................................................................................Menu Screen |
|
|
359 |
|
SYSTEM .......................................................................................................................................................................... |
|
|
|
360 |
PHANTOM SW ...................................................................................................................................................... |
|
|
360 |
|
EXT LEVEL METER ...............................................................................................................................(MB-24) |
|
|
360 |
|
Roland VS-2480 Owner’s Manual |
www.rolandus.com |
17 |

Table of Contents
DRIVE ...................................................................................................................................................................... |
361 |
VGA .......................................................................................................................................................................... |
361 |
PS/2 MOUSE .......................................................................................................................................................... |
362 |
PS/2 KEYBOARD .................................................................................................................................................. |
362 |
GLOBAL ......................................................................................................................................................................... |
362 |
OPERATION DISPLAY ........................................................................................................................................ |
365 |
PROJECT ......................................................................................................................................................................... |
366 |
DIGITAL I/0 ........................................................................................................................................................... |
366 |
DISPLAY .................................................................................................................................................................. |
367 |
PLAYREC ....................................................................................................................................................................... |
367 |
VARI PITCH ........................................................................................................................................................... |
368 |
SOLO/MUTE .......................................................................................................................................................... |
368 |
PREVIEW ................................................................................................................................................................ |
368 |
MIDI ......................................................................................................................................................................... |
368 |
SYNC ............................................................................................................................................................................... |
369 |
TEMPO ............................................................................................................................................................................ |
369 |
Metronome ..................................................................................................................................................................... |
369 |
AUTO PUNCH/LOOP ................................................................................................................................................. |
371 |
MARKER ........................................................................................................................................................................ |
371 |
LOCATE ......................................................................................................................................................................... |
371 |
V.FDR .............................................................................................................................................................................. |
372 |
SCENE ............................................................................................................................................................................. |
372 |
AUTOMIX ...................................................................................................................................................................... |
372 |
SURROUND ................................................................................................................................................................... |
372 |
Oscillator/ANALYZER ................................................................................................................................................ |
372 |
Generator ................................................................................................................................................................. |
372 |
Analyzer .................................................................................................................................................................. |
374 |
DATE/TIME .................................................................................................................................................................. |
376 |
Parameter Initialization ................................................................................................................................................ |
376 |
Resetting Mixer and UTILITY Parameters ......................................................................................................... |
376 |
Phrase Sequencer ........................................................................................................................................................... |
377 |
R-BUS .............................................................................................................................................................................. |
377 |
29—Expanding the VS-2480 |
379 |
|
Installing a VS8F-2 Effect Expansion Board .............................................................................................................. |
379 |
|
Connecting a CD-R/RW Drive to the VS-2480 ......................................................................................................... |
381 |
|
Connecting a Zip Drive to the VS-2480 ...................................................................................................................... |
|
381 |
Attaching an MB-24 Level Meter ................................................................................................................................ |
|
382 |
Connecting the MB-24 to the VS-2480 |
................................................................................................................. |
382 |
Replacing the VS-2480’s Battery .................................................................................................................................. |
|
382 |
Installing A New Internal Hard Drive ....................................................................................................................... |
|
384 |
Supplemental Information |
387 |
|
R-BUS Remote Control ................................................................................................................................................. |
|
387 |
DIF-AT Settings ...................................................................................................................................................... |
|
387 |
Using a Roland DIF-AT ......................................................................................................................................... |
|
388 |
ADA-7000 Settings ................................................................................................................................................. |
|
389 |
AE-7000 Settings ..................................................................................................................................................... |
|
390 |
VSR-880 Settings ..................................................................................................................................................... |
|
392 |
Using the VS-2480 with a VM-7000 Mixing System ................................................................................................. |
393 |
|
Using a Roland VE-7000 ............................................................................................................................................... |
|
394 |
Connecting the VE-7000 ........................................................................................................................................ |
|
394 |
18 |
www.rolandus.com |
Roland VS-2480 Owner’s Manual |

|
Table of Contents |
Using the VE-7000 .................................................................................................................................................. |
394 |
Roland MB-24 Notes ..................................................................................................................................................... |
396 |
Factory EZ Routing Templates ................................................................................................................................... |
397 |
Recording Template .............................................................................................................................................. |
397 |
Bouncing Template ................................................................................................................................................ |
398 |
Mixdown Template ............................................................................................................................................... |
399 |
Mastering Template ............................................................................................................................................... |
400 |
Surround 2+2 Template ........................................................................................................................................ |
401 |
Surround 3+1 Template ........................................................................................................................................ |
402 |
Surround 3+2+1 Template .................................................................................................................................... |
404 |
VS-2480 Tick Resolution Table .................................................................................................................................... |
405 |
MIDI Channels and Control Change Maps .............................................................................................................. |
406 |
V-Fader Control Messages ........................................................................................................................................... |
409 |
Automix Parameter List ............................................................................................................................................... |
410 |
V-Studio Song/VS-2480 Project Compatibility ........................................................................................................ |
412 |
Recording Mode Tables ........................................................................................................................................ |
412 |
Parameter Translations ......................................................................................................................................... |
412 |
Glossary 415
Index 423
Roland VS-2480 Owner’s Manual |
www.rolandus.com |
19 |

Step-By-Step Instruction Finder
Step-by-Step Instruction Finder |
|
Activating R-BUS 2, Coaxial or Optical Digital Inputs ................................................................................ |
131 |
Activating Vari Pitch ................................................................................................................................................. |
183 |
Attaching an MB-24 Level Meter ....................................................................................................................... |
382 |
Auto Punch |
|
Editing Auto Punch IN and OUT Points Manually .......................................................................................... |
193 |
Performing an Auto Punch ................................................................................................................................... |
194 |
Setting Auto Punch Points Using Locators ........................................................................................................ |
193 |
Setting Auto Punch Points Using Markers ......................................................................................................... |
193 |
Setting Auto Punch Points When a Project Isn’t Playing ................................................................................. |
192 |
Setting Auto Punch Points While a Project Is Playing ...................................................................................... |
193 |
Automix |
|
AUTOMIX Button Punching ................................................................................................................................ |
330 |
AUTOMIX STATUS BUTTON Punching ........................................................................................................... |
329 |
Activating Automix Mode .................................................................................................................................... |
327 |
Creating a New Automix Event ........................................................................................................................... |
338 |
Deleting an Automix Event .................................................................................................................................. |
338 |
Micro-Editing Automix Data ................................................................................................................................ |
338 |
Navigating to the Automix Screen ...................................................................................................................... |
326 |
Playing Back Automix Data .................................................................................................................................. |
331 |
Recording a Realtime Automix ............................................................................................................................ |
328 |
Taking a Snapshot .................................................................................................................................................. |
331 |
Targeting Automix Data ....................................................................................................................................... |
332 |
The AUTOMIX EDIT Screen ................................................................................................................................ |
331 |
Undoing a Micro-Edit ............................................................................................................................................ |
338 |
Using the AUTOMIX STATUS Buttons .............................................................................................................. |
327 |
Aux Busses |
|
Adjusting an Aux Bus’s Master Level ................................................................................................................. |
207 |
Configuring an Aux Bus from a CH EDIT VIEW Screen ................................................................................. |
207 |
Configuring an Aux Bus from a MASTER EDIT Screen .................................................................................. |
207 |
Metering Aux Bus and Direct Bus Levels ........................................................................................................... |
206 |
Sending a Signal to an Aux Bus ........................................................................................................................... |
206 |
Setting Up a Headphone Mix ............................................................................................................................... |
211 |
CD-R/RW Operations |
|
Burning an Audio CD ............................................................................................................................................ |
350 |
Erasing a CD-RW Disk .......................................................................................................................................... |
352 |
Importing a .WAV File .......................................................................................................................................... |
355 |
Making Sure You Have Enough Space ............................................................................................................... |
350 |
Playing an Audio CD ............................................................................................................................................. |
353 |
Changing Your Current Location in a Project ................................................................................................ |
126 |
Channels |
|
Activating Fader Control of Aux Send Levels ................................................................................................... |
141 |
Assigning KNOB/FADER ASSIGN Feature to Faders .................................................................................... |
140 |
Controlling a Parameter of Your Choice Using a Fader ................................................................................... |
141 |
Selecting a Channel for Editing ............................................................................................................................ |
138 |
Switching Between Input, Track, Aux and FX Channels ................................................................................. |
137 |
20 |
www.rolandus.com |
Roland VS-2480 Owner’s Manual |
|
Step-By-Step Instruction Finder |
To Reset a Channel’s Fader and Pan .................................................................................................................... |
138 |
Turning KNOB/FADER ASSIGN On and Off ................................................................................................... |
141 |
Connecting a CD-R/RW Drive to the VS-2480 ............................................................................................... |
381 |
Connecting a Zip Drive to the VS-2480 ........................................................................................................... |
381 |
DIF-AT |
|
With a TASCAM DA Series Device ..................................................................................................................... |
388 |
With an ADAT ........................................................................................................................................................ |
388 |
Designating the Master Clock for Digital Audio Input ................................................................................. |
133 |
Direct Busses |
|
Configuring a Direct Bus ....................................................................................................................................... |
209 |
External Insert-Like Effects ................................................................................................................................... |
208 |
Metering Aux Bus and Direct Bus Levels ........................................................................................................... |
206 |
Sending a Signal to a Direct Bus ........................................................................................................................... |
209 |
Drives |
|
Clearing a Drive/Partition .................................................................................................................................... |
115 |
Formatting a Hard Drive ....................................................................................................................................... |
114 |
Running Drive Check ............................................................................................................................................. |
117 |
Selecting a New Destination Drive ...................................................................................................................... |
101 |
Selecting an Item in the Project List ....................................................................................................................... |
94 |
To Display the Projects on a Drive ......................................................................................................................... |
94 |
EZ Routing |
|
Initializing and Clearing Routings ....................................................................................................................... |
295 |
Loading an EZ Routing Template ........................................................................................................................ |
297 |
Making Connections on the EZ ROUTING OUTPUT ASSIGN Screen .......................................................... |
294 |
Making Connections on the EZ ROUTING PATCH BAY Screen ................................................................... |
293 |
Making Connections on the EZ ROUTING VIEW Screen ................................................................................ |
292 |
Making Connections on the LOOP EFFECT ASSIGN Screen .......................................................................... |
294 |
Saving an EZ Routing Template ........................................................................................................................... |
296 |
Editing Tracks |
|
Configuring the Behavior of the IN, OUT, FROM and TO Buttons ................................................................ |
247 |
Copying Data by Dragging with Your Mouse ................................................................................................... |
245 |
Moving Data by Dragging with Your Mouse ..................................................................................................... |
244 |
Moving or Copying Data Using the TRACK EDIT Buttons ............................................................................. |
248 |
Performing an Edit Operation From the Edit Pop-Up Menu ........................................................................... |
246 |
Performing an Edit Operation from the TRACK Menu .................................................................................... |
250 |
Performing an Editing Operation with the TRACK EDIT Buttons ................................................................. |
248 |
Placing Edit Points Using the IN, OUT, FROM and TO Buttons .................................................................... |
247 |
Placing Edit Points on a TRACK Menu Operation Screen ............................................................................... |
250 |
Placing Edit Points with Your Mouse .................................................................................................................. |
242 |
Quick-Selecting from the TRACK Menu ............................................................................................................. |
250 |
Selecting Phrases By Clicking or Dragging Your Mouse .................................................................................. |
243 |
Selecting Phrases and Regions with the VS-2480’s Buttons ............................................................................. |
247 |
Selecting Phrases from the SELECT PHRASE Pop-Up Menu .......................................................................... |
243 |
Selecting Regions From the SELECT TRACK Pop-Up Menu .......................................................................... |
244 |
Selecting Regions by Dragging Your Mouse ...................................................................................................... |
243 |
Selecting a Track Using the VS-2480’s Buttons ................................................................................................... |
247 |
Selecting a Track with Your Mouse ..................................................................................................................... |
242 |
Selection Using the TRACK Menu’s Onscreen Selection Tools ....................................................................... |
252 |
Snapping to Grid ..................................................................................................................................................... |
245 |
Effects |
|
Adding Effects to a Headphone Mix ................................................................................................................... |
234 |
Roland VS-2480 Owner’s Manual |
www.rolandus.com |
21 |

Step-By-Step Instruction Finder |
|
Editing an Effect Patch .......................................................................................................................................... |
224 |
External Insert-Like Effects ................................................................................................................................... |
208 |
Inserting Effects on an Input or Track Channel ................................................................................................. |
217 |
Inserting Effects on the MASTER Bus ................................................................................................................. |
219 |
Routing Aux and Direct Busses to Internal Effects ........................................................................................... |
210 |
Routing Effects to Tracks ...................................................................................................................................... |
231 |
Saving an Effect Patch ........................................................................................................................................... |
225 |
Selecting an Effect Patch ........................................................................................................................................ |
223 |
Setting Up an External Loop Effect ..................................................................................................................... |
215 |
Setting Up an Internal Loop Effect ...................................................................................................................... |
213 |
Using Microphone Modeling ............................................................................................................................... |
226 |
Using Speaker Modeling ....................................................................................................................................... |
225 |
Exporting .WAV Files |
|
Burning Exported .WAV Files to CD .................................................................................................................. |
358 |
Exporting Phrases as .WAV Files ......................................................................................................................... |
357 |
Exporting Tracks as .WAV Files .......................................................................................................................... |
356 |
Exporting Tracks as .WAV Files .......................................................................................................................... |
356 |
Exporting a VS-2480 Project .............................................................................................................................. |
110 |
Fader Groups |
|
Assigning Channels to a Fader Group ................................................................................................................ |
155 |
Finding Events with Microscopic Precision Using Scrub ........................................................................... |
185 |
Headphone Mix Setup ............................................................................................................................................. |
211 |
Importing |
|
Recovering Backup Data ....................................................................................................................................... |
107 |
Importing a .WAV File ............................................................................................................................................. |
355 |
Importing a Song from an Earlier V-Studio ..................................................................................................... |
108 |
Input Channel Signals |
|
Removing Input Signals from the Main Mix ...................................................................................................... |
175 |
Routing an Input Signal to Direct Bus ................................................................................................................ |
175 |
Routing to Tracks ................................................................................................................................................... |
174 |
Sending an Input Channel’s Signal into the Main MIX .................................................................................... |
175 |
Installing A New Internal Hard Drive ................................................................................................................. |
384 |
Installing a VS8F-2 Effect Expansion Board .................................................................................................. |
379 |
KNOB/FADER ASSIGN |
|
Activating Knob or Fader Control of Aux Send Levels .................................................................................... |
141 |
Controlling a Parameter of Your Choice ............................................................................................................ |
141 |
To Set What the KNOB/FADER ASSIGN Feature Controls ........................................................................... |
140 |
To Turn the KNOB/FADER ASSIGN Feature On and Off .............................................................................. |
141 |
Locators |
|
Changing Locator Banks ....................................................................................................................................... |
186 |
Clearing a Locator .................................................................................................................................................. |
186 |
Clearing a Locator in Safe Mode .......................................................................................................................... |
188 |
Editing Locators ..................................................................................................................................................... |
186 |
Recalling a Locator ................................................................................................................................................. |
186 |
Recalling a Locator in Safe Mode ......................................................................................................................... |
187 |
Storing a Locator .................................................................................................................................................... |
186 |
Storing a Locator in Safe Mode ............................................................................................................................ |
188 |
Switching Automatically to Locator Mode ........................................................................................................ |
187 |
Looping |
|
22 |
www.rolandus.com |
Roland VS-2480 Owner’s Manual |

|
Step-By-Step Instruction Finder |
Activating Looped Playback ................................................................................................................................. |
182 |
Editing Loop FROM and TO Points Manually ................................................................................................... |
182 |
Setting Loop Points Using Locators ..................................................................................................................... |
181 |
Setting Loop Points Using Markers ..................................................................................................................... |
181 |
Setting Loop Points When a Project Isn’t Playing .............................................................................................. |
181 |
Setting Loop Points While a Project Is Playing .................................................................................................. |
181 |
MIDI |
|
Changing Effect Patches via MIDI ....................................................................................................................... |
303 |
Changing Scenes via MIDI .................................................................................................................................... |
302 |
Receiving SysEx Bulk Dump Data ....................................................................................................................... |
305 |
Remote Control of the VS-2480 with Control Change Messages ..................................................................... |
303 |
Remote Control of the VS-2480 with SysEx Messages ...................................................................................... |
302 |
Sending SysEx Bulk Dump Data .......................................................................................................................... |
304 |
Setting Up a MIDI Metronome ............................................................................................................................. |
306 |
Using the VS-2480 as a MIDI Control Surface .................................................................................................... |
301 |
Markers |
|
Clearing Markers .................................................................................................................................................... |
190 |
Editing Markers ...................................................................................................................................................... |
190 |
Moving the Timeline to a Marker ......................................................................................................................... |
189 |
Placing a Marker ..................................................................................................................................................... |
189 |
Mastering |
|
Building Mastering Tracks Selection-by-Selection ............................................................................................ |
344 |
Editing Mastering Tracks ....................................................................................................................................... |
346 |
Navigating to the Mastering Room ...................................................................................................................... |
343 |
Placing CD Track Markers .................................................................................................................................... |
348 |
Recording Mastering Tracks ................................................................................................................................. |
345 |
Selecting the Mastering Room Operating Mode ................................................................................................ |
343 |
Selecting the Mastering Tracks’ Recording Mode ............................................................................................. |
343 |
Selecting the Mastering V-Tracks ......................................................................................................................... |
344 |
Stretching Effects .................................................................................................................................................... |
346 |
Turning On the Mastering Room ......................................................................................................................... |
343 |
Using the Mastering Tool Kit ................................................................................................................................ |
345 |
Metronome |
|
Programming the Metronome’s Beat Box ........................................................................................................... |
370 |
Sending the Metronome to Outputs .................................................................................................................... |
371 |
Setting Up a MIDI Metronome ............................................................................................................................. |
306 |
Moving Through a Project ...................................................................................................................................... |
180 |
Muting Channels in Mute Mode ........................................................................................................................... |
143 |
Naming |
|
Entering a New Name Using the VS-2480 Controls ............................................................................................ |
74 |
Entering a New Name from a Keyboard ............................................................................................................... |
74 |
Outputs |
|
Routing a Pair of Busses to a Pair of Outputs ..................................................................................................... |
288 |
Routing a Pair of Busses to the Stereo MONITOR Bus ..................................................................................... |
289 |
Routing a Pair of Tracks to a Pair of Outputs ..................................................................................................... |
290 |
Setting Up Pre or Post Track Direct Outputs ...................................................................................................... |
290 |
PAN/AUX SEND 1-8 Knobs |
|
Activating Knob Control of Any Channel Parameter ....................................................................................... |
141 |
Activating Knob Control of Aux Send Levels .................................................................................................... |
141 |
Activating Knob Control of Channel Panning ................................................................................................... |
139 |
Activating Knob Control of Dynamics and EQ Parameters ............................................................................. |
140 |
Roland VS-2480 Owner’s Manual |
www.rolandus.com |
23 |

Step-By-Step Instruction Finder |
|
Assigning KNOB/FADER ASSIGN Switch to Knobs ...................................................................................... |
140 |
Controlling a Parameter of Your Choice ............................................................................................................ |
141 |
Turning KNOB/FADER ASSIGN On and Off .................................................................................................. |
141 |
Phrase Pads |
|
Activating Phrase Pad Mode ................................................................................................................................ |
275 |
Activating Phrase Sequencer Mode ..................................................................................................................... |
275 |
Bouncing Phrase Sequence Tracks ....................................................................................................................... |
286 |
Controlling the Sound of Sequenced Tracks ...................................................................................................... |
285 |
Micro-Editing Sequencer Data ............................................................................................................................. |
283 |
Navigating to the PHRASE SEQUENCE Screens ............................................................................................. |
276 |
Phrase Sequencing Using Step Entry with AutoLoc ......................................................................................... |
279 |
Phrase Sequencing Using Step Entry without AutoLoc ................................................................................... |
280 |
Phrase Sequencing in Realtime ............................................................................................................................ |
278 |
Playing the Phrase Pads ........................................................................................................................................ |
275 |
Quantizing Phrase Sequence Data ....................................................................................................................... |
282 |
Setting Up a Phrase Pad ........................................................................................................................................ |
274 |
Turning On the Phrase Sequencer Playlist Grid ................................................................................................ |
277 |
Using Tie, Rest and BackStep ............................................................................................................................... |
284 |
Pinpointing an Event with the PREVIEW Buttons ........................................................................................ |
184 |
Playing Back Recorded Tracks ............................................................................................................................ |
180 |
Playing the Factory Demos ...................................................................................................................................... |
76 |
Power |
|
Powering Up ............................................................................................................................................................. |
63 |
Turning Off the VS-2480 .......................................................................................................................................... |
80 |
Projects |
|
Backing Up a Project .............................................................................................................................................. |
106 |
Combining Two Projects ....................................................................................................................................... |
104 |
Copying a Project ................................................................................................................................................... |
101 |
Creating a New Project ............................................................................................................................................ |
98 |
Entering a Project Comment ................................................................................................................................... |
99 |
Erasing a Project ..................................................................................................................................................... |
102 |
Exporting a VS-2480 Project .................................................................................................................................. |
110 |
Importing a Song from an Earlier V-Studio ....................................................................................................... |
108 |
Loading a Project ...................................................................................................................................................... |
95 |
Locking and Un-Locking a Project on Your Hard Drive .................................................................................. |
100 |
Marking a Project ..................................................................................................................................................... |
95 |
Optimizing a Project .............................................................................................................................................. |
100 |
Re-Naming a Project ................................................................................................................................................ |
99 |
Recovering Backup Data ....................................................................................................................................... |
107 |
Selecting a New Destination Drive ...................................................................................................................... |
101 |
Selecting an Item in the Project List ....................................................................................................................... |
94 |
Splitting a Project ................................................................................................................................................... |
103 |
To Display the Projects on a Drive ........................................................................................................................ |
94 |
Quick Routing |
|
An Input Signal to a Track .................................................................................................................................... |
173 |
Recording S/P DIF-Format Digital Input Signals ........................................................................................... |
134 |
Recording a New Track ........................................................................................................................................... |
179 |
Replacing the VS-2480’s Battery ...................................................................................................................... |
382 |
Resetting Mixer and UTILITY Parameters ...................................................................................................... |
376 |
Routing |
|
24 |
www.rolandus.com |
Roland VS-2480 Owner’s Manual |

|
Step-By-Step Instruction Finder |
Effects to Tracks with EZ Routing ........................................................................................................................ |
233 |
Effects to Tracks with Quick Routing .................................................................................................................. |
232 |
Input Channel Signals to Tracks with EZ Routing ............................................................................................ |
174 |
Input Channel Signals to Tracks with Quick Routing ....................................................................................... |
173 |
Input Signals to Input Channels ........................................................................................................................... |
136 |
Tracks to Track with EZ Routing .......................................................................................................................... |
198 |
Tracks to Track with Quick Routing .................................................................................................................... |
197 |
Scenes |
|
Changing Scene Banks ........................................................................................................................................... |
145 |
Clearing a Scene ...................................................................................................................................................... |
145 |
Clearing a Scene in Safe Mode .............................................................................................................................. |
147 |
Editing Scenes .......................................................................................................................................................... |
145 |
Leaving Scene Mode ............................................................................................................................................... |
145 |
Protecting a Channel’s Settings When a Scene is Recalled ............................................................................... |
146 |
Recalling a Scene ..................................................................................................................................................... |
145 |
Recalling a Scene in Safe Mode ............................................................................................................................. |
146 |
Storing a Scene ........................................................................................................................................................ |
144 |
Storing a Scene in Safe Mode ................................................................................................................................ |
147 |
Setting Up |
|
Roland DS-90A and DS-50A Digital Monitors ..................................................................................................... |
75 |
The VS-2480’s Clock ................................................................................................................................................. |
65 |
VGA Monitor, Mouse and Keyboard ..................................................................................................................... |
64 |
Soloing Channels in Solo Mode ............................................................................................................................ |
143 |
Spectrum Analysis Display |
|
Analyzing Your Speakers and Room ................................................................................................................... |
375 |
Powering the Spectrum Analysis Display .......................................................................................................... |
374 |
Setting Up the Spectrum Analysis Display ......................................................................................................... |
375 |
Surround |
|
Positioning a Signal in the Surround Field ......................................................................................................... |
322 |
Turning on Surround Mode .................................................................................................................................. |
321 |
Synchronization |
|
Converting a Sync Track to a Tempo Map .......................................................................................................... |
314 |
Creating a Sync Track Automatically .................................................................................................................. |
311 |
Creating a Tempo Map from Markers ................................................................................................................. |
314 |
Exchanging Digital Audio Data During Synchronization ................................................................................ |
317 |
Generating a Sync Track from Markers ............................................................................................................... |
311 |
Recording a Sync Track from an External Device .............................................................................................. |
311 |
Setting Up the VS-2480 as a Sync Slave ............................................................................................................... |
315 |
Setting Up the VS-2480 as the Sync Master ......................................................................................................... |
315 |
Shaping a Tempo Map By Hand .......................................................................................................................... |
313 |
Shifting the Project Start Time .............................................................................................................................. |
316 |
Starting Synchronized Playback with the VS-2480 as Master .......................................................................... |
315 |
Starting Synchronized Playback with the VS-2480 as Slave ............................................................................. |
317 |
To Set an Analog Input Level ................................................................................................................................ |
130 |
Track Editing |
|
Selecting Phrases from the SELECT PHRASE Pop-Up Menu .......................................................................... |
243 |
Selecting Regions From the SELECT TRACK Pop-Up Menu .......................................................................... |
244 |
Turning Fader Control On or Off .......................................................................................................................... |
300 |
Turning Phantom Power On or Off ..................................................................................................................... |
130 |
Undoing a Track Recording or Editing Operation ............................................................................................ |
73 |
Roland VS-2480 Owner’s Manual |
www.rolandus.com |
25 |

Step-By-Step Instruction Finder |
|
Using Jump ................................................................................................................................................................... |
180 |
Using Microphone Modeling .................................................................................................................................. |
226 |
Using Speaker Modeling ......................................................................................................................................... |
225 |
Using a Roland VE-7000 ........................................................................................................................................ |
394 |
Using the VS-2480 with a VM-7000 Mixing System ................................................................................ |
393 |
Viewing a CH EDIT Screen .................................................................................................................................... |
149 |
Zooming In and Out on the Playlist .................................................................................................................... |
123 |
26 |
www.rolandus.com |
Roland VS-2480 Owner’s Manual |

1—Welcome
Congratulations on the purchase of your Roland VS-2480 Digital Studio Workstation. The VS-2480 will allow you to take your music—or any other kind of sound—from the first spark of inspiration to completed recording.
Although the VS-2480 is designed to be simple to operate, the sheer number of tools it provides do require some introduction and explanation. That’s what the VS-2480 Owner’s Manual is for. Of course, what you do with these tools is up to you and your imagination.
If you’ve purchased a VS8F-2 Effect Board, MB-24 Meter Bridge,VS-CDRII/CD-RACK or VE-7000 for your VS-2480—or would like to attach a Zip® drive—you may want see Chapter 29, beginning on Page 379 before reading the Owner’s Manual.
Your VS-2480 is an extremely reliable device. However, there’s no guarantee against data loss due to improper use of theVS-2480 or unforeseen events. Roland Corporation assumes no liability concerning such loss of data.
About this Manual
How the VS-2480 Owner’s Manual is Organized
The VS-2480 Owner’s Manual explains the VS-2480 ‘s architecture, features, operations and settings. It also provides application suggestions and presents step-by-step procedures. To get the most from your VS-2480, we recommend reading the entire manual. The structure of the manual generally reflects the order in which a typical signal flows through the VS-2480, with extra explanations for beginners at the front.
If you’d like to get to work immediately, you may first want to:
•set the VS-2480’s internal clock and calendar—The VS-2480 time-stamps each recording to make it easy for you to keep track of your work. See Page 65 for instructions.
•connect a mouse, ASCII keyboard and VGA monitor—See Page 64 for more information.
Here’s where you’ll find some instructions that describe how to perform some basic operations:
•“Creating a New Project”—Page 98
•“Recording a New Track”—Page 179
•“Backing Up a Project”—Page 106
•“Inserting Effects on an Input or Track Channel”—Page 217
•“Setting Up an Internal Loop Effect”—Page 213
•“Mixing”—Page 202
These procedures will get you up and running, but, of course, they’re no substitute for actually reading the manual and really learning how the VS-2480’s features work.
Roland VS-2480 Owner’s Manual |
www.rolandus.com |
27 |
1—Welcome
To make it easy for you to find the manual’s numerous step-by-step procedures, we’ve assembled a “Step-by-Step Instruction Finder” that starts on Page 20. There’s also a standard Table of Contents at the front of the book and an Index at the back.
Additional information can be found in the“Supplemental Information” chapter starting on Page 387.
In this manual, illustrations that show VS-2480 screens reflect their appearance at the time the manual was written. As the VS-2480’s software is enhanced through operating system upgrades, the appearance of the VS-2480’s screens may change.
Names
Throughout the VS-2480 Owner’s Manual, the names of buttons, knobs, faders, jacks—as well as settings that appear in the display—are shown exactly as they look on the
VS-2480 itself. As a result, names printed on the VS-2480 are shown completely in capital letters. For example, the button labeled“PROJECT” will appear in the manual as the PROJECT button, or simply PROJECT, as in“Press PROJECT.” Settings on the display are shown in the same lowerand upper -case letters they use onscreen.
A few buttons serve several purposes and have long names. In such cases, we’ll refer to the button by the name that reflects its current use. For example, if we want to view CH EDIT parameters, we’ll say to press the“desired CH EDIT button,” not the“desired CH EDIT/SELECT/PHRASE SEQ STATUS/AUTOMIX STATUS” button. Some buttons have two labels. If we need to refer to both, we’ll show the labels with a bullet between them, as with the HOME•DISPLAY button.
The F 1-6 buttons beneath the display do different things at different times. We’ll show an F button’s current function in parentheses after its name, as in“F1 (INPUT).”
The four arrow keys are a special case. Sometimes, we’ll collectively refer to , , and as“cursor” buttons since they allow you to move, or “cursor,” around in the VS-2480’s display.
Note, Tip, Glossary and Warning Icons
Throughout the VS-2480 Owner’s Manual, you find the symbols shown below in the lefthand margins. Here’s what these symbols mean.
Notes provide additional information about the topic described in the main text.
Tips offer interesting ways to use the feature under discussion.They’ll also let you know why you should care about what’s being said.
This symbol will be of special interest to beginners, because the word—or words—to its right can be found in the glossary that starts on Page 415.
Make sure you pay attention whenever you see the Warning symbol. Warnings provide important information that will help you avoid damage to your recordings,VS-2480, other equipment or even yourself.
28 |
www.rolandus.com |
Roland VS-2480 Owner’s Manual |

1—Welcome
Other Documents in the VS-2480 Box
The VS-2480 User’s Guide provides a quick look at the VS-2480’s major features. It’ll take you through the steps for a variety of basic operations.
The VS-2480 Appendices provide additional detailed information not included in the Owner’s Manual. For example, the VS-2480 will display an error message if you attempt to perform an operation that theVS-2480 doesn’t allow—the Appendices contain a list of all error messages and an explanation of what each one means.You’ll also find a Troubleshooting section that can help you figure out what to do if the VS-2480 behaves in an unexpected manner.
Getting More Help
If you have questions that can’t be answered by the VS-2480 Owner’s Manual, Roland offers a number of informational resources.
The Roland US Web site
Visit the Roland US Web site at: http://www.rolandus. com.You’ll find lots of information about the VS-2480 and a wealth of support materials. If you’re new to recording or mixing, you’ll especially enjoy the downloadable booklets for beginners.
The Roland US Faxback System
If you can receive faxes, you can access our library of support documents 24 hours a day, seven days a week. Call 323-890-3780 for more information about using our faxback system.
Roland US Product Support
If you need help from a real, live person, call the Roland US Product Support team at 323-890-3740, Extension 3741.
Roland VS-2480 Owner’s Manual |
www.rolandus.com |
29 |

1—Welcome
30 |
www.rolandus.com |
Roland VS-2480 Owner’s Manual |
 Loading...