


Users
Guide
C28WF535N
C32WF535N
S C R E E N

Dear HITACHI customer
Congratulations on your purchase of the very latest state of the art television from HITACHI. At Hitachi we pride ourselves on producing high quality
televisions with outstanding picture and audio capabilities. Together with our reputation for superior reliability, you should enjoy many years of trouble free operation from your TV.
Please read this Users Guide thoroughly, especially the Safety
Notes on Page 4. Mis-use may cause damage to your television,
which could shorten its lifespan, or cause injury to yourself. Should
you encounter any difficulty in the set-up or operation of your television, firstly refer to the Trouble Shooting Guide at the rear of
this manual.
In the unlikely event of a problem occurring with your TV, switch off at the mains socket, pull out the plug, and contact your dealer immediately.
Under no circumstances remove the rear cover of your TV. Never guess or take any chances with electrical equipment of any kind - it is better to be safe than sorry!

contents |
|
safety aspects |
|
television safety ................................................................................ |
4 |
battery safety and installation............................................................ |
5 |
TV controls overview |
|
front control panel details .................................................................. |
6 |
rear socket and scart details. ............................................................ |
7 |
set-up |
|
aerial, decoder, VCR and DVD installation ........................................ |
8 |
handset controls |
|
programme tuning ............................................................................ |
9 |
television/VCR operation.................................................................... |
10 |
Teletext functions .............................................................................. |
11 |
tuning in |
|
TV set up and automatic tuning procedure ...................................... |
12 |
manual tuning procedure .................................................................. |
14 |
programme sort ................................................................................ |
16 |
programme name change and download ........................................ |
17 |
viewlink .............................................................................................. |
18 |
customer I.D. ....................................................................................20 |
|
password change .............................................................................. |
21 |
programme, sound and vision adjustment |
|
picture controls .................................................................................. |
22 |
NICAM and stereo sound controls .................................................... |
23 |
audio and equaliser controls ............................................................ |
24 |
sound mode ...................................................................................... |
26 |
digital audio setup ............................................................................ |
28 |
digital audio status - decode mode .................................................. |
29 |
digital audio status - display format .................................................. |
30 |
speaker setup .................................................................................... |
31 |
surround setup .................................................................................. |
33 |
television features |
|
sleep timer and on screen display .................................................... |
36 |
wide screen viewing .......................................................................... |
37 |
Teletext operation ............................................................................ |
39 |
other equipment |
|
other equipment connection ............................................................ |
40 |
signal source entry ............................................................................ |
41 |
audio visual setup .............................................................................. |
43 |
other features |
|
language and installation .................................................................. |
44 |
programme download and demo mode .......................................... |
45 |
information |
|
trouble shooting guide - digital sound .............................................. |
46 |
trouble shooting guide ...................................................................... |
48 |
guarantee .......................................................................................... |
49 |
HITACHI environmental notice .......................................................... |
50 |
technical data .................................................................................... |
51 |
3

television safety safety aspects
4
This television has been designed and manufactured to meet international safety standards, but like any electrical equipment, care must be taken if you are to obtain the best results and safety is to be assured.
NEVER let anyone, especially children, push anything into holes, slots, or any other opening in the case - this could result in a fatal electrical shock. Under NO circumstances remove the rear cover of your TV!
NEVER guess or take chances with electrical equipment of any kind - it is better to be safe than sorry!
DO read the operating instructions before you attempt to use the equipment.
DO observe the manufacturers instructions when connecting extension leads to your TV. The fuse should be a 5 Amp fuse with the safety symbols and displayed. If you are in any doubt about the extension installation, please consult a competent electrician.
SHOULD you require to replace the fuse in the moulded plug with a new fuse, then please replace with one of the same value, type and approval as the original. Ensure the fuse cover is returned to its original position.
TO prevent scratching or damaging the tube face, do not knock or rub the surface with sharp or hard objects. Clean the screen with a soft cloth moistened with warm water and dry with a soft cloth. A mild soap may be used if the screen is extremely dirty. Do not use harsh or abrasive cleaners!
always |
always |
always |
+ |
+ |
+ |
+ |
- |
- |
- |
- |
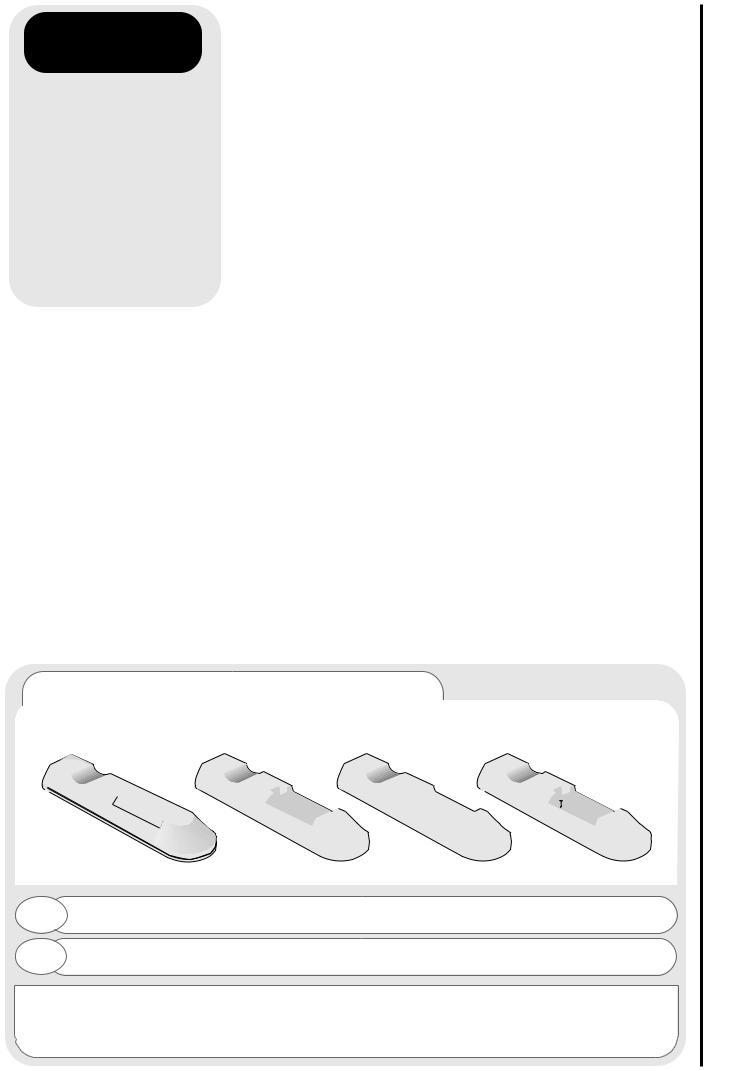
Take care to fit your batteries |
Replace the whole set of |
Store unused batteries in |
correctly, observing the plus |
batteries at one time, taking |
their packaging and away |
‘+’ and minus ‘-’ marks on |
care not to mix old and new |
from metal objects which |
the battery and appliance. |
batteries of different types, |
may cause a short circuit |
Incorrect fitting can cause |
since this can result in |
resulting in leakage, or in |
leakage, or in extreme |
leakage, or in extreme |
extreme cases, fire or |
cases, fire or explosion. |
cases, fire or explosion. |
explosion. |
always never! never!
Remove dead batteries from equipment, and all batteries from equipment that is to be left for long periods of time without any use. Otherwise the batteries may leak and
cause damage.
CHARGE
Never dispose of |
Never attempt to recharge |
|
ordinary batteries, either in a |
||
fire as this can |
||
charger or by applying heat to |
||
explosion |
||
them. They may leak, cause |
||
Respect the |
||
fire or even explode. |
||
always dispose of |
||
Rechargeable NiCAD batteries |
||
in an environmentally |
||
and chargers can be |
||
manner. |
||
purchased from any good |
||
|
||
|
High Street electrical retailer. |
by lifting up the cover at the recess.
handset as shown and replace cover.
correct, that is, ‘+’ to ‘+’, ‘-’ to ‘-’.
guidelines.
battery safety and installation safety aspects
5

front control panel details TV controls overview
6
on/off button
Use this to switch your TV on and off. (When switched off using this button
your TV consumes no power - unlike when in standby mode).
television controls door panel
To use the controls push the door in and release.
TV mode light
when when in
and flash
control the TV.
infra-red lens
This is for reading commands sent
from your remote control handset.
|
|
|
|
|
|
|
|
|
|
|
|
|
|
|
|
|
|
|
|
|
|
|
|
|
|
|
|
|
|
|
|
|
|
|
|
|
|
|
|
|
|
|
|
|
|
|
|
|
|
|
|
|
|
|
|
|
|
|
|
|
|
|
|
|
|
|
|
|
|
|
|
|
|
|
|
|
|
|
|
|
|
|
|
|
|
|
|
|
|
|
|
|
|
|
|
|
|
|
|
|
|
|
|
|
|
|
|
|
|
|
|
|
|
|
|
|
|
|
|
|
|
|
|
|
|
|
|
|
|
|
|
|
|
|
|
|
|
|
|
|
|
|
|
|
|
|
|
|
|
|
|
|
|
|
|
|
|
|
|
|
|
|
|
|
|
|
|
|
|
|
|
|
|
|
|
|
|
|
|
|
|
|
|
|
|
|
|
|
|
|
|
|
|
|
|
|
|
|
|
|
|
|
|
|
|
|
|
|
|
|
|
|
|
|
|
|
|
|
|
|
|
|
|
|
|
|
|
|
|
|
|
|
|
|
|
|
|
|
|
|
|
|
|
|
|
|
|
|
|
|
|
|
|
|
|
|
|
|
|
|
|
|
|
|
|
|
|
|
|
|
|
|
|
|
|
|
|
|
|
|
|
|
|
|
|
|
|
|
|
|
|
|
|
|
|
|
|
|
|
|
|
|
|
|
|
|
|
|
|
|
|
|
|
|
|
|
|
|
|
|
|
|
|
|
|
|
|
|
|
|
|
|
|
|
|
|
|
|
|
|
|
|
|
|
|
|
|
|
|
|
|
|
|
|
|
|
|
|
|
|
|
|
|
|
|
|
|
|
|
|
|
|
|
|
|
|
|
|
|
|
|
|
|
|
|
|
|
|
|
|
|
|
|
|
|
|
|
|
|
|
|
|
|
|
|
|
|
|
|
|
|
|
|
|
|
|
|
|
|
|
|
|
|
|
|
|
|
|
|
|
|
|
|
|
|
|
|
|
|
|
|
|
|
|
|
|
|
|
|
|
|
|
|
|
|
|
|
|
|
|
|
|
|
|
|
|
|
headphone socket |
|
|
|
|
|
|
|
|
|
|
|
|
|
|
|
|
|
|
|
|
|
|
|
|
|
|
|
|
|
|
|
|
|||
|
|
|
|
|
|
|
|
|
|
volume buttons |
|
|
|
|
|
|
|||||||||||||||||||
|
|
|
|
|
|
|
|
|
|
|
|
|
|
|
|
|
|
|
|
|
|
|
|
|
|||||||||||
|
|
Used with |
|
|
|
|
|
|
|
|
|
|
Used to increase ‘+’, or |
|
|
|
|||||||||||||||||||
|
|
|
|
|
|
|
|
decrease ‘-’ your TV's sound (or |
|
|
|
|
|||||||||||||||||||||||
headphones (3.5mm stereo |
|
|
|
|
|
|
|
|
|
||||||||||||||||||||||||||
|
|
|
|
|
|
cursor right and left when in On |
|
|
|
|
|||||||||||||||||||||||||
|
jack plug required). |
|
|
|
|
|
|
|
|
|
|||||||||||||||||||||||||
|
|
|
|
|
|
|
|
|
|
Screen Display menus). |
|
|
|
|
|||||||||||||||||||||
|
|
|
|
|
|
|
|
|
|
|
|
|
|
|
|
|
|||||||||||||||||||
|
|
S-VHS sockets |
|
|
|
|
|
|
|
|
|
|
|
|
program buttons |
|
|
|
|||||||||||||||||
audio/video sockets |
menu button |
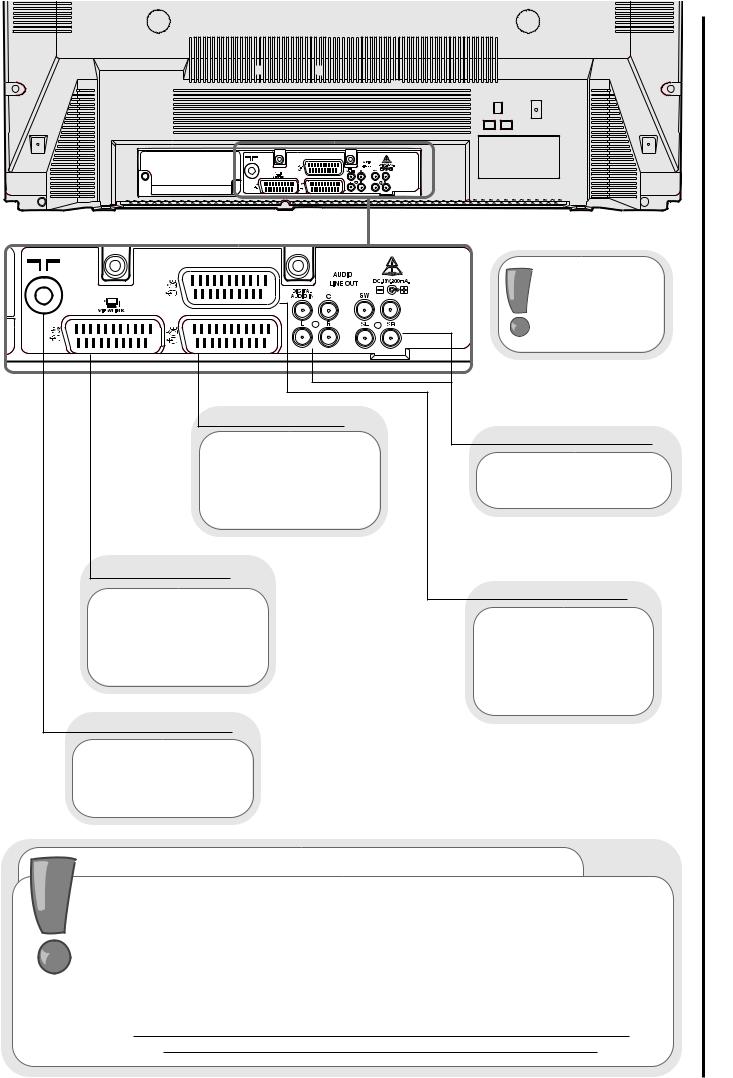
audio output (RCA)
Use this to connect to external amplifier or Hi-Fi system.
Use this to connect digital video broadcasting equipment, home computers, home entertainment systems and DVD players etc. to your TV.
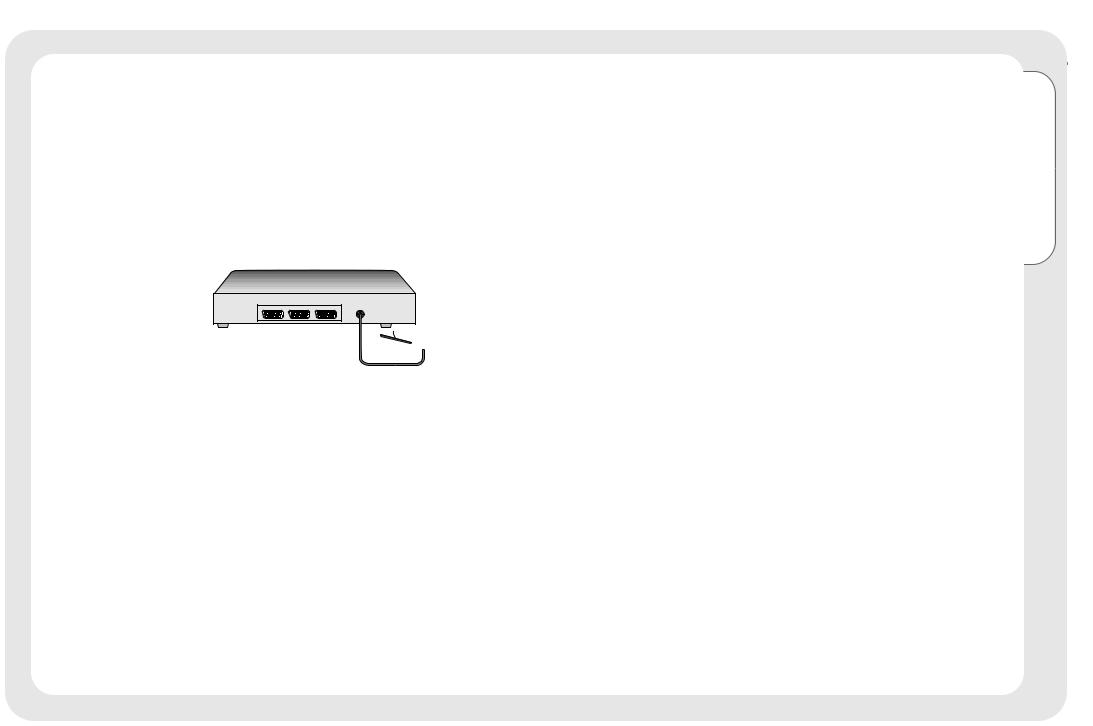
important note on installation
If you intend placing this TV into a cabinet or wall is at least a 100mm (10cm) gap to the sides, rear
is to allow for adequate
Do not allow soft furnishings, such as curtains to in operation.
Never place the TV onto a carpet during normal ventilation slots on the base of
Always place the TV on a flat surface, or if supplied,
Failure to observe the above guidelines overheating of your TV, or even, in
rear socket and scart details TV controls overview
8
aerial, decoder, VCR and DVD installation set-up
1
2
3
AERIAL
STB/DECODER
IN
AUX |
VCR |
TV |
 OUT
OUT
|
IN |
1 |
2 |
DVD PLAYER/COMPUTER/GAMES
Setup TV
VCR
TV
AV2/
DECODER |
|
AV4 |
|
|
|
AV1/TV |
AV1 |
AV2 |
SCART LEADS * (optional) |
3 |
|
connection lead to |
IMPORTANT |
|
|
‘in’ socket marked |
NOTE : |
|
|
|
|
|
When you |
|
|
connect your VCR |
|
to VCR |
to your television, |
|
. |
the Audio Visual |
|
|
option has to be |
|
|
set correctly to |
Connect VCR ‘out’ to TV ‘in’ socket |
ensure best picture |
|
marked |
. |
quality - see audio |
|
|
visual setup section. |
RF LEADS (1 SUPPLIED)
VHS video equipment |
|
leads should be |
should be connected |
|
between your TV and |
AV1 scart socket located |
|
to enhance |
rear of your TV. A |
|
and sound quality. |
programme number |
|
are essential if you |
assigned to AV1, allowing |
|
stereo TV and VCR and |
easier access to |
wish |
stereo sound from your |
equipment viewing. How to |
|
leads can be |
AV signal to dedicated |
purchased from your Hitachi |
|
numbers is explained in |
dealer |
good High Street |
source entry section. |
|
retailer. |
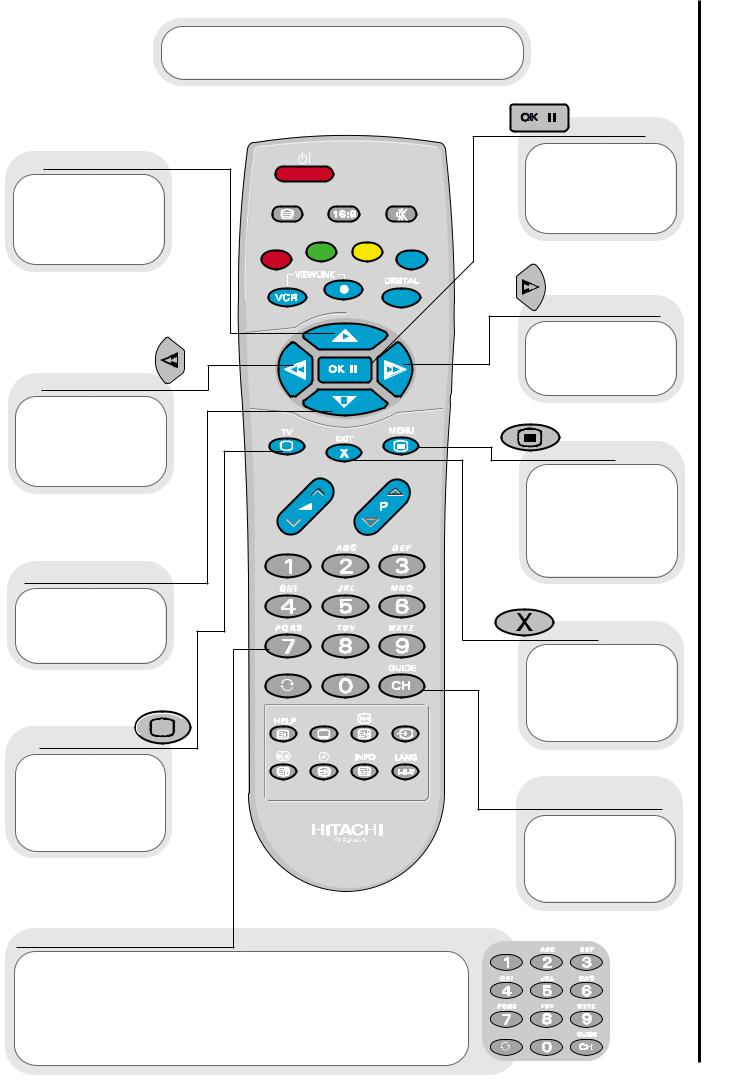
The handset controls shown below are used when programming your TV and to adjust the sound and picture features.
cursor up
Use this button to move the menu selection box up.
cursor left
cursor down 
Use this button to move the menu
selection box down.
This button is used to return to the
previous on screen menu you were
viewing, or to cancel a selection.
 frequency
This allows you to directly input known broadcasting CH or
frequency numbers.
number/letter buttons
These number buttons can also be used
are required for some features e.g. programme To enter letters: Press the number
corresponding letter (written above the second etc.
Example: Press number key 2, twice for ‘A’, four times for ‘C’.
programme tuning handset controls
9

television/VCR operation handset controls
10
The handset controls |
|
shown here are used when your |
|
TV is in normal operation. |
mute |


 VCR/record 16:9 button


This button
allows you to switch between the various
wide screen features of your TV
(see wide screen viewing section).
Press both buttons
simultaneously to stop recording (only
available if VCR is Viewlink compatible - see viewlink
frequency
This allows you to directly input known broadcasting CH or
frequency numbers.
info
Press this button to view the current TV status.
VCR Operation
Your handset incorporates controls for operation of HITACHI Video Cassette Recorders. These controls are PLAY, STOP, REWIND, FAST FORWARD and PAUSE.
To PLAY : Press simultaneously. 

To STOP : Press simultaneously. 

To REWIND :
simultaneously.
To FAST handset
To PAUSE : simultaneously. 

Press button Teletext
Pressing button will
the index
update
entered Teletext
The handset controls shown here are used when you are operating Teletext.
 colours
(red, green, yellow, blue)
pages in these will instructions
to a or title.
 television
 hold
hold
Use this to ‘freeze’ the Teletext page on display to prevent the page changing (press again to continue).
 expand
subtitles
See ‘Teletext operation’ section for details of
Teletext services
Teletext functions
11
TV set-up and automatic tuning procedure tuning in
12
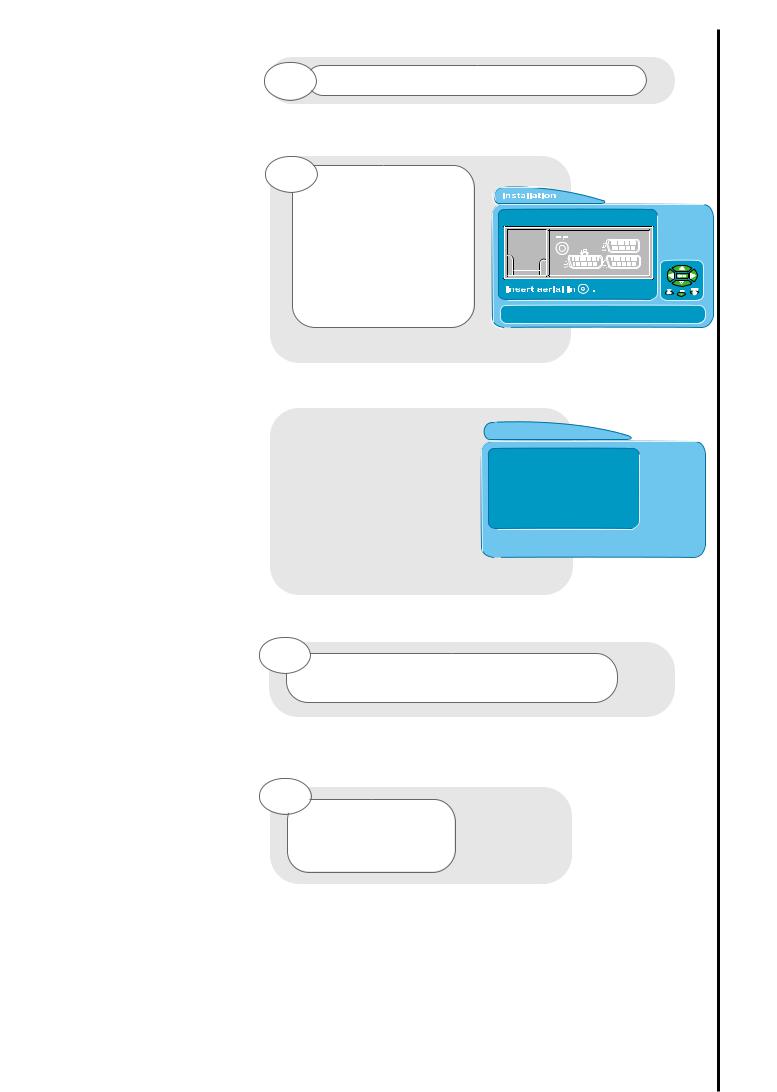
connecting to the mains socket
Important - If you have not already done so, please read the television safety section before connecting your television and external equipment.
insert plug...
...and switch on
important note - on-screen help
When using the
menus of your Television, extra on screen help will be
displayed in this window.
the language of TV’s display. Use the cursor buttons choose your language.
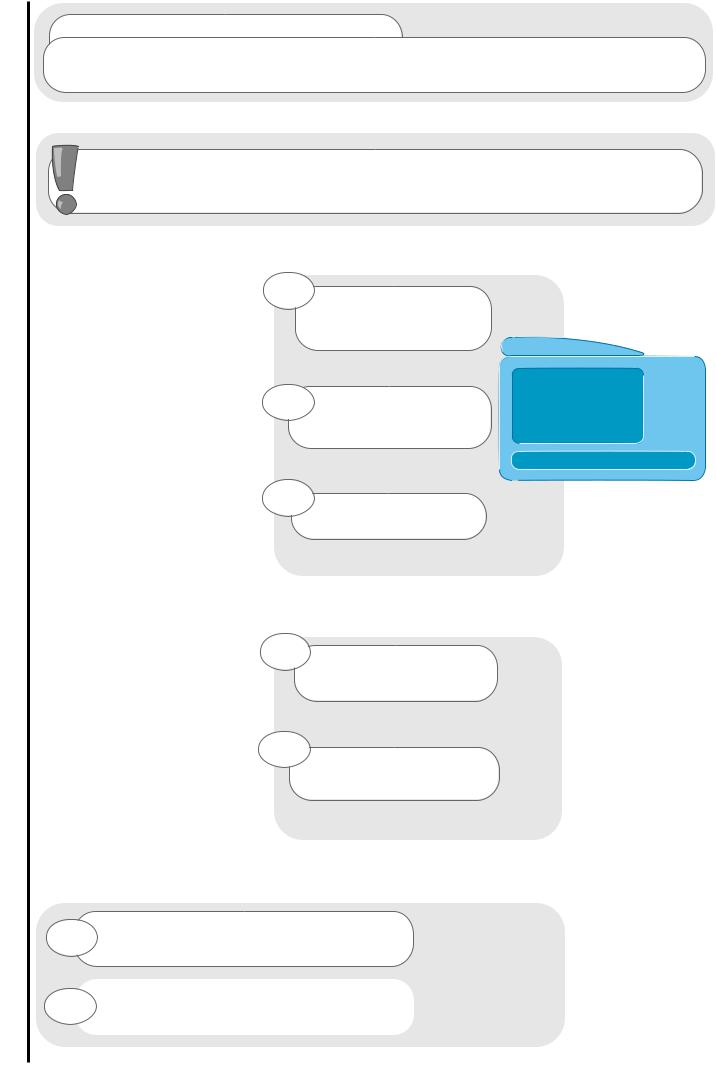
5 country requires you
select the country in which you will be
your TV. Use the buttons to
adjust.
PLEASE NOTE : compatible,
the programme viewlink
TV set-up and automatic tuning procedure tuning in
13
manual tuning procedure tuning in
6
7
14
you to input steps below and
.
Autotune. See

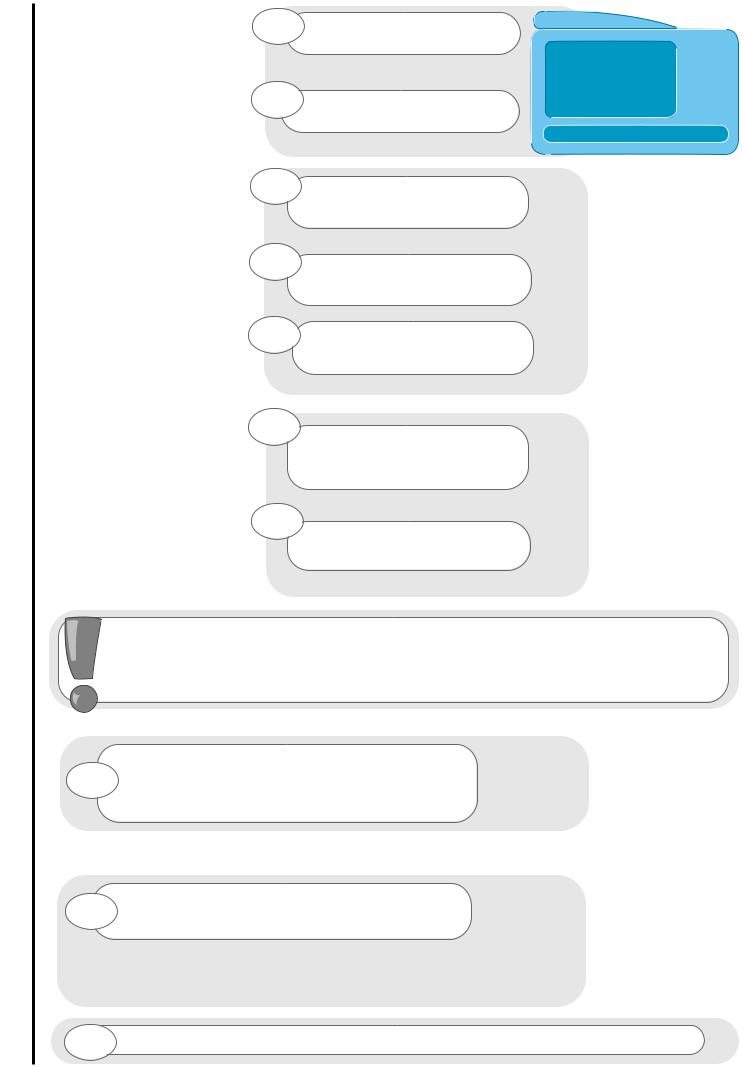
entry method 1
The first option will be to fine frequency either UP or DOWN using cursor keys or search tune UP or
UP/DOWN cursor
entry method 2
If the CH key  is pressed, you can enter a two digit channel number (CH) using buttons 0 - 9 on your handset.
entry method 3
If the CH key  is pressed again, you can enter a two digit S-band number using buttons 0 - 9 on your handset.
entry method 4
If the CH  key is pressed again, manually input a five digit frequency (if known)
buttons 0 - 9 on your handset.
8 |
Once the method of entry has been |
the new frequency or channel |
|
entered, this can then be stored in |
by pressing the OK button. |
|
|
|
If you have a Viewlink compatible |
AV key |
to transfer any |
information |
your VCR. |
|
tuning in
15
programme sort tuning in
16
1 |
MAIN |
|
|
2 |
button |
3 |
accept |
4
5 |
accept |
|
6 cursor keys you wish to
move.
7
a programme - this makes are used to change channels.
your chosen selection turn red. selection. If a hidden channel is to with the handset digits 0 to 9.
If you have a Viewlink compatible video, press the AV key to transfer any information changes to your VCR.
 Loading...