


User’s Manual
5.8 GHz Cordless
Telephone/Speakerphone
Answering System EP5995
with Caller ID & Call Waiting
FLASH |
CANCEL |

Congratulations on your purchase of this AT&T product.
Before using this telephone system, you must read Important safety information on pages 75-77 of this manual.
NEED HELP?
Our representatives are here
to help you with any questions concerning the operation of this product, available accessories, or any other related issues.
Call toll free
1 (800) 222-3111
In Canada, call
1 (866) 288-4268
or visit our website at www.telephones.att.com
Model No.: AT&T EP5995
Product Name: 5.8 GHz Cordless Telephone
Serial No.: SN:
(found at the bottom of the telephone base)
Purchase Date:
Place of Purchase:

IMPORTANT
Information about Caller ID with Call Waiting
This product has a Caller ID with Call Waiting feature that works with services from your local telephone service provider.
Caller ID with Call Waiting lets you see the name of the caller before you answer the telephone, even when you’re on another call.
You may need to change your phone service to use this feature. Contact your telephone service provider if:
•you have both Caller ID and Call Waiting, but as separate services (you may need combined service).
•you have only Caller ID service, or only Call Waiting service.
•you don’t subscribe to any Caller ID or Call Waiting services.
You can use this product with regular Caller ID service, or you can use this product’s other features without subscribing to either Caller ID or combined Caller ID with Call Waiting service.
There are fees for Caller ID services, but these may not be available in all areas.
Depending on your service subscription, you may see the caller’s number, or the caller’s name and number. This product can provide information only if both you and the caller are in areas offering Caller ID service, and if both telephone companies use compatible equipment. The time and date are sent by the service provider along with the call information.
Copyright © 2006 Advanced American Telephones.All Rights Reserved. AT&T and the Globe Design are trademarks of AT&T Corp., licensed to Advanced American Telephones.

You must install and |
STOP! |
See page 8 |
|
charge the battery before |
for easy instructions. |
||
|
|||
using the telephone. |
|
For customer service or product information, visit our website at www.telephones.att.com or call 1 (800) 222-3111. In Canada, call 1 (866) 288-4268.
 Caution: To reduce the risk of fire or injury to persons or damage to the telephone, read and follow these instructions carefully:
•Use only the supplied rechargeable battery (Model 102) or AT&T replacement battery (Model 103).
•Do not dispose of the battery in a fire; it could explode. Check with local codes for special disposal instructions.
•Do not open or mutilate the battery. Released electrolyte is corrosive and
may cause damage to the eyes or skin. It may be toxic if swallowed.
•Exercise care in handling batteries in order not to create a short circuit with conductive materials such as rings, bracelets, and keys.The battery or conductor may overheat and cause harm.
•Charge the battery provided with or identified for use with this product only in accordance with the instructions and limitations specified in this manual.
•Observe proper polarity orientation between the battery and battery charger.
Do not disassemble your telephone.There are no user-serviceable parts inside. Refer to qualified service personnel for servicing.

Add new handsets to make your telephone more versatile (see page 65)
Your telephone can accommodate up to eight cordless handsets.You can add new handsets (AT&T EP590-3, purchased separately) anytime, but each must be registered with the telephone base before use.
The handset provided with your telephone is automatically registered as Handset 1. Additional handsets will be assigned numbers in the order they are registered (2, 3, 4, 5, 6, 7, and 8).You can register a maximum of eight handsets.
|
|
|
|
|
|
Handset 1 |
Telephone base |
Handset 2 Handset 3 Handset 4 Handset 5 Handset 6 Handset 7 Handset 8 |
|||
 NOTE: A maximum of three handsets and the telephone base can be on a call at the same time.
 NOTE: The EP5995 has one pre-registered handset. You can purchase and register seven additional handsets (EP590-3) to the telephone base of EP5995.

User’s manual
5.8 GHz Cordless
Telephone/Speakerphone
Answering System EP5995
FLASH |
CANCEL |
with Caller ID & Call Waiting
Table of Contents
Getting Started |
|
Quick reference guide........................ |
2 |
Parts checklist ...................................... |
5 |
Before you begin.................................. |
6 |
Telephone base installation................ |
7 |
Battery installation & charging.......... |
8 |
Wall mounting...................................... |
9 |
Belt clip & optional headset............ |
10 |
Dialing a call log entry...................... |
44 |
Reviewing your redial log................. |
45 |
Reviewing voice messages ............... |
47 |
Base Call Log & Redial |
|
Reviewing your call log..................... |
49 |
Dialing a call log entry...................... |
51 |
Reviewing your redial log................. |
52 |
Telephone Setup |
|
Handset screen images..................... |
11 |
Handset sounds.................................. |
12 |
Handset messages ............................. |
14 |
Handset settings................................. |
15 |
Base settings ....................................... |
19 |
Telephone Operation |
|
Basic handset operation................... |
23 |
Basic base operation......................... |
25 |
Options while on calls...................... |
27 |
Intercom calls..................................... |
28 |
Handset Directory |
|
New directory entries...................... |
30 |
Directory search................................ |
32 |
Editing or deleting an entry............. |
33 |
Base Directory |
|
New directory entries...................... |
36 |
Directory search................................ |
38 |
Editing or deleting an entry............. |
39 |
Answering System Operation
Setting answering system................. |
55 |
Outgoing announcements................ |
58 |
Message playback............................... |
59 |
Recording and playing memos........ |
60 |
Message window displays................. |
61 |
Remote access ................................... |
62 |
Appendix |
|
Display screen status icons.............. |
63 |
Alert tones and indicator lights...... |
64 |
Adding new handsets........................ |
65 |
Replacing a handset........................... |
66 |
Charging spare battery pack........... |
68 |
Troubleshooting................................. |
69 |
Important safety information.......... |
75 |
FCC Part 68 andACTA.................... |
78 |
FCC Part 15........................................ |
80 |
Limited warranty ............................... |
81 |
Index..................................................... |
84 |
7HFKQLFDO VSHFLÀFDWLRQV..................... |
86 |
Remote access wallet card.............. |
87 |
Handset Call Log and Redial
Reviewing your call log..................... |
42 |
1
Getting started
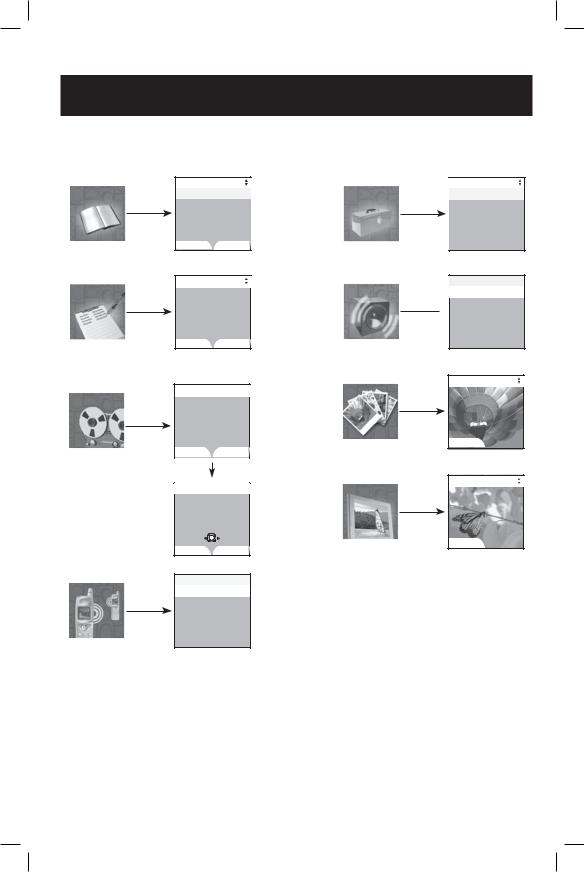
Quick reference guide
Handset
STATUS LIGHT |
/VOLUME |
Blinks when there is a new voicemail, a new message in the answering system, or a call is on hold.
Press to increase or decrease handset listening volume.
SOFTKEYS
Press a softkey to select a menu item displayed just above the key.
 /PHONE/FLASH
Press to make and answer a call.
During a call, press to receive an |
CANCEL |
FLASH |
|
incoming call if Call Waiting is activated |
|
(page 27). |
|
 /SPEAKER
Press to activate the handset speak-
 erphone. Press again to resume nor-
mal handset use (page 23).
/ANSWERING SYSTEM
Press to show the number of old and new messages recorded on the answering system.
 /OFF/CANCEL
During a call, press to hang up.
While using menus, press to cancel an operation, back up to the previous menu, or exit the menu display.
NavKey
Press the CENTER NavKey  to display menus.
Press the UP or DOWN NavKey  or
or
 to navigate through menus (see page 3).
Press the CENTER NavKey  to select a highlighted menu item.
CENTER
UP
LEFT RIGHT
DOWN
2
Getting started
Quick reference guide |
|
||
Main menu |
|
|
|
|
Directory |
|
|
Directory |
Alice |
|
Settings |
|
Amy |
|
|
|
Chris |
|
|
|
Deborah |
|
|
|
Jenny |
|
|
|
Kristen |
|
|
page 29 |
FIND |
NEW |
page 15 |
|
|
||
|
Call Log |
|
|
Call Log |
Alice |
|
Sounds |
|
0-888-883-2445 |
|
|
|
Jan 9 |
10:39AM |
|
page 41 |
SAVE |
DELETE |
pages 12 |
|
|
||
|
Messages |
Pictures |
|
|
|
||
Messages |
|
|
|
|
0 New Messages |
|
|
|
10 Old Messages |
|
|
page 14 |
PLAY |
DELETE |
page 11 |
|
|||
|
|
|
|
|
|
|
Messages |
7 |
Animations |
Jan 16 10:51AM |
|
|
Duration 0:11 |
|
|
REPEAT |
SKIP |
|
STOP |
DELETE |
page 11 |
Intercom
Intercom |
Global Page |
|
BASE
page 28
Settings
Set Time
Edit Handset Name
Show Handset Name
Language
Contrast
Sounds
Ringer Volume
Ringer Melody
 Record Ringer
Keypad Tone
Pictures
SET
Animations
SET
3

Getting started
Quick reference guide
Telephone base
Answering system |
Telephone |
function keys |
function keys |
|
Telephone function keys (see pages 25-28) |
REDIAL ........ Press to access the redial log.
VOLUME ...... Press to adjust listening volume on speakerphone.
MUTE ........... Press to silence microphone; press again to resume.
SPEAKER ..... Press to turn speakerphone on or off (begin or end a call).
INTERCOM.......... |
Press to locate handset(s) or to initiate an intercom |
|
conversation. |
VCID ................. |
Press to scroll down while in menus. Press to display |
|
Caller ID information. While entering names or numbers, |
|
press to move the cursor to the left. (See page 49.) |
SELECT/MENU.... |
Press to enter the base menu and select menu item |
|
displayed on line 2 of the screen. |
^DIR ................. |
Press to scroll up while in menus. Press to display |
|
directory entries. While entering names, press to advance |
|
cursor. (See pages 36-38.) |
CANCEL ............. |
Press to cancel an operation, back up to the previous menu, |
|
or exit the menu display. |
|
Press to make corrections when entering digits in the dialing |
|
screen. |
HOLD/PAUSE ...... |
While on a call, press to place a call on hold. To resume the |
|
telephone conversation, press SPEAKER. |
|
Press to insert a dialing pause when entering digits in the |
|
dialing screen. |
FLASH ................ |
During a call, press to receive an incoming call if Call |
|
Waiting is activated. |
Answering system controls (see pages 54-62)
Press to play or stop playing messages.
DELETE ....... Press to delete current message playing. When idle, press to bring up menu to delete all messages.
Press to repeat message. |
Press to skip to next |
|
|
|
message. |
ANNOUNCE .......... |
Press to listen to current outgoing announcement on the |
|
|
answering system. Press to access the ANNOUNCEMENT |
|
|
menu which can also record new outgoing message or delete |
|
|
the user-recorded outgoing message, and restore the fac- |
|
|
tory-preset outgoing announcement. |
|
MEMO ................... |
Press to record a memo on the answering system. |
|
ANSWER ON/OFF .Press to turn the call answering feature on or off.
4
Getting Started
Parts checklist
Remember to save your sales receipt and original packaging in case it is necessary to ship your telephone for warranty service. Check to make sure the telephone package includes the following:
a. Telephone base |
e. |
Telephone line cord |
|||||||||
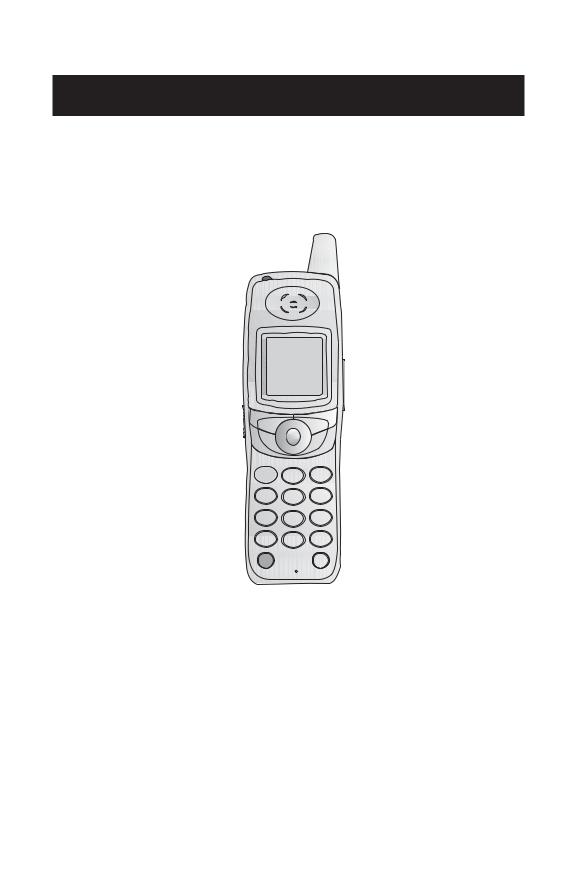
b. Cordless telephone handset |
f. |
Battery pack |
|||||||||
c. Base adapter |
g. |
Belt clip |
|||||||||
d. Wall mount bracket |
h. |
Battery compartment cover |
|||||||||
|
|
|
|
|
|
|
|
|
|
|
|
|
|
|
|
|
|
|
|
|
|
|
|
|
|
|
|
|
|
|
|
|
|
|
|
|
|
|
|
|
|
|
|
|
|
|
|
|
|
|
|
|
|
|
|
|
|
|
|
|
|
|
|
|
|
|
|
|
|
|
|
|
|
|
|
|
|
|
|
|
|
|
|
FLASH |
CANCEL |
|
|
|
|
|
|
|
|
|
|
|
|
|
|
|
|
|
|
a. Telephone base |
b. Cordless telephone handset |
c. Base adapter |
||||||
|
|
|
|
|
|
|
|
|
f. Battery pack
|
|
|
|
|
|
|
|
|
|
|
|
|
|
|
|
|
|
|
|
|
|
|
|
|
|
|
|
|
|
|
|
|
|
|
|
|
|
|
|
|
|
|
|
|
|
|
|
|
|
|
|
|
|
|
d. Wall mount bracket |
e. Telephone line cord |
g. Belt clip |
h. Battery compartment cover |
|||||||
5
Getting Started
Before you begin
About caller identification (CID)
The Caller ID with Call Waiting features in this telephone let you see who’s calling before you answer the phone, even when you’re on another call. These fea-
tures require services provided by your local telephone company.
Contact your telephone service provider if:
•you have both Caller ID and Call Waiting, but as separate services (you may need combined service),
•you have only Caller ID service, or only Call Waiting service, or
•you do not subscribe to any Caller ID or Call Waiting services but wish to try them now.
You can use this telephone with regular Caller ID service, and you can use its other features without subscribing to either Caller ID or combined Caller ID with Call
Waiting service. There may be fees for these services, and these services may not be available in all areas.
The Caller ID features will work only if both you and the caller are in areas offering Caller ID service, and if both telephone companies use compatible equipment.
Telephone operating range
This cordless telephone operates with the maximum power allowed by the Federal Communications Commission (FCC). Even so, this handset and telephone base can communicate over only a certain distance — which can vary with the locations of the telephone base and handset, the weather, and the layout of your home or office.
If there is a call while the handset is out of range, it might not ring — or if it does ring, the call might not connect well when you press  /PHONE/FLASH. Move closer to the telephone base, then press
  /PHONE/FLASH to answer the call.
If the handset moves out of range during a telephone conversation, there might be interference. To improve reception, move closer to the base.
If you move out of range without pressing  /OFF/CANCEL, the telephone will be disconnected after five seconds.
6
Getting Started
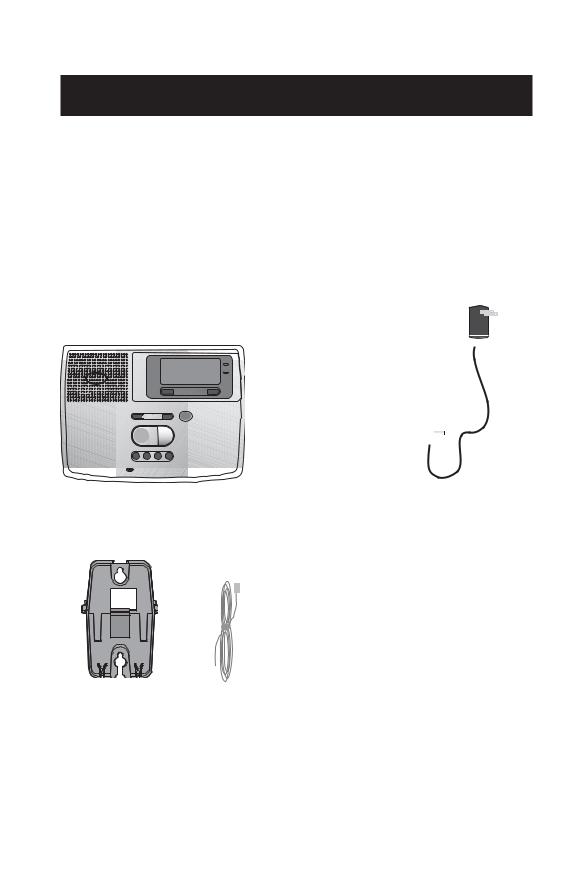
Telephone base installation
Install the telephone base as shown below. Choose a central location within the home, away from any electronic equipment and appliances such as personal computers, computer routers, television sets, microwave ovens, and refrigerators. Avoid excessive heat, cold, dust or moisture.
Plug power adapter into an electrical outlet not controlled by a wall switch.
Plug the telephone line cord into a telephone jack.
 NOTE: Use only the power adapter supplied with this product. If you need a replacement, call 1 (800) 222-3111. In Canada, call 1 (866) 288-4268. Be sure to use an electrical outlet not controlled by a wall switch.
7
Getting Started
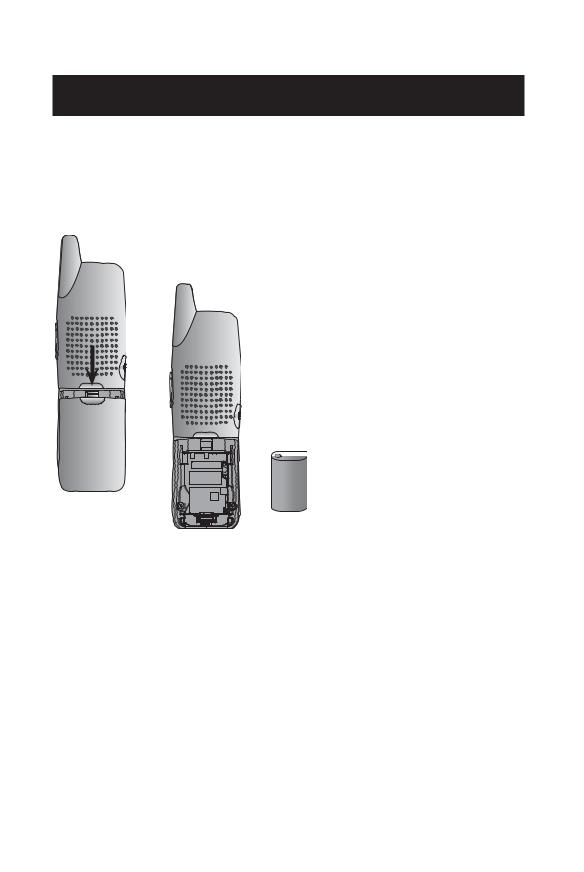
Battery installation & charging
After installation, place the handset in the telephone base and allow the battery to charge for sixteen hours before use.You can keep battery charged by returning the handset to the telephone base after each use. When the battery power is fully depleted, a full recharge takes about sixteen hours.
Low battery indicator
Return handset to telephone base to recharge when this symbol flashes. (Handset will beep when battery is low.)
12:00AM
HANDSET 2
Low Battery
REDIAL |
CALLER ID |
Insert supplied battery as indicated. Insert the top edge (contacts and tab) first, then push down on the lower portion.
1.
2. Press tab and slide 
cover away from the battery compartment.
 Caution: Use only supplied rechargeable battery or AT&T replacement battery Model 103 (SKU 00249).
NOTE: When fully charged, the |
|
|
battery in the handset can pro- |
FLASH |
CANCEL |
vide 5 hours of talk time or 3 days of |
|
|
standby time (when idle and away from |
|
|
the telephone base). |
|
|
NOTE: For installation of the spare battery into the spare bat-
tery compartment on the telephone base, please see page 68.
Replace battery compartment cover.
Place handset in telephone base to charge for at least sixteen hours before first use.
8

Getting Started
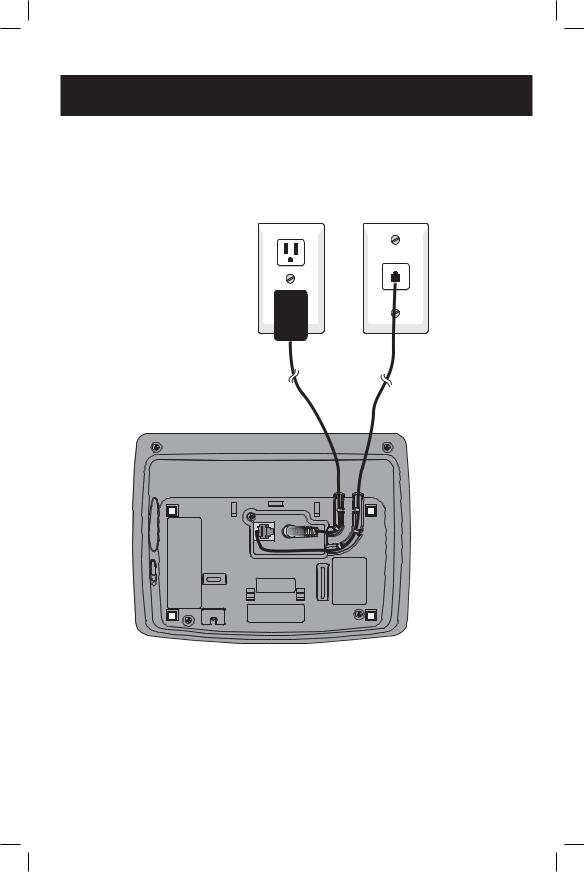
Wall mounting
The telephone base can be installed on any standard telephone outlet as shown below. Choose a central location within the home, away from any electronic equipment such as personal computers, computer routers, television sets or microwave ovens. Avoid excessive heat, cold, dust or moisture.
1)Connect telephone line cord and AC power cord to telephone jacks and wall jacks, as shown on page 7.
2)Install wall mount bracket onto set.
(a) First put the two front wall-mount bracket tabs into the front notches on the bottom of the telephone base.
(b) Squeeze the rear tabs of the wall mount bracket when inserting them into the rear notches on the bottom of the telephone base.
3) Position the wallmount bracket over the wall outlet mounting pegs, then press and slide the wall-mount bracket down firmly so it is held securely on the outlet mounting pegs.
b
b
aa
Plug the power adapter into an electrical outlet not controlled by a switch.
Plug telephone line cord into telephone wall jack.
9
Getting Started
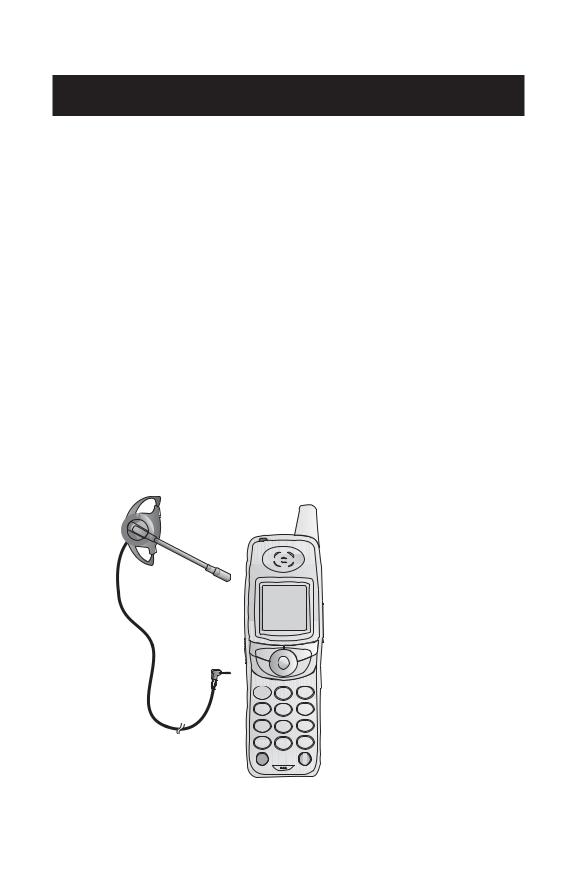
Belt clip & optional headset
Install belt clip as shown below if desired.
Snap the belt clip into the notches on the side of the handset. Rotate and pull to remove.
For hands-free telephone conversations, use any industry standard 2.5 mm headset (purchased separately). For best result, use an AT&T 2.5 mm headset.
FLASH |
CANCEL |
Plug the 2.5 mm headset into the jack on the side of the handset (beneath the small rubber cap).
10
12:00AM
HANDSET 1
REDIAL CALLER ID
x 1 |
or |
x 2 |
Animations |
Pictures |
|
Animations |
SET |
Browse through listings.
Pictures |
SET |
Telephone Setup
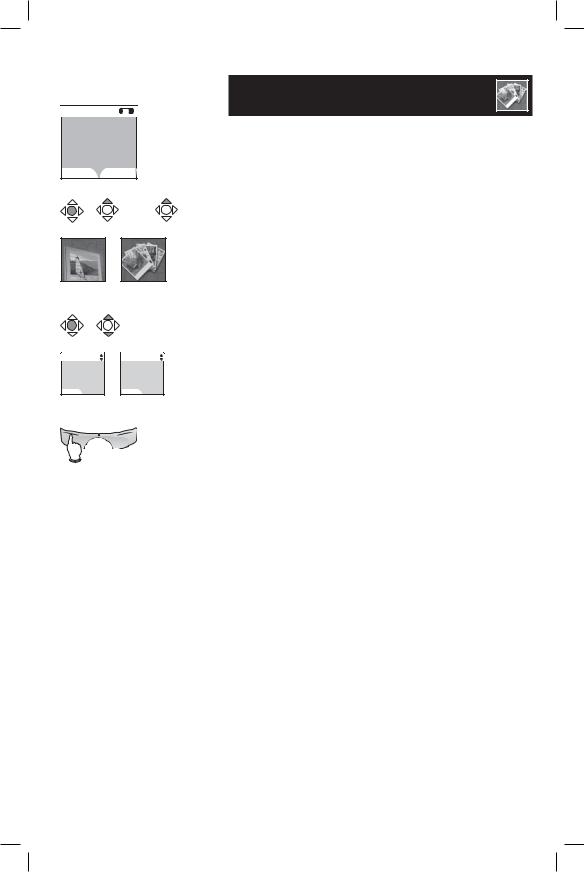
Handset screen images
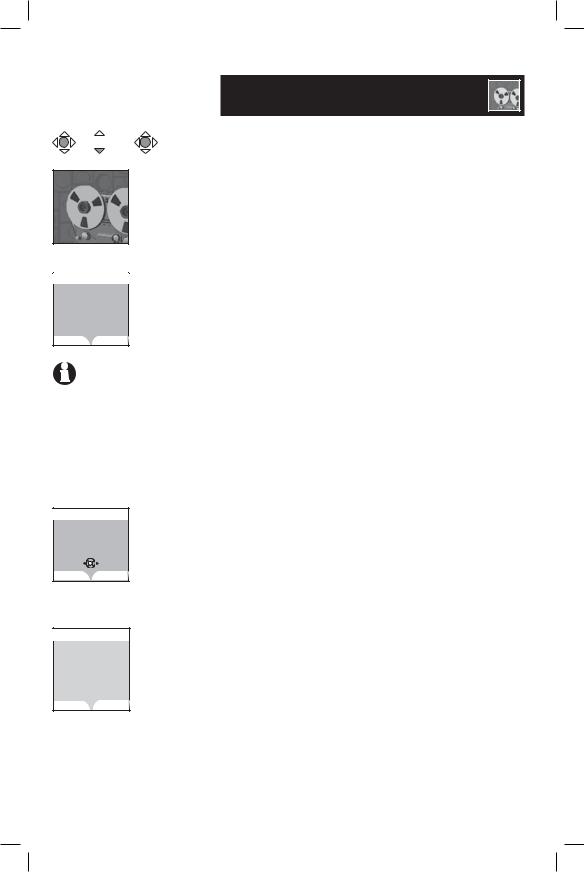
The Pictures and Animations settings allow you to select an image or design as wallpaper for the background of the handset screen.
These images can also be programmed for individual callers in the directory so that different images will show when different callers phone (see page 31).
Press the CENTER NavKey  to display the menu. Use the UP or DOWN NavKey
  or
or  to highlight Animations or Pictures, then press the CENTER NavKey
  again to select this option.
Browse through the options using the UP or DOWN NavKey  or
or  , then press the softkey SET or CENTER NavKey
  to select an image.
To change the wallpaper display, repeat the above steps.
Press the softkey SET to select the desired image.
11
12:00AM
HANDSET 1
REDIAL |
CALLER ID |

 x 3
x 3
Sounds
Sounds
Ringer Volume
Ringer Melody
Record Ringer
Keypad Tone
Record Ringer
Press RECORD to start recording Remaining record time: 0:14
RECORD
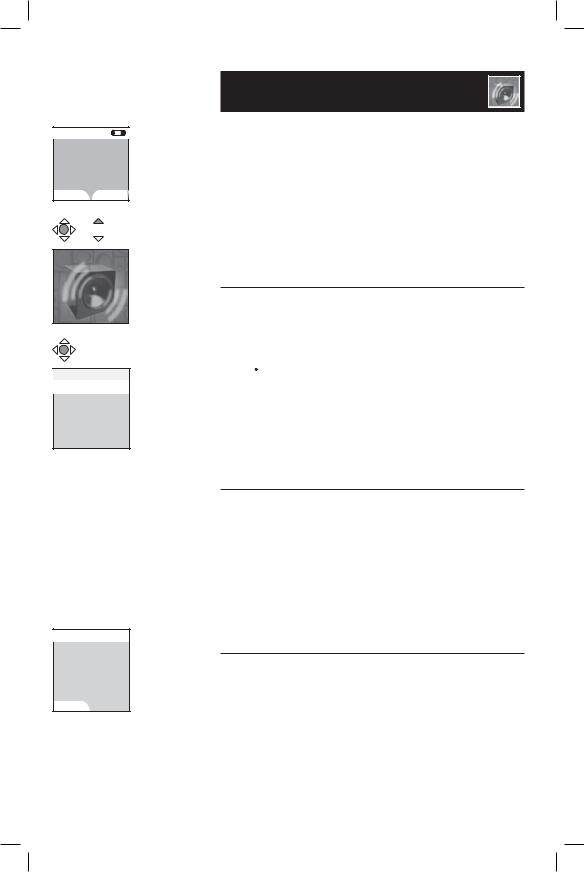
Telephone Setup
Handset sounds
Press the CENTER NavKey  to enter the main menu, and press the UP NavKey
  three times to reach the Sounds menu item, then press the CENTER NavKey
  to start the menu.
After selecting any option, press the CENTER NavKey  or the softkey SET to confirm your choice.
Ringer volume
At this menu, the default ringer volume can be set between levels 1 and 5, or set the ringer off so the phone does not ring at all with incoming calls. When the ringer on the handset is turned off, the icon  is shown on the screen of the handset.
Press the LEFT or RIGHT NavKey  or
or  to adjust the ringer volume. Press the softkey SET to confirm your choice. Press
  /OFF/CANCEL twice until the screen returns to the SOUNDS screen.
Ringer melody
This feature allows you to customize the ringers. The menu includes options for eight ringer styles and 13 musical passages.You will hear an example of each ringer melody when scrolling through the choices. Press the UP or DOWN NavKey  or
or  to change the ringer melody. Press the softkey SET to confirm your choice.
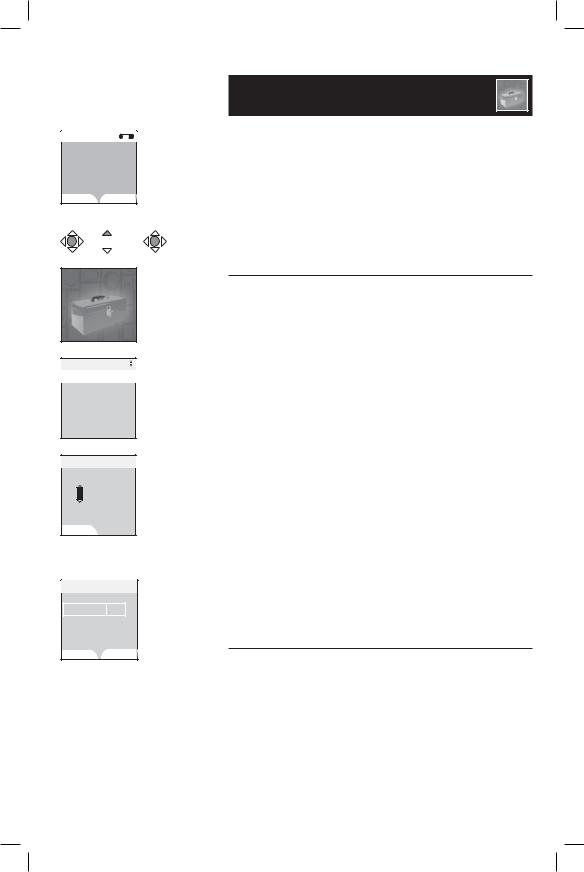
Record ringer
You can also customize the ringer by recording tunes or messages up to 15 seconds in length.
Press the softkey RECORD to start recording. The screen will show Record ringer after tone.
12
NOTE: The microphone used when recording a ringer is located at the bottom of the handset. If recording a tune, place the microphone about twelve inches from the music source. If recording a message, speak clearly from about twelve inches.
Keypad Tone
 On
On
Off
SET
Telephone Setup
Handset sounds
Start recording the new ringer after the tone. When finished recording, press the softkey STOP. Press the softkey PLAY to listen to the recorded ringer. Then press the softkey SAVE to enter the name of this recording using the table on page 30.
Enter up to ten alphanumeric characters for the name of this recording (See table on page 30). Press the softkey SAVE to save this ringer. The recording with the programmed name will then be added to the list of ringer melodies.
More than one record ringer can be recorded as long as there is recording time remaining. The total recording time can be extended if some of the preset musical ringers are deleted.
Keypad tone
The handset is preset to beep with the pressing of each key. The keypad tones can be turned on or off in this menu.
Press the UP or DOWN NavKey  or
or  to select whether you want the keypad tone to be on or off. Then press the softkey SET or the CENTER NavKey
  to confirm.
13

 x 2
x 2
Messages
Messages
3 New Messages
19 Old Messages
PLAY DELETE
NOTE: All incoming telephone messages are played in reverse chronological order so the newest message is played first.
Message |
7 |
Jan 10 10:51AM |
|
Duration 0:11 |
|
REPEAT |
SKIP |
STOP |
DELETE |
Delete All Messages
Delete all
Messages
Are you sure?
YES |
NO |
Telephone Setup
Handset messages
This allows you to listen to messages on the answering system using the cordless handset.
When there are new messages on the answering system, New Message will be displayed on the handset screen, and the status light at the top left corner of the handset will begin to flash. The number in the message window of the telephone base will also flash.
•Press the  /ANSWERING SYSTEM on the handset and the screen will show the number of old and new messages. Press the softkey
PLAY to play all new messages.
OR
•Press the CENTER NavKey  to enter the main menu.
•Press the DOWN NavKey  twice to bring out the Messages menu.
•Press the CENTER NavKey  to confirm.
•The screen will show the number of new messages and old messages.
•Press the softkey PLAY to play the new messages and memos.
The day and time the message was recorded will be announced by the voice prompt. The screen on the handset will show the date and time the memo and incoming messages are recorded (but not for telephone messages), the length of the message, and a diagram of the NavKey illustrating how to repeat or skip a message. If it is a memo recorded at the answering machine, the word Memo will be shown on the screen.
Pressing the softkey STOP will exit to the
Messages screen. Pressing the softkey DELETE when a message is playing will delete that particular message and advance to the next one.
When no message is being played, pressing the softkey DELETE will bring out the question whether you wish to delete all messages. Press the softkey NO if you prefer to keep all messages. Press the softkey YES if you wish to delete all messages, including those which have not been reviewed.
14
12:00AM
HANDSET 1
REDIAL |
CALLER ID |

 x 4
x 4
Settings
Settings
Set Time
Edit Handset Name
Show Handset Name
Language
Contrast
Set Time
12:00AM
SET
Edit Handset Name
HANDSET 2
SAVE |
ERASE |
Telephone Setup
Handset settings
Press the CENTER NavKey  to enter the main menu, then press the UP NavKey
  four times to reach the Settings menu item. Press the CENTER NavKey
  to start the menu.
After selecting any option below, press the CENTER NavKey  to confirm your choice.
Set time
Select this menu to set the time displayed on screen.You must enter four digits to input the time (e.g. 09:23). Using the dial pad, set the current time using the 12-hour clock format, or use the UP and DOWN NavKey  or
or  to enter the time, then use the LEFT or RIGHT NavKey
  or
or  to advance to the next digit. Use the UP or DOWN NavKey
  or
or  or the 2 or 7 on the dial pad to change the AM/PM entry. Press the
CENTER NavKey  to confirm the setting and the correct time will be displayed on the screen.
 NOTE: The time is automatically set and updated with incoming Caller ID information if you have this service (see page 6).
 NOTE: The date information is not available on the handsets.
Edit handset name
In the Settings menu, press the DOWN NavKey  once to select this menu to set the handset name displayed on screen. Enter up to fifteen alphanumeric characters including spaces for the name of this handset. Use the RIGHT NavKey
to insert a space (see page 30). After entering the name of the handset, press the softkey SAVE or the CENTER NavKey  . A confirmation tone will sound.
15
Settings
Set Time
Edit Handset Name
Show Handset Name
Language
Contrast
Language
 English
Español
Français
SET
Telephone Setup
Handset settings
Show handset name
This menu allows you to decide whether the handset name should be shown on the screen of the handset.
From the idle mode, press the CENTER NavKey  to enter the main menu.
Press the DOWN NavKey  four times to reach the SETTINGS menu. Press the CENTER NavKey
  to confirm selection.
When the Settings menu is displayed, press the
DOWN NavKey  twice to reach Show Handset Name. Press the CENTER NavKey
  to confirm.
Use the UP or DOWN NavKey  or
or  to toggle between On and Off. Press the softkey SET or the CENTER NavKey
  to confirm selection. The screen will show Choice saved and return to the
SETTINGS menu.
Language
At this menu, you can select the language used in all menus and screen displays. Choices are English, Español and Français.
From the idle mode, press the CENTER NavKey  to enter the main menu. Press the DOWN NavKey
  four times to reach the SETTINGS menu and press the CENTER NavKey
  to confirm. Press the DOWN NavKey
  three times to highlight Language. Press the CENTER NavKey
  to confirm and the three languages (English, Español and Français) are displayed. Use the UP and DOWN NavKey
  or
or  to scroll through all the languages. When the desired language is highlighted, press the softkey SET or the CENTER NavKey
  to confirm and the screen will show Choice saved.
16
Contrast
SET
Clear Voice Mail
Clear Voice Mail
Indication
Are you sure?
YES |
NO |
NOTE: This procedure only turns off the displayed message, and it does
not delete your voicemail message(s). This feature allows you to correct a voicemail indication that is out of sync with the local telephone company. If there actually is a new voice message, the local telephone company will
continue to send the message which will then turn the display message back on.
NOTE: Clearing the voicemail indication on the handset also turns off the voicemail indicator light on the telephone base.
Telephone Setup
Handset settings
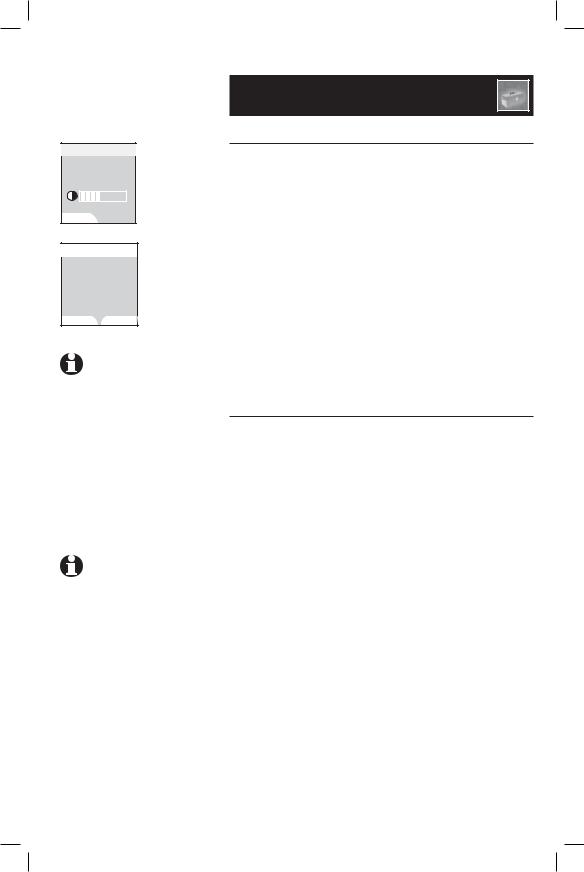
Contrast
At this menu, you can adjust screen contrast to one of eight levels to suit different lighting conditions. Press the CENTER NavKey  to activate the menu from the idle screen.
Press the UP NavKey  four times to reach the Settings screen menu and press the CENTER NavKey
  to activate it.
Press the DOWN NavKey  four times to reach Contrast and press the CENTER NavKey
  to activate the Contrast setting. Press the LEFT or RIGHT NavKey
  or
or  to adjust the level of screen contrast from level 1 to level 8. Press the softkey SET or CENTER NavKey
  to confirm.
Clear voicemail
If you subscribe to voicemail services provided by the local telephone company, you will receive a text message on the handset when there is a new voicemail. After you have listened to these messages, the text message on the display should disappear automatically. In the event that the indication remains after you have listened to your local telephone company’s voicemail messages, you can remove the indication according to the following steps.
•Press the CENTER NavKey  to enter the main menu.
•Press the DOWN NavKey  four times to enter the Settings menu. Press the CENTER NavKey
  to confirm.
•Press the UP NavKey  three times to select Clear Voice Mail. Press the CENTER NavKey
  to confirm.
•Press the softkey YES to delete voicemail indication.
17

Default Settings
Restore
Default Settings
Are you sure?
YES |
NO |
Telephone Setup
Handset settings
Default settings
This menu allows you to restore the factory-set default Settings for all menu settings on the cordless handset. It will NOT clear the directory, call log, handset name, or messages.
•Enter the main menu by pressing the CENTER NavKey  .
.
•Reach the Settings menu by pressing the DOWN
NavKey  four times. Press the CENTER NavKey
  to confirm.
•Press the UP NavKey  twice to go to Default
Settings. Press the CENTER NavKey  to confirm.
•You will be prompted to Restore Default Settings. Select by pressing the softkeys YES or
NO.
•If you select YES, Default Settings loaded will appear on the screen.
18

BASE SETTINGS
Set Date
CID MENU DIR
BASE SETTINGS
Set Time
CID MENU DIR
NOTE: This procedure also sets the time and date on the answering system. The incoming Caller ID also updates the day and time on the telephone base.
BASE SETTINGS
Ringer Volume
CID MENU DIR
Telephone Setup
Base settings
Setting date and time
•Press SELECT/MENU.
•Press VCID twice to scroll to Base Settings.
•Press SELECT/MENU.
•When Set Date is displayed, press SELECT/MENU.
•Use the keypad to enter the appropriate digits for the current year, and the cursor will automatically advance to the next digit to the right for entering the month and date. The system uses the YYYY/MM/DD format to enter the date.
•Press SELECT/MENU to save the settings and a confirmation tone will sound. The correct date will be displayed briefly on the screen.
•Press VCID to set the time. Press SELECT/MENU to confirm. The system uses the 12-hour clock format.
•Use the keypad to enter the appropriate digits for the current hour, and the cursor will automatically advance to the next digit to the right for entering the minutes. Use ^DIR to toggle between AM and PM, or press 2 for AM and press 7 for PM.
•Press VCID to bring the cursor one space to the left to correct any mistakes.
•Press SELECT/MENU to save the setting. A confirmation tone will sound and the correct time will be displayed briefly on the screen.
Ringer volume
At this menu, you can set a default ringer volume level (1 - 4), or turn off the ringer.
•In the Base Settings menu, press VCID twice to reach Ringer Volume.
19
BASE SETTINGS
Ringer Melody
BASE SETTINGS
Keypad Tone
Telephone Setup
Base settings
•Press SELECT/MENU and a volume indication with four levels appears. Adjust the volume by pressing VCID to decrease or ^DIR to increase the volume or  /VOLUME to increase or decrease the volume.
•Press SELECT/MENU to confirm your selection and the screen will show Choice saved. The icon  will be displayed on the screen of the telephone base if its ringer is turned off.
Ringer melody
This feature allows you to customize the ringer on the base. The menu includes options for eight ringer melodies.You will hear a sample of each ringer melody as you scroll through the choices.
•Press SELECT/MENU to enter the main menu. Press VCID twice to reach the Base Settings menu and press SELECT/MENU to confirm.
•From the Base Settings menu, Press VCID three times to enter the Ringer Melody menu. Press
SELECT/MENU to confirm.
•The system will start by showing the name and a sample tune of the current ringer melody.
•Use VCID or ^DIR keys to scroll through the eight ringer melodies.
•Press SELECT/MENU to confirm your selection. A confirmation tone will sound and Choice saved will be displayed briefly.
Keypad tone
The base is preset to beep with the pressing of each key. The keypad tones can be turned on or off in this menu.
•Press SELECT/MENU to enter the main menu. Press VCID twice to reach the Base Settings menu and press SELECT/MENU to confirm.
20

BASE SETTINGS
Language
CID MENU DIR
LANGUAGE
English
CID MENU DIR
BASE SETTINGS
Clear Voice Mail
CID MENU DIR
Clear Voice Mail
Indication?
CID MENU DIR
NOTE: This feature removes the indication from all handsets and the telephone base.
Telephone Setup
Base settings
•From the base settings menu, press VCID four times to enter the Keypad Tone menu and press SELECT/MENU to confirm.
•Use the VCID or ^DIR keys to select whether you prefer the keypad tone to be On or Off.
•Press SELECT/MENU to confirm your selection.
•The screen will show Choice saved to confirm the new setting.
Language
At this menu, you can select the language used in all menus and screen displays. Choices are English, Español or Français.
•From the base settings menu, press ^DIR four times to enter the Language menu and press
SELECT/MENU to confirm.
•Use the VCID or ^DIR keys to scroll through the languages available: English, Español and Français.
•Press SELECT/MENU to confirm your selection.
•The screen will show Choice saved to confirm the new setting.
Clear voicemail
If you subscribe to voicemail services provided by your local telephone company, you will receive a text message on the handset and the New Voicemail Indicator light on the telephone base will light when there is new voicemail. To manually remove the new voicemail indication:
•Press SELECT/MENU to enter the main menu. Press VCID twice to reach the Base Settings menu and press SELECT/MENU to confirm.
•From the Base Settings menu, press ^DIR three times to enter the Clear Voice Mail menu. Press
SELECT/MENU to confirm.
21

BASE SETTINGS
Default Settings
CID MENU DIR
Restore Default
Settings?
CID MENU DIR
Telephone Setup
Base settings
•Press SELECT/MENU to confirm, or press CANCEL to abort.
Default settings
This menu allows you to restore the factory-set default settings for all menu and answering system settings. It will NOT clear the directory, call log, or messages menu.
•Press SELECT/MENU to enter the main menu. Press VCID twice to reach the Base Settings and press SELECT/MENU to confirm.
•From the Base Settings menu, press ^DIR twice to enter the Default Settings menu and press
SELECT/MENU to confirm.
•Press SELECT/MENU to confirm, or press CANCEL to abort and keep all settings.
22

FLASH |
CANCEL |
12:00AM |
|
Phone |
0:41 |
HOLD |
MUTE |
Telephone Operation
Basic handset operation
Making, answering and ending calls
To make a call, press  /PHONE/FLASH or
  / SPEAKER, then dial the number. Press
  /OFF/ CANCEL to hang up. To answer a call, press
  / PHONE/FLASH or
  /SPEAKER or any dial pad key.
To preview numbers before dialing, enter numbers first, then press  /PHONE/FLASH or
  /SPEAKER to dial. Press the LEFT NavKey
  or
or  /OFF/ CANCEL to delete the last digit when entering numbers. Press the softkey PAUSE to generate a two-second delay.
Hands-free speakerphone calls
To make a call using the handsfree speakerphone, press  /SPEAKER, then dial a number.
To answer an incoming call, press  /SPEAKER.
During a call, press  /SPEAKER to toggle between hands-free speakerphone and the normal handset use. Press
  /OFF/CANCEL to hang up.
Mute
Press the softkey MUTE to silence the microphone. Microphone Muted is displayed on the handset.You will be able to hear, but your caller will not be able to hear you until you press the softkey UNMUTE to resume the conversation.
23
 Loading...