


91-000302-050-000_EP5962Englishmanual_Sep.02,2005.qxd 2/13/1950 7:21 PM Page 1
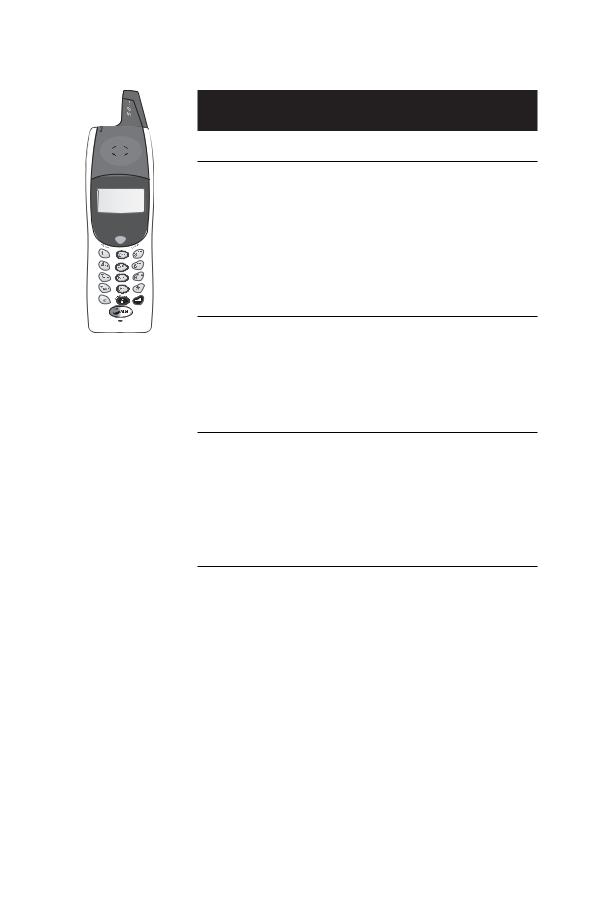
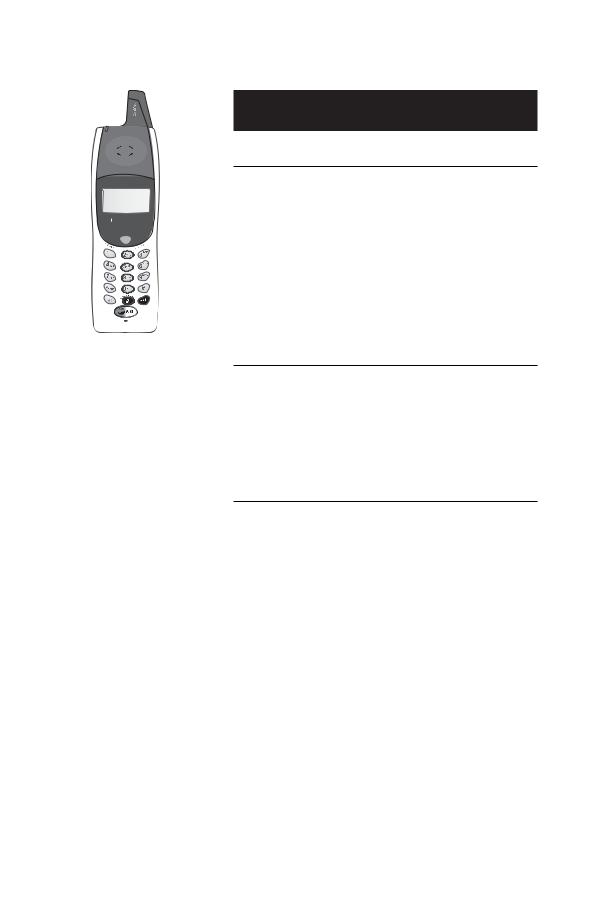
SPEAKER
User Manual (Part 2)
5.8 GHz 2-Line
Corded/Cordless
Answering System EP5962
with Caller ID & CallWaiting
VOLUME

91-000302-050-000_EP5962Englishmanual_Sep.02,2005.qxd 2/13/1950 7:21 PM Page 2
You must install and |
See page 8 |
charge the battery before |
|
using the telephone |
STOP! for easy instructions |
For customer service or product information, visit our web site at
www.telephones.att.com
or call 1-800-222-3111
Please also read
Important Product Information
Enclosed in product package
Add new handsets to make your phone more versatile (see page 41)
Your telephone can accommodate up to eight cordless handsets. You can add new handsets (AT&T model EP590-2 sold separately) at any time, but each must be registered with the base before use.
The handset provided with your telephone is automatically registered as Handset 1. Additional handsets will be assigned numbers in the order they are registered (2, 3, 4, etc.) up to a maximum of eight handsets.
 NOTE: In normal operating conditions, up to four handsets at a time can be used. The number of handsets that can be used may be reduced if a handset is experiencing interference or is almost out of range.
Handset 1 |
Handset 2 |
Handset 3 |

91-000302-050-000_EP5962Englishmanual_Sep.02,2005.qxd 2/13/1950 7:21 PM Page 1
User Manual (Part 2)
5.8 GHz 2-Line
Corded/Cordless
Answering System
EP5962
Table of contents |
|
Getting Started |
|
Quick reference ................................... |
2 |
Parts checklist ....................................... |
4 |
Before you begin .................................. |
5 |
Telephone base installation................ |
6 |
Battery & charger installation............ |
8 |
Belt clip & accessories......................... |
9 |
Telephone Operation |
|
Basic handset operation ................... |
10 |
Basic base operation ......................... |
12 |
Options while on calls ...................... |
14 |
Intercom calls ..................................... |
16 |
Conference calls................................. |
17 |
Handset settings................................. |
18 |
Base settings........................................ |
19 |
Directories |
|
Handset and base directories ......... |
20 |
New directories entries................... |
21 |
Directories search............................. |
22 |
To dial, delete or change entries ... |
23 |
Caller ID Logs |
|
How Caller ID works ....................... |
24 |
To review your call log ................... |
25 |
To dial a call log entry ...................... |
26 |
Messages with Caller ID................... |
27 |
Answering System Operation
Answering system operation .......... |
28 |
Day and time announcements ........ |
29 |
Outgoing announcements................ |
30 |
Message playback ............................... |
31 |
Answering mode................................ |
32 |
Number of rings before answer..... |
33 |
Audible message alert....................... |
34 |
Recording and playing memos ........ |
35 |
Change security code ....................... |
36 |
Remote access.................................... |
37 |
Appendix |
|
Display screen status icons.............. |
38 |
Display screen messages .................. |
39 |
Alert tones & indicator lights.......... |
40 |
Adding new handsets ........................ |
41 |
Replacing a handset ........................... |
42 |
Re-Registering a handset.................. |
43 |
Charging a spare battery.................. |
44 |
In case of difficulty ............................. |
45 |
INDEX.................................................. |
47 |
Technical specifications .................... |
49 |
Spare remote access card................ |
50 |
1
91-000302-050-000_EP5962Englishmanual_Sep.02,2005.qxd 2/13/1950 7:21 PM Page 2
Getting Started
Quick reference guide
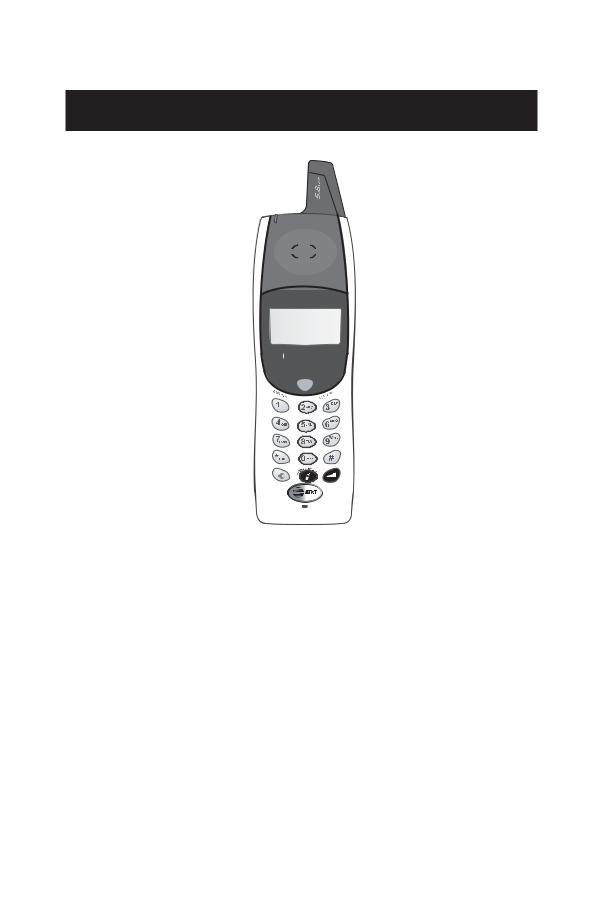
Handset
Softkeys
Press a softkey to select an item displayed just above the key.
L1/Flash, L2/Flash
Press LINE 1 to make or answer a call on |
RDL MENU CID |
line 1. |
|
Press LINE 2 to make or answer a call on |
|
line 2. |
|
During a call, press FLASH to receive an incoming call, if Call Waiting is activated or use for other features requiring FLASH (see page 14).
Speaker |
SPE |
V |
|
AK |
UM |
|
ER |
OL |
Press to activate handset speakerphone. Press again to switch to normal handset use (earpiece).
Off/Clear
During a call, press to hang up.
While using menus, press to cancel an operation, back up to the previous menu, or exit the menu display.
Xfer/Intercom
Press to transfer a call or initiate an intercom conversation (see pages 11 &
16).
Volume
Press to adjust voice volume or control the handset ringer volume while ringing.
Screens
|
ID Logs |
Main Menu |
|
Setup Handset |
|
|
page 24) |
Directory |
See page 20 |
Ringers |
See page 18 |
|
|
||||
|
|
Mailboxes................ |
See page 28 |
Low Batt Tone ........ |
See page 18 |
HANDSET 1 |
|
Setup handset |
See menu |
Keypad Tone |
See page 18 |
|
|
||||
RDL MENU |
CID |
Register .................. |
See page 41 |
Contrast .................. |
See page 18 |
|
|
|
|
Rename .................. |
See page 18 |
Menus |
|
|
|
|
|
2

91-000302-050-000_EP5962Englishmanual_Sep.02,2005.qxd 2/13/1950 7:21 PM Page 3
Getting Started
Quick reference guide
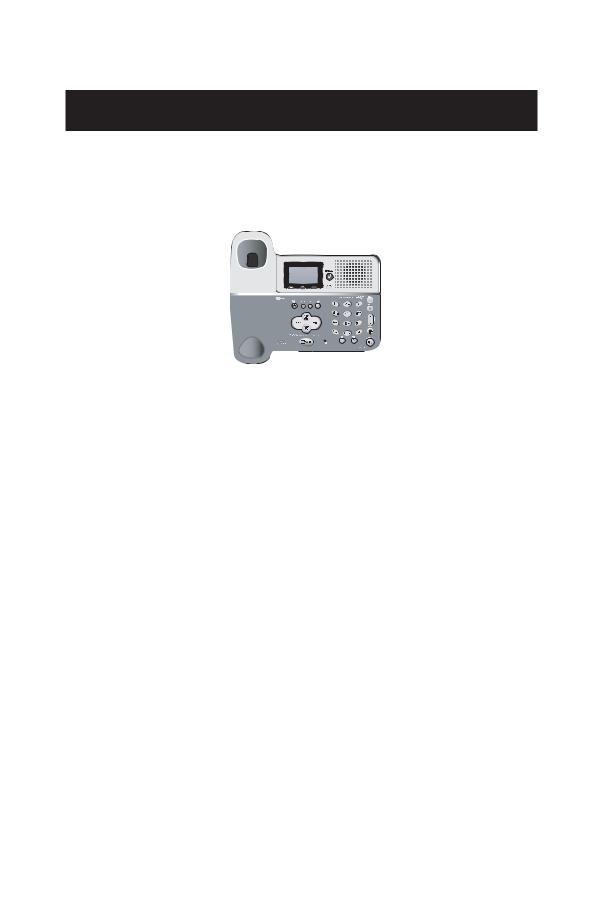
Base/Speakerphone
Telephone function keys
Answering system function keys
|
|
|
Telephone function keys (see pages 12-19) |
|
RDL |
MENU |
CID |
SOFTKEYS ............ |
Press to select item displayed just above the key. |
|
|
|
CLEAR.................... |
Press to exit current menu or clear an entry. |
|
|
|
INTERCOM/ |
|
|
|
|
TRANSFER ............ |
Press to begin intercom call or transfer external call. |
|
MUTE ...................... |
Press to silence microphone; press again to resume. |
|
FLASH .................... |
During a call, press to receive an incoming call, if |
|
VOLUME |
Call Waiting is activated. |
|
Press to adjust speakerphone listening volume or control |
|
|
HEADSET |
the base ringer volume while ringing. |
|
Press to activate headset. |
|
|
LINE 1 .................... |
Press, then lift handset to make or answer a call on line 1. |
|
LINE 2 .................... |
Press, then lift handset to make or answer a call on line 2. |
|
SPEAKERPHONE |
Press to turn speakerphone on or off (begin or end a call). |
|
Answering system function keys (see pages 28-37)
LINE 1 ...... |
Press to turn LINE 1 on or off. |
LINE 2 ...... |
Press to turn LINE 2 on or off. |
................ |
Press to record a memo, phone conversation or outgoing |
|
announcement. |
.................. |
Press to delete messages. |
LINE ....1 Press to play or stop playing Mailbox 1. |
|
LINE ....2 Press to play or stop playing Mailbox 2. |
|
SKIP .................. |
Press to repeat current message or hear previous message. |
Press to hear next message. |
|
3
91-000302-050-000_EP5962Englishmanual_Sep.02,2005.qxd 2/13/1950 7:21 PM Page 4
Getting Started
Parts checklist
Remember to save your sales receipt and original packaging in case you ever need to ship your telephone for warranty service. Check to make sure the telephone package includes the following:
Charger power adapter
Base handset |
Telephone base |
Cordless |
Handset charger |
|
|
handset |
Base |
|
power |
|
adapter |
Battery pack
Telephone line cords (2)
Battery compartment  cover
cover
Belt clip
Handset cord
4

91-000302-050-000_EP5962Englishmanual_Sep.02,2005.qxd 2/13/1950 7:21 PM Page 5
Getting Started
Before you begin
About Caller Identification
Caller ID with Call Waiting features in this telephone let you see who’s calling before you answer the phone, even when you’re on another call. These features require services provided by your local telephone company.
Contact your telephone service provider if:
•You have both Caller ID and Call Waiting, but as separate services (you may need combined service).
•You have only Caller ID service, or only Call Waiting service.
•You don’t subscribe to any Caller ID or Call Waiting services.
You can use this phone with regular Caller ID service, and you can use its other features without subscribing to either Caller ID or combined Caller ID with Call Waiting service. There may be fees for these services, and they may not be available in all areas.
Caller ID features will work only if both you and the caller are in areas offering Caller ID service, and if both telephone companies use compatible equipment.
See Caller ID Operation, beginning on page 24, for more details about how these features work.
Telephone operating range
This cordless telephone operates with the maximum power allowed by the Federal Communications Commission (FCC). Even so, this handset and base can communicate over only a certain distance — which can vary with the locations of the base and handset, the weather, and the construction of your home or office. For best performance, install the telephone base away from electronic equipment, such as personal computers, computer routers, television sets or microwave ovens.
If you receive a call while you are out of range, the handset might not ring — or if it does ring, the call might not connect when you press LINE 1/LINE 2. Move closer to the base, then press to answer the call.
If you move out of range during a phone conversation, you might hear noise or interference. To improve reception, move closer to the base.
If you move out of range without pressing OFF, your phone will be left “off the hook.” To hang up properly, walk back toward the telephone base, periodically pressing OFF until the call is disconnected.
5
91-000302-050-000_EP5962Englishmanual_Sep.02,2005.qxd 2/13/1950 7:21 PM Page 6
Getting Started
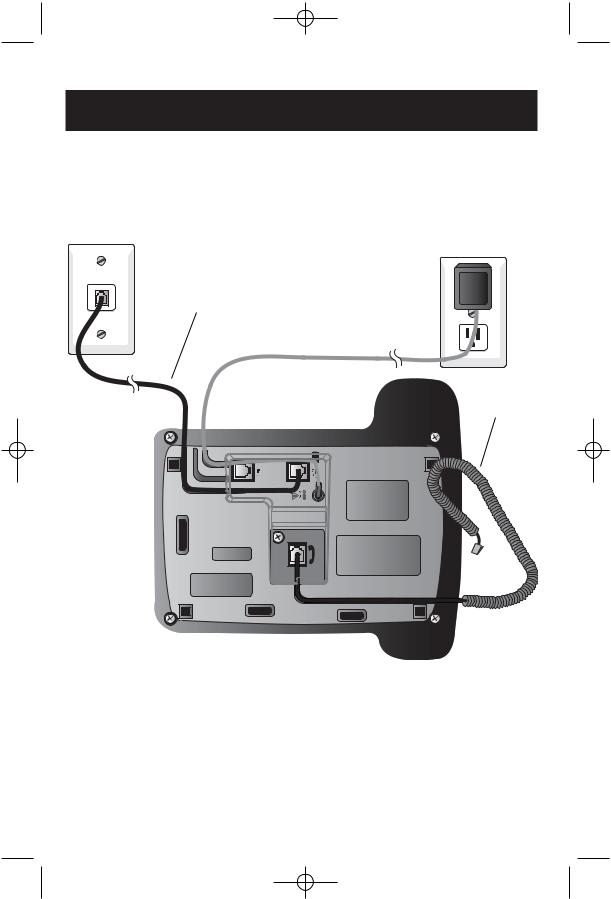
Telephone base installation (2-line jack)
If you have a 2-line wall jack, install the base as shown below. Choose a location away from electronic equipment, such as personal computers, computer routers, television sets or microwave ovens. Avoid excessive heat, cold, dust or moisture.
Line 1 + Line 2
Connect the black line cord to jack
labeled LINE 1/L1+L2.
Plug base power cord transformer into electrical outlet.
Connect handset cord to corded handset.
Line identification
To identify phone lines, press SPEAKERPHONE, then call one of your telephone numbers. If you hear a busy signal, Line 1 is the number you called. If Line 2 rings, it is the number you called.
 NOTE: Use only the power cord supplied with this product.
If you need a replacement, call 1-800-222–3111.
Be sure to use an electrical outlet not controlled by a wall switch.
6

91-000302-050-000_EP5962Englishmanual_Sep.02,2005.qxd 2/13/1950 7:21 PM Page 7
Getting Started
Telephone base installation (separate line jacks)
If you have separate wall jacks for each line, install the base as shown below. Choose a location away from electronic equipment, such as personal computers, computer routers, television sets or microwave ovens. Avoid excessive heat, cold, dust or moisture.
Line 1 |
Line 2 |
Connect black line cord to jack labeled LINE 2.
Plug base power cord transformer into electrical outlet.
Connect handset cord to base handset.
Connect clear line cord to jack labeled
LINE 1/L1+L2.
Line identification
To identify phone lines, press SPEAKERPHONE, then call one of your telephone numbers. If you hear a busy signal, Line 1 is the number you called. If Line 2 rings, it is the number you called.
 NOTE: Use only the power cord supplied with this product.
If you need a replacement, call 1-800-222–3111.
Be sure to use an electrical outlet not controlled by a wall switch.
7
91-000302-050-000_EP5962Englishmanual_Sep.02,2005.qxd 2/13/1950 7:21 PM Page 8
Getting Started
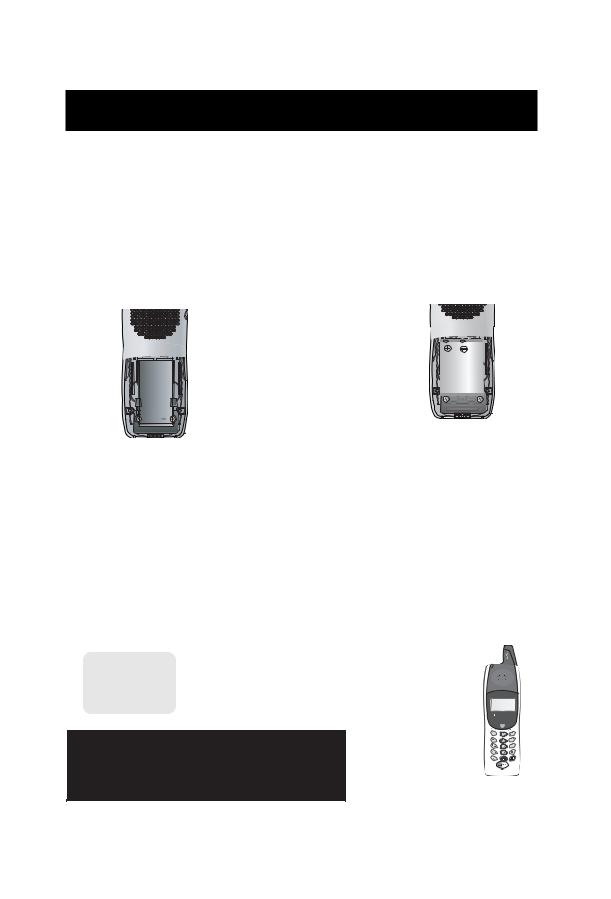
Battery & charger installation
Installation of Battery Pack in Handset
Follow the steps below:
1.Remove the battery compartment cover by pressing on the indentation and sliding downward. Place the new battery pack in the handset with the positive and negative poles aligned in the battery compartment.
2.Replace the battery cover by sliding it upwards.
3.Place the handset in its charger, and allow it to charge for at least 10-12 hours. After initial charge, a maintenance charge of 8 hours should be sufficient.
Insert supplied battery.
Charging of the Handset Battery Pack
Caution: Use only supplied rechargeable battery (model 102) or AT&T replacement battery model 103.
The cordless handset is powered by a rechargeable battery pack. It charges automatically whenever the handset is in its charger. You should charge the battery pack for at least 10-12 hours when you first receive your phone. Average talk time on a fully charged battery is about 8 hours depending on environmental conditions. The battery charge will last for about 4.5 days if you don't use the phone.
You will know the battery pack needs charging when :
•The low battery message is displayed. OR
•The handset seems completely dead, the LCD is completely clear and does not respond when you press the keys.
|
Plug power cord into jack |
|
LOW |
on underside of charger, |
|
then plug A.C. plug into |
||
BATTERY |
||
electrical outlet. |
||
|
|
DID YOU KNOW?
An optional spare battery pack can be kept charged in the base for quick replacement when a handset battery becomes depleted and for power failure operation (see page 44).
Place handset in charger for 12 hours before first use.
8
91-000302-050-000_EP5962Englishmanual_Sep.02,2005.qxd 2/13/1950 7:21 PM Page 9
Getting Started
Belt clip & accessories
Install belt clip as shown below if desired.
For hands-free telephone conversations, you can use any industry standard 2.5 mm headset (purchased separately). For best results use an AT&T 2.5 mm headset.
Snap belt clip into notches on side of handset. Rotate and pull to remove.
Use DATA port at back of phone to connect fax or modem if desired (data port uses Line 2 only).
Plug 2.5 mm headset into jack on side of handset (beneath small rubber cap) or base.
S
P
EAKER
VOLUME
9
91-000302-050-000_EP5962Englishmanual_Sep.02,2005.qxd 2/13/1950 7:21 PM Page 10
SPEAKE |
LUME |
R |
VO |
HANDSET 1
RDL |
MENU |
CID |
 M
M
VOL HOLD MUTE
Telephone Operation
Basic handset operation
Making and answering calls
To answer an incoming call, press LINE 1 or LINE 2. Press LINE 1 or LINE 2 to make a call on Line 1 or Line 2, then dial a number. Press OFF/CLEAR to hang up.
To preview before dialing, enter digit(s) first, then press LINE
1 or LINE 2 to dial. Press OFF/CLEAR to make corrections as you enter the telephone number.
Hands-free speakerphone calls
To answer a call, press SPEAKER. To make a call, press SPEAKER, then dial a telephone number. During a call you can press SPEAKER to toggle between hands-free speakerphone and normal handset use. Press OFF to hang up.
Last number redial
digits
then press to delete
this number from the redial memory, or SELECT and then SAVE to copy the number into your directory (see page 21).
Mute
During a conversation, select MUTE to silence the microphone. You will see MICROPHONE MUTED in the display. You will be able to hear, but your caller will not be able to hear you until you select MUTE again to resume speaking.
10
91-000302-050-000_EP5962Englishmanual_Sep.02,2005.qxd 2/13/1950 7:21 PM Page 11
 H
H
VOL |
HOLD |
MUTE |
SPEAKE |
LUME |
R |
VO |
BASE 0
HANDSET2 2
HANDSET3 3
^ OK V
Telephone Operation
Basic handset operation
Hold
During a conversation, select HOLD to place a call on hold. CALL ON HOLD will be displayed for 4 seconds and an H will appear in the upper left corner of the display. Press the corresponding key (LINE 1 or LINE 2) to resume the call.
NOTE: If the call is not resumed in five minutes the set will ring. The display will show CALL ON HOLD RING BACK!. If the RING BACK is not answered
in 30 seconds, the call will end.
If you are on a call on the other line, your call will not be interrupted by the RING BACK for the held line. The call on the held line will end in five minutes with no warning.
Call transfer
During a conversation you can transfer the call to the base or to another handset.
Press XFER to display a list of handsets and base. Use
the^Vbuttons to highlight the set you want, then select OK to transfer the call to the remote set. A person at the remote set can press LINE 1, LINE 2, or the INTERCOM/TRANSFER button to receive the transferred call.
NOTE: If the transferred call is not answered in 30 seconds, the call will be returned to the originating handset. Thirty seconds later, the display of the
originating handset will show CALL ON HOLD RING BACK!. If the RING BACK is not answered in 30 seconds, the call will end.
You can announce to the base or to another handset that you will transfer the call to them by selecting HOLD and then pressing XFER. This will send an intercom signal. When the intercom call is answered, you can talk privately. After the intercom call ends (by pressing OFF on the handset or INTERCOM on the base), the call will be transferred.
11

91-000302-050-000_EP5962Englishmanual_Sep.02,2005.qxd 2/13/1950 7:21 PM Page 12
Telephone Operation
Mute


 Headset
Speakerphone
Basic base operation
Making and answering calls
To answer a call, lift the corded handset, press SPEAKERPHONE, or press HEADSET (if a headset is connected).
To make a call, lift the corded handset, press SPEAKERPHONE or press HEADSET, then dial a number. You may choose a line by pressing LINE 1 or LINE 2 before or after you choose your calling method.
To preview a telephone number before dialing, enter digits before choosing your calling method.
Press CLEAR to make corrections as you enter digits.
To hang up, replace the corded handset, press SPEAKERPHONE or press HEADSET.
BASE
RDL |
MENU |
CID |
 M
M
VOL HOLD MUTE
DID YOU KNOW?
You can record up to four minutes of a phone conversation (see page 35 for more detail).
Last number redial
Select RDL to view the last 5 numbers called (up to 32
digits each). Use the ^Vbuttons to highlight a number, then press LINE 1 or LINE 2 to dial. Select SELECT then ERASE to delete this number from the redial memory, or SELECT and then SAVE to copy it into your directory (see page 21).
Mute
During a conversation, select MUTE to silence the microphone. You will see MICROPHONE MUTED in the display and the MUTE indicator will light. You will be able to hear, but your caller will not be able to hear you until you select MUTE again to resume speaking.
12
91-000302-050-000_EP5962Englishmanual_Sep.02,2005.qxd 2/13/1950 7:21 PM Page 13
 H
H
VOL HOLD MUTE
Telephone Operation
Basic base operation
Hold
select HOLD to place a call on HOLD will be displayed for 4 seconds and
in the upper left corner of the display. corresponding key (LINE 1 or LINE 2) to
resume the call.
NOTE: If the call is not resumed in five minutes the set will ring. The display will show CALL ON HOLD RING BACK!. If the RING BACK is not
answered in 30 seconds, the call will end.
If you are on a call on the other line, your call will not be interrupted by the RING BACK for the held line. The call on the held line will end in five minutes with no warning.
Call transfer
During a conversation you can transfer the call to a handset. Press TRANSFER to display a list of handsets. Use the
^Vbuttons to highlight the set you want, then select OK to transfer the call to the remote set.
NOTE: If the transferred call is not answered in 30 seconds, the call will be returned to the base. Thirty seconds later, the base display will show
CALL ON HOLD RING BACK!. If the RING BACK is not answered in 30 seconds, the call will end.
You can announce to the handset that you will transfer the call to them by selecting HOLD and then pressing XFER. This will send an intercom signal. When the intercom call is answered, you can talk privately. After the intercom call ends (by pressing OFF on the handset or INTERCOM on the base), the call will be transferred.
13
91-000302-050-000_EP5962Englishmanual_Sep.02,2005.qxd 2/13/1950 7:21 PM Page 14
Line 1 |
RDL |
MENU CID |
Line 2 |
|
|
||
Flash |
|
|
Flash |
Volume
Flash

 Volume
Telephone Operation
Options while on calls-Handset and Base
To adjust volume
Press VOLUME button(s) on the handset or the base to adjust listening volume. On the base, each button press raises or lowers the volume by one level. The handset volume button increases the volume. When it is at the loudest level, you will hear a series of beeps and the next press will take the volume back to the lowest level. Select OK when you are done.
Note: You can also use the VOL softkey and then - or + to adjust the volume.
Call waiting
If you have Call Waiting service, you will hear a beep if someone calls while you are already on a call. Press the FLASH button for the line in use to put your current call on hold and take the new call. You can press FLASH at any time to switch back and forth between calls.
Ring silencing
Press CLEAR while the phone is ringing to silence the ringer temporarily. You can still answer, or let the caller leave a message. The next phone call will ring normally.
14
 Loading...