


 Loading...
User’s manual
TL7800
DECT 6.0
accessory cordless headset
Congratulations
on your purchase of this AT&T product.
Enjoy up to 12 hours of hands-free talk time and crystalclear sound quality with the AT&T TL7800 DECT 6.0 Accessory Cordless Headset. Pair it wirelessly with AT&T DECT phone, including the Synapse or SynJ
 business phone system. Easy
one-button answer, volume and mute controls enhance wireless freedom, while a range of up to 500 feet maximizes mobility.
A magnetic charger in the cradle ensures the headset fits and charges securely—so you’ll never run out of battery during long calls. Lightweight and comfortable, the headset offers multiple wearing styles: over the ear, over the head or behind the neck.
Before using this AT&T product, please read the Important safety information section on pages 39-41 of this manual. Please thoroughly read this user’s manual for the feature operations and troubleshooting information necessary to install and operate your new AT&T product. You can also visit our website at www.telephones.att.com/smb or call
1 (800) 222-3111. In Canada, dial 1 (866) 288-4268.
Visit www.smbtelephones.att.com/compatibility-finder for a complete list of AT&T phones that have been tested and found to be compatible with the TL7800.
Synapse and SynJ
 are registered trademarks of Advanced American Telephones.

Model number: TL7800
Type: |
DECT 6.0 accessory cordless headset |
Serial number: Purchase date: Place of purchase:
Both the model and serial numbers of your AT&T product can be found on the bottom of the headset charger.
Save your sales receipt and original packaging in case it is necessary to return this product for warranty service.
Compatible with Hearing Aid T-Coil
T
TIA-1083
Telephones identified with this logo have reduced noise and interference when used with most T-coil equipped hearing aids and cochlear implants. The TIA-1083 Compliant Logo is a trademark of the Telecommunications Industry Association. Used under license.
© 2012-2013 Advanced American Telephones. All Rights Reserved. AT&T and the AT&T logo are trademarks of AT&T Intellectual Property licensed to Advanced American Telephones, San Antonio, TX 78219. Printed in China.

Parts checklist
Check to make sure the headset package includes the following items. Save your sales receipt and original packaging in the event warranty service is necessary.
User’s manual
TL7800
DECT 6.0 cordless headset
Quick start guide
TL7800
DECT 6.0 cordless headset
User's manual |
Quick start guide |
Cordless headset |
Headset charger |
|
|
with earbud attached |
|
Battery with battery |
Five earbuds |
Headset charger |
compartment cover attached |
|
power adapter |
Three over the ear hooks |
Two over the head bands |
Behind the neck band |

User’s manual
TL7800
DECT 6.0
accessory cordless headset
Table of contents |
|
Getting started |
|
Quick reference guide - |
|
headset......................................... |
1 |
Headset lights............................ |
1 |
Headset alert tones................ |
3 |
Quick reference guide - |
|
headset charger....................... |
4 |
Installation...................................... |
5 |
Battery installation..................... |
6 |
Headset charger installation |
|
and battery charging............. |
7 |
Adding and registering |
|
headsets....................................... |
8 |
Register a headset to |
|
the TL7810/TL7812 |
|
headset base.............................. |
9 |
Register a headset to |
|
the Synapse SB67030/ |
|
SB67031 deskset..................... |
10 |
Register a headset to |
|
the SynJ SB67138/ |
|
SB67158 base........................... |
11 |
Register a headset to |
|
an AT&T DECT cordless |
|
telephone base........................ |
13 |
Deregistering headset.............. |
15 |
Deregister all headsets |
|
from the TL7810/TL7812 |
|
headset base.............................. |
15 |
Deregister headset from |
|
the Synapse SB67030/ |
|
SB67031 deskset..................... |
16 |
Deregister headset from |
|
the SynJ SB67138/ |
|
SB67158 base........................... |
17 |
Deregister all headsets |
|
from an AT&T DECT |
|
cordless telephone base..... |
18 |
Headset attachments................ |
19 |
Earbud.......................................... |
19 |
Over the ear hook.................. |
20 |
Over the head band.............. |
23 |
Behind the neck band.......... |
25 |
Operation |
|
Headset operation...................... |
28 |
Power on/off the |
|
headset........................................ |
28 |
Make a call................................. |
28 |
Answer a call............................ |
28 |
End a call.................................... |
28 |
Headset ringer.......................... |
29 |
Temporary ringer |
|
silencing...................................... |
29 |
Call waiting................................ |
29 |
Options while on calls............. |
30 |
Volume control......................... |
30 |
Mute............................................... |
30 |
Multiple headsets use........... |
31 |
Appendix |
|
Troubleshooting........................... |
32 |
Maintenance.................................. |
38 |
Important safety |
|
information................................ |
39 |
Safety information.................. |
39 |
Especially about cordless |
|
headsets...................................... |
40 |
Precautions for users |
|
of implanted cardiac |
|
pacemakers................................ |
41 |
Pacemaker patients............... |
41 |
FCC Part 68 and ACTA............. |
42 |
FCC Part 15................................... |
44 |
Limited warranty......................... |
45 |
Index |
|
Technical specifications........... |
48 |
DECT 6.0 digital |
|
technology................................. |
48 |
Operating range...................... |
48 |
Extended range and |
|
clarity............................................ |
48 |
Index |
|
Index.................................................. |
49 |

Getting started
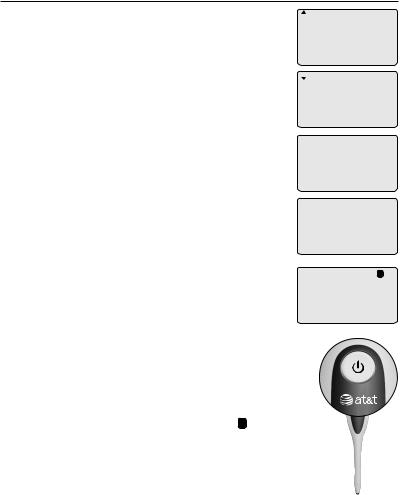
Quick reference guide - headset
 (On/off button and light)
Press to make, answer or end a call (page 28).
Headset lights
 light status
Red |
• On when the headset is charging in the |
|
headset charger. |
|
• Flashes every 10 seconds to indicate the battery is |
|
low when the headset is not in the headset charger. |
|
• Flashes three times to indicate the headset is |
|
powering off. |
Blue |
• On when a fully charged and registered headset is |
|
in the headset charger. |
|
• Flashes three times to indicate the headset is |
|
powering on. |
|
• Flashes twice every three seconds when the headset |
|
is in use. |
|
• Flashes four times every four seconds when there is |
|
an incoming call. |
|
• Flashes every 10 seconds when a fully charged |
|
and registered headset in idle mode is out of the |
|
headset charger. |
|
|
Red and blue |
• Flashes slowly when the headset is not registered. |
|
• Flashes quickly when the headset is trying to |
|
register to a headset base or telephone base. |
Off |
• The battery is dead. |
|
• No battery is installed. |
|
• The headset is powered off. |
|
|

Getting started
Quick reference guide - headset
Earpiece
Battery with cover attached
Remove to replace the battery (page 6).
Microphone
The microphone incorporates noise canceling technology for clearer calls.
VOL+/VOL-
Slide the volume switch to the right or left to adjust the headset ringer volume while
in idle mode, or the listening volume while on a call (page 30).
FLASH
Press to answer an incoming call when you receive a call waiting alert during a call (page 29)
MUTE
Press to mute the microphone during a call (page 30).
Press to mute the ringer in the earpiece when there is an incoming call (page 29).

Getting started
Quick reference guide - headset
Headset alert tones
One short beep every |
• The microphone is muted. |
30 seconds |
|
|
|
Two beeps |
• Error alert tone. |
|
• The ringer volume has reached its lowest |
|
setting. |
|
• The listening volume has reached its highest |
|
or lowest setting. |
|
• The speaking volume has reached its highest |
|
or lowest setting. |
|
• Any key is pressed while the headset is out |
|
of range. |
|
|
Two low beeps |
• Call waiting alert tone. |
|
|
Two rapid beeps |
• Low battery warning. |
every 20 seconds |
|
|
|
Three rising beeps |
• A conference call has started. |
|
|
Three rapid beeps |
• The headset is out of range. |
every 20 seconds |
• The headset is not yet registered. |
|
|
Three rapid beeps |
• The headset is powering on or off. |
|
|

Getting started
Quick reference guide - headset charger
Magnetic charging mount
Place the headset here for charging.
Power cord slot
Route the power cord through the slot.
Power jack
Getting started
Installation
You must install and |
See pages 6-7 |
charge the battery before |
STOP! for easy instructions. |
using the headset. |
For customer service or product information, visit our website at www.telephones.att.com/smb or call
1 (800) 222-3111. In Canada, dial 1 (866) 288-4268.
Avoid placing the telephone base too close to:
•Communication devices such as television sets, VCRs or other cordless telephones.
•Excessive heat sources.
•Noise sources such as a window with traffic outside, motors, microwave ovens, refrigerators or fluorescent lighting.
•Excessive dust sources such as a workshop or garage.
•Excessive moisture.
•Extremely low temperature.
•Mechanical vibration or shock such as on top of a washing machine or work bench.
Getting started
Battery installation
The battery is permanently attached to the battery compartment cover. Do not try to separate them from each other. After installing the battery, charge it for at least 15 minutes. You may be able to make and receive short calls. For optimal performance, charge the headset battery for at least three hours before use. When fully charged, the headset battery provides approximately 12 hours of talk time or 5 days of standby time. When the headset is not in use, recharge it by returning it to the headset charger.
1. Insert the battery into the battery compartment.
2.Press down on the battery until it clicks into place.
 NOTES:
•Remove any headset attachment, except the earbud, before battery replacement.
•To order a replacement battery (model BT191665), visit our website at
www.telephones.att.com/smb or call
1 (800) 222-3111. In Canada, dial 1 (866) 288-4268.

Getting started
Headset charger installation and battery charging
After installing the battery, charge the headset by placing it in the magnetic charging mount as shown below. The  light turns on when the headset is charging.
1.Plug the small end of the headset charger power adapter into the power jack at the bottom of the headset charger. Route the power cord through the power cord slot. Plug the large end of the power adapter into an electrical outlet not controlled by a wall switch.
2.Insert the headset into the magnetic charging mount.
Magnetic charging mount
3.The magnet holds the top of the headset in place. The  light turns on.
IMPORTANT INFORMATION
Use only the supplied rechargeable battery pack or replacement
battery pack (model BT191665). To order, visit our website at www.telephones.att.com/smb or call
1 (800) 222-3111. In Canada, dial 1 (866) 288-4268.
Getting started
Adding and registering headsets
You must register your new TL7800 headset to one of the following devices before use:
•AT&T TL7810/TL7812 cordless headset (see page 9). You can register a maximum of two headsets to each headset base.
•Synapse SB67030/SB67031 deskset (see page 10).
•SynJ SB67138/SB67158 base (see pages 11-12).
•A compatible AT&T DECT 6.0 cordless telephone (see pages 13-14). Visit www.smbtelephones.att.com/ compatibility-finder for a list of compatible telephones.
Refer to the user’s manual of your telephone for the maximum number of handsets and headsets that you can register to the telephone. If you have the maximum number of handsets/ headsets registered, you need to follow the deregistration instructions (see pages 15-18) to deregister all registered devices before you can register this new headset.
You can only register the headset to one device at a time. You must deregister the headset before registering it to another headset base or telephone.

Getting started
Adding and registering headsets
Register a headset to the TL7810/TL7812 headset base
1.Make sure the battery is properly installed in the headset (see page 6). The  light flashes
slowly in red and blue to indicate the headset is not registered.
2. Place the headset in the headset charger and allow it to charge for at least one hour before beginning registration.
3.Remove the headset from the headset charger.
4.Press and hold the PAIR button on the headset base that is registering this headset (about four seconds). When the MUTE light on
that headset base turns on, release the button.
5.Return the headset to the headset charger for registration. The  light flashes quickly in red and blue.
It takes about 60 seconds to complete the registration process. The  light turns red when the headset is registered but not fully
charged, or turns blue when it is registered and fully charged.
If the registration fails, you hear the voice prompt "Not registered" when you press the  button on the headset, and the
  light on the headset flashes slowly in red and blue.
To reset the headset, remove it from the headset charger and try the registration process again.
 NOTE: You cannot register a headset if another system headset is in use.

Getting started
Adding and registering headsets
Register a headset to the Synapse SB67030/SB67031 deskset
1.Press MENU on the deskset.
2.Scroll to User Settings, then press SELECT.
3.Scroll to Cordless Settings, then press SELECT.
4.Scroll to Headset, then press SELECT.
Make sure the screen shows Cordless Headset is currently Not Registered before registration.
If the screen shows Cordless Headset is currently Registered, there is already a registered cordless headset. Refer to the deregistration instructions on page 16 to deregister the old headset before registering a new one.
5.On the deskset, press Register. The screen displays Registration in Progress... while the deskset is searching for the headset.
6.Lift the headset from the headset charger, then replace it
to the charger. The  light flashes red and blue to indicate it is registering to the deskset.
7.When registration is complete, the screen displays Cordless Headset is currently Registered.
It takes about 60 seconds to complete the registration process. The  light turns red when the headset is registered but not fully charged, or turns blue when it is registered and fully charged.
To verify the registration, press the  button on the headset and check for a dial tone. If the registration fails, you hear the voice prompt, "Not registered" and the
  light on the headset flashes slowly in red and blue.
If the registration was not successful, remove it from the headset charger and try the registration process again.
10
Getting started
Adding and registering headsets
Register a headset to the SynJ SB67138/SB67158 base
1.Place the headset in the headset charger and allow it to charge for at least five minutes before beginning registration. Make sure the headset is out of the headset charger before you begin registration.
2.On the telephone base, press MENU.
3.Scroll down to Registration and then press ENTER.
4.Press ENTER again to select Register HS. The telephone base shows Registering new device...
5.Place the headset into the charger. It takes up to 60 seconds to complete the registration. The telephone base shows
Cordless headset registered and beeps when the registration is successful.
It takes about 60 seconds to complete the registration process. The  light turns red when the headset is registered but not fully charged, or turns blue when it is registered and fully charged.
To verify the registration, press the  button on the headset and check for a dial tone. If you hear a dial tone and the extension 0 icon appears on the telephone base, the registration
was successful. If the registration fails, you hear the voice prompt, "Not registered" and
the  light on the headset flashes slowly in red and blue.
COVM
Speed dial setup Customer support
>Registration
>Register HS
Deregistration
Registering
new device...
Cordless headset registered
0
Line1 00:00:05
11

Getting started
Adding and registering headsets
Register a headset to the SynJ SB67138/SB67158 base (cont.)
If the registration was not successful, remove it from the headset charger and try the registration process again.
If you have a dial tone but an extension number other than 0 displays on the telephone base, the headset is registered as a handset and will not function properly. If this is the case, you must deregister and start over. See the deregistration procedures on page 17.
12
Loading...