


 Loading...
U
CD RECEIVER
AMPLI-TUNER CD
OWNER’S MANUAL
MODE D’EMPLOI
IMPORTANT SAFETY INSTRUCTIONS
CAUTION |
RISK OF ELECTRIC SHOCK |
DO NOT OPEN |
CAUTION: TO REDUCE THE RISK OF |
ELECTRIC SHOCK, DO NOT REMOVE |
COVER (OR BACK). NO USER-SERVICEABLE |
PARTS INSIDE. REFER SERVICING TO |
QUALIFIED SERVICE PERSONNEL. |
• Explanation of Graphical Symbols
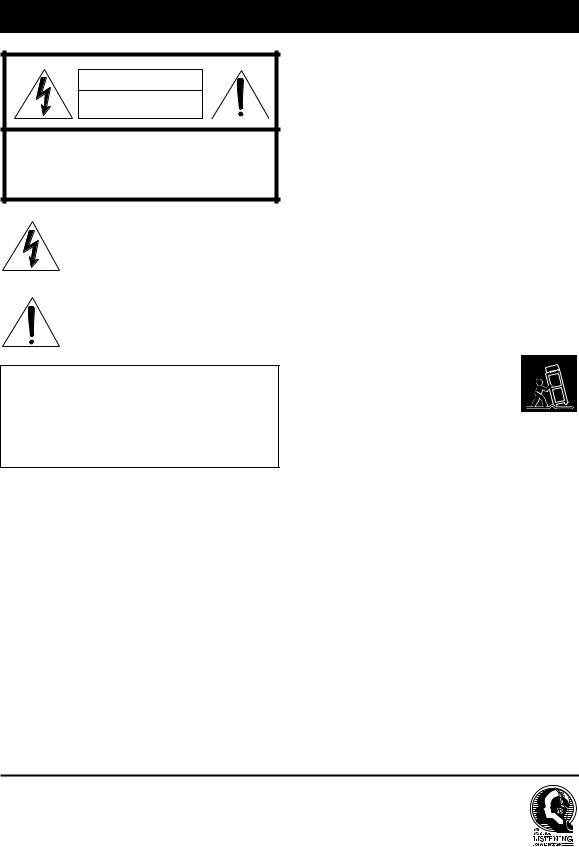
The lightning flash with arrowhead symbol, within an equilateral triangle, is intended to alert you to the presence of uninsulated “dangerous voltage” within the product’s enclosure that may be of sufficient magnitude to constitute a risk of electric shock to persons.
The exclamation point within an equilateral triangle is intended to alert you to the presence of important operating and maintenance (servicing) instructions in the literature accompanying the appliance.
IMPORTANT
Please record the serial number of this unit in the space below.
MODEL:
Serial No.:
The serial number is located on the rear of the unit. Retain this Owner’s Manual in a safe place for future reference.
1Read these instructions.
2Keep these instructions.
3Heed all warnings.
4Follow all instructions.
5Do not use this apparatus near water.
6Clean only with dry cloth.
7Do not block any ventilation openings. Install in accordance with the manufacturer’s instructions.
8Do not install near any heat sources such as radiators, heat registers, stoves, or other apparatus (including amplifiers) that produce heat.
9Do not defeat the safety purpose of the polarized or grounding-type plug. A polarized plug has two blades with one wider than the other. A grounding type plug has two blades and a third grounding prong. The wide blade or the third prong are provided for your safety. If the provided plug does not fit into your outlet, consult an electrician for replacement of the obsolete outlet.
10Protect the power cord from being walked on or pinched particularly at plugs, convenience receptacles, and the point where they exit from the apparatus.
11Only use attachments/accessories specified by the manufacturer.
12Use only with the cart, stand, tripod,
bracket, or table specified by the manufacturer, or sold with the apparatus. When a cart is used, use caution when moving the cart/apparatus combination to avoid injury from tip-over.
13Unplug this apparatus during lightning storms or when unused for long periods of time.
14Refer all servicing to qualified service personnel. Servicing is required when the apparatus has been damaged in any way, such as power-supply cord or plug is damaged, liquid has been spilled or objects have fallen into the apparatus, the apparatus has been exposed to rain or moisture, does not operate normally, or has been dropped.
We Want You Listening For A Lifetime
Yamaha and the Electronic Industries Association’s Consumer Electronics Group want you to get the most out of your equipment by playing it at a safe level. One that lets the sound come through loud and clear without annoying blaring or distortion – and, most importantly, without affecting your sensitive hearing. Since hearing damage from loud sounds is often undetectable until it is too late, Yamaha and the Electronic Industries Association’s Consumer Electronics Group recommend you to avoid prolonged exposure from excessive volume levels.
i En

FCC INFORMATION (for US customers)
1 IMPORTANT NOTICE: DO NOT MODIFY THIS |
Compliance with FCC regulations does not guarantee |
|
UNIT! |
that interference will not occur in all installations. If |
|
This product, when installed as indicated in the |
this product is found to be the source of interference, |
|
instructions contained in this manual, meets FCC |
which can be determined by turning the unit “OFF” |
|
requirements. Modifications not expressly approved by |
and “ON”, please try to eliminate the problem by using |
|
Yamaha may void your authority, granted by the FCC, |
one of the following measures: |
|
to use the product. |
Relocate either this product or the device that is being |
|
2 IMPORTANT: When connecting this product to |
||
affected by the interference. |
||
accessories and/or another product use only high quality |
||
Utilize power outlets that are on different branch |
||
shielded cables. Cable/s supplied with this product MUST |
||
be used. Follow all installation instructions. Failure to |
(circuit breaker or fuse) circuits or install AC line |
|
follow instructions could void your FCC authorization to |
filter/s. |
|
use this product in the USA. |
In the case of radio or TV interference, relocate/ |
|
3 NOTE: This product has been tested and found to comply |
reorient the antenna. If the antenna lead-in is 300 ohm |
|
ribbon lead, change the lead-in to coaxial type cable. |
||
with the requirements listed in FCC Regulations, Part 15 |
||
|
||
for Class “B” digital devices. Compliance with these |
If these corrective measures do not produce |
|
requirements provides a reasonable level of assurance that |
satisfactory results, please contact the local retailer |
|
your use of this product in a residential environment will |
authorized to distribute this type of product. If you can |
|
not result in harmful interference with other electronic |
not locate the appropriate retailer, please contact |
|
devices. |
Yamaha Electronics Corp., U.S.A. 6660 Orangethorpe |
|
This equipment generates/uses radio frequencies and, |
Ave, Buena Park, CA 90620. |
|
if not installed and used according to the instructions |
The above statements apply ONLY to those products |
|
found in the users manual, may cause interference |
||
distributed by Yamaha Corporation of America or its |
||
harmful to the operation of other electronic devices. |
||
subsidiaries. |
||
|
ii En

CAUTION: READ THIS BEFORE OPERATING YOUR UNIT.
1To assure the finest performance, please read this manual carefully. Keep it in a safe place for future reference.
2Install this sound system in a well ventilated, cool, dry, clean place - away from direct sunlight, heat sources, vibration, dust, moisture, and/or cold. For proper ventilation, allow the following minimum clearances around CRX-332.
Top: 20 cm (8 in) Rear: 10 cm (4 in) Sides: 10 cm (4 in)
3Locate this unit away from other electrical appliances, motors, or transformers to avoid humming sounds.
4Do not expose this unit to sudden temperature changes from cold to hot, and do not locate this unit in an environment with high humidity (i.e. a room with a humidifier) to prevent condensation inside this unit, which may cause an electrical shock, fire, damage to this unit, and/or personal injury.
5Avoid installing this unit where foreign object may fall onto this unit and/or this unit may be exposed to liquid dripping or splashing. On the top of this unit, do not place:
–Other components, as they may cause damage and/or discoloration on the surface of this unit.
–Burning objects (i.e. candles), as they may cause fire, damage to this unit, and/or personal injury.
–Containers with liquid in them, as they may fall and liquid may cause electrical shock to the user and/or damage to this unit.
6Do not cover this unit with a newspaper, tablecloth, curtain, etc. in order not to obstruct heat radiation. If the temperature inside this unit rises, it may cause fire, damage to this unit, and/or personal injury.
7Do not plug in this unit to a wall outlet until all connections are complete.
8Do not operate this unit upside-down. It may overheat, possibly causing damage.
9Do not use force on switches, knobs and/or cords.
10When disconnecting the power cable from the wall outlet, grasp the plug; do not pull the cable.
11Do not clean this unit with chemical solvents; this might damage the finish. Use a clean, dry cloth.
12Only voltage specified on this unit must be used. Using this unit with a higher voltage than specified is dangerous and may cause fire, damage to this unit, and/or personal injury. Yamaha will not be held responsible for any damage resulting from use of this unit with a voltage other than specified.
13To prevent damage by lightning, keep the power cable and outdoor antennas disconnected from a wall outlet or this unit during a lightning storm.
14Do not attempt to modify or fix this unit. Contact qualified Yamaha service personnel when any service is needed. The cabinet should never be opened for any reasons.
15When not planning to use this unit for long periods of time (i.e. vacation), disconnect the AC power plug from the wall outlet.
16Be sure to read the “TROUBLESHOOTING” section on common operating errors before concluding that this unit is faulty.
17Before moving this unit, press  to set this unit to the standby mode, and disconnect the AC power plug from the wall outlet.
18Condensation will form when the surrounding temperature changes suddenly. Disconnect the power cable from the outlet, then leave this unit alone.
19When using this unit for a long time, this unit may become warm. Turn the power off, then leave this unit alone for cooling.
20Install this unit near the AC outlet and where the AC power plug can be reached easily.
21The batteries shall not be exposed to excessive heat such as sunshine, fire or the like.
22Excessive sound pressure from earphones and headphones can cause hearing loss.
This unit is not disconnected from the AC power source as long as it is connected to the wall outlet, even if this unit itself is turned off by  . This state is called the standby mode. In this state, this unit is designed to consume a very small quantity of power.
WARNING
TO REDUCE THE RISK OF FIRE OR ELECTRIC SHOCK, DO NOT EXPOSE THIS UNIT TO RAIN OR MOISTURE.
LASER SAFETY
This unit employs a laser. Due to possible eye injury, only a qualified service person should remove the cover or attempt to service this device.
DANGER
This unit emits visible laser radiation when open. Avoid direct eye exposure to beam. When this unit is plugged into the wall outlet, do not place your eyes close to the opening of the disc tray and other openings to look into inside.
LASER |
|
Type |
Semiconductor laser GaAs/GaAlAs |
Wave length |
790 nm |
Output Power |
10 mW |
|
|
WARNING
DO NOT TOUCH THIS UNIT WHEN IT IS USED CONTINUOUSLY AT HIGH VOLUME BECAUSE THE BOTTOM OF THIS UNIT MAY BECOME HOT. IT MAY LEAD TO INJURIES SUCH AS BURNS, ETC.
CAUTION
Danger of explosion if battery is incorrectly replaced. Replace only with the same or equivalent type.
FOR CANADIAN CUSTOMERS
To prevent electric shock, match wide blade of plug to wide slot and fully insert.
This Class B digital apparatus complies with Canadian ICES-003.
iii En

CONTENTS
PREPARATION |
|
SUPPLIED ACCESSORIES ................................. |
2 |
PLAYABLE DISCS AND FILE FORMAT......... |
3 |
CONNECTION....................................................... |
4 |
Connecting speakers/antennas/subwoofer ................. |
4 |
Connecting the power cable....................................... |
5 |
Other connection........................................................ |
5 |
REMOTE CONTROL ........................................... |
6 |
FRONT PANEL DISPLAY ................................... |
7 |
OPERATION |
|
FRONT PANEL AND BASIC OPERATION ..... |
8 |
LISTENING TO MUSIC....................................... |
9 |
Playback operation..................................................... |
9 |
Other operation ........................................................ |
10 |
LISTENING TO RADIO STATIONS................ |
11 |
Tuning to radio stations ........................................... |
11 |
Presetting radio stations........................................... |
11 |
Selecting preset radio stations (Preset tuning)......... |
11 |
USING USEFUL FUNCTIONS .......................... |
12 |
Using option menu................................................... |
12 |
Using sleep timer ..................................................... |
12 |
ADDITIONAL INFORMATION |
|
TROUBLESHOOTING ....................................... |
13 |
General..................................................................... |
13 |
iPod/iPad.................................................................. |
14 |
USB/iPad ................................................................. |
15 |
Radio reception........................................................ |
15 |
Disc playback .......................................................... |
16 |
Remote control ........................................................ |
16 |
HANDLING COMPACT DISCS ........................ |
17 |
SPECIFICATIONS............................................... |
17 |
■ About this manual
•“iPod” described in this manual may also refer to “iPhone”.
•This manual describes how to operate this unit using a remote control except when it is not available. Some of these operations are also available using the front panel buttons.
•The symbol “ ” with page number(s) indicates the corresponding reference page(s).
•Notes contain important information about safety and operating instructions. yindicates a tip for your operation.
•This manual is printed prior to production. Design and specifications are subject to change in part as a result of improvements, etc. In case of differences between the manual and the product, the product has priority.
PREPARATION |
|
|
|
|
|
OPERATION |
|
|
|
|
|
INFORMATION |
ADDITIONAL |
|
|
English
1 En
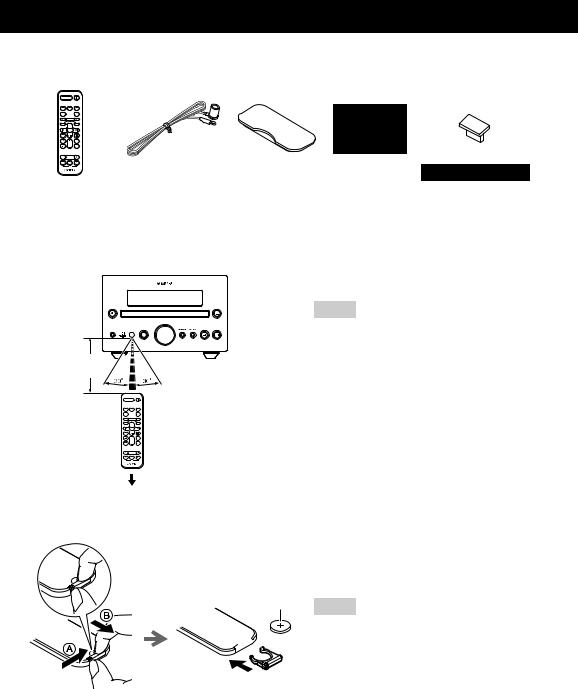
SUPPLIED ACCESSORIES
Make sure you have all of the following items.
Remote control |
FM antenna |
Dock cover |
AM antenna |
USB cap |
|
|
SLEEP |
|
|
|
|
CD |
iPod AUX |
|
|
|
|
TUNER |
USB |
|
|
|
|
FOLDER
MENU
ENTER
OPTION
DISPLAY
VOLUME
MUTE
TUNING
MEMORY
PRESET
CAUTION
(With CR2032 battery)
Keep the USB cap out of the reach of children, so that it is not mistakenly swallowed.
■ Using the remote control
VOLUME
INPUT
PHONES
PRESET
Within 6 m (20’)
Use the remote control within 6 m (20’) of this unit and point it toward the remote control sensor.
Notes
•Do not spill liquid on the remote control.
•Do not drop the remote control.
•Do not leave the remote control in the following places:
–hot or humid places such as a bathroom or near a heater
–extremely cold places
–dusty places
 Battery insulation sheet: Remove before using.
■Replacing the battery in the remote control
1
CR2032 battery

 2
2
3
While pushing the release tab in direction  , slide out the battery holder in direction
  .
.
Change the battery when the operation range of the remote control decreases.
Notes
•If the battery grows old, the effective operation range of the remote control decreases considerably. If this happens, replace the battery with new one as soon as possible.
•Exhausted battery may leak. If the battery have leaked, dispose of it immediately. Avoid touching the leaked material or letting it come into contact with clothing, etc. Clean the battery compartment thoroughly before installing a new battery.
•Keep the battery away from children. If the battery is accidentally swallowed, contact your doctor immediately.
•When not planning to use the remote control for long periods of time, remove the battery from the remote control.
•Do not charge or disassemble the supplied battery.
2 En
PLAYABLE DISCS AND FILE FORMAT
■ Playable discs
Use compact discs bearing the marks below.


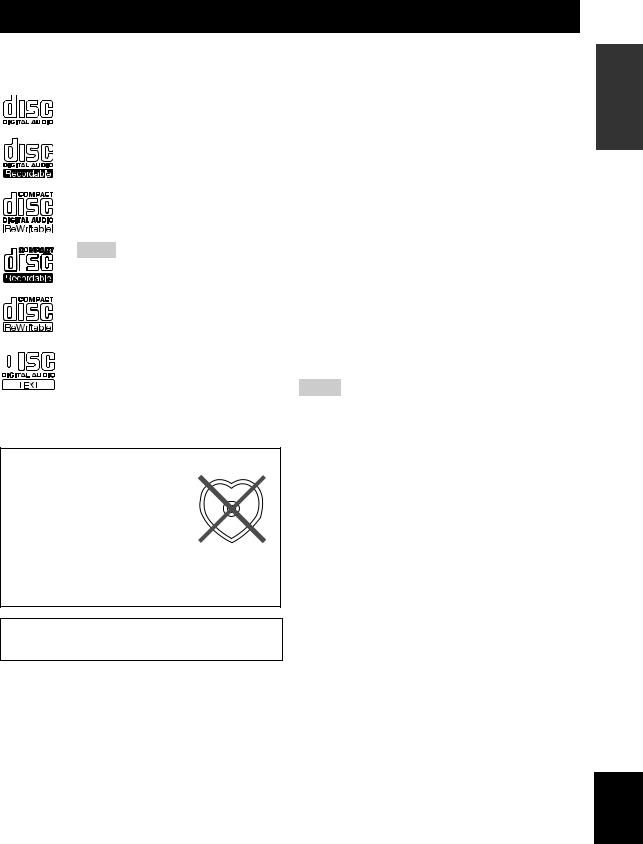
 .... Compact discs (digital audio)


 .... CD-R,CD-RW digital audio discs
• CD-R or CD-RW discs bearing one of
the following phrases. FOR CONSUMER
FOR CONSUMER USE FOR MUSIC USE ONLY
• Finalized CD-R or CD-RW discs
Note
This compact disc player may not be able to play some CD-R/CD-RW discs or discs on which recording was not made correctly.


 .... CD-TEXT discs
To play back an 8-cm (3 in) CD
Place it in the inner recessed area of the disc tray. Do not put a normal (12-cm) CD on top of an 8-cm (3 in) CD.
To prevent a malfunction of this unit:
•Do not use any nonstandard shaped disc (heart, etc.) available on the
market because it might damage the unit.
•Do not use a disc with tape, stickers, or paste on it. If you use such a disc, the disc may get stuck in the unit, or damage to the unit may result.
Note: Do not use any lens cleaners as they may be a cause of malfunction.
■ Playable MP3 and WMA files
MP3
|
|
Bitrate |
Sampling |
Format |
|
frequency |
|
|
(kbps) |
||
|
|
(kHz) |
|
|
|
|
|
|
|
|
|
MPEG 1 Audio Layer-3 |
|
32-320*1 |
32/44.1/48 |
MPEG 2 Audio Layer-3, 2 |
|
8-160*1 |
16/22.05/24 |
*1 Variable bitrate is supported. |
|
|
|
WMA
•Version 8
•Version 9 (Standard and variable bitrates are supported. Professional and Lossless are not supported.)
|
Bitrate |
Sampling |
|
Profile |
frequency |
||
(kbps) |
|||
|
(kHz) |
||
|
|
||
|
|
|
|
High Profile |
32-320*2 |
32/44.1/48 |
|
Mid Profile |
16-32 |
22.05 |
|
|
|
|
*2 Both constant and variable bitrates are supported.
Notes
•Playback for Data Disc starts in alphanumeric order of files.
•Playback for USB starts in order by date and time of creation.
•Copyright-protected WMA (DRM) files cannot be played back by this unit.
•The disc must be ISO 9660 compatible.
•The maximum file and folder numbers are as follows.
|
Data Disc |
USB |
|
|
|
|
|
Maximum total number of file |
512 |
9,999 |
|
and folder*3 |
|||
|
|
||
Maximum folder number*3 |
255 |
999 |
|
Maximum file number per |
511 |
255 |
|
folder |
|||
|
|
||
|
|
|
|
*3 The root is counted as one of the folders. |
|
||
PREPARATION
English
3 En
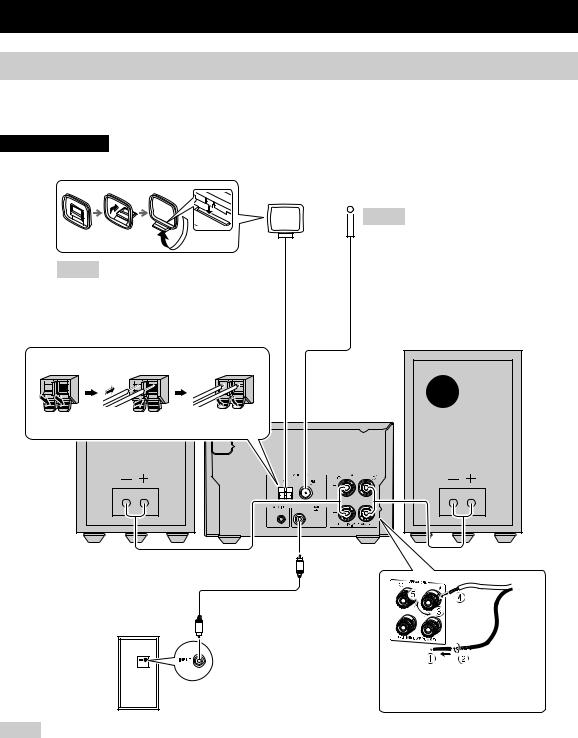
CONNECTION
Connecting speakers/antennas/subwoofer
Follow the procedure below to connect the speakers and FM/AM antennas to this unit. For information on your speakers, refer to the owner’s manual supplied for the speakers.
If a subwoofer is connected, low-frequency audio signals are output through SUBWOOFER OUT.
CAUTION
Do not connect the power cable of this unit until all cable connections are completed.
AM antenna
Notes
•Place the antenna in a location with good signal reception.
•Digital devices located near the antenna may affect signal reception.
FM antenna
 Notes
Notes
•The antenna should be stretched out.
•If you use an outdoor antenna instead of the supplied FM antenna, reception will be better.
•If radio reception is poor, change the height, direction, or placement of the antenna.
Press and |
hold |
Insert |
Release |
|||||||||||
|
|
|
|
|
|
|
|
|
|
|
|
|
|
|
|
|
|
|
|
|
|
|
|
|
|
|
|
|
|
|
|
|
|
|
|
|
|
|
|
|
|
|
|
|
|
|
|
|
|
|
|
|
|
|
|
|
|
|
|
The wires of the AM antenna have no polarity.
Subwoofer cable Subwoofer (sold separately) (sold separately)
Be sure to remove insulation from the end of each speaker cable.
Notes
•If you connect a subwoofer, use a subwoofer that has a built-in amplifier.
•Be sure to connect the left channel (L), right channel (R), “+”(red) “–”(black) properly. If the connections are faulty, no sound will be heard from the speakers, and if the polarity of the speaker connections is incorrect, the sound will be unnatural and lacks bass.
•Do not let the bare speaker wires touch each other or do not let them touch any metal part of this unit. This could damage this unit and/ or the speakers.
•Use speakers having more than 6 Ω impedance.
•There is a chance that placing speakers too close to a CRT-based (Braun tube) TV set might impair picture color. Should this happen, move the speakers away from the TV set.
4 En
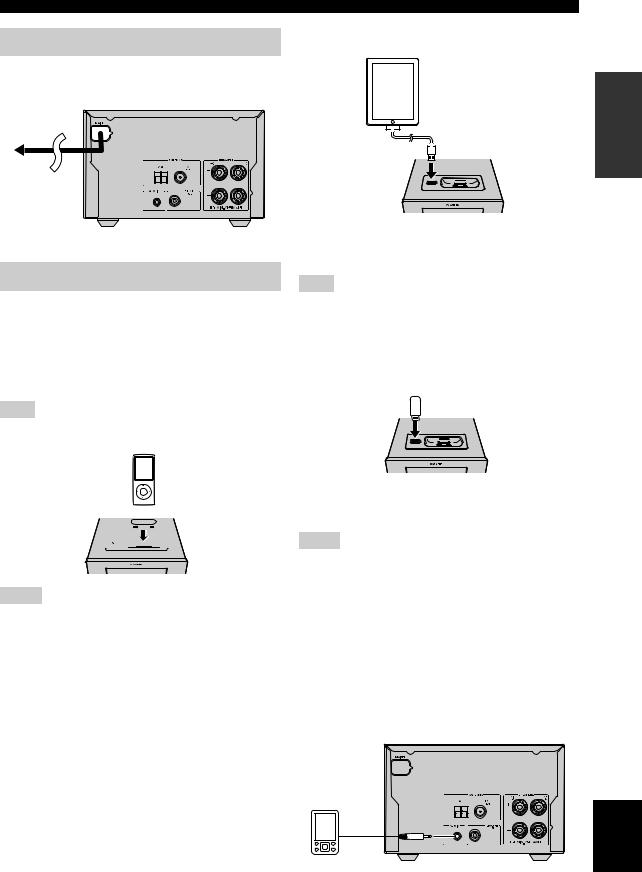
Connecting the power cable
After you made all connections, connect the power cables of this unit
To the wall outlet
Other connection
■ Stationing iPod
Station or remove your iPod whenever you want.
y
An iPod is charged when set in the iPod dock.
When the unit is turned on and the input source is set to USB, the iPod is not charged.
Note
This unit is compatible with iPod classic, iPod nano (2nd generation and later), iPod touch and iPhone.
 Dock Adapter
 iPod dock
Notes
•To secure the connection, attach a compatible Dock Adapter supplied with the iPod or an iPod Universal Dock Adapter (sold separately), and remove the protective case covering from your iPod.
•If you do not use an adapter or if the adapter is not compatible, the connection could be loose or poor, which could cause damage or malfunctions. For details on dock adaptor information, please visit official Apple’s website.
•If an iPod in protective case is connected by force, the connector may be damaged. Remove the protective case before connection.
•Attach the dock cover to the iPod dock whenever you are not using it.
CONNECTION
■ Connecting iPad
Connect or remove your iPad whenever you want.
PREPARATION
y
When the unit is turned on and the input source is set to USB, the connected iPad is charged.
Note
•Make sure to use a Dock Connector to USB Cable that is supplied with your iPad.
•When an iPad or USB device is not in use, set the USB cover to protect USB port.
■ Connecting a USB device
Connect or remove your USB device whenever you want.
y
When the unit is turned on and the input source is set to USB, the connected USB device is charged.
Notes
•This unit supports USB mass storage class devices (e.g., flash memories or portable audio players) using FAT16 or FAT32 format.
•Do not connect devices other than USB mass storage class devices (such as USB chargers or USB hubs), PCs, card readers, an external HDD, etc.
•USB devices that use encryption cannot be used.
•When an iPad or USB device is not in use, set the USB cover to protect USB port.
■ Connecting an external device
Connect your portable audio device using a commercially available 3.5 mm (1/8 in) mini plug cable.
English
5 En
1
2
3
4
5
6
7
8
9
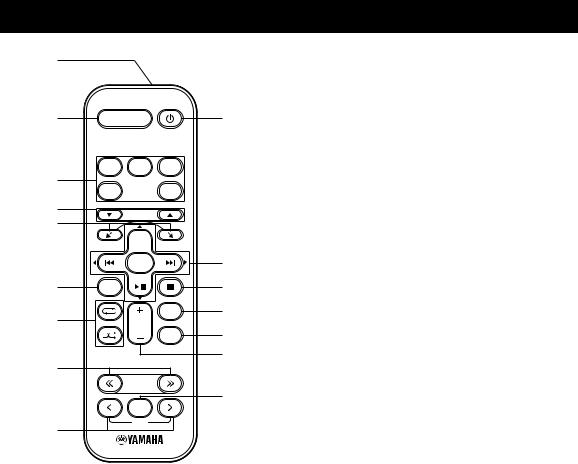
REMOTE CONTROL
SLEEP
CD iPod AUX
TUNER |
USB |
FOLDER |
MENU
ENTER
OPTION
DISPLAY
VOLUME
MUTE
TUNING
MEMORY
PRESET
0
A
B
C
D E
F
1Infrared signal transmitter
2SLEEP: Sleep setting ( P. 12)
3Source buttons: Change sources. When listening to the radio, press TUNER to switch between the FM and AM bands.
4FOLDER (during data CD/USB playback): Change folder.
5 ,
,  : Scrolls through items on the iPod’s screen.
6OPTION: Displays the option menu. ( P. 12)
7 (Shuffle),
  (Repeat) ( P. 10)
8TUNING (during receiving radio): Tuning radio ( P. 11)
9PRESET (during receiving radio): Select the preset radio station ( P. 11)
0  : Standby/on
A ,
,  (during playback): Skip backward and forward/ press and hold to rewind and fast-forward
MENU: Returns to the upper level in the iPod menu.
 : Play/pause
S/T/W/X (During using the option menu): Changes the setting
ENTER
(During using the iPod): Select group/start playback (During using the option menu): Confirms the setting
B : Stop playback.
CDISPLAY: Switches the information shown on the front panel. ( P. 10)
DMUTE: Mute/resume the sound.
EVOLUME: Volume control
FMEMORY: Memories preset radio stations. ( P. 11)
6 En
FRONT PANEL DISPLAY
1 |
2 |
3 |
4 |
5 |
6 |
7 |
SLEEP PRESET STEREO AUTO |
SHUFFLE REPEAT |
MUTE |
||||
|
TUNED MEMORY |
|
|
ARTISTS ALBUMS SONGS |
|
|
VOLUME |
|
|
|
|
|
B |
INPUT |
|
|
|
|
|
|
PHONES |
|
|
|
|
|
|
8 |
9 |
0 |
|
|
A |
|
1SLEEP indicator: Lights up when the sleep timer is on ( P. 12).
2PRESET indicator: Lights up when you preset radio stations ( P. 11).
3STEREO indicator: Lights up when this unit is receiving a strong signal from an FM stereo broadcast.
4AUTO indicator: Lights up when this unit is in the Automatic Tuning mode ( P. 11).
5SHUFFLE indicator: Lights up when you set your iPod/iPad/CD/USB to shuffle play ( P. 10).
6REPEAT indicator: Lights up when you set your iPod/iPad/CD/USB to repeat play ( P. 10).
7MUTE indicator: Lights up when the sound is muted.
8Multi information display: Shows the various information.
9TUNED indicator: Lights up when this unit is tuned into a station ( P. 11).
0MEMORY indicator: Flashes when searching for a radio station by automatic preset tuning. Lights up when you preset radio stations automatically or manually ( P. 11).
AMulti information indicators: Indicate the music information currently displayed on Multi information display ( P. 10).
BOperation indicators: Show the available menu buttons for the currently selected OPTION menu item.
PREPARATION
English
7 En
FRONT PANEL AND BASIC OPERATION
y
•Press  to set the unit to standby mode. All the information on the front panel display is not displayed in standby mode. This can reduce power consumption. To turn on the unit, press
  ,
,  , or
, or  on the front panel. If you press
  , the input source is set to CD, iPod or USB depending on which input source is used last. Playback begins if the input source is set to CD or USB.
USB port:
P. 5, 9
 :
:
Unit standby/on
PHONES
3.5 mm (1/8 in) mini plug cable
Remote control sensor:
Receives signals from the remote control.
iPod dock
USB
IPod
|
Disc tray |
|
: |
VOLUME |
Disc tray open/close |
INPUT
 :
:
PRESET
Play/pause playback
:
Stop playback
(During playback):
Skip and search backward/forward.
PRESET (During receiving radio):
Select the preset radio station.
VOLUME
VOLUME
Down |
Up |
INPUT button:
Press repeatedly to choose the input source.
|
CD iPod AUX USB FM AM |
|
y |
|
To listen to an external device, select AUX |
PHONES: |
and use the external device to begin |
Connecting headphones |
playback. |
No sound is output from the speakers |
|
when headphones are connected. |
|
8 En

LISTENING TO MUSIC
Playback operation
Follow the procedures below to play back music.
|
1 |
Set the source |
2 |
Switch the |
3 Select music and start playback |
|
|
input |
|||
|
|
|
|
|
|
|
|
Dock Adapter |
|
|
|
|
iPod*1 |
|
|
iPod |
|
|
|
|
|
|
|
|
|
|
|
|
Scroll the list |
|
|
P. 5 |
|
|
|
|
|
|
|
|
MENU |
|
|
|
|
|
ENTER |
|
iPad*1 |
|
|
|
Control menu |
|
|
|
|
|
|
|
|
|
|
USB |
|
|
|
P. 5 |
|
|
|
|
|
|
|
|
Skip to the first file in the previous/next |
|
USB*2 |
|
|
|
folder for MP3 or WMA*3 |
|
|
|
|
|
|
|
|
P. 5 |
|
|
FOLDER |
|
|
|
|
|
|
|
|
|
|
|
MENU |
|
|
|
|
|
ENTER |
|
CD |
|
|
CD |
|
|
|
|
|
OPTION |
|
|
|
|
|
|
|
*1 |
Some features may not be available depending on the model or the software version of your iPod/iPad. |
||||
*2 |
· Some devices may not work properly even if they meet the requirements. |
|
|||
·Playability of and power supply to all kind of USB devices are not guaranteed.
·The reading time may exceed 30 seconds depending on the number of files/folders.
·Yamaha and suppliers accept no liability for the loss of data saved on the USB devices connected to this unit. As a precaution, it is recommended that the files are made backup copies.
*3 · If you press these buttons, the folder name is displayed on the front panel display for a certain period. · ROOT is displayed for the root folder when the directory contains playable files.
9 En
OPERATION
English
Loading...