


OWNER’S MANUAL
STAGE PIANO
EN
SPECIAL MESSAGE SECTION
PRODUCT SAFETY MARKINGS: Yamaha electronic products may have either labels similar to the graphics shown below or molded/stamped facsimiles of these graphics on the enclosure. The explanation of these graphics appears on this page. Please observe all cautions indicated on this page and those indicated in the safety instruction section.
CAUTION |
RISK OF ELECTRIC SHOCK |
DO NOT OPEN |
CAUTION: TO REDUCE THE RISK OF ELECTRIC SHOCK. |
DO NOT REMOVE COVER (OR BACK). |
NO USER-SERVICEABLE PARTS INSIDE. |
REFER SERVICING TO QUALIFIED SERVICE PERSONNEL. |
The exclamation point within the equilateral triangle is intended to alert the user to the presence of important operating and maintenance (servicing) instructions in the literature accompanying the product.
The lightning flash with arrowhead symbol, within the equilateral triangle, is intended to alert the user to the presence of uninsulated “dangerous voltage” within the product’s enclosure that may be of sufficient magnitude to constitute a risk of electrical shock.
IMPORTANT NOTICE: All Yamaha electronic products are tested and approved by an independent safety testing laboratory in order that you may be sure that when it is properly installed and used in its normal and customary manner, all foreseeable risks have been eliminated. DO NOT modify this unit or commission others to do so unless specifically authorized by Yamaha. Product performance and/or safety standards may be diminished. Claims filed under the expressed warranty may be denied if the unit is/has been modified. Implied warranties may also be affected.
SPECIFICATIONS SUBJECT TO CHANGE: The information contained in this manual is believed to be correct at the time of printing. However, Yamaha reserves the right to change or modify any of the specifications without notice or obligation to update existing units.
92-469- (rear)
ENVIRONMENTAL ISSUES: Yamaha strives to produce products that are both user safe and environmentally friendly. We sincerely believe that our products and the production methods used to produce them, meet these goals. In keeping with both the letter and the spirit of the law, we want you to be aware of the following:
Battery Notice: This product MAY contain a small nonrechargeable battery which (if applicable) is soldered in place. The average life span of this type of battery is approximately five years. When replacement becomes necessary, contact a qualified service representative to perform the replacement.
Warning: Do not attempt to recharge, disassemble, or incinerate this type of battery. Keep all batteries away from children. Dispose of used batteries promptly and as regulated by applicable laws. Note: In some areas, the servicer is required by law to return the defective parts. However, you do have the option of having the servicer dispose of these parts for you.
Disposal Notice: Should this product become damaged beyond repair, or for some reason its useful life is considered to be at an end, please observe all local, state, and federal regulations that relate to the disposal of products that contain lead, batteries, plastics, etc.
NOTICE: Service charges incurred due to lack of knowledge relating to how a function or effect works (when the unit is operating as designed) are not covered by the manufacturer’s warranty, and are therefore the owners responsibility. Please study this manual carefully and consult your dealer before requesting service.
NAME PLATE LOCATION: The graphic below indicates the location of the name plate. The model number, serial number, power requirements, etc., are located on this plate. You should record the model number, serial number, and the date of purchase in the spaces provided below and retain this manual as a permanent record of your purchase.
Model
Serial No.
Purchase Date
2 CP300 Owner’s Manual

IMPORTANT SAFETY INSTRUCTIONS
INFORMATION RELATING TO PERSONAL INJURY, ELECTRICAL SHOCK, AND FIRE HAZARD POSSIBILITIES HAS BEEN INCLUDED IN THIS LIST.
WARNING- When using any electrical or electronic product, basic precautions should always be followed. These precautions include, but are not limited to, the following:
1. Read all Safety Instructions, Installation Instructions, Special Message Section items, and any Assembly Instructions found in this manual BEFORE making any connections, including connection to the main supply.
2. Main Power Supply Verification: Yamaha products are manufactured specifically for the supply voltage in the area where they are to be sold. If you should move, or if any doubt exists about the supply voltage in your area, please contact your dealer for supply voltage verification and (if applicable) instructions. The required supply voltage is printed on the name plate. For name plate location, please refer to the graphic found in the Special Message Section of this manual.
3. This product may be equipped with a polarized plug (one blade wider than the other). If you are unable to insert the plug into the outlet, turn the plug over and try again. If the problem persists, contact an electrician to have the obsolete outlet replaced. Do NOT defeat the safety purpose of the plug.
4. Some electronic products utilize external power supplies or adapters. Do NOT connect this type of product to any power supply or adapter other than one described in the owners manual, on the name plate, or specifically recommended by Yamaha.
5. WARNING: Do not place this product or any other objects on the power cord or place it in a position where anyone could walk on, trip over, or roll anything over power or connecting cords of any kind. The use of an extension cord is not recommended! If you must use an extension cord, the minimum wire size for a 25’ cord (or less) is 18 AWG. NOTE: The smaller the AWG number, the larger the current handling capacity. For longer extension cords, consult a local electrician.
6. Ventilation: Electronic products, unless specifically designed for enclosed installations, should be placed in locations that do not interfere with proper ventilation. If instructions for enclosed installations are not provided, it must be assumed that unobstructed ventilation is required.
7. Temperature considerations: Electronic products should be installed in locations that do not significantly contribute to their operating temperature. Placement of this product close to heat sources such as; radiators, heat registers and other devices that produce heat should be avoided.
8. This product was NOT designed for use in wet/damp locations and should not be used near water or exposed to rain. Examples of wet/damp locations are; near a swimming pool, spa, tub, sink, or wet basement.
9. This product should be used only with the components supplied or; a cart, rack, or stand that is recommended by the manufacturer. If a cart, rack, or stand is used, please observe all safety markings and instructions that accompany the accessory product.
10. The power supply cord (plug) should be disconnected from the outlet when electronic products are to be left unused for extended periods of time. Cords should also be disconnected when there is a high probability of lightning and/or electrical storm activity.
11. Care should be taken that objects do not fall and liquids are not spilled into the enclosure through any openings that may exist.
12. Electrical/electronic products should be serviced by a qualified service person when:
a.The power supply cord has been damaged; or
b.Objects have fallen, been inserted, or liquids have been spilled into the enclosure through openings; or
c.The product has been exposed to rain: or
d.The product dose not operate, exhibits a marked change in performance; or
e.The product has been dropped, or the enclosure of the product has been damaged.
13.Do not attempt to service this product beyond that described in the user-maintenance instructions. All other servicing should be referred to qualified service personnel.
14.This product, either alone or in combination with an amplifier and headphones or speaker/s, may be capable of producing sound levels that could cause permanent hearing loss. DO NOT operate for a long period of time at a high volume level or at a level that is uncomfortable. If you experience any hearing loss or ringing in the ears, you should consult an audiologist.
IMPORTANT: The louder the sound, the shorter the time period before damage occurs.
15.Some Yamaha products may have benches and/or accessory mounting fixtures that are either supplied as a part of the product or as optional accessories. Some of these items are designed to be dealer assembled or installed. Please make sure that benches are stable and any optional fixtures (where applicable) are well secured BEFORE using. Benches supplied by Yamaha are designed for seating only. No other uses are recommended.
PLEASE KEEP THIS MANUAL
92-469-2
CP300 Owner’s Manual |
3 |

PRECAUTIONS
PLEASE READ CAREFULLY BEFORE PROCEEDING
* Please keep this manual in a safe place for future reference.
 WARNING
Always follow the basic precautions listed below to avoid the possibility of serious injury or even death from electrical shock, short-circuiting, damages, fire or other hazards. These precautions include, but are not limited to, the following:
Power supply/Power cord
•Only use the voltage specified as correct for the instrument. The required voltage is printed on the name plate of the instrument.
•Check the electric plug periodically and remove any dirt or dust which may have accumulated on it.
•Use only the supplied power cord/plug.
•Do not place the power cord near heat sources such as heaters or radiators, and do not excessively bend or otherwise damage the cord, place heavy objects on it, or place it in a position where anyone could walk on, trip over, or roll anything over it.
Water warning
•Do not expose the instrument to rain, use it near water or in damp or wet conditions, or place containers on it containing liquids which might spill into any openings.
•Never insert or remove an electric plug with wet hands.
Fire warning
•Do not put burning items, such as candles, on the unit. A burning item may fall over and cause a fire.
Do not open
•Do not open the instrument or attempt to disassemble the internal parts or modify them in any way. The instrument contains no user-serviceable parts. If it should appear to be malfunctioning, discontinue use immediately and have it inspected by qualified Yamaha service personnel.
If you notice any abnormality
•If the power cord or plug becomes frayed or damaged, or if there is a sudden loss of sound during use of the instrument, or if any unusual smells or smoke should appear to be caused by it, immediately turn off the power switch, disconnect the electric plug from the outlet, and have the instrument inspected by qualified Yamaha service personnel.
 CAUTION
Always follow the basic precautions listed below to avoid the possibility of physical injury to you or others, or damage to the instrument or other property. These precautions include, but are not limited to, the following:
Power supply/Power cord |
|
Location |
•When removing the electric plug from the instrument or an outlet, always hold the plug itself and not the cord. Pulling by the cord can damage it.
•Remove the electric plug from the outlet when the instrument is not to be used for extended periods of time, or during electrical storms.
•Do not connect the instrument to an electrical outlet using a multiple-connector. Doing so can result in lower sound quality, or possibly cause overheating in the outlet.
•Do not expose the instrument to excessive dust or vibrations, or extreme cold or heat (such as in direct sunlight, near a heater, or in a car during the day) to prevent the possibility of panel disfiguration or damage to the internal components.
•Do not use the instrument in the vicinity of a TV, radio, stereo equipment, mobile phone, or other electric devices. Otherwise, the instrument, TV, or radio may generate noise.
•Do not place the instrument in an unstable position where it might accidentally fall over.
•Before moving the instrument, remove all connected cables.
•When setting up the instrument, make sure that the AC outlet you are using is easily accessible. If some trouble or malfunction occurs, immediately turn off the power switch and disconnect the plug from the outlet.
•Do not place the instrument against a wall (allow at least 3 cm/one-inch from the wall), since this can cause inadequate air circulation, and possibly result in the instrument overheating.
4 |
CP300 Owner’s Manual |
(1)B-9 1/2 |

Connections
•Before connecting the instrument to other electronic components, turn off the power for all components. Before turning the power on or off for all components, set all volume levels to minimum. Also, be sure to set the volumes of all components at their minimum levels and gradually raise the volume controls while playing the instrument to set the desired listening level.
Maintenance
•When cleaning the instrument, use a soft, dry or slightly damp cloth. Do not use paint thinners, solvents, cleaning fluids, or chemical-impregnated wiping cloths.
Handling caution
•Do not insert a finger or hand in any gaps on the instrument.
•Never insert or drop paper, metallic, or other objects into the gaps on the panel or keyboard. If this happens, turn off the power immediately and unplug the power cord from the AC outlet. Then have the instrument inspected by qualified Yamaha service personnel.
•Do not place vinyl, plastic or rubber objects on the instrument, since this might discolor the panel or keyboard.
•Do not rest your weight on, or place heavy objects on the instrument, and do not use excessive force on the buttons, switches or connectors.
•Do not operate the instrument for a long period of time at a high or uncomfortable volume level, since this can cause permanent hearing loss. If you experience any hearing loss or ringing in the ears, consult a physician.
Saving data
Saving and backing up your data
•Current memory data (see page 82) is lost when you turn off the power to the instrument. Save the data to the storage memory (see page 82)/external device such as a computer.
Saved data may be lost due to malfunction or incorrect operation. Save important data to external device such as a computer.
Yamaha cannot be held responsible for damage caused by improper use or modifications to the instrument, or data that is lost or destroyed.
Always turn the power off when the instrument is not in use.
(1)B-9 2/2 |
CP300 Owner’s Manual |
5 |

Introduction
Introduction
Thank you for choosing the Yamaha Stage Piano CP300. The CP300 features exceptionally high-quality sound, comprehensive features and a variety of editing functions—making it suitable for a wide range of applications, including live performance and recording.
We recommend that you read this manual carefully so that you can fully take advantage of the advanced and convenient functions of the CP300. We also recommend that you keep this manual in a safe and handy place for future reference.
About this Owner’s Manual
This manual consists of four main sections: Introduction, Basic Operation, Reference and Appendix.
Introduction (page 6)
Please read this section first.
Basic Operation (page 20)
This section explains the basic functions and how to use them in detail.
Refer to this section while you play the CP300.
Reference (page 53)
This section explains how to make detailed settings for the CP300’s various functions. Refer to this section as necessary.
Appendix (page 94)
This section contains important reference material, including Voice and Drum Kit lists, and various detailed charts and tables.
• The illustrations and LCD displays as shown in this Owner’s Manual are for instructional purposes only, and may appear somewhat different from those on your instrument.
Copying of the commercially available musical data including but not limited to MIDI data and/or audio data is strictly prohibited except for your personal use. If you wish to use such data for occasions other than personal use, consult a copyright expert.
This product incorporates and bundles computer programs and contents in which Yamaha owns copyrights or with respect to which it has license to use others’ copyrights. Such copyrighted materials include, without limitation, all computer software, style files, MIDI files, WAVE data, musical scores and sound recordings. Any unauthorized use of such programs and contents outside of personal use is not permitted under relevant laws. Any violation of copyright has legal consequences. DON’T MAKE, DISTRIBUTE OR USE ILLEGAL COPIES. This device is capable of using various types/ formats of music data by optimizing them to the proper format music data for use with the device in advance. As a result, this device may not play them back precisely as their producers or composers originally intended.
Trademarks
•Windows is the registered trademark of Microsoft® Corporation.
•Apple and Macintosh are trademarks of Apple Computer, Inc.
•The company names and product names in this Owner’s Manual are the trademarks or registered trademarks of their respective companies.
6 CP300 Owner’s Manual

Supplied Accessories
•Power cord
•Foot pedal (FC3)
•Owner’s Manual
Main Features
The CP300 gives you the ultimate acoustic grand piano sound—utilizing three-stage dynamic sampling, providing the ability to change tone with the sustain pedal, and adding a subtle, authentic release sound when you lift your fingers from the keys.
Among the advanced features are:
•88-key “Graded Hammer” keyboard with action that is virtually indistinguishable from an actual acoustic piano.
•Sophisticated AWM synthesis engine and tone generation system, with a maximum polyphony of 128 notes. Using AWM, the CP300 has 50 original Voices—including a variety of ultra-realistic piano and other keyboard Voices, plus a wealth of authentic sounds of virtually every instrument type.
•High-grade five-band Master EQ, which enables you to control the tone intuitively using sliders on the panel.
•Luscious reverb and chorus effects, plus an enormous variety of other effects that add extraordinary depth and expression to your sound.
•Comprehensive MIDI functions for use with other devices and in larger music production systems.
•Four pedal connectors for maximum expressive capabilities—especially ideal for live performance—and built-in high-quality stereo speakers.
•A powerful, versatile Performance function, which lets you store and instantly recall your custom CP300 settings, including Dual/Split configurations, Voice and effect parameters, MIDI transmit/receive channel values and Master Edit settings.
•Built-in 16-track sequencer for recording and playing back your keyboard performance, as well as for creating complex multi-instrument arrangements and Songs—up to a maximum 16 parts.
•Master mode, which allows you to independently control up to four external tone generators.
•Comprehensive selection of inputs/outputs and interfaces—including two separate stereo output pairs, stereo inputs, MIDI terminals, and a USB connector.
Introduction
CP300 Owner’s Manual |
7 |

Introduction
Contents
Introduction . . . . . . . . . . . . . . . . . . . . . . . . . . . . . . . . . . 6
Application Index . . . . . . . . . . . . . . . . . . . . . . . . . . . . . . . . . . . . . . . . . . . . . . . . . . 10
Before Using the CP300 . . . . . . . . . . . . . . . . . . . . . . . . . . . . . . . . . . . . . 11
Power Supply Connections . . . . . . . . . . . . . . . . . . . . . . . . . . . . . . . . . . . . . . . . . . 11
Using the Pedals . . . . . . . . . . . . . . . . . . . . . . . . . . . . . . . . . . . . . . . . . . . . . . . . . . 11
Using Headphones . . . . . . . . . . . . . . . . . . . . . . . . . . . . . . . . . . . . . . . . . . . . . . . . 12
Turning the Power On . . . . . . . . . . . . . . . . . . . . . . . . . . . . . . . . . . . . . . . . . . . . . . 12
Adjusting the Brightness of the Display . . . . . . . . . . . . . . . . . . . . . . . . . . . . . . . . . 13
Setting the Volume . . . . . . . . . . . . . . . . . . . . . . . . . . . . . . . . . . . . . . . . . . . . . . . . . 13
Playing the keyboard . . . . . . . . . . . . . . . . . . . . . . . . . . . . . . . . . . . . . . . 14
Playing the Sounds . . . . . . . . . . . . . . . . . . . . . . . . . . . . . . . . . . . . . . . . . . . . . . . . 14
Basic Operation . . . . . . . . . . . . . . . . . . . . . . . . . . . . . . . . . . . . . . . . . . . 15
Display Settings—Basic Operation . . . . . . . . . . . . . . . . . . . . . . . . . . . . . . . . . . . . 15
Restoring the Factory-programmed Settings of the CP300 . . . . . . . . . . . . . . . . . . 16
Basic Instructions. . . . . . . . . . . . . . . . . . . . . . . . . . . . . . . . . . . . . . . . . . 18
Basic Operation . . . . . . . . . . . . . . . . . . . . . . . . . . . . . . 20
Control Names and Functions. . . . . . . . . . . . . . . . . . . . . . . . . . . . . . . . 20
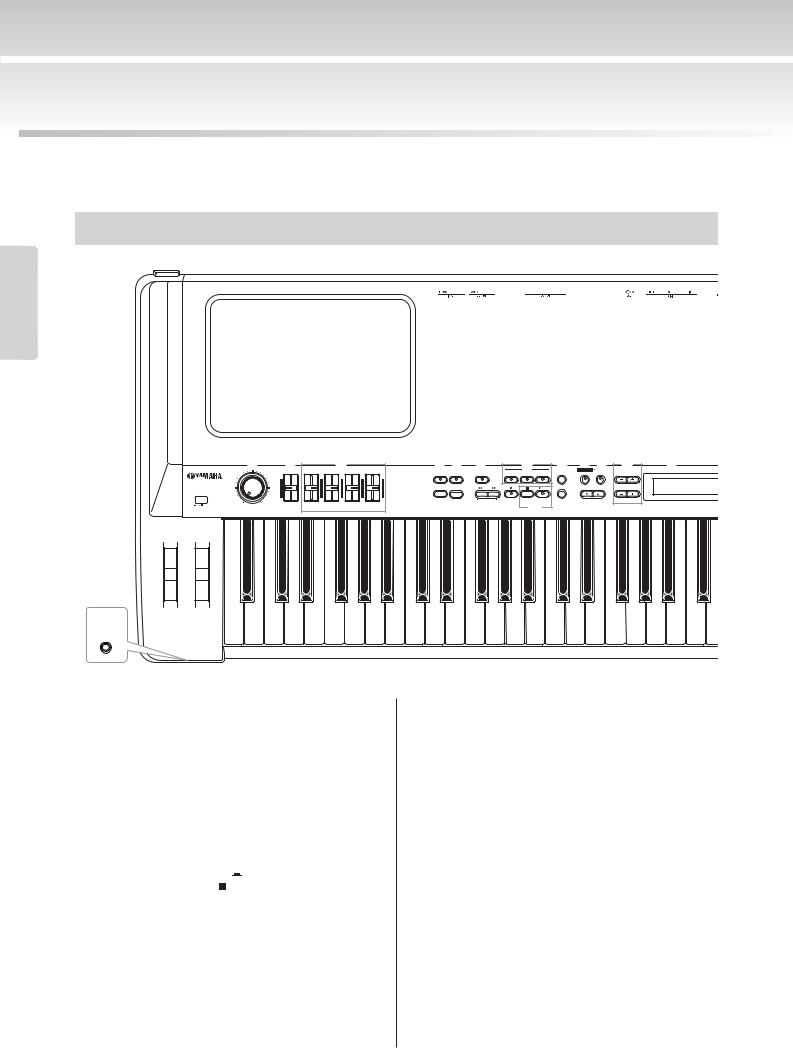
Front Panel . . . . . . . . . . . . . . . . . . . . . . . . . . . . . . . . . . . . . . . . . . . . . . . . . . . . . . . 20
Rear Panel . . . . . . . . . . . . . . . . . . . . . . . . . . . . . . . . . . . . . . . . . . . . . . . . . . . . . . . 22
Quick Guide. . . . . . . . . . . . . . . . . . . . . . . . . . . . . . . . . . . . . . . . . . . . . . . 23
Listening to the Demo Songs . . . . . . . . . . . . . . . . . . . . . . . . . . . . . . . . . . . . . . . . . 23 Playing Voices . . . . . . . . . . . . . . . . . . . . . . . . . . . . . . . . . . . . . . . . . . . . . . . . . . . . 25 Playing Different Voices Simultaneously . . . . . . . . . . . . . . . . . . . . . . . . . . . . . . . . 27 Changing the Volume for Each Part (Zone Control) . . . . . . . . . . . . . . . . . . . . . . . 28 Combining Voices—Dual . . . . . . . . . . . . . . . . . . . . . . . . . . . . . . . . . . . . . . . . . . . . 29 Playing Different Voices with the Left and Right Hands—Split . . . . . . . . . . . . . . . 31 Using the Pedals . . . . . . . . . . . . . . . . . . . . . . . . . . . . . . . . . . . . . . . . . . . . . . . . . . 33 Bending Notes—Pitch Bend Wheel . . . . . . . . . . . . . . . . . . . . . . . . . . . . . . . . . . . . 34 Adding a Vibrato Effect to the Sound—Modulation Wheel . . . . . . . . . . . . . . . . . . 34 Enhancing the Sound with Reverb and Chorus . . . . . . . . . . . . . . . . . . . . . . . . . . . 35 Equalizer (EQ) . . . . . . . . . . . . . . . . . . . . . . . . . . . . . . . . . . . . . . . . . . . . . . . . . . . . 36 Key Transposition—Transpose . . . . . . . . . . . . . . . . . . . . . . . . . . . . . . . . . . . . . . . 37 Using the Click . . . . . . . . . . . . . . . . . . . . . . . . . . . . . . . . . . . . . . . . . . . . . . . . . . . . 38
Using the Master Mode. . . . . . . . . . . . . . . . . . . . . . . . . . . . . . . . . . . . . . 39
Selecting a Performance . . . . . . . . . . . . . . . . . . . . . . . . . . . . . . . . . . . . 40
Recording Your Performance . . . . . . . . . . . . . . . . . . . . . . . . . . . . . . . . 41
Recording Your Performance . . . . . . . . . . . . . . . . . . . . . . . . . . . . . . . . . . . . . . . . 42
Re-recording Parts of a Song . . . . . . . . . . . . . . . . . . . . . . . . . . . . . . . . . . . . . . . . 44
Other Recording Techniques. . . . . . . . . . . . . . . . . . . . . . . . . . . . . . . . . . . . . . . . . 46
Song Playback . . . . . . . . . . . . . . . . . . . . . . . . . . . . . . . . . . . . . . . . . . . . 49
Playing Back a Song . . . . . . . . . . . . . . . . . . . . . . . . . . . . . . . . . . . . . . . . . . . . . . . 49
Convenient Functions . . . . . . . . . . . . . . . . . . . . . . . . . . . . . . . . . . . . . . 51
Panel Lock Function. . . . . . . . . . . . . . . . . . . . . . . . . . . . . . . . . . . . . . . . . . . . . . . . 51
MIDI Transmission On/Off . . . . . . . . . . . . . . . . . . . . . . . . . . . . . . . . . . . . . . . . . . . 51
8 CP300 Owner’s Manual

MIDI Panic Control . . . . . . . . . . . . . . . . . . . . . . . . . . . . . . . . . . . . . . . . . . . . . . . . . 52
Built-in Speakers On/Off . . . . . . . . . . . . . . . . . . . . . . . . . . . . . . . . . . . . . . . . . . . . 52
Reference Section . . . . . . . . . . . . . . . . . . . . . . . . . . . . 53
Master Settings—Master Edit . . . . . . . . . . . . . . . . . . . . . . . . . . . . . . . . 53 Detailed Settings for the Voices—Voice Edit . . . . . . . . . . . . . . . . . . . . 56
Voice Edit—Basic Operation . . . . . . . . . . . . . . . . . . . . . . . . . . . . . . . . . . . . . . . . . 56
Detailed Settings for MIDI Operations—MIDI Settings . . . . . . . . . . . . 63
About MIDI . . . . . . . . . . . . . . . . . . . . . . . . . . . . . . . . . . . . . . . . . . . . . . . . . . . . . . . 63
MIDI Settings—Basic Operation . . . . . . . . . . . . . . . . . . . . . . . . . . . . . . . . . . . . . . 64
Miscellaneous CP300 Settings—Other Settings . . . . . . . . . . . . . . . . . 67
Other Settings—Basic Operation. . . . . . . . . . . . . . . . . . . . . . . . . . . . . . . . . . . . . . 67
Master Equalizer Settings . . . . . . . . . . . . . . . . . . . . . . . . . . . . . . . . . . . 72
Using the Performance Functions . . . . . . . . . . . . . . . . . . . . . . . . . . . . 73
Performance Parameters . . . . . . . . . . . . . . . . . . . . . . . . . . . . . . . . . . . . . . . . . . . . 74
Handling Performance Files . . . . . . . . . . . . . . . . . . . . . . . . . . . . . . . . . 76
Performance File—Basic Operation . . . . . . . . . . . . . . . . . . . . . . . . . . . . . . . . . . . 76
Handling Song Files . . . . . . . . . . . . . . . . . . . . . . . . . . . . . . . . . . . . . . . . 81
Song File—Basic Operation. . . . . . . . . . . . . . . . . . . . . . . . . . . . . . . . . . . . . . . . . . 81
Settings for Song Recording and Playback—Song Settings . . . . . . . 85
Song Settings—Basic Operation . . . . . . . . . . . . . . . . . . . . . . . . . . . . . . . . . . . . . . 85
Connecting to a Computer and Other MIDI Devices . . . . . . . . . . . . . . 88
Connecting to External Audio Equipment . . . . . . . . . . . . . . . . . . . . . . . . . . . . . . . 88 Connecting to External Equipment . . . . . . . . . . . . . . . . . . . . . . . . . . . . . . . . . . . . 89 Connecting to External MIDI Equipment . . . . . . . . . . . . . . . . . . . . . . . . . . . . . . . . 90 Connecting to a Computer. . . . . . . . . . . . . . . . . . . . . . . . . . . . . . . . . . . . . . . . . . . 92
Appendix. . . . . . . . . . . . . . . . . . . . . . . . . . . . . . . . . . . . 94
Message List . . . . . . . . . . . . . . . . . . . . . . . . . . . . . . . . . . . . . . . . . . . . . . 94
Troubleshooting . . . . . . . . . . . . . . . . . . . . . . . . . . . . . . . . . . . . . . . . . . . 98
MIDI Data Compatibility . . . . . . . . . . . . . . . . . . . . . . . . . . . . . . . . . . . . 100
Factory Setting List . . . . . . . . . . . . . . . . . . . . . . . . . . . . . . . . . . . . . . . 101
Voice List . . . . . . . . . . . . . . . . . . . . . . . . . . . . . . . . . . . . . . . . . . . . . . . . 103
Program Change List . . . . . . . . . . . . . . . . . . . . . . . . . . . . . . . . . . . . . . 105
Preset Performance List. . . . . . . . . . . . . . . . . . . . . . . . . . . . . . . . . . . . 106
XG Voice List. . . . . . . . . . . . . . . . . . . . . . . . . . . . . . . . . . . . . . . . . . . . . 108
XG Drum Kit List . . . . . . . . . . . . . . . . . . . . . . . . . . . . . . . . . . . . . . . . . . 112
Effect Type List . . . . . . . . . . . . . . . . . . . . . . . . . . . . . . . . . . . . . . . . . . . 114
Effect Parameter List . . . . . . . . . . . . . . . . . . . . . . . . . . . . . . . . . . . . . . 115
Effect Data Assign Table . . . . . . . . . . . . . . . . . . . . . . . . . . . . . . . . . . . 123
MIDI Data Format . . . . . . . . . . . . . . . . . . . . . . . . . . . . . . . . . . . . . . . . . 125
MIDI Implementation Chart . . . . . . . . . . . . . . . . . . . . . . . . . . . . . . . . . 137
Specifications . . . . . . . . . . . . . . . . . . . . . . . . . . . . . . . . . . . . . . . . . . . . 138
Index. . . . . . . . . . . . . . . . . . . . . . . . . . . . . . . . . . . . . . . . . . . . . . . . . . . . 139
Introduction
CP300 Owner’s Manual |
9 |

Introduction
Application Index
Listening
• Listening to Demo Songs with different Voices . . . . . . . . . . . . . .“Listening to the Demo Songs” on page 23
• Listening to your recorded performance . . . . . . . . . . . . . . . . . . . . . . . . . . “Playing Back a Song” on page 49
Playing
• Selecting and playing Voices . . . . . . . . . . . . . . . . . . . . . . . . . . . . . . . . . . . . . . . . “Playing Voices” on page 25
• Selecting and playing Performances . . . . . . . . . . . . . . . . . . . . . . . . . . . “Selecting a Performance” on page 40
• Using different pedals. . . . . . . . . . . . . . . . . . . . . . . . . . . . . . . . . . . . . . . . . . . “Using the Pedals” on page 33
• Using multiple MIDI tone generators . . . . . . . . . . . . . . . . . . . . . . . . . “Using the Master Mode” on page 39
Changing Voices
• Viewing the list of Voices . . . . . . . . . . . . . . . . . . . . . . . . . . . . . . . . . . . . . . . . . . . . “Voice List” on page 103
• Viewing the list of Performances. . . . . . . . . . . . . . . . . . . . . . . . . . . . . “Preset Performance List” on page 106
• Combining Voices . . . . . . . . . . . . . . . . . . . . . . . . . . . . . . . . . . . . . . “Combining Voices—Dual” on page 29
• Playing different sounds with left and right hands
. . . . . . . . . . . . . . . . . . . . . . . . . .“Playing Different Voices with the Left and Right Hands—Split” on page 31
• Adding Variations to the Sound . . . . . . . . . . . . . . . . . . . . “Bending Notes—Pitch Bend Wheel” on page 34 “Adding a Vibrato Effect to the Sound—Modulation Wheel” on page 34 “Enhancing the Sound with Reverb and Chorus” on page 35 “Equalizer (EQ)” on page 36
Recording
• Recording your performance . . . . . . . . . . . . . . . . . . . . . . . . . . . . “Recording Your Performance” on page 42
• Deleting recorded Songs. . . . . . . . . . . . . . . . . . . . . . . . . . . . . . . . . . . . . . “Handling Song Files” on page 81
Settings
• Making detailed settings for Voices. . . . . . . . . . . . “Detailed Settings for the Voices—Voice Edit” on page 56
• Making detailed settings for the entire CP300 “Miscellaneous CP300 Settings—Other Settings” on page 67
• Making settings for Master mode . . . . . . . . . . . . . . . . . . . . . . . . “Master Settings—Master Edit” on page 53
• Making detailed settings for MIDI . . .“Detailed Settings for MIDI Operations—MIDI Settings” on page 63
• Making detailed settings for Master Equalizer . . . . . . . . . . . . . . . . . .“Master Equalizer Settings” on page 72
Saving
• Saving the Voice settings. . . . . . . . . . . . . . . . . . . . . . . . . . . . . . . . .“Handling Performance Files” on page 76
Connecting the CP300 to other devices
• What is MIDI?. . . . . . . . . . . . . . . . . . . . . . . . . . . . . . . . . . . . . . . . . . . . . . . . . . . “About MIDI” on page 63
• Connecting to multiple MIDI devices . . . . . . . . . . “Connecting to External MIDI Equipment” on page 90
• Raising the volume. . . . . . . . . . . . . . . . . . . . . . . . . “Connecting to External Audio Equipment” on page 88
• Connecting to a computer . . . . . . . . . . . . . . . . . . . . . . . . . . . . . . . “Connecting to a Computer” on page 92
Quick solutions
• Returning to the main display . . . . . . . . . . . . . . . . . . . . . . “Display Settings—Basic Operation” on page 15
• Resetting the default settings . . . . . “Restoring the Factory-programmed Settings of the CP300” on page 16
• About the display messages. . . . . . . . . . . . . . . . . . . . . . . . . . . . . . . . . . . . . . . . . . “Message List” on page 94
• Troubleshooting . . . . . . . . . . . . . . . . . . . . . . . . . . . . . . . . . . . . . . . . . . . . . . . “Troubleshooting” on page 98
10 CP300 Owner’s Manual
Before Using the CP300
Power Supply Connections
1 Make sure that the instrument’s [POWER] switch on the rear panel is at the OFF position.
POWER
POWER
OFF!! ON OFF
2 Connect the supplied power cord to the [AC INLET] jack (page 22) on the instrument’s rear panel.
3 Connect the other end of the power cord to an AC outlet. Make sure your CP300 meets the voltage requirement for the country or region in which it is being used.
 AC INLET jack
Power cord (included)
Using the Pedals
Connect the included pedal (FC3) to the [1 SUSTAIN] jack.
An optional FC3/FC4/FC5 foot switch or FC7 foot controller can alternately be connected to this jack. Also an optional FC3/FC4/FC5 foot switch or FC7 foot controller can be connected to the [4 AUX] jack, and can be assigned to control a variety of parameters on the instrument (page 33).
ASSIGNABLE FOOT PEDAL
1 |
2 |
3 |
4 |
SUSTAIN |
SOSTENUTO |
SOFT |
AUX |
Introduction
FC3/FC4/FC5 FC7
CP300 Owner’s Manual 11
Introduction
Before Using the CP300
Using Headphones
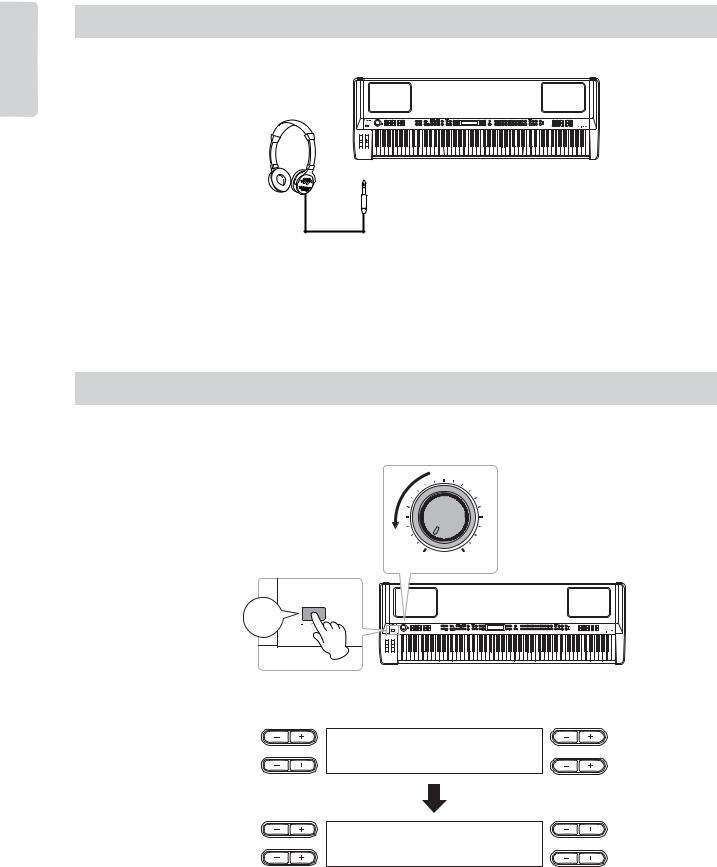
If you are using a set of headphones, connect them to the [PHONES] jack.
 PHONES jack
 CAUTION
Do not use headphones at a high volume for an extended period of time. Doing so may cause hearing loss.
nIf the [SPEAKER] button is lit, this indicates that the built-in speakers sound normally when using the headphones.
Turning the Power On
Make sure the volume setting of the CP300 and external devices are turned down to the minimum. Press the [POWER] switch to turn the power on.
MIN |
MAX |
MASTER VOLUME
|
POWER |
POWER |
|
ON! |
ON OFF |
The display located in the center of the front panel lights up.
A B
****** PleaseWait ****** |
YES |
|
|
NO |
|
****** YAMAHA |
****** |
|
C |
|
D |
|
|
|
A |
|
B |
Grand Piano 1 |
NO |
YES |
|
||
C D
Press the [POWER] switch again to turn off the power to the CP300.
The display will disappear.
12 CP300 Owner’s Manual
Before Using the CP300
Adjusting the Brightness of the Display
You can adjust the contrast of the display by turning the [CONTRAST] knob located to the right of the LCD.
A B CONTRAST
Grand Piano 1
NO YES
EXIT
C D
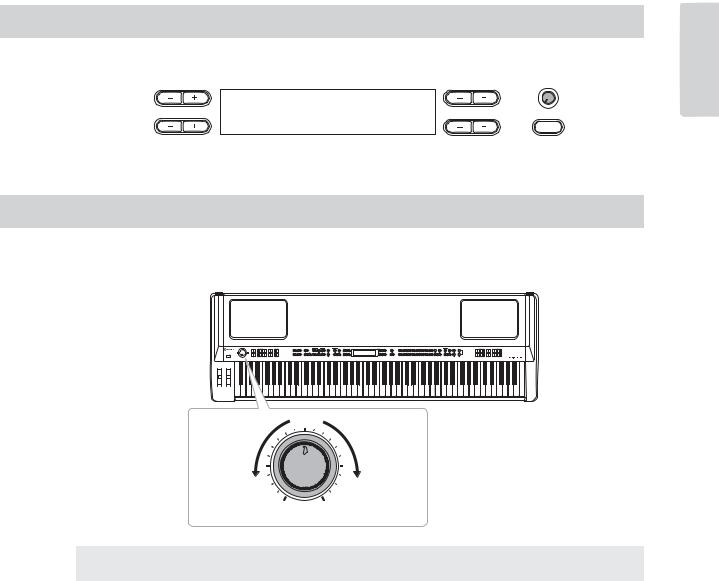
Setting the Volume
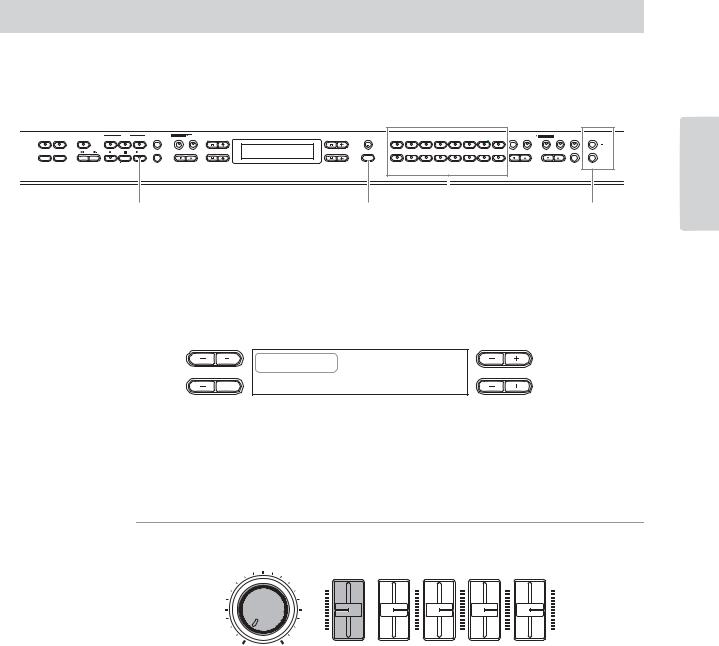
To adjust the volume, use the [MASTER VOLUME] dial located at the left of the panel. When you start playing, re-adjust the [MASTER VOLUME] dial to the most comfortable listening level.
Introduction
The level |
The level |
decreases. |
increases. |
MIN |
MAX |
MASTER VOLUME
Terminology
Master Volume: The volume level of the entire keyboard sound.
nThe [MASTER VOLUME] dial also controls the volume of the headphones.
CP300 Owner’s Manual 13
Introduction
Playing the keyboard
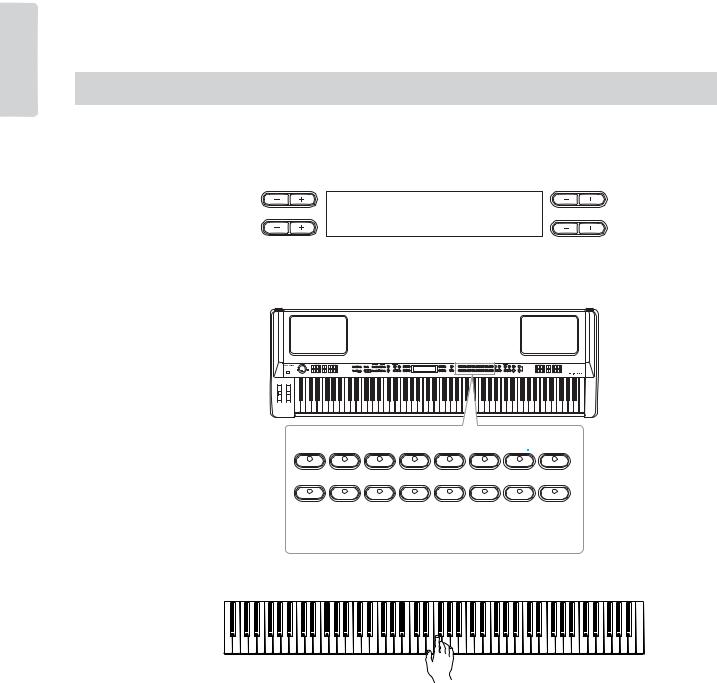
Playing the Sounds
Try playing some of the realistic and dynamic CP300 sounds from the keyboard now.
When you turn the power on following the directions in “Power Supply Connections” (pages 11 and 12), the display below appears.
A B
Grand Piano 1
NO YES
C D
In this condition, you can play the keyboard and hear the sound of the selected “Grand Piano 1” Voice. To change the Voice, press any one of the Voice group buttons located at the right of the panel.
GRAND |
GRAND |
MONO |
|
|
|
CLAVI. |
|
PIANO 1 |
PIANO 2 |
PIANO |
E. PIANO 1 |
E. PIANO 2 |
E. PIANO 3 |
VIBES |
|
1 |
2 |
3 |
4 |
5 |
6 |
7 |
8 |
ORGAN 1 |
ORGAN 2 |
HARPSI. |
STRINGS |
CHOIR/PAD |
GUITAR |
BASS |
XG |
9 |
10 |
11 |
12 |
13 |
14 |
15 |
16 |
VOICE/PERFORMANCE
Voice group buttons
Play the keyboard and enjoy the sound.
14 CP300 Owner’s Manual
Basic Operation
In this section you’ll learn about the fundamental operations of the CP300—the use of the panel buttons and controls and how to restore the CP300’s memory to the factory default settings.
Display Settings—Basic Operation
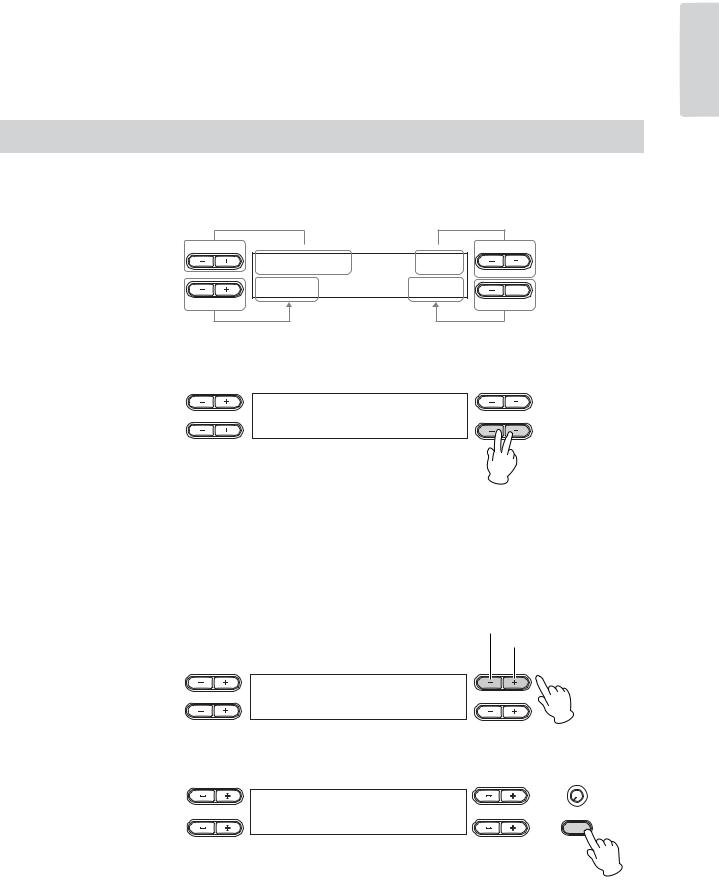
Each function may have many items or parameters from which you can choose. To select an item or parameter, press one of the A [–][+] – D [–][+] buttons.
Each parameter in the display corresponds to the A [–][+] – D [–][+] buttons next to it.
A 
 B
B
GrandPiano1 |
Choir |
|
NO YES |
Strings |
E.Bass |
C |
D |
Sometimes, after you’ve changed the parameter values or settings, you may want to reset them to their normal condition. To do this, simply press the [–] button and [+] button simultaneously.
A B
ClickVolume
NO YES
100
C
nThe TEMPO [DOWN][UP] buttons are the same shape as the A [–][+] – D [–][+] buttons. Parameters corresponding to button pairs of this shape can all be reset to their default values by pressing both buttons simultaneously.
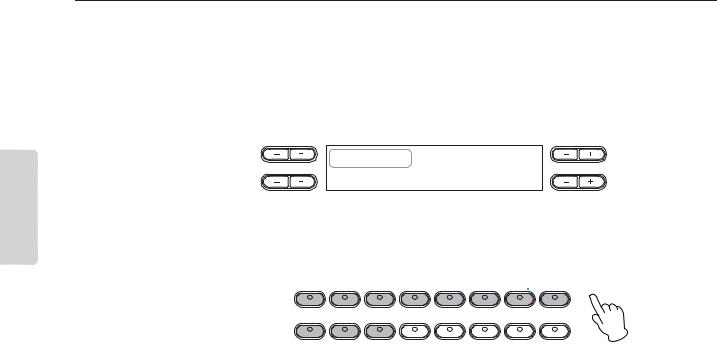
To execute the operation, press B [+(YES)] button. To cancel the operation, press the B [– (NO)] button. In general, when a prompt is shown on the upper right of the display, press the appropriate B [– (NO)] [+(YES)] buttons to execute or cancel the operation.
 NO: Cancel
 YES: Execute
A B
SaveToMemory Execute?-->
NO YES
M-001:NewSong.MID
C D
Press the [EXIT] button to exit from a function.
A B CONTRAST
Main |
Set?--> |
NO YES |
|
|
|
Octave |
0 |
EXIT |
|
|
|
C |
|
D |
Introduction
CP300 Owner’s Manual 15
Introduction
Basic Operation
Restoring the Factory-programmed Settings of the CP300
The CP300 has a Factory Set function for restoring your CP300’s memory to the factory default settings. This lets you restore the CP300’s default Voices and Performances, as well as its System and other settings. Refer to “Factory Setting List” on page 101.
There are two ways you can restore the CP300’s memory to the factory default settings: 1) Set the “Factory Set” parameter in the Other Settings menu, or 2) Turn the power off and turn the power on again while holding the C7 key (rightmost key on the keyboard).
Method 1
1 Press the [OTHER SETTING] button to access the Other Settings menu.
OTHER SETTING
2 Press the [OTHER SETTING] button repeatedly or use the A [–][+] buttons to call up
“Factory Set” in the display.
A B
FactorySet Execute?-->
NO YES
MemoryFileExcluded
C D
3 Use the D [–][+] buttons to select either “Memory File Excluded” or “Memory File
Included.”
Storage memory selections:
Memory File Excluded |
.......................Memory files are maintained. |
|
||
Memory File Included ....................... |
Memory files are erased. |
|
|
|
A |
|
|
B |
|
|
FactorySet |
Execute?-- |
> |
YES |
|
|
|
NO |
|
|
MemoryFileExcluded |
|
||
C |
|
|
D |
|
|
Indicates memory files are maintained. |
|
||
A |
|
|
B |
|
|
FactorySet |
Execute?-- |
> |
YES |
|
|
|
NO |
|
|
MemoryFileIncluded |
|
||
C |
|
|
D |
|
|
Indicates memory files are erased. |
|
||
n The “Character Code” parameter in the Song File menu does not change (page 84).
16 CP300 Owner’s Manual
Basic Operation
4 Press the B [+ (YES)] button to execute the job.
After the job has been completed, a “Completed” message appears and operation returns to the original display.
 CAUTION
For Factory Set operations that take longer to process, you will see the message “Executing” during processing. Do not switch the power off while this message is on the display. Turning the power off in this state may cause the system to freeze.
Terminology
File: A file contains various data in a group. A file includes both Performance data and Song data (pages 73, 81).
Method 2
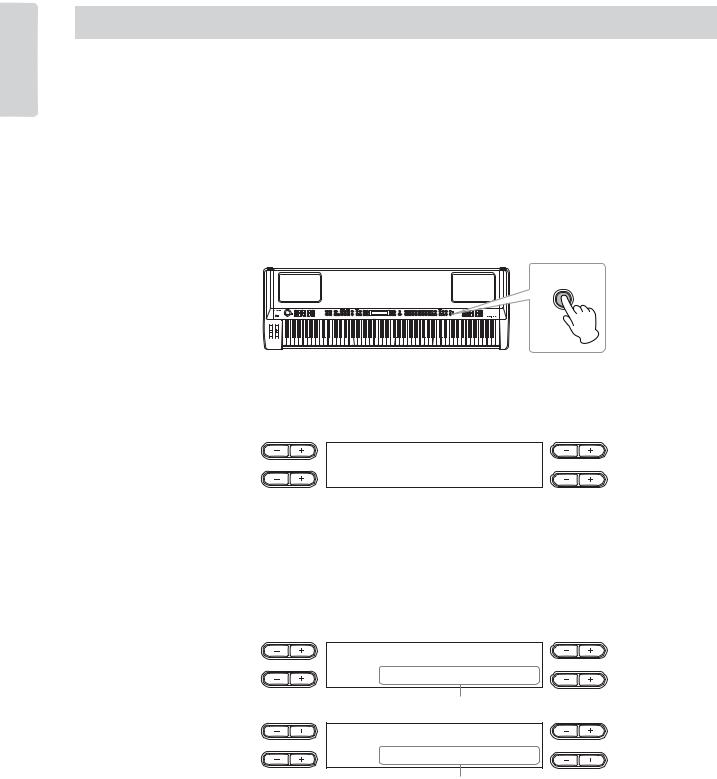
Simultaneously hold down the white key on the right end of the keyboard (C7), and press the [POWER] switch to turn on the power to the CP300.
In this case, the Memory files saved in the storage memory are not erased.
POWER
ON OFF
C7
If you wish to erase Memory files at this time, simultaneously hold down the rightmost white key (C7) and black key (Bb6) together and press the [POWER] switch to turn on the power to the CP300.
POWER
ON OFF
Bb6 C7
Terminology
Storage memory: This memory area enables you to save Performance files and recorded Songs.
Introduction
CP300 Owner’s Manual 17

Introduction
Basic Instructions
Turning the Power On
First, turn the power on and set up the keyboard before playing.
•Before Using the CP300 (pages 11 and 12)
POWER
ON!
 ON
ON OFF
OFF

Selecting and Playing a Voice
The CP300 features an exceptionally wide variety of Preset Voices for playing in virtually any musical style. Try searching through the Voices to find your favorites.
• Selecting a Voice (page 25)
Terminology
Preset: Refers to data loaded to the internal memory of the CP300 before being shipped from the factory.
GRAND |
GRAND |
MONO |
|
|
|
CLAVI. |
|
PIANO 1 |
PIANO 2 |
PIANO |
E. PIANO 1 |
E. PIANO 2 |
E. PIANO 3 |
VIBES |
|
1 |
2 |
3 |
4 |
5 |
6 |
7 |
8 |
ORGAN 1 |
ORGAN 2 |
HARPSI. |
STRINGS |
CHOIR/PAD |
GUITAR |
BASS |
XG |
9 |
10 |
11 |
12 |
13 |
14 |
15 |
16 |
VOICE/PERFORMANCE
Combining Voices and Playing Them on the Keyboard
The CP300 allows you to play several different Voices together in a layer, or play one Voice with your left hand while you play a different Voice (or even two layered Voices!) with your right. Try out some of the variations and experiment with your own Voice combinations.
•Playing Different Voices Simultaneously (page 27)
•Combining Voices—Dual (page 29)
•Playing Different Voices with the Left and Right Hands—Split (page 31)
Create Your Own Original Voices
Once you’ve explored your favorite Voices and feel comfortable with them, try branching out creatively and use the editing features to make your own original Voices.
• Detailed Settings for the Voices—Voice Edit (page 56)
Connecting to a Computer and MIDI devices
•Connecting to External Audio Equipment (page 88)
•Connecting to External MIDI Equipment (page 90)
•Connecting to a Computer (page 92)
18 CP300 Owner’s Manual
Basic Instructions
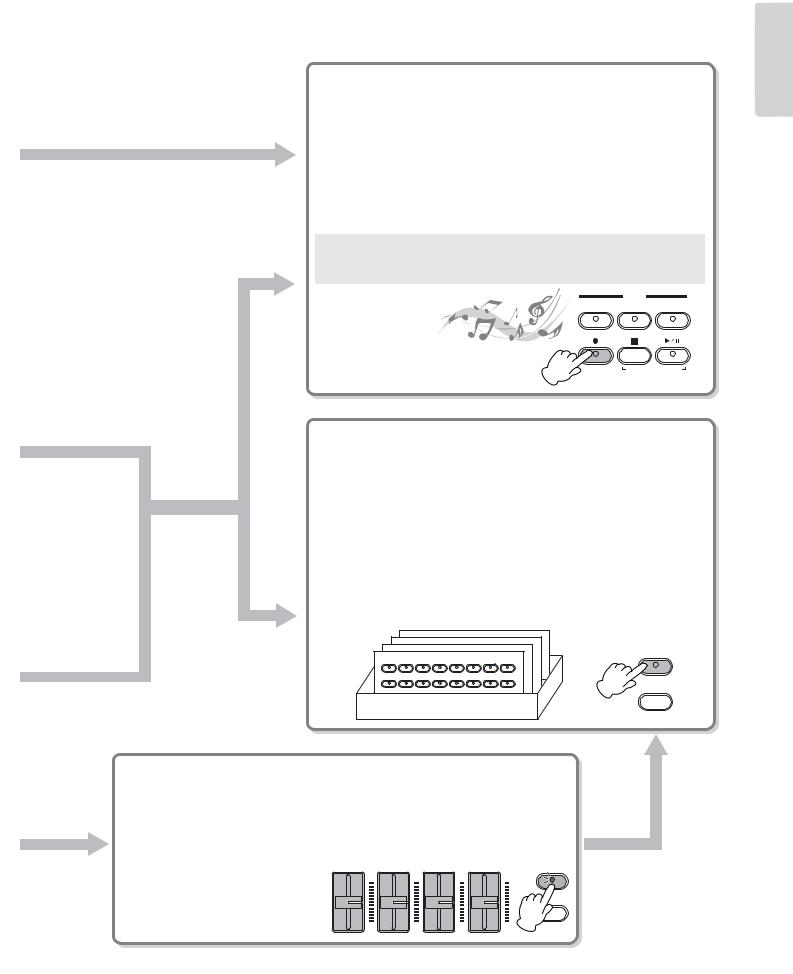
Recording Your Performance and Playing It Back
Recording and playing back your performance is exceptionally easy. The CP-300 allows you to record up to sixteen independent parts, letting you record the leftand right-hand parts separately—and lets you build up a complete, multi-instrument Song by recording each part one-by-one.
•Recording Your Performance (page 42)
•Other Recording Techniques (page 46)
•Handling Song Files (page 81)
•Playing Back Songs (page 49)
Terminology
On the CP300, performance data is called a “Song.” This includes demonstration tunes and piano preset tunes.
|
TRACK |
|
1 |
2 |
3-16 |
REC |
STOP |
PLAY/PAUSE |
SYNCHRO START
Using the Performance Functions
The useful Performance functions enable you to store and recall the entire CP300 settings all together. These include the Dual/Split settings, Voice and effect parameters, MIDI transmit/receive channel settings and Master Edit settings. If you have any original Voices you’ve created, you can save these to a Performance as well.
•Using the Performance Functions (page 73)
•Selecting a Performance (page 40)
•Performance Parameters (page 74)
•Handling Performance Files (page 76)
|
|
|
|
|
|
|
|
PERFORMANCE |
GRAND |
GRAND |
MONO |
|
|
|
CLAVI. |
|
|
PIANO 1 |
PIANO 2 |
PIANO |
E. PIANO 1 |
E. PIANO 2 |
E. PIANO 3 |
VIBES |
|
|
1 |
2 |
3 |
4 |
5 |
6 |
7 |
8 |
|
ORGAN 1 |
ORGAN 2 |
HARPSI. |
STRINGS |
CHOIR/PAD |
GUITAR |
BASS |
XG |
|
9 |
10 |
11 |
12 |
13 |
14 |
15 |
16 |
PERFORM.FILE |
Using as a Master Keyboard
The Master mode of the instrument enables you to control up to four external tone generators (or four separate instrument parts on one multi-timbral tone generator). This effectively lets you play four different MIDI instruments at one time. Once you’ve created your custom Master settings, you can save them to a Performance as well.
• Using the Master Mode (page 39) |
ZONE 1 |
ZONE 2 |
ZONE 3 |
ZONE 4 |
MASTER |
• Master Settings—Master Edit (page 53)
MASTER EDIT
Introduction
CP300 Owner’s Manual 19
Control Names and Functions
Basic Operation
Control Names and Functions
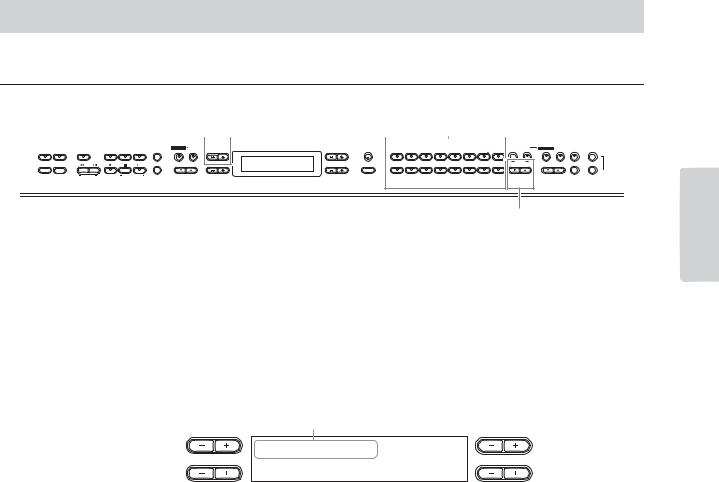
Front Panel
Operation Basic
|
5 6 7 |
8 ) @ $ & ( º ™ £ |
|||||||||||
|
|
ZONE 1 |
ZONE 2 |
ZONE 3 |
ZONE 4 |
|
|
TRACK |
|
|
|
|
|
|
|
|
|
|
MASTER PERFORMANCE |
TRANSPOSE |
1 |
2 |
3-16 |
SONG FILE |
MIDI OUT |
PANEL LOCK |
A |
4 |
|
|
|
|
|
SONG SELECT |
REC |
STOP |
PLAY/PAUSE |
SONG SETTING |
|
|
|
|
|
|
|
MASTER EDIT PERFORM.FILE |
|
|
|
|
DOWN |
UP |
|
||
POWER |
|
|
|
|
|
|
|
|
|
|
|
|
|
|
|
|
|
|
|
NEW SONG |
|
SYNCHRO START |
|
TEMPO |
C |
||
MIN |
MAX |
SONG |
|
|
9 ! |
# % SONG^ * |
¡ |
|
|||||
ON OFF |
|
|
|
|
|||||||||
MASTER VOLUME |
VOLUME |
ZONE CONTROL |
|
||||||||||
12
3
PHONES
A-1 B-1 C0 D0 E0 F0 G0 A0 B0 C1 D1 E1 F1 G1 A1 B1 C2 D2 E2 F2 G2 A2 B2 C3 D
1 Pitch Bend wheel |
(page 34) |
|
|
Controls the pitch bend effect. |
|
2 Modulation wheel |
(page 34) |
|
|
Controls the modulation effect. |
|
3 |
[PHONES] jack |
(page 12) |
|
For connection to a pair of stereo headphones. |
|
4 |
[POWER] switch |
(page 12) |
|
For turning the power on or off. The power is turned on if the |
|
|
button is set to this position: |
. The power is turned off if |
|
the button is set this way: . |
|
5 |
[MASTER VOLUME] dial |
(page 13) |
|
Adjusts the overall volume. |
|
6 |
[SONG VOLUME] slider |
(page 47) |
Adjusts the volume of the Song playback.
7 [ZONE CONTROL] sliders |
(pages 28, 39) |
These four sliders adjust the output level for each Layer parts (up to four). Turning on the [MASTER] button switches the function assigned to the [ZONE CONTROL] sliders.
8 [MASTER] button |
(page 39) |
Turning on the [MASTER] button switches the CP300 to function as a Master keyboard.
9 [MASTER EDIT] button |
(page 53) |
Enables selection of the settings for the Master mode.
) [PERFORMANCE] button |
(page 40) |
Switches the Performance on/off. |
|
! [PERFORM.FILE] button |
(page 76) |
Enables selection of Performance File settings, such as saving and deleting Performance data, and making other settings for Performance files.
20 CP300 Owner’s Manual
Control Names and Functions
Basic Operation
™ |
¢ |
|
|
|
§ |
|
|
|
¶• ‚ ¤ › |
|
|
fl |
|
|
|||||||
|
B |
CONTRAST |
GRAND |
GRAND |
MONO |
|
|
|
CLAVI. |
|
VOICE EDIT |
SPLIT |
REVERB |
CHORUS |
SPEAKER |
MIDI SETTING |
LOW |
LO-MID |
MID |
HI-MID |
HIGH |
|
PIANO 1 |
PIANO 2 |
PIANO |
E. PIANO 1 |
E. PIANO 2 |
E. PIANO 3 |
VIBES |
|
|
|
|
|
|||||||||
NO |
YES |
|
1 |
2 |
3 |
4 |
5 |
6 |
7 |
8 |
VARIATION |
MASTER EQ EDIT |
CLICK |
OTHER SETTING |
DEMO |
|
|
|
|
||
|
|
|
ORGAN 1 |
ORGAN 2 |
HARPSI. |
STRINGS |
CHOIR/PAD |
GUITAR |
BASS |
XG |
|
|
|
|
|
||||||
|
|
EXIT |
|
|
|
|
|
|
|
|
|
|
|
|
|
|
|
|
|
|
|
|
D |
|
9 |
10 |
11 |
12 |
13 |
14 |
15 |
16 |
|
|
|
|
|
|
|
|
|
|
|
|
∞ |
|
|
|
|
|
|
|
|
ª |
⁄ ‹ fi |
|
|
|
|
|
|||||
|
|
|
|
|
VOICE/PERFORMANCE |
|
|
|
|
MASTER EQUALIZER |
|
|
|||||||||
|
|
|
|
|
|
|
|
|
|
|
|
|
|
|
|||||||
D3 |
E3 |
F3 |
G3 |
A3 |
B3 |
C4 |
D4 |
E4 |
F4 |
G4 |
A4 |
B4 |
C5 |
D5 |
E5 |
F5 |
G5 |
A5 |
B5 |
C6 |
D6 |
E6 |
F6 |
G6 |
A6 |
B6 |
C7 |
@ [TRANSPOSE] button |
(page 37) |
The Transpose function makes it possible to shift the pitch of the entire keyboard up or down, letting you easily match the pitch of the keyboard to the range of a singer or other instruments.
# SONG SELECT [N][O] buttons
(pages 42, 49)
Selects a Preset Song or one of your recorded Songs.
$ TRACK [1], [2], and [3-16] buttons (page 50)
For turning off the specified track as required so you can practice the corresponding track (the track that is turned off) on the keyboard.
% SONG [REC] button (page 42)
For recording your keyboard performance.
^ SONG [PLAY/PAUSE], [STOP] buttons
(page 49)
Plays back the Preset Songs or your recorded Songs.
& [SONG FILE] button |
(page 81) |
Saves recorded Songs and makes other settings for Song files.
* [SONG SETTING] button |
(page 85) |
Enables selection of the settings for playback of recorded |
|
Songs. |
|
( [MIDI OUT] button |
(page 51) |
Switches MIDI transmission on/off. |
|
º [PANEL LOCK] button |
(page 51) |
Switches panel lock on/off. Turning on the button disables the |
|
panel operations. |
|
¡ TEMPO [UP]/[DOWN] buttons |
(page 38) |
Adjusts the tempo. |
|
CP300 Owner’s Manual 21
Operation Basic
Control Names and Functions
™ A to D [–][+] buttons |
(page 15) |
For selecting parameters and changing values while viewing the display.
£ Display |
(page 15) |
For showing various messages and certain settings of the |
|
instrument. |
|
¢ [CONTRAST] knob |
(page 13) |
Adjusts the brightness of the display. |
|
∞ [EXIT] button |
(page 15) |
Returns to the initial display (the display that first appears when the power is turned on).
§ Voice group buttons |
(pages 25, 40) |
These let you select from sixteen groups of Voices, including grand piano. You can also select a Performance if the [PERFORMANCE] button is turned on.
¶ [VOICE EDIT] button |
(page 56) |
Enables selection of detailed settings of the sounds and effects.
• [SPLIT] button |
(page 31) |
Allows you to play different Voices on the leftand right-hand sections of the keyboard.
ª VARIATION [▼][▲] buttons |
(page 25) |
Enables selection of alternate Voices in the selected Voice group.
‚ [REVERB], [CHORUS] buttons |
(page 35) |
These add ambience (Reverb) and depth (Chorus) to the sound. You can turn the corresponding effect on or off with a single touch.
⁄ MASTER EQ EDIT [▼][▲] buttons (page 72)
Enables selection of detailed settings for the Master Equalizer.
¤ [SPEAKER] button |
(page 52) |
Switches the built-in speakers on or off.
‹ [CLICK] button |
(page 38) |
Switches the click function on or off.
› [MIDI SETTING] button |
(page 64) |
Enables selection of detailed MIDI settings. |
|
fi [OTHER SETTING] button |
(page 67) |
This lets you make detailed settings, such as adjusting the keyboard touch or making fine adjustments to the scale.
fl [MASTER EQUALIZER] sliders |
(page 36) |
These five sliders adjust the tone of each band: LOW (low band) to HIGH (high band).
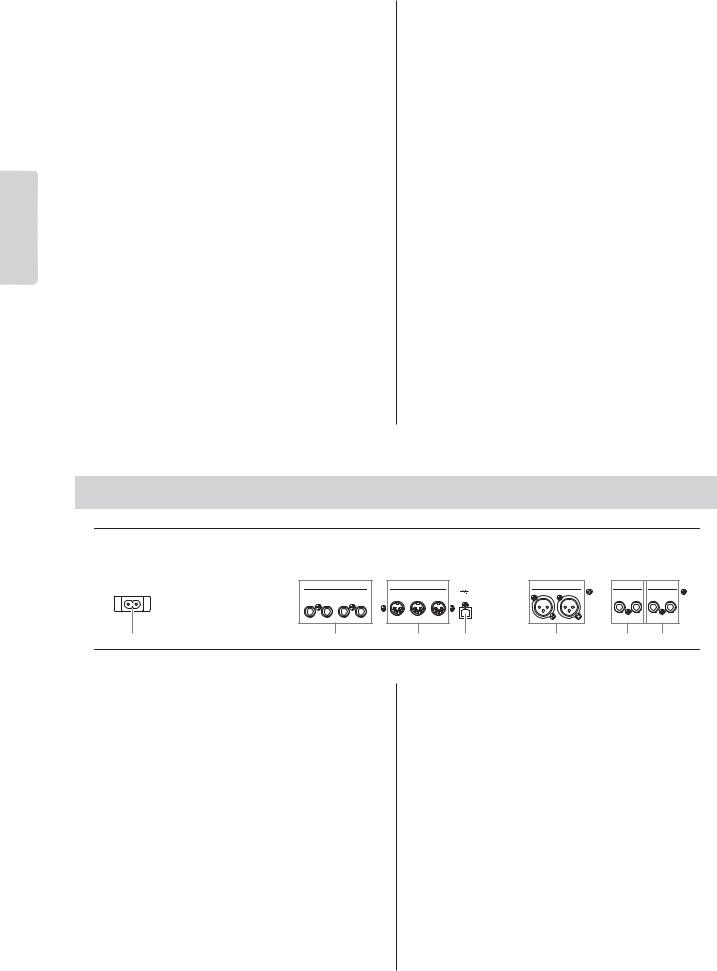
Rear Panel
AC INLET |
ASSIGNABLE FOOT PEDAL |
|
|
MIDI |
USB |
|
OUTPUT |
|
OUTPUT |
|
INPUT |
|
1 |
2 |
3 |
4 |
IN |
OUT |
THRU |
R |
L |
R |
L/MONO |
R |
L/MONO |
SUSTAIN |
SOSTENUTO |
SOFT |
AUX |
|
|
|
|
|
|
|
|
|
1 |
2 |
|
|
3 |
4 |
|
5 |
6 |
|
7 |
||
1 [AC INLET] jack |
(page 11) |
Connect the supplied AC power cord here. Use only the AC power cord supplied with the CP300.
2 |
[ASSIGNABLE FOOT PEDAL] jacks |
|
|
(pages 11, 33) |
|
|
For connecting the included pedal (FC3), an optional FC4/5 |
|
|
foot switch, or FC7 foot controller. |
|
3 MIDI [IN][OUT][THRU] connectors |
(page 90) |
|
|
For connecting external MIDI devices, allowing the use of |
|
|
various MIDI functions. |
|
4 |
[USB] connector |
(page 92) |
|
For connecting the CP300 and computer. |
|
5 OUTPUT [L][R] jacks |
(page 88) |
These jacks output balanced audio signals, and are for |
|
connection to an external device such as a mixer. |
|
6 OUTPUT [L/MONO][R] jacks |
(page 88) |
These jacks output stereo audio signals (1/4" mono phone plug). For monophonic output, use just the L/MONO jack.
7 INPUT [L/MONO][R] jacks |
(page 89) |
External audio signals can be input via these phone jacks (1/4" mono phone plug). The sound of an external instrument can be reproduced via the CP300’s speakers. Use 1/4" mono phone plugs. For stereo input from an audio device, connect to both the L/MONO and R jacks.
22 CP300 Owner’s Manual
Quick Guide
Listening to the Demo Songs
The CP300 has a variety of specially recorded Demo Songs that effectively showcase each of the instrument’s Voice groups. Listen to some of these Demo Songs now and hear the wide-ranging capabilities of the CP300.
nMake sure the CP300 is ready for playback. Details are given in the section “Before Using the CP300” on page 11.
|
|
|
TRACK |
|
|
|
|
|
|
|
GRAND |
GRAND |
MONO |
|
|
|
|
|
|
|
|
|
|
MASTER PERFORMANCE |
TRANSPOSE |
1 |
2 |
3-16 |
SONG FILE |
MIDI OUT |
PANEL LOCK |
A |
B |
CONTRAST |
PIANO 1 |
PIANO 2 |
PIANO |
E. PIANO 1 |
E. PIANO 2 |
E. PIANO 3 |
CLAVI. |
VIBES |
VOICE EDIT SPLIT |
REVERB CHORUS |
SPEAKER |
MIDI SETTING |
|
MASTER EDIT PERFORM.FILE |
SONG SELECT |
REC |
STOP |
PLAY/PAUSE |
SONG SETTING |
|
|
|
NO |
YES |
1 |
2 |
3 |
4 |
5 |
6 |
7 |
8 |
VARIATION |
MASTER EQ EDIT |
CLICK |
OTHER SETTING |
DEMO |
|
|
|
|
DOWN |
UP |
|
|
|
ORGAN 1 |
ORGAN 2 |
HARPSI. |
STRINGS |
CHOIR/PAD |
GUITAR |
BASS |
XG |
|
||||||
|
|
|
|
|
|
|
|
|
|
EXIT |
|
|
|
|
|
|
|
|
|
|
|
|
|
|
NEW SONG |
|
SYNCHRO START |
|
TEMPO |
C |
D |
|
9 |
10 |
11 |
12 |
13 |
14 |
15 |
16 |
|
|
|
|
|
||
|
|
|
SONG |
|
|
|
|
|
|
|
|
|
|
VOICE/PERFORMANCE |
|
|
|
|
|
|
|
||
3 4 2 1
1 Simultaneously press both the [MIDI SETTING] button and the [OTHER SETTING] button.
The Voice group button indicators will flash in sequence. The “Voice Demo” message appears in the display.
A B
VoiceDemo
NO YES
SelectVoiceButton
C D
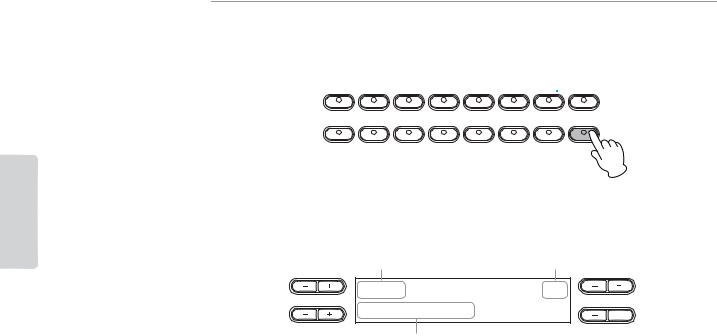
2 Press one of the Voice group buttons to listen to the Demo Songs.
The corresponding Voice button indicator lights up and playback starts. Demo Songs provided for each Voice group will play back in sequence until you press the [STOP] button.
Adjusting the Volume
To adjust the volume level of the Demo Songs, use the [MASTER VOLUME] dial or [SONG VOLUME] slider.
ZONE 1 |
ZONE 2 |
ZONE 3 |
ZONE 4 |
MIN |
MAX |
SONG |
|
MASTER VOLUME |
|
||
VOLUME |
ZONE CONTROL |
||
nMake sure that the [SONG VOLUME] slider is set appropriately. If the [SONG VOLUME] slider is set to minimum, no sound can be heard.
3 Press the button of the Voice group currently being played or the [PLAY/PAUSE] button to stop the Voice demo.
4 Press the [EXIT] button to exit the Demo selection display.
Basic Operation
CP300 Owner’s Manual 23
Operation Basic
Quick Guide
Listening to the Piano Demo Songs
1 Simultaneously press both the [MIDI SETTING] button and the [OTHER SETTING] button.
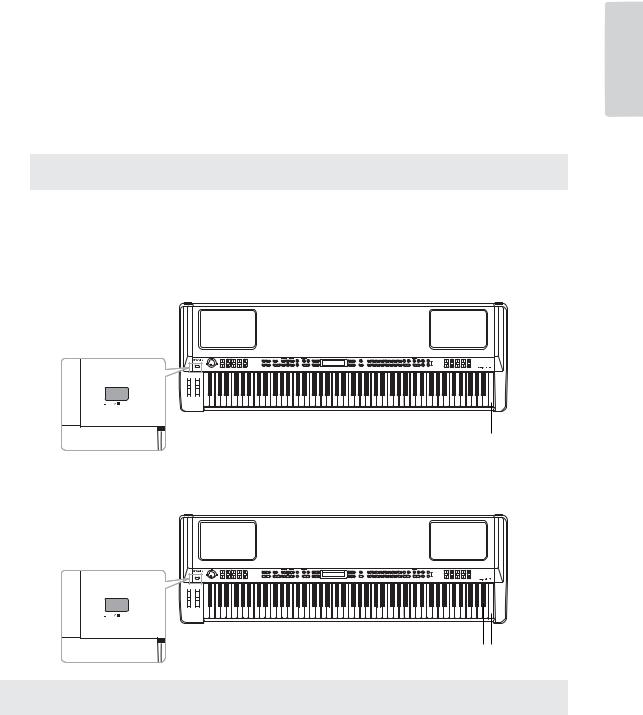
2 Use the A [–][+] buttons to select the Piano Demo Songs.
The “Piano Demo” message appears in the display.
A B
PianoDemo
NO YES
SelectVoiceButton
C D
3 Press one of the Voice group buttons to listen to the corresponding Piano Demo
Song.
GRAND |
GRAND |
MONO |
|
|
|
CLAVI. |
|
PIANO 1 |
PIANO 2 |
PIANO |
E. PIANO 1 |
E. PIANO 2 |
E. PIANO 3 |
VIBES |
|
1 |
2 |
3 |
4 |
5 |
6 |
7 |
8 |
ORGAN 1 |
ORGAN 2 |
HARPSI. |
STRINGS |
CHOIR/PAD |
GUITAR |
BASS |
XG |
9 |
10 |
11 |
12 |
13 |
14 |
15 |
16 |
VOICE/PERFORMANCE
The Piano Demo Songs are assigned to the sound buttons as follows.
|
Voice Name |
Piano Demo Song |
Description |
|
1 |
GRAND PIANO 1 |
Stereo sampling |
Song recorded in stereo. |
|
|
|
|
|
|
2 |
GRAND PIANO 2 |
Mono sampling |
Song recorded with a mono sampled sound. |
|
|
|
|
|
|
3 |
MONO PIANO |
Dynamic sampling: mezzopiano |
Showcases the Dynamic Sampling feature, with |
|
|
|
|
multiple velocity-switched samples to accurately |
|
4 |
E. PIANO 1 |
Dynamic sampling: mezzoforte |
||
simulate the timbral response of an acoustic |
||||
|
|
|
instrument. |
|
5 |
E. PIANO 2 |
Dynamic sampling: forte |
||
|
||||
|
|
|
|
|
6 |
E. PIANO 3 |
With Sustain |
Showcases the Sustain Sampling feature, which |
|
|
|
(with Sustain Sampling) |
reproduces the unique resonance of an acoustic |
|
|
|
|
grand piano’s soundboard and strings when the |
|
7 |
CLAVI. |
No Sustain |
||
damper pedal is pressed. |
||||
|
|
(without Sustain Sampling) |
|
|
|
|
|
|
|
8 |
VIBES |
With KeyOff |
Showcases the Key-off Samples that add the |
|
|
|
(with Key-off Sampling) |
subtle sound produced when the keys are |
|
|
|
|
released on an acoustic piano. |
|
9 |
ORGAN 1 |
No KeyOff |
||
|
||||
|
|
(without Key-off Sampling) |
|
|
|
|
|
|
|
10 |
ORGAN 2 |
With String Resonance |
Showcases the String Resonance feature that |
|
|
|
|
recreates the characteristic resonance of actual |
|
11 |
HARPSI. |
No String Resonance |
||
piano strings. |
||||
|
|
|
|
24 CP300 Owner’s Manual
Quick Guide
Playing Voices
Selecting a Voice
|
|
|
|
|
|
|
2 |
|
|
|
|
|
1 Voice group buttons |
|
|||||
|
|
|
|
|
|
|
|
|
|
|
|
|
|
|
|
|
|
|
|
|
|
|
|
|
|
|
|
|
|
|
|
|
|
|
|
|
|
|
|
|
|
|
TRACK |
|
SONG FILE |
MIDI OUT PANEL LOCK |
A |
B |
CONTRAST |
GRAND |
GRAND |
MONO |
|
CLAVI. |
VIBES VOICE EDIT SPLIT |
REVERB CHORUS |
SPEAKER MIDI SETTING |
||
|
|
|
|
|
|||||||||||||||
MASTER PERFORMANCE |
TRANSPOSE |
1 |
2 |
3-16 |
PIANO 1 |
PIANO 2 |
PIANO |
E. PIANO 1 E. PIANO 2 E. PIANO 3 |
|||||||||||
SONG SELECT |
REC |
STOP |
PLAY/PAUSE |
|
|
NO |
YES |
1 |
2 |
3 |
4 |
5 |
6 |
7 |
8 |
VARIATION |
MASTER EQ EDIT |
CLICK |
OTHER SETTING |
DEMO |
MASTER EDIT PERFORM.FILE |
|
|
SONG SETTING |
DOWN |
UP |
|
|
ORGAN 1 |
ORGAN 2 |
HARPSI. |
STRINGS |
CHOIR/PAD |
GUITAR |
BASS |
XG |
|
||||
|
|
|
|
|
|
|
|
EXIT |
|
|
|
|
|
|
|
|
|
|
|
|
NEW SONG |
|
SYNCHRO START |
TEMPO |
C |
|
D |
9 |
10 |
11 |
12 |
13 |
14 |
15 |
16 |
|
|
|
|
|
|
|
|
|
|
|
|
|
|
|
|
|
|
|
|
|
||||||
|
|
SONG |
|
|
|
|
|
|
|
|
VOICE/PERFORMANCE |
|
|
|
|
|
|
|
|
|
2
1 Select the desired Voice group button by pressing one of the Voice group buttons.
In this step, press the [GRAND PIANO 1] button.
n Make sure the [PERFORMANCE] button is turned off. For details about Performances, refer to page 73. n Refer to the “Voice List” on page 103 for more information on the characteristics of each Preset Voice.
2 Select the desired Voice by using the VARIATION [▼][▲] buttons or the A [–][+] buttons.
The currently selected Voice will sound when you play the keyboard.
Indicates the currently selected Voice
A B
Mellow Piano 1
NO YES
C D
Voice Group |
Voice Name |
GrandPiano1 |
Grand Piano 1 |
|
|
|
Mellow Piano 1 |
|
|
|
Rock Piano |
|
|
|
Honky Tonk Piano |
|
|
GrandPiano2 |
Grand Piano 2 |
|
|
|
Mellow Piano 2 |
|
|
MonoPiano |
Mono Piano 1 |
|
|
|
Mono Piano 2 |
|
|
|
Comp. Piano 1 |
|
|
|
Comp. Piano 2 |
|
|
E.Piano1 |
Chorus E.Piano |
|
|
|
Phaser E.Piano |
|
|
|
AutoPan E.Piano |
|
|
|
Standard E.Piano |
|
|
E.Piano2 |
DX E.Piano 1 |
|
|
|
DX E.Piano 2 |
|
|
|
Synth Piano |
|
|
E.Piano3 |
Tremolo Vintage E.P. |
|
|
|
Vintage E.Piano |
|
|
|
Amp.Sim.Vintage E.P. |
|
|
Clavi. |
Phaser Clavi. |
|
|
|
Clavi. 1 |
|
|
|
Wah Clavi. |
|
|
|
Clavi. 2 |
|
|
Vibraphone |
Vibraphone |
|
|
|
Marimba |
|
|
|
Celesta |
|
|
Voice Group |
Voice Name |
Organ1 |
Jazz Organ |
|
|
|
Theater Organ |
|
|
|
Rock Organ |
|
|
|
Draw Organ |
|
|
Organ2 |
Pipe Organ Principal |
|
|
|
Pipe Organ Tutti |
|
|
|
Pipe Organ Flute |
|
|
Harpsichord |
Harpsichord 8' |
|
|
|
Harpsichord 8'+4' |
|
|
Strings |
Strings |
|
|
|
Synth Strings |
|
|
|
Slow Strings |
|
|
Choir/Pad |
Choir |
|
|
|
Slow Choir |
|
|
|
Scat |
|
|
|
Synth Pad 1 |
|
|
|
Synth Pad 2 |
|
|
Guitar |
Nylon Guitar |
|
|
|
Steel Guitar |
|
|
Bass |
Wood Bass |
|
|
|
Bass&Cymbal |
|
|
|
Electric Bass |
|
|
|
Fretless Bass |
|
|
XG |
XG Voice |
|
|
Basic Operation
CP300 Owner’s Manual 25
Operation Basic
Quick Guide
About XG Voices
The XG Voices are categorized and contained in appropriate folders. Select the XG Voice group first, then select the desired Voice.
2-1 Press the [XG] button.
GRAND |
GRAND |
MONO |
|
|
|
CLAVI. |
|
PIANO 1 |
PIANO 2 |
PIANO |
E. PIANO 1 |
E. PIANO 2 |
E. PIANO 3 |
VIBES |
|
1 |
2 |
3 |
4 |
5 |
6 |
7 |
8 |
ORGAN 1 |
ORGAN 2 |
HARPSI. |
STRINGS |
CHOIR/PAD |
GUITAR |
BASS |
XG |
9 |
10 |
11 |
12 |
13 |
14 |
15 |
16 |
VOICE/PERFORMANCE
2-2 Simultaneously press the [–] [+] buttons located beside the XG Voice name display, to call up the display for selecting XG Voices.
In this case, press the A [–][+] buttons simultaneously to call up the XG Voice selection display.
Voice group name |
Indicates that an XG Voice is selected |
A |
B |
PIANO |
XG |
|
NO YES |
00:GrandPiano |
|
C |
D |
Voice name |
|
The XG Voice selection display can also be called up by pressing both the VARIATION [▼][▲] buttons simultaneously, after pressing the [XG] button.
2-3 Use the A [–][+] buttons to select a Voice group.
2-4 Use the C [–][+] buttons to select a specific Voice.
3 Play the keyboard.
26 CP300 Owner’s Manual
Quick Guide
Playing Different Voices Simultaneously
The advanced features of the CP300 allow you to do things and perform in ways that are simply not possible on an acoustic instrument. For example, you can play several different Voices together in a layer, or play one Voice (or even two) layered Voices with your left hand while you play a different Voice (or two) layered Voices with your right.
You can make detailed settings for each Voice and combined Voice in Dual or Split. Refer to the “Detailed Settings for the Voices—Voice Edit” on page 56.
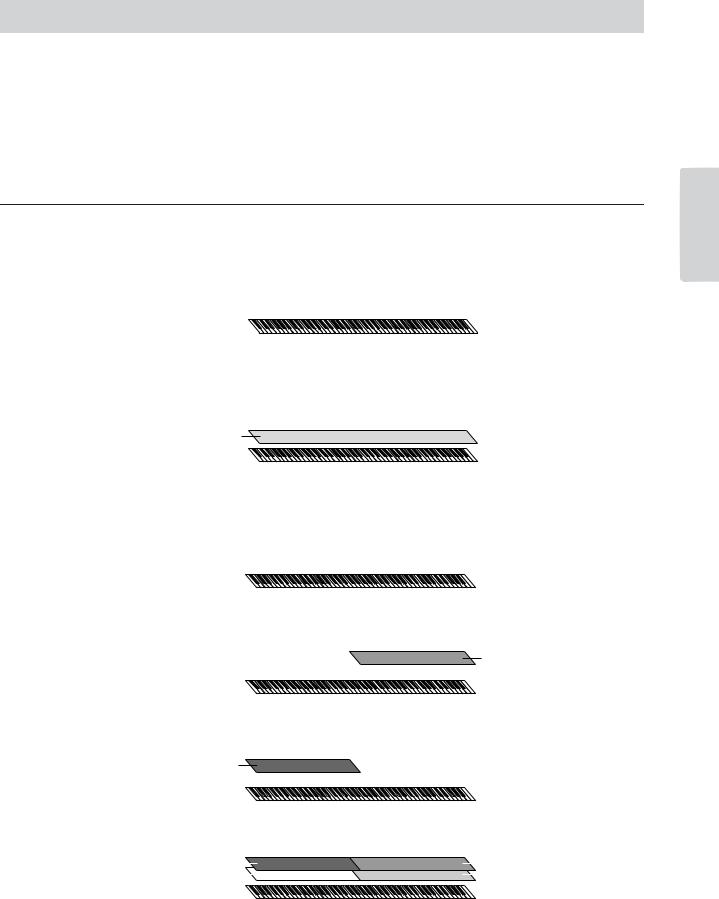
Keyboard Part Combinations
The CP300 lets you effectively divide the keyboard into four independent parts: Main, Layer, Left and Left Layer. Moreover, a different Voice can be assigned to each part.
■Playing a Single Voice (Main part) (page 25)
You can play a single Voice over the entire keyboard range. This is used for normal performance.
Main part 
■Playing Two Voices Simultaneously (Dual) (page 29)
This lets you play a unison melody with two different instruments, or combine two similar, complementary Voices to create a thicker sound.
Layer part 
Main part
■Playing Different Voices with Your Left and Right Hands (Split) (page 31)
This allows you to play different Voices with your left and right hands. For example, you can play a bass part with your left hand, using the Wood Bass or Electric Bass Voice, and a melody on top with your right hand.
Left part 
 Main part
■Playing Three Different Voices with Your Left and Right Hands (Split and Dual for the Main parts) (pages 29, 31)
Layer part
Left part 
 Main part
■Playing Three Different Voices with Your Left and Right Hands (Split and Dual for the Left parts) (page 31)
Left Layer part
Left part 
 Main part
■ Playing Four Different Voices with Your Left and Right Hands (Split and Dual) (page 30)
Left Layer part |
|
|
|
|
|
Layer part |
|
|
|
|
|
|
|||
Left part |
|
|
|
|
|
|
Main part |
|
|
|
|
|
|
||
|
|
|
|
|
|
|
|
nThe volume level for each Voice part can be adjusted independently. For details, refer to page 28.
Basic Operation
CP300 Owner’s Manual 27
Operation Basic
Quick Guide
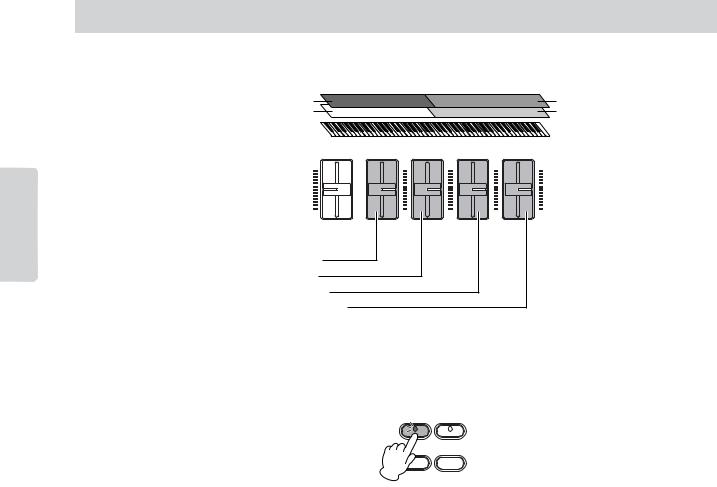
Changing the Volume for Each Part (Zone Control)
The convenient [ZONE CONTROL] sliders allow you to adjust the volume of each part independently while you play the keyboard. Moving a slider up increases the volume while pulling the slider down decreases it.
Left Layer part |
|
|
Layer part |
Left part |
|
|
Main part |
ZONE 1 |
ZONE 2 |
ZONE 3 |
ZONE 4 |
SONG |
|
VOLUME |
ZONE CONTROL |
ZONE 1: Main part
ZONE 2: Left part
ZONE 3: Layer part
ZONE 4: Left Layer part
nWhen you play a single Voice (Main part), you can adjust the volume by moving the [ZONE 1] slider. In this case, the [ZONE 2], [ZONE 3] and [ZONE 4] sliders have no effect on the volume.
Turning on the [MASTER] button switches the function assigned to the [ZONE CONTROL] sliders. Refer to the “Using the Master Mode” on page 39.
MASTER PERFORMANCE
EDIT PERFORM.FILE
28 CP300 Owner’s Manual

Quick Guide
Combining Voices—Dual
Using Voices of Different Voice Groups—Dual
|
|
|
|
|
|
|
|
2 |
2 |
|
|
|
1, 3 Voice group buttons |
|
|
|
|||||||
|
|
|
TRACK |
|
|
|
|
|
|
|
GRAND |
GRAND |
MONO |
|
|
|
|
|
|
|
|
|
|
MASTER PERFORMANCE |
TRANSPOSE |
1 |
2 |
3-16 |
SONG FILE |
MIDI OUT |
PANEL LOCK |
A |
B |
CONTRAST |
PIANO 1 |
PIANO 2 |
PIANO |
E. PIANO 1 |
E. PIANO 2 |
E. PIANO 3 |
CLAVI. |
VIBES |
VOICE EDIT SPLIT |
REVERB CHORUS |
SPEAKER |
MIDI SETTING |
|
MASTER EDIT PERFORM.FILE |
SONG SELECT |
REC |
STOP |
PLAY/PAUSE |
SONG SETTING |
|
|
|
NO |
YES |
1 |
2 |
3 |
4 |
5 |
6 |
7 |
8 |
VARIATION |
MASTER EQ EDIT |
CLICK |
OTHER SETTING |
DEMO |
|
|
|
|
DOWN |
UP |
|
|
|
ORGAN 1 |
ORGAN 2 |
HARPSI. |
STRINGS |
CHOIR/PAD |
GUITAR |
BASS |
XG |
|
||||||
|
|
|
|
|
|
|
|
|
|
EXIT |
|
|
|
|
|
|
|
|
|
|
|
|
|
|
NEW SONG |
|
SYNCHRO START |
|
TEMPO |
C |
D |
|
9 |
10 |
11 |
12 |
13 |
14 |
15 |
16 |
|
|
|
|
|
||
|
|
|
SONG |
|
|
|
|
|
|
|
|
|
|
VOICE/PERFORMANCE |
|
|
|
|
|
|
|
||
nMake sure the [PERFORMANCE] button is turned off. For details about Performances, refer to page 73.
1 Press two Voice group buttons at the same time (or press one Voice group button while holding down another) to enable Dual.
In this step, press the [GRAND PIANO 1] button and the [CHOIR/PAD] button.
The [GRAND PIANO 1] button and [CHOIR/PAD] button light. The selected Voice name will appear in the display.
Main part |
Layer part |
A |
B |
|
Dual |
GrandPiano1 |
Choir |
|
NO YES |
C |
D |
2 Select the particular Voice for each part by using the A [–][+] buttons and B [– (NO)]
[+ (YES)] buttons.
You can also select the Main part Voice by using the VARIATION [▼][▲] buttons.
n XG Voices can also be selected. For more information, refer to “About XG Voices” on page 26.
Select the “Honky Tonk Piano” Voice by using the A [–][+] buttons and select the “Scat” Voice by using the B [– (NO)][+ (YES)] buttons.
Main part |
Layer part |
A |
B |
HonkyTonkPiano |
Scat |
|
NO YES |
C |
D |
To select three parts—Main, Layer and Left—simultaneously hold down the [SPLIT] button and press the desired Voice group button.
Main part |
Layer part |
A |
B |
|
Split + Dual for the Main parts |
GrandPiano1 |
Choir |
|
NO YES |
Strings |
|
C |
D |
Left part |
|
Basic Operation
CP300 Owner’s Manual 29
Operation Basic
Quick Guide
To select four parts—Main, Layer, Left and Left Layer—simultaneously hold down the [SPLIT] button and press two Voice group buttons.
Main part |
Layer part |
A |
B |
|
Split + Dual |
GrandPiano1 |
Choir |
|
NO YES |
Strings |
E.Bass |
C |
D |
Left part |
Left Layer part |
You can select other Voices by using the A – D letter buttons (A [–][+] to D [–][+]).
n For details about the Split function, refer to page 31.
3 Press any single Voice group button to exit Dual and return to normal play.
Using Voices in the Same Voice Group—Dual
Dual can also be used to select and play Voices in the same Voice group.
1 Press one of the Voice group buttons.
2 Use the A [–][+] buttons to select the desired Voice.
You can also select the Main part Voice by pressing the VARIATION [▼][▲] buttons.
3 Use the B [– (NO)][+ (YES)] buttons to select another Voice in the same Voice group.
To use identical Voices, press the B [– (NO)][+ (YES)] buttons once.
To use different Voices within the same Voice group, press the B [– (NO)][+ (YES)] buttons repeatedly.
30 CP300 Owner’s Manual
 Loading...