


CGP-1000
Yamaha CGP-1000, PSR-OR700, CVP-401, CVP-403, CVP-405 Installation Guide
...
Accessory CD-ROM for Windows
Installation Guide/Installationshandbuch/Manuel d’installation/Guía de instalación
SPECIAL NOTICES
• The software and this Installation Guide are exclusive copyrights of Yamaha Corporation.
• Use of the software and this guide is governed by the SOFTWARE LICENSE AGREEMENT which the purchaser fully agrees to upon
breaking the seal of the software packaging. (Please read carefully the AGREEMENT at the end of this guide before installing the application.)
• Copying of the software or reproduction of this guide in whole or in part by any means is expressly forbidden without the written consent of
the manufacturer.
• Yamaha makes no representations or warranties with regard to the use of the software and documentation and cannot be held responsible for
the results of the use of this guide and the software.
• Copying of the commercially available music data is strictly prohibited except for your personal use.
• The company names and product names in this Installation Guide are the trademarks or registered trademarks of their respective companies.
• Software such as the USB-MIDI driver may be revised and updated without prior notice. Make sure to check and download the latest version
of the software from the following site.
http://music.yamaha.com/download
• Future upgrades of application and system software and any changes in specifications and functions will be announced separately.
BESONDERE HINWEISE
• Dieses Programm und diese Installationsanleitung sind im Sinne des Urheberrechts alleiniges Eigentum der Yamaha Corporation.
• Die Benutzung des Programms und dieser Anleitung unterliegt der SOFTWARE-LIZENZVEREINBARUNG, mit der sich der Erwerber
durch Öffnen des Siegels der Programmverpackung uneingeschränkt einverstanden erklärt. (Bitte lesen Sie die VEREINBARUNG am Ende
dieser Anleitung vor Installation der Anwendung sorgfältig durch.)
• Das Kopieren der Software und die Reproduktion dieser Anleitung, in welcher Form auch immer, in Teilen oder als Ganzes, sind nur mit
schriftlicher Genehmigung des Herstellers erlaubt und sonst ausdrücklich verboten.
• Yamaha leistet keinerlei Garantie hinsichtlich der Benutzung des Programms und der zugehörigen Dokumentation und übernimmt keine
Verantwortung für die Ergebnisse der Benutzung dieser Anleitung oder des Programms.
• Das Kopieren im Handel erhältlicher Musikdaten ist nur für Ihren Privatgebrauch zulässig und sonst streng untersagt.
• Die in dieser Installationsanleitung erwähnten Firmen- und Produktnamen sind Warenzeichen bzw. eingetragene Warenzeichen der
betreffenden Firmen.
• Software wie z.B. der USB MIDI Driver kann ohne vorherige Benachrichtigung überarbeitet und aktualisiert werden. Achten Sie darauf, auf
der folgenden Website nach der neuesten Version der Software zu suchen und sie herunterzuladen.
http://music.yamaha.com/download
• Zukünftige Aktualisierungen von Anwendungs- und Systemsoftware sowie jede Änderung der technischen Daten und Funktionen werden
separat bekanntgegeben.
EnglishDeutschFrançaisEspañol
REMARQUES PARTICULIERES
• Les droits d’auteurs (copyright) de ce logiciel et de ce manuel d’installation appartiennent exclusivement à Yamaha Corporation.
• L’usage de ce logiciel et de ce manuel est défini par l’accord de licence auquel l’acheteur déclare souscrire sans réserve lorsqu’il ouvre le sceau
de l’emballage du logiciel. (Veuillez donc lire attentivement l’accord de licence du logiciel situé à la fin de ce manuel avant d’installer le
logiciel.)
• Toute copie du logiciel et toute reproduction totale ou partielle de ce manuel, par quel moyen que ce soit, est expressément interdite sans
l’autorisation écrite du fabricant.
• Yamaha n’offre aucune garantie en ce qui concerne l’utilisation du logiciel et de la documentation. Yamaha ne peut en aucun cas être tenu
responsable des dommages éventuels résultant de l’utilisation de ce manuel et de ce logiciel.
• Toute copie de données musicales commercialisées est formellement interdite, sauf pour usage personnel.
• Les noms des firmes et des produits apparaissant dans ce manuel d’installation sont des marques commerciales ou des marques déposées
appartenant à leurs détenteurs respectifs.
• Les logiciels tels que le pilote USB MIDI sont susceptibles d’être révisés et mis à jour sans avertissement préalable. Veuillez toujours à vérifier
la version du logiciel utilisée et à télécharger la dernière version en date sur le site suivant :
http://music.yamaha.com/download
• Les remises à jour du programme et du système ainsi que toute modification des caractéristiques et fonctions seront annoncées séparément.
AVISOS ESPECIALES
• El copyright del software y de la guía de instalación es propiedad exclusiva de Yamaha Corporation.
• La utilización de este software y de esta guía debe ajustarse al CONTRATO PARA USO DE SOFTWARE BAJO LICENCIA, con el que el
comprador manifiesta su total conformidad al abrir el paquete de software. (Lea detenidamente el CONTRATO que se incluye al final de esta
guía antes de instalar la aplicación).
• La copia del software o la reproducción total o parcial de este manual por cualquier medio sin la autorización escrita del fabricante está
expresamente prohibida.
• Yamaha no asume responsabilidad alguna ni ofrece garantía alguna en relación con el uso del software y de la documentación, y no puede ser
declarada responsable de los resultados de la utilización de este manual ni del software.
• Queda terminantemente prohibida la copia de datos musicales disponibles comercialmente, excepto para uso personal.
• Los nombres de compañías y de productos que aparecen en esta guía de instalación son marcas o marcas registradas de sus respectivas
compañías.
• El software, por ejemplo el controlador USB MIDI, se puede revisar y actualizar sin previo aviso. Compruebe que existe la versión más reciente
del software y descárguela en el sitio siguiente:
http://music.yamaha.com/download
• Las futuras actualizaciones de la aplicación y del software del sistema, y cualquier cambio en las especificaciones y funciones, se anunciarán
independientemente.
Accessory CD-ROM for Windows Installation Guide 1
EN
DE
FR
ES

Important Notices about the CD-ROM
Data Types
This CD-ROM includes application software. Please refer to page 4 for software installation instructions.
Operating System (OS)
The applications in this CD-ROM are provided in versions for Windows operating systems.
English
CD-ROM Installation Procedure
Before breaking the seal of the software packaging, please read carefully the Software License Agreement at the end of this guide.
1 Check the system requirements to make sure that the software will run on your computer (page 3).
2 Insert the included CD-ROM into the CD-ROM drive.
The Start window should appear automatically. (Users of Windows Vista will need to click [Start.exe] to open the Start window after
inserting the CD-ROM.)
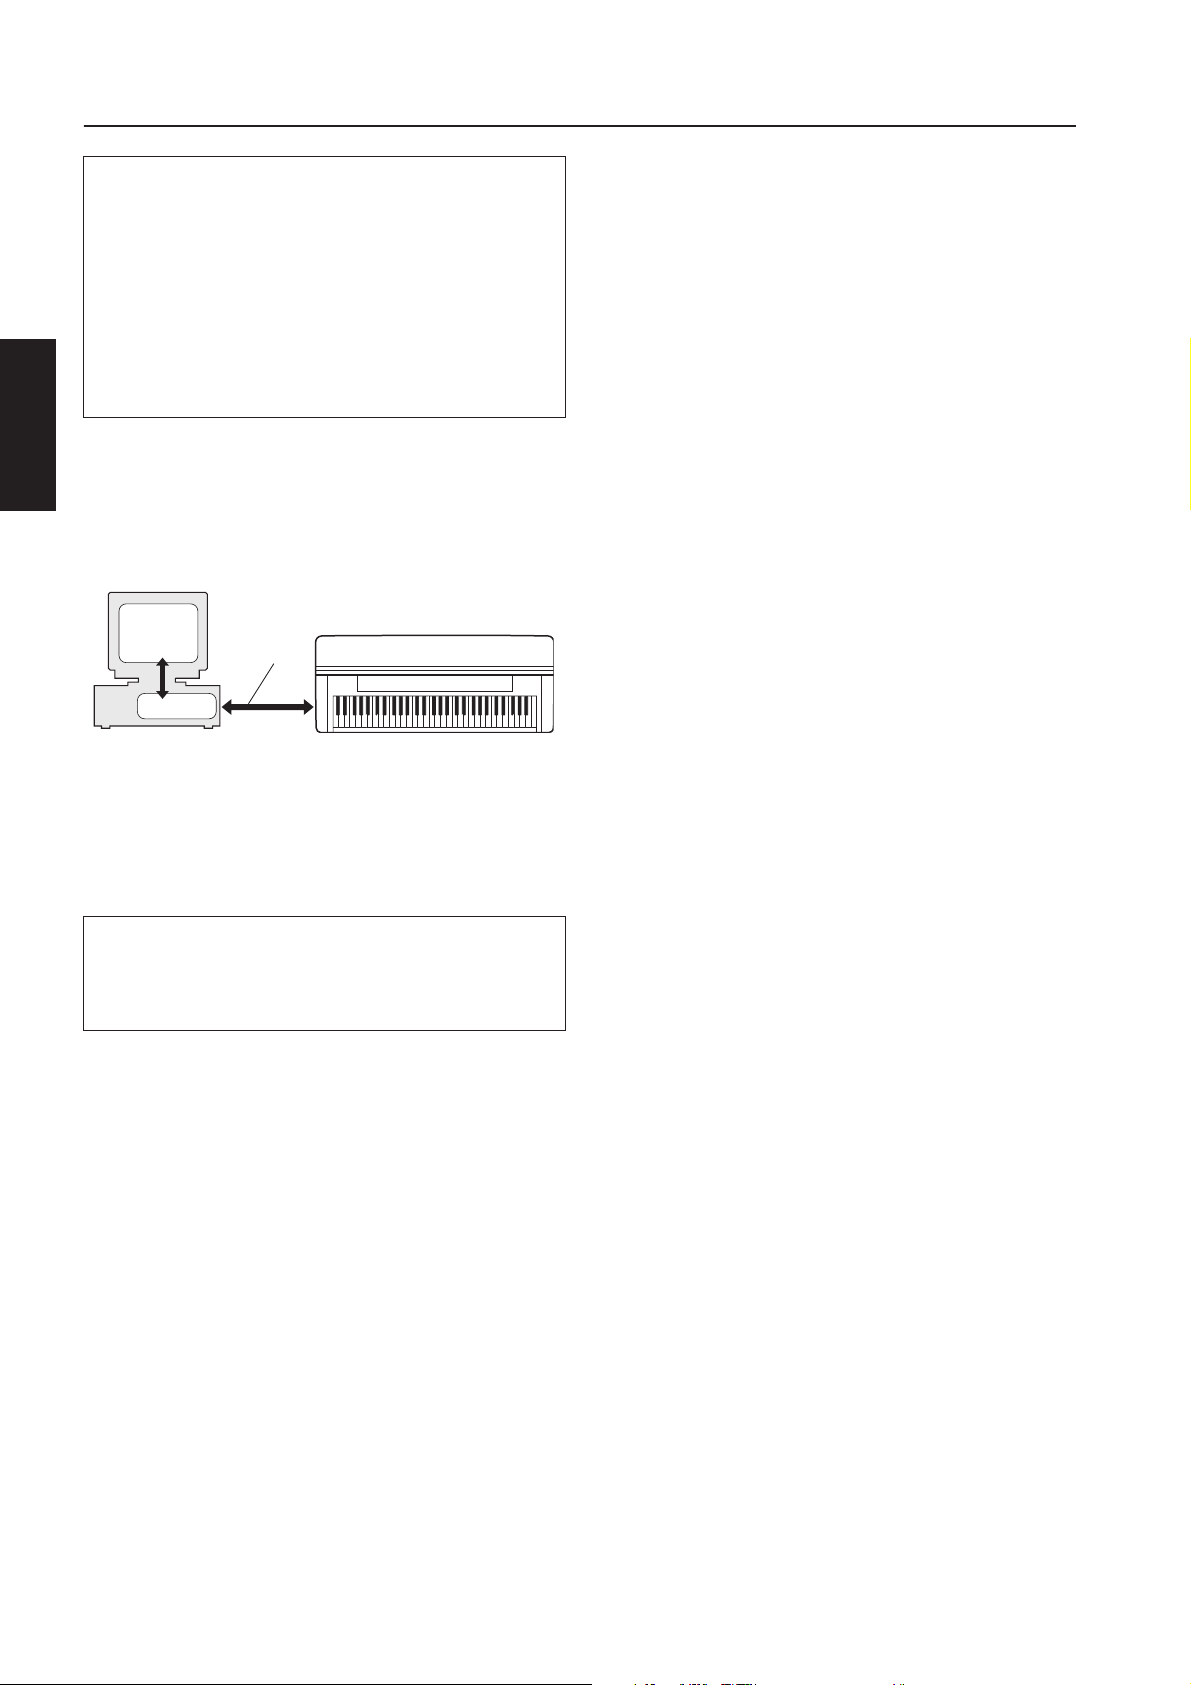
3 Connect the instrument to the computer.
Refer to the Owner’s Manual of the instrument.
4 Install the USB-MIDI driver to the computer (page 4).
5 Install the software (page 6).
CAUTION
This CD-ROM is not meant for use with an audio/visual system (CD player, DVD player, etc.). Never attempt to use the disk
on equipment other than a computer.
6 Start up the software.
For subsequent operations, refer to the owner’s manual for each software program (online help/PDF manual).
If you have any problems in driver installation, refer to the “Troubleshooting” on page 7.
n To view PDF files, you must install Adobe Reader on your computer.
If you do not have Adobe Reader, you can download the application from the Adobe website at the following URL:
http://www.adobe.com
2 Accessory CD-ROM for Windows Installation Guide

Contents of the CD-ROM
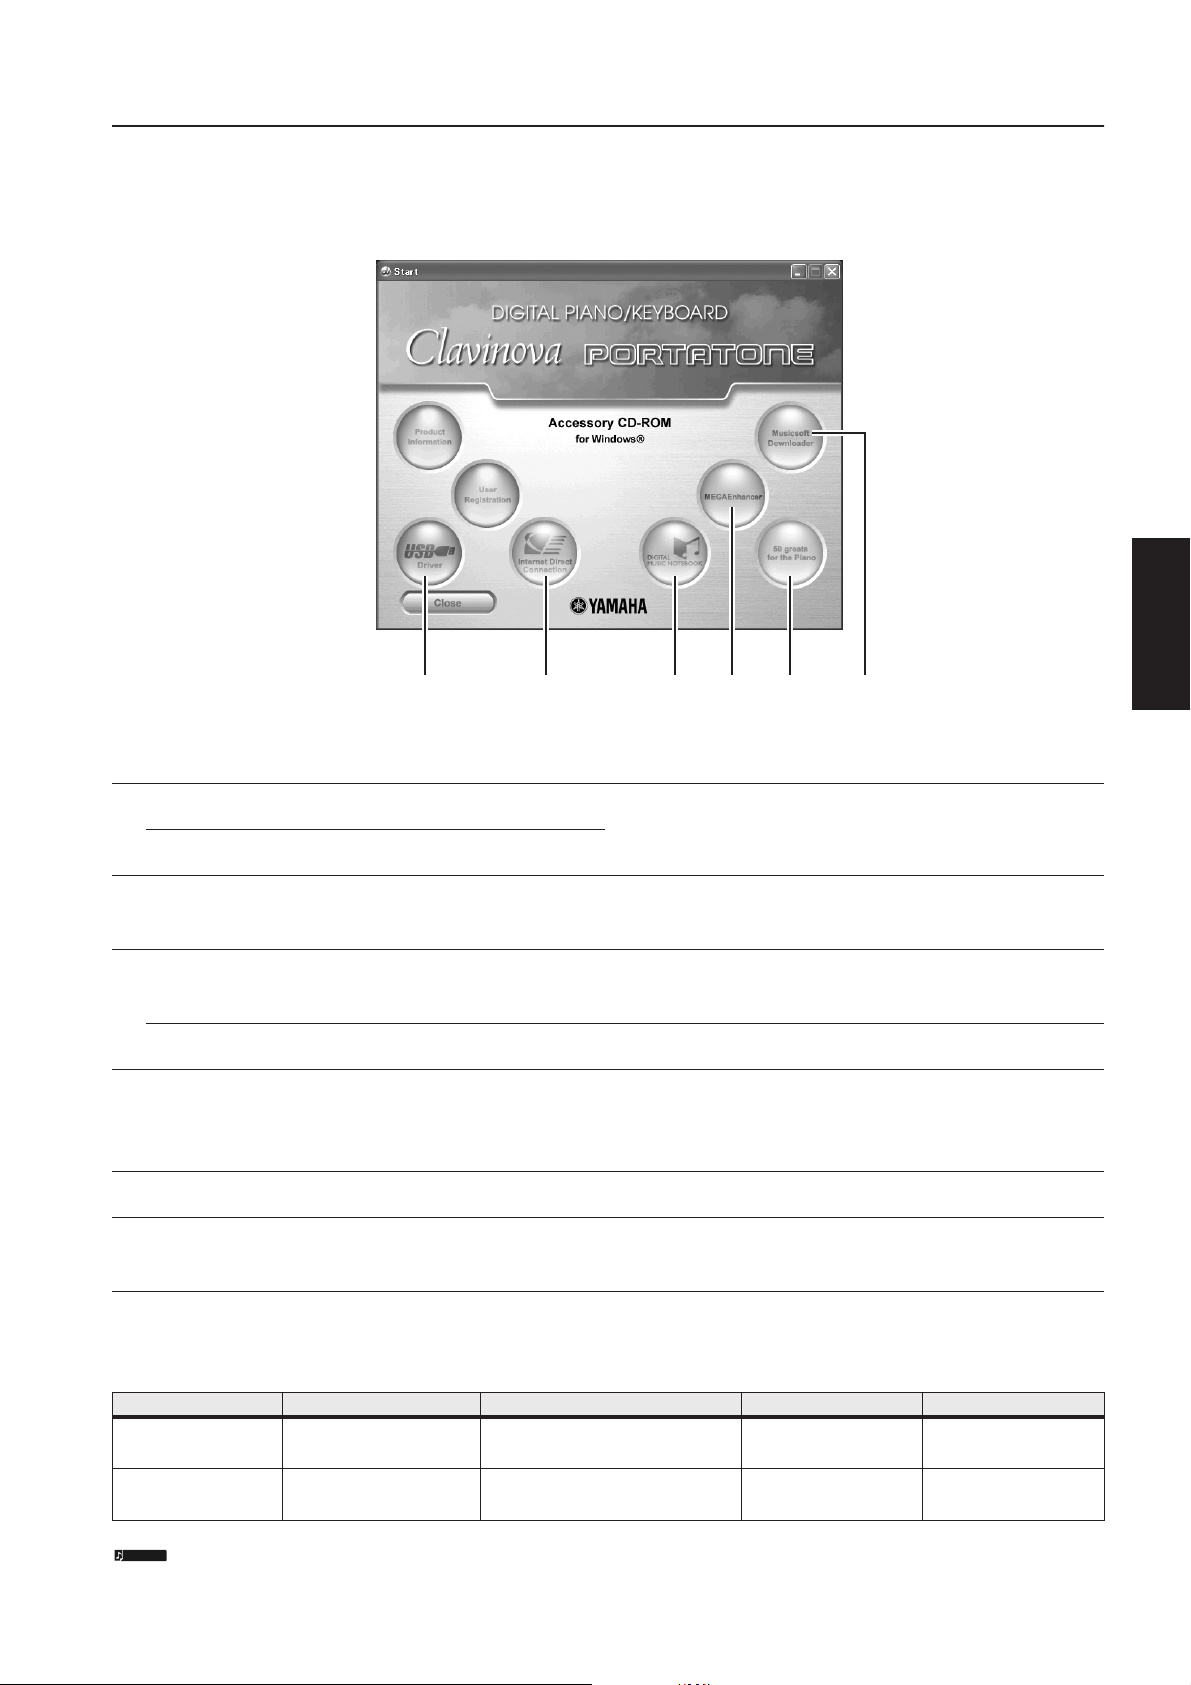
The start window as shown below will appear automatically when you insert the included CD-ROM. (Users of Windows Vista will need to
click [Start.exe] to open the Start window after inserting the CD-ROM.) By clicking each menu on the Start window, you can access the User
Registration page on the Internet and download some of the wide variety of application software available.
2 3 4 61 5
Application / Data Name Folder Name Contents
USB-MIDI Driver
(Windows 2000/XP)
1
USB-MIDI Driver
(Windows Vista/XP x64)
Internet Direct Connection Flash Demo IDC_FlashDemo
2
Digital Music Notebook (Available at Yamaha website.)
3
Digital Music Notebook Flash Demo DMN_FlashDemo
MEGAEnhancer (Available at Yamaha website.)
4
50 greats for the Piano SongData
5
Musicsoft Downloader (Available at Yamaha website.)
6
USBdrv2k_
USBdrvVista_
This software is necessary when using your instrument with a computer via a
USB connection. It enables MIDI communication and control between the
instrument and the computer.
Full-motion demo software which introduces all features of the Internet Direct
Connection, from within the program.
Please note that the Internet Direct Connection function may not be available
depending on your instrument.
Digital Music Notebook is a combination music learning program and online
service that makes it easy and fun to practice and master your favorite songs.
Digital Music Notebook can be downloaded from the Internet.
Full-motion demo software which introduces all features of the Digital Music
Notebook, from within the program.
Allows conversion of conventional XG/GM song data to song data optimized for
use with the Mega Voice feature (on a compatible instrument or tone generator.
MEGAEnhancer makes MIDI guitar and bass tracks come to life, with enhanced
realism and expression.
MEGAEnhancer can be downloaded from the Internet.
Piano Song files which can be played back via the song playback function of the
instrument.
Utilizing a connection between the instrument and a computer, this application
allows you to directly download song data to the instrument.
Microsoft Downloader can be downloaded from the Internet.
English
• All the applications listed above are supplied with online/PDF manuals.
Minimum System Requirements
Application/Data OS CPU Memory Hard Disk
USB Driver for Windows
2000/XP
USB Driver for Windows
Vista/XP x64
n For the System Requirements of the other software available in the CD-ROM, see the respective download page on the web. The download page can be
displayed by clicking the software menu on the Start window and the “download” button in the next page.
Windows 2000/XP Home
Edition/XP Professional
Windows Vista/XP
Professional x64 Edition
166 MHz or higher; Intel® Pentium®/
Celeron® Processor family
800 MHz or higher; Intel® Pentium®/
Celeron® Processor family or Intel® 64
compatible processor
32 MB or more (64 MB or
more is recommended)
512 MB or more at least 3 MB of free space
at least 3 MB of free space
Accessory CD-ROM for Windows Installation Guide 3
Software Installation
• • • • • • • • • • • • • • • • • • • • • • • • • • • • • • • • • • • • • • • • • • • • • • • • • • • • • • •
Uninstall (Removing the installed application)
To remove any installed application software:
Select [START] → [Settings] → [Control Panel] → [Add/
Remove Programs] → [Install/Uninstall], then select the
application to be removed and click [Add/Remove...].
Follow the on-screen instructions to uninstall the
application.
n The button names or menus may differ depending on the
English
n For instructions on uninstalling the USB-MIDI driver, refer to
USB-MIDI Driver
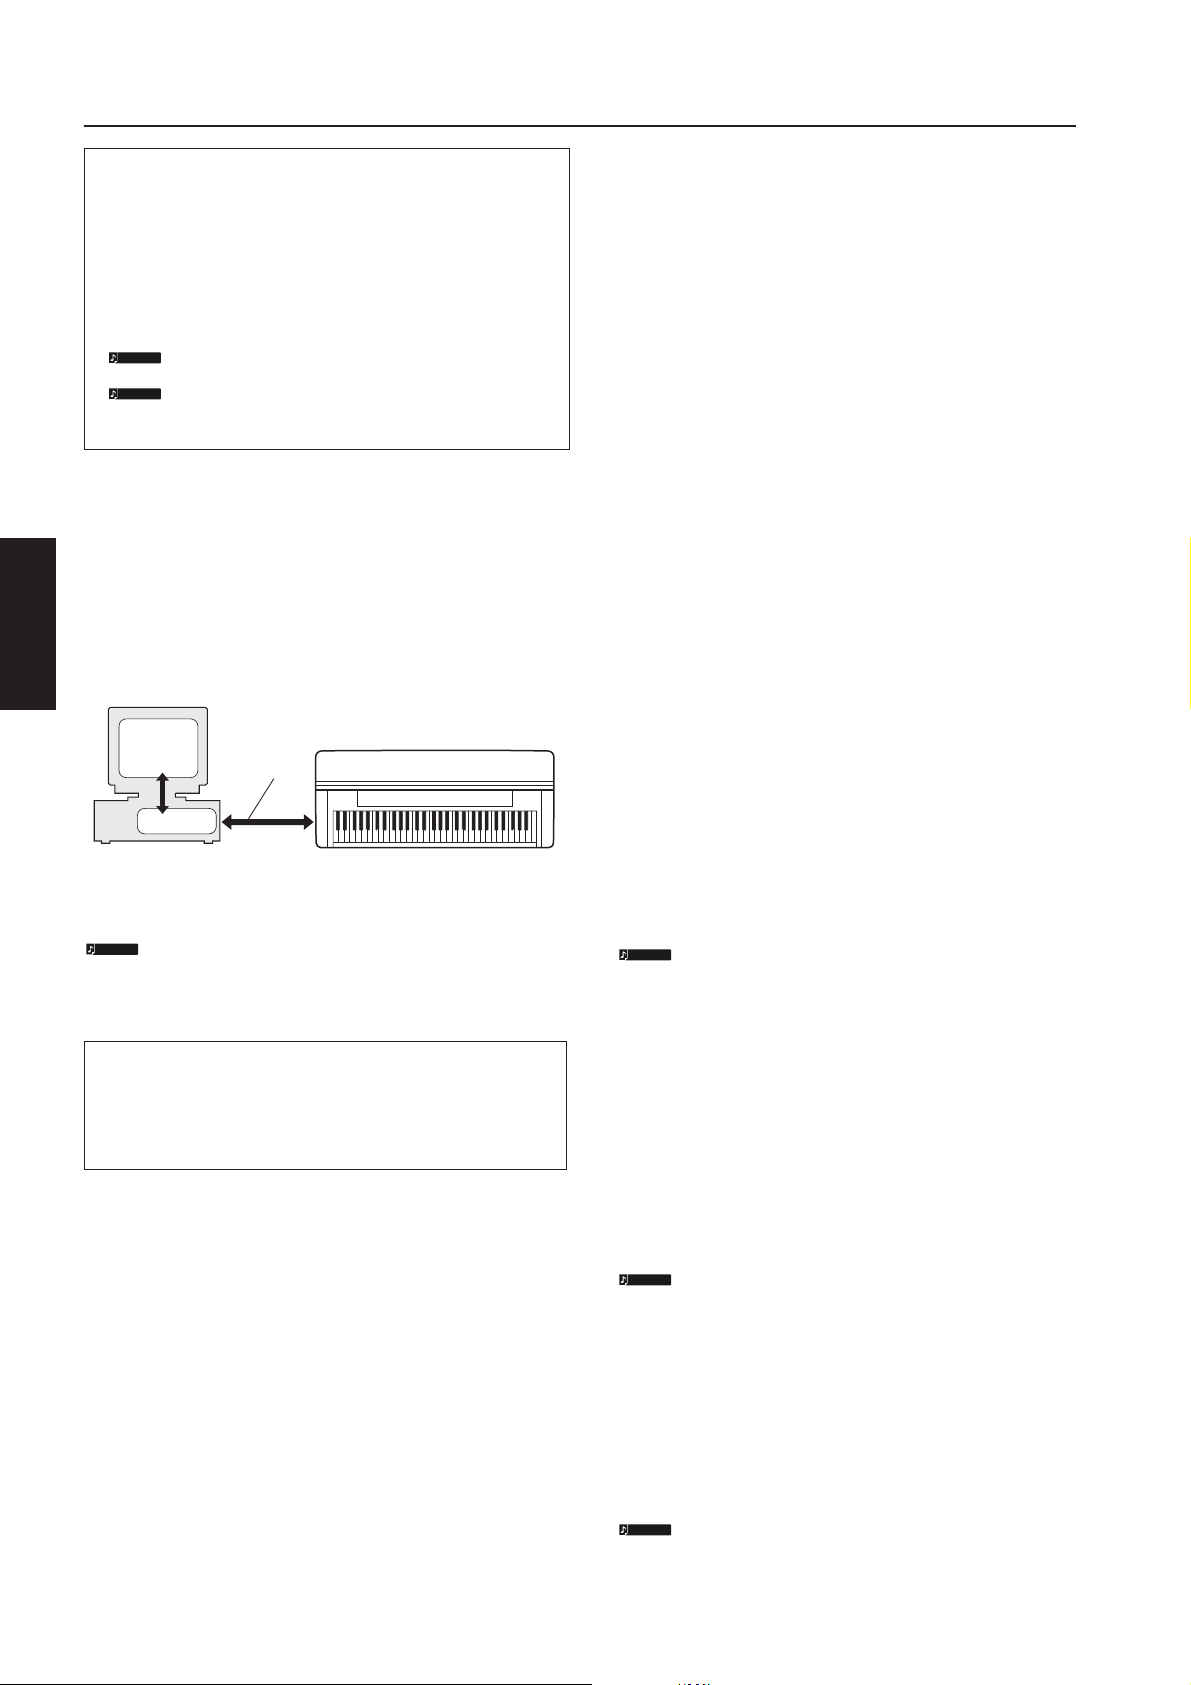
To operate the instrument from your computer via USB, you’ll
need to install the appropriate driver software.
The USB-MIDI driver is software that transfers MIDI data back and
forth between sequence software and the instrument via a USB cable.
For Windows XP: See the column at right.
For Windows 2000: See page 5.
For Windows Vista: See page 5.
n
Check the drive name of the CD-ROM drive you will be using
(D:, E:, Q:, etc.) The drive name is displayed beside the CDROM icon in your “My Computer” folder. The root directory
of the CD-ROM drive will be D:\ , E:\ , or Q:\ , respectively.
computer OS.
“How can I remove the driver?” in the “Troubleshooting”
section (page 7).
Computer
Sequence
Software
Driver
See the Yamaha Download page at the following URL for up-to-date
news on USB-MIDI driver:
http://music.yamaha.com/download/
USB cable
MIDI instrument (Clavinova, etc.)
Installing the driver on Windows XP
1 Start the computer and use the “Administrator” account
to log on to Windows XP.
2 Select [Start] → [Control Panel].
If the control panel appears as “Pick a category”, click
“Switch to Classic View” in the upper left of the window.
All control panels and icons will be displayed.
3
Go to [System] → [Hardware] → [Driver Signing
Options] and check the radio button to the left of
“Ignore” and click [OK].
4 Click the [OK] button to close System Properties, and
then click “X” in the upper right of the window to close
the Control Panel.
5 Insert the included CD-ROM into the CD-ROM drive.
The Start window will appear automatically.
6 First, make sure the POWER switch on the instrument is set
to OFF, then use a USB cable to connect the USB connector of
the computer to the USB TO HOST connector of the
instrument. When the instrument is turned on, the computer
automatically displays the “Found New Hardware Wizard.”
If the Wizard window is not displayed automatically, refer to
“Troubleshooting.”
If the system displays “Found New Hardware” in the lower right
corner, wait until “Found New Hardware Wizard” is displayed. (The
Wizard window may take a while to display on some computers.)
If the Wizard window prompts you to specify whether or not
to connect to Windows Update, select the radio button for
“No, not this time,” then click [Next].
7 Check the radio button to the left of “Install the
software automatically (Recommended).” Click [Next].
The system starts the installation.
n If during the installation the system displays “...has not passed
Windows Logo testing to verify its compatibility with Windows
XP,” click [Continue Anyway].
8 When the installation is complete, the system displays
“Completing the Found New Hardware Wizard.” Click [Finish].
(The Wizard window may take a while to display on some computers.)
4 Accessory CD-ROM for Windows Installation Guide
9 Restart the computer.
If the system displays “Found New Hardware” in the lower right
corner, wait until “System Settings Change” is displayed. (The
Wizard window may take a while to display on some computers.)
n This Wizard window will not appear when using Windows XP
Professional x64 Edition. There is no need to restart the computer.
) When using Windows XP Professional x64 Edition, the
Support Module must be installed.
After installing the USB-MIDI drivers for all the connected
USB devices, select “My Computer” from the Start menu.
Right-click the CD-ROM icon and select “Open” from the popup menu. Select “USBdrvVista_”
→ “Setup.exe” and launch “Setup.exe.” Follow the on-screen
→ “XPx64SupportModule”
directions.
n Once the Support Module is installed, this step is not necessary,
even if you’ve connected a new USB device or updated the USBMIDI driver.
The USB-MIDI driver installation is complete.

Installing the driver on Windows 2000
Installing the driver on Windows Vista
1 Start the computer and use the “Administrator” account
to log on to Windows 2000.
2 Select [My Computer] → [Control Panel] → [System] →
[Hardware] → [Driver Signing] → [File Signature
Verification], and check the radio button to the left of
“Ignore—Install all files, regardless of file signature”
and click [OK].
3 Insert the included CD-ROM into the CD-ROM drive.
The Start window will appear automatically.
4 First, make sure the POWER switch on the instrument is set to
OFF, then use a USB cable to connect the USB connector of the
computer to the USB TO HOST connector of the instrument.
When the instrument is turned on, the computer automatically
displays the “Found New Hardware Wizard.” Click [Next].
(The Wizard window may take a while to display on some computers.)
If the Wizard window is not displayed automatically, refer to
“Troubleshooting.”
5 Check the radio button to the left of “Search for a suitable
driver for my device (Recommended).” Click [Next].
6 Check the “CD-ROM drives” box and uncheck all other
items. Click [Next].
n
The system may ask you to insert a Windows CD-ROM while it
checks for the driver. Specify the “USBdrv2k_” folder of the CDROM drive (such as D:\USBdrv2k_\) and continue the installation.
7 Click [Next].
n
If the Wizard panel informs you that “The software you are about
to install does not contain a Microsoft digital signature,” click [Yes].
8 When the installation is complete, the system displays
“Completing the Found New Hardware Wizard.” Click [Finish].
(The Wizard window may take a while to display on some computers.)
1 Start the computer and use the “Administrator” account
to log on to Windows Vista.
2 Insert the included CD-ROM into the CD-ROM drive.
The AutoPlay window will appear.
3 Click [Run Start.exe].
The Start window will appear automatically.
4 First, make sure the POWER switch on the instrument
is set to OFF, then use a USB cable to connect the USB
connector of the computer to the USB TO HOST
connector of the instrument. When the instrument is
turned on, the computer automatically displays the
“Found New Hardware” window. Click “Locate and
install driver software (recommended)”.
If the window is not displayed automatically, refer to
“Troubleshooting.” (Some computers may take a while to
display the window.)
n If the “User Account Control” window appears, click [Continue].
5 If a message allowing Windows to search online for
driver software appears, click “Don’t search online.”
6 If a message prompting you to insert the disk that came
with your device appears, click [Next].
The system starts the installation.
n If the “Windows Security” window appears, confirm this software
is authored by Yamaha Corporation then click [Install].
7 When the installation is complete, the system displays
the message “The software for this device has been
successfully installed.” Click [Close].
(Some computers may take a while to display the window.)
The USB-MIDI driver installation is complete.
English
9 Restart the computer.
The USB-MIDI driver installation is complete.
Accessory CD-ROM for Windows Installation Guide 5

• • • • • • • • • • • • • • • • • • • • • • • • • • • • • • • • • • • • • • • • • • • • • • • • • • • • • • •
MEGAEnhancer
• • • • • • • • • • • • • • • • • • • • • • • • • • • • • • • • • • • • • • • • • • • • • • • • • • • • • • •
• • • • • • • • • • • • • • • • • • • • • • • • • • • • • • • • • • • • • • • • • • • • • • • • • • • • • • •
IMPORTANT
• Instruments not compatible with the Mega Voice feature
cannot properly play back song data created with the
MEGAEnhancer program.
• When installing MEGAEnhancer to Windows XP, 2000
or Vista, make sure to log on to the Administrator
account.
• To install MEGAEnhancer, your computer must be
connected to the Internet and be online.
Insert the included CD-ROM into the CD-ROM drive of
1
the computer.
English
The Start window appears on the screen. Each menu on the
window indicates the application or data contained in the
Accessory CD-ROM.
2 Click “MEGAEnhancer” on the Start window.
The page which explains the details about MEGAEnhancer is
displayed on the window.
3 Click “MEGAEnhancer Download” button at the bottom
of the window.
The Download page on the web is displayed. Verify that your
system meets the requirements before installing the software.
Musicsoft Downloader
IMPORTANT
• When installing Musicsoft Downloader to Windows XP,
2000 or Vista, make sure to log on to the Administrator
account.
• To install Musicsoft Downloader, your computer must be
connected to the Internet and be online.
1 Insert the included CD-ROM into the CD-ROM drive of
the computer.
The Start window appears on the screen. Each menu on the
window indicates the application or data contained in the
Accessory CD-ROM.
2 Click “Musicsoft Downloader” on the Start window.
The page which explains the details about Musicsoft
Downloader is displayed on the window.
3 Click “Musicsoft Downloader Download” button at the
bottom of the window.
The Download page on the web is displayed. Verify that your
system meets the requirements before installing the software.
n
For the instrument including this Accessory CD-ROM, you can use
only the Musicsoft Downloader as a file transfer application software.
Other applications such as File Utility and Song Filer cannot be used.
Digital Music Notebook
IMPORTANT
• When installing Digital Music Notebook to Windows XP
or Vista, make sure to log on to the Administrator account.
• To install Digital Music Notebook, your computer must be
connected to the Internet and be online.
1 Insert the included CD-ROM into the CD-ROM drive of
the computer.
The Start window appears on the screen. Each menu on the
window indicates the application or data contained in the
Accessory CD-ROM.
2 Click “DIGITAL MUSIC NOTEBOOK” on the Start window.
The page which explains the details about Digital Music
Notebook is displayed on the window.
3 Click “Digital Music Notebook Download” button at the
bottom of the window.
4 Automatically jump at the site of Digital Music
Notebook. Follow the on-screen instructions to
download the application.
IMPORTANT
Credit card settlement is required to purchase Digital Music
Notebook content. Credit card processing may not be
possible for some areas, so please check with your local
authorities to make sure that your credit card can be used.
6 Accessory CD-ROM for Windows Installation Guide

Troubleshooting
The driver cannot be installed.
• Is the USB cable connected correctly?
→Check the USB cable connection.
→Disconnect the USB cable, then connect it again.
• Is the USB function enabled on your computer?
→When you connect the instrument to the computer for
the first time, if the “Add New Hardware Wizard” does not
appear, the USB function on the computer may be disabled.
Perform the following steps.
1 Select [Control Panel]* → [System] → [Hardware] → [Device
Manager] (for Windows XP/2000), or select [Control Panel] →
[Device Manager] (for Windows Vista).
* Classic View only in Windows XP.
2 Make sure that no “!” or “x” marks appear at “Universal serial
bus controller” or “USB Root Hub.” If you see an “!” or “x” mark,
the USB controller is disabled.
• Is any unknown device registered?
→If driver installation fails, the instrument will be marked as an
“Unknown device,” and you will not be able to install the driver.
Delete the “Unknown device” by following the steps below.
1 Select [Control Panel]* → [System] → [Hardware] → [Device
Manager] (for Windows XP/2000), or select [Control Panel] →
[Device Manager] (for Windows Vista).
* Classic View only in Windows XP.
2 Look for “Other devices” in the menu “View devices by type.”
3 If you find “Other devices,” double-click it to extend the tree to
look for “Unknown device.” If one appears, select it and click the
[Remove] button.
4 Remove the USB cable from the instrument, and make the
connection again.
5 Install the driver again. (See page 4.)
Cannot suspend or resume the computer correctly.
• Do not suspend the computer while the MIDI application is
running.
• You may not be able to suspend/resume normally, depending on the
particular environment (USB Host Controller, etc.). Even so, simply
disconnecting and connecting the USB cable will allow you to use
the instrument functions again.
How can I remove the driver?
1 Start the computer and use the “Administrator” account to
log on to Windows.
Close all applications and windows that are open.
2 Insert the included CD-ROM into the CD-ROM drive.
3 Select [Start] → [My Computer] (for Windows XP), or select
[My Computer] (for Windows 2000), or select [Start] →
[Computer] (for Windows Vista).
4 Right-click the CD-ROM icon and select “Open” from the
pop-up menu.
5 Select “USBdrvVista_” or “USBdrv2k_” folder →
“uninstall” folder → “uninstall.exe” file and launch the
“uninstall.exe.” file.
Follow the on-screen instructions to uninstall the driver.
n When using a 64-bit OS, click “uninstall_x64.exe.” from the
“USBdrvVista_” folder.
n If the “User Account Control” window appears, click [Continue].
English
When controlling the instrument from your computer via USB,
the instrument does not operate correctly or no sound is heard.
• Did you install the driver (page 4)?
• Is the USB cable connected correctly?
• Are the volume settings of the instrument, playback device, and
application program set to the appropriate levels?
• Have you selected an appropriate port in the sequence software?
• On the Clavinova, check whether the Piano Lock is engaged or
not.
• Are you using the latest USB-MIDI driver?
The latest driver can be downloaded from the web site (page 4).
Playback response is delayed.
• Does your computer satisfy the system requirements?
• Is any other application or device driver running?
Accessory CD-ROM for Windows Installation Guide 7

Wichtige Hinweise zur CD-ROM
Datentypen
Diese CD-ROM enthält Anwendungssoftware. Anweisungen zur Installation der Software finden Sie auf Seite 4.
VORSICHT
Betriebssysteme
Die Anwendungen auf dieser CD-ROM werden in Versionen für Windows-Betriebssysteme bereitgestellt.
Verfahren zur Installation der CD-ROM
Bevor Sie das Siegel der Softwareverpackung öffnen, lesen Sie bitte die Software-Lizenzvereinbarung am Ende dieser Anleitung
sorgfältig durch.
1 Überprüfen Sie die Systemanforderungen, um sicherzustellen, dass die Software auf Ihrem Computer ausgeführt
werden kann (Seite 3).
2 Legen Sie die mitgelieferte CD-ROM in das CD-ROM-Laufwerk ein.
Deutsch
Das Startfenster sollte automatisch erscheinen. (Anwender von Windows Vista müssen nach dem Einlegen der CD-ROM auf
[Start.exe] klicken, um das Startfenster zu öffnen.)
3 Schließen Sie das Instrument an den Computer an.
Lesen Sie hierzu die Bedienungsanleitung des Instruments.
4 Installieren Sie den USB-MIDI-Treiber auf dem Computer (Seite 4).
Diese CD-ROM ist nicht zur Verwendung mit einem Audio-/Videosystem gedacht (CD-Player, DVD-Player usw.).
Verwenden Sie die Disc ausschließlich an einem Computer.
5 Installieren Sie die Software (Seite 6).
6 Starten Sie die Software.
Informationen zur weiteren Bedienung finden Sie in der Bedienungsanleitung des jeweiligen Softwareprogramms (Online-Hilfe/
Handbuch als PDF-Datei).
Falls Sie bei der Installation des Treibers Probleme haben, lesen Sie bitte im Kapitel „Fehlerbehebung“ auf Seite 7 nach.
HINWEIS
Um PDF-Dateien anzeigen zu können, müssen Sie den Adobe Reader auf Ihrem Computer installieren.
Wenn Sie den Adobe Reader noch nicht besitzen, können Sie das Programm unter der folgenden URL von der Adobe-Website herunterladen:
http://www.adobe.com
2 Accessory CD-ROM for Windows Installationshandbuch
Inhalt der CD-ROM
Das Startfenster (siehe unten) erscheint automatisch, wenn Sie die mitgelieferte CD-ROM einlegen. (Anwender von Windows Vista müssen
nach dem Einlegen der CD-ROM auf [Start.exe] klicken, um das Startfenster zu öffnen.) Durch Anklicken des jeweiligen Eintrags im
Startfenster erreichen Sie die Seite User Registration (Anwenderregistrierung) im Internet und können aus der Vielzahl von AnwendungsSoftware auswählen und diese herunterladen.
Bezeichnung der Anwendung/
Daten
USB-MIDI-Treiber
(Windows 2000/XP)
1
USB-MIDI-Treiber
(Windows Vista/XP x64)
Flash-Demo für Internet Direct
Connection (Internet-
2
Direktverbindung)
Digital Music Notebook
3
Flash-Demo für Digital Music
Notebook
MEGAEnhancer
4
50 greats for the Piano
5
(50 Klassiker für Klavier)
Musicsoft Downloader
6
2 3 4 61 5
Ordnername Inhalt
USBdrv2k_
USBdrvVista_
IDC_FlashDemo
(Erhältlich auf der YamahaWebsite.)
DMN_FlashDemo
(Erhältlich auf der YamahaWebsite.)
SongData
(Erhältlich auf der YamahaWebsite.)
Diese Software benötigen Sie, wenn Ihr Instrument über eine USB-Verbindung
an einen Computer angeschlossen ist. Sie ermöglicht die Kommunikation und
Steuerung über MIDI zwischen dem Instrument und dem Computer.
Animierte Demo-Software, die innerhalb des Programms alle Funktionen der
Internet-Direktverbindung vorstellt.
Bitte beachten Sie, dass die Funktion Internet Direct Connection je nach
verwendetem Instrument nicht immer zur Verfügung steht.
Digital Music Notebook (Digitales Notenheft) ist eine Kombination aus einem
Musik-Lernprogramm und einem Online-Service, mit dem Sie Ihre LieblingsSongs einfach und mit Freude üben und erlernen können.
Digital Music Notebook kann auch aus dem Internet heruntergeladen werden.
Animierte Demo-Software, die innerhalb des Programms alle Funktionen von
Digital Music Notebook vorstellt.
Ermöglicht die Konvertierung herkömmlicher XG-/GM-Songdaten in
Songdaten, die für die Verwendung mit der Mega-Voice-Funktion (an einem
kompatiblen Instrument oder Klangerzeuger) optimiert sind. MEGAEnhancer
verleiht MIDI-Gitarren- und MIDI-Bassspuren Lebendigkeit sowie mehr
Realistik und stärkeren Ausdruck.
MEGAEnhancer kann auch aus dem Internet heruntergeladen werden.
Piano-Song-Dateien, die über die Song-Wiedergabefunktion des Instruments
wiedergegeben werden können.
Mithilfe einer Verbindung zwischen dem Instrument und einem Computer
ermöglicht Ihnen diese Anwendung, Songdaten direkt auf das Instrument
herunterzuladen.
Musicsoft Downloader steht auf der Yamaha-Website zum Download bereit.
Deutsch
• Zu allen oben aufgelisteten Programmen stehen Ihnen auch Online/PDF-Bedienungsanleitungen zur Verfügung.
System-Mindestanforderungen
Anwendung/Daten Betriebssystem Prozessor Arbeitsspeicher Festplatte
USB Driver for
Windows 2000/XP
USB Driver for
Windows Vista/XP x64
HINWEIS
Für die Systemanforderungen anderer Software auf der CD-ROM beachten Sie die Informationen auf der entsprechenden Download-Seite im Internet.
Die Download-Seite lässt sich aufrufen mit einem Klick in das Software-Menü im Start-Fenster und Anklicken der „Download“-Schaltfläche auf der
dann erscheinenden Seite.
Windows 2000/XP Home
Edition/XP Professional
Windows Vista/XP
Professional x64 Edition
166 MHz oder schneller; Prozessor
der Familie Intel® Pentium®/Celeron®
800 MHz oder schneller; Prozessor
der Familie Intel® Pentium®/Celeron®
oder mit Intel® 64 kompatibler Prozessor
32 MB oder mehr
(64 MB oder mehr werden
empfohlen)
512 MB oder mehr
mindestens 3 MB
freier Speicherplatz
mindestens 3 MB
freier Speicherplatz
Accessory CD-ROM for Windows Installationshandbuch 3
Software-Installation
• • • • • • • • • • • • • • • • • • • • • • • • • • • • • • • • • • • • • • • • • • • • • • • • • • • • • • •
Deinstallieren (installierte Anwendung entfernen)
Um eine der installierten Anwendungen zu entfernen:
Wählen Sie den Befehlspfad → [START] → [Einstellungen]
→ [Systemsteuerung] → [Software] → [Programme ändern
oder entfernen], markieren Sie die zu entfernende
Anwendung, und klicken Sie auf [Entfernen…].
Befolgen Sie die Anweisungen auf dem Bildschirm zur
Deinstallation der Anwendung.
USB-MIDI-Treiber
Deutsch
Um das Instrument von einem Computer aus über USB bedienen
zu können, müssen Sie zunächst die passende Treibersoftware
(englisch: Driver) installieren.
Der USB-MIDI-Treiber ist eine Software, die über ein USB-Kabel
MIDI-Daten zwischen der Sequencer-Software und dem Instrument
überträgt.
Für Windows XP: Siehe rechte Spalte.
Für Windows 2000: Siehe Seite 5.
Für Windows Vista: Siehe Seite 5.
HINWEIS
Überprüfen Sie die Laufwerksbezeichnung (D:, E:, Q: usw.)
Ihres CD-ROM-Laufwerks, die neben dem CD-ROM-Symbol
im Ordner „Arbeitsplatz“ Ihres Computers angezeigt wird.
(Das Stammverzeichnis des CD-ROM-Laufwerks ist
beispielsweise D:\, E:\ oder Q:\ usw.)
4 Accessory CD-ROM for Windows Installationshandbuch
HINWEIS
HINWEIS
Je nach Betriebssystem können die Namen von
Schaltflächen oder Menüs anders lauten.
Anweisungen zur Deinstallation des USB-MIDI-Treibers
finden Sie unter „Wie kann ich den Treiber entfernen?“ im
Kapitel „Fehlerbehebung“ (Seite 7).
Computer
Sequenzer-
programm
Treiber
Beachten Sie die Download-Seite von Yamaha unter folgendem
URL für aktuelle Informationen zum USB-MIDI-Treiber:
http://music.yamaha.com/download/
USB-Kabel
MIDI-Instrument (Clavinova usw.)
Installieren des Treibers unter Windows XP
1 Starten Sie den Computer, und melden Sie sich mit
dem Zugang „Administrator“ bei Windows XP an.
2 Wählen Sie [Start] → [Systemsteuerung].
Falls im rechten Fenster der Systemsteuerung „Wählen Sie
eine Kategorie“ angezeigt ist, klicken Sie oben links im
Fenster auf „Zur klassischen Ansicht wechseln“. Alle
Symbole der Systemsteuerung werden angezeigt.
3
Gehen Sie zu [System] → [Hardware] →
[Treibersignaturoptionen], aktivieren Sie die Option
„Ignorieren“, und klicken Sie auf [OK].
4 Klicken Sie auf [OK], um das Fenster „Eigenschaften von
System“ zu schließen, und klicken Sie dann oben rechts
im Fenster auf die Schaltfläche „X“, um die
Systemsteuerung zu schließen.
5 Legen Sie die mitgelieferte CD-ROM in das CD-ROM-
Laufwerk ein.
Daraufhin erscheint automatisch das Startfenster.
6 Vergewissern Sie sich zunächst, dass der Netzschalter
POWER am Instrument auf OFF (Aus) gestellt ist, und
verwenden Sie dann ein USB-Kabel, um die USB-Schnittstelle
des Computers mit der Buchse USB TO HOST am Instrument
zu verbinden. Wenn das Instrument eingeschaltet wird, wird
auf dem Computer automatisch der „Assistent für das
Suchen neuer Hardware“ angezeigt.
Wenn das Assistentenfenster nicht automatisch erscheint,
lesen Sie weiter bei „Fehlerbehebung“.
Wenn das System „Neue Hardware gefunden“ in der unteren rechten
Ecke anzeigt, warten Sie, bis das entsprechende Assistentenfenster
erscheint. (Bei einigen Computern kann es eine Weile dauern, bis das
Assistentenfenster erscheint.)
Falls Sie der Assistent auffordert, anzugeben, ob eine
Verbindung zu Windows Update hergestellt werden soll,
wählen Sie die Option „Nein, diesmal nicht“, und klicken
Sie dann auf [Weiter].
7 Aktivieren Sie bitte die Option „Software automatisch
installieren (empfohlen)“. Klicken Sie auf [Weiter].
Das System beginnt mit der Installation.
HINWEIS
Falls während der Installation die Meldung „…has not
passed Windows Logo testing to verify its compatibility
with Windows XP“ (…hat den Windows-Logo-Test zur
Verifizierung seiner Kompatibilität mit Windows XP nicht
bestanden) angezeigt wird, klicken Sie auf [Continue
Anyway] (Trotzdem fortfahren).
8 Sobald die Installation erfolgreich beendet wurde, erscheint
das Fenster „Fertig stellen des Assistenten“. Klicken Sie auf
[Fertig stellen].
(Bei einigen Computern kann es eine Weile dauern, bis das
Assistentenfenster erscheint.)
9 Starten Sie den Computer neu.
Wenn das System „Neue Hardware gefunden“ in der unteren
rechten Ecke anzeigt, warten Sie, bis „System Settings
Change“ (Systemeinstellungen ändern) erscheint.
(Bei einigen Computern kann es eine Weile dauern, bis das
Assistentenfenster erscheint.)
HINWEIS
Dieses Assistentenfenster erscheint nicht, wenn Sie
Windows XP Professional x64 Edition verwenden. Es ist
nicht erforderlich, den Computer neu zu starten.
) Wenn Sie Windows XP Professional x64 Edition
verwenden, muss zunächst das Support-Modul
installiert werden.
Nach Installation der USB-MIDI-Treiber für alle
angeschlossenen USB-Geräte wählen Sie „Arbeitsplatz“ aus
dem Startmenü. Klicken Sie mit der rechten Maustaste auf
das Symbol des CD-ROM-Laufwerks und wählen Sie [Öffnen]
aus dem Aufklappmenü. Wählen Sie „USBdrvVista_“
„XPx64SupportModule“
„Setup.exe“. Folgen Sie den Anweisungen auf dem Bildschirm.
HINWEIS
Nachdem das Support-Modul installiert wurde, ist dieser
Schritt auch dann nicht mehr notwendig, wenn Sie ein
neues USB-Gerät angeschlossen oder den USB-MIDITreiber aktualisiert haben.
Die Installation des USB-MIDI-Treibers ist abgeschlossen.
→ „Setup.exe“ und starten Sie
→
 Loading...