


FTM-400DR |
DUAL BAND TRANSCEIVER |
|
144/430MHz 50W |
Instruction Manual |
C4FM FDMA/FM |
(APRS Edition)
Thank you for purchasing this Yaeau product.
This instruction manual explains information related to the “APRS Function” . For information on basic operation of the transceiver, please refer to the enclosed FTM-400DR operating manual.

Using APRS® functions |
|
Contents |
|
What is APRS®? ...................................................................................................................................................... |
3 |
APRS Initial Settings.............................................................................................................................................. |
3 |
Setting the position information of your own station................................................................................................. |
3 |
Using the GPS function........................................................................................................................................ |
3 |
Setting the function manually............................................................................................................................... |
4 |
Setting your own station call sign ............................................................................................................................. |
6 |
Setting the symbol of your own station..................................................................................................................... |
8 |
Setting the APRS baud rate.................................................................................................................................... |
12 |
Other settings ......................................................................................................................................................... |
13 |
Starting APRS Operation ..................................................................................................................................... |
14 |
Activating the APRS function.................................................................................................................................. |
14 |
Deciding the operating band................................................................................................................................... |
15 |
Setting the squelch detection condition.................................................................................................................. |
16 |
Matching the frequency .......................................................................................................................................... |
17 |
Receiving APRS Beacons.................................................................................................................................... |
18 |
Checking downloaded beacons.............................................................................................................................. |
19 |
Viewing the contents of a beacon........................................................................................................................... |
20 |
Viewing the beacon information using packet data (RAW display).................................................................... |
31 |
Convenient functions.............................................................................................................................................. |
32 |
Sorting the station list ............................................................................................................................................. |
33 |
Sorting a list ....................................................................................................................................................... |
33 |
Filtering the list................................................................................................................................................... |
34 |
Deleting information from a list .......................................................................................................................... |
36 |
Transmitting APRS Beacons ............................................................................................................................... |
38 |
Manually transmitting APRS beacons .................................................................................................................... |
38 |
Sending an APRS beacon automatically................................................................................................................ |
39 |
Setting the APRS beacon automatic transmission interval................................................................................ |
39 |
Using SmartBeaconing™ ....................................................................................................................................... |
40 |
Attaching status text to a beacon ........................................................................................................................... |
42 |
Selecting a position comment................................................................................................................................. |
43 |
Setting the digipeater route .................................................................................................................................... |
45 |
Sending and Receiving APRS Messages........................................................................................................... |
48 |
Checking messages........................................................................................................................................... |
48 |
Viewing the message contents .......................................................................................................................... |
49 |
Receiving APRS messages.................................................................................................................................... |
50 |
Convenient functions ......................................................................................................................................... |
50 |
Sending APRS messages ...................................................................................................................................... |
52 |
Creating and sending a new message .............................................................................................................. |
52 |
Using standard text............................................................................................................................................ |
55 |
Replying to a received message........................................................................................................................ |
57 |
Sorting the APRS message list............................................................................................................................... |
59 |
Deleting a message from the list........................................................................................................................ |
59 |
Message receipt acknowledgement (ACK) ............................................................................................................ |
62 |
APRS Set-up Menu List........................................................................................................................................ |
64 |
APRS set-up menu basic operations...................................................................................................................... |
67 |
Resetting the APRS settings .................................................................................................................................. |
68 |
Using the APRS Set-up Menu.............................................................................................................................. |
69 |
APRS compass setting ...................................................................................................................................... |
69 |
Model code display ............................................................................................................................................ |
69 |
Filter function setting.......................................................................................................................................... |
70 |
Inputting standard message text........................................................................................................................ |
71 |
1

Contents |
|
Turning the APRS function ON/OFF .................................................................................................................. |
71 |
APRS operating band mute setting.................................................................................................................... |
71 |
APRS reception pop-up setting.......................................................................................................................... |
72 |
Setting the display color of the pop-up for each APRS packet .......................................................................... |
73 |
Setting the bell ring when a message or beacon is transmitted/received.......................................................... |
74 |
Call sign setting for CALL RINGER ................................................................................................................... |
76 |
Data transmission delay time setting ................................................................................................................. |
77 |
Setting the display units of the APRS data ........................................................................................................ |
77 |
Transmission beacon information setting .......................................................................................................... |
79 |
Status text input ................................................................................................................................................. |
80 |
Beacon automatic transmission setting ............................................................................................................. |
80 |
Selecting the digipeater route ............................................................................................................................ |
83 |
Setting the digipeater route PATH 1 to PATH 4 addresses................................................................................ |
83 |
Setting the digipeater route FULL 1 and FULL 2 addresses.............................................................................. |
84 |
My call sign setting............................................................................................................................................. |
85 |
Filter setting for messages received .................................................................................................................. |
85 |
Automatic response setting of received messages ........................................................................................... |
86 |
My position setting ............................................................................................................................................. |
87 |
Entering your own station position..................................................................................................................... |
87 |
Setting your own station symbol ........................................................................................................................ |
87 |
Position comment setting................................................................................................................................... |
87 |
Smart beaconing setting .................................................................................................................................... |
88 |
Software functions and filter settings ................................................................................................................. |
91 |
Voice alert function setting................................................................................................................................. |
93 |
List of APRS Bell Rings ....................................................................................................................................... |
95 |
2

What is APRS®?
APRS (Automatic Packet Reporting System) is a packet communication protocol on amateur radios that is advocated by Bob Bruninga (WB4APR).
The APRS function of this device is a data communication system for messages and position data using the APRS format.
A partner amateur radio station using a GPS receiver can send an APRS message including GPS position information of the partner station. The direction, distance speed etc. of the partner station in relation to your own station will appear on the display of the FTM-400DR transceiver. The position information can be used in the same way by connecting the external GPS antenna unit or entering the position data manually.
APRS Initial Settings
This sets the various information of your own station prior to commencing APRS operation.
Setting the position information of your own station
The position information can be set automatically or manually depending on the situation and the location where the device is used.
Using the GPS function
Data from the in-built GPS antenna unit or an external GPS device connected to the device can be downloaded automatically. The GPS function is recommended to be used when operating mobile.
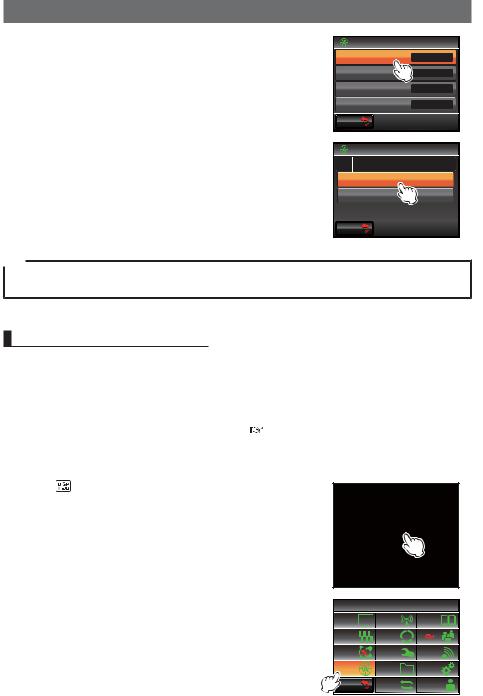
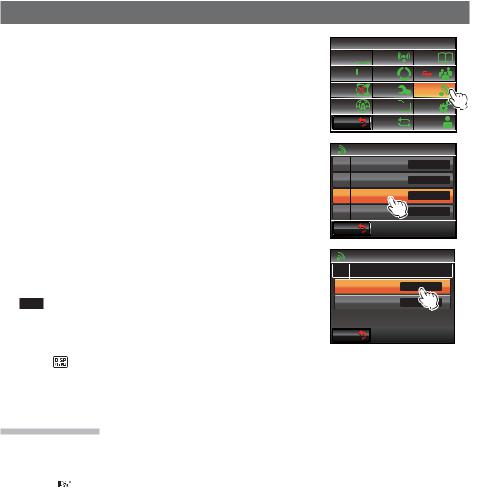
1Press  for one second or longer The set-up menu will be displayed.
2Select and touch [APRS]
The menu list will be displayed.
|
5'672 /'07 |
|
|
&+52.#; |
6: 4: |
/'/14; |
|
5+)0#.+0) |
5%#0 |
|
|
9 4'5 |
%10(+) |
# |
|
#245 |
5& %#4& |
126+10 |
|
$#%- |
4'5'6 |
%#..5+)0 |
|
%.10' |
|||
|
|
3
APRS Initial Settings
3Select and touch [26 MY POSITION SET]
The screen for selecting the setting method of the position information will be displayed.
#245
|
/; 215+6+10 5'6 |
)25 |
|
/; 215+6+10 |
|
|
/; 5;/$1. |
%10 = ? |
|
215+6+10 %1//'06 1HH &W [ |
|
|
|
|
 $#%-
$#%-
4Press [GPS]
“GPS” will be selected, and the screen will return to the main menu list.
5Press  for one second or longer
The display will return to the previous screen.
#245
/; 215+6+10 5'6
)25
/#07#.
 $#%-
$#%-
Tip
Using the GPS function, the time data received from a GPS satellite will be automatically used to correct the in-built clock of the main device.
Setting the function manually
The latitude and longitude of your own station can be entered by following the procedure below, when not using the GPS function. This may be necessary when the GPS satellites cannot be acquired or the radio is used in a fixed location.
(1) Matching the time
Please refer to “Adjusting the date and time” ( P.56) in the basic operating manual for the details.
(2) Registering position information
1Press  for one second or longer The set-up menu will be displayed.
2Select and touch [APRS]
The menu list will be displayed.
|
5'672 /'07 |
|
|
&+52.#; |
6: 4: |
/'/14; |
|
5+)0#.+0) |
5%#0 |
|
|
9 4'5 |
%10(+) |
# |
|
#245 |
5& %#4& |
126+10 |
|
$#%- |
4'5'6 |
%#..5+)0 |
|
%.10' |
|||
|
|
4
3Select and touch [26 MY POSITION SET]
The screen to choose the setting method of the position information will be displayed.
4Touch [MANUAL]
“MANUAL” will be selected, and the screen will return to the menu list.
5Select and touch [27 MY POSITION]
The screen for selecting the latitude and longitude will be displayed.
6Touch [LAT]
The screen for entering the latitude will be displayed.
APRS Initial Settings
#245
|
/; 215+6+10 5'6 |
)25 |
|
/; 215+6+10 |
|
|
/; 5;/$1. |
%10 = ? |
|
215+6+10 %1//'06 1HH &W [ |
|
|
|
|
 $#%-
$#%-
#245
/; 215+6+10 5'6
)25
/#07#.
 $#%-
$#%-
#245
|
/; 215+6+10 5'6 |
)25 |
|
/; 215+6+10 |
|
|
/; 5;/$1. |
%10 = ? |
|
215+6+10 %1//'06 1HH &W [ |
|
|
|
|
 $#%-
$#%-
#245
/; 215+6+10
21+06 #
.#6 0
.10 '
 $#%-
$#%-
7Touch [N] or [S]
Select either northern latitude (N) or southern latitude(S).
The cursor will shift to the right and only the number keys can be selected.
.#6 0
0
5 $#%-
' 5RCEG
 9 '06
9 '06
8 |
Touch the number keys to enter the “degrees”, “minutes” and “1/100 minute” |
|
|
|
||||
|
The cursor will shift to the right each time a number |
|
|
|
|
|
|
|
|
|
|
|
|
|
|
|
|
|
.#6 |
0 |
|
|
|
|
||
|
is touched. |
|
|
|
0 |
|
|
|
|
|
|
|
|||||
|
|
|
|
|
||||
9 |
Touch [ENT] |
|
|
|
5 |
|
|
|
|
|
|
' |
|
5RCEG |
|||
|
The display will return to the original screen, and the |
|
|
|
9 |
'06 |
|
|
|
set latitude will be displayed in [LAT]. |
|
|
|
||||
|
|
|
|
|
|
|
|
|
|
|
|
|
|
|
|
|
|
5

APRS Initial Settings
10 Touch [LON] twice
The screen for entering the longitude will be displayed.
11 Touch [E] or [W]
Select either the eastern longitude (E) or the western longitude (W).
 #245
#245
/; 215+6+10
21+06 #
.#6 0
.10 '
 $#%-
$#%-

The cursor will shift to the right and only the number keys can be selected. 12 Enter the “degree”, “minute” and “1/100th minute” in the same way as Step 6. 13 Touch [ENT]
The display will return to the previous screen, and the set longitude will be displayed in [LON].
14 Press |
for one second or longer |
The position information will be registered and the display will return to the previous screen.
Tips
•Please use the map of WGS-84 (world geodetic reference system) to find out the latitude and longitude.
•In this device, the position information is displayed using both second and 1/100th minute formats. Please check and enter the map display method to be used (second÷60×100=1/100 minute).
Setting your own station call sign
Register your own station call sign in order to send and receive messages and to send out beacons in APRS. Enter the call sign like “JA1ZRL-7”. The “-7” in the call sign refers to the SSID (Secondary Station Identifier). There are 16 types of SSID signs available including one without SSID. Generally, the SSIDs shown in the table below are used in APRS.
SSID |
Explanation |
NIL |
Fixed stations that can exchange |
|
messages |
-1 |
1200 bps narrow-to-middle band |
|
digipeater |
-2 |
9600 bps digipeater |
-3 |
1200 bps broadband digipeater |
-4 |
Digipeater, mobile station, meteorological |
|
station, etc. |
-5 |
Operation station using mobile devices |
|
(smartphones etc.) |
-6 |
Operation station for satellite |
|
communications, events, etc. |
-7 |
Use of FT1DR etc. in handy terminals |
|
|
SSID |
Explanation |
-8 |
Marine mobile stations, land mobile |
|
stations |
-9 |
Using the FTM-400DR etc. for mobile |
|
applications |
-10 |
I-Gate station, Internet connection station |
-11 |
Balloons, aircraft, spacecraft, etc. |
-12 |
1-way tracker station (messages cannot |
|
be exchanged) |
-13 |
Meteorological station (weather station) |
|
|
-14 |
Tracking mobile stations |
|
|
-15 |
Digipeater, mobile station, meteorological |
|
station, etc. |
6

APRS Initial Settings
Caution
Use the dedicated call sign in APRS. Please make sure to set the call sign when the device is used for the first time.
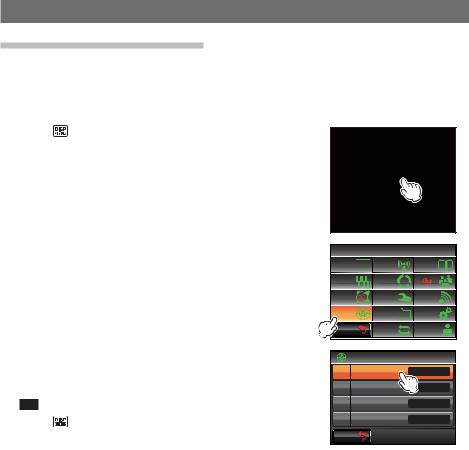
1Press  for one second or longer The set-up menu will be displayed.
2Select and touch [APRS]
The menu list will be displayed.
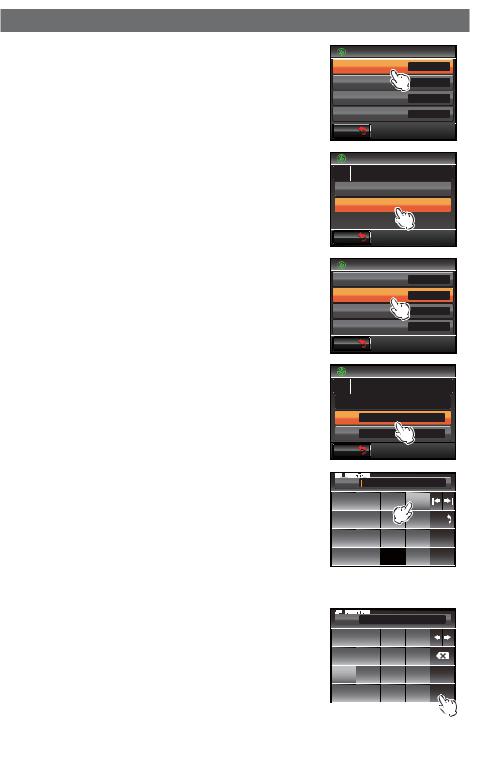
3Select and touch [23 CALLSIGN (APRS)]
The screen for inputting the call sign will be displayed.
4Touch the character keys to enter the call sign
5Touch [ENT]
The entered call sign will be registered, and the screen will return to the menu list.
6Press  for one second or longer
The display will return to the previous screen.
|
|
|
5'672 /'07 |
|
|
|
||||
&+52.#; |
6: 4: |
|
/'/14; |
|
||||||
5+)0#.+0) |
5%#0 |
|
|
|
|
|||||
9 4'5 |
|
%10(+) |
|
# |
|
|||||
#245 |
|
|
5& %#4& |
|
126+10 |
|
||||
$#%- |
|
4'5'6 |
|
%#..5+)0 |
||||||
|
%.10' |
|
||||||||
|
|
|
|
|
|
|
|
|||
|
|
#245 |
|
|
|
|
|
|
|
|
|
|
&+)+ 2#6* (7.. |
|
|
|
|||||
|
|
&+)+ 2#6* (7.. |
|
|
|
|||||
|
|
%#..5+)0 #245 |
|
|
|
|
||||
|
|
/'55#)' )4172 |
|
|
|
|||||
$#%- |
|
|
|
|
|
|
|
|
||
/; %#..5+)0 |
|
,3 ;$( |
|
|||||||
3 |
9 |
' |
4 |
6 |
; |
7 |
+ |
1 |
2 |
|
# 5 & ( ) * |
, |
- . |
||||||||
%CRU |
< |
: |
% |
|
8 |
$ |
0 |
/ |
|
|
|
|
#$% |
|
|
5RCEG |
|
'06 |
|||
@ |
|
|
|
|
|
|
|
|
|
|
|
|
#245 |
|
|
|
|
|
|
|
|
|
|
&+)+ 2#6* (7.. |
|
|
|
|||||
|
|
&+)+ 2#6* (7.. |
|
|
|
|||||
|
|
%#..5+)0 #245 |
,3 ;$( |
|
||||||
|
|
/'55#)' )4172 |
|
|
|
|||||
$#%- |
|
|
|
|
|
|
|
|
||
Tip
Please refer to http://aprs.org/aprs11/SSIDs.txt for the latest SSID information.
7

APRS Initial Settings
Setting the symbol of your own station
The station symbol and code combination used when sending data in APRS can be set using up to 4 patterns. The combination of symbol and code can be selected from the following 67 types. The preferred code can also be set for one pattern only.
Symbol |
Code |
Name |
5 |
/# |
DIGI |
|
||
|
|
|
5 |
/& |
HF Gateway |
|
||
|
|
|
5 |
/' |
Small Aircraft |
|
||
|
|
|
5 |
/- |
House QTH (VHF) |
|
||
|
|
|
5 |
/. |
X |
|
||
|
|
|
5 |
/0 |
Circle |
|
||
|
|
|
5 |
/: |
Fire |
|
||
|
|
|
5 |
/; |
Campground |
|
||
|
|
|
5 |
/< |
Motorcycle |
|
||
|
|
|
5 |
/> |
Car |
|
||
|
|
|
5 |
/C |
Canoe |
|
||
|
|
|
5 |
/E |
Eyeball |
|
||
|
|
|
5 |
/I |
TCP/IP |
|
||
|
|
|
5 |
/K |
School |
|
||
|
|
|
5 |
/O |
Balloon |
|
||
|
|
|
5 |
/P |
Police |
|
||
|
|
|
5 |
/R |
REC. vehicle |
|
||
|
|
|
5 |
/T |
SSTV |
|
||
|
|
|
5 |
/U |
Bus |
|
||
|
|
|
5 |
/V |
ATV |
|
||
|
|
|
5 |
/W |
NWS Site |
|
||
|
|
|
Symbol |
Code |
Name |
5 |
/X |
Helicopter |
|
||
|
|
|
5 |
/Y |
Yacht (sailboat) |
|
||
|
|
|
5 |
/[ |
Human/Person |
|
||
|
|
|
5 |
/\ |
Triangle (DF) |
|
||
|
|
|
5 |
/^ |
Large Aircraft |
|
||
|
|
|
5 |
/_ |
Weather Station |
|
||
|
|
|
5 |
/a |
Ambulance |
|
||
|
|
|
5 |
/b |
Bicycle |
|
||
|
|
|
5 |
/f |
Fire Truck |
|
||
|
|
|
5 |
/g |
Glider |
|
||
|
|
|
5 |
/j |
Jeep |
|
||
|
|
|
5 |
/k |
Truck |
|
||
|
|
|
5 |
/m |
Mic-E Repeater |
|
||
|
|
|
5 |
/r |
Repeater |
|
||
|
|
|
5 |
/s |
Ship (powerboat) |
|
||
|
|
|
5 |
/v |
Van |
|
||
|
|
|
5 |
/y |
Yagi @ QTH |
|
||
|
|
|
5 |
\# |
Overlay DIGI |
|
||
|
|
|
5 |
\& |
Overlay Gate |
|
||
|
|
|
5 |
\- |
House (HF) |
|
||
|
|
|
5 |
\. |
Ambiguous |
|
||
|
|
|
8

APRS Initial Settings
Symbol |
Code |
Name |
5 |
\0 |
Circle |
|
||
|
|
|
' |
E0 |
EchoLink |
|
||
|
|
|
+ |
I0 |
IRLP |
|
||
|
|
|
5 |
S0 |
Staging Area |
|
||
|
|
|
5 |
W0 |
WIRES |
|
||
|
|
|
5 |
\; |
Park/Picnic Area |
|
||
|
|
|
5 |
\= |
APRStt |
|
||
|
|
|
5 |
\> |
Overlayed Car |
|
||
|
|
|
5 |
\K |
Kenwood HT |
|
||
|
|
|
5 |
\W |
NWS Site |
|
||
|
|
|
5 |
\Y |
Radios & Devices |
|
||
|
|
|
# |
AY |
Alinco Radios |
|
||
|
|
|
|
IY |
Icom Radios |
|
||
|
|
|
Symbol |
Code |
Name |
- |
KY |
Kenwood Radios |
|
||
|
|
|
; |
YY |
Yaesu Radios |
|
||
|
|
|
5 |
\^ |
Aircraft |
|
||
|
|
|
5 |
\_ |
WX Site |
|
||
|
|
|
5 |
\m |
Value Signpost |
|
||
|
|
|
5 |
\n |
Overlayed Triangle |
|
||
|
|
|
5 |
\s |
Overlayed Ship |
|
||
|
|
|
5 |
\u |
Overlayed Truck |
|
||
|
|
|
5 |
\v |
Overlayed Van |
|
||
|
|
|
5 |
\x |
Obstruction |
|
||
|
|
|
5 |
\u |
Truck (18 wheel) |
|
||
|
|
|
5 |
/= |
Rail Engine |
|
||
|
|
|
– |
– |
– |
|
|
|
1Press for one second or longer The set-up menu will be displayed.
2Select and touch [APRS]
The menu list will be displayed.
|
5'672 /'07 |
|
|
&+52.#; |
6: 4: |
/'/14; |
|
5+)0#.+0) |
5%#0 |
|
|
9 4'5 |
%10(+) |
# |
|
#245 |
5& %#4& |
126+10 |
|
$#%- |
4'5'6 |
%#..5+)0 |
|
%.10' |
|||
|
|
9

APRS Initial Settings
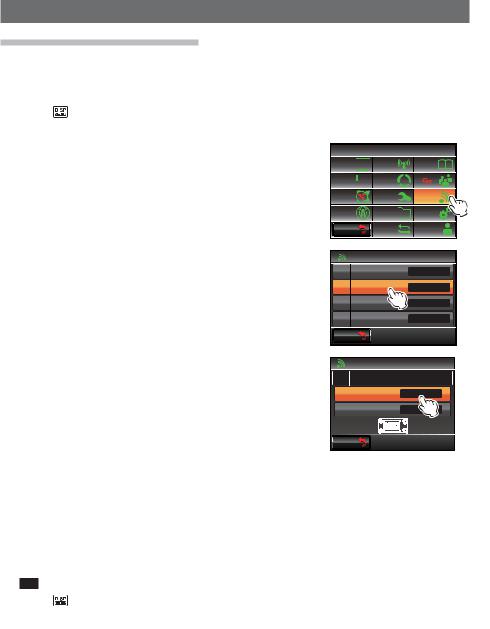
3 Select and touch [28 MY SYMBOL]
The screen for selecting the symbol will be displayed.
Tip When shipped from the factory, the following combinations are set in the 4 patterns.
Pattern |
Code |
Symbol and name |
ICON1 |
/> |
5 |
Car |
||
ICON 2 |
/R |
5 |
REC. vehicle |
||
ICON 3 |
/- |
5 |
House QTH (VHF) |
||
USER |
YY |
; |
Yaesu Radios |
4Select and touch [ICON 1]
The code displayed within the parentheses [ ] will blink.
5Turn 
 to display the combination of preferred symbols and codes.
6Press 

The symbol will be confirmed.
Tip The symbol can also be confirmed by touching [ICON 1] one more time.
7Repeat Steps 4 to 6 when setting [ICON 2] and [ICON 3] as well.
8Among [ICON 1], [ICON 2] and [ICON 3], touch the pattern that you want to use immediately.
9Touch [BACK]
The screen will return to the menu list, and the pattern last touched will be displayed in the setting field of [28 MY SYMBOL].
10Press  for one second or longer
The display will return to the previous screen.
 #245
#245
/; 215+6+10 5'6 |
)25 |
/; 215+6+10
/; 5;/$1. %10 = ?
215+6+10 %1//'06 1HH &W [
 $#%-
$#%- 

#245 |
|
|
/; 5;/$1. |
|
|
+%10 = ? |
+%10 = 4? |
|
+%10 = ? |
75'4 |
=;;? ; |
$#%- |
6CDNG +& |
%QFG |
 #245
#245
/; 215+6+10 5'6 |
)25 |
/; 215+6+10
/; 5;/$1. %10 = 4?
215+6+10 %1//'06 1HH &W [
 $#%-
$#%-

10
APRS Initial Settings
●Setting preferred symbols
You can change the code and set your own symbol when the symbol that you want is not available.
The two characters of the code refer to the following contents.
• First character: Table ID
This indicates the classification of the symbol. It is a code used for classifying the symbols into basic symbols, substitute symbols and symbols with an overlay.
• Second character: Symbol character
This indicates the symbol pattern. A number and symbol is assigned to each pattern.
1Press  for one second or longer The set-up menu will be displayed.
2Select and touch [APRS]
The menu list will be displayed.
3Select and touch [28 MY POSITION]
The screen for selecting the symbol will be displayed.
4Select and touch [APRS]
The table ID enclosed within the parentheses [ ] will blink.
5 Turn 
 to display the target table ID
 #245
#245
|
/; 5;/$1. |
|
|
|
|||
|
|
|
|
|
|
|
|
+%10 = ? |
|
+%10 = 4? |
|
|
|||
|
|
|
|
|
|
|
|
|
|
|
|
|
|
|
|
|
|
|
|
|
|
|
|
+%10 = ? |
|
75'4 |
=;;? |
; |
|
||
|
|
|
|
|
|
|
|
|
|
|
|
|
|
|
|
|
|
|
|
||||
$#%- |
6CDNG +& |
%QFG |
|
||||
|
|
|
|
|
|
|
|
 #245
#245
|
/; 5;/$1. |
|
|
|
||||
+%10 = ? |
|
+%10 = 4? |
|
|
||||
|
|
|
||||||
|
|
|
|
|
|
|
|
|
|
|
|
|
|
|
|
|
|
|
|
|
|
|
|
|
|
|
+%10 = ? |
|
75'4 |
=;;? |
; |
|
|||
|
|
|
|
|
|
|
|
|
|
|
|
|
|
|
|
|
|
|
|
|
|
|
||||
$#%- |
|
6CDNG +& |
%QFG |
|
||||
|
|
|
|
|
|
|
|
|
11
APRS Initial Settings
6Touch [Code]
The symbol character enclosed within the parentheses [ ] will blink.
7Turn 
 to display the target symbol character
8Press 

The symbol will be confirmed.
9Touch [BACK]
The screen will return to the menu list, and the pattern set will be displayed in the setting field of [28 MY SYMBOL].
10Press  for one second or longer
The display will return to the previous screen.
#245
/; 5;/$1. |
|
|
+%10 = ? |
+%10 = 4? |
|
+%10 = ? |
75'4 |
=‗;? ‗ |
|
|
|
$#%- |
6CDNG +& |
%QFG |
|
|
|
#245
/; 5;/$1. |
|
|
+%10 = ? |
+%10 = 4? |
|
+%10 = ? |
75'4 |
=‗;? ‗ |
|
|
|
$#%- |
6CDNG +& |
%QFG |
|
|
|
 #245
#245
|
/; 215+6+10 5'6 |
)25 |
|
/; 215+6+10 |
|
|
/; 5;/$1. |
75'4 = ;? |
|
215+6+10 %1//'06 1HH &W [ |
|
 $#%-
$#%-
Tip
Please refer to “http://aprs.org/symbols/symbolsX.txt” and “http://aprs.org/symbols/symbolsnew.txt” for the latest symbol table.
Setting the APRS baud rate
The APRS baud rate (communication speed) can be selected from the following two types.
•1200 bps: APRS operations. can be carried out using AFSK 1200 bps packets.
•9600 bps: APRS operations can be carried out using GMSK 9600 bps packets.
1 Press |
for one second or longer |
The set-up menu will be displayed.
12
2Select and touch [DATA]
The menu list will be displayed.
APRS Initial Settings
5'672 /'07
&+52.#; |
|
6: 4: |
/'/14; |
|
|||||
5+)0#.+0) |
|
|
|
|
|
5%#0 |
|
|
|
|
|
|
|
|
|
|
|||
|
|
|
|
||||||
|
|
|
|||||||
9 4'5 |
%10(+) |
# |
|
||||||
#245 |
|
|
|
|
|
|
5& %#4& |
126+10 |
|
|
|
|
|
|
|
|
|
|
|
$#%- |
|
|
|
|
|
|
4'5'6 |
%#..5+)0 |
|
|
|
|
|
|
|
%.10' |
|||
|
|
|
|
|
|
|
|
|
|
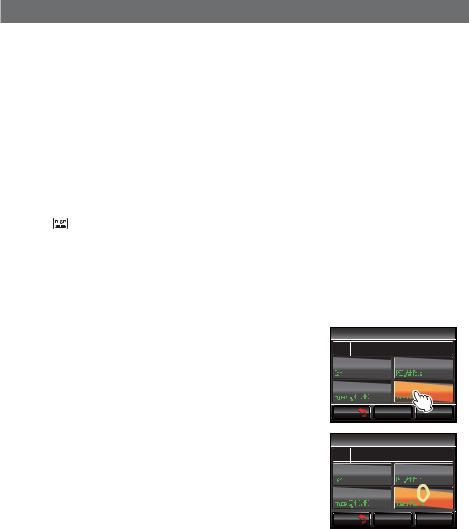
3Select and touch [3 DATA SPEED]
4Touch [APRS] to select the baud rate
The baud rate will switch between “1200 bps” and
“9600 bps” each time it is touched.
Tips • Factory default value: 1200 bps
•When receiving a message, the baud rate will automatically match the baud rate of the partner station signal regardless of the value set.
#
%1/ 2146 5'66+0)
# $#0& 5'.'%6
# 52''&
# 537'.%*
$#%-
#
# 52''&
#245 DRU
# DRU
 $#%-
$#%-
5Press  for one second or longer
The baud rate will be set and the display will return to the previous screen.
Other settings
Besides these, other settings such as the mute setting for the receive audio sound of the APRS operating band can also be configured. Please refer to “Using the APRS Setup Menu” ( P.69) for the details.
13
Starting APRS Operation
Activating the APRS function
During APRS operation, communications are carried out via the built-in APRS modem in the radio. When shipped from the factory, the APRS modem is set to OFF. Before starting APRS operation, set the APRS modem to ON.
1 |
Press |
for one second or longer |
|
|
|
|
|
|
The set-up menu will be displayed. |
|
|
|
|
||
2 Select and touch [APRS] |
|
|
5'672 /'07 |
|
|||
|
The menu list will be displayed. |
&+52.#; |
6: 4: |
/'/14; |
|||
|
|
|
|
5+)0#.+0) |
5%#0 |
|
|
|
|
|
|
9 4'5 |
%10(+) |
# |
|
|
|
|
|
#245 |
|
5& %#4& |
126+10 |
|
|
|
|
$#%- |
4'5'6 |
%#..5+)0 |
|
|
|
|
|
%.10' |
|||
|
|
|
|
|
|
|
|
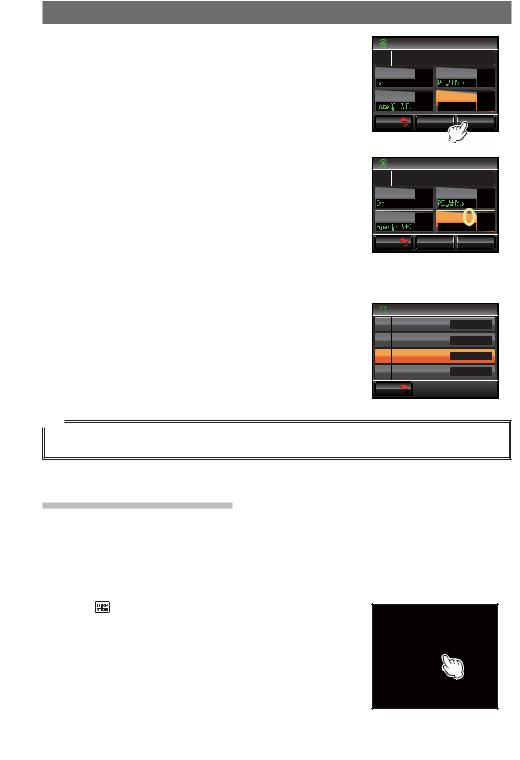
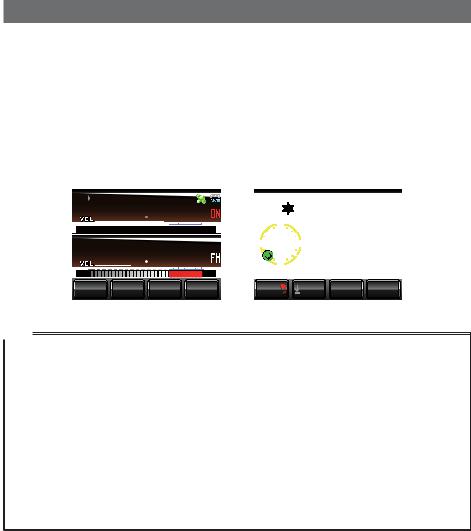
3 Touch [5 APRS MODEM] to select ON. |
|
#245 |
|
||||
|
Each time this key touched, the setting will switch |
|
#245 /1&'/ |
1(( |
|||
|
between “ON” and “OFF”. |
|
#245 /76' |
1(( |
|||
4 |
Tip |
Factory default value: OFF |
|
#245 212 72 |
|
||
Press |
for one second or longer |
|
#245 212 72 %1.14 |
|
|||
|
The APRS function will be set to ON and the display |
$#%- |
|
|
|||
|
will return to the previous screen. |
|
|
|
|
||
14
Starting APRS Operation
Deciding the operating band
Although the APRS is set to operate in Band B when shipped from the factory, Band A and also separate operating bands can be used for sending and receiving.
1Press  for one second or longer The set-up menu will be displayed.
2Select and touch [DATA]
The menu list will be displayed.
5'672 /'07
&+52.#; |
|
6: 4: |
/'/14; |
|
|||||
5+)0#.+0) |
|
|
|
|
|
5%#0 |
|
|
|
|
|
|
|
|
|
|
|||
|
|
|
|
||||||
|
|
|
|||||||
9 4'5 |
%10(+) |
# |
|
||||||
#245 |
|
|
|
|
|
|
5& %#4& |
|
|
|
|
|
|
|
|
|
|
|
|
$#%- |
|
|
|
|
|
|
4'5'6 |
%#.. |
|
|
|
|
|
|
|
%.10' |
|
||
|
|
|
|
|
|
|
|
|
|
3Touch and select [2 DATA BAND SELECT]
The screen for the detailed settings will be displayed.
#
%1/ 2146 5'66+0)
# $#0& 5'.'%6
# 52''&
# 537'.%*
 $#%-
$#%-
4 |
Touch [APRS] to select the band to be used for |
# |
|
|||
|
APRS operation |
|
|
# $#0& 5'.'%6 |
||
|
The band changes as follows each time [APRS] |
#245 |
$ $#0& (+: |
|||
|
touched. |
|
|
# |
$ $#0& (+: |
|
|
³$ %$1' ),;´ |
³% %$1' ),;´ |
³$ 7; % 5;´ |
|
|
|
|
³$ 5; % 7;´ |
³0$,1 %$1'´ |
³68% %$1'´ |
$#%- |
|
|
“A-BAND FIX”: Always send and receive using Band A.
“B-BAND FIX”: Always send and receive using Band B. “A=TX/B=RX”: Send using Band A and receive using Band B. “A=RX/B=TX”: Receive using Band A and send using Band B.
“MAIN BAND”: Send and receive using the operating band at that point. “SUB BAND”: Send and receive using the sub-band at that point.
Tip Factory default value: B-BAND FIX
5Press  for one second or longer
The operating band will be set and the display will return to the previous screen.
15

Starting APRS Operation
Setting the squelch detection condition
This sets the squelch detection condition during APRS (internal modem) operation.
1Press  for one second or longer The set-up menu will be displayed.
2Select and touch [DATA]
The menu list will be displayed.
5'672 /'07
&+52.#; |
|
6: 4: |
/'/14; |
|
|||||
5+)0#.+0) |
|
|
|
|
|
5%#0 |
|
|
|
|
|
|
|
|
|
|
|||
|
|
|
|
||||||
|
|
|
|||||||
9 4'5 |
%10(+) |
# |
|
||||||
#245 |
|
|
|
|
|
|
5& %#4& |
|
|
|
|
|
|
|
|
|
|
|
|
$#%- |
|
|
|
|
|
|
4'5'6 |
%#..5+)0 |
|
|
|
|
|
|
|
%.10' |
|||
|
|
|
|
|
|
|
|
|
|
3Touch [4 DATA SQUELCH]
The screen for the detailed settings will be displayed.
4Touch [APRS] to select the squelch detection condition during APRS operation using the internal modem
The squelch detection condition switches between “RX BAND” and “TX/RX BAND” each time it is touched.
“RX BAND”: Transmission is not possible when the squelch of the reception band is open.
#
%1/ 2146 5'66+0)
# $#0& 5'.'%6
# 52''&
# 537'.%*
 $#%-
$#%-
#
# 537'.%*
#245 4: $#0&
# 4: $#0&
6:10
 $#%-
$#%-
“TX/RX BAND”: Transmission is not possible when the squelch of either the receive band or the transmit band is open.
Tip Factory default value: RX BAND
5Press  for one second or longer
The squelch target will be set and the display will return to the previous screen.
16

Starting APRS Operation
Matching the frequency
The frequency varies between regions and countries.
The frequency can be matched using the following methods.
(1)Turn 
 of the APRS operating band
Press 
 briefly and then turn it to change the frequency by 1 MHz units.
Press 
 for one second or longer and then turn it to change the frequency by 5 MHz units.
(2)Press  and touch [

 ] in the function menu The frequency value can be entered directly.
Please refer to “Tuning the radio” ( P.40) in the basic operating manual for the details.
17
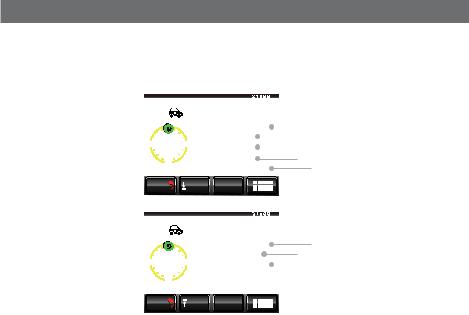
Receiving APRS Beacons
The signal containing the position of the radio station, meteorological information, communication range, etc. that is transmitted in APRS format, is known as a “beacon” while the radio station that transmitted the beacon is called a “station”.
A “ding dong” bell will sound when a beacon is received by the radio and the beacon information will be displayed for a fixed period of time. The information will continue to be displayed when a key or the touch panel is operated while the information is being displayed.
The received beacon will be downloaded into the radio memory. Up to a maximum of 100 beacons can be saved in the memory.
|
|
|
|
|
|
|
|
|
|
|
|
|
|
|
|
|
|
|||||||
|
|
61-;1 |
|
|
|
5 |
,3 ;$( |
|
(6/ & |
|
||||||||||||||
|
|
|
|
|
|
|
|
|
||||||||||||||||
|
|
|
|
|
|
|
|
|
0 |
0 |
5RGGF |
|
|
|
MO J |
|
||||||||
|
|
|
|
|
|
|
|
|
|
|
|
|
||||||||||||
|
8(1 |
|
|
|
|
|
|
|
|
|
%QWTUG |
|
|
|
|
|||||||||
|
|
|
|
|
|
9 |
|
|
|
' # V VWFG |
|
|
O |
|
||||||||||
|
|
|
|
|
|
|
.CV VWFG |
0 |
|
|
||||||||||||||
|
|
|
|
5 |
|
|||||||||||||||||||
|
|
|
|
|
|
|
|
|
|
MO .QPI VWFG |
' |
|
|
|||||||||||
|
|
|
|
|
|
|
|
|
|
|
|
|
|
|
35; |
|
|
|
|
|
|
|
|
|
8 / |
|
53. |
/76' |
5%12' |
|
$#%- |
|
6':6 |
|
|
|
|
|
|
|
|
||||||||
|
|
|
|
|
|
|
|
|
|
|
|
|||||||||||||
|
|
|
|
|
|
|
'06 |
|
|
|
||||||||||||||
|
|
|
|
|
|
|
|
|
|
|
|
|||||||||||||
|
|
|
|
|
|
|
|
|
|
|
|
|
|
|
|
|
|
|
|
|
|
|
|
|
Tips
• When the compass is touched, the screen will switch between “Heading UP” where the direction of advance of your own station is always displayed at the top, and “North UP” where north is always displayed at the top. The display heading can also be changed using [APRS] [1 APRS COMPASS] in the set-up menu.
• The display time of the beacon information can be changed using [APRS] [7 APRS POP-UP] in the set-up menu. The detailed information can also be set not to appear even when a beacon is received by setting the display time to “OFF”.
• The beacons to be saved into memory can be filtered using [APRS] [3 APRS FILTER] in the set-up menu.
•The reception audio (beacon and voice etc.) of the APRS operating band can be muted using
[APRS] [6 APRS MUTE] in the set-up menu.
•A distinctive notification bell can be sounded when an APRS beacon is received by setting “RX BEACON” under [APRS] [9 APRS RINGER] to “ON” in the set-up menu. The bell sound when a beacon is received can be muted by setting it to “OFF”.
18

Receiving APRS Beacons
Checking downloaded beacons
Beacons saved into the memory can be viewed in a list. A beacon can also be selected from the list to check its contents.
1 Press
The function menu will be displayed.
2 |
Touch [S.LIST] |
|
|
|
|
|
|
8(1 |
|
|
|
||||
|
Tip |
When [S.LIST] is not displayed, touch [BACK] or [FWD] to |
|
|
|
|
|
|
|
|
|
|
|
||
|
|
switch the function menu. |
|
61-;1 |
$'#%10 |
||
|
|
|
|||||
|
The station list will be displayed. |
5 .+56 |
|
/5) |
$'#%10 |
6: |
|
|
|
|
|||||
|
The stations will be displayed starting from the oldest |
$#%- |
*1/' .1) |
(9& |
|||
|
8 / |
|
53. |
/76' |
5%12' |
||
|
beacon received to the latest. |
|
|||||
|
|
|
|
|
|
||
|
Tips |
• The list can be displayed according to the time, call sign or distance ( |
P.91). |
|
|||
|
|
• The stations displayed in the list can be filtered by the type of beacon ( |
P.70). |
|
|||
•Turn 
 to scroll the list.
•Touch [TOP] to return to the top of the list.
3Select and touch and the station whose details you want to view
The detailed information screen will be displayed.
Tip The station can also be confirmed by pressing |
. |
;#'57 |
|
|
1$,'%6 |
|
||
,# <4. |
|
|
(6 & |
/*\ |
||
,3 ;$( |
|
|
(+:'& |
9 6MP 0 ( |
||
,3 ;$) |
|
|
(6/ |
JG Q |
||
,* ;2% |
|
|
(6 & |
|
||
$#%- |
|
|
612 |
|
35; |
|
|
|
|
|
|||
|
|
|
|
|
|
|
|
|
|
|
|
|
|
5 |
|
|
,3 ;$( (+:'& |
|||
* |
|
|
|
9 6-P 0 ( P &+) |
||
5 |
9 |
|||||
+ 6'001<7 |
||||||
|
|
|
|
|
|
|
' |
|
0 |
|
|||
|
|
|||||
O
 $#%-
$#%-


 612
612 

 35;
35; 


19
Receiving APRS Beacons
Viewing the contents of a beacon
The contents of the beacon will be displayed in the following screen.
|
|
|
|
|
||||
|
|
|
|
,* |
|
;2% |
|
|
|
|
|
(+:'& |
|||||
|
||||||||
|
0 |
0 |
|
|
4CPIG |
|
|
|
|
O |
|
|
||||
|
|
|
|
|
|
' |
.CV VWFG |
0 |
|
|
|
|||||
|
9 |
|
|
|
|
.QPI VWFG |
' |
|
|
|||||||
|
|
|
|
|
||||||||||||
|
|
|
|
|
|
|
||||||||||
|
|
5 |
|
|
|
|
# |
|
|
|||||||
|
|
|
MO |
|
|
|
|
|
|
|
|
|
|
|
||
|
|
|
|
|
|
|
|
|
|
|
|
|
|
|||
|
|
|
|
|
|
|
|
|
|
|
|
|
|
|
|
|
|
$#%- |
|
|
6':6 |
35; |
|
|
|
|
|
||||||
|
|
|
|
|
|
|
|
|
|
|
|
|
|
|
|
|
|
|
|
|
|
|
|
|
|
|
|
|
|
|
|
|
|
|
|
|
|
|
|
|
|
|
|
||
|
|
|
Display explanation |
||
|
Number |
Entry number in the station list |
|||
|
Symbol |
Symbol of transmitting station |
|||
|
|
|
For overlay symbols, the characters will be displayed at the top left. |
||
|
Station name |
Call sign, object name, or item name of a transmitting station |
|||
|
Beacon type |
Tag showing the contents of the beacon (refer to the table on the |
|||
|
|
|
following page) |
|
|
|
Compass |
Display the direction of the transmitting station as seen from your own |
|||
|
|
|
station |
|
|
|
|
|
The direction of the compass panel will switch between “N-UP (with |
||
|
|
|
north shown at the top all the time)” and “H-UP (with the direction of |
||
|
|
|
advance of your own station shown at the top all the time)” every time it |
||
|
|
|
is touched. |
|
|
|
Distance |
Distance from transmitting station to your own station |
|||
|
Transmitting station |
Information and comments of transmitting station |
|||
|
information |
|
|
|
|
|
[BACK] |
The display will return to the previous screen when touched. |
|||
|
[TEXT] |
The display will switch to the top of the comment list when touched. |
|||
|
[TOP] |
The display will switch to the top of the information list when touched. |
|||
|
[QSY] |
When touched, the frequency information embedded in the target station |
|||
|
|
|
can be set in a band separate from the APRS operating band. |
||
|
[ |
] |
The expansion key screen will be displayed when touched. |
||
Tips
•When the radio is first turned on, the position and distance will not be displayed if the detailed screen is displayed before the GPS is acquired.
•Turn 
 to change to another beacon display. Press
 to remove the “LIST” displayed at the top right, and turn
 to scroll the display contents one row at a time.
20

|
Receiving APRS Beacons |
|
The beacons are classified as follows. |
|
|
|
|
|
Type |
Explanation |
Page |
Mic-E |
Microphone encoder station beacon |
22 |
FIXED |
Fixed station beacon |
23 |
fixed |
Fixed station beacon (compression type) |
23 |
MOVING |
Moving station beacon |
24 |
moving |
Moving station beacon (compression type) |
24 |
WEATHER |
Meteorological station |
25 |
weather |
Meteorological station beacon (compression type) |
25 |
OBJECT |
Object station beacon |
26 |
object |
Object station beacon (compression type) |
26 |
ITEM |
Item station beacon |
26 |
item |
Item station beacon (compression type) |
26 |
KILLOBJ |
Killed Object: Deleted object station beacon |
26 |
killobj |
Killed Object: Deleted object station beacon (compression type) |
26 |
KILLITEM |
Killed Item: Deleted item station beacon |
26 |
killitem |
Killed Item: Deleted item station beacon (compression type) |
26 |
STATUS |
Status station beacon |
27 |
GGA/GLL |
RAW NMEA data station beacon |
28 |
GPRMC |
RAW NMEA data station beacon |
28 |
OTHER |
Data except APRS packet |
29 |
!!EMG!! |
Emergency signal from Mic-E station |
30 |
21
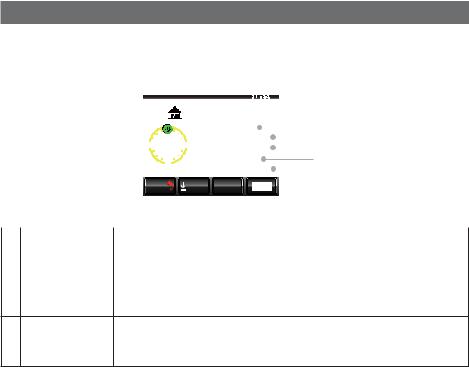
Receiving APRS Beacons
●Information display example of microphone encoder station beacon
The following information is displayed when a Mic-E station on the frequency display screen is received, or when the list on the station list screen is touched.
|
|
|
|
|
,3 ;$) |
|
(6/ & |
|
|
|
||||||||
|
|
|
0 |
0 |
|
5RGGF |
|
|
|
MO J |
|
|
|
|
||||
|
|
|
|
|
|
|
|
|
|
|||||||||
|
|
|
|
|
|
|
%QWTUG |
|
|
|
|
|
|
|
||||
|
|
|
|
|
|
|
|
|
|
|||||||||
|
|
|
|
|
|
|
|
|
|
|
|
|||||||
|
|
|
|
|
|
|
|
|
|
|||||||||
|
|
|
|
|
|
|
|
|
|
|||||||||
|
|
|
9 |
|
|
|
' # V VWFG |
|
|
|
O |
|
|
|
|
|
||
|
|
|
|
|
|
|
|
|
|
|
|
|
||||||
|
|
|
|
5 |
|
2QU EQOO |
|
1HH &WV[ |
|
|
||||||||
|
|
|
|
MO |
.CV VWFG |
|
0 |
|
|
|||||||||
|
|
|
$#%- |
|
|
6':6 |
|
35; |
|
|
|
|
|
|
|
|||
|
|
|
|
|
|
|
|
|
|
|
|
|
|
|
|
|
||
|
|
|
|
|
|
|
|
|
|
|
|
|||||||
|
|
|
|
|
,3 ;$) |
|
(6/ & |
|
|
|||||||||
|
|
|
0 |
0 |
|
.QPI VWFG |
' |
|
|
|
||||||||
|
|
|
|
|
|
|||||||||||||
|
|
|
|
|
|
|
|
|
# |
|
||||||||
|
|
|
|
|
|
|
|
|
||||||||||
|
|
|
|
|
|
|
|
|
||||||||||
|
|
|
9 |
|
|
|
' |
|
|
|
|
|
|
|
|
|
|
|
|
|
|
|
|
|
|
|
|
|
|
|
|
|
|
|
|
|
|
|
|
|
|
5 |
|
|
|
|
|
|
|
|
|
|
|
|
|
|
|
|
|
|
MO |
|
|
|
|
|
|
|
|
|
|
|
|
||
|
|
|
$#%- |
|
|
612 |
|
35; |
|
|
|
|
|
|
|
|||
|
|
|
|
|
|
|
|
|
|
|
|
|
||||||
|
|
|
|
|
|
|
|
|
|
|||||||||
|
|
|
||||||||||||||||
|
Speed |
The movement speed of the partner station will be displayed. |
||||||||||||||||
|
Direction |
The movement direction of the partner station will be displayed. |
||||||||||||||||
|
Altitude |
The altitude of the partner station will be displayed. |
||||||||||||||||
|
Position comment |
The standard message from the partner station will be displayed. |
||||||||||||||||
|
Latitude |
The current position of the partner station will be displayed in N (northern |
||||||||||||||||
|
|
latitude) or S (southern latitude). |
|
|
||||||||||||||
|
|
(DD degree MM.MM minute or DD degree MM minute SS second) |
||||||||||||||||
|
Longitude |
The current position of the partner station will be displayed in E (eastern |
||||||||||||||||
|
|
longitude) or W (western longitude). |
|
|
||||||||||||||
|
|
(DD degree MM.MM minute or DD degree MM minute SS second) |
||||||||||||||||
|
Date / Time / |
The date the beacon is received (MM month / DD day) / time the beacon |
||||||||||||||||
|
Communication |
is received (HH hour: MM minute) / the baud rate A12 (1200 bps) or A96 |
||||||||||||||||
|
Speed |
(9600 bps) will be displayed. |
|
|
||||||||||||||
|
Comments |
Comments, if any, from a partner station will be displayed. |
||||||||||||||||
22
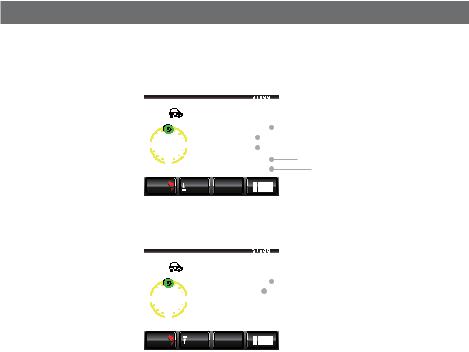
Receiving APRS Beacons
●Example of a beacon information display of a fixed station
The following information is displayed when a FIXED station or a fixed station (compressed type*) is received, or when the list on the station list screen is touched.
|
|
|
|
|
,3 ;$) |
|
(+:'& |
|
|
|
|
|||||||
|
|
|
0 |
0 |
|
# V VWFG |
|
|
|
O |
|
|
|
|
||||
|
|
|
|
|
|
|
|
|
|
|
||||||||
|
|
|
|
|
|
|
.CV VWFG |
|
0 |
|
|
|
|
|
||||
|
|
|
|
|
|
|
|
|
|
|||||||||
|
|
|
|
|
|
|
|
|||||||||||
|
|
|
9 |
|
|
' .QPI VWFG |
' |
|
|
|
|
|||||||
|
|
|
|
|
|
|
|
|
||||||||||
|
|
|
|
|
|
|
|
# |
|
|
||||||||
|
|
|
|
5 |
|
|
|
|||||||||||
|
|
|
|
|
MO |
# |
|
|
|
|
|
|
|
|||||
|
|
|
|
|
|
|
|
|
|
|
|
|||||||
|
|
|
$#%- |
|
6':6 |
35; |
|
|
|
|
|
|
|
|
||||
|
|
|
|
|
|
|
|
|
|
|
|
|
|
|||||
|
|
|
||||||||||||||||
|
Altitude |
The altitude of the partner station will be displayed. |
||||||||||||||||
|
Latitude |
The position of the partner station will be displayed in N (northern latitude) or |
||||||||||||||||
|
|
S (southern latitude). |
|
|
|
|
|
|
|
|
|
|
||||||
|
|
(DD degree MM.MM minute or DD degree MM minute SS second) |
||||||||||||||||
|
Longitude |
The position of the partner station will be displayed in E (eastern longitude) or |
||||||||||||||||
|
|
W (western longitude). |
|
|
|
|
|
|
|
|
|
|
||||||
|
|
(DD degree MM.MM minute or DD degree MM minute SS second) |
||||||||||||||||
Date / Time / The date the beacon is received (MM month / DD day) / time the beacon is Communication received (HH hour: MM minute) / the baud rate A12 (1200 bps) or A96 (9600
Speed |
bps) will be displayed. |
Comments |
Comments, if any, from a partner station will be displayed. |
*: A beacon where part of the information is sent in a compressed format.
23
Receiving APRS Beacons
●Example of a beacon information display of a mobile station
The following information is displayed when a MOVING station or a moving station (compressed type*) is received, or when the list on the station list screen is touched.
|
|
,3 ;$) |
|
/18+0) |
|
|
|
||||||
0 |
0 |
|
5RGGF |
|
|
MO J |
|
|
|
|
|||
|
|
|
|
|
|
||||||||
|
|
|
%QWTUG |
|
|
|
|
|
|||||
|
|
|
|
||||||||||
|
|
|
|
|
|
||||||||
|
|
|
|
||||||||||
|
|
|
|
||||||||||
9 |
|
|
' # V VWFG |
|
|
|
O |
|
|
|
|
|
|
|
|
|
|
|
|
|
|
||||||
|
5 |
|
.CV VWFG |
|
0 |
|
|
|
|
||||
|
MO |
.QPI VWFG |
' |
|
|
|
|||||||
$#%- |
|
6':6 |
35; |
|
|
|
|
|
|
|
|||
|
|
|
|
|
|
|
|
|
|
|
|
|
|
|
|
|
|
|
|
|
|
|
|
|
|
|
|
|
|
|
|
|
,3 ;$) |
/18+0) |
|
|
|
|||||
|
|
|
0 |
|
|
|
|
|
|
|
|
|
||
|
|
|
|
0 |
|
# |
|
|
||||||
|
|
|
|
|
|
|
|
|||||||
|
|
|
9 |
|
|
|
' |
|
|
|
|
|
|
|
|
|
|
|
|
|
|
|
|
|
|
|
|
||
|
|
|
|
|
|
|
|
|
|
|
|
|
||
|
|
|
|
|
|
|
|
|
|
|
|
|
||
|
|
|
|
|
|
|
|
|
|
|
|
|
|
|
|
|
|
|
5 |
|
|
|
|
|
|
|
|
|
|
|
|
|
|
MO |
|
|
|
|
|
|
|
|
||
|
|
|
$#%- |
|
|
612 |
35; |
|
|
|
|
|
|
|
|
|
|
|
|
|
|
|
|
|
|
||||
|
|
|
|
|
|
|
|
|
|
|
|
|||
|
|
|
||||||||||||
|
Speed |
The movement speed of the partner station will be displayed. |
||||||||||||
|
Direction |
The movement direction of the partner station will be displayed. |
||||||||||||
|
Altitude |
The altitude of the partner station will be displayed. |
||||||||||||
|
Latitude |
The current position of the partner station will be displayed in N (northern |
||||||||||||
|
|
latitude) or S (southern latitude). |
||||||||||||
|
|
(DD degree MM.MM minute or DD degree MM minute SS second) |
||||||||||||
|
Longitude |
The current position of the partner station will be displayed in E (eastern |
||||||||||||
|
|
longitude) or W (western longitude). |
||||||||||||
|
|
(DD degree MM.MM minute or DD degree MM minute SS second) |
||||||||||||
|
Date / Time / |
The date the beacon is received (MM month / DD day) / time the beacon is |
||||||||||||
|
Communication |
received (HH hour: MM minute) / the baud rate A12 (1200 bps) or A96 (9600 |
||||||||||||
|
Speed |
bps) will be displayed. |
|
|
|
|
|
|
||||||
|
Comments |
Comments, if any, from a partner station will be displayed. |
||||||||||||
*: A beacon where part of the information is sent in a compressed format.
24
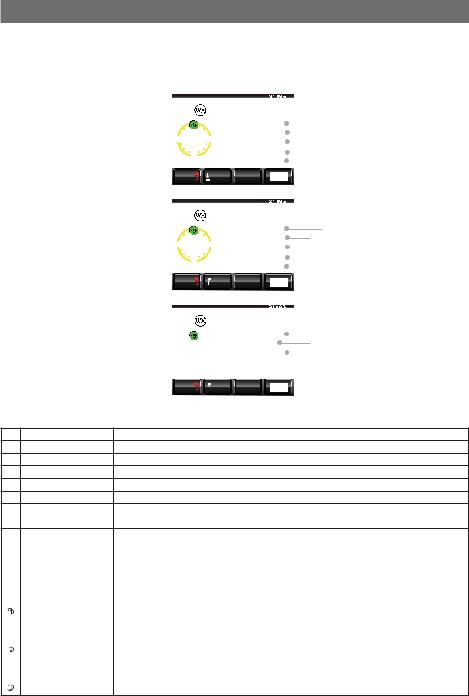
Receiving APRS Beacons
●Example of a beacon information display of a meteorological station
The following information is displayed when a WEATHER station or a weather station (compressed type*) is received, or when the list on the station list screen is touched.
|
|
,3 ;$) |
|
|
9'#6*'4 |
|
|
|
|
|
|||
0 |
0 |
|
6GORGTCVWTG |
|
|
% |
|
|
|
|
|
||
|
|
|
|
|
|
|
|||||||
|
|
|
|
4C P |
*QWT |
|
|
OO |
|
|
|||
|
|
|
|
|
|||||||||
|
|
|
|
|
|
|
|||||||
|
|
|
|
|
|||||||||
9 |
|
|
|
' 4C P *QWTU |
|
OO |
|
|
|
|
|||
|
|
|
|
|
|
|
|||||||
|
5 |
|
4C P O FP IJV |
OO |
|
|
|
||||||
|
MO |
9 PF F TGEV |
|
|
|
|
|
|
|
||||
$#%- |
|
|
6':6 |
35; |
|
|
|
|
|
|
|
||
|
|
|
|
|
|
|
|
|
|
|
|
|
|
|
|
|
|
|
|
|
|
|
|
|
|
|
|
|
|
,3 ;$) |
|
|
9'#6*'4 |
|
|
|
|
||||
0 |
0 |
|
9KPF URGGF |
|
|
O |
U |
|
|||||
|
|
|
|
||||||||||
|
|
|
|
)WUV URGGF |
|
|
O U |
|
|||||
|
|
|
|
|
|
||||||||
|
|
|
|
|
|
||||||||
9 |
|
|
|
' $CTQ RTGUUWTG |
|
|
|
|
|
|
|||
|
|
|
|
J2C |
|
|
|
||||||
|
5 |
|
*WOKFKV[ |
|
|
|
|
|
|
|
|||
|
MO |
.CV VWFG |
0 |
|
|
|
|
|
|
||||
$#%- |
|
|
612 |
35; |
|
|
|
|
|
|
|
||
|
|
|
|
|
|
|
|
|
|
|
|
|
|
|
|
|
|
|
|
|
|
|
|
|
|
|
|
|
|
,3 ;$) |
|
|
9'#6*'4 |
|
|
|
|
|
|||
0 |
0 |
|
.QPI VWFG |
' |
|
|
|
|
|
|
|||
|
|
|
|
|
|||||||||
|
|
|
|
|
|
|
# |
|
|||||
|
|
|
|
|
|
|
|||||||
|
|
|
|
|
|
|
|||||||
9 |
|
|
|
' |
|
|
|
|
|
|
|
|
|
|
|
|
|
|
|
|
|
|
|
|
|
|
|
|
5 |
|
|
|
|
|
|
|
|
|
|
|
|
|
MO |
|
|
|
|
|
|
|
|
|
|
||
$#%- |
|
|
612 |
35; |
|
|
|
|
|
|
|
||
|
|
|
|
|
|
|
|
|
|||||
|
|
|
|
|
|
|
|
|
|
|
|
|
|
|
|
|
|
|
|
|
|
|
|
|
|
|
|
Temperature Information on the temperature will be displayed.
Rainfall (hour) Information on the rainfall per hour will be displayed.
Rainfall (day) Information on the rainfall per day will be displayed.
Rainfall (night) Information on the rainfall from midnight onwards will be displayed.
Wind direction Information on the wind direction will be displayed.
Wind speed |
Information on the wind speed will be displayed. |
Maximum wind Information on the maximum wind speed will be displayed. speed
Atmospheric Information on the atmospheric pressure will be displayed.
|
pressure |
|
|
Humidity |
Information on the humidity will be displayed. |
|
Latitude |
The current position of the partner station will be displayed in N (northern |
|
|
latitude) or S (southern latitude). |
|
|
(DD degree MM.MM minute or DD degree MM minute SS second) |
|
Longitude |
The current position of the partner station will be displayed in E (eastern |
|
|
longitude) or W (western longitude). |
|
|
(DD degree MM.MM minute or DD degree MM minute SS second) |
|
Date / Time / |
The date the beacon is received (MM month / DD day) / time the beacon is |
|
Communication |
received (HH hour: MM minute) / the baud rate A12 (1200 bps) or A96 (9600 |
|
Speed |
bps) will be displayed. |
|
Comments |
Comments, if any, from a partner station will be displayed. |
*: A beacon where part of the information is sent in a compressed format.
25
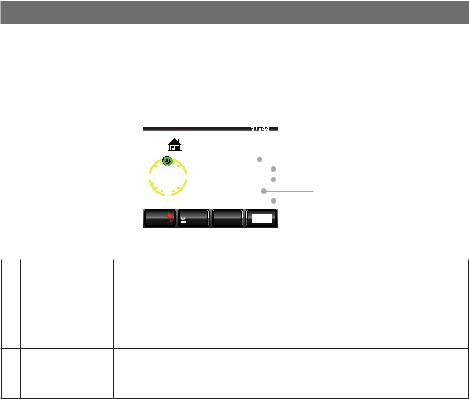
Receiving APRS Beacons
●Example of a beacon information display of an object station or item station
The following information is displayed when an OBJECT station, object station (compressed type*), ITEM station, item station (compressed type*), KILLOBJ station, killobj station (compressed type*), KILLITEM station, or killitem station (compressed type*) is received, or when the list is touched on the station list screen.
|
|
|
|
|
;#'57 |
|
|
1$,'%6 |
|
|
|
|
|
||||
|
|
|
|
|
|
|
,3 ;$) |
|
|
||||||||
|
|
|
0 |
0 |
|
# V VWFG |
|
|
|
O |
|
|
|
|
|||
|
|
|
|
|
|
|
|
|
|
|
|||||||
|
|
|
|
|
|
.CV VWFG |
|
0 |
|
|
|
|
|
||||
|
|
|
|
|
|
|
|
|
|||||||||
|
|
|
|
|
|
|
|||||||||||
|
|
|
9 |
|
|
' .QPI VWFG |
' |
|
|
|
|
||||||
|
|
|
|
|
|
|
|
||||||||||
|
|
|
|
|
|
|
|
# |
|
|
|||||||
|
|
|
|
5 |
|
|
|
||||||||||
|
|
|
|
MO |
# |
|
|
|
|
|
|
|
|||||
|
|
|
|
|
|
|
|
|
|
|
|||||||
|
|
|
$#%- |
|
6':6 |
35; |
|
|
|
|
|
|
|
|
|||
|
|
|
|
|
|
|
|
|
|
|
|
|
|||||
|
|
|
|||||||||||||||
|
Altitude |
The altitude of the partner station will be displayed. |
|||||||||||||||
|
Latitude |
The position of the partner station will be displayed in N (northern latitude) or |
|||||||||||||||
|
|
S (southern latitude). |
|
|
|
|
|
|
|
|
|
|
|||||
|
|
(DD degree MM.MM minute or DD degree MM minute SS second) |
|||||||||||||||
|
Longitude |
The position of the partner station will be displayed in E (eastern longitude) or |
|||||||||||||||
|
|
W (western longitude). |
|
|
|
|
|
|
|
|
|
|
|||||
|
|
(DD degree MM.MM minute or DD degree MM minute SS second) |
|||||||||||||||
Date / Time / The date the beacon is received (MM month / DD day) / time the beacon is Communication received (HH hour: MM minute) / the baud rate A12 (1200 bps) or A96 (9600
Speed |
bps) will be displayed. |
Comments |
Comments, if any, from a partner station will be displayed. |
*: A beacon where part of the information is sent in a compressed format.
26

Receiving APRS Beacons
●Example of a beacon information display of a status station
The following information will be displayed when a STATUS station is received, or when the list on the station list screen is touched.
|
|
|
|
|
,3 ;$) 56#675 |
|
|
||||||
|
|
|
0 |
0 |
|
|
# |
|
|||||
|
|
|
|
|
|||||||||
|
|
|
|
|
|
UVCVWU |
TGRQTV |
|
|
|
|
||
|
|
|
|
|
|
|
|
|
|
||||
|
|
|
|
|
|
|
|
|
|||||
|
|
|
9 |
|
|
' |
|
|
|
|
|
|
|
|
|
|
|
|
|
|
|
|
|
|
|
||
|
|
|
|
|
|
|
|
|
|
|
|
|
|
|
|
|
|
5 |
|
|
|
|
|
|
|
|
|
|
|
|
$#%- |
|
|
|
35; |
|
|
|
|
|
|
|
|
|
|
6':6 |
|
|
|
|
|
|
|||
|
|
|
|
|
|
|
|
|
|
|
|
||
|
|
||||||||||||
|
Date / Time / |
The date the beacon is received (MM month / DD day) / time the beacon is |
|||||||||||
|
Communication |
received (HH hour: MM minute) / the baud rate A12 (1200 bps) or A96 (9600 |
|||||||||||
|
Speed |
bps) will be displayed. |
|
|
|
|
|
|
|||||
|
Comments |
Comments, if any, from a partner station will be displayed. |
|||||||||||
27
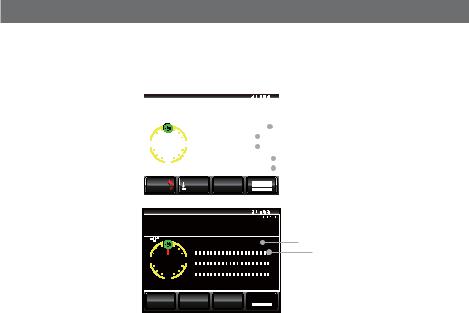
Receiving APRS Beacons
●Example of a beacon information display of a RAW NMEA station
The following information will be displayed when a RAW NMEA data station (GGA/GLL or GPRMC) is received, or when the list on the station list screen is touched.
|
|
,3 ;$) |
|
)24/% |
|
|
|||||||
0 |
0 |
5RGGF |
|
|
|
MO J |
|
|
|
||||
|
|
|
|
|
|
||||||||
|
|
|
%QWTUG |
|
|
|
|
|
|
|
|
||
|
|
|
|
|
|
|
|
||||||
|
|
|
|
|
|||||||||
9 |
|
' # V VWFG |
|
|
O |
|
|
|
|
||||
|
|
|
|
|
|
|
|
||||||
|
5 |
.CV VWFG |
0 |
|
|
|
|
|
|||||
|
|
|
|
||||||||||
|
|
MO .QPI VWFG |
' |
|
|
|
|||||||
|
|
|
|
||||||||||
$#%- |
6':6 |
35; |
|
|
|
|
|
|
|
|
|||
|
|
|
|
|
|
|
|
|
|
|
|
|
|
|
|
,3 ;$) |
|
)24/% |
|
|
|
||||||
0 |
0 |
|
# |
|
9  '
'
5
MO
 $#%-
$#%-


 612
612 

 35;
35; 


|
Speed |
The movement speed of the partner station will be displayed. |
|
Direction |
The movement direction of the partner station will be displayed. |
|
Altitude |
The altitude of the partner station will be displayed. |
|
Latitude |
The current position of the partner station will be displayed in N (northern |
|
|
latitude) or S (southern latitude). |
|
|
(DD degree MM.MM minute or DD degree MM minute SS second) |
|
Longitude |
The current position of the partner station will be displayed in E (eastern |
|
|
longitude) or W (western longitude). |
|
|
(DD degree MM.MM minute or DD degree MM minute SS second) |
|
Date / Time / |
The date the beacon is received (MM month / DD day) / time the beacon is |
|
Communication |
received (HH hour: MM minute) / the baud rate A12 (1200 bps) or A96 (9600 |
|
Speed |
bps) will be displayed. |
|
Comments |
Comments, if any, from a partner station will be displayed. |
28
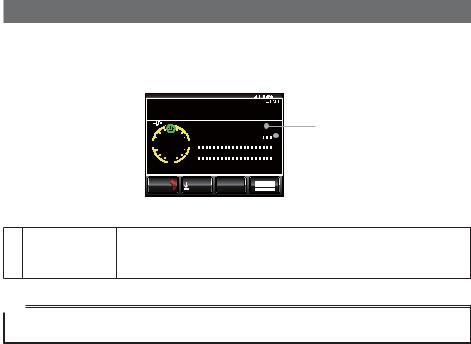
Receiving APRS Beacons
●Display example of non-APRS packet data
The following information will be displayed when an OTHER station is received, or when the list on the station list screen is touched.
,3 ;$) 16*'4
0 |
0 |
|
|
|
# |
|
|
||||
|
|
|
|||||||||
|
|
|
|
QVJGT |
RCEMGV |
FCVC |
|
|
|||
9 |
|
|
|
' |
|
|
|
|
|
|
|
|
|
|
|
|
|
|
|
|
|
||
|
|
|
|
|
|
|
|
|
|
|
|
|
5 |
|
|
|
|
|
|
|
|
|
|
|
|
|
|
|
|
|
|
|
|
|
|
$#%- |
|
6':6 |
|
35; |
|
|
|
|
|
||
|
|
|
|
|
|
|
|
|
|
|
|
Date / Time / The date the beacon is received (MM month / DD day) / time the beacon is Communication received (HH hour: MM minute) / the baud rate A12 (1200 bps) or A96 (9600
Speed |
bps) will be displayed. |
Comments |
Only packet data that cannot be decoded will be displayed as it is. |
Tip
Other types of packets will not be displayed in the list if “OTHER” is not set to ON under [APRS] [3 APRS FILTER] in the set-up menu (factory default value: OFF).
29
 Loading...