


Sidexis 4
Table of contents
 Loading...
kÉï=~ë=çÑW=
pЙкобЕЙ=j~ем~д
MPKOMNS
pfabufp=Q
pзСнп~кЙ=оЙклбзе=sQKNKP
bеЦдблЬ
=
bеЦдблЬ
SIDEXIS 4 service manual


64 58 983 D3592
D3592.076.01.03.02 03.2016
3
Sirona Dental Systems GmbH Table of contents
Service Manual SIDEXIS 4
bеЦдблЬ
Table of contents
1
About this Service Manual....................................................................................... 5
1.1 Structure of the document ............................................................................ 5
1.1.1 Identification of the danger levels.................................................... 5
1.1.2 Formats and symbols used ............................................................. 6
1.2 Scope ........................................................................................................... 6
1.3 Other relevant documents ............................................................................ 6
2
Configuring software................................................................................................ 7
2.1 Configuration menu ...................................................................................... 7
2.1.1 "General settings"............................................................................ 10
2.1.2 "Patient settings" ............................................................................. 21
2.1.3 "Exposure"....................................................................................... 22
2.1.4 "Output" ........................................................................................... 29
2.1.5 "SIDEXIS Manager" ........................................................................ 32
2.2 Call up the configuration menu..................................................................... 35
2.3 Personalizing SIDEXIS 4.............................................................................. 36
2.3.1 Setting the program language......................................................... 36
2.3.2 Practice-specific settings................................................................. 38
2.3.2.1 Enter practice information................................................. 39
2.3.2.2 Define practice logo.......................................................... 40
2.3.2.3 Configure headers for printing.......................................... 42
2.3.2.4 Selecting the dental notation ............................................ 45
2.3.3 Set up communication partners....................................................... 47
2.3.4 User set up/administration............................................................... 49
3
Configuring the computer ........................................................................................ 51
3.1 Free hard disk space for PDATA.................................................................. 51
4
Data and database .................................................................................................. 52
4.1 Data migration .............................................................................................. 53
4.2 Data backup ................................................................................................. 53
4.2.1 Data backup via "Windows task scheduler" .................................... 54
4.2.2 Data backup via the "SQL Management Studio"............................. 55
4.3 Restoring database ...................................................................................... 59
4.4 Installing database ....................................................................................... 64
4.5 Database movement .................................................................................... 65
4.5.1 Moving the SQL server.................................................................... 65
4.5.1.1 Prepare the “new” SQL server.......................................... 65
4.5.1.2 Backing up the “old” SQL server ...................................... 65

64 58 983 D3592
4 D3592.076.01.03.02 03.2016
Table of contents Sirona Dental Systems GmbH
Service Manual SIDEXIS 4
4.5.1.3 Restoring database to the "new" SQL server.................... 65
4.5.1.4 Execute provisioning ......................................................... 66
4.5.2 Moving the PDATA folder................................................................. 68
4.5.2.1 Move the PDATA folder to a bigger hard disk “within the
computer”
68
4.5.2.2 Migrate the data (PDATA) to a new “remote” file server ...68
4.6 Disconnecting CEREC database (if available).............................................. 72
5
Special features with 64bit operating systems ......................................................... 73
5.1 Astra Plugin................................................................................................... 73
6
Troubleshooting........................................................................................................ 75
6.1 Errors during installation ............................................................................... 75
6.1.1 DVD setup........................................................................................ 75
6.1.2 SQL server installation ..................................................................... 75
6.1.3 Server provisioning .......................................................................... 75
6.2 Error during reference run............................................................................. 76
6.2.1 On the SIDEXIS 4 workstation ......................................................... 76
6.3 Errors when establishing exposure readiness .............................................. 79
6.4 Errors when executing TWAIN devices......................................................... 80
6.5 Errors during SLIDA communication............................................................. 80
7
Other ........................................................................................................................ 81
7.1 Uninstalling X-ray log book ........................................................................... 81
7.2 Changing the SQL database port.................................................................. 82
7.3 Switching service ports ................................................................................. 85
64 58 983 D3592
D3592.076.01.03.02 03.2016
5
Sirona Dental Systems GmbH 1About this Service Manual
Service Manual SIDEXIS 4 1.1Structure of the document
bеЦдблЬ
1
About this Service Manual
1.1
Structure of the document
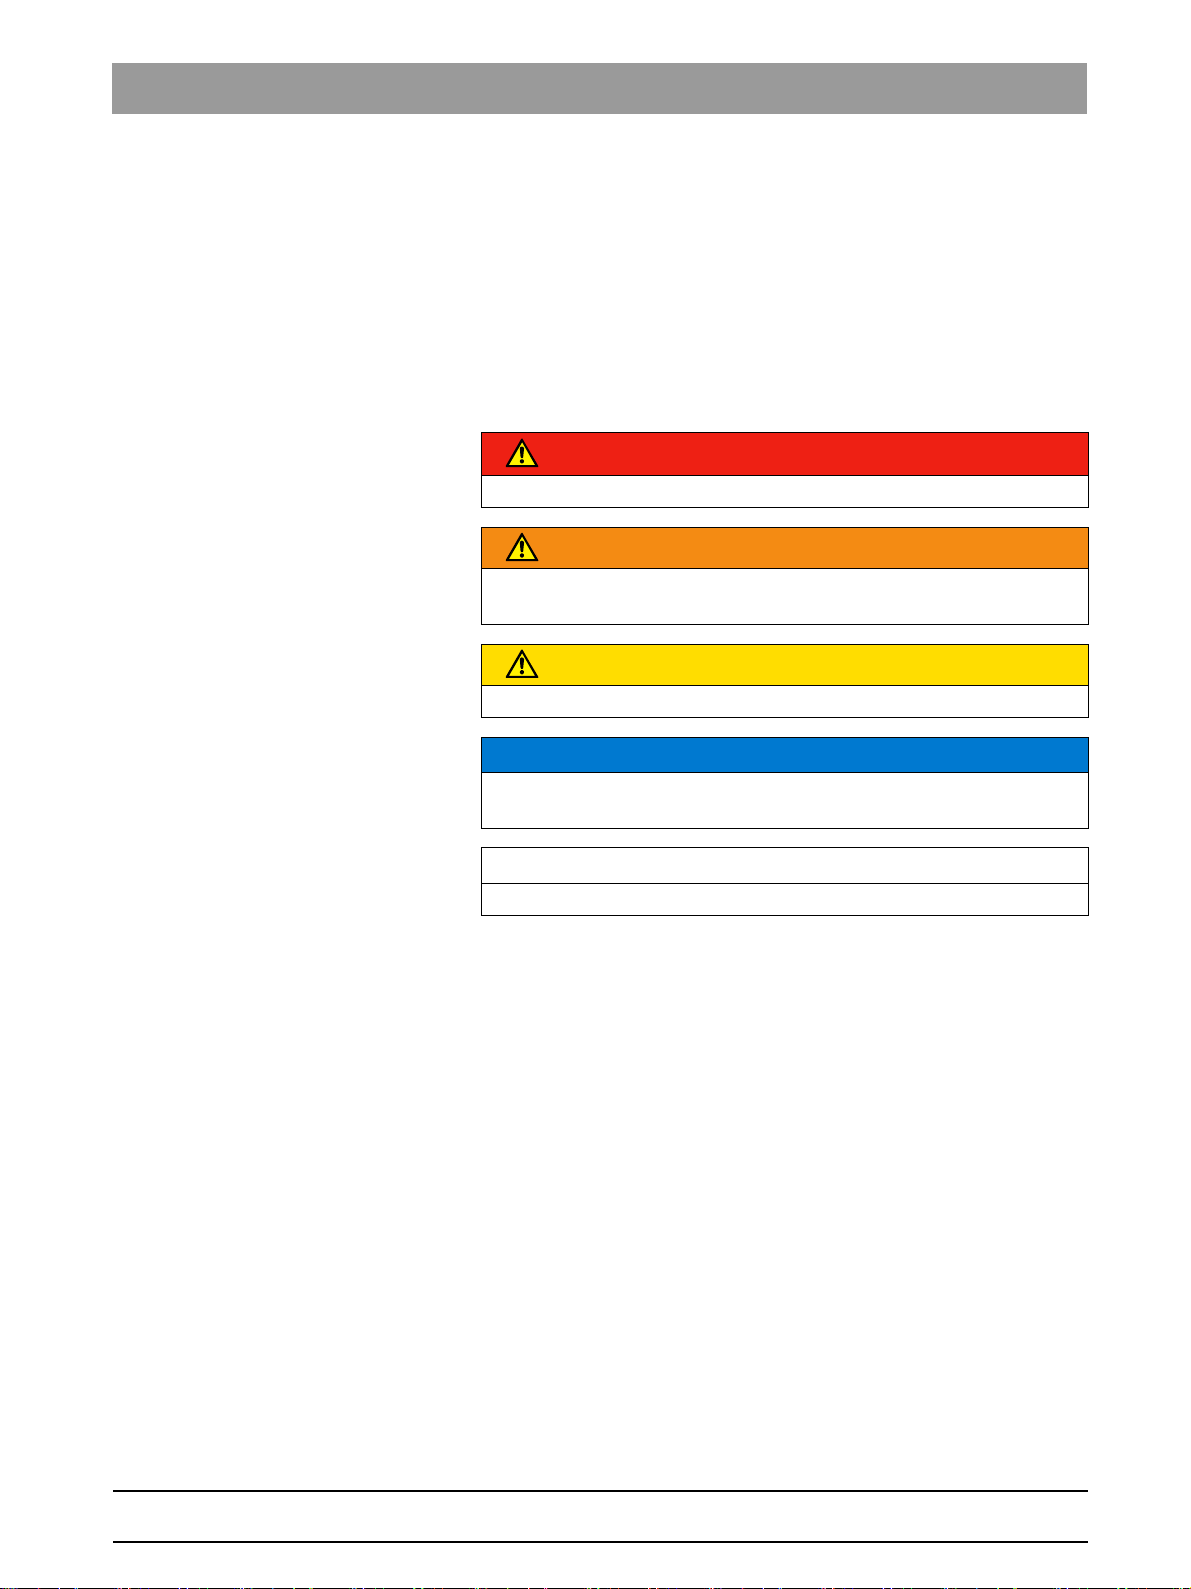
1.1.1 Identification of the danger levels
To prevent personal injury and material damage, please observe the
warning and safety information provided in these operating instructions.
Such information is highlighted as follows:
Tip: Information on making work easier.
DANGER
An imminent danger that could result in serious bodily injury or death.
WARNING
A possibly dangerous situation that could result in serious bodily injury
or death.
CAUTION
A possibly dangerous situation that could result in slight bodily injury.
NOTICE
A possibly harmful situation which could lead to damage of the product
or an object in its environment.
IMPORTANT
Application instructions and other important information.
64 58 983 D3592
6 D3592.076.01.03.02 03.2016
1About this Service Manual Sirona Dental Systems GmbH
1.2Scope Service Manual SIDEXIS 4
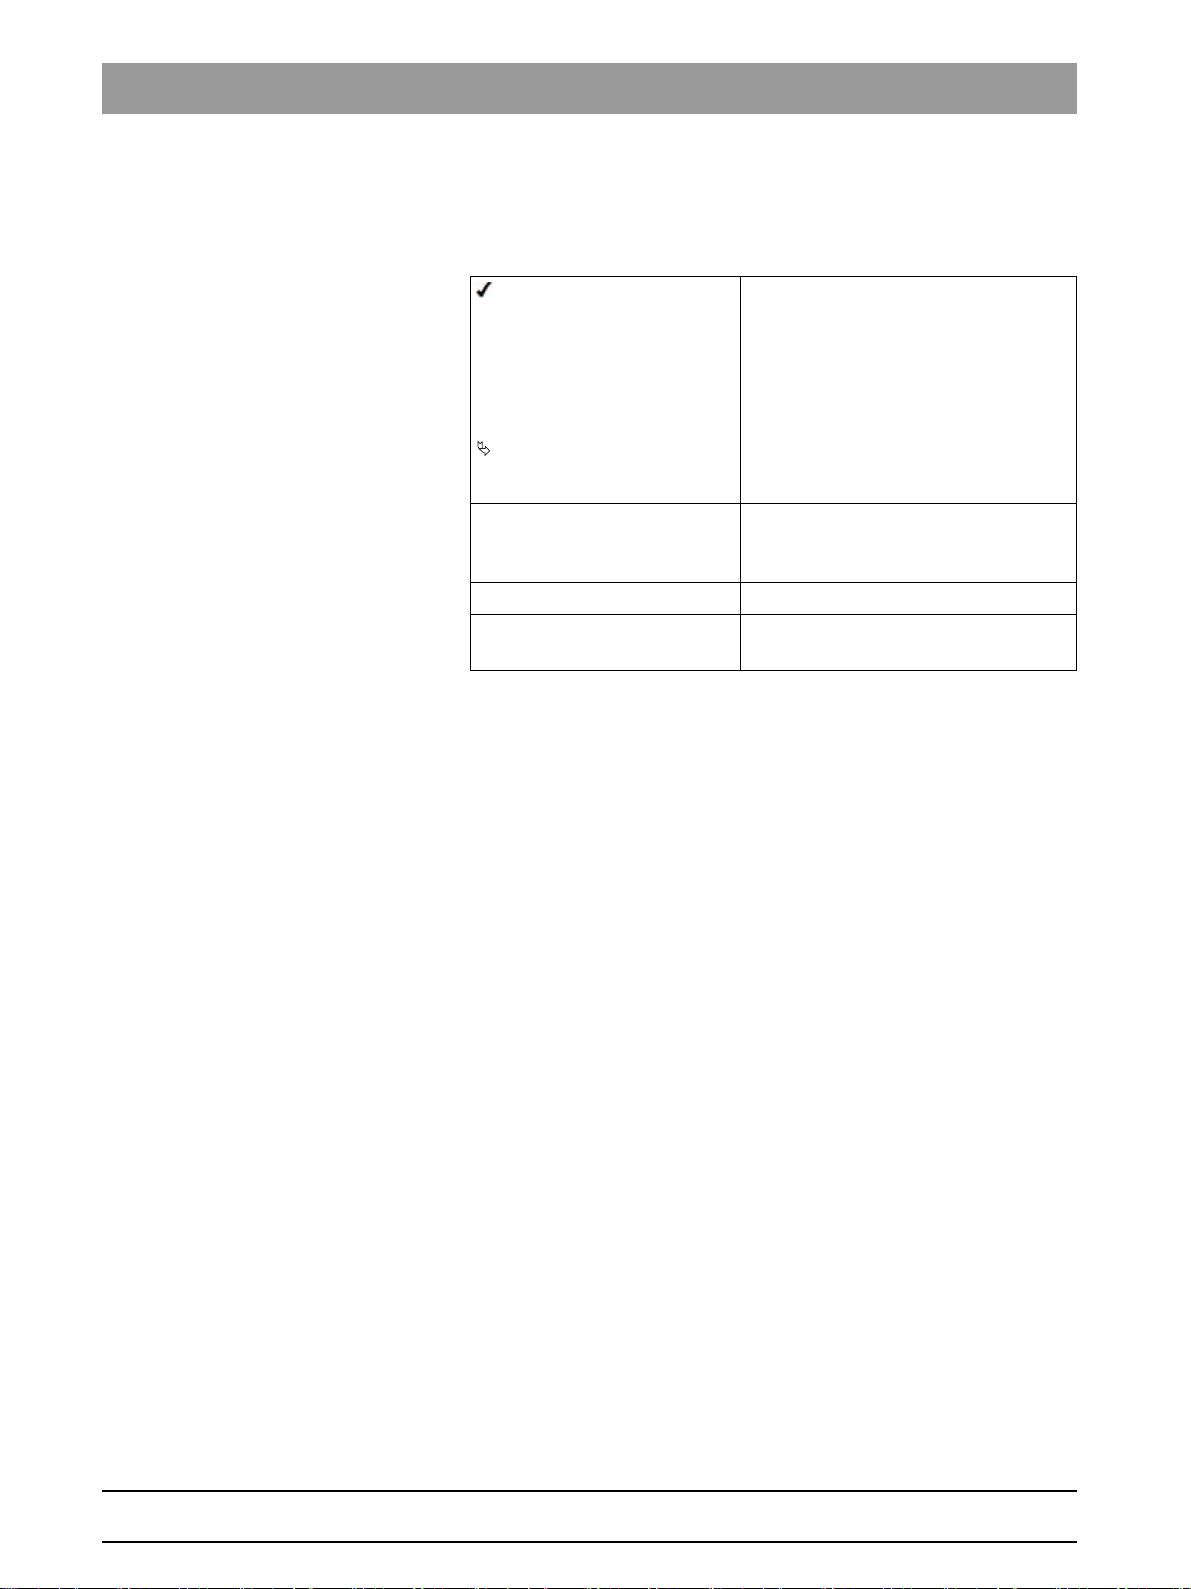
1.1.2 Formats and symbols used
The formats and symbols used in this document have the following
meaning:
1.2
Scope
This Service Manual describes the servicing of the software SIDEXIS 4.
It is intended for use exclusively by trained and authorized distributors
and service technicians.
1.3
Other relevant documents
In addition to this manual, you need the following documents:
Installation Instructions
● SIDEXIS 4 Installation Instructions: REF 64 47 200
DVD text
Current service documentation, such as the Service Manual, can be
downloaded from the Sirona dealer website.
System requirements can be found in the
"readme.html"
file on the
SIDEXIS 4 DVD.
Prerequisite
1. First action step
2. Second action step
or
➢ Alternative action
Result
➢ Individual action step
Prompts you to do something.
See "Formats and symbols
used [ → 6]"
Identifies a reference to another text
passage and specifies its page
number.
● List Designates a list.
"Command / menu item" Indicates commands, menu items or
quotations.
64 58 983 D3592
D3592.076.01.03.02 03.2016
7
Sirona Dental Systems GmbH 2Configuring software
Service Manual SIDEXIS 4 2.1Configuration menu
bеЦдблЬ
2
Configuring software
Configuration of SIDEXIS 4 takes place via a Configuration menu [→7],
which you SIDEXIS 4can open [ → 35] via the cog symbol in the headline.
2.1
Configuration menu
You can adjust SIDEXIS 4 according to the requirements of your practice.
To do this, you are provided with a clear configuration menu
Configuration menu, e.g. the "Application language" menu
The menus for presetting the program are compiled into groups.
●
"General Settings"
●
"Patient Settings"
●
"Acquisition"
●
"Output"
●
"SIDEXIS Tools"
NOTE: If plug-ins for treatment units that require settings are installed in
SIDEXIS 4, these are also displayed as buttons here.
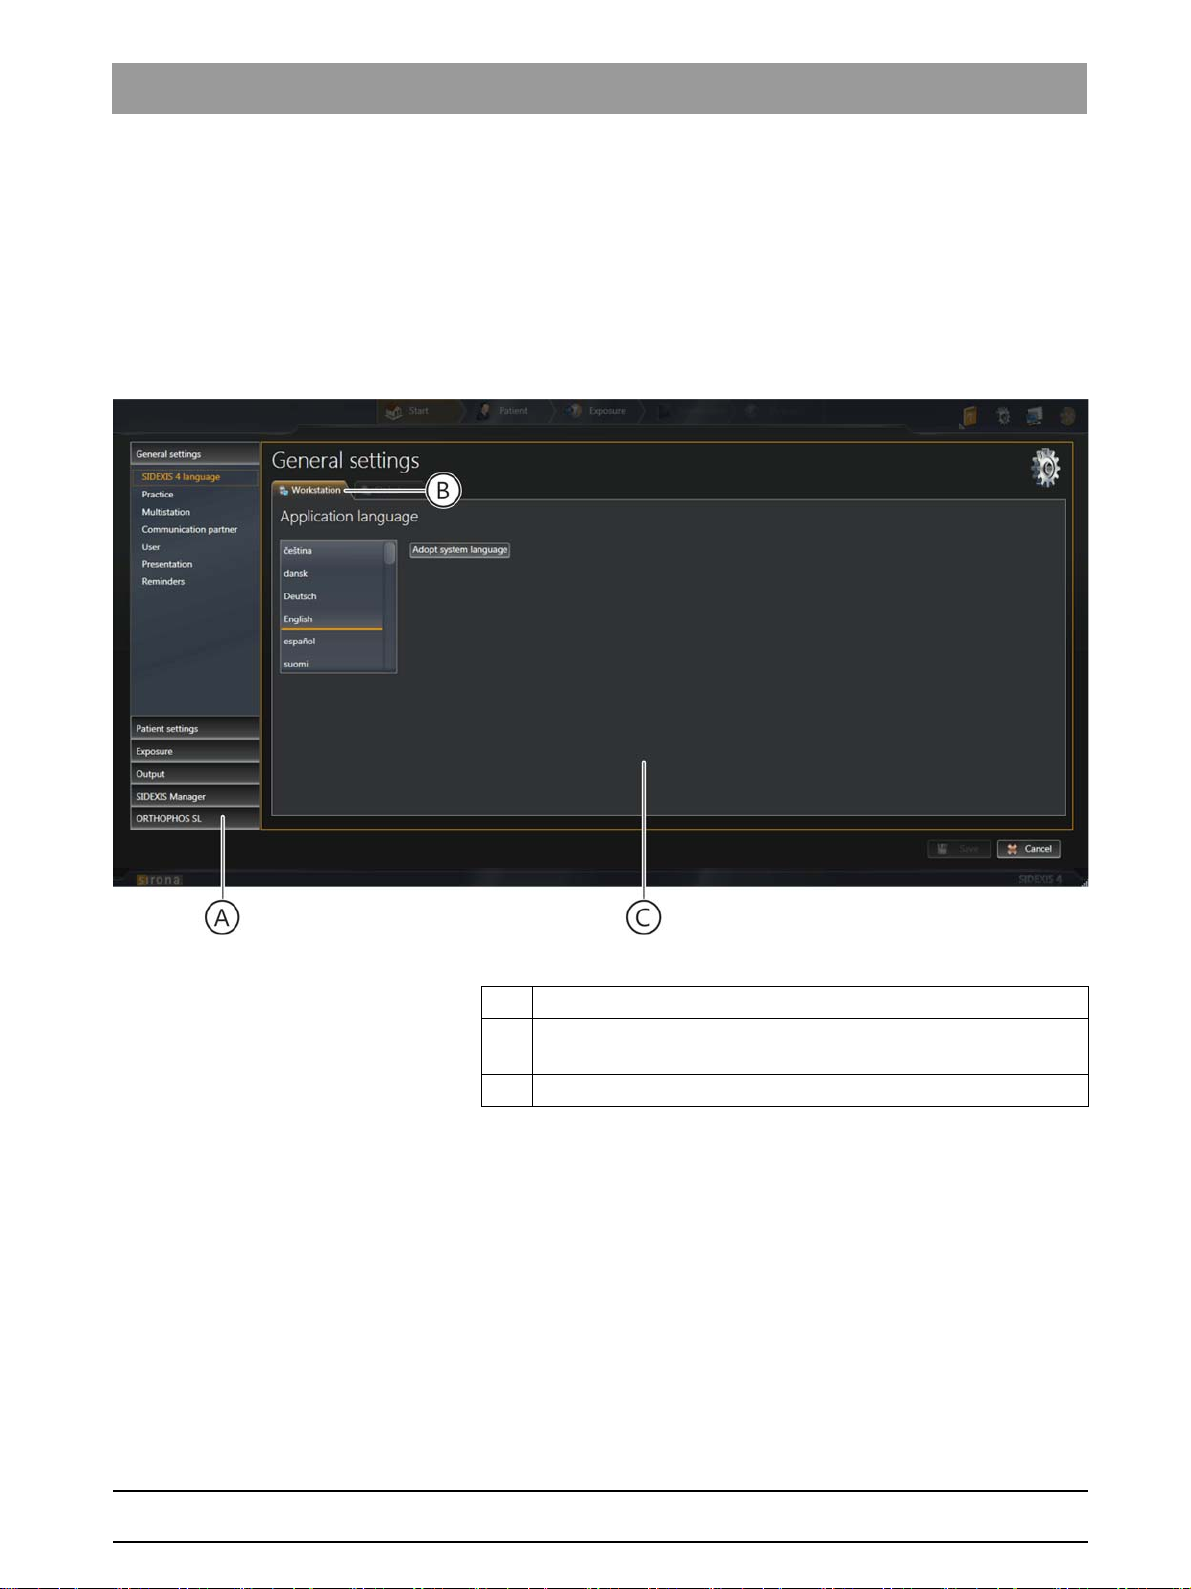
A Structure tree with buttons for menu selection
B Display tab: displays whether the menu contains global, user-
specific, or workstation-related settings.
C Menu

64 58 983 D3592
8 D3592.076.01.03.02 03.2016
2Configuring software Sirona Dental Systems GmbH
2.1Configuration menu Service Manual SIDEXIS 4
By clicking on the group name (E) (e.g.
"General Settings"
) the buttons
(F) for the relevant menu become visible.
When you click on a button, the corresponding menu opens.

64 58 983 D3592
D3592.076.01.03.02 03.2016
9
Sirona Dental Systems GmbH 2Configuring software
Service Manual SIDEXIS 4 2.1Configuration menu
bеЦдблЬ
Identifying changes to the configuration
Identifying a change to the configuration that has not yet been saved
If you have made changes in the configuration menu and these have not
yet been saved, the corresponding buttons in the structure tree (H) are
labeled with an * (I). This identification is deleted again once the
configuration is saved.
Saving the changes To save the changes to the configuration click on the
"Save"
button (J)
on the bottom right of the configuration menu. The changes are saved
and the menu closes.
Closing the configuration menu with no
changes
If you wish to close the configuration menu without saving the changes to
the configuration, click on the
"Cancel"
button (G). The changes are
discarded and the menu closes.
64 58 983 D3592
10 D3592.076.01.03.02 03.2016
2Configuring software Sirona Dental Systems GmbH
2.1Configuration menu Service Manual SIDEXIS 4
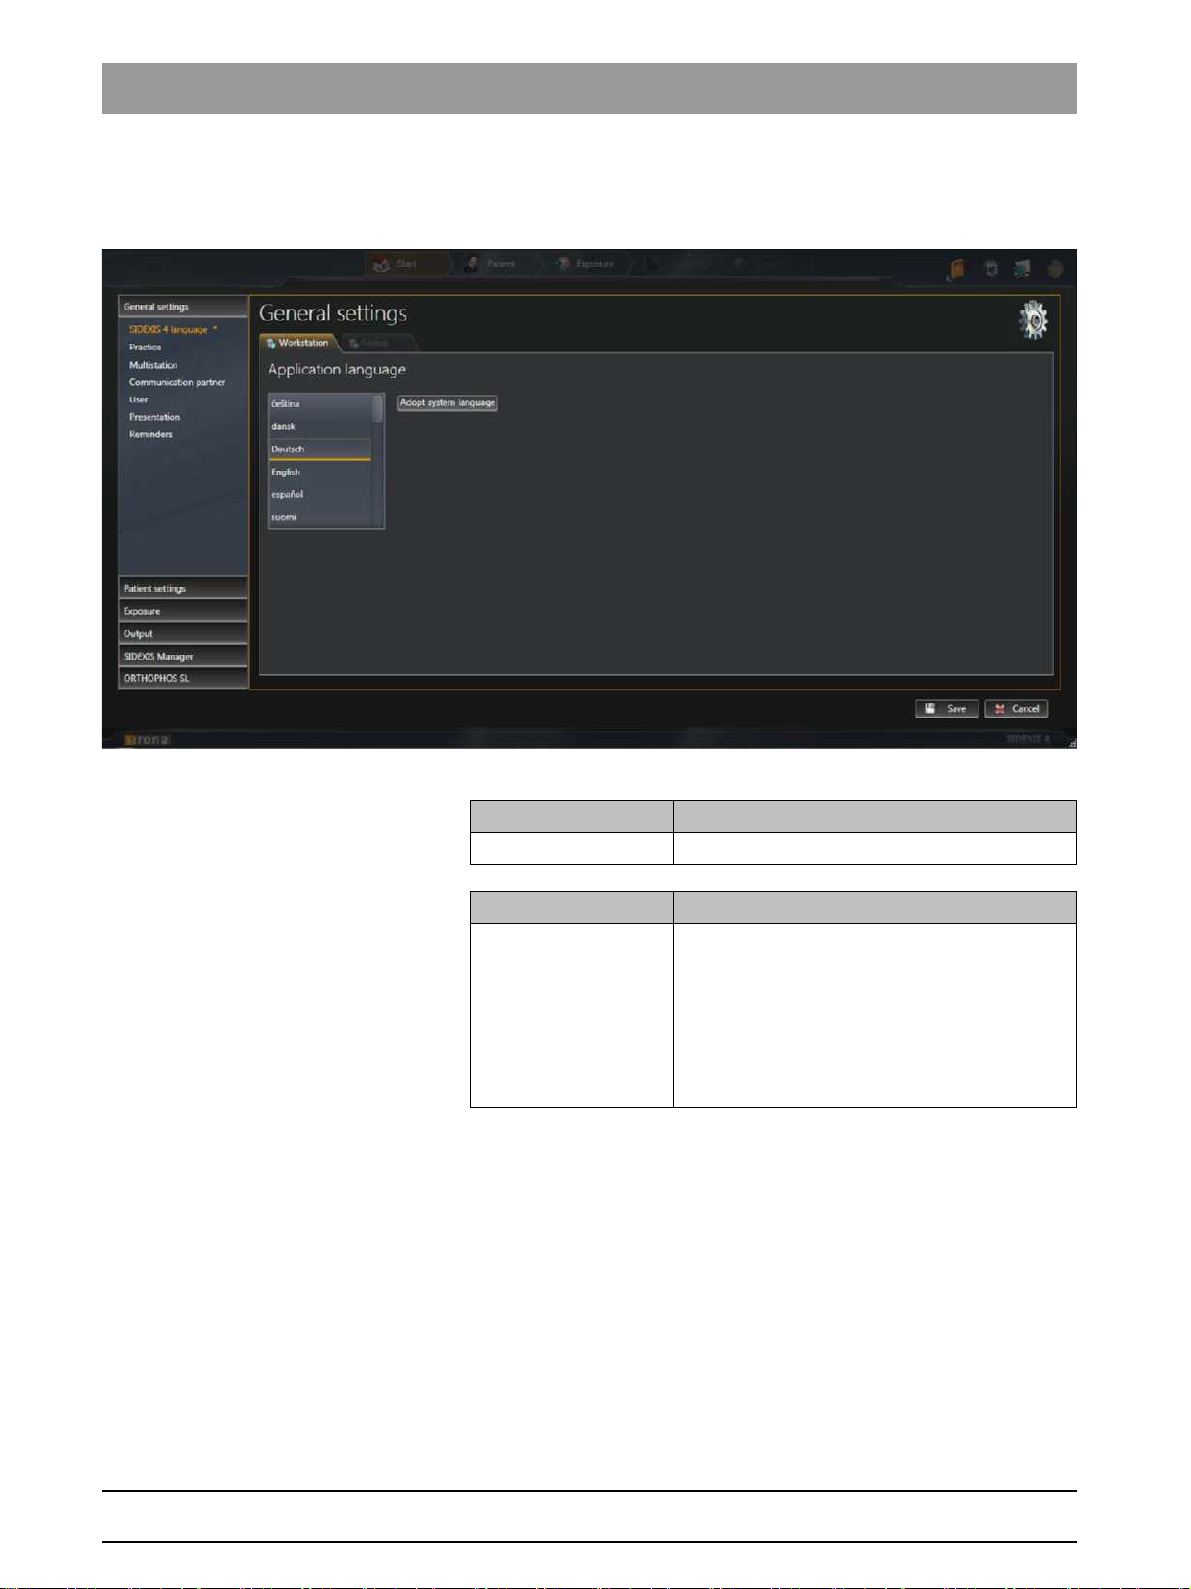
2.1.1 "General settings"
"Language SIDEXIS 4" User-specific
settings for the program language
"Application language" menu
List field Function
Application language Selecting the program language
Button Function
"Adopt system
language"
Select system language as the program
language.
The currently set system language is adopted
as the program language. If the system
language is not available as program language,
English is automatically used as the program
language.

64 58 983 D3592
D3592.076.01.03.02 03.2016
11
Sirona Dental Systems GmbH 2Configuring software
Service Manual SIDEXIS 4 2.1Configuration menu
bеЦдблЬ
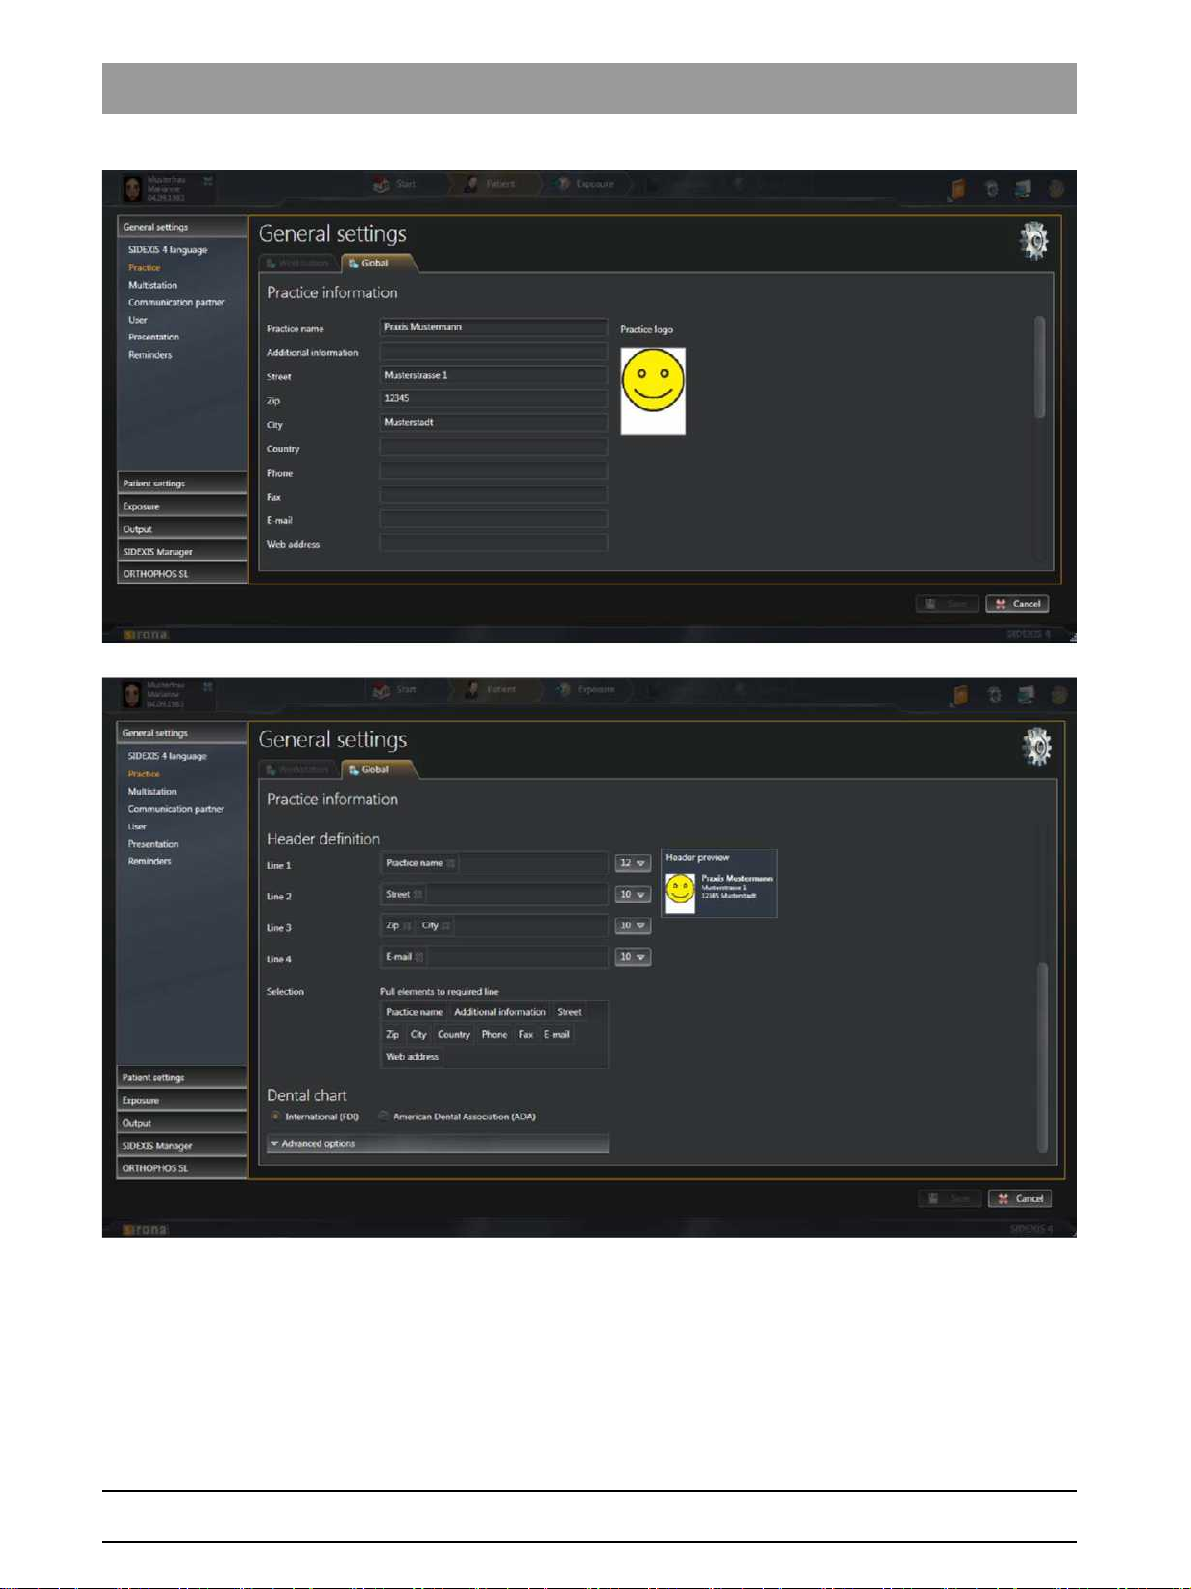
"Praxis" Global
settings for the practice data; e.g. how data is displayed on a
printout
The
"General Settings"
menu contains the following sub-areas:
●
"Praxis Settings"
●
"Header definition"
●
"Dental chart"
You can move the menu up or down in the window using the scrollbar to
the right of the menu.
64 58 983 D3592
12 D3592.076.01.03.02 03.2016
2Configuring software Sirona Dental Systems GmbH
2.1Configuration menu Service Manual SIDEXIS 4
"Praxis Settings" menu

64 58 983 D3592
D3592.076.01.03.02 03.2016
13
Sirona Dental Systems GmbH 2Configuring software
Service Manual SIDEXIS 4 2.1Configuration menu
bеЦдблЬ
Example of a practice address in a printout
Another check box appears by clicking on the
"Advanced options"
button.
The configuration for displaying the practice address in the printout is
described in the Personalizing SIDEXIS 4 ⇒ Practice-specific
settings [ → 38] section.
SH multi-user
Entry fields Entry
"Praxis name"
Name of the practice
"Additional
information"
Any additional information
"Street"
Street
"Zip"
Zip code
"City"
City
"Country"
Country
"Phone"
Phone number
"Fax"
Fax number
"E-Mail"
Email address
"Web address"
Website
Option button Option button activated
"International (FDI)"
International dental notation is used
"American Dental
Association (ADA)"
American dental notation is used
Button Function
"Praxis logo"
Define practice logo for printouts
"Show preview"
Preview the display of practice data;
e.g. on printouts
Check box Function
"Temporarily show
deleted media"
Display deleted media temporarily in
"Timeline"
for reactivation.
64 58 983 D3592
14 D3592.076.01.03.02 03.2016
2Configuring software Sirona Dental Systems GmbH
2.1Configuration menu Service Manual SIDEXIS 4
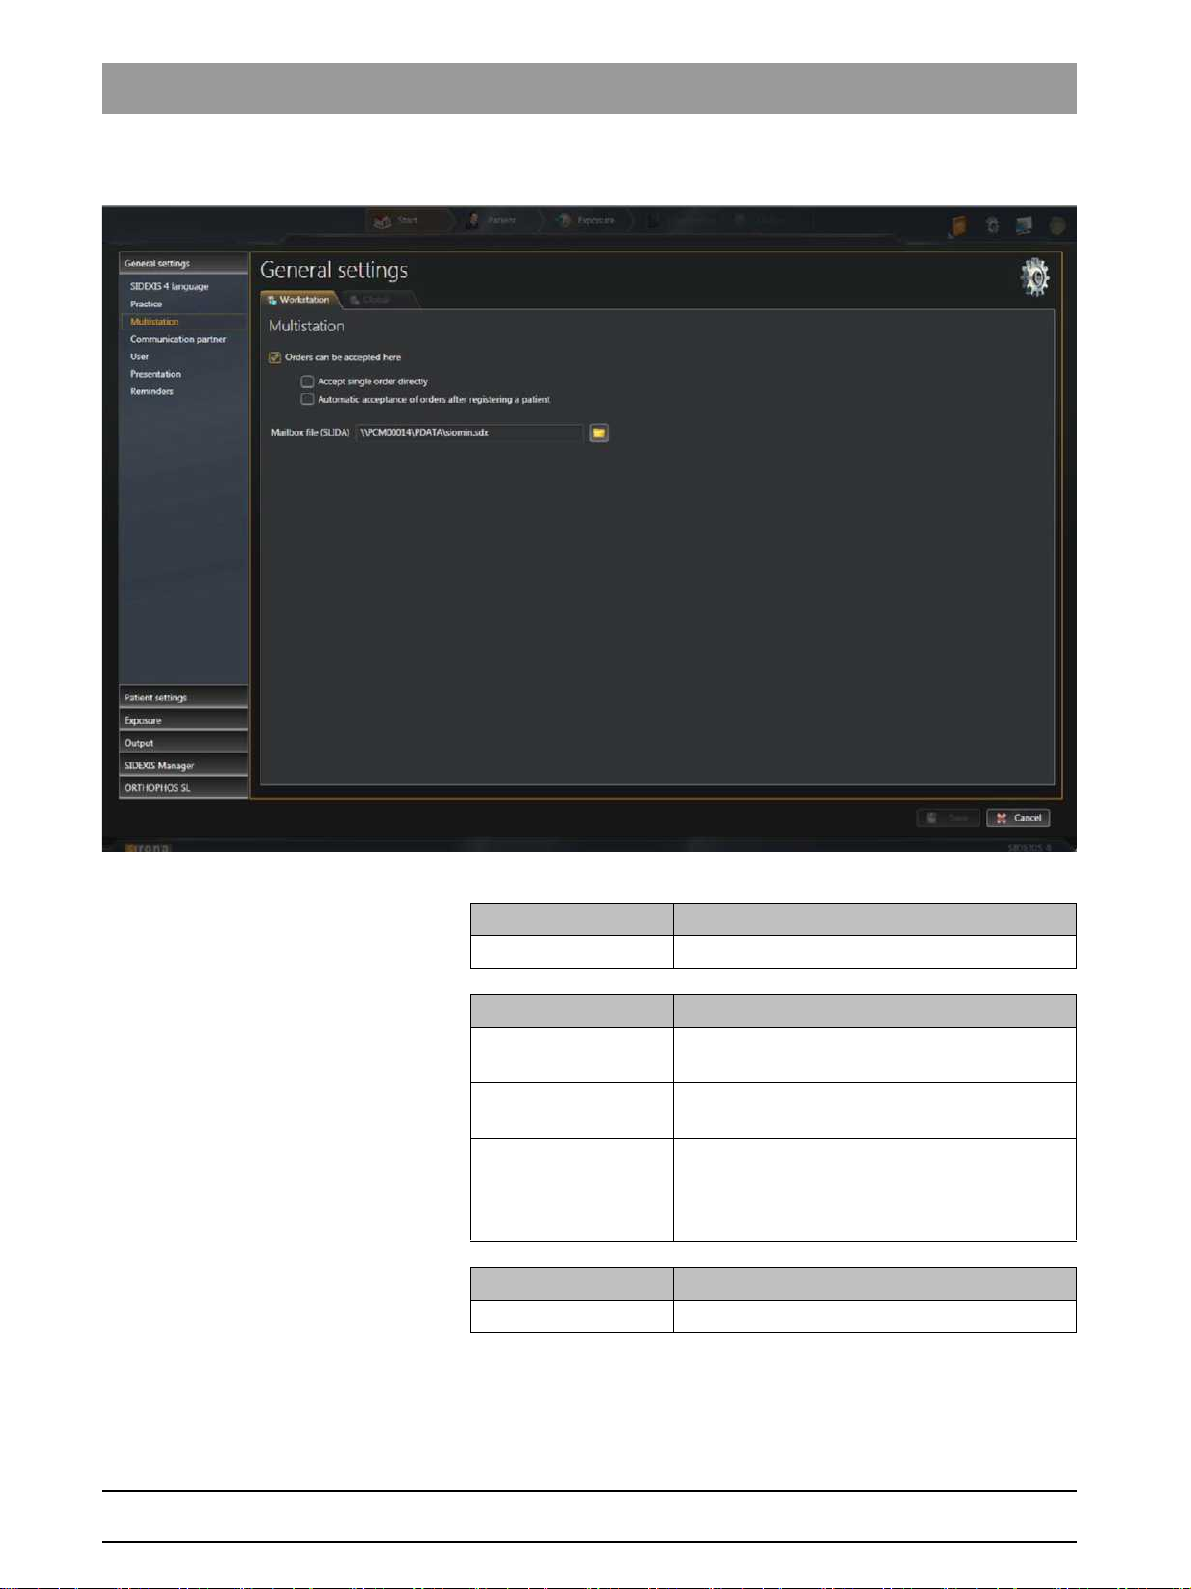
"Multistation" Workstation-related
settings for multi-user operation
"Multistation capability" menu
SH communication partner
Entry fields Entry
"Mailbox File (SLIDA)"
Path to the PAS mailbox file
Check box Check box activated
"Orders can be
accepted here"
X-ray jobs are taken automatically from the
PAS
"Accept a single order
directly"
X-ray jobs are added to the job list
"Automatic
acceptance of orders
after registering a
patient"
X-ray jobs are added to the job list once the
patient is logged in
Button Function
Folder icon Path selection
64 58 983 D3592
D3592.076.01.03.02 03.2016
15
Sirona Dental Systems GmbH 2Configuring software
Service Manual SIDEXIS 4 2.1Configuration menu
bеЦдблЬ
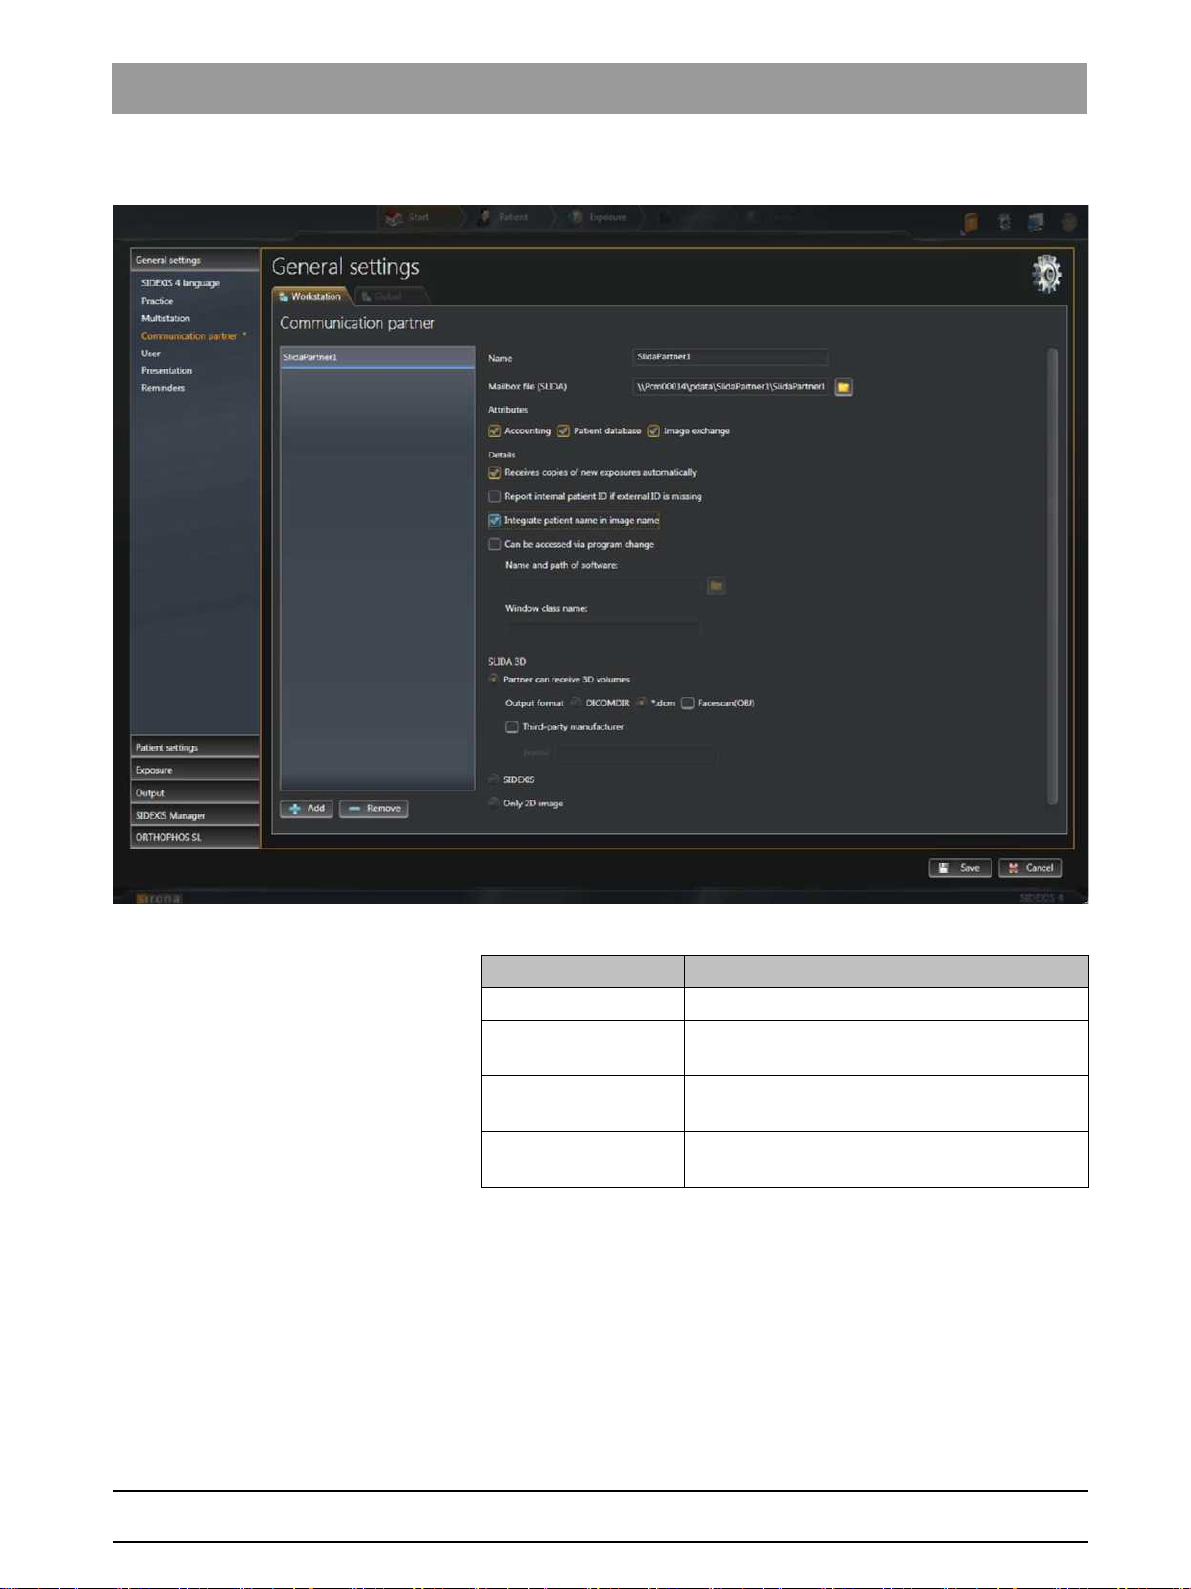
"Communication partners" Workstation-related
setup of a communication partner
Menu "Communication partners"
Entry fields Entry
"Name"
Name of communication partner
"Mailbox File (SLIDA)"
Path to the practice mailbox file for the
communication partner
"Name and path of the
SW"
Name and path of the communication program
"Window class name"
Identification key for the communication
program

64 58 983 D3592
16 D3592.076.01.03.02 03.2016
2Configuring software Sirona Dental Systems GmbH
2.1Configuration menu Service Manual SIDEXIS 4
Menu area
"SLIDA 3D"
:
Check box Check box activated
"Accounting"
Attributes are defined for communication
"Patient database"
"Image exchange"
"Automatically
receives a copy of new
exposures"
With each exposure a copy is placed in the
folder in which the mailbox file is located.
"Report internal patient
ID if external is
missing"
If there is no external file card index number
available from the PAS for a patient, the
internal SIDEXIS 4 card index number is
transmitted to the communication partner to
identify the patient.
"Integrate patient
name in image file
name"
Patient name is integrated into the file name
during media transfer
"Can be accessed by
program change"
Activates the entry fields
"Name and path of the
SW"
and
"Window class name"
Option buttons Function
"Remove"
Remove communication partners
"Add"
Add communication partners
Button Function
"Remove"
Remove communication partners
"Add"
Add communication partners
Entry fields Entry
"Profile"
Profile of the external manufacturer
Check box Check box activated
"Third-patry
manufacturer"
External manufacturer available
"Facescan(OBJ)"
The Facescan OBJ file (if available) is also
exported.

64 58 983 D3592
D3592.076.01.03.02 03.2016
17
Sirona Dental Systems GmbH 2Configuring software
Service Manual SIDEXIS 4 2.1Configuration menu
bеЦдблЬ
Option buttons Function
"Partner can receive
3D volumes"
The communication partner can receive 3D
volumes.
"DICOMDIR"
DICOMDIR
"*.dcm"
Gathering DCM files
"Sidexis"
Exporting the 3D volumes as DICOMDIR.
3D volumes that are exported in this type, can
be reimported in SIDEXIS 4.
"Only 2D image"
Only 2D thumbnail.
Communication partners who cannot receive
the 3D volumes receive a 2D thumbnail in tiff
format.
64 58 983 D3592
18 D3592.076.01.03.02 03.2016
2Configuring software Sirona Dental Systems GmbH
2.1Configuration menu Service Manual SIDEXIS 4
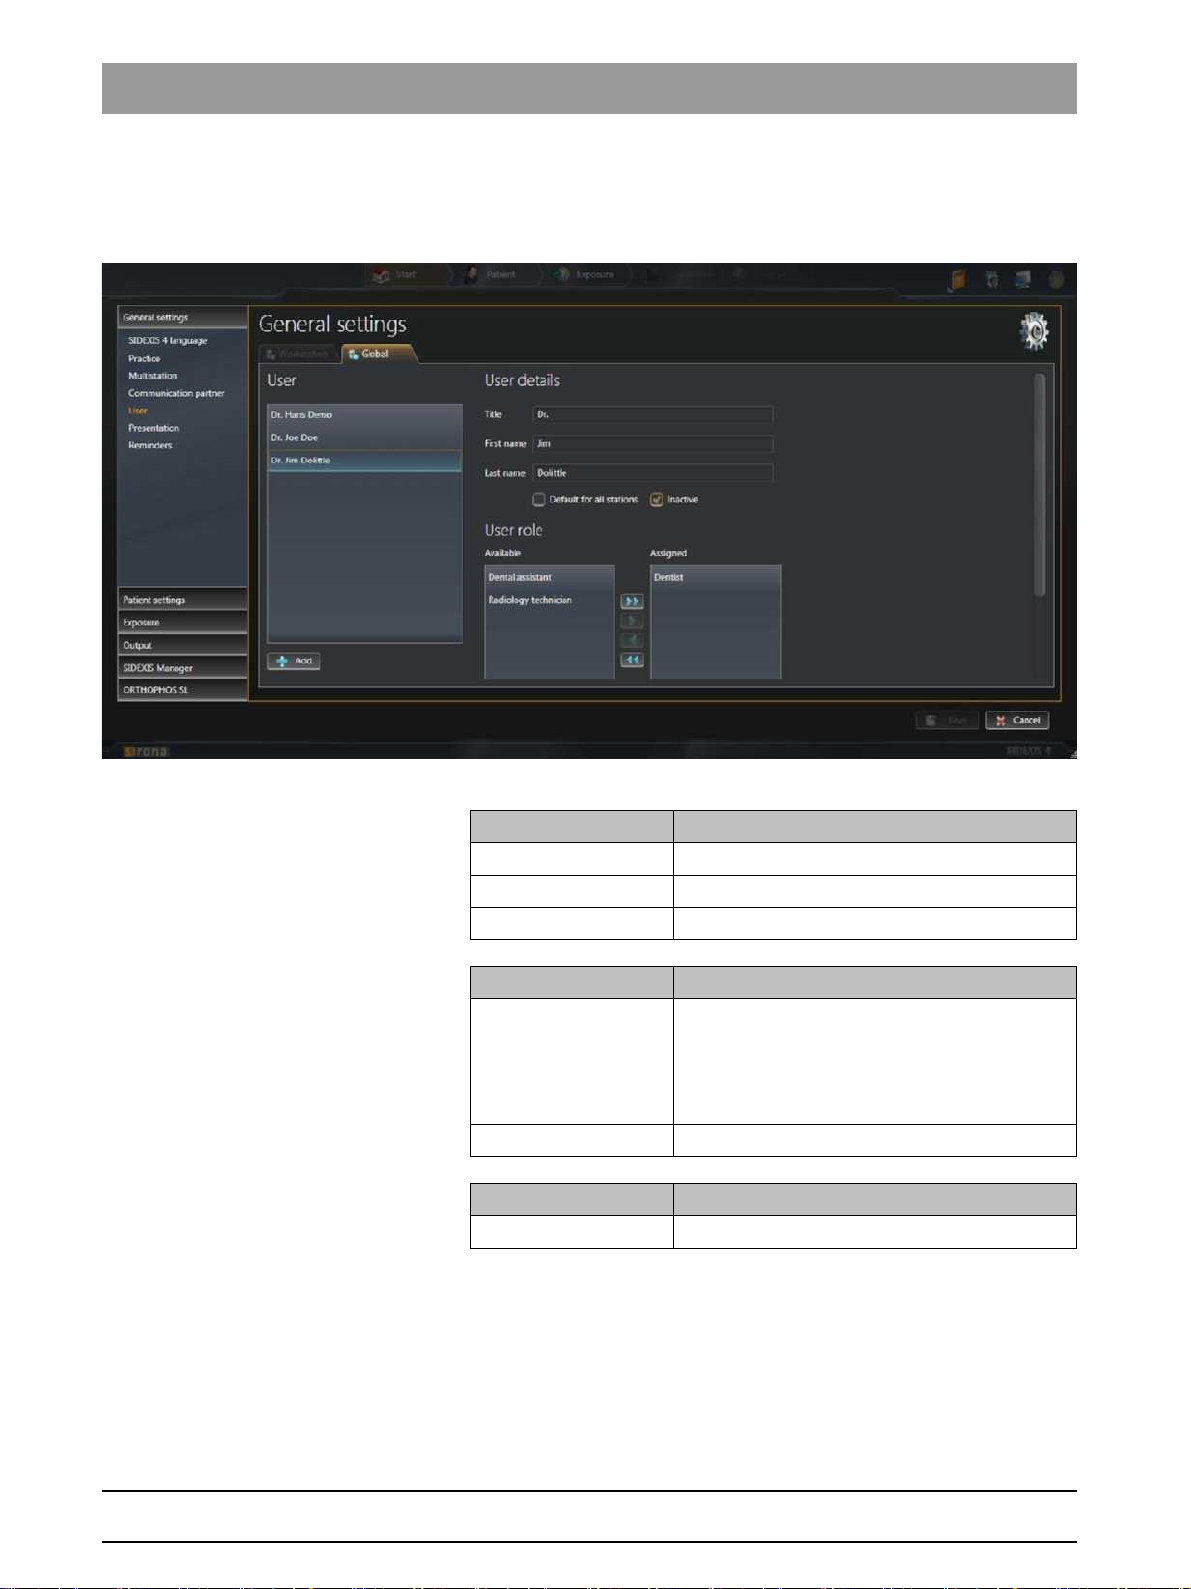
"User" Global
user setup.
Users set up here are entered into different list fields of SIDEXIS 4 (e.g.
when entering the indication prior to exposure) and can be selected there.
"User/User details/User role" menu
Entry fields Entry
"Title"
Title of the user
"First name"
First name of the user
"Last name"
Surname of the user
Check box Check box activated
"Default for all
stations"
Selected users are defined as standard
consultants.
If a patient is not assigned to a consultant, this
standard consultant is suggested as the main
consultant in the menus.
"Inactive"
Deactivate user
Button Function
"Add"
Add new user
64 58 983 D3592
D3592.076.01.03.02 03.2016
19
Sirona Dental Systems GmbH 2Configuring software
Service Manual SIDEXIS 4 2.1Configuration menu
bеЦдблЬ
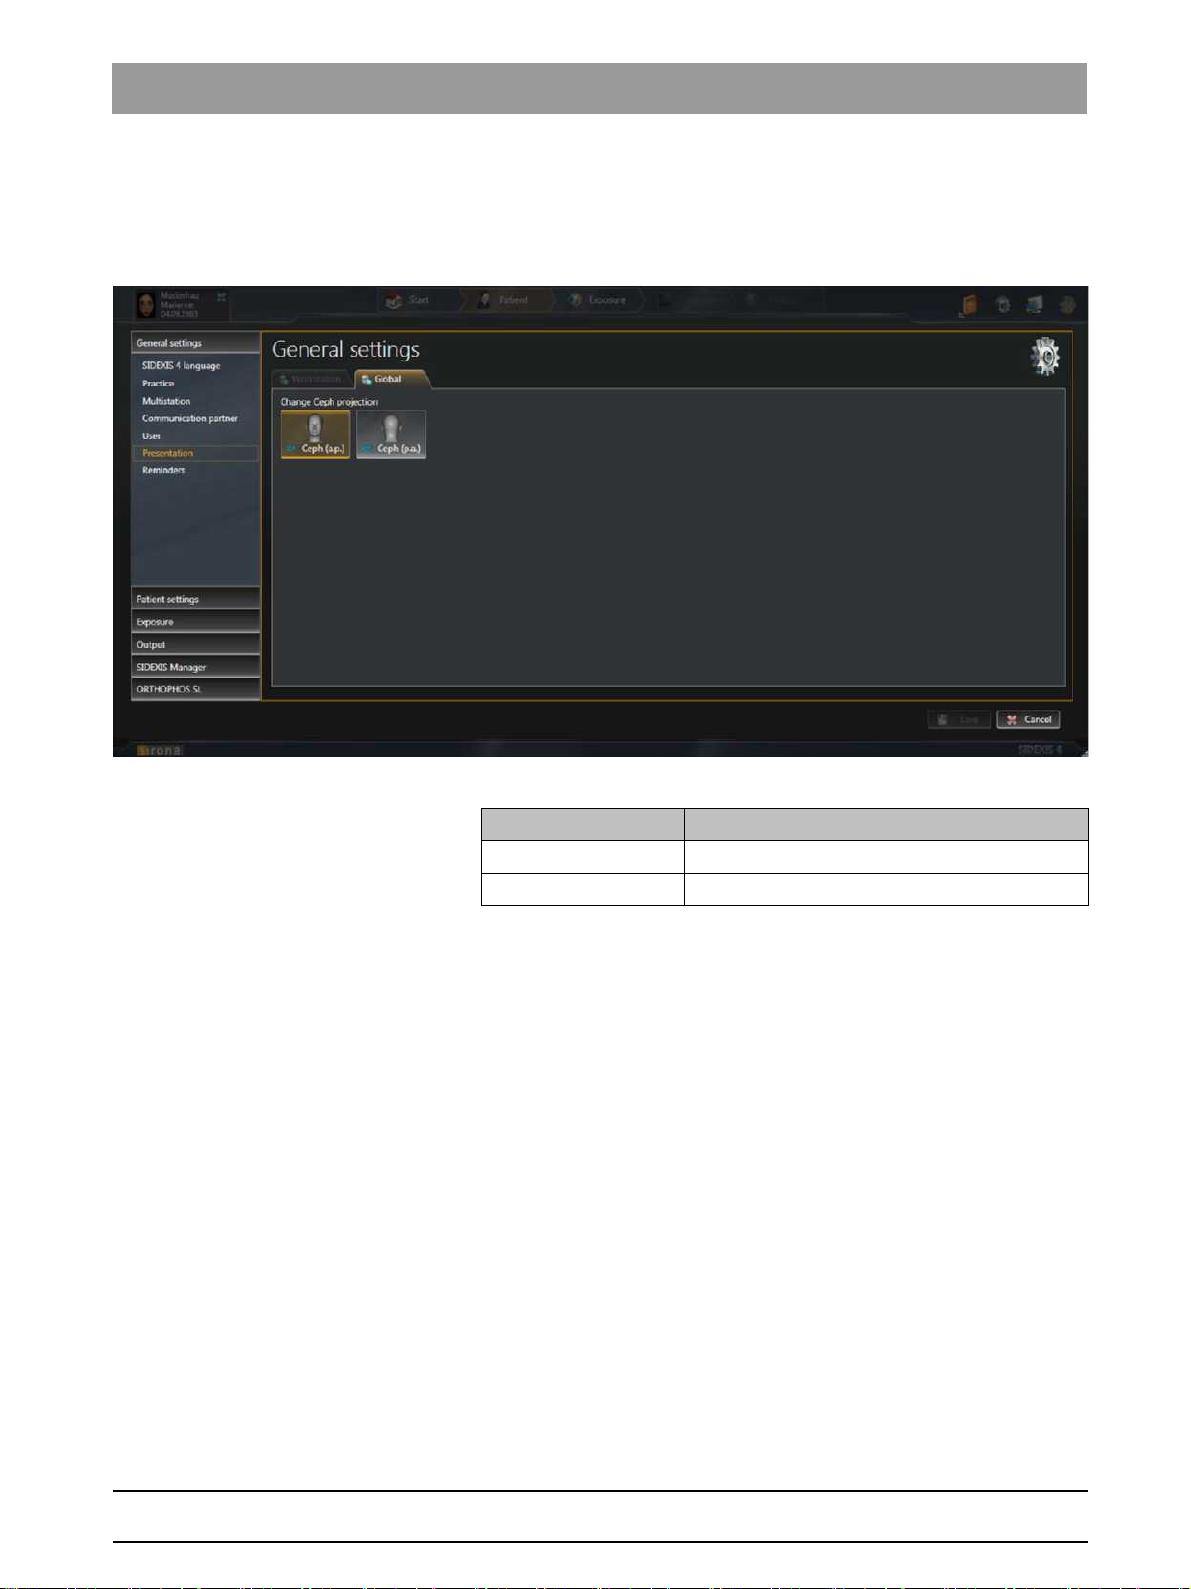
"Presentation" Global
settings for the ceph projection.
The
"Presentation"
configuration menu can be used to switch the
"CA"
ceph projection from
"CA Ceph (a.p.)"
(factory settings) to
"CP Ceph
(p.a.)"
.
"Presentation" menu
Button Function
"CA Ceph (a.p.)" "CA"
anterior – posterior projection
"CP Ceph (p.a.)" "CA"
posterior – anterior projection

64 58 983 D3592
20 D3592.076.01.03.02 03.2016
2Configuring software Sirona Dental Systems GmbH
2.1Configuration menu Service Manual SIDEXIS 4
"Reminder" Global
settings for the diary.
Via the
"Reminder"
configuration menu, entries are defined that appear
as reminders in the list of appointments in the
"Start"
work area.
"Reminder" menu
Entry fields Entry
"Name"
Appointment title
"Interval (in days)"
Interval for automatically creating regular
appointments in the diary
"Executing Program"
Selecting the program that should be started
when clicking on an appointment in the diary.
"Next reminder"
Date of the next appointment
Check box Check box activated
"Set automatically to
done"
Appointments are automatically set to the
"Completed" status after clicking on them in the
diary.
"Enable Reminder"
The defined appointment is activated and
appears in the diary
Button Function
"Add"
Add new appointment
"Remove"
Delete existing appointment
Folder icon Path selection
64 58 983 D3592
D3592.076.01.03.02 03.2016
21
Sirona Dental Systems GmbH 2Configuring software
Service Manual SIDEXIS 4 2.1Configuration menu
bеЦдблЬ
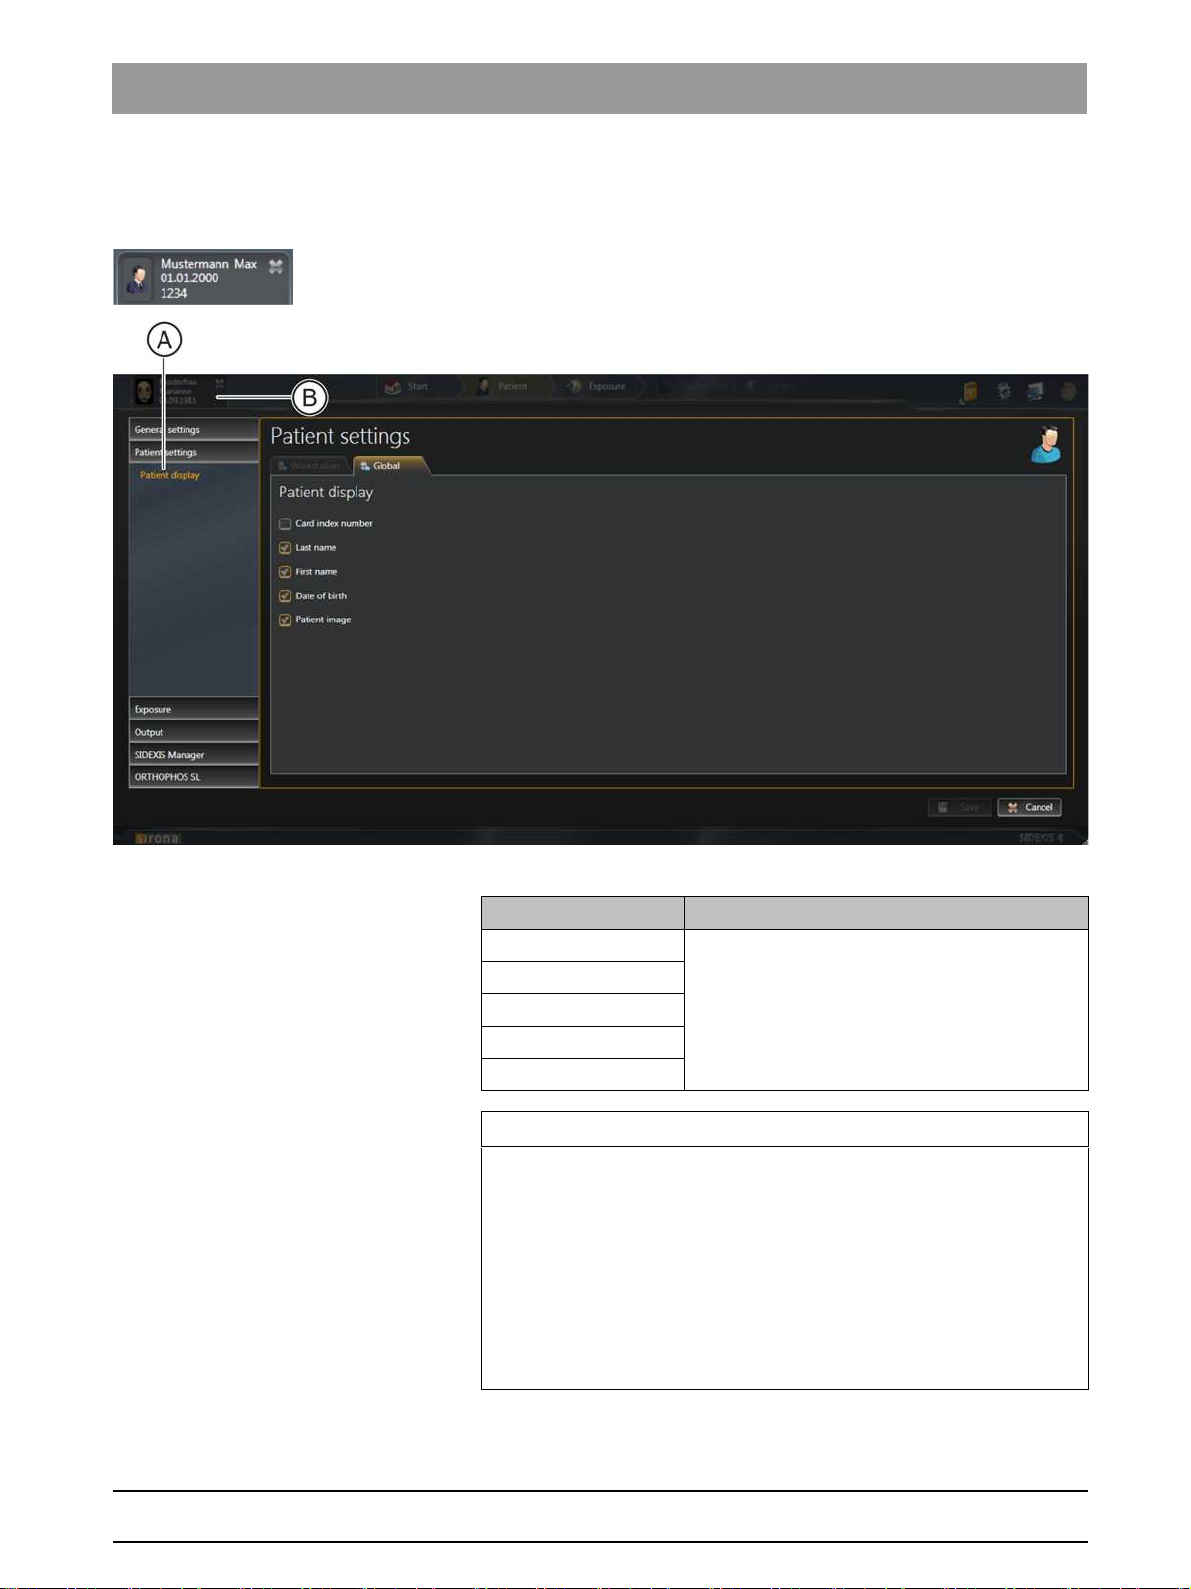
2.1.2 "Patient settings"
"Patient display"
Global
settings for displaying the logged in patient in the header line
"Patient display" menu
Card index number
Check box Check box activated
"Card-index no."
Information is displayed in the header line
"Last name"
"First name"
"Date of birth"
"Patient image"
IMPORTANT
At least the
"Card-index no."
check box or the check boxes
"Last name"
,
"First name"
, and
"Date of birth"
must be checked to uniquely identify
a patient.
If just the
"Card-index no."
check box is checked, a card index number
must be entered for each patient.
If a patient is logged in for whom this does not apply (no card index
number, even though only the
"Card-index no."
check box is ticked in
the configuration, with the exception of check box
"Patient image"
), the
red text
"Not clearly identifiable"
appears in the display for the logged-
in patient.
64 58 983 D3592
22 D3592.076.01.03.02 03.2016
2Configuring software Sirona Dental Systems GmbH
2.1Configuration menu Service Manual SIDEXIS 4
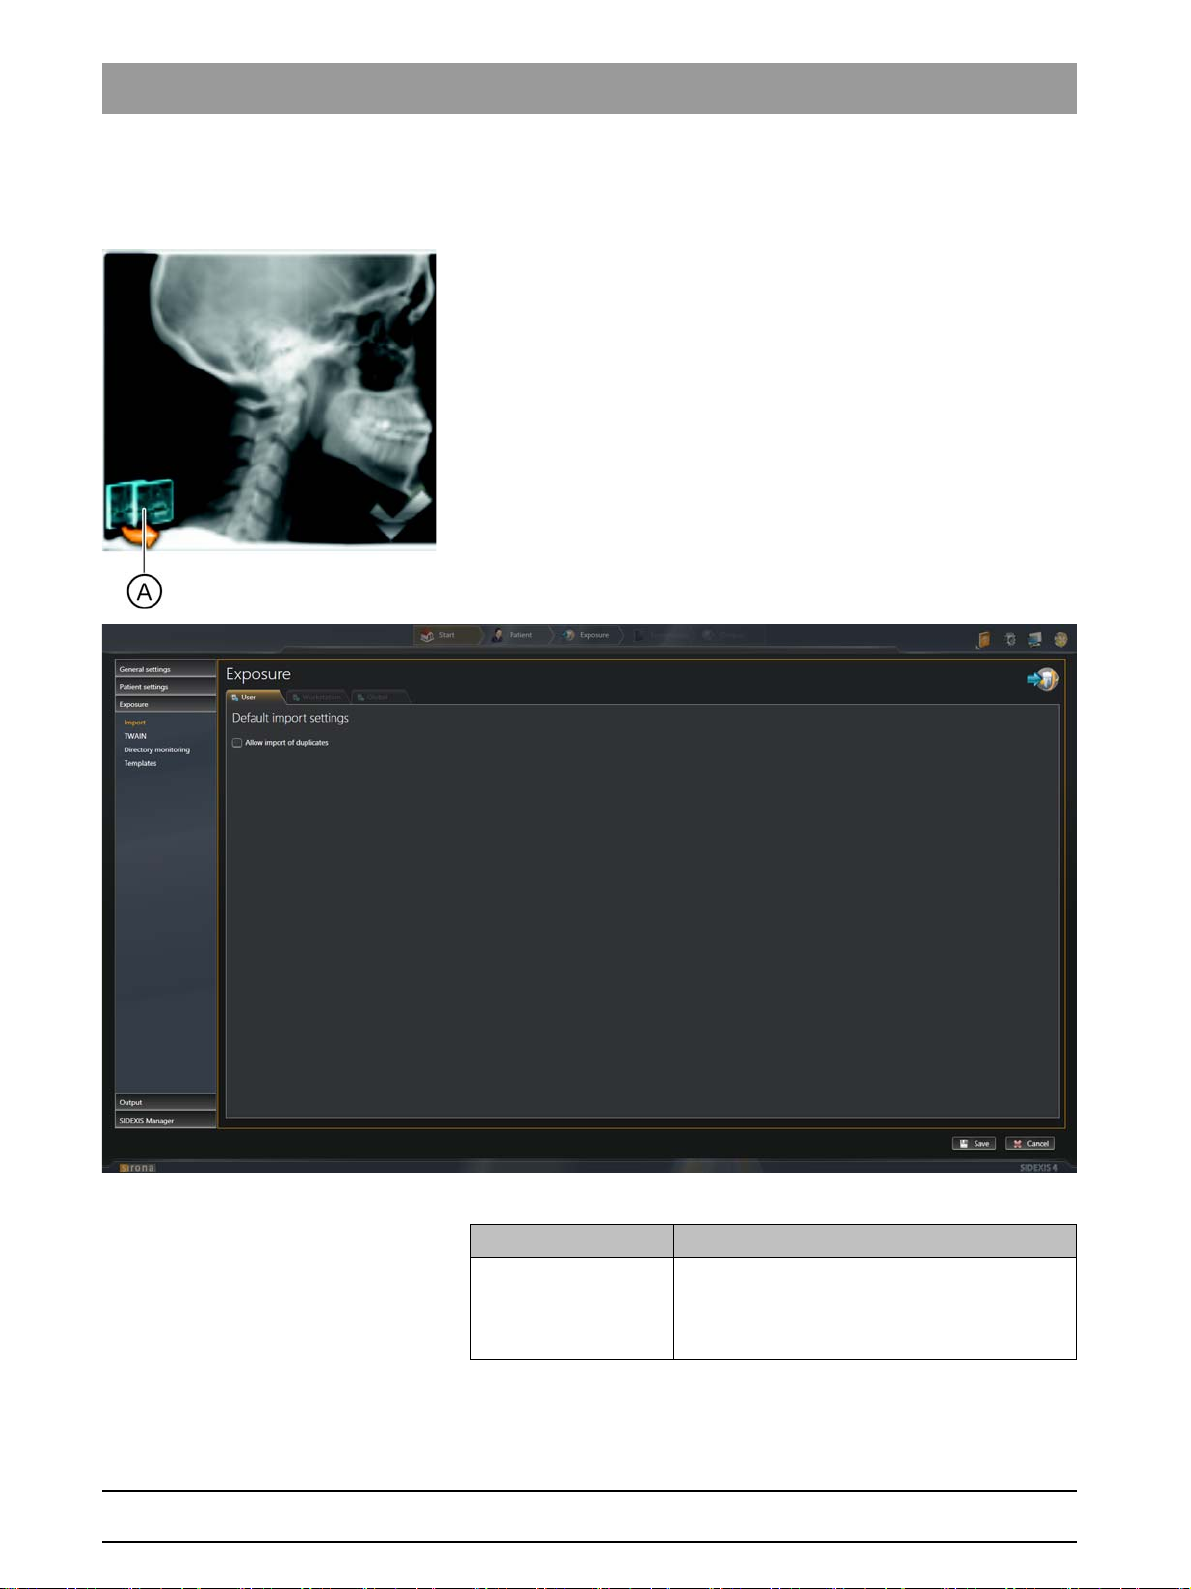
2.1.3 "Exposure"
"Import" User-specific
settings for importing available media
When importing media items, a check is performed to see whether the
media item is already in the SIDEXIS 4 database. If the check box is
deactivated (factory setting), an icon (A) is displayed to signal that an
import is not possible when attempts are made to import media items that
are already available.
In the
"File Import"
menu you can cancel the import of the duplicate once
through the
"Allow import of duplicates (if image already exists in
database)"
check box.
"Default Import Settings" menu
Check box Check box activated
"Allow import of
duplicates (if image
already exists in
database)"
If a media item to be imported is already
present in the database, this is still imported as
a duplicate.

64 58 983 D3592
D3592.076.01.03.02 03.2016
23
Sirona Dental Systems GmbH 2Configuring software
Service Manual SIDEXIS 4 2.1Configuration menu
bеЦдблЬ
"TWAIN" Workstation-related
settings for TWAIN devices
"TWAIN devices" menu
You can set the TWAIN connection via the check boxes in the
"TWAIN
devices"
menu.
64 58 983 D3592
24 D3592.076.01.03.02 03.2016
2Configuring software Sirona Dental Systems GmbH
2.1Configuration menu Service Manual SIDEXIS 4
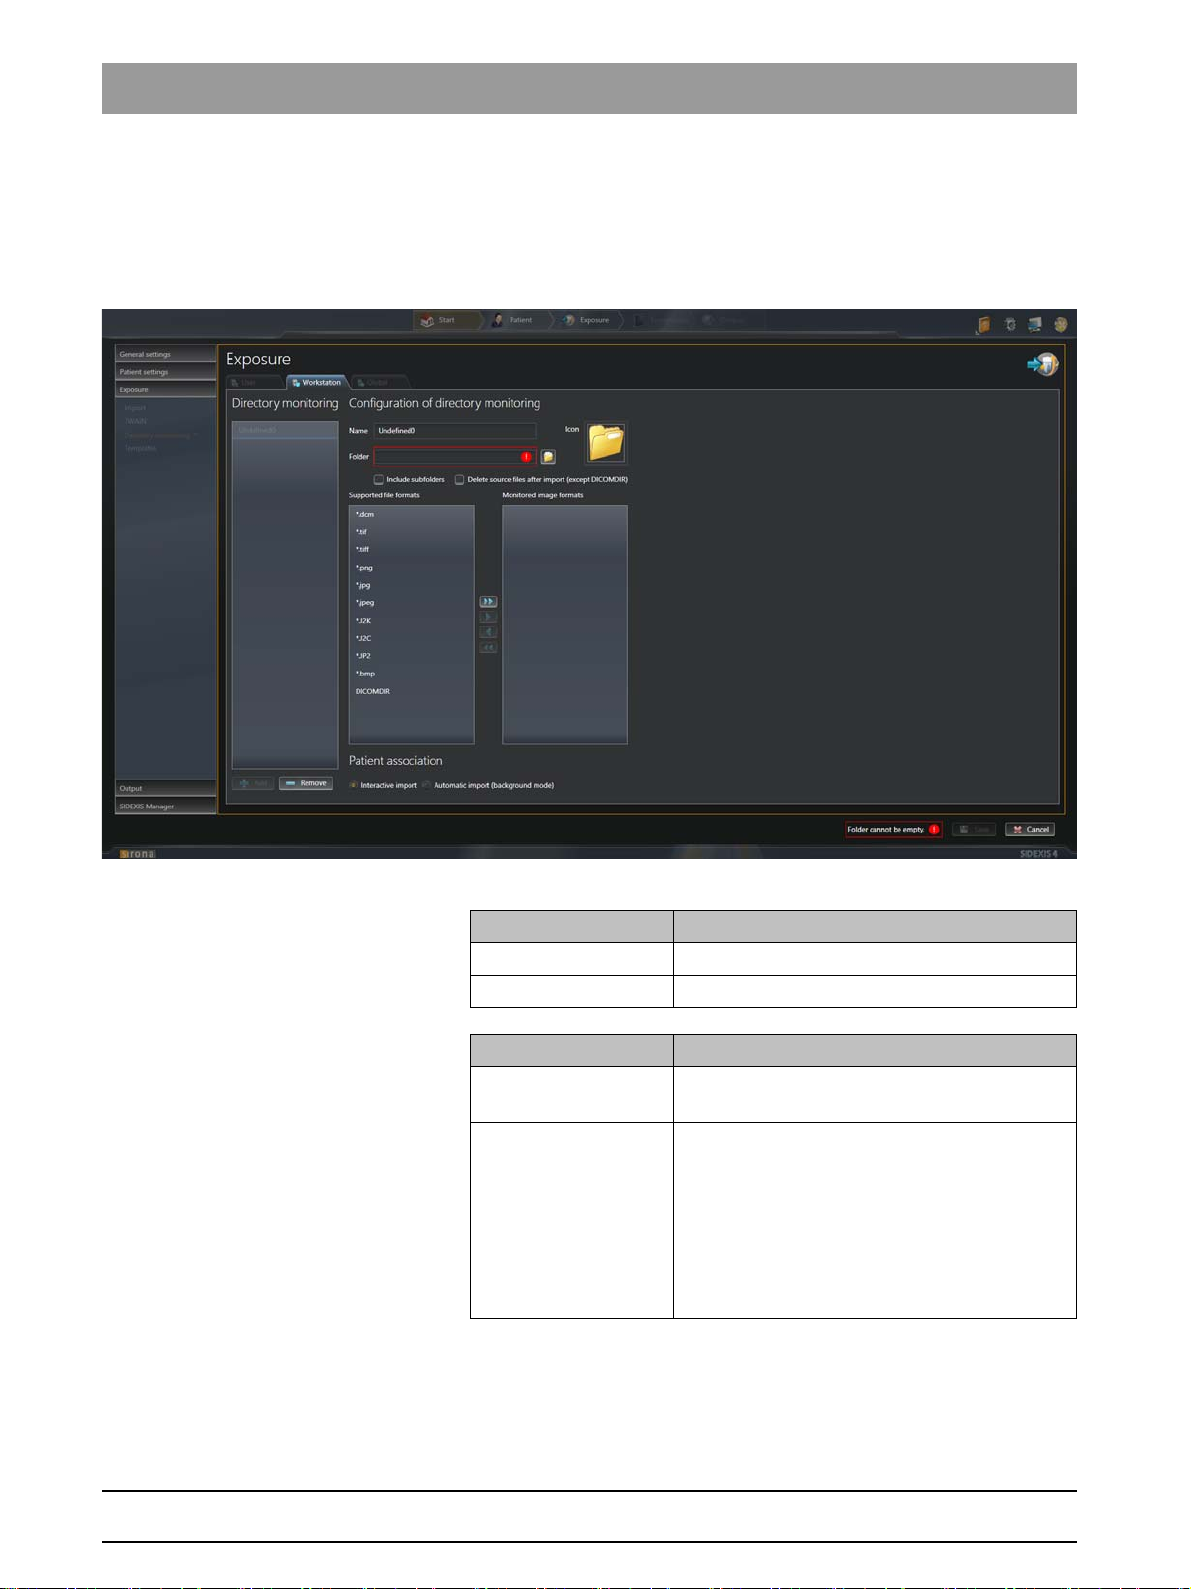
"File watcher" Workstation-related
settings for directory monitoring for media imports
Via the directory monitoring, you can set up an automatic import of media
items from a "monitored" folder. Via the
"File watchers"
menu, you can
create and delete "monitored" folders and specify which media items are
to be automatically imported with which patient assignment.
"File watchers" menu
Entry fields Entry
"Name"
Name of the practice
"Folder"
Any additional information
Check box Check box activated
"include subfolders"
Media items that sit in subfolders of monitored
folders are also imported.
"delete source files
after import"
The original files are deleted in the monitored
folder after the import.
NOTE: The "deleted" files are not actually
deleted, but are moved from the import to the
"temp" folder. The temp folder must therefore
be deleted every now and then. You can
access the required directory using the
environment variable "%TMP%".

64 58 983 D3592
D3592.076.01.03.02 03.2016
25
Sirona Dental Systems GmbH 2Configuring software
Service Manual SIDEXIS 4 2.1Configuration menu
bеЦдблЬ
Option button Option button activated
"interactive import"
Media items are assigned manually to patients
during imports.
"automatic import
(background mode)"
The assignment of media items (tif, tiff) to
patients is done automatically through DICOM.
Button Function
"Add"
Add monitored folder
"Remove"
Delete monitored folder
"Icon"
Define icon for the monitored folder
Folder icon Path selection

64 58 983 D3592
26 D3592.076.01.03.02 03.2016
2Configuring software Sirona Dental Systems GmbH
2.1Configuration menu Service Manual SIDEXIS 4
"Templates" Global
settings for the exposure series
"Templates" menu
Entry fields Entry
"Holding time for
viewing the exposure
(sec.)"
Time interval between the exposure appearing
and the request for triggering the next exposure
Check box Check box activated
"Show positioning aid"
Activate positioning aid for the exposure series
64 58 983 D3592
D3592.076.01.03.02 03.2016
27
Sirona Dental Systems GmbH 2Configuring software
Service Manual SIDEXIS 4 2.1Configuration menu
bеЦдблЬ
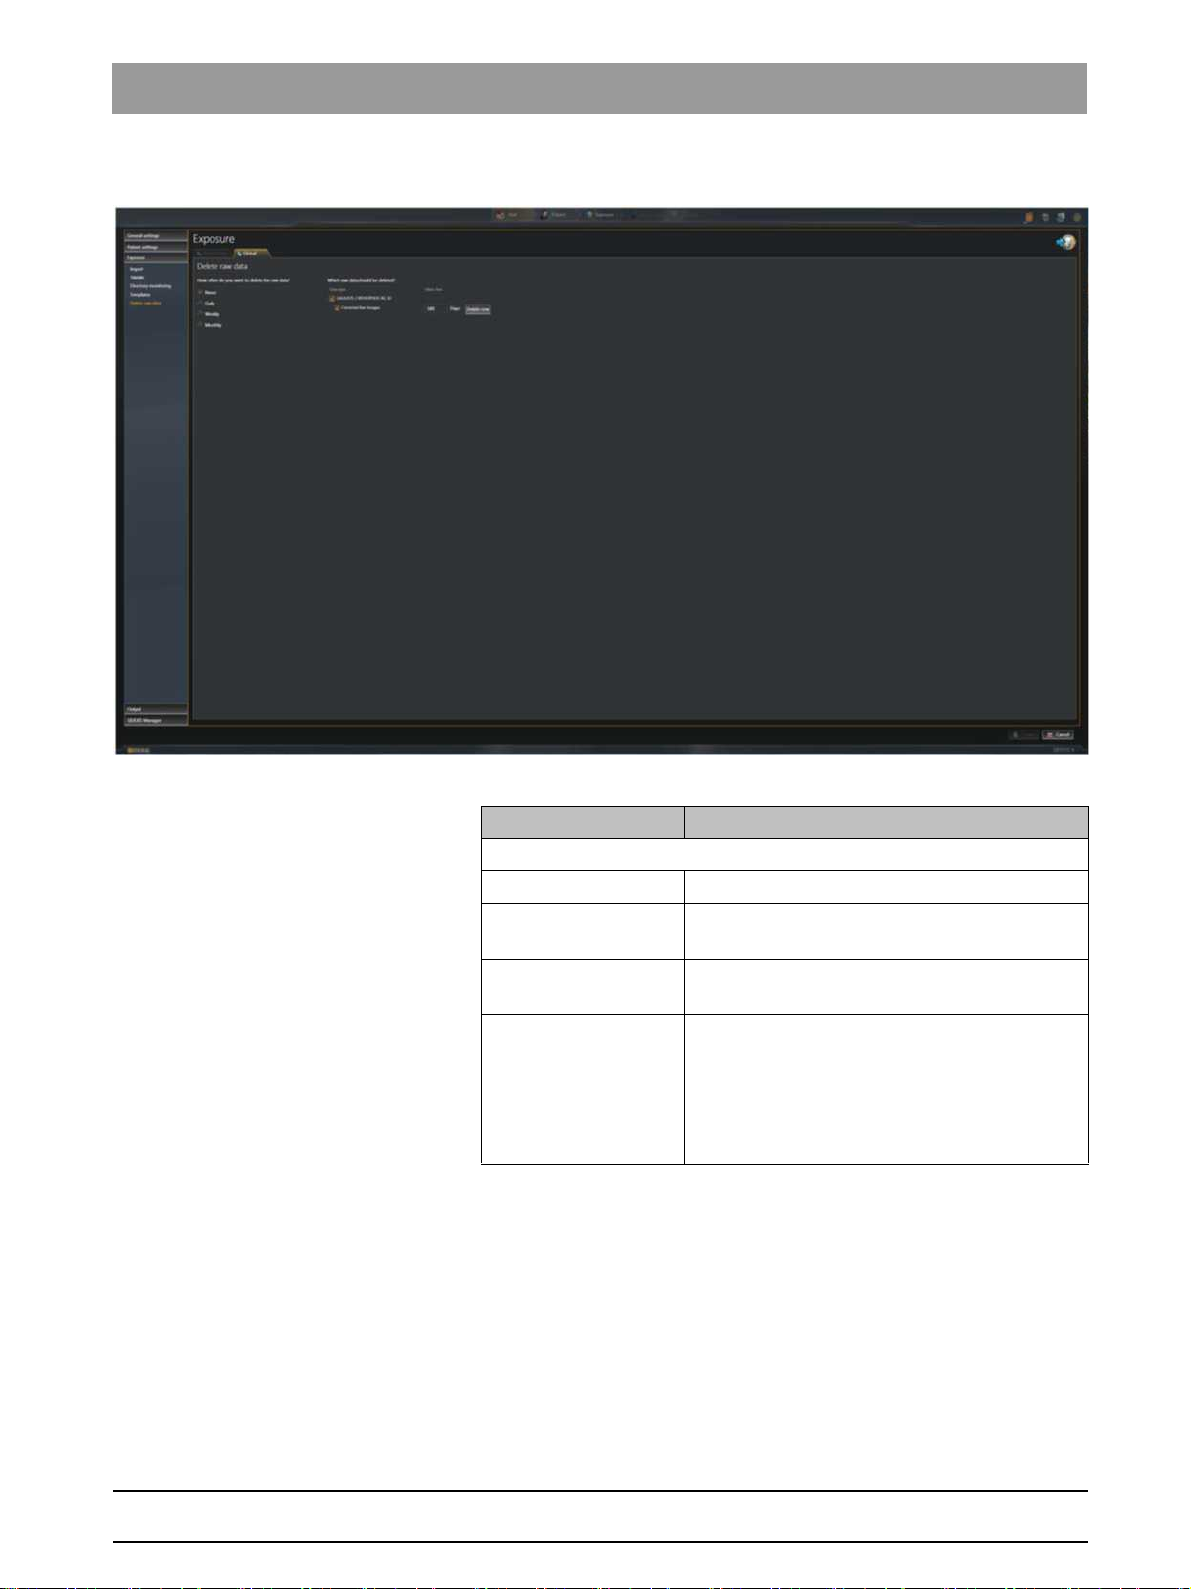
"Delete raw data" Global
settings for deleting raw data
"Delete raw data" menu
Option buttons Entry
Configuration of the deletion frequency
"Never"
No raw data is deleted.
"Daily"
Raw data is deleted daily;
time can be adjusted
"Weelky"
Raw data is deleted weekly;
weekday and time can be adjusted
"Monthly"
Raw data is deleted monthly;
day of the month (1-31) and time can be
adjusted
NOTE: If a month has less days than the set
day, the raw data is deleted on the last day of
the month.
Loading...