

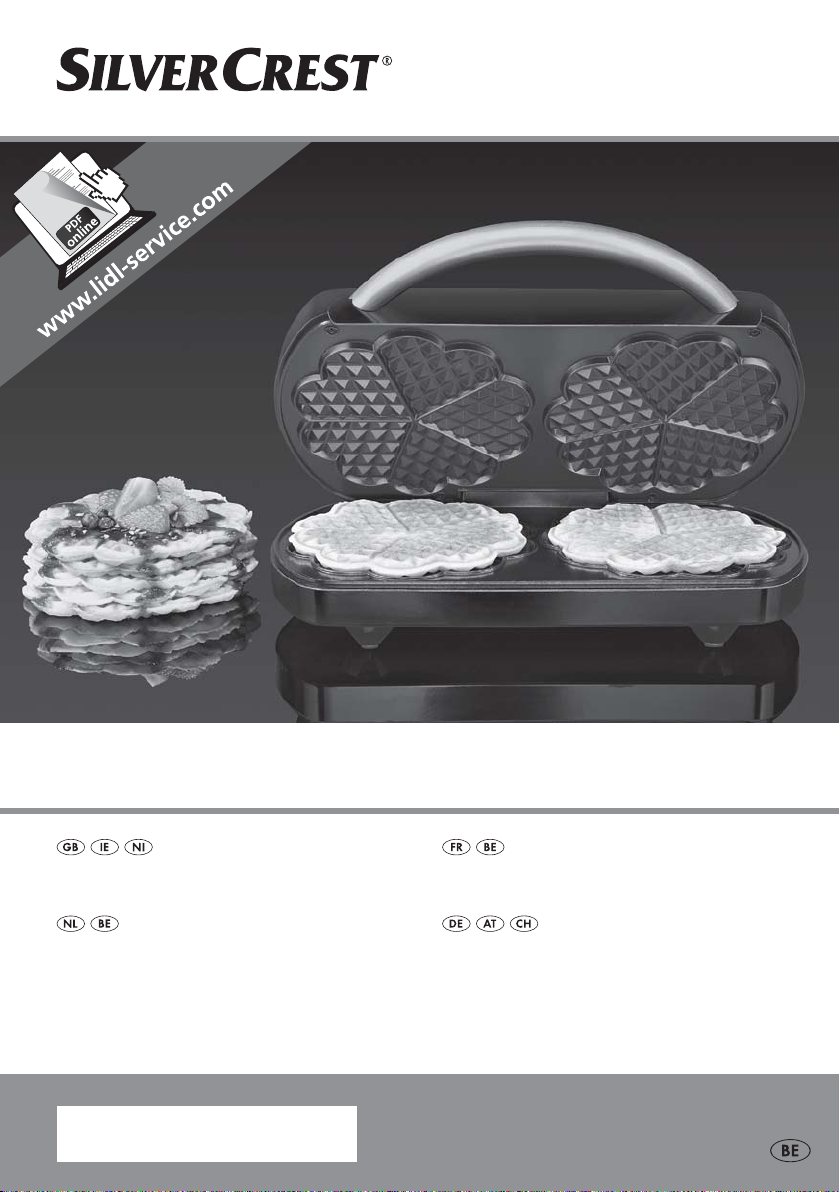
WAFFLE MAKER SDW 1200 B2
WAFFLE MAKER
Operating instructions
DUBBEL WAFELIJZER
Gebruiksaanwijzing
IAN 277009
GAUFRIER DOUBLE
Mode d’emploi
DOPPEL-WAFFELEISEN
Bedienungsanleitung
Before reading, unfold the page containing the illustrations and familiarise yourself with all functions of
the device.
Avant de lire le mode d'emploi, ouvrez la page contenant les illustrations et familiarisez-vous ensuite avec
toutes les fonctions de l'appareil.
Vouw vóór het lezen de pagina met de afbeelding en open en maak u vertrouwd met alle functies van het
apparaat.
Klappen Sie vor dem Lesen die Seite mit den Abbildungen aus und machen Sie sich anschließend mit allen
Funktionen des Gerätes vertraut.
GB / IE / NI Operating instructions Page 1
FR / BE Mode d'emploi Page 11
NL / BE Gebruiksaanwijzing Pagina 21
DE / AT / CH Bedienungsanleitung Seite 31


CONTENT PAGE
1. Intended Use 2
2. Items supplied 2
3. Appliance description 2
4. Technical data 2
5. Safety Instructions 3
6. Before the first usage 4
7. Baking waffles 4
8. Cleaning and care 5
9. Storage 6
10. Disposal 6
11. Kompernass Handels GmbH warranty 6
12. Service 7
13. Importeur 7
14. Recipes 8
1. Basic Batter...................................................................................................................................8
2. Sour cream waffles......................................................................................................................8
3. Chocolate waffles........................................................................................................................9
4. Poppy seed waffles......................................................................................................................9
5. Tomato waffles...........................................................................................................................10
- 1 -

WAFFLE MAKER
2. Items supplied
Congratulations on the purchase of your new appliance.
You have clearly decided in favour of a quality product. These operating instructions are a part of this
product. They contain important information in regard to safety, use and disposal. Before using the
product, familiarise yourself with all of these operating
and safety instructions. Use the product only as described and only for the specified areas of application.
In addition, pass these documents on, together with
the product, to any future owner.
1. Intended Use
This appliance is intended exclusively for the baking
of waffles. This appliance is intended exclusively for
use in domestic households. It is not intended for the
preparation of other foodstuffs. Do not use it for
commercial purposes.
• Waffle Maker
• Operating manual
Remove all packaging materials or labels from the
appliance after unpacking.
3. Appliance description
1 Operating light (red / green)
2 Browning regulator
3 Grip
4. Technical data
Voltage: 220 - 240 V ~ / 50 Hz
Power consumption: 1200 W
All of the parts of this appliance that come
into contact with food are food-safe.
- 2 -

5. Safety Instructions
Danger! Electric shock!
• Ensure that the appliance never comes into contact with water when the
plug is inserted into a power socket, especially if it is being used in the
kitchen and close to the sink.
• Ensure that the power cable never becomes wet or damp when the appliance is in use. Route the cable so that it cannot be trapped or damaged in
any way.
• Always disconnect the plug from the mains power socket after use.
• Arrange for defective power plugs and/or cables to be replaced at
once by qualified technicians or our Customer Service Department.
Attention! Risk of injury!
• Parts of the appliance will become hot during operation; you should
hold the appliance only by the grip. The browning regulator can also
become hot after a certain amount of operation – it is therefore best to
wear oven mitts.
• This appliance may be used by children of the age of 8 years or more
and by persons with reduced physical, sensory or mental capabilities or
lack of experience and/ or knowledge if they are being supervised or
have been instructed with regard to the safe use of the appliance and
have understood the potential risks.
• Children must not play with the appliance.
• Cleaning and user maintenance should not be performed by children,
unless they are older than 8 years of age and are supervised. Children
younger than 8 years of age are to be kept away from the appliance
and the power cable.
• Very hot steam clouds can escape when opening the lid. It is thus best to
wear oven mitts when opening the appliance.
Attention! Risk of fire!
• Bakery products can burn! Therefore, never place the appliance under
flammable objects, especially flammable curtains.
• Do not use an external timing switch or a separate remote control system
to operate the appliance.
• Never let the appliance be in use without supervision.
- 3 -

6. Before the first usage
7. Baking waffles
Before taking the appliance into use check to ensure
that the appliance, the power plug and the power
cable are all in a serviceable condition and that all
packaging materials have been removed.
First clean the appliance as described chapter
“8. Cleaning and care”.
Lightly grease the baking surfaces with an oil
that is suitable for baking/grilling. In this way any
production-related residues on the baking surfaces
are better dissolved.
Heat the appliance briefly to the maximum
temperature with the lid closed:
Note:
On this first use, the development of a light odour
may occur, caused by production residues (a slight
smoke development is also possible). This is normal
and dissipates after a short time. Provide for sufficient
ventilation. For example, open a window.
1. To do this, insert the plug into the wall socket and
set the browning regulator 2 to level 5.
2. The red operating light 1 glows as long as the
power plug is in the socket. The green operating
light 1 glows as soon as the appliance is sufficiently warmed up.
• Remove the power plug and, with the lid open,
allow the appliance to cool down.
Clean the appliance again as described under
“8. Cleaning and care”. The waffle maker is now
ready for use.
When you have prepared a pastry that is intended
for baking in the waffle machine:
1. Heat the appliance with the lid closed. To do this,
insert the plug into the wall socket and turn the
browning regulator 2 to level 3. The further you
turn the browning regulator 2 to the right, the
darker the waffles will be baked.
2. As soon as the green operating light 1 glows
the appliance is sufficiently warmed up.
Note:
If you have prepared a low-fat dough, for example
curd cheese dough, then lightly oil the baking surfaces
with an oil that is suitable for baking.
• Spread the dough evenly over the lower baking
surfaces. To determine the correct amount of
dough, fill it until the pastry is just touching the
edge of the baking surfaces. If necessary, increase
or decrease the amount of dough used in the next
waffle. Ensure that the batter does not run over
the edge of the baking surfaces.
Close the lid.
• After 2 minutes at the earliest you can open the
lid to check the baking result. Opening the lid
earlier will only tear the waffle.
• After about 3 minutes the waffle is baked.
Note:
As the ideal level of browning is very dependent on
personal taste and the type of pastry, the baking
time can vary: Therefore, bake the waffles until your
personally desired level of browning is achieved.
The level of browning can be determined either by
adjusting the browning regulator 2 or by the length
of baking time. In this way you can bake crispy
golden waffles.
- 4 -

• When removing the waffles ensure that you do
not damage the coating of the baking surfaces.
If you do, it will be harder to separate the waffles
from the surfaces.
Note:
The baking surfaces do not need to be greased
before each fresh waffle.
• After baking the last waffle, remove the power
plug from the wall socket and allow the appliance
to cool with the lid up.
8. Cleaning and care
Risk of electric shock!
Never open the casing of the appliance. There are
no user-serviceable elements inside. When the casing is open, there is the risk of receiving a fatal
electrical shock. Before cleaning the appliance,
remove the power plug from the wall socket and
allow the device to cool down completely.
Attention!
Under no circumstances may the components of the
appliance be submerged in water or other liquids!
There would be the risk of a fatal electric shock
upon the next use of the appliance should moisture
be present in the voltage conducting elements.
• First of all, clean the baking surfaces with a dry
paper towel to soak up the grease residue.
• Then clean all surfaces and the power cable with
a lightly moistened dish cloth. Always dry the
appliance well before using it again.
Attention!
• Do not use chemical or aggressive cleaning
agents or solvents. These could not only cause
damage to the appliance, they can also leave
traces that could be baked into the next waffles.
• Under no circumstances should you use hard
objects for cleaning. These could damage the
coatings of the baking surfaces.
For greasy soiling:
Apply some mild detergent onto a damp cloth. Use
it to rub the greasy soiling away. If this still does not
dissolve it, use a soft washing-up brush.
Remove the detergent residues thoroughly with a
wash cloth moistened with clean water. Completely
remove the detergent residues from the cloth with
clean water and then repeat the cleaning process
until all detergent residues are removed from the
waffel surfaces.
If you do not, there may be residues in the next waffles!
In the case of stubborn residues:
Place a piece of damp cloth on the stubborn
residues, so as to soften them. After that, you can
then remove the softened residues with a wet cloth.
- 5 -

9. Storage
Allow the appliance to cool off completely before
putting it into storage. Wind the mains cable around
the holder under the bottom of the appliance and
fix it with the cable clip.
Store the appliance in a dry location.
10. Disposal
Do not dispose of the appliance in your
normal domestic waste. This product is
subject to the European guideline
2012/19/EU.
Dispose of the appliance through an approved disposal centre or at your community waste facility.
Observe the currently applicable regulations.
In case of doubt, please contact your waste disposal
centre.
Dispose of all packaging materials in an
environmentally responsible manner.
11. Kompernass Handels
GmbH warranty
Dear Customer,
This appliance has a 3-year warranty valid from the
date of purchase. If this product has any faults, you,
the buyer, have certain statutory rights. Your statutory
rights are not restricted in any way by the warranty
described below.
Warranty conditions
The validity period of the warranty starts from the
date of purchase. Please keep your original receipt
in a safe place. This document will be required as
proof of purchase.
If any material or production fault occurs within
three years of the date of purchase of the product,
we will either repair or replace the product for you
at our discretion. This warranty service is dependent
on you presenting the defective appliance and the
proof of purchase (receipt) and a short written description of the fault and its time of occurrence.
If the defect is covered by the warranty, your product
will either be repaired or replaced by us. The repair
or replacement of a product does not signify the beginning of a new warranty period.
Warranty period and statutory claims
for defects
The warranty period is not prolonged by repairs
effected under the warranty. This also applies to
replaced and repaired components. Any damage
and defects present at the time of purchase must be
reported immediately after unpacking. Repairs
carried out after expiry of the warranty period shall
be subject to a fee.
Scope of the warranty
This appliance has been manufactured in accordance
with strict quality guidelines and inspected meticulously prior to delivery.
- 6 -

The warranty covers material faults or production
faults. The warranty does not extend to product
parts subject to normal wear and tear or fragile
parts such as switches, batteries, baking moulds or
parts made of glass.
The warranty does not apply if the product has been
damaged, improperly used or improperly maintained. The directions in the operating instructions for
the product regarding proper use of the product
are to be strictly followed. Uses and actions that are
discouraged in the operating instructions or which
are warned against must be avoided.
This product is intended solely for private use and
not for commercial purposes. The warranty shall be
deemed void in cases of misuse or improper handling, use of force and modifications/repairs which
have not been carried out by one of our authorised
Service centres.
Warranty claim procedure
To ensure quick processing of your case, please
observe the following instructions:
Please have the till receipt and the item number
(e.g. IAN 12345) available as proof of purchase.
You will find the item number on the type plate, an
engraving on the front page of the instructions (bottom left), or as a sticker on the rear or bottom of the
appliance.
?? If functional or other defects occur, please contact the service department listed either by telephone
or by e-mail.
You can return a defective product to us free of
charge to the service address that will be provided to
you. Ensure that you enclose the proof of purchase
(till receipt) and information about what the defect
is and when it occurred.
You can download these instructions
along with many other manuals,
product videos and software on
www.lidl-service.com.
12. Service
Service Great Britain
Tel.: 0871 5000 720 (£ 0.10/Min.)
E-Mail: kompernass@lidl.co.uk
Service Ireland
Tel.: 1890 930 034
(0,08 EUR/Min., (peak))
(0,06 EUR/Min., (off peak))
E-Mail: kompernass@lidl.ie
IAN 277009
13. Importeur
Please note that the following address is not the
service address. Please use the service address
provided in the operating instructions.
KOMPERNASS HANDELS GMBH
BURGSTRASSE 21
44867 BOCHUM
GERMANY
www.kompernass.com
- 7 -

14. Recipes
1. Basic Batter
For approx. 20 waffles
250 g margarine or butter (soft)
200 g sugar
2 packets of vanilla sugar
5 eggs
500 g flour
5 g baking powder
400 ml milk
Close the appliance and allow it to heat up.
Scramble the eggs and stir in the sugar and the
margarine or butter to form a smooth dough. Add
the vanilla sugar. Now add the flour and baking
powder, and stir in.
Lastly, add the milk bit by bit and stir in until the
dough has a smooth, soft consistency.
Place about 2 tablespoons of batter into the middle
of the lower baking surface, then close the waffle
iron. Let each waffle bake for about 3 minutes until
golden brown. Lay the cooked waffles on a cake grill.
2. Sour cream waffles
For approx. 8 waffles
200 g soft butter
150 g sugar
4 eggs
250 g sour cream
300 g flour
100 g corn starch
Close the appliance and allow it to heat up.
Beat the butter, sugar and eggs into a foamy batter.
Mix in the sour cream, then stir in the flour and corn
starch.
Place about 2 tablespoons of batter into the middle
of the lower baking surfaces, then close the waffle
iron. Allow each waffle to bake for about 3 minutes
until golden brown. Place the finished waffles on a
cake grill.
- 8 -

3. Chocolate waffles
4. Poppy seed waffles
For approx. 8 waffles
200 g soft butter
200 g sugar
4 eggs
150 g crème fraîche
80 g chocolate drops
200 g flour
Close the appliance and allow it to heat up.
Beat the butter with the sugar, eggs and crème
fraîche until creamy. Stir in the chocolate chips
and the flour.
Place about 2 tablespoons of batter into the middle
of each lower baking surface, then close the waffle
iron. Let each waffle bake for about 3 minutes until
golden brown. Lay the ready waffles on a cake grill.
For approx. 8 waffles
160 g soft butter
130 g sugar
3 eggs
100 g poppy seed mix (ready-to-use product)
200 g flour
5 g baking powder
Close the appliance and allow it to heat up.
Beat the butter with the sugar, eggs and poppy
seed mix to a foamy batter, then stir in the flour
and baking powder.
Place about 2 tablespoons of batter into the middle
of the lower baking surfaces, then close the waffle
iron. Allow each waffle to bake for about 3 minutes
until golden brown. Place the finished waffles on a
cake grill.
- 9 -

5. Tomato waffles
For approx. 8 waffles
5 eggs
100 g soft butter
1 tsp. salt
8 tbsp. butter milk
150 g flour
100 g tomatos, dried and marinaded in oil
3 stalks of basil
Close the appliance and allow it to heat up.
First separate the eggs. Beat the whites until stiff.
Beat the yolks with the butter and salt until creamy.
Then blend in the butter milk and the flour.
Drain the tomatos and cut them into small pieces.
Wash the basil and shake it dry. Pluck off the leaves
and cut into small pieces. Stir the tomatoes and
basil into the mixture, then mix in the egg white.
Stir the batter occasionally so that the tomato pieces
are distributed evenly.
Place about 2 tablespoons of pastry mixture into the
middle of each lower baking surface, then close the
waffle iron. Let each waffle bake for about 4 minutes
until golden brown. Lay the ready waffles on a cake
grill.
- 10 -

SOMMAIRE PAGE
1. Finalité de l'appareil 12
2. Accessoires fournis 12
3. Description de l'appareil 12
4. Caractéristiques techniques 12
5. Consignes de sécurité 13
6. Avant la première mise en service 14
7. Faire des gaufres 14
8. Nettoyage et entretien 15
9. Rangement 16
10. Mise au rebut 16
11. Garantie de Kompernass Handels GmbH 16
12. Service après-vente 17
13. Importateur 17
14. Délicieuses recettes de gaufres 18
1. Pâte de base..............................................................................................................................18
2. Gaufres à la crème aigre.........................................................................................................18
3. Gaufres au chocolat ................................................................................................................19
4. Gaufres aux graines de pavot.................................................................................................19
5. Gaufres aux tomates.................................................................................................................20
- 11 -
 Loading...