

Page 1
3
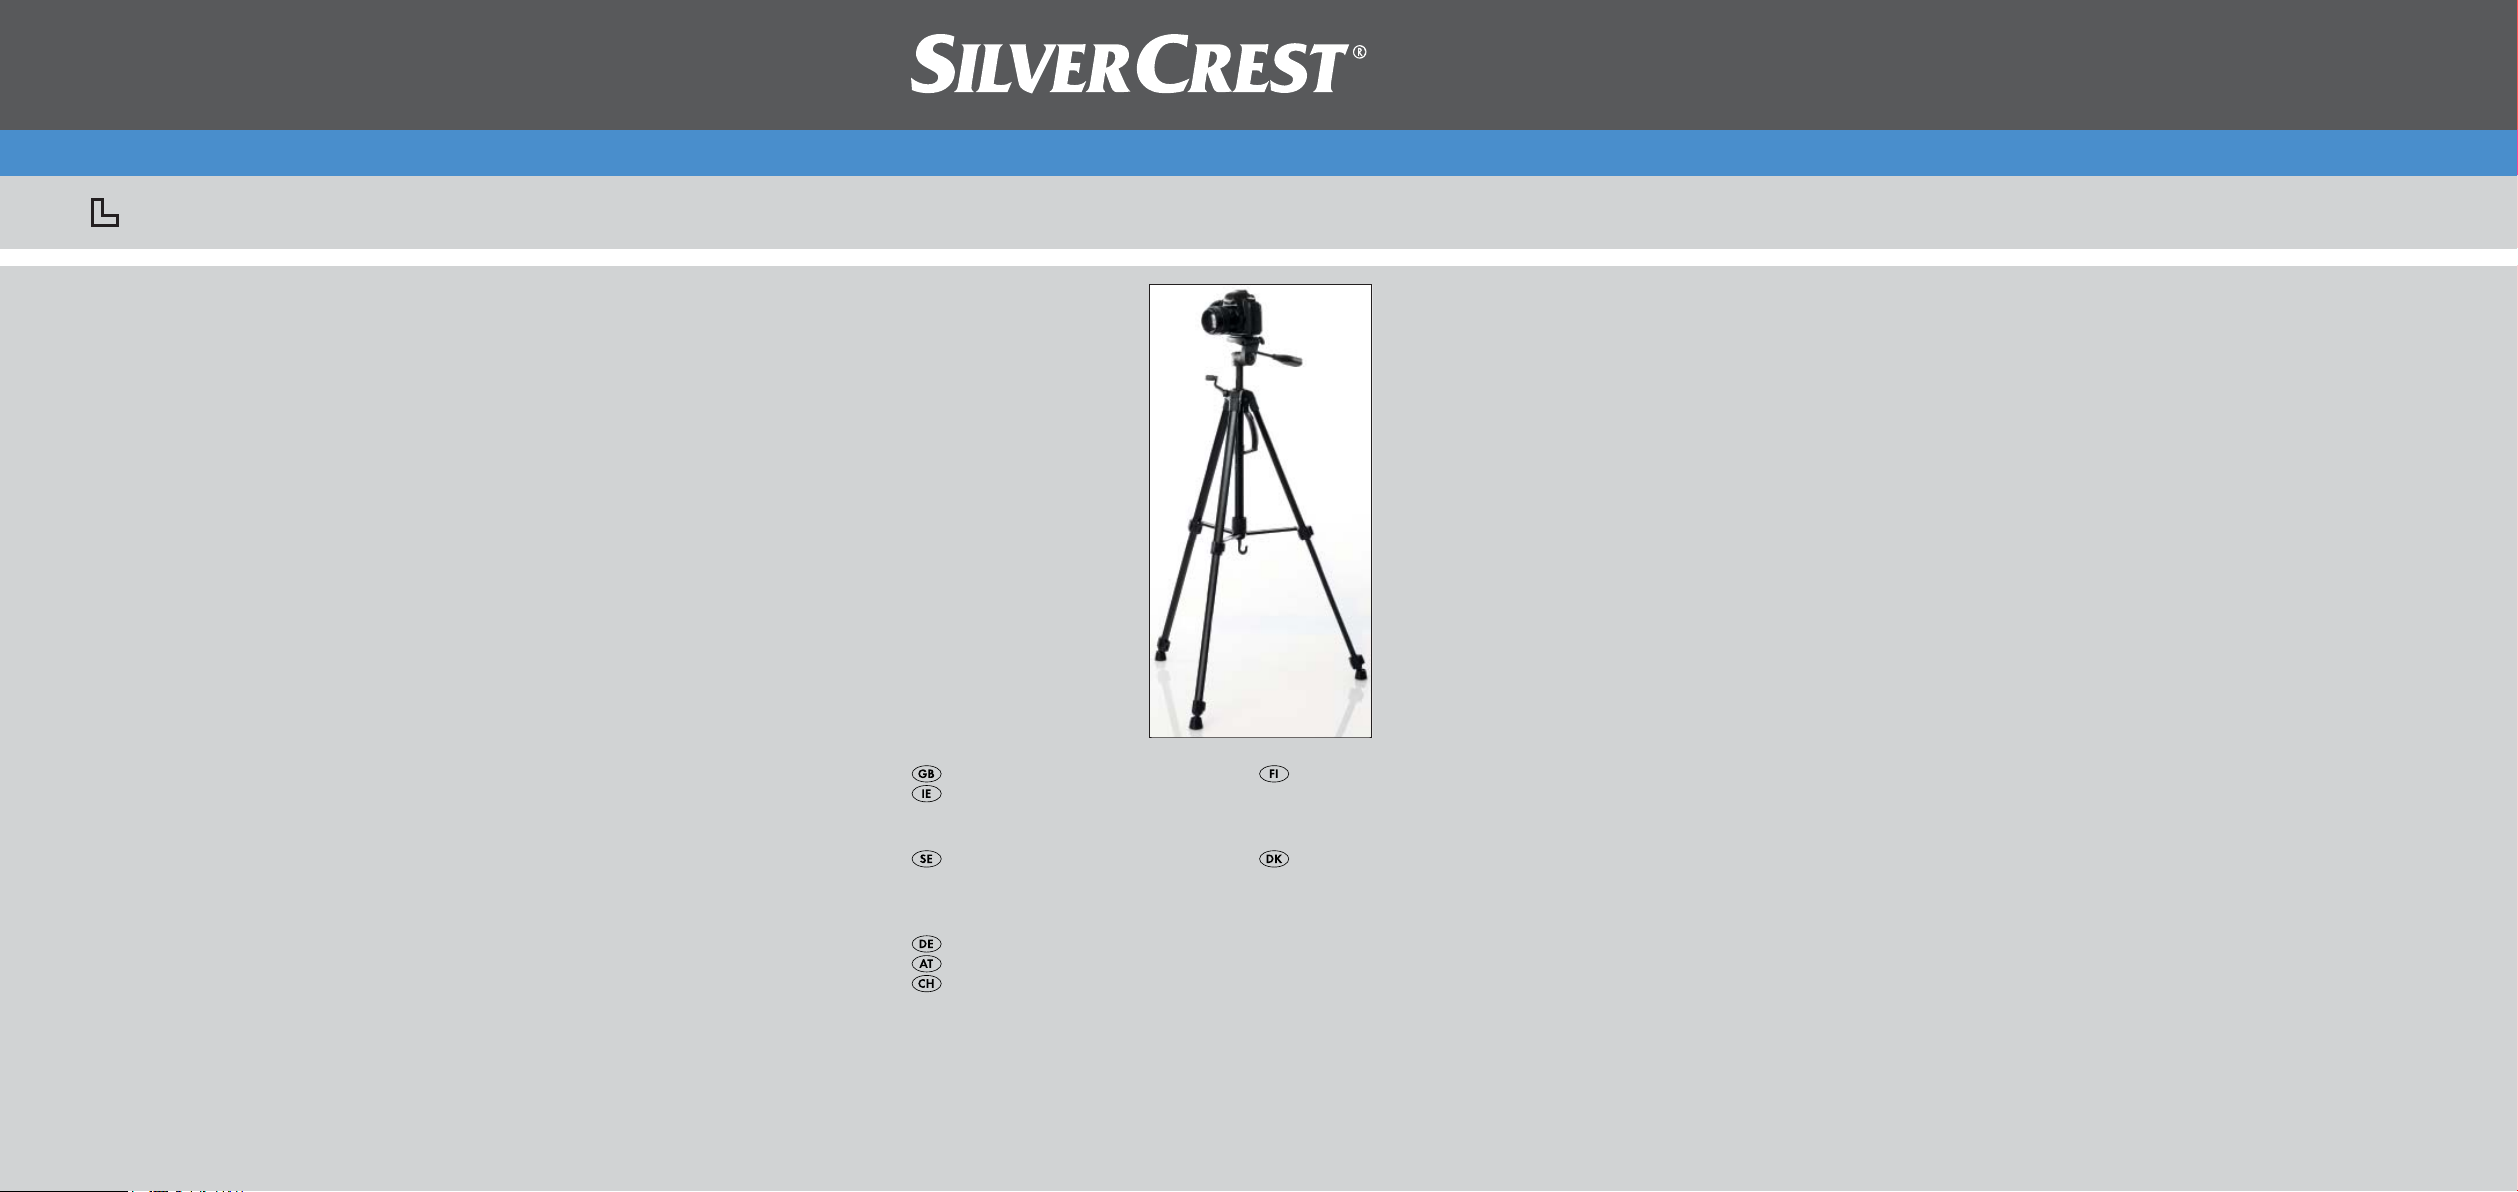
Telescopic Camera Tripod SDS 3000 A1
KOMPERNASS GMBH
BURGSTRASSE 21 · D-44867 BOCHUM
www.kompernass.com
ID-Nr.: SDS3000A1-12/10-V2
IAN: 61190
Telescopic Camera Tripod
Operating instructions
Teleskopfotostativ
Bruksanvisning
Teleskop-Fotostativ
Bedienungsanleitung
Teleskooppijalusta
Käyttöohje
Teleskopstativ
Betjeningsvejledning
Page 2

SDS 3000 A1
1
2
3
0
z
t
q
9
8
4
5
6
7
w
e
r
Page 3

Index
Introduction . . . . . . . . . . . . . . . . . . . . . . . . . . . . . . . . . . . . . . . . . . . . . . . . . . . 2
Information for these operating instructions . . . . . . . . . . . . . . . . . . . . . . . . . . . . . . . . . . . . . 2
Copyright . . . . . . . . . . . . . . . . . . . . . . . . . . . . . . . . . . . . . . . . . . . . . . . . . . . . . . . . . . . . . . . 2
Intended use . . . . . . . . . . . . . . . . . . . . . . . . . . . . . . . . . . . . . . . . . . . . . . . . . . . . . . . . . . . . 2
Safety instructions . . . . . . . . . . . . . . . . . . . . . . . . . . . . . . . . . . . . . . . . . . . . . 3
Items supplied . . . . . . . . . . . . . . . . . . . . . . . . . . . . . . . . . . . . . . . . . . . . . . . . . 4
Operating components . . . . . . . . . . . . . . . . . . . . . . . . . . . . . . . . . . . . . . . . . 4
Setup . . . . . . . . . . . . . . . . . . . . . . . . . . . . . . . . . . . . . . . . . . . . . . . . . . . . . . . . 5
Unpacking . . . . . . . . . . . . . . . . . . . . . . . . . . . . . . . . . . . . . . . . . . . . . . . . . . . . . . . . . . . . . . 5
Disposal of the packaging . . . . . . . . . . . . . . . . . . . . . . . . . . . . . . . . . . . . . . . . . . . . . . . . . . 5
Setting the tripod up . . . . . . . . . . . . . . . . . . . . . . . . . . . . . . . . . . . . . . . . . . . . . . . . . . . . . . 5
Securing devices . . . . . . . . . . . . . . . . . . . . . . . . . . . . . . . . . . . . . . . . . . . . . . . 6
Using the tripod. . . . . . . . . . . . . . . . . . . . . . . . . . . . . . . . . . . . . . . . . . . . . . . . 6
Transportation and storage . . . . . . . . . . . . . . . . . . . . . . . . . . . . . . . . . . . . . . 7
Cleaning and Care . . . . . . . . . . . . . . . . . . . . . . . . . . . . . . . . . . . . . . . . . . . . . 7
Disposal of the device . . . . . . . . . . . . . . . . . . . . . . . . . . . . . . . . . . . . . . . . . . . 7
GB
IE
Technical data . . . . . . . . . . . . . . . . . . . . . . . . . . . . . . . . . . . . . . . . . . . . . . . . . 7
Importer . . . . . . . . . . . . . . . . . . . . . . . . . . . . . . . . . . . . . . . . . . . . . . . . . . . . . . 8
Service . . . . . . . . . . . . . . . . . . . . . . . . . . . . . . . . . . . . . . . . . . . . . . . . . . . . . . . 8
SDS 3000 A1
1
Page 4

GB
IE
Introduction
Information for these operating instructions
These operating instructions are a component of the Telescopic Camera Tripod
SEAD 1800 A1 and they provide you with important information about the
intended use, the safety and the handling of the appliance.
These operating instructions must be constantly kept available close to the tripod.
They are to be read and applied by everyone assigned to operate the tripod.
Retain these operating instructions and pass them on, together with the tripod, to
any future owners.
Copyright
This documentation is copyright protected.
Any copying or reproduction, including as extracts, as well as the reproduction of
images, also in an altered state, is only permitted with the written authorisation of
the manufacturer.
Intended use
This tripod is designed for the secure attachment of photo cameras, video cameras
and similar devices with a 1/4 inch thread.
This tripod is intended for domestic use only, it is not suitable for commercial or
industrial applications.
Claims of any kind resulting from damage caused by improper use, incompetent
repairs, unauthorized modifi cations or the use of non-approved spare parts will
not be acknowledged.
The operator alone bears liability.
2
SDS 3000 A1
Page 5

Safety instructions
For safe handling of the tripod observe the following safety information:
WARNING - RISK OF INJURY!
►
This appliance is not intended for use by individuals (including children)
with restricted physical, physiological or intellectual abilities or defi ciences
in experience and/or knowledge unless they are supervised by a person
responsible for their safety or receive from this person instruction in how the
appliance is to be used.
Children should be supervised to ensure that they do not play with the ►
appliance.
WARNING - PROPERTY DAMAGE!
Ensure that the tripod stands securely and fi rmly. If you do not, it may fall ►
over and the tripod as well as the attached device may be damaged.
►
Ensure that the device is fi rmly screwed onto the quick release plate.
Otherwise, it may fall off and become damaged!
Ensure that the quick release plate is fi rmly attached to the tripod plate. ►
Otherwise, the affi xed device may fall off and be damaged!
►
Never burden the tripod with more weight than that indicated in the technical
data. If you do, the device and the tripod may be damaged.
Defective components may only be replaced with original replacement
►
parts. Only by using original replacement parts can you guarantee that the
safety requirements are complied with.
GB
IE
SDS 3000 A1
3
Page 6

GB
IE
Items supplied
The device is delivered with the following components as standard:
Tripod
▯
Transport bag ▯
Operating instructions ▯
NOTICE
Check the contents to ensure that everything is present and for signs of ►
visible damage.
If the contents are incomplete or have been damaged due to defective ►
packaging or through transportation, contact the Service Hotline (see
chapter Service).
Operating components
1 Thread
2 Quick release plate
3 Tripod plate
4 Adjustment spirit level
5 Locking screw "360°"
6 Levelling spirit level
7 Locking screw "Height"
8 Locking device
9 Tripod head screw
0 Grip
q Crank
w Locking ring
e Locking lever
r Locking lever
t Accessory hook
z Transport handle
4
SDS 3000 A1
Page 7
Setup
Unpacking
Remove all parts of the tripod and the operating instructions from the ■
packaging.
Remove all packing material.
■
Disposal of the packaging
The packaging protects the appliance from transport damage. The packaging
materials are selected from the point of view of their environmental friendliness
and disposal technology and are therefore recyclable.
The return of packaging into the material circuit saves on raw materials and
reduces the amount of generated waste. Dispose of packaging material that
is no longer needed according to the regionally established regulations.
Setting the tripod up
Open the tripod out completely, so that the locking ring 1) w touches the
column end..
Turn the locking ring 2) w fi rmly in a clockwise direction so that it can no
longer move.
Loosen the locking levers 3) e+r to unlock the legs of the tripod and pull
them out to the required lengths.
Align the tripod by shifting the legs as required. For this use the levelling spirit 4)
level 6.
GB
IE
SDS 3000 A1
NOTICE
The air bubble must be located in the middle of the circular marking. ►
When you have found the right position, relock the tripod legs with the 5)
locking levers e+r.
Now align - if you want to have the tripod plate 6) 3 lined up exactly horizontally - the tripod plate 3. For this, turn on the grip 0 and move it up or,
respectively, down.
NOTICE
The air bubble of the adjustment spirit level ► 4 must be located between
the two markings.
5
Page 8

GB
IE
Securing devices
NOTICE
This tripod is equipped with a quick release plate ► 2. When a device is
screwed onto the quick release plate 2 you can, by sliding the locking
device 8 on the side of the tripod plate 3, loosen the device together
with the quick release plate 2 from the tripod plate 3. Thus, you do not
always have to unscrew the device from the thread 1.
Remove the quick release plate 1) 2 from the tripod. For this, slide the locking
device 8 to the side so that you can lift the quick release plate 2.
Screw the required device onto the quick release plate 2) 2. To do this, turn
the screw - with the help of the handle on the underside of the quick release
plate 2 - until the device is fi rmly seated.
To replace the quick release plate 3) 2 complete with the device back on
the tripod plate 3, slide the locking device 8 to the side and reposition
the quick release plate 2. Then secure the locking device 8, such that the
quick release plate 2 is fi rmly seated.
Using the tripod
When you have set the tripod up and the device is mounted on it, you can then
adjust it as follows:
Loosen the locking screw “High”
■ 7 to a point where the crank q can be
turned easily. Turn the crank q to adjust the height. When the desired height
has been reached, fi rmly retighten the locking screw “High” 7.
NOTICE
Always hold the grip ► 0 fi rmly when you loosen the locking screw “High”
7 and turn the crank q. Otherwise – if the locking screw “High” 7 is
loosened and the crank q is not fi rmly held - the rod with the attached
device could fall down to the lowest setting and, through it, the device
could be damaged.
■
To swivel the device horizontally through up to 360°, loosen the locking
screw "360°" 5. Take hold of the grip 0 and swivel the tripod plate 3.
When you have reached the desired position, retighten the locking screw
"360°" 5 fi rmly.
To adjust the tilt angle, rotate the grip
■ 0 and move it either up or down.
When the desired tilt angle has been reached, rotate the grip 0 again until
it is fi rm.
6
SDS 3000 A1
Page 9

Should you wish to bring the tripod plate ■ 3 through up to 90°, from the
vertical to the horizontal position, to take for example photos in portrait
format, then loosen the tripod head screw 9. Swivel the tripod plate 3 into
the required position and then retighten the tripod plate screw 9 fi rmly.
NOTICE
You can additionally stabilise the tripod by placing a weight (max. 2 kg) ►
on the accessory hook t.
Transportation and storage
Transport the tripod by using the transport handle ■ z. This is also possible
when it is set up.
If you need to transport the tripod over long distances, then slide it together
■
and place it into the supplied transport bag.
Store the tripod at a clean and dry location. Preferably, in the supplied
■
transport bag.
Cleaning and Care
WARNING - PROPERTY DAMAGE!
Do not use abrasive or aggressive cleaning materials. These could attack ►
the upper surfaces and irreparably damage the tripod.
■
Clean the tripod with a lightly moistened cloth.. For stubborn soiling use a
mild detergent on the cloth..
GB
IE
Disposal of the device
Dispose of the appliance through an approved disposal centre or at your community waste facility. Observe the currently applicable regulations. In case of
doubt, please contact your waste disposal centre.
Technical data
Max. loading approx. 3 kg
Height when compacted approx. 55. 5 cm
Height when fully extended approx. 157 cm
Thread size 1/4 inch
SDS 3000 A1
7
Page 10

GB
IE
Importer
KOMPERNASS GMBH
BURGSTRASSE 21
44867 BOCHUM, GERMANY
www.kompernass.com
Service
DES UK LTD
Tel.: 0871 5000 700
E-Mail: support.uk@kompernass.com
Kompernass Service Ireland
Tel: 1850 930 412
Standard call rates apply. Mobile operators may vary.
E-Mail: support.ie@kompernass.com
(£ 0.10 / minute)
(0,082 EUR/Min.)
8
SDS 3000 A1
Page 11

Sisällysluettelo
Johdanto . . . . . . . . . . . . . . . . . . . . . . . . . . . . . . . . . . . . . . . . . . . . . . . . . . . . 10
Tietoja tästä käyttöohjeesta . . . . . . . . . . . . . . . . . . . . . . . . . . . . . . . . . . . . . . . . . . . . . . . . 10
Tekijänoikeus . . . . . . . . . . . . . . . . . . . . . . . . . . . . . . . . . . . . . . . . . . . . . . . . . . . . . . . . . . . 10
Määräystenmukainen käyttö . . . . . . . . . . . . . . . . . . . . . . . . . . . . . . . . . . . . . . . . . . . . . . . 10
Turvaohjeet . . . . . . . . . . . . . . . . . . . . . . . . . . . . . . . . . . . . . . . . . . . . . . . . . . 11
Toimituslaajuus . . . . . . . . . . . . . . . . . . . . . . . . . . . . . . . . . . . . . . . . . . . . . . . 12
Osat . . . . . . . . . . . . . . . . . . . . . . . . . . . . . . . . . . . . . . . . . . . . . . . . . . . . . . . . 12
Pystytys . . . . . . . . . . . . . . . . . . . . . . . . . . . . . . . . . . . . . . . . . . . . . . . . . . . . . 13
Purkaminen pakkauksesta . . . . . . . . . . . . . . . . . . . . . . . . . . . . . . . . . . . . . . . . . . . . . . . . . 13
Pakkauksen hävittäminen . . . . . . . . . . . . . . . . . . . . . . . . . . . . . . . . . . . . . . . . . . . . . . . . . . 13
Teleskooppijalustan pystytys . . . . . . . . . . . . . . . . . . . . . . . . . . . . . . . . . . . . . . . . . . . . . . . 13
Laitteen kiinnittäminen . . . . . . . . . . . . . . . . . . . . . . . . . . . . . . . . . . . . . . . . . 14
Teleskooppijalustan käyttö . . . . . . . . . . . . . . . . . . . . . . . . . . . . . . . . . . . . . 14
Kuljettaminen ja säilyttäminen . . . . . . . . . . . . . . . . . . . . . . . . . . . . . . . . . . 15
Puhdistus ja huolto . . . . . . . . . . . . . . . . . . . . . . . . . . . . . . . . . . . . . . . . . . . . 15
Laitteen hävittäminen . . . . . . . . . . . . . . . . . . . . . . . . . . . . . . . . . . . . . . . . . . 15
FI
Tekniset tiedot . . . . . . . . . . . . . . . . . . . . . . . . . . . . . . . . . . . . . . . . . . . . . . . . 15
Maahantuoja . . . . . . . . . . . . . . . . . . . . . . . . . . . . . . . . . . . . . . . . . . . . . . . . . 16
Huolto . . . . . . . . . . . . . . . . . . . . . . . . . . . . . . . . . . . . . . . . . . . . . . . . . . . . . . 16
SDS 3000 A1
9
Page 12

Johdanto
Tietoja tästä käyttöohjeesta
FI
Tekijänoikeus
Määräystenmukainen käyttö
Tämä käyttöohje on teleskooppijalustan SDS 3000 A1 osa ja se antaa tärkeitä
ohjeita teleskooppijalustan määräystenmukaisesta käytöstä, turvallisuudesta ja
käsittelystä.
Käyttöohjeen on oltava jatkuvasti käytettävissä teleskooppijalustan lähellä.
Teleskooppijalustaa käyttävien henkilöiden on luettava se ja noudatettava sitä.
Säilytä tämä käyttöohje ja anna tämä teleskooppijalustan kanssa edelleen
seuraavalle omistajalle.
Tämä asiakirja on suojattu tekijänoikeuden nojalla.
Kaikenlainen monistaminen tai kaikki jälkipainatus, myös osittain, sekä kuvien
toistaminen, myös muunnetussa muodossa, on sallittua ainoastaan valmistajan
kirjallisella suostumuksella.
Teleskooppijalusta on tarkoitettu kameroiden, videokameroiden tai muiden
1/4-tuumaisella kierteellä varustettujen laitteiden tukevaan pystytykseen.
Teleskooppijalusta on tarkoitettu ainoastaan yksityiseen käyttöön, eikä se sovellu
kaupallisiin tai teollisiin tarkoituksiin.
Valmistaja ei vastaa määräystenvastaisesta käytöstä, virheellisistä korjauksista,
luvattomasti suoritetuista muutoksista tai muiden kuin hyväksyttyjen varaosien
käytöstä aiheutuvista vahingoista.
Riski on yksinomaan käyttäjän.
10
SDS 3000 A1
Page 13

Turvaohjeet
Huomioi teleskooppijalustan turvallisen käytön takaamiseksi seuraavat turvaohjeet:
VAROITUS - LOUKKAANTUMISVAARA!
►
Tätä laitetta ei ole tarkoitettu sellaisten henkilöiden (mukaan lukien lapset)
käyttöön, joiden rajoitetut, fyysiset, aistilliset tai henkiset kyvyt tai kokemuksen
ja/tai tiedon puute estävät käytön, lukuun ottamatta tilanteita, joissa heitä
valvoo turvallisuudesta vastaava henkilö tai joissa he ovat saaneet tältä
ohjeita laitteen käytöstä.
Lapsia on valvottava, jotta varmistettaisiin, etteivät he leiki laitteella. ►
HUOMIO - AINEELLISET VAHINGOT!
Varmista, että teleskooppijalusta seisoo varmasti ja tukevasti. Muuten se voi ►
kaatua ja teleskooppijalusta sekä sille asetettu laite vaurioitua.
►
Varmista, että laite on ruuvattu tiukasti pikaliitäntälevyyn. Muuten se voi
pudota ja vaurioitua!
Varmista, että pikakytkinlevy on liitetty tiukasti jalustan lautaseen. Muuten ►
jalustaan kierretty laite voi pudota ja vaurioitua.
Älä kuormita teleskooppijalustaa teknisissä tiedoissa ilmoitettua painoa ►
suuremmalla kuormalla. Muuten laite ja teleskooppijalusta voivat vaurioitua.
►
Vialliset rakenneosat saa vaihtaa ainoastaan alkuperäisiin varaosiin. Vain
näillä osilla on taattua, että ne täyttävät turvallisuusvaatimukset.
FI
SDS 3000 A1
11
Page 14

Toimituslaajuus
Laite toimitetaan vakiona seuraavina osina:
Teleskooppijalusta
FI
▯
Kantolaukku ▯
Käyttöohje ▯
OHJE
Tarkasta toimituksen täydellisyys ja tarkista osat näkyvien vaurioiden ►
varalta.
Jos havaitset toimituksessa puutteita tai puutteellisesta pakkauksesta tai ►
kuljetuksesta aiheutuneita vaurioita, käänny huollon palvelunumeron puoleen
(katso luku Huolto).
Osat
1 Kierre
2 Pikakytkinlevy
3 Jalustan lautanen
4 Säätövesivaaka
5 Kiinnitysruuvi "360°"
6 Tasausvesivaaka
7 Kiinnitysruuvi "Korkeus"
8 Lukitus
9 Jalustan lautasen ruuvi
0 K a h v a
q K a m p i
w Kiinnitysrengas
e Lukitusvipu
r Lukitusvipu
t Lisävarustekoukku
z Kantokahva
12
SDS 3000 A1
Page 15
Pystytys
Purkaminen pakkauksesta
Ota kaikki teleskooppijalustan osat ja käyttöohje pakkauksesta. ■
Poista koko pakkausmateriaali ■
Pakkauksen hävittäminen
Pakkaus suojaa laitetta kuljetusvaurioilta. Pakkausmateriaalit on valittu ympäristöystävällisyys ja kierrätystekniset näkökannat huomioiden ja siksi ne voidaan
kierrättää.
Pakkauksen palauttaminen materiaalikiertoon säästää raaka-aineita ja vähentää
jätteiden syntymistä. Hävitä tarpeettomat pakkausmateriaalit paikallisten voimassa
olevien määräysten mukaisesti.
Teleskooppijalustan pystytys
Avaa teleskooppijalusta täydellisesti niin, että kiinnitysrengas 1) w koskee
tangon päätä.
Kierrä kiinnitysrengas 2) w kiinni myötäpäivään niin, ettei se pääse enää
liikkumaan.
Avaa lukitusvivut 3) e+r vapauttaaksesi teleskooppijalustan jalkojen lukituksen ja vedä ne ulos haluttuun pituuteen.
Tasaa teleskooppijalusta jalkoja siirtämällä. Käytä tähän tasausvesivaakaa 4) 6.
FI
SDS 3000 A1
OHJE
Ilmakuplan tulee sijaita keskellä rengasmerkintää. ►
Kun olet löytänyt oikean asennon, lukitse teleskooppijalustan jalat uudelleen 5)
lukitusvivuilla e+r.
Oikaise nyt jos haluat jalustan lautasen 6) 3 olevan täysin vaakasuorassa, oikaise nyt jalustan lautanen 3. Kierrä sitä varten kahvasta 0 ja liikuta lautasta
ylöspäin tai alaspäin.
OHJE
Säätövesivaa'an ► 4 ilmakuplan on sijaittava molempien merkintöjen
välissä.
13
Page 16

Laitteen kiinnittäminen
OHJE
FI
Tämä teleskooppijalusta on varustettu pikakytkinlevyllä ► 2. Kun laite on
ruuvattu pikakytkinlevylle 2, voidaan jalustan lautasen 3 sivussa olevaa
lukitusta 8 työntämällä irrottaa laite yhdessä pikakytkinlevyn 2 kanssa ja-
lustan lautaselta 3. Näin laitetta ei tarvitse aina ruuvata irti kierteestä 1.
Irrota pikakytkinlevy 1) 2 teleskooppijalustasta. Työnnä tätä varten lukitus 8
sivuun niin, että voit nostaa pikakytkinlevyn 2 ylös.
Kierrä haluamasi laite pikakytkinlevylle 2) 2. Kierrä tätä varten ruuvia kaaren
avulla pikakytkinlevyn 2 pohjassa niin pitkälle, kunnes laite on tiukasti
paikoillaan.
Pikakytkinlevy 3) 2 ja laite liitetään jälleen jalustan lautaselle 3 työntämällä
lukitus 8 sivuun ja asettamalla pikakytkinlevy 2 jälleen paikoilleen. Sulje
sitten lukitus 8 niin, että pikakytkinlevy 2 on tiukasti paikoillaan.
Teleskooppijalustan käyttö
Kun teleskooppijalusta on pystytetty ja laite on asennettu jalustalle, sitä voidaan
säätää seuraavasti:
Avaa kiinnitysruuvia ”Korkeus”
■ 7 niin pitkälle, että kampea q voidaan kier-
tää ongelmitta. Kierrä kampea q säätääksesi korkeutta. Kun haluttu korkeus
on saavutettu, kiristä kiinnitysruuvi ”Korkeus” 7 uudelleen tiukalle.
14
OHJE
Pidä aina kahvasta ► 0 kiinni, kun avaat kiinnitysruuvia 7 ”Korkeus” ja kier-
rät kampea q. Muutoin - kun kiinnitysruuvi 7 on avattu, eikä kammesta
q pidetä kiinni - tanko ja sille asetettu laite voi pudota alimpaan asentoon
ja laite vaurioitua.
■
Voit kääntää laitetta jopa 360° vaakatasossa avaamalla kiinnitysruuvi
"360°" 5 . Ota kahvasta 0 kiinni ja käännä jalustan lautasta 3. Kun
olet saavuttanut haluamasi asennon, kierrä kiinnitysruuvi "360°" 5 jälleen
tiukalle.
Säädä kallistuskulmaa kiertämällä kahvasta
■ 0 ja liikuttamalla sitä ylöspäin
tai alaspäin. Kun haluttu kallistuskulma on saavutettu, kierrä kahva 0 jälleen
tiukalle.
Jos haluat saattaa jalustan lautasen
■ 3 korkeintaan 90° pystysuorasta asen-
nosta vaaka-asentoon, esimerkiksi pystykuvien ottamista varten, avaa silloin
jalustan lautasen ruuvi 9. Käännä jalustan lautanen 3 haluttuun asentoon
ja ruuvaa jalustan lautasen ruuvi 9 jälleen tiukalle.
SDS 3000 A1
Page 17

OHJE
Voit vakauttaa teleskooppijalustaa lisää kiinnittämällä painon (kork. 2 kg) ►
lisätarvikekoukkuun t.
Kuljettaminen ja säilyttäminen
Kuljeta teleskooppijalustaa kantokahvasta ■ z. Se on mahdollista myös
pystytettynä.
Jos kuljetat teleskooppijalustaa pidempiä matkoja, työnnä se kasaan ja laita
■
se mukana tulevaan kantolaukkuun.
Säilytä teleskooppijalustaa puhtaassa ja kuivassa paikassa. Mieluiten mukana
■
tulevassa kantolaukussa.
Puhdistus ja huolto
HUOMIO - AINEELLISET VAHINGOT!
Älä käytä hankaavia tai syövyttäviä puhdistusaineita. Nämä voivat vahingoit- ►
taa pintaa ja vaurioittaa teleskooppijalustan korjauskelvottomaan kuntoon.
■
Puhdista teleskooppijalusta kevyesti kostutetulla liinalla. Jos lika on kovapintaista, lisää liinaan mietoa astianpesuainetta.
Laitteen hävittäminen
Hävitä laite hyväksytyn jätteenhuoltoyrityksen tai kunnallisen jätehuollon kautta.
Noudata voimassa olevia määräyksiä. Ota epävarmoissa tapauksissa yhteyttä
jätelaitokseesi.
FI
Tekniset tiedot
Maks. kuormitus n. 3 kg
Korkeus koottuna n. 55, 5 cm
Korkeus ulos vedettynä n. 157 cm
Kierteen koko 1/4 tuumaa
SDS 3000 A1
15
Page 18

Maahantuoja
KOMPERNASS GMBH
FI
BURGSTRASSE 21
44867 BOCHUM, SAKSA
www.kompernass.com
Huolto
Kompernass Service Suomi
Tel.: 010 30 935 80
(Soittamisen hinta lankaliittymästä: 8,21 snt/puh + 5,9 snt/min /
Matkapuhelimesta: 8,21 snt/puh + 16,90 snt/min)
E-Mail: support.fi @kompernass.com
16
SDS 3000 A1
Page 19

Innehållsförteckning
Introduktion . . . . . . . . . . . . . . . . . . . . . . . . . . . . . . . . . . . . . . . . . . . . . . . . . 18
Information om den här bruksanvisningen . . . . . . . . . . . . . . . . . . . . . . . . . . . . . . . . . . . . . 18
Upphovsrätt . . . . . . . . . . . . . . . . . . . . . . . . . . . . . . . . . . . . . . . . . . . . . . . . . . . . . . . . . . . . 18
Föreskriven användning . . . . . . . . . . . . . . . . . . . . . . . . . . . . . . . . . . . . . . . . . . . . . . . . . . . 18
Säkerhetsanvisningar . . . . . . . . . . . . . . . . . . . . . . . . . . . . . . . . . . . . . . . . . 19
Leveransens innehåll . . . . . . . . . . . . . . . . . . . . . . . . . . . . . . . . . . . . . . . . . . 20
Komponenter . . . . . . . . . . . . . . . . . . . . . . . . . . . . . . . . . . . . . . . . . . . . . . . . 20
Uppställning . . . . . . . . . . . . . . . . . . . . . . . . . . . . . . . . . . . . . . . . . . . . . . . . .21
Uppackning . . . . . . . . . . . . . . . . . . . . . . . . . . . . . . . . . . . . . . . . . . . . . . . . . . . . . . . . . . . . 21
Kassera förpackningen . . . . . . . . . . . . . . . . . . . . . . . . . . . . . . . . . . . . . . . . . . . . . . . . . . . 21
Ställa upp stativet. . . . . . . . . . . . . . . . . . . . . . . . . . . . . . . . . . . . . . . . . . . . . . . . . . . . . . . . 21
Fästa apparaten . . . . . . . . . . . . . . . . . . . . . . . . . . . . . . . . . . . . . . . . . . . . . . 22
Använda stativet . . . . . . . . . . . . . . . . . . . . . . . . . . . . . . . . . . . . . . . . . . . . . . 22
Transport och förvaring . . . . . . . . . . . . . . . . . . . . . . . . . . . . . . . . . . . . . . . . 23
Rengöring och skötsel . . . . . . . . . . . . . . . . . . . . . . . . . . . . . . . . . . . . . . . . . 23
Kassera produkten . . . . . . . . . . . . . . . . . . . . . . . . . . . . . . . . . . . . . . . . . . . . 23
Tekniska data . . . . . . . . . . . . . . . . . . . . . . . . . . . . . . . . . . . . . . . . . . . . . . . . 23
Importör . . . . . . . . . . . . . . . . . . . . . . . . . . . . . . . . . . . . . . . . . . . . . . . . . . . . 24
Service . . . . . . . . . . . . . . . . . . . . . . . . . . . . . . . . . . . . . . . . . . . . . . . . . . . . . . 24
SE
SDS 3000 A1
17
Page 20

SE
Introduktion
Information om den här bruksanvisningen
Den här bruksanvisningen ingår som en del i leveransen av stativ SDS 3000 A1
och den innehåller viktig information om föreskriven användning, säkerhet och
hantering av produkten.
Bruksanvisningen måste alltid förvaras i närheten av produkten. Anvisningarna
ska läsas och följas av alla som använder stativet.
Ta väl vara på bruksanvisningen och lämna över den tillsammans med stativet
om du överlåter det till någon annan person.
Upphovsrätt
Det här dokumetet skyddas av upphovsrätt.
All form av mångfaldigande eller eftertryck, även delvis, samt återgivning av
bilderna, även i förändrat tillstånd, är endast tillåten med tillverkarens skriftliga
godkännande.
Föreskriven användning
Det här stativet ska användas som ett stabilt fäste för uppställning av fotoapparater,
videokameror och liknande med en 1/4-tums gänga.
Stativet är endast avsett för privat bruk och får inte användas yrkesmässigt eller
industriellt.
Det fi nns inga som helst möjligheter att ställa krav på ersättning för skador som
är ett resultat av att produkten använts på ett sätt som strider mot föreskrifterna,
felaktigt utförda reparationer, för att otillåtna ändringar gjorts på produkten eller
för att reservdelar som inte är godkända använts.
Det är användaren själv som bär hela ansvaret.
18
SDS 3000 A1
Page 21

Säkerhetsanvisningar
Observera följande anvisningar för säker hantering av produkten:
VARNING - RISK FÖR PERSONSKADOR!
►
Den här produkten ska inte användas av personer (inklusive barn) med
begränsad fysisk, sensorisk eller mental förmåga eller bristande erfarenhet
och kunskap om de inte först övervakats eller instruerats av någon ansvarig
person.
Se noga till så att barnen inte leker med produkten. ►
AKTA - RISK FÖR MATERIALSKADOR!
Se till så att stativet står säkert och stabilt. Annars kan det välta och både ►
stativet och den apparat som fästs på det kan skadas.
►
Kontrollera att apparaten sitter ordentligt fastskruvad på snabbkopplingen.
Annars kan den falla ner och skadas!
Kontrollera att snabbkopplingsplattan sitter fast på stativets platta. ►
Annars kan den fastskruvade apparaten falla ner och skadas.
Belasta inte stativet med högre vikt än vad som anges i tekniska data. ►
Annars kan både apparaten och stativet skadas.
►
Defekta delar får endast bytas ut mot reservdelar i original. Det är endast
originaldelarna som uppfyller säkerhetskraven.
SE
SDS 3000 A1
19
Page 22

SE
Leveransens innehåll
Produkten levereras med följande delar som standard:
Stativ
▯
Transportväska ▯
Bruksanvisning ▯
OBSERVERA
Kontrollera att leveransen är komplett och inte har några synliga skador. ►
Om någonting saknas eller om leveransen skadats på grund av bristfäl- ►
lig förpackning eller i tranporten ska du kontakta vår Service Hotline (se
kapitel Service).
Komponenter
1 Gänga
2 Snabbkopplingsplatta
3 Stativplatta
4 Justeringslibell
5 Arreteringsskruv 360°
6 Nivelleringslibell
7 Arreteringsskruv Höjd
8 Spärr
9 Skruv till stativplatta
0 Handtag
q V e v
w Låsring
e Arreteringsspak
r Arreteringsspak
t Krok för tillbehör
z Transporthandtag
20
SDS 3000 A1
Page 23

Uppställning
Uppackning
Ta upp alla delar av stativet och bruksanvisningen ur förpackningen. ■
Ta bort allt förpackningsmaterial. ■
Kassera förpackningen
Förpackningen ska skydda produkten från transportskador. Förpackningsmaterialet
har valts med tanke på vår miljö och de tekniska möjligheterna för avfallshantering
och kan därför återvinnas.
Genom att återföra förpackningen till kretsloppet kan vi spara på råvaror och
minska sopberget. Kassera förpackningar som inte behövs längre enligt gällande
lokala bestämmelser.
Ställa upp stativet
Fäll upp stativet helt och hållet så att låsringen 1) w rör vi mittpelarens ände.
Skruva låsringen 2) w medsols tills den sitter fast ordentligt.
Lossa arreteringsspakarna 3) e+r för att ta bort spärren på benen och dra ut
dem till önskad längd.
Rikta upp stativet genom att förskjuta benen. Ta nivelleringslibellen 4) 6 till
hjälp.
OBSERVERA
Luftbubblan måste ligga mitt i cirkeln. ►
När du hittat rätt position låser du fast benen med arreteringsspakarna 5)
e+r.
Om du vill att stativplattan 6) 3 ska vara exakt vågrät ska du rikta upp plattan
3 nu. För att göra det vrider du på handtaget 0 och fl yttar den uppåt eller
nedåt.
SE
SDS 3000 A1
OBSERVERA
Luftbubblan i justeringslibellen ► 4 måste ligga mellan de båda markering-
arna.
21
Page 24

SE
Fästa apparaten
OBSERVERA
Det här stativet är utrustat med en snabbkopplingsplatta ► 2. Om du skruvat
fast en apparat på snabbkopplingsplattan 2 kan du föra på spärren 8
på sidan av stativplattan 3 och lossa apparaten och snabbkopplingen
tillsammans 2 från plattan 3. Man behöver alltså inte alltid skruva loss
apparaten från gängan 1.
Ta bort snabbkopplingsplattan 1) 2 från stativet. För spärren 8 åt sidan så att
snabbkopplingen 2 kan tas av.
Skruva fast den apparat du ska använda på snabbkopplingsplattan 2) 2.
Använd bygeln på snabbkopplingsplattans 2 undersida för att skruva fast
apparaten ordentligt.
Sätt fast snabbkopplingsplattan 3) 2 med monterad apparat på stativplattan 3
igen genom att föra spärren 8 åt sidan och sätta tillbaka plattan 2 på
stativet. Lås spärren 8 för att fästa snabbkopplingsplattan 2 .
Använda stativet
När du ställt upp stativet och monterat en apparat kan det anpassas på följande
sätt:
Lossa skruven ”Höjd”
■ 7 så pass att veven q kan vevas utan problem.
Använd veven q för att ändra höjden. När du ställt in rätt höjd skruvar du åt
skruven ”Höjd” 7 igen.
22
OBSERVERA
Håll alltid fast i handtaget ► 0 när du lossar skruven ”Höjd” 7 och vevar
på veven q. Om skruven 7 lossas och man inte håller fast veven q
kan stången med den monterade apparaten kan halka ner till den lägsta
inställningen så att apparaten skadas.
■
Om du vill luta apparaten ända upp till 360° horisontellt lossar du arreteringsskruven 360°“ 5 . Fatta tag om handtaget 0 och luta stativplattan 3.
När du hittat rätt position skruvar du åt arreteringsskruven 360°“ 5 igen.
Om du vill ändra lutningsvinkel vrider du på handtaget
■ 0 och fl yttar det
uppåt eller nedåt. När du hittat rätt lutningsvinkel skruvar du åt handtaget 0
igen.
Om du vill fl ytta stativplattan
■ 3 ända upp till 90° från en vertikal till en hori-
sontell position position, t ex för att ta foton i högformat, lossar du skruven 9
på stativplattan. Luta stativplattan 3 till rätt position och skruva åt skruven
9 igen.
SDS 3000 A1
Page 25

OBSERVERA
Du kan stabilisera stativet ytterligare genom att hänga en vikt (max. 2 kg) ►
på kroken t.
Transport och förvaring
Bär stativet i bärhandtaget ■ z. Det kan du göra utan att fälla ihop det.
Om du ska transportera stativet längre sträckor ska du fälla ihop det och
■
stoppa in det i medföljande transportväska.
Förvara stativet på ett rent och torrt ställe. Förvara det helst i medföljande
■
transportväska.
Rengöring och skötsel
AKTA - RISK FÖR MATERIALSKADOR!
Använd inga slipande eller frätande rengöringsmedel. Då kan stativets yta ►
skadas och stativet bli totalförstört.
■
Rengör stativet med en något fuktig trasa. Envis smuts kan tas bort med
några droppar milt diskmedel på trasan.
Kassera produkten
Lämna in produkten till ett godkänt återvinningsföretag eller till din kommunala
avfallsanläggning för kassering. Följ gällande föreskrifter. Kontakta din avfallsanläggning om du har några frågor.
Tekniska data
Max. belastning ca 3 kg
Höjd, hopfällt ca 55, 5 cm
Höjd, utfällt ca 157 cm
Gängmått 1/4 tum
SE
SDS 3000 A1
23
Page 26

SE
Importör
KOMPERNASS GMBH
BURGSTRASSE 21
44867 BOCHUM, GERMANY
www.kompernass.com
Service
Kompernass Service Sverige
Tel.: 0770 93 00 35
E-Mail: support.sv@kompernass.com
Kompernass Service Suomi
Tel.: 010 30 935 80
(Soittamisen hinta lankaliittymästä: 8,21 snt/puh + 5,9 snt/min /
Matkapuhelimesta: 8,21 snt/puh + 16,90 snt/min)
E-Mail: support.fi @kompernass.com
24
SDS 3000 A1
Page 27

Indholdsfortegnelse
Introduktion . . . . . . . . . . . . . . . . . . . . . . . . . . . . . . . . . . . . . . . . . . . . . . . . . 26
Informationer til denne betjeningsvejledning . . . . . . . . . . . . . . . . . . . . . . . . . . . . . . . . . . . 26
Ophavsret . . . . . . . . . . . . . . . . . . . . . . . . . . . . . . . . . . . . . . . . . . . . . . . . . . . . . . . . . . . . . 26
Anvendelsesområde . . . . . . . . . . . . . . . . . . . . . . . . . . . . . . . . . . . . . . . . . . . . . . . . . . . . . 26
Sikkerhedsanvisninger . . . . . . . . . . . . . . . . . . . . . . . . . . . . . . . . . . . . . . . . . 27
Medfølger ved køb . . . . . . . . . . . . . . . . . . . . . . . . . . . . . . . . . . . . . . . . . . . . 28
Betjeningselementer . . . . . . . . . . . . . . . . . . . . . . . . . . . . . . . . . . . . . . . . . . . 28
Opstilling . . . . . . . . . . . . . . . . . . . . . . . . . . . . . . . . . . . . . . . . . . . . . . . . . . . . 29
Udpakning . . . . . . . . . . . . . . . . . . . . . . . . . . . . . . . . . . . . . . . . . . . . . . . . . . . . . . . . . . . . . 29
Bortskaff else af emballagen . . . . . . . . . . . . . . . . . . . . . . . . . . . . . . . . . . . . . . . . . . . . . . . 29
Opstilling af teleskopstativet . . . . . . . . . . . . . . . . . . . . . . . . . . . . . . . . . . . . . . . . . . . . . . . 29
Fastgøring af apparatet . . . . . . . . . . . . . . . . . . . . . . . . . . . . . . . . . . . . . . . 30
Brug af teleskopstativet . . . . . . . . . . . . . . . . . . . . . . . . . . . . . . . . . . . . . . . . 30
Transport og opbevaring . . . . . . . . . . . . . . . . . . . . . . . . . . . . . . . . . . . . . . . 31
Rengøring og vedligeholdelse . . . . . . . . . . . . . . . . . . . . . . . . . . . . . . . . . . . 31
Bortskaff else af teleskopstativet . . . . . . . . . . . . . . . . . . . . . . . . . . . . . . . . . 31
DK
Tekniske data . . . . . . . . . . . . . . . . . . . . . . . . . . . . . . . . . . . . . . . . . . . . . . . . 31
Importør . . . . . . . . . . . . . . . . . . . . . . . . . . . . . . . . . . . . . . . . . . . . . . . . . . . . 32
Service . . . . . . . . . . . . . . . . . . . . . . . . . . . . . . . . . . . . . . . . . . . . . . . . . . . . . . 32
SDS 3000 A1
25
Page 28

DK
Introduktion
Informationer til denne betjeningsvejledning
Denne betjeningsvejledning er del af teleskopstativet SDS 3000 A1 og giver
vigtige informationer om teleskopstativets anvendelsesområde samt om sikkerheden og håndteringen af det.
Betjeningsvejledningen skal altid opbevares i nærheden af teleskopstativet. Den
skal læses og anvendes af alle personer, som er beskæftiget med at betjene
teleskopstativet.
Opbevar betjeningsvejledningen, og lad den følge med teleskopstativet, hvis du
giver det videre til andre.
Ophavsret
Denne dokumentation er ophavsretligt beskyttet.
Kopiering eller eftertryk - også i uddrag - samt gengivelse af billederne - også i
ændret tilstand - er kun tilladt efter skriftligt samtykke fra producenten.
Anvendelsesområde
Teleskopstativet bruges til stabil opstilling af fotoapparater, videokameraer eller
lignende apparater med et 1/4-tomme-gevind.
Teleskopstativet er kun beregnet til privat brug og ikke egnet til erhvervsmæssige
eller industrielle formål.
Krav af enhver art i forbindelse med skader på grund af anvendelse uden for
anvendelsesområdet, forkert udførte reparationer, ændringer, der er foretaget
uden tilladelse, samt anvendelse af ikke-tilladte reservedele, er udelukkede.
Ejeren bærer alene risikoen.
26
SDS 3000 A1
Page 29

Sikkerhedsanvisninger
Overhold de følgende sikkerhedsanvisninger for sikker brug af teleskopstativet:
ADVARSEL - FARE FOR PERSONSKADER!
►
Dette teleskopstativ må ikke benyttes af personer (inklusive børn) med
begrænsede fysiske, sensoriske eller psykiske evner eller med manglende
erfaringer og/eller manglende viden, medmindre en ansvarlig person holder
opsyn med dem og giver dem anvisninger til, hvordan teleskopstativet skal
benyttes.
Børn skal være under opsyn, så det sikres, at de ikke leger med teleskop- ►
stativet.
OBS - MATERIELLE SKADER!
Sørg for, at teleskopstativet står sikkert og stabilt. Ellers kan det vælte, og ►
teleskopstativet og det monterede apparat kan beskadiges.
►
Sørg for, at apparatet er skruet fast på teleskopstativets hurtigkoblingsplade.
Ellers kan det falde ned og gå i stykker!
Sørg for, at hurtigkoblingspladen er fast forbundet med teleskopstativpladen. ►
Ellers kan det påskruede apparat falde ned og gå i stykker.
►
Belast aldrig teleskopstativet med større vægt end den, som er angivet i de
tekniske data. Ellers kan apparatet og teleskopstativet falde ned og gå i
stykker.
Defekte komponenter må kun udskiftes med originale reservedele. ►
Sikkerhedskravene kan kun garanteres, hvis der anvendes disse dele.
DK
SDS 3000 A1
27
Page 30

DK
Medfølger ved køb
Teleskopstativet leveres standardmæssigt med følgende komponenter:
Teleskopstativ
▯
Bæretaske ▯
Betjeningsvejledning ▯
BEMÆRK
Kontrollér, at alle dele er leveret med, og at de ikke har synlige skader. ►
Hvis der mangler dele, eller hvis der fi ndes skader på grund af mangelfuld ►
emballage eller på grund af transporten, bedes du henvende dig til vores
service-hotline (se kapitlet Service).
Betjeningselementer
1 Gevind
2 Hurtigkoblingsplade
3 Teleskopstativtallerken
4 Justeringslibelle
5 Fikseringsskrue "360°"
6 Nivelleringslibelle
7 Fikseringsskrue "højde"
8 Lås
9 Teleskopstativtallerkenskrue
0 Håndtag
q Håndsving
w Fikseringsring
e Låsearm
r Låsearm
t Tilbehørskrog
z Bærehåndtag
28
SDS 3000 A1
Page 31

Opstilling
Udpakning
Tag alle teleskopstativets dele og betjeningsvejledningen ud af kassen. ■
Fjern alt emballeringsmaterialet. ■
Bortskaff else af emballagen
Emballagen beskytter teleskopstativet mod transportskader. Emballeringsmaterialerne er valgt ud fra kriterier som miljøforligelighed og bortskaff elsesteknik og
kan derfor genbruges.
Afl evering af emballagen til materialerecirkulation sparer råstoff er og reducerer
aff aldsmængden.Bortskaf emballeringsmaterialerne, som du ikke skal bruge
længere, i henhold til de lokalt gældende forskrifter.
Opstilling af teleskopstativet
Åbn teleskopstativet helt, så fi kseringsringen 1) w rører ved søjleenden.
Drej fi kseringsringen 2) w i urets retning, så den sidder fast og ikke kan bevæge
sig længere.
Løsn låsearmene 3) e+r for at låse teleskopstativets ben op, og træk dem ud
til den ønskede længde.
Indstil teleskopstativet ved at fl ytte benene. Brug nivelleringslibellen 4) 6 hertil.
BEMÆRK
Luftblæren skal være midt i cirkelmarkeringen. ►
DK
SDS 3000 A1
Når du har fundet den rigtige stilling, låses teleskopstativets ben igen med 5)
låsearmene e+r.
Justér nu teleskopstativtallerkenen 6) 3 helt vandret, hvis du ønsker det. Drej på
håndtaget 0, og fl yt teleskopstativtallerkenen op eller ned.
BEMÆRK
Justeringslibellens luftblære ► 4 skal være mellem de to markeringer.
29
Page 32

DK
Fastgøring af apparatet
BEMÆRK
Dette teleskopstativ er udstyret med en hurtigkoblingsplade ► 2. Hvis der
er skruet et apparat på hurtigkoblingspladen 2, kan du løsne apparatet
og hurtigkoblingspladen 2 fra teleskopstativtallerkenen 3 ved at fl ytte
låsen 8 på siden af teleskopstativtallerkenen 3. Så skal du ikke altid
skrue apparatet af gevindet 1.
Tag hurtigkoblingspladen 1) 2 af teleskopstativet. Skub låsen 8 til side, så
hurtigkoblingspladen 2 kan tages af.
Skru det ønskede apparat på hurtigkoblingspladen 2) 2. Drej skruen ved
hjælp af bøjlen på undersiden af hurtigkoblingspladen 2, indtil apparatet
sidder fast.
For at sætte hurtigkoblingspladen 3) 2 med apparatet på teleskopstativtallerkenen 3 igen skal du skubbe låsen 8 til siden og sætte hurtigkoblingspladen 2 på igen. Luk så låsen 8, så hurtigkoblingspladen 2 sidder fast.
Brug af teleskopstativet
Når teleskopstativet er stillet op, og apparatet er monteret på det, kan du indstille
stativet på følgende måde:
Løsn låseskruen ”Højde”
■ 7 så meget, at håndsvinget q kan drejes uden
problemer. Drej på håndsvinget q for at indstille højden. Når den ønskede
højde er nået, skrues låseskruen ”Højde” 7 fast igen.
30
BEMÆRK
Hold altid fast i håndtaget ► 0, når du løsner låseskruen ”Højde” 7, og
drej på håndsvinget q. Stangen på det monterede apparat kan ellers
falde ned til den nederste stilling, hvis låseskruen 7 er løsnet, og
For at dreje apparatet op til 360° vandret skal du løsne fi kseringsskruen
■
"360°" 5. Hold på håndtaget 0, og drej teleskopstativtallerkenen 3. Når
du har nået den ønskede position, skal du dreje fi kseringsskruen "360°" 5
igen, så den sidder fast.
For at indstille hældningsvinklen skal du dreje på håndtaget
■ 0 og fl ytte
det op eller ned. Når den ønskede hældningsvinkel er nået, skal du skrue
håndtaget 0 fast igen.
Hvis du vil anbringe teleskopstativtallerkenen
■ 3 indtil 90° fra den lodrette
stilling til den vandrette stilling - f.eks. for at tage billeder i højformat - skal du
løsne teleskopstativtallerkenskruen 9. Drej teleskopstativtallerkenen 3 til
den ønskede stilling, og skru teleskopstativtallerkenskruen 9 fast igen.
SDS 3000 A1
Page 33

BEMÆRK
Du kan stabilisere teleskopstativet yderligere ved at anbringe en vægt ►
(maks. 2 kg) på tilbehørskrogen t.
Transport og opbevaring
Transportér teleskopstativet med transporthåndtaget ■ z. Det er også muligt,
når det er stillet op.
Hvis du vil transportere teleskopstativet over længere strækninger, skal du
■
skubbe det sammen og lægge det i den medfølgende bæretaske.
Opbevar teleskopstativet på et rent og tørt sted. Det skal helst opbevares i
■
den medfølgende bæretaske.
Rengøring og vedligeholdelse
OBS - MATERIELLE SKADER!
Brug ikke skurende eller ætsende rengøringsmidler. De kan angribe overfl a- ►
den og beskadige teleskopstativet, så det ikke kan repareres igen.
■ Hvis snavset sidder meget fast,
Rengør teleskopstativet med en let fugtet klud.
kan du komme lidt mildt opvaskemiddel på kluden.
Bortskaff else af teleskopstativet
Bortskaf teleskopstativet via en godkendt bortskaff elsesvirksomhed eller den
kommunale genbrugsstation. Følg de aktuelt gældende regler. Henvend dig i
tvivlstilfælde til det lokale bortskaff elsessted.
DK
Tekniske data
Maks. belastning ca. 3 kg
Højde - benene skubbet sammen ca. 55, 5 cm
Højde - benene rettet ud ca. 157 cm
Gevindstørrelse 1/4 tomme
SDS 3000 A1
31
Page 34

DK
Importør
KOMPERNASS GMBH
BURGSTRASSE 21
D-44867 BOCHUM, GERMANY
www.kompernass.com
Service
Kompernass Service Danmark
Tel.: 80-889 980
(Der kan kun ringes til servicenummeret fra fastnet)
E-Mail: support.dk@kompernass.com
32
SDS 3000 A1
Page 35

Inhaltsverzeichnis
Einführung . . . . . . . . . . . . . . . . . . . . . . . . . . . . . . . . . . . . . . . . . . . . . . . . . . . 34
Informationen zu dieser Bedienungsanleitung . . . . . . . . . . . . . . . . . . . . . . . . . . . . . . . . . . 34
Urheberrecht . . . . . . . . . . . . . . . . . . . . . . . . . . . . . . . . . . . . . . . . . . . . . . . . . . . . . . . . . . . 34
Bestimmungsgemäße Verwendung . . . . . . . . . . . . . . . . . . . . . . . . . . . . . . . . . . . . . . . . . . 34
Sicherheitshinweise . . . . . . . . . . . . . . . . . . . . . . . . . . . . . . . . . . . . . . . . . . . 35
Lieferumfang . . . . . . . . . . . . . . . . . . . . . . . . . . . . . . . . . . . . . . . . . . . . . . . . . 36
Bedienelemente . . . . . . . . . . . . . . . . . . . . . . . . . . . . . . . . . . . . . . . . . . . . . . 36
Aufstellen . . . . . . . . . . . . . . . . . . . . . . . . . . . . . . . . . . . . . . . . . . . . . . . . . . . . 37
Auspacken . . . . . . . . . . . . . . . . . . . . . . . . . . . . . . . . . . . . . . . . . . . . . . . . . . . . . . . . . . . . . 37
Entsorgung der Verpackung . . . . . . . . . . . . . . . . . . . . . . . . . . . . . . . . . . . . . . . . . . . . . . . 37
Stativ aufstellen . . . . . . . . . . . . . . . . . . . . . . . . . . . . . . . . . . . . . . . . . . . . . . . . . . . . . . . . . 37
Gerät befestigen . . . . . . . . . . . . . . . . . . . . . . . . . . . . . . . . . . . . . . . . . . . . . . 38
Stativ benutzen . . . . . . . . . . . . . . . . . . . . . . . . . . . . . . . . . . . . . . . . . . . . . . .38
Transportieren und Aufbewahren . . . . . . . . . . . . . . . . . . . . . . . . . . . . . . . . 39
Reinigen und Pfl egen . . . . . . . . . . . . . . . . . . . . . . . . . . . . . . . . . . . . . . . . . . 39
Gerät entsorgen . . . . . . . . . . . . . . . . . . . . . . . . . . . . . . . . . . . . . . . . . . . . . . 39
Technische Daten . . . . . . . . . . . . . . . . . . . . . . . . . . . . . . . . . . . . . . . . . . . . . . 39
Importeur . . . . . . . . . . . . . . . . . . . . . . . . . . . . . . . . . . . . . . . . . . . . . . . . . . . 40
Service . . . . . . . . . . . . . . . . . . . . . . . . . . . . . . . . . . . . . . . . . . . . . . . . . . . . . . 40
DE
AT
CH
SDS 3000 A1
33
Page 36

DE
AT
CH
Einführung
Informationen zu dieser Bedienungsanleitung
Diese Bedienungsanleitung ist Bestandteil des Statives SDS 3000 A1 und gibt
Ihnen wichtige Hinweise für den bestimmungsgemäßen Gebrauch, die Sicherheit
sowie die Handhabung des Statives.
Die Bedienungsanleitung muss ständig in der Nähe des Statives verfügbar sein.
Sie ist von jeder Person zu lesen und anzuwenden, die mit der Bedienung des
Statives beschäftigt ist.
Bewahren Sie diese Bedienungsanleitung auf und geben Sie diese mit dem Stativ
an Nachbesitzer weiter.
Urheberrecht
Diese Dokumentation ist urheberrechtlich geschützt.
Jede Vervielfältigung, bzw. jeder Nachdruck, auch auszugsweise, sowie die
Wiedergabe der Abbildungen, auch im veränderten Zustand ist nur mit schriftlicher
Zustimmung des Herstellers gestattet.
Bestimmungsgemäße Verwendung
Das Stativ dient der stabilen Aufstellung von Fotoapparaten, Videokameras oder
ähnlichen Geräten mit einem 1/4-Zoll Gewinde.
Das Stativ ist nur für den privaten Gebrauch bestimmt und nicht für gewerbliche
oder industrielle Zwecke geeignet.
Ansprüche jeglicher Art wegen Schäden aus nicht bestimmungsgemäßer Verwendung, unsachgemäßen Reparaturen, unerlaubt vorgenommenen Veränderungen
oder Verwendung nicht zugelassener Ersatzteile sind ausgeschlossen.
Das Risiko trägt allein der Betreiber.
34
SDS 3000 A1
Page 37

Sicherheitshinweise
Beachten Sie für einen sicheren Umgang mit dem Stativ die folgenden Sicherheitshinweise:
WARNUNG - VERLETZUNGSGEFAHR!
►
Dieses Gerät ist nicht dafür bestimmt, durch Personen (einschließlich Kinder)
mit eingeschränkten physischen, sensorischen oder geistigen Fähigkeiten
oder mangels Erfahrung und/oder mangels Wissen benutzt zu werden, es
sei denn, sie werden durch eine für ihre Sicherheit zuständige Person beaufsichtigt oder erhielten von ihr Anweisungen, wie das Gerät zu benutzen ist.
Kinder sollten beaufsichtigt werden, um sicherzustellen, dass sie nicht mit ►
dem Gerät spielen.
ACHTUNG - SACHSCHADEN!
Achten Sie darauf, dass das Stativ sicher und stabil steht. Ansonsten kann ►
es umkippen und das Stativ sowie das aufgesetzte Gerät beschädigt
werden.
►
Achten Sie darauf, dass das Gerät fest auf der Schnellkupplungsplatte aufgeschraubt ist. Ansonsten kann es herunterfallen und beschädigt werden!
Achten Sie darauf, dass die Schnellkupplungsplatte fest mit dem Stativteller ►
verbunden ist. Ansonsten kann das aufgeschraubte Gerät herunterfallen
und beschädigt werden.
Belasten Sie das Stativ nie mit mehr Gewicht, als in den technischen Daten ►
angegeben. Ansonsten können das Gerät und das Stativ beschädigt
werden.
►
Defekte Bauteile dürfen nur gegen Original-Ersatzteile ausgetauscht
werden. Nur bei diesen Teilen ist gewährleistet, dass sie die Sicherheitsanforderungen erfüllen werden.
DE
AT
CH
SDS 3000 A1
35
Page 38

DE
AT
CH
Lieferumfang
Das Gerät wird standardmäßig mit folgenden Komponenten geliefert:
Stativ
▯
Transporttasche ▯
Bedienungsanleitung ▯
HINWEIS
Prüfen Sie die Lieferung auf Vollständigkeit und auf sichtbare Schäden. ►
Bei einer unvollständigen Lieferung oder Schäden infolge mangelhafter ►
Verpackung oder durch Transport wenden Sie sich an die Service-Hotline
(siehe Kapitel Service).
Bedienelemente
1 Gewinde
2 Schnellkupplungsplatte
3 Stativteller
4 Justierlibelle
5 Feststellschraube „360°“
6 Nivellierlibelle
7 Feststellschraube „Höhe“
8 Verriegelung
9 Stativtellerschraube
0 Griff
q Kurbel
w Feststellring
e Arretierungshebel
r Arretierungshebel
t Zubehörhaken
z Transportgriff
36
SDS 3000 A1
Page 39

Aufstellen
Auspacken
Entnehmen Sie alle Teile des Statives und die Bedienungsanleitung aus dem ■
Karton.
Entfernen Sie sämtliches Verpackungsmaterial.
■
Entsorgung der Verpackung
Die Verpackung schützt das Gerät vor Transportschäden. Die Verpackungsmaterialien sind nach umweltverträglichen und entsorgungstechnischen Gesichtspunkten ausgewählt und deshalb recyclebar.
Die Rückführung der Verpackung in den Materialkreislauf spart Rohstoff e und
verringert das Abfallaufkommen. Entsorgen Sie nicht mehr benötigte Verpackungsmaterialien gemäß den örtlich geltenden Vorschriften.
Stativ aufstellen
Öff nen Sie das Stativ komplett, so dass der Feststellring 1) w das Säulenende berührt.
Drehen Sie den Feststellring 2) w im Uhrzeigersinn fest, so dass dieser sich
nicht mehr bewegen kann.
Lösen Sie die Arretierungshebel 3) e+r, um die Beine des Statives zu
entriegeln und ziehen Sie sie auf die gewünschte Länge aus.
Richten Sie das Stativ durch Verschieben der Beine aus. Nutzen Sie dafür 4)
die Nivellierlibelle 6.
DE
AT
CH
SDS 3000 A1
HINWEIS
Die Luftblase muss sich in der Mitte der Kreismarkierung befi nden. ►
Wenn Sie die richtige Position gefunden haben, verriegeln Sie die Beine 5)
des Stativs mit den Arretierungshebeln e+r wieder.
Richten Sie nun - wenn Sie den Stativteller 6) 3 exakt waagerecht ausgerichtet haben wollen - den Stativteller 3 aus. Drehen Sie dafür am Griff 0 und
bewegen Sie ihn nach oben bzw. unten.
HINWEIS
Die Luftblase der Justierlibelle ► 4 muss sich zwischen beiden Markierun-
gen befi nden.
37
Page 40

DE
AT
CH
Gerät befestigen
HINWEIS
Dieses Stativ ist mit einer Schnellkupplungsplatte ► 2 ausgestattet. Wenn
ein Gerät auf der Schnellkupplungsplatte 2 aufgeschraubt ist, können Sie
durch Schieben der Verriegelung 8 an der Seite des Stativtellers 3 das
Gerät mitsamt der Schnellkupplungsplatte 2 vom Stativteller 3 lösen. So
müssen Sie das Gerät nicht immer vom Gewinde 1 abschrauben.
Nehmen Sie die Schnellkupplungsplatte 1) 2 vom Stativ ab. Schieben Sie
hierzu die Verriegelung 8 zur Seite, so dass Sie die Schnellkupplungsplatte
2 abheben können.
Schrauben Sie das gewünschte Gerät auf die Schnellkupplungsplatte 2) 2.
Drehen Sie hierzu die Schraube mit Hilfe des Bügels an der Unterseite der
Schnellkupplungsplatte 2 so weit, bis das Gerät fest sitzt.
Um die Schnellkupplungsplatte 3) 2 mit dem Gerät wieder auf den Stativteller
3 aufzustecken, schieben Sie die Verriegelung 8 zur Seite und setzen Sie
die Schnellkupplungsplatte 2 wieder auf. Schließen Sie dann die
Verriegelung 8, so dass die Schnellkupplungsplatte 2 fest sitzt.
Stativ benutzen
Wenn Sie das Stativ aufgebaut haben und das Gerät darauf montiert ist, können
Sie es folgendermaßen verstellen:
38
Lösen Sie die Feststellschraube „Höhe“
■ 7 soweit, bis sich die Kurbel q
problemlos drehen lässt. Drehen Sie an der Kurbel q, um die Höhe zu
verstellen. Wenn die gewünschte Höhe erreicht ist, drehen Sie die Feststellschraube „Höhe“ 7 wieder fest.
HINWEIS
Halten Sie immer den Griff ► 0 fest, wenn Sie die Feststellschraube „Höhe“
7 lösen und an der Kurbel q drehen. Ansonsten kann - wenn die Feststellschraube 7 gelöst ist und die Kurbel q nicht festgehalten wird - die
Stange mit dem aufgesetzten Gerät bis zur niedrigsten Einstellung herunterfallen und das Gerät dabei beschädigt werden.
■
Um das Gerät bis zu 360° horizontal zu schwenken, lösen Sie die Feststellschraube „360°“ 5 . Fassen Sie den Griff 0 an und schwenken Sie den
Stativteller 3. Wenn Sie die gewünschte Position erreicht haben, drehen Sie
die Feststellschraube „360°“ 5 wieder fest.
Um den Neigungswinkel zu verstellen, drehen Sie am Griff
■ 0 und bewe-
gen Sie ihn nach oben bzw. unten. Wenn der gewünschte Neigungswinkel
erreicht ist, drehen Sie den Griff 0 wieder fest.
SDS 3000 A1
Page 41

Wenn Sie den Stativteller ■ 3 bis zu 90° von der vertikalen Position in die
horizontale Position bringen wollen, zum Beispiel für Fotos im Hochformat,
dann lösen Sie die Stativtellerschraube 9. Schwenken Sie den Stativteller
3 in die gewünschte Position und schrauben Sie die Stativtellerschraube 9
wieder fest.
HINWEIS
Sie können das Stativ zusätzlich stabilisieren, indem Sie ein Gewicht (max. ►
2 kg) am Zubehörhaken t anbringen.
Transportieren und Aufbewahren
Transportieren Sie das Stativ am Transportgriff ■ z. Dies ist auch im aufgebau-
ten Zustand möglich.
Wenn Sie das Stativ über längere Strecken transportieren, dann schieben Sie
■
es zusammen und stecken Sie es in die mitgelieferte Transporttasche.
Bewahren Sie das Stativ an einem sauberen und trockenen Ort auf. Am
■
besten in der mitgelieferten Transporttasche.
Reinigen und Pfl egen
ACHTUNG - SACHSCHADEN!
Benutzen Sie keine scheuernden oder ätzenden Reinigungsmittel. Diese ►
können die Oberfl äche angreifen und das Stativ irreparabel beschädigen.
■
Reinigen Sie das Stativ mit einem leicht angefeuchteten Tuch. Bei hartnäckigeren Verschmutzungen geben Sie ein mildes Spülmittel auf das Tuch.
DE
AT
CH
Gerät entsorgen
Entsorgen Sie das Gerät über einen zugelassenen Entsorgungsbetrieb oder über
Ihre kommunale Entsorgungseinrichtung. Beachten Sie die aktuell geltenden
Vorschriften. Setzen Sie sich im Zweifelsfall mit Ihrer Entsorgungseinrichtung in
Verbindung.
Technische Daten
Max. Belastung ca. 3 kg
Höhe zusammengefahren ca. 55, 5 cm
Höhe ausgefahren ca. 157 cm
Gewindegröße 1/4 Zoll
SDS 3000 A1
39
Page 42

DE
AT
CH
Importeur
KOMPERNASS GMBH
BURGSTRASSE 21
44867 BOCHUM, GERMANY
www.kompernass.com
Service
Schraven Service- und Dienstleistungs GmbH
Tel.: +49 (0) 180 5 008107
(0,14 EUR/Min. aus dem dt. Festnetz, Mobilfunk max. 0,42 EUR/Min.)
Fax: +49 (0) 2832 3532
E-Mail: support.de@kompernass.com
Kompernaß Service Österreich
Tel.: 0820 899 913
E-Mail: support.at@kompernass.com
Kompernaß Service Switzerland
Tel.: 0848 000 525
E-Mail: support.ch@kompernass.com
(0,20 EUR/Min.)
(max. 0,0807 CHF/Min.)
40
SDS 3000 A1
 Loading...