


This device complies with Part 15 of the FCC Rules. Operation is subject to the following two conditions: (1) This device may not cause harmful interference, and
(2) this device must accept any interference received, including interference that may cause undesired operation.
WARNING FCC Regulations state that any unauthorized changes or modifications to this equipment not expressly approved by the manufacturer could void the user's authority to operate this equipment.
Note: This equipment has been tested and found to comply with the limits for a Class B digital device, pursuant to Part 15 of the FCC Rules.
These limits are designed to provide reasonable protection against harmful interference in a residential installation. This equipment generates, uses, and can radiate radio frequency energy and, if not installed and used in accordance with the instructions, may cause harmful interference to radio communications.
However, there is no guarantee that interference will not occur in a particular installation. If this equipment does cause harmful interference to radio or television reception, which can be determined by turning the equipment off and on, the user is encouraged to try to correct the interference by one or more of the following measures:
–Reorient or relocate the receiving antenna.
–Increase the separation between the equipment and receiver.
–Connect the equipment into an outlet on a circuit different from that to which the receiver is connected.
–Consult the dealer or an experienced radio/TV technician for help.
Note: A shielded interface cable is required to ensure compliance with FCC regulations for Class B certification.
FOR YOUR RECORDS....
For your assistance in reporting this product in case of loss or theft, please record the model number and serial number (located on the bottom of the case) below. Please retain this information.
Model Number
Serial Number
Date of Purchase
Place of Purchase

LIMITED WARRANTY
SHARP ELECTRONICS CORPORATION warrants to the first consumer purchaser that this Sharp brand product (the "Product"), when shipped in its original container, will be free from defective workmanship and materials and agrees that it will, at its option, either repair the defect or replace the defective Product or part thereof at no charge to the purchaser for parts or labor for the time period(s) set forth below.
This warranty does not apply to any appearance items of the Product nor to the additional excluded item(s) set forth below nor to any product the exterior of which has been damaged or defaced, which has been subjected to misuse, abnormal service or handling or which has been altered or modified in design or construction.
In order to enforce the rights under this limited warranty, the purchaser should follow the steps set forth below and provide proof of purchase to the servicer.
The limited warranty described herein is in addition to whatever implied warranties may be granted to purchasers by law. ALL IMPLIED WARRANTIES INCLUDING THE WARRANTIES OF MERCHANTABILITY AND FITNESS FOR USE ARE LIMITED TO THE PERIOD(S) FROM THE DATE OF PURCHASE SET FORTH BELOW. Some states do not allow limitations on how long an implied warranty lasts, so the above limitation may not apply to you.
Neither the sales personnel of the seller nor any other person is authorized to make any warranties other than those described herein or to extend the duration of any warranties beyond the time period described herein on behalf of Sharp.
The warranties described herein shall be the sole and exclusive warranties granted by Sharp and shall be the sole and exclusive remedy available to the purchaser. Correction of defects, in the manner and for the period of time described herein, shall constitute complete fulfillment of all liabilities and responsibilities of Sharp to the purchaser with respect to the Product and shall constitute full satisfaction of all claims, whether based on contract, negligence, strict liability or otherwise. In no event shall Sharp be liable, or in any way responsible, for any damages or defects in
the Product which were caused by repairs or attempted repairs performed by anyone other than an authorized servicer. Nor shall Sharp be liable, or in any way responsible, for any incidental or consequential economic or property damage. Some states do not allow the exclusion of incidental or consequential damages, so the above exclusion may not apply to you.
THE WARRANTY GIVES YOU SPECIFIC LEGAL RIGHTS. YOU MAY ALSO HAVE OTHER RIGHTS WHICH VARY FROM STATE TO STATE.
Your Product : |
Electronic Organizer |
Warranty Period for this |
One (1) year parts and labor from date of purchase. |
Product : |
|
Additional items excluded |
Any consumable items such as paper, maintenance |
from warranty coverage : |
cartridge, ink cartridges supplied with the Product |
|
or to any equipment or any hardware, software, |
|
firmware, fluorescent lamp, power cords, covers, |
|
rubber parts, or peripherals other than the Product. |
Where to obtain service : |
At a Sharp Authorized Servicer located in the United |
|
States. To find out the location of the nearest Sharp |
|
|
|
Authorized Servicer, call Sharp toll free at |
|
800-BE-SHARP. |
What to do to obtain service : Ship (prepaid) or carry in your Product to a Sharp Authorized Servicer. Be sure to have proof of purchase available. If you ship or mail the Product, be sure it is packaged carefully.
TO OBTAIN SUPPLY, ACCESSORY OR PRODUCT INFORMATION, CALL 1-800-BE-SHARP.

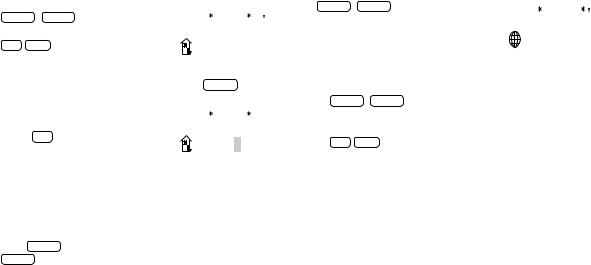
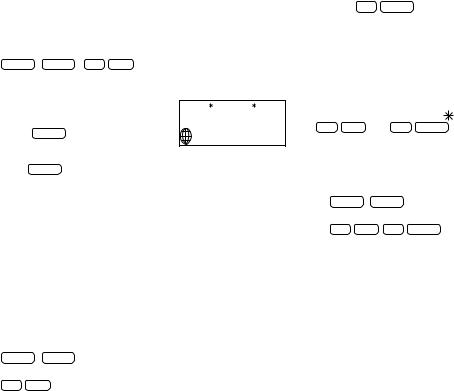
PARTS NAMES
Display
Option port (4-pin option jack)
Command center
Power on/off keys
Cursor movement keys
Search keys
 Reset switch
Return key
Enter key
1

INTRODUCTION
Congratulations on purchasing the YO-150/YO-170 Electronic Organizer. Please read this operation manual carefully to familiarize yourself with all the features of the Organizer and to ensure years of reliable operation. For quick reference, keep this operation manual on hand.
NOTES:
•Unless otherwise specified, the text material applies to both models.
•Some of the accessories described in this manual may not be available at the time you purchase this product.
Check with your local SHARP dealer concerning availability.
•The differences between YO-150/YO-170 are memory capacity.
NOTICE
•SHARP strongly recommends that you keep separate permanent written records of all important data. Data may be lost or altered in virtually any electronic memory product under certain circumstances. Therefore, SHARP assumes no responsibility for data lost or otherwise rendered unusable whether as a result of improper use, repairs, defects, battery replacement, use after the specified battery life has expired, or any other case.
•SHARP assumes no responsibility, directly or indirectly, for financial losses or claims from third persons resulting from the use of this product and any of its functions, such as stolen credit card numbers, the loss or alteration of stored data, etc.
•The information provided in this manual is subject to change without prior notice.
The functions such as Calendar and Schedule in this product can handle dates from January 1, 1901 to December 31, 2099.
2
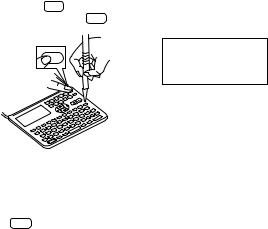
TABLE OF CONTENTS |
|
BEFORE USE |
|
|
|
|
|
|
INTRODUCTION .................................................................................... |
2 |
BEFORE USE ......................................................................................... |
3 |
GETTING STARTED ............................................................................... |
4 |
BASIC ENTRY PROCEDURES ............................................................... |
5 |
USING THE HOME AND WORLD CLOCKS .......................................... |
6 |
USING THE CALENDAR FUNCTION ..................................................... |
9 |
USING THE SCHEDULE FUNCTION ................................................... |
10 |
USING THE ANNIVERSARY FUNCTION ............................................. |
15 |
USING THE TELEPHONE DIRECTORY ............................................... |
17 |
USING THE MEMO FUNCTION ........................................................... |
20 |
USING THE TO DO FUNCTION ........................................................... |
22 |
USING THE EXPENSE FUNCTION ...................................................... |
24 |
USING THE CALCULATOR FUNCTION .............................................. |
26 |
USING THE CONVERSION FUNCTION .............................................. |
27 |
USING THE SECRET FUNCTION ........................................................ |
27 |
USING THE MISCELLANEOUS FUNCTION ........................................ |
30 |
USING THE OPTION FUNCTION ........................................................ |
32 |
APPENDIX ............................................................................................ |
35 |
Using the Organizer for the first time
Be sure to perform the following procedures before using the Organizer for the first time.
1.Open the Organizer.
2.Initialize the Organizer.
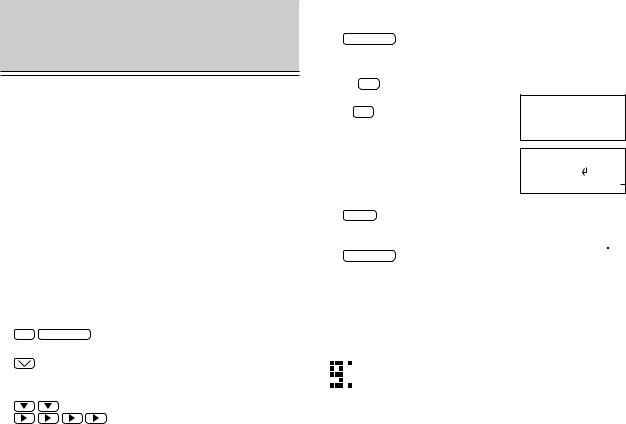
While holding ON , press the RESET switch. Release the RESET switch and then release ON . The following display will appear:
CLEAR ALL DATA
C•CE
ON
OK (Y/N) ?
LINK
R
COMPUTE
NOTE: Under certain conditions the message may appear as “Data has been impaired! Press [Y] to CLEAR ALL memory”. Proceed to the next step in either case.
3.Press Y .
The Organizer is initialized and the TEL1 directory is displayed.
3
AUTO POWER OFF function
When none of the keys have been pressed for approximately 7 minutes, the Organizer automatically turns the power off to save the batteries. (The actual time may vary depending on the conditions of use.) Press ON to resume operation.
Backlight
Pressing BACKLIGHT once illuminates the display and the Backlight will remain on for as long as you continue to use the Organizer, or when none of the keys have been pressed for fifteen seconds.
The Backlight may remain on for less than fifteen seconds if the battery level is very low.
The length of time to turn on the Backlight can be changed. (Refer to page 31.)
NOTES:
Do not use the Backlight unnecessarily.
•Since the Backlight drains power from the operating batteries, excessive use of the Backlight will significantly reduce your battery life.
•Continuous use of the Backlight will, over time, lead to gradual loss of brightness.
If the Backlight is on for 10 minutes per day (for example 15 seconds
40 times a day), the brightness will be reduced by half after 10* years (at an ambient temperature of 25°C/77°F and 65% humidity).
*This figure may vary depending on the surrounding environment.
Freeing up memory
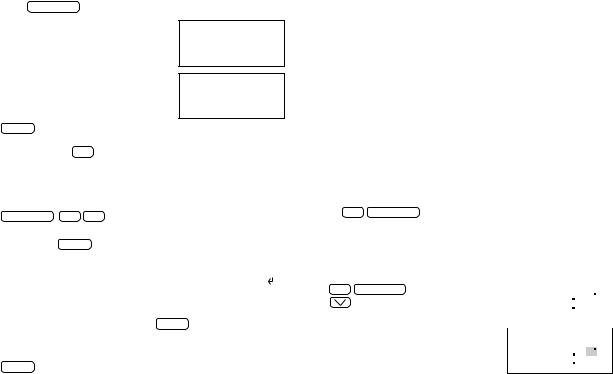
When you turn the power on, the following message may be displayed, asking you to free up memory by deleting unnecessary space:
“DO YOU WANT TO FREE UP MEMORY? (Yes/No)”
Press |
Y |
to delete them. Freeing up memory requires maximum one |
minute. |
|
|
Press |
N |
when you wish to start the operation soon. |
For more information, refer to page 31, “Freeing up memory”.
GETTING STARTED
Display symbols
This symbol appears when the operating battery level is low.
Åñ |
The data appearing on the display is secret data accessible |
||
|
only by password. |
|
|
S |
The secret function is in effect. |
|
|
|
A “beep” will sound when a key is pressed. |
||
|
The specified schedule alarm(s) will sound. |
||
CAPS |
Capital (uppercase) letters will be entered. To enter small |
||
|
(lowercase) letters, turn “CAPS” off by pressing CAPS . |
||
EDIT |
The entry on the display may be edited. |
||
2nd |
2nd has been pressed. |
|
|
řŴ |
There is more data which is not on the display. The data can |
||
|
be displayed by pressing |
or |
. |
NOTE: The symbol “ ” shown by setting the LCD contrast to DARK is not used in this product.
The  keys
keys
These keys are used to select capital or small letters or to access the symbols marked in white above keys. While holding down  , press the desired key to be entered.
Turning the “beep” on and off
While “  ” is displayed, a “beep” will sound when a key is pressed. To turn the “beep” on and off, press 2nd
  . The “beep” will not sound after “
  ” goes off. To turn the “beep” back on, repeat the process.
4
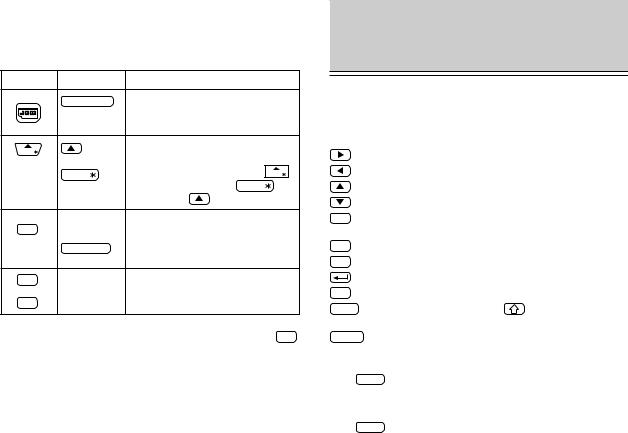
Key notations
This manual uses the following notations for key operations and functions:
Key |
Notation |
|
Note |
|
|
CALENDAR |
CALENDAR |
Keys with only one function always |
|
||
|
|
appear in the manual with the |
|
||
|
|
function enclosed in a box. |
|
||
MARK |
|
Keys with multiple functions appear in |
|||
or |
the manual with only the contextually |
||||
|
|||||
|
MARK |
appropriate function boxed; i.e., MARK |
|||
|
will sometimes appear as MARK |
and |
|||
|
|
||||
|
|
sometimes as |
. |
|
|
FUNCTION |
S |
Alphabetical keys with multiple |
|
||
S |
or |
functions appear sometimes as |
|
||
|
FUNCTION |
unboxed letters and sometimes as the |
|||
|
|
boxed function name. |
|
||
7 |
7 |
Numerical keys and alphabetical keys |
|||
|
N |
are noted only with unboxed numbers |
|||
N |
and letters. |
|
|
||
NOTE: The blue functions and symbols are operated by pressing |
2nd |
||||
and the appropriate keys.
BASIC ENTRY
PROCEDURES
Entering characters and numbers
To practice entering characters and numbers, select the MEMO mode.
Keys and their functions
: Moves the cursor to the right.
: Moves the cursor to the left.
: Moves the cursor up to the previous line.
: Moves the cursor down to the next line.
INS : Puts the Organizer into insert mode. Pressing this key again exits the insert mode.
DEL : Deletes the character at the cursor.
BS : Deletes the character to the left of the cursor (“backspace”).
: Moves the cursor to the beginning of the next line (new line).
C•CE : Clears the data being entered.
CAPS : Functions as a capslock key. ( |
functions in the same |
way.) |
|
ENTER : Stores the data being displayed.
Entering graphic symbols and special characters
Press SMBL to select the symbol entry mode. A total of 90 symbols can be selected. To select the symbol display containing the desired symbol/special character, press  or
or  , then press the number corresponding to it.
to exit the symbol entry mode.
5
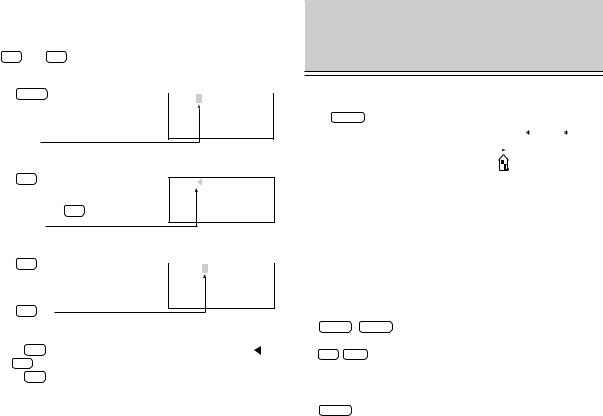
Making corrections
Misspellings and incorrect entries can be corrected using the cursor keys, INS , and DEL as follows:
Correcting misspellings
1. |
Press |
MEMO . |
|
|
NEW |
YARK |
|||
2. |
Enter “NEW YARK”. |
|
|
|
3.Press 

 .
.
4.Enter “O”.
Inserting missing letters
1. Press C•CE . |
NEW YRK |
|
2.Enter “NEW YRK”.
3.Press 
 INS .
INS .
4.Enter “O”.
Deleting unwanted characters
1. |
Press C•CE . |
|
NEW YOARK |
||
2. |
Enter “NEW YOARK”. |
|
3.Press 

 .
.
4.Press DEL .
NOTES:
• |
Pressing INS sets the insert mode and changes the cursor to “ ”. |
|
Press INS again to exit the insert mode. |
• |
Pressing C•CE deletes the data currently being entered. |
USING THE HOME AND
WORLD CLOCKS
Displaying the HOME time
Press CLOCK to display the HOME time.
|
|
|
HOME |
Day of the week |
NEW YORK |
||
|
|
|
FRI JAN 1,1999 |
month/day/year |
|
||
|
12:00AM |
||
|
|
|
|
NOTE: The date format can be changed. Refer to page 31. |
|||
Setting the HOME clock
Setting and changing the HOME city
Set your local city as the HOME city by selecting its zone number. Zone numbers are based on the distance of the zones from the international date line (zone number zero). For example, there is a 13hour difference between the date line and London (London is 13 hours behind), so the zone number for London is 13. (Refer to page 36.)
1.Display the HOME clock.
CLOCK ( CLOCK )
2.Enter the edit mode.
2nd EDIT
3.Display the desired city name from the cities stored in the Organizer.  (or
(or  )
)
4.Set the HOME city.
ENTER
6
NOTES:
•Between step 2 and step 4, the Organizer stops the clock. Be sure to set the correct time after setting or changing the HOME or WORLD city.
•Some city names are abbreviated on the display as follows: HONG KONG ........... HONGKONG
NEW DELHI .............. DELHI RIO DE JANEIRO ..... RIO LOS ANGELES ......... L.A. ANCHORAGE ........... ANC.
•For zone numbers 0, 14, and 15, the city name display is blank.
Setting the clock |
|
|
|
Zone number |
|||
1. |
Display the HOME clock. |
|
|
|
|||
|
|
|
|
|
|
||
|
|
|
|
|
|
||
|
CLOCK ( CLOCK ) |
|
|
HOME |
|
|
|
|
|
|
|
||||
2. |
Enter the edit mode. |
NEW YORK |
[18.0] |
||||
FRI JAN |
1,1999 |
||||||
|
2nd EDIT |
|
|
12:00AM |
|||
|
|
|
|
||||
|
|
|
|
|
|
|
|
3.Select the time system.
The time can be displayed using either the conventional 12-hour AM/PM system or the 24-hour system. Pressing 12 24 switches between them.
4. Set the time. (The date in the example |
HOME |
[18.0] |
|
below is January 10, 1999, 1:30 PM.) |
NEW YORK |
||
01 30 PM |
FRI JAN |
1,1999 |
|
1:30 |
PM |
||
|
The hours and minutes must be entered using two digits each.
5.Enter the date.  01 10 1999
Enter the month and day using 2 digits and the year using 4 digits. For single digit months or days, enter “0” before the single digit.
6.Press ENTER to start the clock from 0 seconds of the specified time.
ENTER
When the time is set on the 12-hour basis, noon and midnight changes are displayed as below:
11:59AM → 12:00PM (noon) → 12:59PM → 1:00PM 11:59PM → 12:00AM (midnight) → 12:59AM → 1:00AM
Using the WORLD clock
The time in any place in the world can be checked by selecting its zone number. The default city for the WORLD time is London.
Displaying the WORLD time
Display the WORLD clock. |
The time differences from the HOME city |
|||||
|
|
|
|
|
|
|
CLOCK ( CLOCK ) |
|
|
|
|
|
|
|
LONDON |
WORLD |
|
|
|
|
|
|
|
||||
|
|
(+ 5:00) |
|
|||
(The initial WORLD city setting is London.) |
SUN JAN 10,1999 |
|
||||
|
6:30PM |
|
||||
|
|
|
|
|||
Changing the city for the WORLD time
1.Display the WORLD clock.
CLOCK ( CLOCK )
The current city setting appears on the display.
2.Enter the edit mode.
2nd EDIT
3.Follow the procedure for “Setting and changing the HOME city” (from step 3) on page 6 to select the city name you want.
Changing the time
If you wish to change the current HOME time and date, follow the procedure under “Setting the clock” mentioned above. Skip step 4 if you do not want to change the time. Skip step 5 if you do not want to change the date.
7
Registering a city name not found in the list
For example, if you wish to set the city for the WORLD time to Rome (which is in zone number 12, but is not included in the city list):
1.Display the WORLD clock and enter the edit mode.
CLOCK ( CLOCK ) 2nd EDIT
The cursor flashes on the city name line.
2.Use  and
and  to set the zone number to 12 (initially, the city is Paris.)
3.Enter the city name (up to 8 characters). ROME SPACE
WORLD
ROME  [12.0]
SUN JAN 10,1999
7:30PM
4. Press ENTER to store the name.
NOTE: To register a city name for the HOME clock, first display the HOME clock then 
 followed by
 to move the cursor to the city name line.
Setting daylight saving time/summer time
If DST (daylight saving time/summer time) is used, the local time is advanced once hour during the summer. The HOME clock and the WORLD clock can be set for DST as follows:
HOME clock:
To set
1.Display the HOME clock.
CLOCK ( CLOCK )
2.Enter the edit mode.
2nd EDIT
3. Enter the correct DST time.
4. Press 2nd ENTER .
“  ” appears on the display and DST is set.
To clear
Perform the steps above except for step 3. To clear the DST, set time other than the DST in step 3.
“  ” disappears and DST is cleared.
NOTE: For HOME clock, the “  ” display is turned on or off whenever 2nd EDIT then 2nd ENTER are pressed, even if the time setting is not changed. After this operation, the clock starts from 0 seconds.
WORLD clock:
To set
1.Display the WORLD clock.
CLOCK ( CLOCK )
2.Enter the edit mode and change the setting.
2nd EDIT 2nd ENTER
“  ” appears on the display and DST is set. Setting DST in the WORLD clock automatically sets the time one hour ahead.
To clear
Perform the same steps as those used to set the DST.
“  ” disappears and the time for all WORLD cities is one hour back.
NOTES:
•When DST is set for one WORLD city, it is used for all cities displayed in the WORLD clock.
•DST can be set independently in the HOME and WORLD clocks. For example, if DST is set for the HOME clock, it does not have to be set for the WORLD clock.
8
USING THE CALENDAR
FUNCTION
Displaying and changing the monthly calendar
In the CALENDAR mode, the month can be changed by using  and
and  , or designating the year and month.
Operations of  and
and  during the monthly calendar display
The Organizer has a five-line display. The monthly calendar is displayed occasionally in two separate displays. In this instance, symbol “  ” appears on the display and the last week will be displayed by pressing
  several time.
Changing the month with  and
and 
In the CALENDAR mode, the month can be changed by pressing  (to display the upcoming months) and
  (to display past months) as follows:
1.Select the CALENDAR mode.
CALENDAR
“ ” indicates that the last week of the month is hidden below. To display the last week, press
  until the cursor scrolls into the next screen.
’99 |
|
|
|
|
|
|
1 |
2 |
1 |
3 |
4 |
5 |
6 |
7 |
8 |
9 |
|
|
|
10 |
11 |
12 |
13 |
14 |
15 |
16 |
|
|
17 |
18 |
19 |
20 |
21 |
22 |
23 |
|
24 |
25 |
26 |
27 |
28 |
29 |
30 |
|
If the display above does not appear, press 2nd CALENDAR . (In this example, January 1999 is displayed.)
2. Display the calendar for the next month.
3. Display the calendar for two months prior |
’98 |
|
|
@1 2 3 |
4 5 |
|
to the month presently on the display. |
12 |
6 |
7 |
8 |
9 10 |
11 12 |
|
|
13 |
14 |
15 |
16 17 18 19 |
|
|
|
20 |
21 |
22 |
23 24 25 26 |
|
|
|
27 |
28 |
29 |
30 31 |
|
NOTES:
•When  or
or  is pressed continuously, the calendar will scroll forward or backward.
•A “ ’ ” is attached to the years 1901 to 1999 while no mark is attached to the years 2000 to 2099.
4. Press 2nd CALENDAR to return the calendar to the current date.
Recalling a month by designating the date
For example, to display the month of February 1999, perform the steps below:
1.Select the CALENDAR mode.
2nd CALENDAR
2. Enter the date entry mode. |
MM/DD/YYYY |
|
C•CE |
MONTH |
:01 |
|
DAY |
:10 |
|
YEAR |
:1999 |
|
|
|
To change the date, move the cursor with the cursor movement keys. To clear the displayed date, press C•CE .
3. Enter the date. |
MM/DD/YYYY |
|
||
02 01 1999 |
MONTH |
:02 |
|
|
|
DAY |
:01 |
|
|
|
YEAR |
:1999 |
|
|
|
|
|
|
|
To enter a single-digit date or month, enter zero and the digit (that is “02” or “01").
4.Recall the calendar.
ENTER
The specified monthly calendar will be displayed.
9
USING THE SCHEDULE
FUNCTION
Entering data in the SCHEDULE mode
The date of a schedule item can be selected:
1.By selecting the desired date in the CALENDAR mode.
2.By selecting the desired date in the SCHEDULE mode with  and
and  .
.
3.By recalling the desired date directly in the SCHEDULE mode.
Once the date has been selected, actual entry of the schedule item is the same for all three methods.
NOTE: Multiple items may be scheduled on the same date. If other items have been previously scheduled for a given date, simply enter the new appointment over the old one. The Organizer’s display will clear upon recognition of the new entry.
Entering items from the CALENDAR mode
To enter an item from the CALENDAR mode, such as, “February 19, 1999 10:00AM - 2:00PM ABC Project meeting in room 23”:
1. |
Select the CALENDAR mode. |
|
|
|
|
|
|
|
|
|
2nd CALENDAR |
|
|
|
|
|
|
|
|
2. |
Change the calendar to February 1999. |
|
|
|
|
|
|
|
|
3. |
Move the cursor to the 19th of February, |
|
|
|
|
|
|
|
|
’99 |
|
1 |
2 |
3 |
4 |
5 |
6 |
||
|
using the cursor movement keys. |
2 |
7 |
8 |
9 10 |
11 |
12 |
13 |
|
|
|
|
14 |
15 |
16 |
17 |
18 |
19 |
20 |
|
|
|
21 |
22 |
23 |
24 |
25 |
26 |
27 |
|
|
|
28 |
|
|
|
|
|
|
4. |
Change to the SCHEDULE mode. |
FRI |
FEB 19,1999 |
|
SCHEDULE |
TIME |
? |
5. |
Enter the starting time. |
|
|
|
|
10 AM (“:00AM” will be entered automatically.)
6.Enter the finishing time. 2 PM
7.Enter the schedule detail.
Use the  (Return) key to change the line.
FRI FEB 19,1999 10:00AM~ 2:00PM DESCRIPTION ?
FRI FEB 19,1999 10:00AM~ 2:00PM ABC Project meeting in room 23
8. |
Store the scheduled meeting in the memory. |
|
|
|
|
|
|
|
|
|
ENTER |
|
|
|
|
|
|
|
|
9. |
Now check to see if the data was |
|
|
|
|
|
|
|
|
’99 |
|
1 |
2 |
3 |
4 |
5 |
6 |
||
|
registered in the memory. |
2 |
7 |
8 |
9 10 |
11 |
12 |
13 |
|
|
CALENDAR |
|
14 |
15 |
16 |
17 |
18 |
19 |
20 |
|
|
21 |
22 |
23 |
24 |
25 |
26 |
27 |
|
|
|
|
|||||||
|
|
|
28 |
|
|
|
|
|
|
Notice the tag (  ) next to “February 19”. It indicates a scheduled item for that date. Items beginning in the morning result in a tag at the upper right of the date, while those beginning in the afternoon result in a tag appearing at the lower right of the date.)
If an anniversary has been set, the tag will appear in the center.
 Schedule item beginning in the morning

 Anniversary item
 Schedule item beginning after the noon
Entering items from the SCHEDULE mode
There are two methods of selecting the date depending on which is more convenient.
10
Selecting the date with  and
and 
This method is convenient for entering data into a nearby date. For example, to enter an item such as, “February 17, 3:00PM - 5:00PM Sales meeting”:
1.Press SCHEDULE .
2.Recall “February 17”.
 or
or 
Press  or
or  until “February 17” is recalled.
3.Enter the starting and finishing times, and detail.
4.Store the scheduled meeting in the memory.
ENTER
WED FEB 17,1999 TIME ?
WED FEB 17,1999 3:00PM~ 5:00PM
Sales meeting_
Scheduling with C•CE and the numerical keys
This method is convenient for entering data into a date that is not close to the displayed date. For example, to schedule, “February 24, 1999 1:30PM Dr. Wilson visit at Guest room”:
1.Enter the date entry mode.
SCHEDULE C•CE C•CE
2.Enter the scheduled date. (February 24, 1999) 02 24 1999 ENTER
3. Enter the starting and finishing times, |
WED FEB |
24,1999 |
and detail. |
1:30PM~ |
|
|
Dr. Wilson visit |
|
|
at Guest |
room_ |
|
|
|
NOTE: If you don’t know what time a scheduled item, such as a meeting, will finish, press either  or ENTER following the starting time, then enter the schedule item.
4.Store the scheduled meeting in the memory.
ENTER
Scheduling items without times
After selecting the schedule date as outlined above, schedule items can be entered directly without a specified time, except in instances when the date begins with a number. Simply begin by entering the letters in the item.
Recalling scheduled data
Scheduled items can be displayed by:
1.Recalling today’s agenda.
2.Recalling scheduled items from the CALENDAR mode.
3.Recalling scheduled items from the SCHEDULE mode with  and
and  .
.
4.Recalling only scheduled dates (skip empty dates).
5.Recalling scheduled items from SCHEDULE mode by entering the date numerically.
6.Recalling scheduled items using the first letter(s) of the item.
7.Recalling scheduled items with a keyword search.
8.Recalling scheduled items using the index display.
Recalling today’s agenda
Press 2nd SCHEDULE .
If nothing has been entered for the day, only the date will be displayed.
Recalling scheduled items from the CALENDAR mode
For example, to recall the schedule for February 19, 1999:
1. |
Select the CALENDAR mode. |
’99 |
|
|
1 |
2 |
3 |
4 |
5 |
6 |
|
2nd CALENDAR |
2 |
7 |
|
8 |
9 10 |
11 |
12 |
13 |
|
|
|
|
14 |
15 |
16 |
17 |
18 |
19 |
20 |
|
|
|
|
21 |
22 |
23 |
24 |
25 |
26 |
27 |
|
|
|
|
28 |
|
|
|
|
|
|
|
2. |
Select the 19th with the cursor |
|
|
|
|
|
|
|
|
|
’99 |
|
1 |
2 |
3 |
4 |
5 |
6 |
|||
|
movement keys. |
2 |
7 |
8 |
9 10 |
11 |
12 |
13 |
||
14 15 16 17 18 19 20
21 22 23 24 25 26 27
28
11

You may also recall February 19 in the CALENDAR mode by pressing C•CE , entering the date, and pressing ENTER .
3.Recall the schedule display.
SCHEDULE
Recalling scheduled items from the SCHEDULE mode with  and
and 
For example, to recall the schedule for January 10, 1999 (today):
1.Select the SCHEDULE mode to display today’s schedule.
2nd SCHEDULE
2.Recall the schedule for the next day.
The agenda for the next day will be displayed. If there are several items on the same day, use  to recall them in chronological order.
Recalling only scheduled dates (skip empty dates)
1.Search for all days containing scheduled items.
SCHEDULE
2nd
2. Press 2nd  to recall the next scheduled items.
NOTES:
•After the last scheduled item has been found, “NOT FOUND!” is displayed, then the previous display reappears. Pressing 2nd  references scheduled items in reverse.
•Pressing SCHEDULE C•CE C•CE and 2nd  displays the oldest past scheduled item. If you press 2nd
  , the most distant future scheduled item is displayed.
Recalling scheduled items from SCHEDULE mode by entering the date numerically
This method is handy for recalling scheduled items which are far away. For example, to recall the schedule for February 17, 1999:
1.Enter the date entry mode.
SCHEDULE C•CE C•CE
2.Enter the date. 02 17 1999
3.Recall the agenda for that date.
ENTER
Recalling scheduled items using the first letter(s) of the item
For example, to recall the “Dr.”-related items scheduled after January 10, 1999 (today):
1.Select the SCHEDULE mode to display today’s schedule.
2nd SCHEDULE
2.Enter the first letter(s) and begin the search. DR.
NOTES:
•This search is not case sensitive.
•When  is pressed, a forward search from the displayed date will begin for scheduled items beginning with the word “Dr.”
•If  is pressed, a reverse search will take place for items scheduled before the date presently appearing on the display.
Recalling scheduled items with a keyword search
To search for scheduled items containing the word “meeting” after January 1, 1999, for example:
1.Recall the schedule for January 1, 1999.
SCHEDULE C•CE C•CE 01 01 1999 ENTER
2.Enter the keyword for the search and begin the search. MEETING 2nd 
The first scheduled item containing the word “meeting” after January 1, 1999 will appear on the display.
12
 Loading...