


 Loading...
Instruction Manual
DVD-V9800
www.samsung.com
AK68-01623B-01
SA F E T Y IN S T R U C T I O N S
Important Safety Instructions
1)Read these instructions.
2)Keep these instructions.
3)Heed all warnings.
4)Follow all instructions.
5)Do not use this apparatus near water.
6)Clean only with a dry cloth.
7)Do not block any ventilation openings, Install in accordance with the manufacturer's instructions.
8)Do not install near any heat sources such as radiators, heaters, or other apparatus (including amplifiers) that produce heat.
9)Do not defeat the safety purpose of the polarized or groundingtype plug. A polarized plug has two blades with one wider than the other. A grounding type plug has two blades and a third grounding prong.
The wide blade and the third prong are provided for your safety. If the provided plug does not fit into your outlet, consult an electrician for replacement of the outlet.
10)Protect the power cord from being walked on or pinched particularly at plugs, convenience receptacles, and the point where they exit from the apparatus.
11)Only use attachments/accessories specified by the manufacturer.
12)Use only with a cart, stand, tripod, bracket, or table specified by the manufacturer, or sold with the apparatus.
13)When a cart is used, unplug this apparatus and use caution when moving the cart/apparatus combination to avoid injury from tip-over.
14)Refer all servicing to qualified service personnel. Servicing is required when
the apparatus has been damaged in any way, such as the power-supply cord or plug is damaged, liquid has been spilled or objects have fallen into the apparatus. Service is also required if the apparatus has been exposed to rain or moisture, does not operate normally, or has been dropped.
ENG-2
SA F E T Y IN S T R U C T I O N S
Precautions
TO REDUCE THE RISK OF ELECTRIC SHOCK, DO NOT
REMOVE THE COVER (OR BACK).
NO USER-SERVICEABLE PARTS ARE INSIDE. REFER
SERVICING TO QUALIFIED SERVICE PERSONNEL.
This symbol indicates “dangerous voltage” inside the product that presents a risk of electric shock or personal injury.
This symbol indicates important instructions accompanying the product.
Do not install this equipment in a confined space such as a bookcase or similar unit.
WARNING : To prevent damage which may result in fire or electric shock hazard, do not expose this appliance to rain or moisture.
Note to CATV system installer: This reminder is provided to call CATV system installer’s attention to Article 820-40 of the National Electrical Code (Section 54 of Canadian Electrical Code, Part I) that provides guidelines for proper grounding and, in particular, specifies that the cable ground shall be connected to the grounding system of the building as close to the point of cable entry as practical.
Caution: FCC regulations state that any unauthorized changes or modifications to this equipment may void the user’s authority to operate it.
•Apparatus shall not be exposed to dripping or splashing and no objects filled with liquids, such as vases, shall be placed on the apparatus.
•If this power supply is used at 240V ac, a suitable plug adapter should be used.
FCC NOTE (for U.S.A):
This equipment has been tested and found to comply with the limits for a Class B digital device, pursuant to Part 15 of the FCC rules. These limits are designed to provide reasonable protection against harmful interference in a residential installation. This equipment generates, uses and can radiate radio frequency energy and, if not installed and used in accordance with the instructions, may cause harmful interference to radio or television reception, which can be determined by turning the equipment off and on.
The user is encouraged to try to correct the interference by one or more of the following measures.
•Reposition or relocate the receiving antenna.
•Increase the separation between the equipment and receiver.
•Connect this equipment into an outlet on a circuit different from that to which the receiver is connected.
•Consult the dealer or an experienced radio/TV technician for help.
This class B digital apparatus meets all requirements of the Canadian Interference -- Causing Equipment Regulations.
CLASS 1 LASER PRODUCT
KLASSE 1 LASER PRODUKT
LUOKAN 1 LASER LAITE
KLASS 1 LASER APPARAT
PRODUCTO LÁSER CLASE 1
ENG-3

SA F E T Y IN S T R U C T I O N S
CAUTION
THIS PRODUCT UTILIZES A LASER. USE OF CONTROLS OR ADJUSTMENTS OR PERFORMANCE OF PROCEDURES OTHER THAN THOSE SPECIFIED HEREIN MAY RESULT IN HAZARDOUS RADIATION EXPOSURE. DO NOT OPEN COVER AND DO NOT REPAIR YOURSELF. REFER SERVICING TO QUALIFIED PERSONNEL.
Note:
•This unit can be used only where the power supply is AC 120V, 60Hz. It cannot be used elsewhere.
•This DVD player is designed and manufactured to respond to the Region Management Information. If the Region number of a DVD disc does not correspond to the Region number of this DVD player, the DVD player cannot play the disc.
•The product unit accompanying this user manual is licensed under certain intellectual property rights of certain third parties. In particular, this product is licensed under the following US patents: 5,060,220 5,457,669 5,561,649 5,705,762 5,987,417 6,043,912 6,222,983 6,272,096 6,377,524 6,377,531 6,385,587 6,389,570 6,408,408 6,466,532 6,473,736 6,477,501 6,480,829 6,556,520 6,556,521 6,556,522 6,578,163 6,594,208 6,631,110 6,658,588 6,674,697 6,674,957 6,687,455 6,697,307 6,707,985 6,721,243 6,721,493 6,728,474 6,741,535 6,744,713 6,744,972 6,765,853 6,765,853 6,771,890 6,771,891 6 775,465 6,778,755 6,788,629 6,788,630 6,795,637 6,810,201 6,862,256
6,868,054 6,894,963 6,937,552, 6,836,549; 6,381,747; 7,050,698; 6,516,132; and 5,583,936. This license is limited to private non-commercial use by end-user consumers for licensed contents.
No rights are granted for commercial use. The license does not cover any product unit other than this product unit and the license does not extend to any unlicensed product unit or process conforming to ISO/IEC 11172-3 or ISO/IEC 13818-3 used or sold in combination with this product unit.
The license only covers the use of this product unit to encode and/or decode audio files conforming to the ISO/IEC 11172-3 or ISO/IEC 13818-3. No rights are granted under this license for product features or functions that do not conform to the ISO/IEC 11172-3 or ISO/IEC 13818-3.
Handling Cautions
•Before connecting other components to this player, be sure to turn them all off.
•Do not move the player while a disc is being played, or the disc may be scratched or broken, and the player’s internal parts may be damaged.
•Do not put a flower vase filled with water or any small metal objects on the player.
•Be careful not to put your hand into the disc tray.
•Do not place anything other than the disc in the disc tray.
•Exterior interference such as lightning and static electricity can affect normal operation of this player.
If this occurs, turn the player off and on again with the POWER button, or disconnect and then reconnect the AC power cord to the AC power outlet. The player will operate normally.
•Be sure to remove the disc and turn off the player after use.
•Disconnect the AC power cord from the AC outlet when you don’t intend to use the player for long periods of time.
•Clean the disc by wiping in a straight line from the inside to the outside of the disc.
•The Mains plug is used as a disconnect device and shall stay readily operable at anytime.
Disc Storage
Be careful not to harm the disc because the data on these discs is highly vulnerable to the environment.
•Do not keep under direct sunlight.
•Keep in a cool ventilated area.
•Store vertically.
•Keep in a clean protection jacket.
Maintenance of Cabinet
For safety reasons, be sure to disconnect the AC power cord from the AC outlet.
•Do not use benzene, thinner, or other solvents for cleaning.
•Wipe the cabinet with a soft cloth.
ENG-4
BE F O R E Y O U S TA R T
Before you start
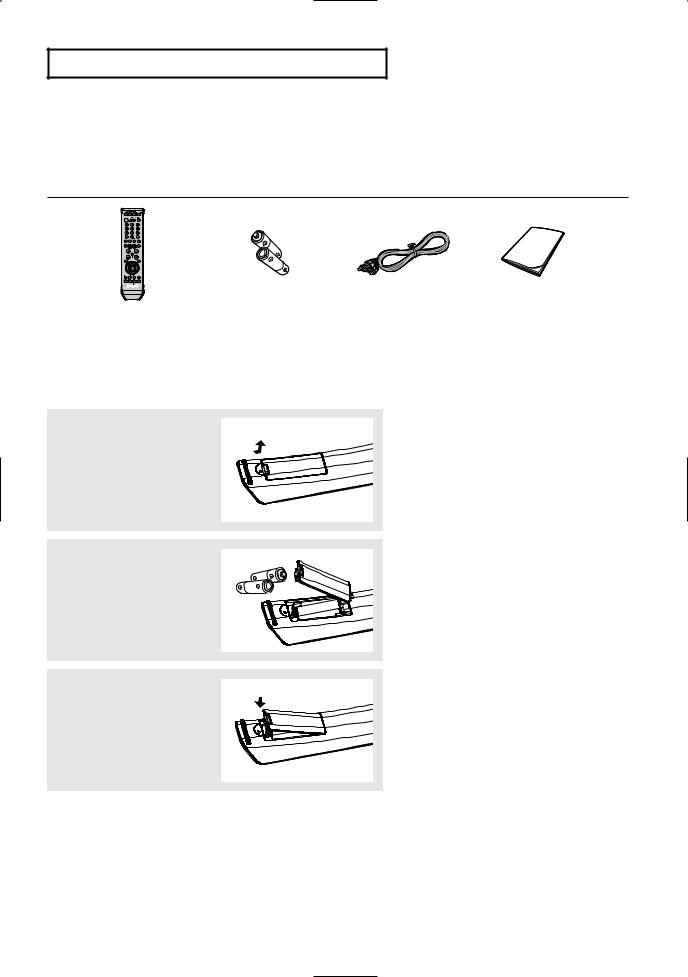
Accessories
Remote Control |
Batteries-2EA |
Video/Audio Cable |
User’s Guide |
AK59-00061J |
1.5V(AAA) |
AC39-00073A |
AK68-01623B |
|
AC43-12002H |
|
|
|
|
|
|
Install Batteries in the Remote Control
1
Open the battery cover on the back of the remote control.
2
Insert two AAA batteries. Make sure that the polarities (+ and -) are aligned correctly.
3
Replace the battery cover.
If the remote control doesn’t operate properly:
■Check the polarity +, - of the batteries.
■Check if the batteries are drained.
■Check if the remote control sensor is blocked by obstacles.
■Check if there is any fluorescent lighting nearby.
ENG-5

TA B L E O F CO N T E N T S |
|
Table of Contents |
|
Safety Instructions ........................................................................................................................................ |
2 |
Important Safety Instructions ................................................................................................................ |
2 |
Precautions .......................................................................................................................................... |
3 |
Before you start ............................................................................................................................................ |
5 |
Accessories............................................................................................................................................ |
5 |
Install Batteries in the Remote Control .................................................................................................. |
5 |
Chapter 1: Setup |
|
General Features............................................................................................................................................ |
8 |
Disc Type and Characteristics ........................................................................................................................ |
9 |
Description.................................................................................................................................................... |
10 |
Tour of the Remote Control.................................................................................................................. |
12 |
Chapter 2: Connections |
|
Before Connecting the DVD-VCR .............................................................................................................. |
13 |
Connecting a Set-top/Cable/Satellite Box to the DVD-VCR ........................................................................ |
13 |
Connection to a TV ...................................................................................................................................... |
14 |
Connecting to a TV with an HDMI Jack .............................................................................................. |
14 |
Connecting to a TV (Progressive)........................................................................................................ |
16 |
Connecting to a TV (Interlace) ............................................................................................................ |
17 |
Connecting to a TV (Video).................................................................................................................. |
18 |
Connection to an Audio System .................................................................................................................. |
19 |
Connecting to an Audio System (2 Channel Amplifier, Analog) .......................................................... |
19 |
Connecting to an Audio System (Dolby digital, MPEG2 or DTS Amplifier).......................................... |
20 |
Connecting the Power Cord ........................................................................................................................ |
21 |
Chapter 3: Initial Setup |
|
Selecting a Menu Language ........................................................................................................................ |
22 |
Setting the Clock ........................................................................................................................................ |
23 |
Setting the Clock Manually ................................................................................................................ |
23 |
Setting the Front Panel Display .................................................................................................................. |
24 |
Setting the Auto Power Off .......................................................................................................................... |
25 |
Chapter 4: DVD Operations |
|
Playing a Disc .............................................................................................................................................. |
26 |
Using the Search and Skip Functions ........................................................................................................ |
28 |
Using the Display Function .......................................................................................................................... |
29 |
Using the Disc and Title Menu (DVD) .......................................................................................................... |
31 |
Using the Function Menu (DVD) .................................................................................................................. |
32 |
Repeat Play ................................................................................................................................................ |
33 |
Slow Play .................................................................................................................................................... |
34 |
Adjusting the Aspect Ratio (EZ View) .......................................................................................................... |
35 |
Selecting the Audio Language .................................................................................................................... |
37 |
ENG-6

TA B L E O F CO N T E N T S |
|
Selecting the Subtitle Language ................................................................................................................ |
38 |
Changing the Camera Angle ...................................................................................................................... |
39 |
Using the Bookmark Function (DVD) .......................................................................................................... |
39 |
Using the Zoom Function (DVD) .................................................................................................................. |
41 |
Clips Menu for CD Audio/MP3/WMA/JPEG/MPEG4 files ............................................................................ |
42 |
Folder Selection .......................................................................................................................................... |
42 |
CD Audio/MP3/WMA Playback .................................................................................................................... |
43 |
MPEG4 Playback ........................................................................................................................................ |
45 |
Picture CD Playback .................................................................................................................................... |
47 |
Using the Setup Menu ................................................................................................................................ |
49 |
Setting Up the Language Features .............................................................................................................. |
50 |
Setting Up the Audio Options ...................................................................................................................... |
52 |
Setting Up the Display Options .................................................................................................................... |
54 |
Setting Up the Parental Control .................................................................................................................. |
58 |
DivX(R) Registration .................................................................................................................................... |
61 |
Chapter 5: VCR Operations |
|
Inserting and Ejecting a Video Cassette Tape ............................................................................................ |
62 |
Playing a Pre-Recorded Video Cassette Tape ............................................................................................ |
63 |
Special VCR Playback Features ................................................................................................................ |
64 |
Using Automatic Tracking ............................................................................................................................ |
65 |
Selecting the Cassette Type ........................................................................................................................ |
66 |
Setting the Auto Play .................................................................................................................................. |
67 |
Setting the Auto Repeat .............................................................................................................................. |
68 |
Using the Tape Counter .............................................................................................................................. |
69 |
Using the Assemble Edit Function .............................................................................................................. |
70 |
Selecting the Audio Output Mode ................................................................................................................ |
71 |
Searching for a Specific Sequence ............................................................................................................ |
72 |
Basic Recording .......................................................................................................................................... |
74 |
Special Recording Features ........................................................................................................................ |
75 |
Using One-Touch Recording ...................................................................................................................... |
76 |
Selecting the Recording Speed .................................................................................................................. |
77 |
Making a Timer Recording .......................................................................................................................... |
78 |
Chapter 6: Reference |
|
Using the TV Buttons on the Remote Control ............................................................................................ |
80 |
Troubleshooting .......................................................................................................................................... |
81 |
Technical Specifications .............................................................................................................................. |
83 |
ENG-7

Chapter 1
SE T U P
General Features
DVD-VCR Features
■Perfect compatibility to play back DVDs, audio CDs or VHS Tapes.
■Composite, Component Video and HDMI outputs.
■On-Screen Program (English/French/Spanish).
Note
This product incorporates copyright protection technology that is protected by U.S. patents and other intellectual property rights. Use of this copyright protection technology must be authorized by Macrovision, and is intended for home and other limited viewing uses only unless otherwise authorized by Macrovision. Reverse engineering or disassembly is prohibited.
DVD Features
■10-bit video digital to analog converter and 54MHz advanced digital filter.
■Playback of 96KHz/24-bit sources.
■DTS digital output for DTS-enhanced DVDs.
■This unit can play MPEG4 formats within an avi file.
■Playback MP3-CDs.
VCR Features
■Hi-Fi Stereo VCR.
■Superior slow motion and stop action (with 4 heads).
■Playback of S-VHS tapes with a better than standard resolution.
■INTRO Scan, Zero Return, and END Search.
■Time remaining counter, real time counter.
Note
■Discs which cannot be played with this player.
-DVD-ROM/DVD-RAM/VCD
-CDI/CDV
-Super Audio CD (CD, HD layer)
-CDGs play audio only, not graphics.
-DVD-RW (VR mode)
-Non finalized DVD-RW, -R, DVD+RW, and +R discs.
■Ability to play back may depend on recording conditions.
-DVD-RW, -R/CD-RW/DVD+RW, +R/CD-ROM
■This DVD-VCR unit does not have a TV tuner. Recording TV broadcasts is possible via Connection to Cable/Satellite boxes and Multi Channel Video Services.
COPY PROTECTION
Many DVD discs are encoded with copy protection. Because of this, you should only connect your DVDVCR directly to your TV, not to a VCR. Connecting to a VCR results in a distorted picture from copyprotected DVD discs.
This product incorporates copyright protection technology that is protected by methods claims of certain U.S. patents and other intellectual property rights owned by Macrovision Corporation and other rights owners. Use of this copyright protection technology must be authorized by Macrovision Corporation, and is intended for home and other limited viewing uses only unless otherwise authorized by Macrovision Corporation. Reverse engineering or disassembly is prohibited.
PROGRESSIVE SCAN
OUTPUT SETTING
PLEASE NOTE THAT NOT ALL
HIGH DEFINITION TELEVISION SETS ARE FULLY COMPATIBLE WITH THIS PRODUCT AND MAY CAUSE ARTIFACTS TO BE DISPLAYED IN THE PICTURE. IF PROGRESSIVE SCAN PICTURE PROBLEMS OCCUR, WE RECOMMEND SWITCHING THE CONNECTION TO THE ‘STANDARD DEFINITION’ OUTPUT. IF THERE ARE QUESTIONS REGARDING YOUR TV SET COMPATIBILITY WITH THIS DVD-VCR, PLEASE CONTACT SAMSUNG'S CUSTOMER SERVICE CENTER.
ENG-8
SE T U P
Disc Type and Characteristics
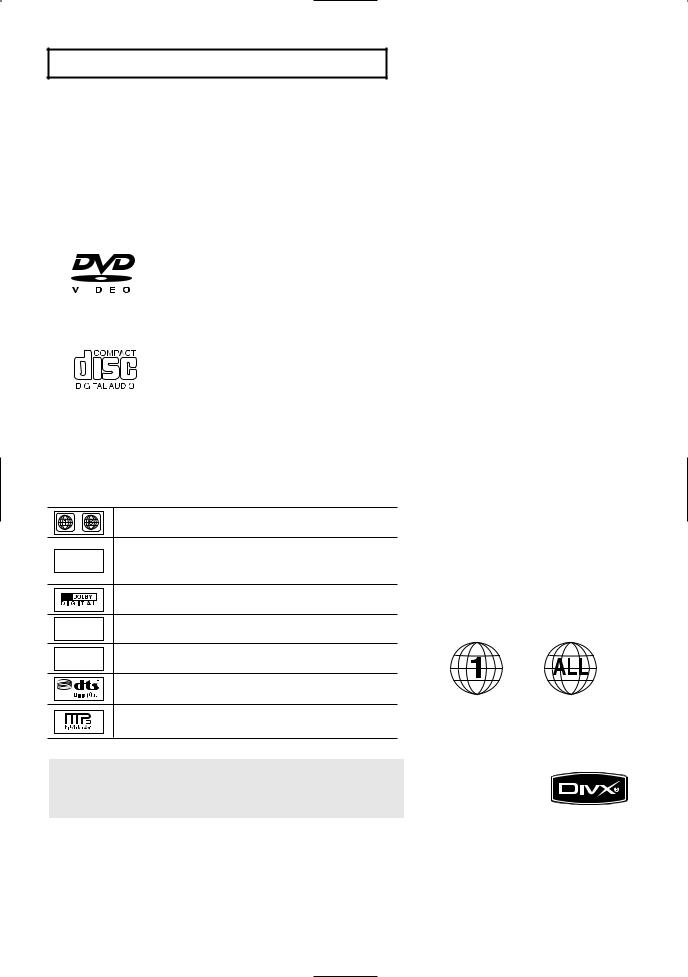
This DVD-VCR is capable of playing the following types of discs with the corresponding logos:
|
Disc Types (Logos) |
Recording Types |
Disc Size |
Max. Playing Time |
Characteristics |
|
|||||
|
|
|
|
|
|
|
|
|
|
|
|
|
|
|
DVD |
|
5” |
Single-sided 240 min. |
- DVD contains excellent sound |
|
|||
|
|
|
|
|
|
|
Audio |
Double-sided 480 min. |
and video due to Dolby Digital |
|
|
|
|
|
|
|
|
|
|
and MPEG-2 system. |
|
||
|
|
|
|
|
|
|
+ |
|
|
|
|
|
|
|
|
|
|
|
|
|
- Various screen and audio |
|
|
|
|
|
|
|
|
|
Video |
3 1/2” |
Single-sided 80 min. |
|
|
|
|
|
|
|
|
|
functions can be easily selected |
|
|||
|
|
|
|
|
|
|
|
Double-sided 160 min. |
|
||
|
|
|
|
|
|
|
|
|
through the on-screen menu. |
|
|
|
|
|
|
|
|
|
|
|
|
|
|
|
|
|
|
|
|
|
|
|
|
|
|
|
AUDIO-CD |
|
5” |
74 min. |
- CD is recorded as a Digital |
|
|||||
|
|
|
|
|
|
|
|
Signal with better audio quality, |
|
||
|
|
|
|
|
|
|
|
|
|
|
|
|
|
|
|
|
|
|
Audio |
|
|
less distortion and less |
|
|
|
|
|
|
|
|
|
|
|
||
|
|
|
|
|
|
|
|
3 1/2” |
20 min. |
deterioration of audio quality |
|
|
|
|
|
|
|
|
|
over time. |
|
||
|
|
|
|
|
|
|
|
|
|||
|
|
|
|
|
|
|
|
|
|
|
|
■CD-R,CD-RW and DVD-RW, -R, DVD+RW, +R discs may not be playable in all cases due to the disc type or condition of the recording.
■Do not run the player with two discs loaded at the same time.
Disc Markings
~ |
Play Region Number |
|
NTSC |
NTSC broadcast system in U.S.A, Canada, Korea, |
|
Japan, etc. |
||
|
||
|
Dolby Digital disc |
|
STEREO |
Stereo disc |
|
DIGITAL |
Digital Audio disc |
|
SOUND |
||
|
DTS disc |
|
|
MP3 disc |
You must only insert one DVD disc at a time. Inserting two or more discs will not allow playback and may cause damage to the DVD-VCR.
Region Number
Both the DVD-VCR and the discs are coded by region. These regional codes must match in order for the disc to play. If the codes do not match, the disc will not play.
The Region Number for this player is described on the rear panel of the player.
DivX Certification
DivX, DivX Certified, and associated logos are
trademarks of DivXNetworks, Inc and are used under license.
ENG-9
SE T U P
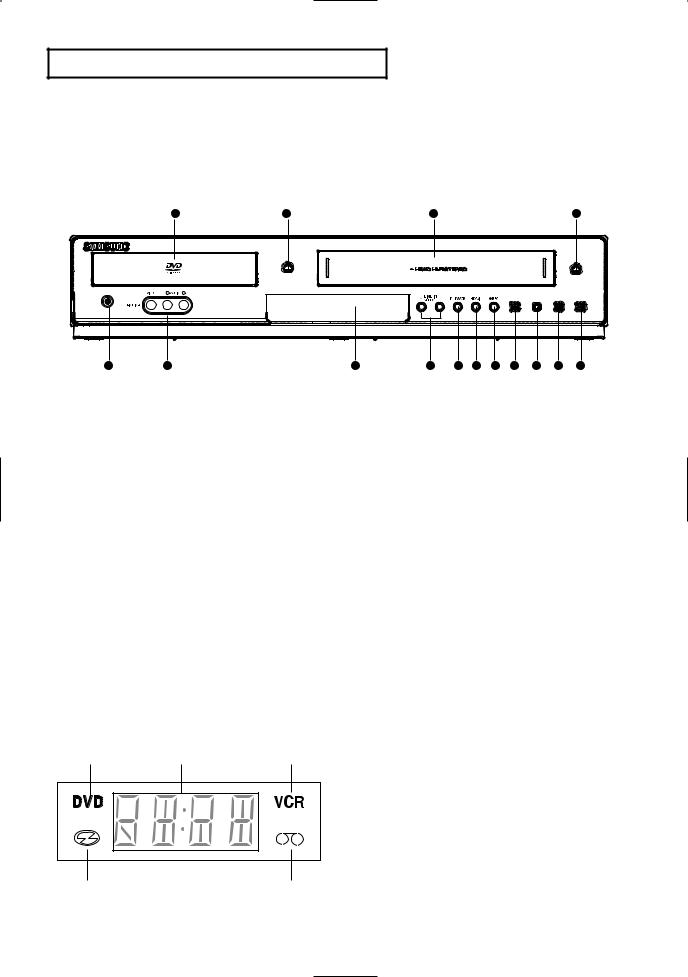
Description
Front Panel Controls
1 |
2 |
3 |
4 |
5 |
6 |
7 |
8 |
9 |
10 |
11 |
12 |
13 |
14 |
15 |
1DISC TRAY
Place the disc here.
2 OPEN/CLOSE
Press to open and close the disc tray.
3VCR Deck
Insert a standard VHS video tape.
4 EJECT
EJECT
Press to eject a video tape if the tape is stopped.
5 (POWER)
Press to turn the DVD-VCR on and off.
6LINE IN 2
Connects to the Video/Audio output jack of your external device.
7Front Panel Display
Operation indicators are displayed here.
8LINE IN SELECT
Press to select Line Input 1 or 2. These buttons are also used as Tracking buttons for the VCR.
Front Panel Display
|
|
|
|
|
9DVD/VCR
Press to select DVD or VCR mode.
10HDMI
HDMI Output resolution setup.
11 REC (VCR)
Press to begin recording.
12 (Reverse/Rewind)
Press to reverse/rewind a disc/video tape.
13 (STOP)
Press to stop a disc/video tape during playback or record (VCR).
14 (Play/Pause)
Press to play or pause the disc/video tape.
15 (Forward/Fast Forward)
Press to forward/fast forward a disc/videotape.
1DVD is activated.
2The time, counter position, time remaining or current deck status is indicated.
3VCR is activated.
4DVD or CD media is loaded.
5VHS videotape is loaded.
ENG-10
SE T U P
Rear Panel
Œ ´ ˇ
¨ ˆ |
Ø ¨ |
1AUDIO OUT
Connect to the Audio input jacks of your television.
2COMPONENT VIDEO OUT
-Use these jacks if you have a TV with Component Video in jacks.
These jacks provide PR, PB and Y video.
3.HDMI OUT JACK
-Use an HDMI cable to connect this jack to the HDMI jack on your television for the best quality picture.
-If an HDMI cable is connected to an HDMIcompatible TV, HDMI will be output automatically within 10 seconds.
-If you want to use the Video or Component Output, unplug the HDMI cable.
4DIGITAL AUDIO OUT (OPTICAL/COAXIAL)
-Use either an optical or coaxial digital audio cable to connect to a compatible Dolby Digital receiver.
-Use either an optical or coaxial digital audio cable to connect to an A/V Amplifier that contains a Dolby Digital, MPEG2 or DTS decoder.
5LINE IN 1 (VIDEO/AUDIO)
Connect to the Video/Audio output jack of your external device.
6LINE OUT (VIDEO/AUDIO)
Use a Video/Audio cable to connect to the Video/Audio input jacks on your television. You must have these jacks connected to see video playback from the VCR on your TV.
DVD/VCR Output Chart
Type of Connection |
DVD Output Jacks |
VCR Output Jacks |
|
|
|
COMPONENT VIDEO OUT |
O |
X |
|
|
|
AUDIO OUT (L,R) |
O |
X |
DIGITAL AUDIO OUT (OPTICAL, COAXIAL) |
O |
X |
|
|
|
LINE OUT (A/V) |
O |
O |
|
|
|
HDMI OUT |
O |
X |
|
|
|
▼
O : Active.
X : Inactive.
Notes
■Consult your TV User’s Manual to find out if your TV supports Progressive Scan. If Progressive Scan is supported, follow the TV User’s Manual regarding Progressive Scan settings in the TV’s menu system.
ENG-11

SE T U P
Tour of the Remote Control
1TV button
Use to operate the TV.
2DVD button
Use to operate the DVD player.
3POWER button
Press to turn the DVD-VCR on and off.
4NUMBER Buttons
5TV 100+ button
6
 Skip button
Press to skip a disc backwards. Use to skip a title,chapter or track on a disc.
7REC button
Press to begin recording. (VCR)
8 Search button
Press to search a disc backwards.
9 (STOP) button
Press to stop a disc/video tape during play or record (VCR).
10TV VOL (+,-) button
11MENU button
Brings up the DVD-VCR player’s menu.
12ENTER/ buttons
This button functions as a toggle switch.
13DISC MENU button
Brings up the Disc menu. (DVD).
14EZVIEW button
The aspect ratio of a picture can easily be adjusted according to the screen size of your TV (16:9 or 4:3).
15SUBTITLE button
Press to display the subtitle language name abbreviation on screen.
16MODE button
Use to select the program or random play.
REPEAT button
Allows you to repeat play a title, chapter, track, or disc. (DVD)
17INPUT SEL. button
Press to select Line input 1 or 2 in VCR mode.
18VCR button
Use to operate the VCR.
|
|
19 F.ADV/SKIP button |
||
|
|
|
Press to advance play one |
|
|
|
|
frame at a time (DVD and |
|
Π|
˜ |
|
VCR). Press to fast forward a |
|
|
video tape (VCR). Press to |
|||
´ |
¯ |
|
select a external signal |
|
ˇ |
˘ |
|
source. |
|
20 OPEN/CLOSE button |
||||
¿ |
||||
|
||||
|
|
|
Use to open and close the |
|
|
|
|
disc tray or eject a video |
|
¨ |
|
|
tape. |
|
|
21 ZOOM button |
|||
|
|
|||
|
|
|
To enlarge the picture. |
|
|
|
22 |
Skip button |
|
ˆ |
¸ |
|
Press to skip a disc forward. |
|
|
Use to skip a title, chapter or |
|||
|
|
|
||
Ø |
˛ |
|
track on a disc. |
|
23 SPEED button |
||||
∏ |
◊ |
|||
|
Use to select the tape |
|||
” |
± |
|
recording speed. |
|
’ |
≠ |
24 |
Search button |
|
|
|
|
Press to search a disc |
|
˝ |
– |
|
forward. |
|
25 |
(Play/Pause) button |
|||
|
|
|||
|
— |
|
Press to play or pause the |
|
|
|
disc/video tape. |
||
Ô |
÷ |
26 TRK/TV CH button |
||
|
|
|
Use to change channels. |
|
|
|
|
(TV) Use to adjust tape |
|
|
|
|
tracking. (VCR) |
|
|
|
27 AUDIO/TV MUTE button |
||
|
|
|
Use this button to access |
|
|
|
|
various audio functions on a |
|
Ò |
® |
|
disc. (DVD mode) |
|
|
This operates as Sound |
|||
Ú |
∑ |
|
||
Æ |
μ |
|
Mute. (TV mode) |
|
28 RETURN button |
||||
ı |
¥ |
|||
|
|
|
Returns to a previous menu. |
|
29 CLEAR button
Use to remove menus or status displays from the screen.
30 INFO. button
Displays the current disc mode. (DVD)
31 MARK/SEARCH button
Press to memorize scenes for replay. (DVD)
Displays the VCR Function menu. (VCR)
32 ANGLE/TIMER button
Use to access various camera angles on a disc. (DVD) Displays the Timer Program menu (VCR).
ENG-12

Chapter 2
CO N N E C T I O N S
Before Connecting the DVD-VCR
-Always turn off the DVD-VCR, TV, and other components before you connect or disconnect any cables.
-Refer to the user’s manual of the additional components (such as a TV) you are connecting for more information on those particular components.
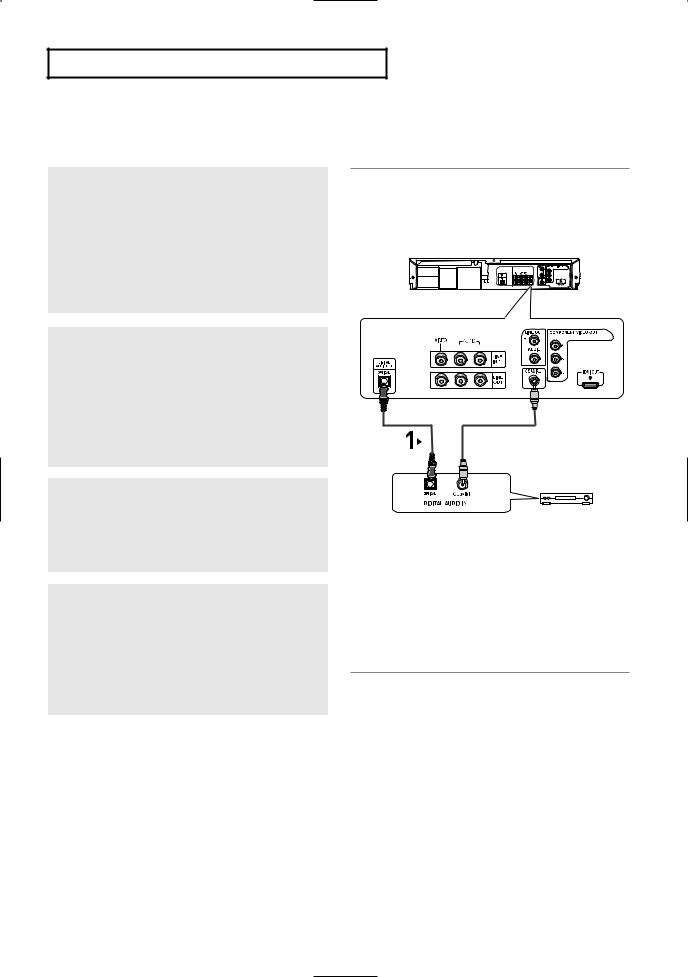
Connecting a Set-top/Cable/Satellite Box to the DVD-VCR
The following instructions show how to connect a Set-Top Box,TV and Amplifier to the DVD-VCR.
1
Use a TV antenna cable to connect the signal source coming from the antenna or wall to the ANT IN jack on the STB.
2
Use the Video/Audio Cable to connect the LINE OUT jacks on the STB to the AUDIO/VIDEO LINE IN 1 jacks on the DVD-VCR..
3
Select LINE 1 by pressing LINE IN SELECT button on the front panel or INPUT SEL. button on remote control in VCR mode .
4
Use the Video/Audio Cable to connect the LINE AUDIO OUT(R/L)/VIDEO OUT jacks on the DVDVCR to the Audio & Video jacks on the TV.
Tunerless DVD Player & VCR
Video Cable 

 Audio Cable
Video Cable 

 Audio Cable
This DVD-VCR unit does not have a TV tuner. Recording TV broadcasts is possible via Connection to Cable/Satellite boxes and Multi Channel Video Services.
Notes
-If you want to use other connections to a TV, please refer to the TV connection pages. (See pages 14 to 18)
-If you want to connect to an Amplifier, please refer to the Amplifier connection page. (See pages 19 to 20)
-When you connect a STB through the LINE IN 1 jack of the DVD-VCR, you still can see the picture from the STB on your TV set if the DVD-VCR is turned off.
ENG-13
CO N N E C T I O N S
Connection to a TV
The following shows examples of connections commonly used to connect the DVD-VCR with a TV and other components.
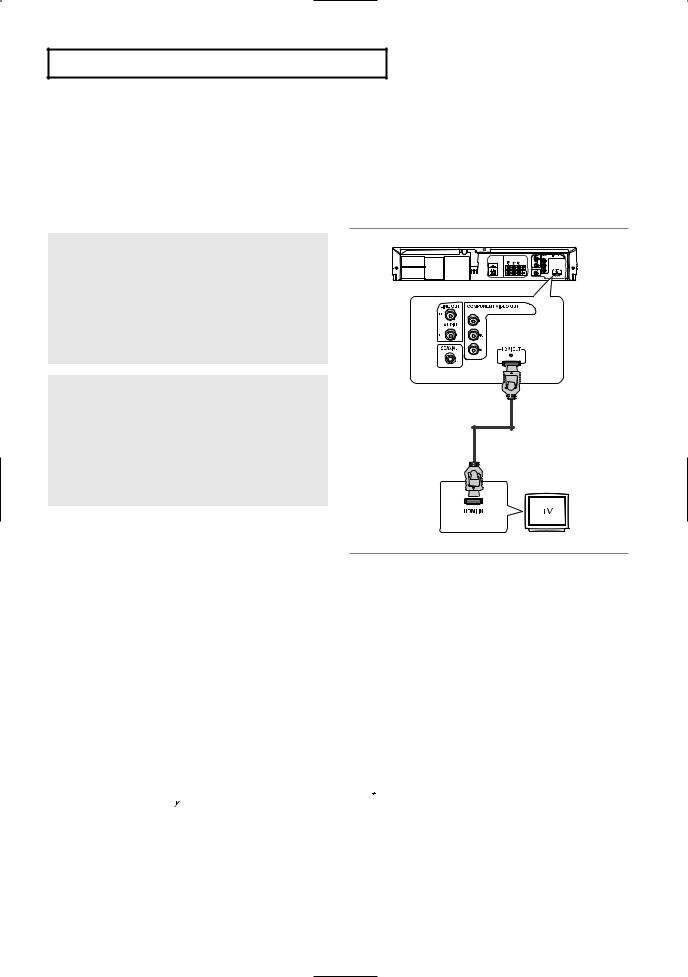
Connecting to a TV with an HDMI Jack
1
Using an HDMI-HDMI cable, connect the HDMI OUT jack on the rear of the DVD player to the HDMI IN jack of your TV.
2
Press the input selector on your TV remote control until the HDMI signal from the DVD player appears on your TV screen.
HDMI VIDEO Specifications
HDMI Cable Not included
When you press the HDMI button on the front panel, 480p, 720p, and 1080p are selected in order.
The first press of the HDMI button on the front panel brings up the current resolution.
The second press allows you to change the HDMI output resolution.
-Depending on your TV, certain HDMI output resolutions may not work.
-Please refer to the user’s manual of your TV.
-When using an HDMI connection, the DVD player’s output is set to HDMI within 10 seconds.
-For better picture quality, set the HDMI output resolution to 720p or 1080p (see page 56).
-If you connect an HDMI cable between Samsung TV and this DVD player, you can operate this DVD player using your TV remote control. This is only available with Samsung TVs that support Anynet+(HDMICEC).( see page 56-57)
-If your TV has an 

 logo, then it will supports

 the Anynet+ function.
ENG-14

CO N N E C T I O N S
● HDMI (High Definition Multimedia Interface)
HDMI is an interface that enables the digital transmission of video and audio data with just a single cable. Using HDMI, the DVD player transmits a digital video and audio signal and displays a vivid picture on
a TV having an HDMI input jack.
● HDMI connection description
HDMI consists of uncompressed video and digital audio data (LPCM or Bit Stream).
-The player outputs only a pure digital signal to the TV through HDMI.
-If TV does not support HDCP (High-bandwidth Digital Content Protection), snow noise appears on the screen.
●Why does Samsung use HDMI?
HDMI provides an interface between any compatible digital audio/video source, such as a set-top box, a DVD player, a PC, a video game system, or an AV receiver and a compatible digital audio and/or video monitor, such as a digital television (DTV).
HDMI supports any TV or PC video format with digital high-definition pictures.
ENG-15

CO N N E C T I O N S
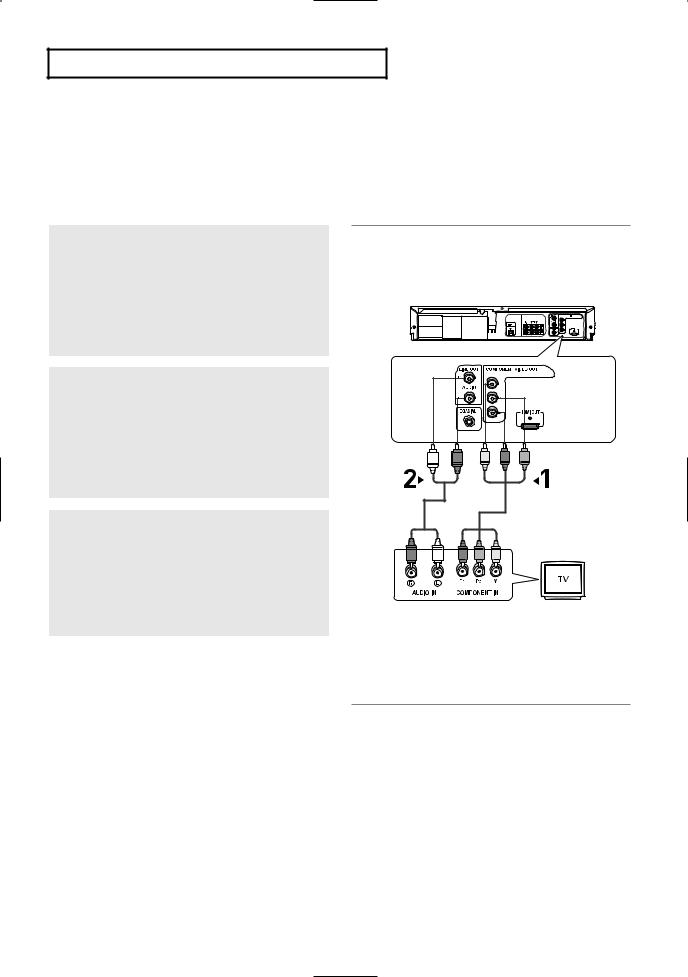
Connecting to a TV (Progressive)
1
Using Component video cables (not included), connect the COMPONENT VIDEO OUT jacks on the rear of the DVD-VCR to the COMPONENT IN jacks of your TV.
2
Using the audio cables, connect from the AUDIO OUT or LINE OUT AUDIO (red and white) jacks on the rear of the DVD-VCR to the AUDIO (red and white) IN jacks of your TV.
Turn on the DVD-VCR and TV.
3
With the unit in Stop mode, set the video output to Progressive Out in the Setup Menu. Then press ENTER and progressive will be output. (See pages 55)
White
Red |
Green Blue Red |
Audio Cable |
Component Cable |
|
|
|
(not included) |
Red White Red |
Blue Green |
To see the progressive video output,
-Consult your TV User’s Manual to find out if your TV supports Progressive Scan.
If Progressive Scan is supported, follow the TV User’s Manual regarding Progressive Scan settings in the TV’s menu system.
-Depending on your TV, the connection method may differ from the illustration above.
Note
What is "Progressive Scan"?
Progressive scan has twice as many scanning lines as the interlace output method. Progressive scanning method provides better and clearer picture quality.
The Component Video jacks only output video from the DVD player. To view video from the VCR, you must have the Video/Line Out (yellow) jack connected.
Only the 480p output resolution is possible with Component.
ENG-16
CO N N E C T I O N S
Connecting to a TV (Interlace)
-Connecting to your TV using Component video cables.
-You will enjoy high quality and accurate color reproduction images. Component video separates the picture element into black and white(Y), blue(PB), red(PR) signals to present clear and clean images. (Audio signals are delivered through the audio out or line out audio).
1
Using Component video cables (not included), connect the COMPONENT VIDEO OUT jacks on the rear of the DVD-VCR to the COMPONENT IN jacks of your TV.
2
Using the audio cables, connect from the AUDIO OUT or LINE OUT AUDIO (red and white) jacks on the rear of the DVD-VCR to the AUDIO (red and white) IN jacks of your TV.
Turn on the DVD-VCR and TV.
3
With the unit in Stop mode, set the video output to Progressive Out in the Setup Menu. Then press ENTER and Component Interlace will be output. (See pages 55)
Notes
White |
|
Blue |
Red |
Green |
Red |
Audio Cable |
|
Component Cable |
|
|
|
|
|
(not included) |
Red White Red |
Blue |
Green |
-If you want to connect to an Amplifier, please refer to the Amplifier connection page. (See pages 19 to 20)
-The component jack of your TV may be marked “R-Y, B-Y, Y” or “Cr, Cb, Y” instead of “PR, PB, Y” depending on the manufacturer. The number and position of jacks may vary depending on the TV set. Please refer to the user's manual of your TV.
-The Component Video Out jacks only output video from the DVD player. To view video from the VCR, you must have the Video Out (Yellow) jack connected.
-You can hear sound from the LINE OUT AUDIO or AUDIO OUT (red and white) jacks with a Component connection. VCR audio only outputs through Line Out Audio jacks (Red,White).
ENG-17

CO N N E C T I O N S
Connecting to a TV (Video)
1
Using video/audio cables, connect the VIDEO (yellow)/AUDIO (red and white) OUT jacks on the rear of the DVD-VCR to the VIDEO (yellow)/AUDIO (red and white) IN jacks of your TV.
2
Turn on the DVD-VCR and TV.
3
Press the input selector on your TV remote control until the Video signal from the DVD-VCR appears on the TV screen.
Notes
Yellow Red |
White |
Video Cable
Audio Cable
Yellow Red |
White |
-Noise may be generated if the audio cable is placed too close to the power cable.
-If you want to connect to an Amplifier, please refer to the Amplifier connection page. (See pages 19 to 20).
-The number and position of jacks may vary depending on your TV set. Please refer to the user's manual of your TV.
-If there is one audio input jack on the TV, connect it to the LINE OUT AUDIO OUT Left (white) jack of the DVD-VCR.
-When you connect an external device (STB or VCR) and play it through the LINE IN 1 jack of the DVD-VCR, you can still see the display on your TV set although the DVD-VCR set has been turned off.
ENG-18
CO N N E C T I O N S
Connection to an Audio System
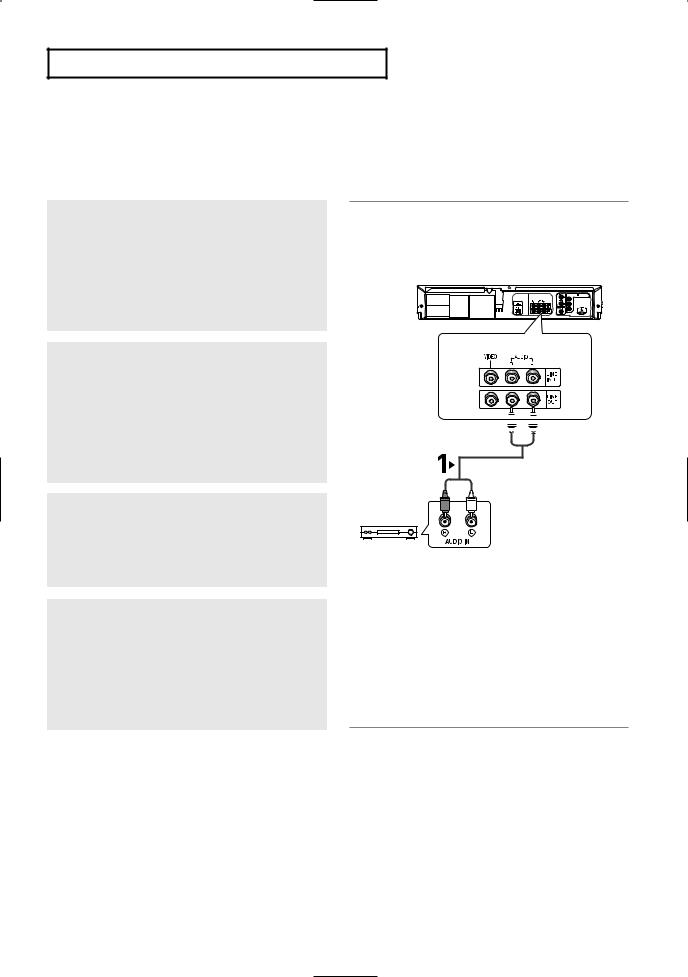
Connecting to an Audio System (2 Channel Amplifier, Analog)
1
Using the audio cables, connect the (LINE) AUDIO (red and white) OUT jacks on the rear of the DVD-VCR to the AUDIO (red and white) IN jacks of the Amplifier.
2
Using the video signal cable(s), connect the
VIDEO or COMPONENT OUT jacks on the rear of the DVD-VCR to the VIDEO or COMPONENT IN jack of your TV as described on pages 14 to 18.
3
Turn on the DVD-VCR, TV, and Amplifier.
4
Press the input select button of the Amplifier to select the External input in order to hear sound from the DVD-VCR.
Refer to your Amplifier's user manual to set the Amplifier's audio input.
Notes
Red 
 White
White
Audio Cable
Red White
2-channel Stereo Amp.
-Please turn the volume down when you turn on the Amplifier. Sudden loud sound may cause damage to the speakers and your ears.
-Please set the audio in the menu screen according to the Amplifier. (See pages 52 to 53)
-The position of jacks may vary depending on the Amplifier. Please refer to your Amplifier's user manual .
-You can also connect the amplifier using the AUDIO OUT (red and white) jacks from the DVD-VCR.
ENG-19
CO N N E C T I O N S
Connecting to an Audio System (Dolby digital, MPEG2 or DTS
Amplifier)
1
Using a Coaxial cable or an Optical cable (not included), connect the DIGITAL AUDIO OUT (COAXIAL) or DIGITAL AUDIO OUT (OPTICAL) jack on the rear of the DVD-VCR to the DIGITAL AUDIO IN (COAXIAL) or DIGITAL AUDIO IN (OPTICAL) jack of the Amplifier.
2
Using the video signal cable(s), connect the
VIDEO or COMPONENT OUT jacks on the rear of the DVD-VCR to the VIDEO or COMPONENT IN jack of your TV as described on pages 14 to 18.
3
Turn on the DVD-VCR, TV, and Amplifier.
4
Press the input select button of the Amplifier to select external input in order to hear sound from the DVD-VCR.
Refer to your Amplifier's user manual to set the Amplifier's audio input.
Notes
Optical Cable |
Coaxial Cable |
(not included) |
(not included) |
Dolby digital or
DTS Amp.
-Please turn the volume down when you turn on the Amplifier. Sudden loud sound may cause damage to the speakers and your ears.
-Please set the audio in the menu screen according to the Amplifier. (See pages 52 to 53)
-The jack position may vary depending on the Amplifier. Please refer to the user's manual of the Amplifier.
ENG-20
CO N N E C T I O N S
Connecting the Power Cord
1
Your DVD-VCR's power cord should be plugged into a standard 120V/60Hz wall outlet.
2
Turn on the power by pressing the POWER button on the remote control or on the front panel.
3
Turn on your TV by pressing the POWER button on the TV remote control.
4
Press the input selector on your TV remote until the signal from the DVD-VCR appears.
ENG-21
Chapter 3
IN I T I A L SE T U P
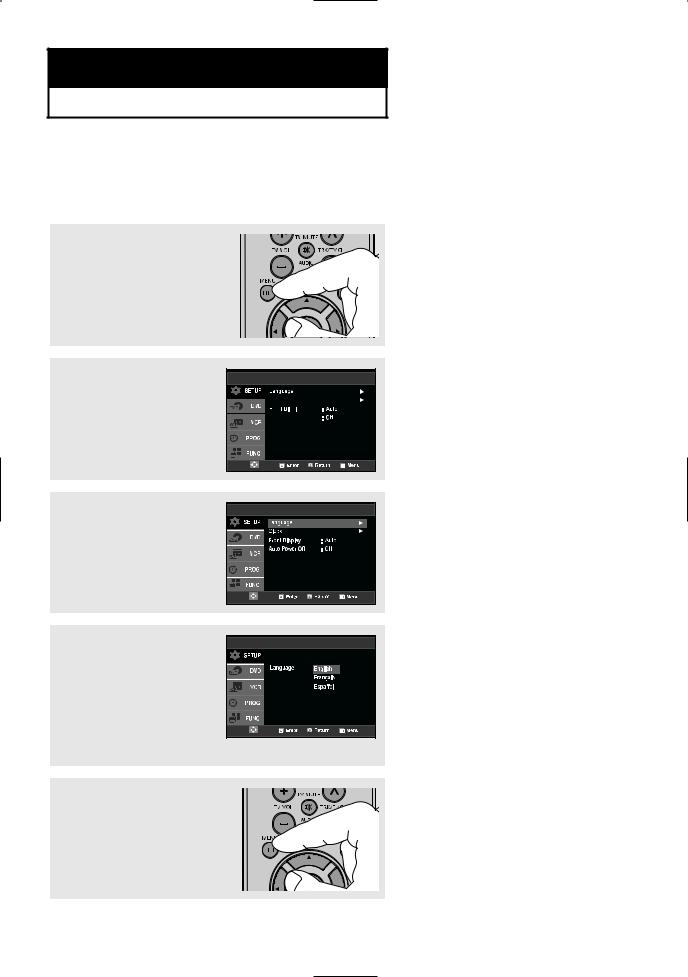
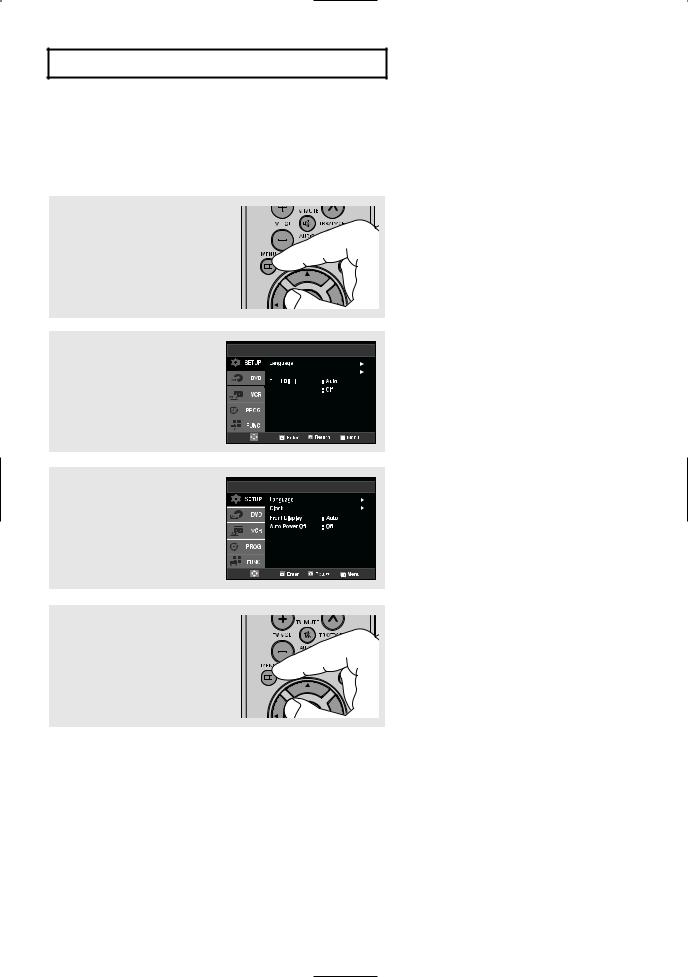
Selecting a Menu Language
Follow these steps to change the on-screen MENU language to English, French or Spanish.
1
Press the MENU button.
2
Press the buttons to 

 select Setup, then press the


or ENTER button.
3
Press the buttons to select Language, then press the or ENTER button.
4
Press the buttons to select the appropriate language : English, Français or Español.
Press the ENTER button.
5
Press the MENU button to exit.
ENG-22
IN I T I A L SE T U P
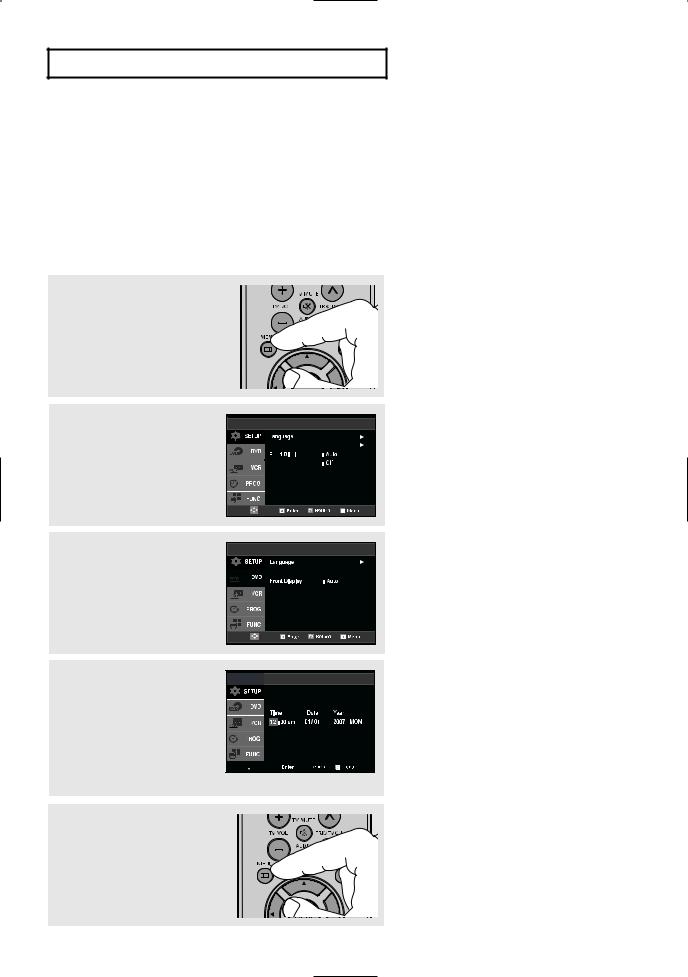
Setting the Clock
This menu is used to set the current time. You need to set the time to use timer recording.
Setting the Clock Manually
If Auto Setup fails to set the DVD-VCR’s internal clock by locating a local TV station, follow these steps to set the date and time manually.
Note: For accurate Timer Recording, your DVD-VCR's internal clock must be set correctly.
1
Press the MENU button.
2
Press the buttons to 

 select Setup, then press the


or ENTER button.
3
Press the buttons to 


 select Clock, then press the


or ENTER button.
4
Use the buttons to select
each of the following options, then use the buttons to
set each option.
Press the ENTER button to set  the clock.
6
Press the MENU button to exit.
ENG-23
IN I T I A L SE T U P
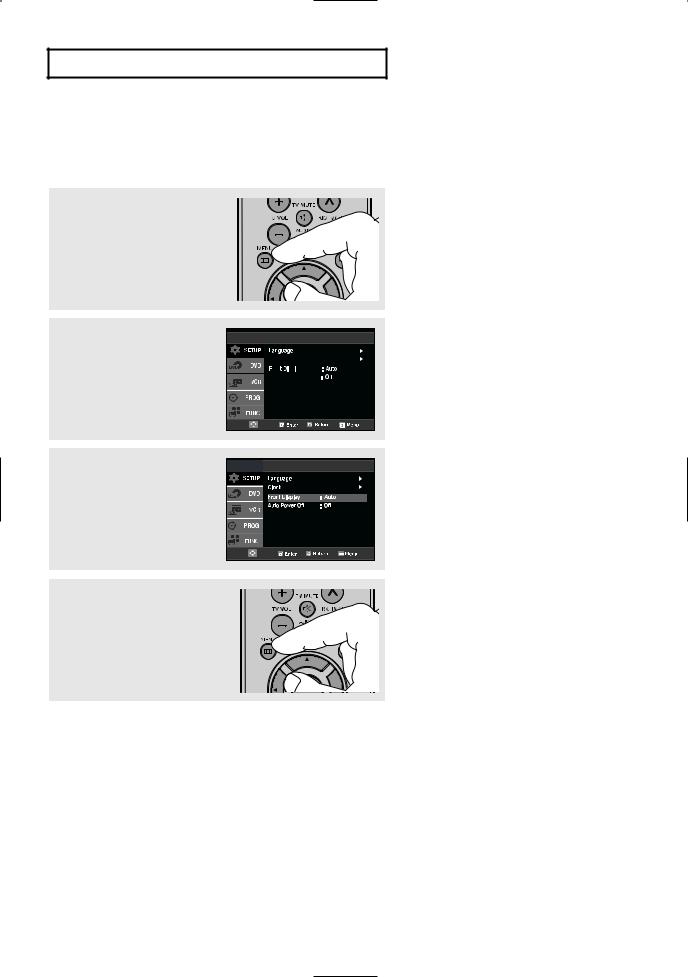
Setting the Front Panel Display
You can set the Front Panel Display to be bright, dim, or to automatically dim during power off.
1
Press the MENU button.
2
Press the buttons to 

 select Setup, then press the


or ENTER button.
3
Press the buttons to select Front Display, then press the or ENTER button to select Auto, Bright or Dim.
4
Press the MENU button to exit.
■Auto: Front Panel Display will dim automatically during power off.
■Bright: Front Panel Display will be bright.
■ Dim: |
Front Panel Display will be dim. |
ENG-24
IN I T I A L SE T U P
Setting the Auto Power Off
This feature automatically turns off your DVD-VCR if no signal is received and you do not press any buttons for the selected time.
1
Press the MENU button.
2
Press the buttons to 

 select Setup, then press the


or ENTER button.
3
Press the buttons to select Auto Power Off, then press the or ENTER button to select Off, 1Hr or 2Hr.
4
Press the MENU button to exit.
■Off: Auto power off is disabled.
■1Hr: DVD-VCR will auto shut off 1 hour after the last button is pressed or no signal is received.
■2Hr: DVD-VCR will auto shut off 2 hours after the last button is pressed or no signal is received.
ENG-25
Chapter 4
DVD OP E R AT I O N S
Playing a Disc
Before Play
-Turn on your TV and set it to the correct Video Input on your TV's remote control.
-If you connected an external Audio System, turn on your Audio System and set it to the correct Audio Input.
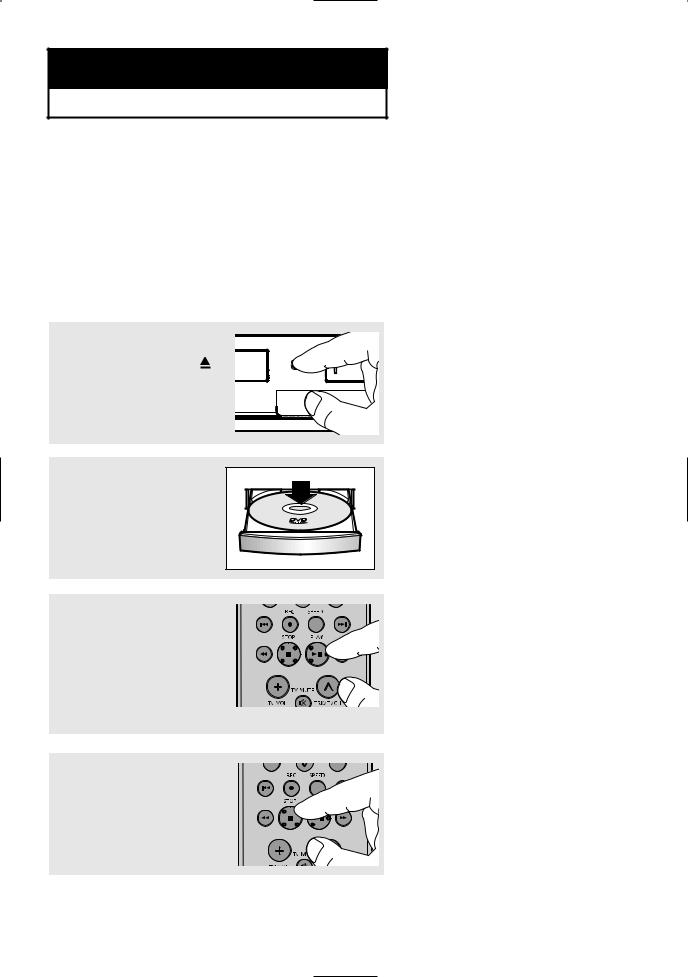
Playback
1
Press the OPEN/CLOSE button on the front panel.
2
Place a disc gently into the tray with the disc’s label facing up.
3
Press the (Play/Pause) button on your remote control or on the front panel.
Most discs will start to play back as soon as the tray closes.
4
Stopping Play
Press the  (Stop) button during play.
▼
Stop/Resume
-Press the  (Stop) button once to stop playback. To resume the DVD/CD from the point where the
disc stopped, press the (Play/Pause) button.
-Press the  (Stop) button twice to completely stop playback. The next
time you press the (Play/Pause), the disc will start over from the beginning.
ENG-26
DVD OP E R AT I O N S
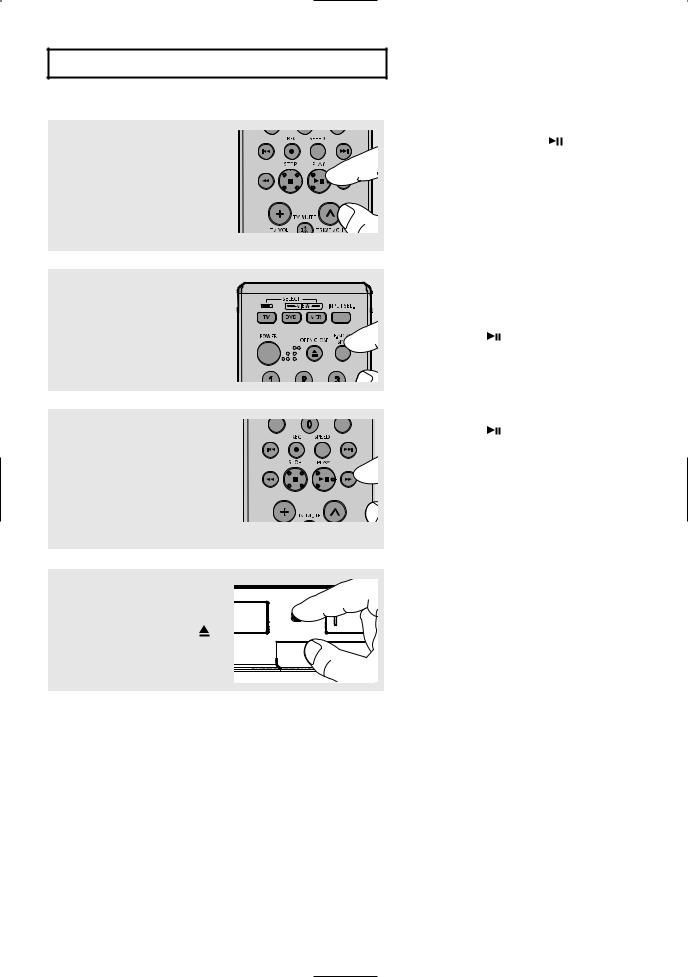
5
Pausing Play
Press the (Play/Pause) button on your remote control or on the front panel during play.
6
Step Motion Play (Except CD)
Press the F.ADV button on the remote control during play.
7
Slow Motion Play (Except CD)
Press the /
/ (Search) button to choose the play speed between 1/8, 1/4 and 1/2 of normal during PAUSE or STEP mode.
8
Removing Disc
Press the OPEN/CLOSE button on the front panel.
▼ - |
Screen stops, no sound. |
- |
To resume, press the |
|
(Play/Pause) button once again. |
Note
If the player is left for about 5 minutes in pause mode, it will stop.
▼ - |
Each time the button is pressed, a |
|
|
new frame will appear. |
|
- |
No sound is heard during STEP |
|
|
mode. |
|
- |
Press the |
(Play/Pause) button to |
|
resume normal play. |
|
- |
You can only perform step motion |
|
|
play in the forward direction. |
|
▼ - |
No sound is heard during slow mode. |
|
- |
Press the |
(Play/Pause) button to |
resume normal play.
Note
- This (  ) icon indicates an invalid button press.
- The Slow Motion feature works in both the forward and reverse directions.
ENG-27
Loading...