


43-124
Please read this user’s guide before
installing, setting up and using your new product
www.radioshack.com
43-124
900Mhz Wireless Intercoms
Wireless Intercoms (2)
AC Adapters (2) User’s Guide
what’s included
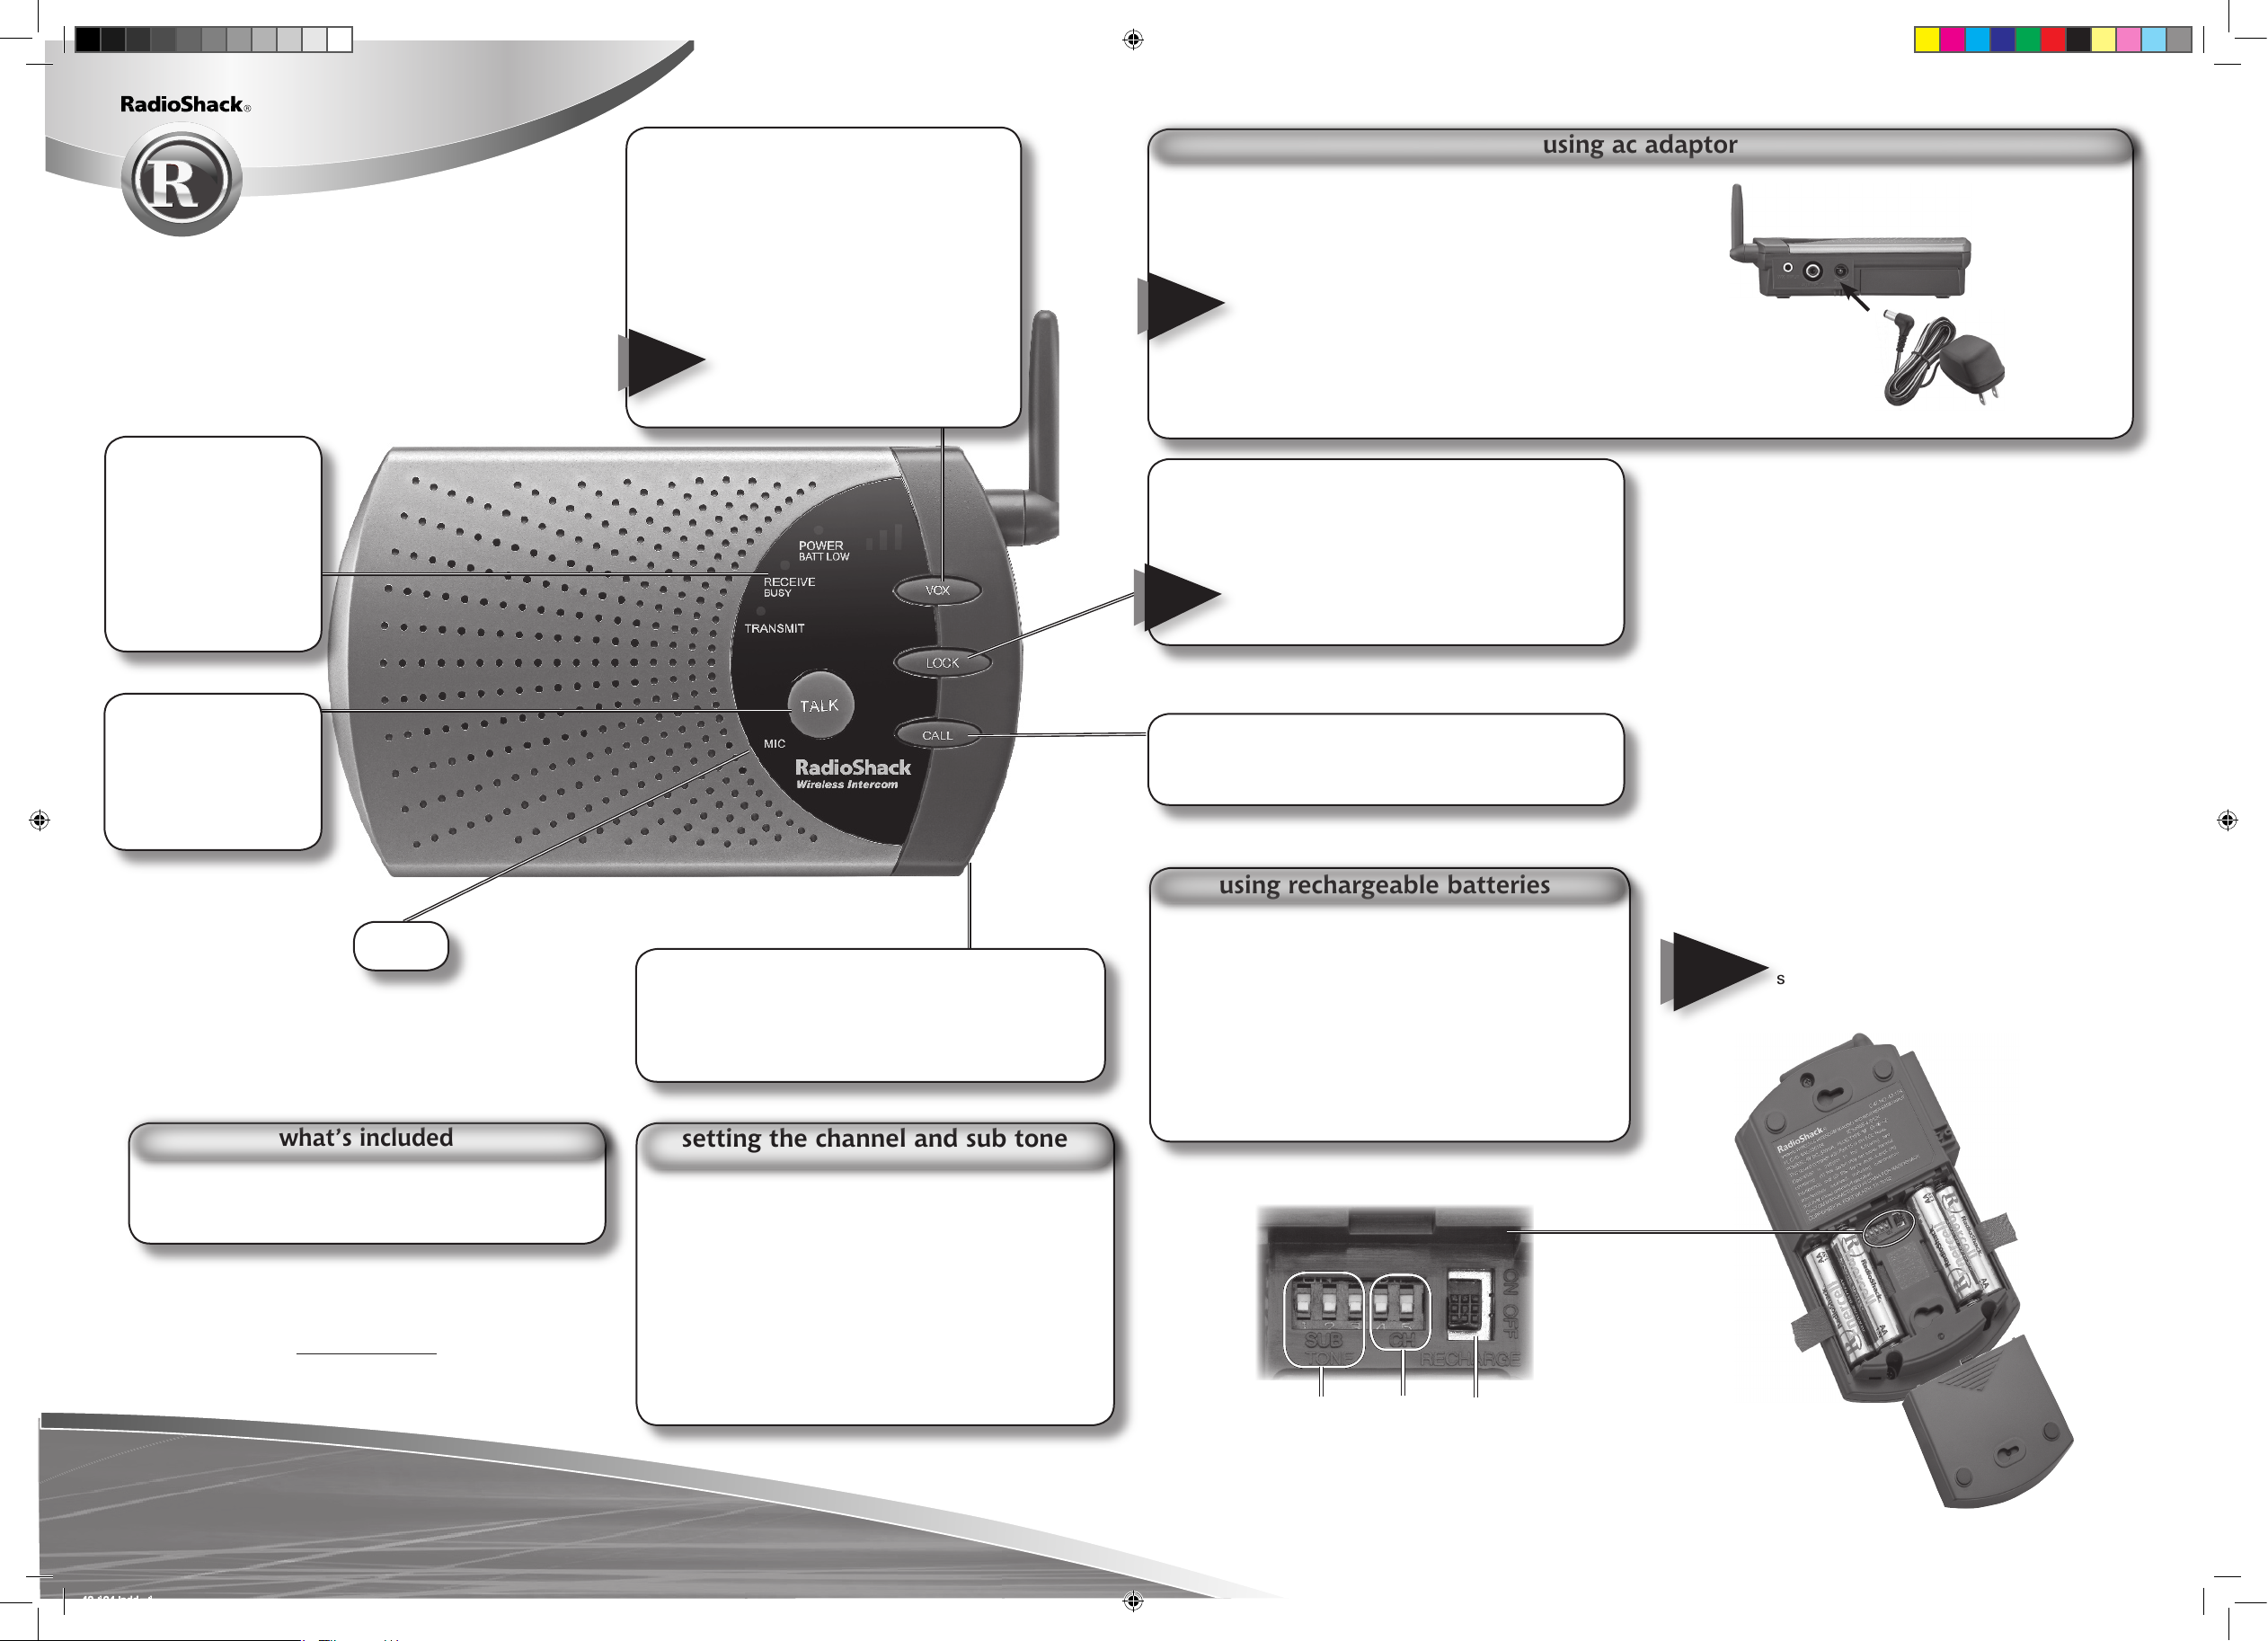
Insert the AC adapter into the DC 9V jack and a standard
AC outlet to power your intercom and/or charge
batteries.
• You must use a Class 2 power source that
supplies regulated 9V DC and delivers at
least 350 mA. Its center tip must be set to
positive and its plug must t the intercom’s
DC 9V jack. Using an adapter that does not
meet these specications could damage the
intercoms or the adapter.
• The correct orientation for this power unit is
in a vertical or oor mount position.
using ac adaptor
©2007 RadioShack Corporation.
All rights reserved. RadioShack and
RadioShack.com are trademarks
used by RadioShack Corporation.
AO0286AAC1
43-124
07A07
Printed in China
By default your two intercoms are on the same
channel, but you can change your intercom channels
for your system. Or, if you receive interference on a
channel you selected, set each intercom to one of eight
different sub tones. Complete the following to change
the intercoms channel or sub tone:
1. Open the battery compartment of the intercom and
set the SUB or CH switches.
2. Useapointedobjecttosettherstthreeswitches
(labeled SUB TONE) inside the battery compartment
you want to use.
setting the channel and sub tone
SUB TONE
CH
RECHARGE ON/OFF
Battery Notes:
• Use only fresh batteries of the required size and
recommended type.
• Do not mix old and new batteries, different types
of batteries (standard, alkaline, or rechargeable), or
rechargeable batteries of different capacities.
• If you do not plan to use the intercoms with
batteries for a week or more, remove the batteries.
Batteries can leak chemicals that can destroy
electronic parts.
• Dispose of old batteries promptly and properly. Do
not burn or bury them.
• Always connect the AC adapters to the intercoms
before connecting them to AC power.
• Do not attempt to charge alkaline batteries and
never install non-rechargeable batteries when
RECHARGE ON/OFF is set to ON. Nonrechargeable
batteries can get hot or explode if you try to charge
them.
To charge rechargeable batteries (not included), slide
the RECHARGE ON/OFF switch to ON, install batteries,
plug in the AC adapter, then turn on the intercom.
Complete charging takes about 12 to 14 hours. Average
charging time varies with different battery capacity.
• NiMH (1500 mAH) batteries charge in about
12 hours.
• NiCd (700 mAH) batteries charge in about 4
hours.
using rechargeable batteries
LOCK
To monitor continuously, press until the
TRANSMITindicatorashes.PressTALK to
unlock.
When an intercom is in the LOCK mode,
it cannot receive voice messages or call
tones from the other intercom.
CALL
Press to sound a tone (or call) on another
intercom for about three seconds.
You must slide the RECHARGE ON/OFF
switch to ON before charging rechargeable
batteries.
WARNING
AC adapter
VOX
For hands-free communication, press
VOX until the VOX level indicator lights
to communicate through the intercom
hands-free. Repeatedly press VOX
to set the sensitivity level, from low,
medium, to high.
VOX function turns off when VOX level
indicator turns off.
In VOX mode, there is a short
delay between when you
start talking and intercom
transmission.
MIC
NOTES
ON/OFF VOLUME
(Right Side) Turn VOLUME until it clicks to turn
on, the POWER/BATT LOW indicator lights,
then adjust VOLUME to a comfortable listening
level.
Thank you for purchasing the 900Mhz Wireless Intercoms
from RadioShack. With a line of site of up to 200 feet,
you can use your new intercoms in large areas. You can
also connect auxillary audio sources and weather radio
(neither included).
NOTE
RECEIVE BUSY
Lights when
you receive a
voice message
or when you
monitor a locked
intercom. Flashes
when channel is
in use.
TALK
Hold down and
speak into the
MIC, release to
listen when VOX
mode turns off.
NOTE
43-124.indd 1 07/25/2007 11:34:13
 Loading...