


CAT. NO 15-2133
OWNER’S MANUAL
Please read before using this equipment.
6-IN-ONE
TOUCHSCREEN REMOTE


 6-IN-ONE
TABLE OF CONTENTS
Introduction . . . . . . . . . . . . . . . . . . . . . . . . . . . . . .4
Quick Start Guide . . . . . . . . . . . . . . . . . . . . . . . . . .5
Installing Batteries . . . . . . . . . . . . . . . . . . . . . .5
Brightness Adjustment of the Kameleon
Display . . . . . . . . . . . . . . . . . . . . . . . . . . . . . . . .5
About the Keypad . . . . . . . . . . . . . . . . . . . . .6-9
Setting Up the Remote . . . . . . . . . . . . . . . . . .10
Programming TV/VCR Combo . . . . . . . . . . .11
Search Method . . . . . . . . . . . . . . . . . . . . . .12-13
Introducción . . . . . . . . . . . . . . . . . . . . . . . . . . . . .14
Guía de inicio rápido . . . . . . . . . . . . . . . . . . . . . .15 Instalación de baterías . . . . . . . . . . . . . . . . . .15 Ajuste del brillo de la pantalla Kameleon . . .16 Acerca del teclado . . . . . . . . . . . . . . . . . . .16-19 Configuración del 6-en-Uno . . . . . . . . . . . . . .20 Método de Búsqueda . . . . . . . . . . . . . . . . .21-23
Key Table . . . . . . . . . . . . . . . . . . . . . . . . . . . . .24-25
Code Verification . . . . . . . . . . . . . . . . . . . . . . . . .26
Quick code reference . . . . . . . . . . . . . . . . . . . .26
Volume Lock . . . . . . . . . . . . . . . . . . . . . . . . . .27-28
Favorite Channel Scan . . . . . . . . . . . . . . . . . . . . .29
Using Channel Scan . . . . . . . . . . . . . . . . . . . . . . .30
The Learning Feature . . . . . . . . . . . . . . . . . . . . . .31 To delete a learned function . . . . . . . . . . . . . .32 To delete all learned functions within a certain mode . . . . . . . . . . . . . . . . . . . . . . . . . . . . . . . .32
Using Macros . . . . . . . . . . . . . . . . . . . . . . . . . . . .34 Macros . . . . . . . . . . . . . . . . . . . . . . . . . . . . . . .34 To erase a Macro . . . . . . . . . . . . . . . . . . . . . . .35
Reassigning Mode Keys . . . . . . . . . . . . . . . . . . . .36
Resetting a device key . . . . . . . . . . . . . . . . . . .37
Upgrading Your Remote . . . . . . . . . . . . . . . . . . . .38
Troubleshooting . . . . . . . . . . . . . . . . . . . . . . .40-41
Specifications . . . . . . . . . . . . . . . . . . . . . . . . . . . .42
FCC Statement . . . . . . . . . . . . . . . . . . . . . . . . . . .42
Care . . . . . . . . . . . . . . . . . . . . . . . . . . . . . . . . . . . .43
Limited 90-Day Warranty . . . . . . . . . . . . . . .44-45
Manufacturer’s Codes (CÓDIGOS DEL
FABRICANTE) . . . . . . . . . . . . . . . . . . . . . . . .46-61

USER’S GUIDE
SETUP CODES FOR AUDIO AMPLIFIERS (CÓDIGOS DE CONFIGURACIÓN PARA AMPLIFICADORES DE AUDIO) . . . . . . . . . . . . .46
SETUP CODES FOR AUDIO RECEIVERS (CÓDIGOS DE CONFIGURACIÓN PARA RECEPTORES DE AUDIO) . . . . . . . . . . . . . . .46-48
SETUP CODES FOR CABLE CONVERTERS (CÓDIGOS DE CONFIGURACIÓN PARA CONVERTIDORES DE CABLE) . . . . . . . . . . . . .48
SETUP CODES FOR CD PLAYERS (CÓDIGOS DE CONFIGURACIÓN PARA
REPRODUCTORES DE CDS) . . . . . . . . . . . . . . . .49
SETUP CODES FOR DVD PLAYERS (CÓDIGOS DE CONFIGURACIÓN PARA
REPRODUCTORES DVD) . . . . . . . . . . . . . . .49-50
SETUP CODES FOR HOME AUTOMATION (CÓDIGOS DE CONFIGURACIÓN PARA LA AUTOMATIZACIÓN DEL HOGAR) . . . . . . . . . .50
SETUP CODES FOR HOME-THEATER-IN-A-BOX DEVICES (CÓDIGOS DE CONFIGURACIÓN PARA DISPOSITIVOS HOME-THEATER- IN-A-BOX) . . . . . . . . . . . . . . . . . . . . . . . . . . . . . .51
SETUP CODES FOR SATELLITE RECEIVERS (CÓDIGOS DE CONFIGURACIÓN PARA RECEPTORES DE SATÉLITE) . . . . . . . . . . . . . . .51
SETUP CODES FOR TVS (CÓDIGOS DE CONFIGURACIÓN PARA TELEVISORES) . .52-55
SETUP CODES FOR TV/VCR COMBOS (CÓDIGOS DE CONFIGURACIÓN PARA APARATOS COMBINADOS TELEVISOR/VIDEOGRABADORA) . . . . . . .55-56
SETUP CODES FOR VCRS (CÓDIGOS DE CONFIGURACIÓN PARA
VIDEOGRABADORAS) . . . . . . . . . . . . . . . . .56-59
SETUP CODES FOR TV/DVD COMBOS (CÓDIGOS DE CONFIGURACIÓN PARA APARATOS COMBINADOS TELEVISOR/ REPRODUCTORES DVD) . . . . . . . . . . . . . . . . . .60
SETUP CODES FOR PVRS
(CÓDIGOS DE CONFIGURACIÓN PARA VIDEO GRABADORA PERSONAL) . . . . . . . . . . . . . . . . .60
SETUP CODES FOR XBOX (CÓDIGOS DE CONFIGURACIÓN PARA XBOX) . . . . . . . . . . . .60
SETUP CODES FOR PLAYSTATION2 (CÓDIGOS DE CONFIGURACIÓN PARA
PLAYSTATION2) . . . . . . . . . . . . . . . . . . . . . . . . .60


 6-IN-ONE
INTRODUCTION
Thank you for purchasing a RadioShack 6-in-One Remote powered by Kameleon™. Your remote is the next generation in remote control technology. It only displays the active keys for each device, so each screen is simple and unique. This easy to use display interface also features animated icons to identify the selected device.
Your remote is designed to operate up to six home entertainment devices, including TV,VCR, cable converter, satellite receiver, CD player, audio receiver, amplifier, home-theater-in-a-box, DVD player, and even some home automation devices (e.g., remote controlled lights). Preprogrammed with the most commonly used commands for your home entertainment device, your 6-in-One is also packed with advanced features such as:
•Macros – for instant activation of favorite key sequences
•Learning – to capture and reproduce unique functions from your devices’ original remote controls
•Code Search and Verification – helps you quickly set up the remote control to operate your devices
•Channel Scan and Favorite Channel Scan – lets you “channel surf ” all available and favorite channels
•Volume Lock – to assign volume controls to individual devices or to one global device
•Dedicated Menu/Guide Keys – for instant access to cable and satellite program guides and menus
•Searchable Code Library – contains world’s largest and most efficient group of infrared remote control codes for virtually every current brand and make
•Picture-in-Picture – supports TVs equipped with Picture-in-Picture functionality
After installing four (4) new AAA alkaline batteries (not supplied, available at RadioShack), you can immediately use the 6-in-One remote to control an RCA TV,VCR, DVD and satellite receiver, and Pioneer CD and audio devices.
To control other brands and devices, see “Setting up the Remote” on page 10.
4 Introduction

USER’S GUIDE
QUICK START GUIDE
Para instrucciones en espanol, vea la pagina 14.
INSTALLING BATTERIES
Your remote requires four AAA batteries (not supplied) for power. Batteries are available at your local RadioShack store or online at www.radioshack.com.
BATTERY NOTES
•DISPOSE OF OLD BATTERIES PROMPTLY AND PROPERLY.
•DO NOT BURN OR BURY BATTERIES.
•USE ONLY FRESH BATTERIES OF THE REQUIRED SIZE AND
RECOMMENDED TYPE.
• DO NOT MIX OLD AND NEW BATTERIES, DIFFERENT TYPES OF BATTERIES (STANDARD, ALKALINE, OR RECHARGEABLE), OR RECHARGEABLE BATTERIES OF DIFFERENT CAPACITIES.
• IF YOU DO NOT PLAN TO USE THE REMOTE FOR AN EXTENDED PERIOD, REMOVE THE BATTERIES. BATTERIES CAN LEAK CHEMICALS THAT CAN DESTROY ELECTRONIC PARTS.
To Install Batteries:
1.Loosen the screw on the battery compartment cover on the back of the remote and remove the cover.
2.Insert four AAA batteries according to the polarity symbols (+ and –) marked inside.
3.Replace the battery cover and tighten the screw.
• YOU DO NOT HAVE TO REPROGRAM THE REMOTE AFTER REMOVING THE BATTERIES, BECAUSE YOUR REMOTE HAS PERMANENT MEMORY RETENTION.
• TO EXTEND BATTERY LIFE, THE DISPLAY TURNS OFF AFTER 10 SECONDS OF KEYPAD INACTIVITY AND TURNS ON AGAIN WHEN YOU MOVE THE REMOTE CONTROL OR PRESS A KEY.
BRIGHTNESS ADJUSTMENT OF THE KAMELEON DISPLAY
Follow the steps below to increase or decrease the brightness on the remote’s screen.
1.Hold down P for at least 3 seconds. The bottom of the Infared (IR) Indicator blinks twice, and a circle appears around P.
2.Press 9 7 4.
3.To increase the brightness press CH+. To decrease the brightness press CH-.
4.Press P to store the brightness setting.
•INCREASING THE BRIGHTNESS OF THE KAMELEON PANEL CAN SHORTEN
THE BATTERY LIFE. BATTERY LIFE VARIES FROM 3 - 12 MONTHS
(DEPENDING ON BRIGHTNESS SETTING).
Quick Start Guide 5


 6-IN-ONE
QUICK START GUIDE (CONTINUED)
ABOUT THE KEYPAD
1. Kameleon panel
This remote is powered by Kameleon, a unique backlit display that combines the functionality of a traditional remote with the power of a touchscreen. It only displays the active keys for each device mode.
Each mode has a main screen and menu screen. Press MENU to access the menu screen for the selected mode.
After 10 seconds of inactivity, the Kameleon backlight turns off to conserve power. Pick up the remote or press any key to turn the backlight back on.
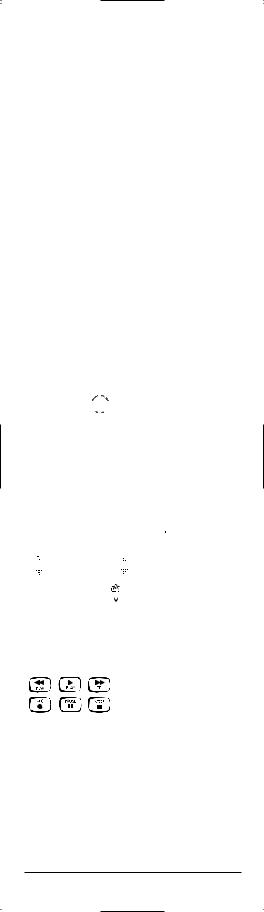
2. IR (infrared) Indicator
The IR Indicator animates when a signal is sent or received.“Outgoing IR” appears on the screen whenever a function key is pressed. When the remote is learning,“incoming IR” appears.
3. Device keys
[ 


 ]
]
The TV, VCR, SAT/CBL, CD, AUD and DVD keys select the device to be controlled. For example, pressing the TV key allows the remote to control the functions of your television. As an added value, your remote features animated device (mode) keys. After pressing a mode key, an animation appears to show the currently
activated mode.
4. P [  ]
]
Use P for all programming sequences. When you hold down P for at least 3 seconds, the bottom of the IR Indicator blinks twice, and a circle appears around P to show that you are in programming mode.
5. SCREEN [  ]
]
The SCREEN key gives you the possibility to move through the different screens (if applicable) within a certain mode during normal use and set up mode.
6. POWER [  ]
]
The POWER key controls the same function as on your original remote.
6 Quick Start Guide

USER’S GUIDE
7. Digit keys
The digit (1 – 9, 0) keys control the same function as on your original remote. In AUD mode, the digit keys provide direct input selection.
8. +100
Use +100 on some devices to enter channels over 100 (e.g., for channel 131, press +100, then 3, and then 1).
9. ENTER
Press ENTER once after entering the channel numbers on some TVs,VCRs, Cable and Satellite devices. The ENTER key controls the same function as on your original remote.
10. VOL (+/-)
The volume keys control the same function as on your original remote.
11. LAST [ ]
]
Press LAST once to recall the last-viewed channel or to page back one screen on the main menu.
12. MUTE [ ]
]
The MUTE key controls the same function as on your original remote.
13. FAV SCAN [ ]
]
In the TV,VCR, DVD, SAT and CBL modes, press FAV SCAN to scan through favorite channels and/or all channels.
14. CH / SKIP (+/-)
These keys control the same functions as on your original remote. In DVD and CD mode they function as SKIP +/- keys.
15. MENU [  ]
]
The MENU key controls the same function as on your original remote.
16. GUIDE [ ]
]
Use GUIDE to display the program, guide, or setup menu for the selected device.
17. EXIT [  ]
]
Press EXIT to exit the selected device’s program, guide, or menu.
18. INFO [  ]
]
Use INFO to display the current channel and program information.
Quick Start Guide 7


 6-IN-ONE
QUICK START GUIDE (CONTINUED)
19. SELECT [


 ]
]
Press SELECT to choose options from your selected device’s menu or guide.
20. Directional keys
Use the directional keys to move the cursor in the program guide and menu screens. If your stereo does not have a menu, these keys allow you to adjust the volume of your rear speakers
+ (


 ) or – (


 ) and to adjust the balance left (

 ) and right (

 ).
).
21. PAGE KEYS / [  ]
]
Use the Page up and down keys to scroll the pages of your program guide and menu screens in SAT and CABLE modes.
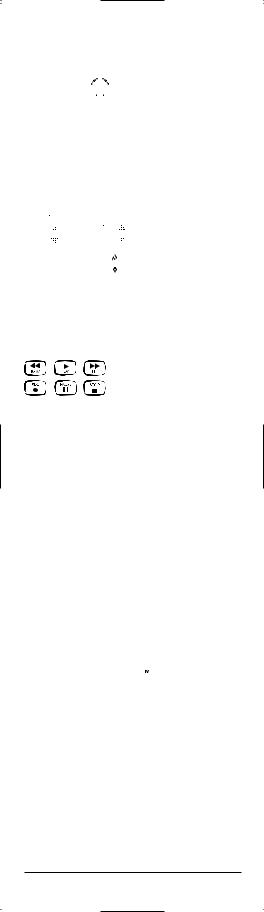
22. VCR / DVD / SAT / CD / AUD (transport) keys
When in VCR, DVD, SAT, CD, or AUD mode, these keys operate the transport functions (PLAY, FF, REW, etc.) of your device. To prevent accidental recording, RECORD must be pressed twice to start recording.
23. PIP / [  ]
]
Use PIP to switch the Picture-in-Picture feature on or off (if available on your TV). Instant Replay [  ] operates the same function as on your TiVo or Replay original remote control.
24. MOVE / [  ]
]
Use MOVE to move the window picture (if available) to different positions in the main picture. Advance operates the same function as on your TiVo or Replay original remote control.
25. FREEZE / LIVE TV [  ]
]
Press FREEZE once to capture a frame of video in the main picture (if available). Press it again to resume normal viewing. LIVE TV operates the same function as on your TiVo or Replay original remote control.
26. SWAP / [  ]
]
Use SWAP to switch images and sound (if available) between the main and window pictures. Slow [ ] operates the same function as on your TiVo or Replay original remote control.
8 Quick Start Guide
|
USER’S GUIDE |
27. SUR SND / SLEEP [ |
] |
When in AUD mode, SUR SND is illuminated to allow you to access Surround Sound functionality on your audio device. When in TV,VCR, SAT, and CBL modes, SLEEP is illuminated to allow you to access Sleep functionality on devices that have a built-in Sleep timer. These keys operate the same function as they did on your original remote control.
28. TV/VCR / A-B [  ]
]
Use TV/VCR (A-B) to switch the TV’s input to view TV or VCR programs, or to act as your cable box’s A/B switch.
29. M1, M2, M3, M4
These keys let you customize the remote by learning additional functions from your original remote (see “The Learning Feature” on page 31).
Quick Start Guide 9


 6-IN-ONE
QUICK START GUIDE (CONTINUED)
SETTING UP THE REMOTE
The remote is preprogrammed at the factory to operate an RCA TV,VCR, DVD and satellite receiver, and Pioneer CD and audio devices. To control devices other than the default brands, perform the following steps and repeat them as needed for each device to be programmed; otherwise skip this section.
Direct code set up
TO SET UP THE REMOTE FOR YOUR TELEVISION:
1.Find your device code in the Manufacturer’s code section (page 46 – 60).
Codes are listed by device type and brand name. The most popular code for each brand is listed first.
2.Make sure your television is switched on.
3.Press and release TV.
4.Hold down P for at least 3 seconds. The bottom of the IR Indicator blinks twice, and a circle appears around P.
5.Enter your four-digit code using the number keys. The bottom of the IR Indicator blinks once after each of the first three digits are entered. After the fourth digit, it blinks twice to confirm that a valid four-digit code has
been entered.
6.Aim your remote at your television and press POWER. If your television switches off, your remote is ready to control your television.
• IF YOUR DEVICE DOES NOT RESPOND, FOLLOW STEPS 1 THROUGH 6 WITH EACH CODE LISTED FOR YOUR BRAND. IF NONE OF THE CODES LISTED FOR YOUR BRAND OPERATE YOUR DEVICE, SEE “SEARCH METHOD” ON PAGE
12 FOR OTHER OPTIONS.
• SOME CODES ARE QUITE SIMILAR. IF YOUR DEVICE DOES NOT RESPOND OR IS NOT FUNCTIONING PROPERLY WITH ONE OF THE CODES, TRY ANOTHER CODE LISTED UNDER YOUR BRAND.
•IF THE ORIGINAL REMOTE CONTROL FROM YOUR VCR DID NOT HAVE A POWER KEY, PRESS PLAY INSTEAD OF POWER DURING STEP 6.
•TO SET UP YOUR OTHER DEVICES, FOLLOW THE SAME INSTRUCTIONS
ABOVE, BEING SURE TO PRESS THE APPROPRIATE DEVICE KEY DURING STEP 3.
• REMEMBER TO PRESS THE CORRECT DEVICE KEY BEFORE OPERATING YOUR DEVICE. ONLY ONE DEVICE (CD, AMPLIFIER, CABLE, ETC.) CAN BE
10 Quick Start Guide
USER’S GUIDE
ASSIGNED TO A DEVICE KEY. IF YOUR ORIGINAL REMOTE OPERATES MORE THAN ONE DEVICE (FOR EXAMPLE, A RECEIVER, CD PLAYER, AND CAS-
SETTE PLAYER IN ONE REMOTE), YOU NEED TO SET UP EACH DEVICE SEPARATELY.
• WRITE YOUR CODE IN THE BOXES PROVIDED ON PAGE 26, FOR QUICK,
EASY REFERENCE.
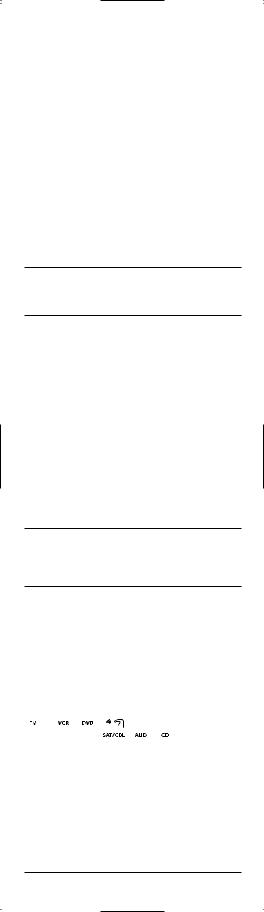
Devices types that can be set up under the following mode keys:
- TV |
- VCR |
- DVD |
|
- CASSETTE PLAYER |
- LASER DISK PLAYER |
|
- DIGITAL AUDIO TAPE |
- XBOX |
|
- PVR |
- PLAYSTATION2 |
- SATELLITE |
- AMP/TUNER |
- CD PLAYER |
RECEIVER |
- AMPLIFIER |
- HOME ACCESSORY |
- CABLE BOX |
- HOME THEATER |
|
- VIDEO ACCESSORY |
|
|
To set up a second TV,VCR, SAT, CD, AUD or DVD, see page 36.
Programming a TV/VCR Combo
1.Find the codes for the devices you want to program in Setup Codes for TV/VCR Combos on page 55 and write them down or highlight them.
2.Turn on the TV/VCR Combo and insert a videocassette.
3.Press and release VCR.
4.Hold down P for at least 3 seconds. The bottom of the IR Indicator blinks twice, and a circle appears around P.
5.Enter your four-digit code using the number keys. The bottom of the IR Indicator blinks once after each of the first three digits are entered, and blinks twice after the fourth digit to confirm that a valid four-digit code has been entered.
6.Aim your remote at your TV/VCR and press POWER. If your television switches off, your remote should be ready to control your TV/VCR.
Quick Start Guide 11


 6-IN-ONE
QUICK START GUIDE (CONTINUED)
• IF YOUR DEVICE DOES NOT RESPOND, FOLLOW STEPS 1 THROUGH 6 WITH EACH CODE LISTED FOR YOUR BRAND. IF NONE OF THE CODES LISTED FOR YOUR BRAND OPERATE YOUR DEVICE, THEN TRY “SEARCH METHOD” ON PAGE 12.
• SOME CODES ARE QUITE SIMILAR. IF YOUR DEVICE DOES NOT RESPOND OR IS NOT FUNCTIONING PROPERLY WITH ONE OF THE CODES, TRY ANOTHER CODE LISTED UNDER YOUR BRAND.
• IF THE ORIGINAL REMOTE CONTROL DID NOT HAVE A POWER KEY, PRESS PLAY INSTEAD OF POWER DURING STEP 5.
• WRITE YOUR CODE IN THE BOXES PROVIDED ON PAGE 26, FOR QUICK,
EASY REFERENCE.
SEARCH METHOD
If your device does not respond to the remote after trying all codes listed for your brand, try manually searching for your code. The Search Method allows you to find the code for your device by scanning through all the codes contained in the memory of the remote. The Search Method may also work if your brand is not listed at all.
TO SEARCH FOR YOUR TV CODE:
1.Switch your Television on (not on standby).
2.Press TV.
3.Aim the remote at your television. Hold down P for at least 3 seconds. The bottom of the IR Indicator blinks twice, and a circle appears around P.
4.Press 9 9 1. The bottom part of the IR Indicator blinks twice.
5.Press POWER. If the TV turns off, you have found your code. If not, press the TV key to cycle to the next code, and press POWER again. Repeat this process until you find the code that turns off your TV. You may have to repeat this sequence many times so please be patient. Remember to keep pointing the remote at your television while pressing these keys.
6.When your television switches off, press P to store the code.
Now your remote is ready to control your television.
12 Quick Start Guide

USER’S GUIDE
• IF YOU CANNOT CONTROL YOUR TELEVISION PROPERLY, PLEASE CONTINUE THE SEARCH METHOD AS YOU MAY BE USING THE WRONG CODE.
• DURING STEP 5, IT IS ALSO POSSIBLE TO SEND ANOTHER SIGNAL INSTEAD OF THE POWER SIGNAL. SIMPLY PRESS ANY OF THE FOLLOWING KEYS DURING STEP 5 INSTEAD OF THE POWER KEY: 0, 1, 2, 3, CH+, VOL+, PLAY OR STOP. IF, FOR EXAMPLE, DURING STEP 5 YOU PRESS “2” INSTEAD OF “POWER”, THE REMOTE WILL SEND THE “NUMBER 2”
SIGNAL (MAKE SURE YOUR TV IS SWITCHED TO A CHANNEL OTHER THAN
2).
• IF NO KEY IS PRESSED WITHIN 30 SECONDS DURING STEP 5, THE REMOTE EXITS THE SET UP MODE AND RETURNS TO THE CODE PREVIOUSLY SET UP BEFORE STARTING THIS PROCESS.
• TO SEARCH FOR YOUR OTHER DEVICES, FOLLOW THE SAME INSTRUCTIONS ABOVE, ONLY PRESS THE APPROPRIATE DEVICE KEY DURING STEP 2 AND
5.
• IF YOUR VCR’S ORIGINAL REMOTE CONTROL DOES NOT HAVE A POWER KEY, PRESS PLAY INSTEAD OF POWER DURING STEP 5.
Congratulations! You should now have your remote set up to operate your home entertainment components. For instructions on how to operate advanced features of your remote, like Favorite Channel Scan,Volume Lock, and Macros, see page 27.
Quick Start Guide 13


 6-IN-ONE
INTRODUCCIÓN
Gracias por comprar un control remoto “Radioshack 6-in-one” potenciado por Kameleon. Este dispositivo que acaba de adquirir representa la última generación en tecnología de controles remotos. Sólo muestra en pantalla las teclas activas para cada dispositivo, por lo que cada pantalla resulta simple para el usuario y única para cada dispositivo. Este control remoto de fácil manejo también incluye iconos animados para identificar el dispositivo seleccionado.
Está diseñado para operar hasta seis aparatos domésticos de entretenimiento, incluyendo TV, VCR, convertidor de cable, receptor de satélite, reproductor de CD, receptor de audio, amplificador, home-theather-in-a-box (cinema en casa), reproductor de DVD, y otros dispositivos automáticos de la casa como el control automatizado de luces. Su 6-en-Uno viene ya preprogramado con los comandos más usados en sus aparatos domésticos de entretenimiento y con características avanzadas como:
•Macros – para una instante activación de sus preferidas secuencias de teclas.
•Aprendizaje – para capturar y reproducir funciones particulares propias de los controles remotos originales de sus aparatos.
•Búsqueda de código y verificación – le ayuda con la configuración de su control remoto para que opere sus aparatos.
•Búsqueda de canales y de canal favorito – le permite visualizar rápidamente todos los canales disponibles y sus favoritos.
•Asignación fija de volumen – para asignar los controles de volumen a cada aparato o a uno mismo para todos.
•Menú dedicado/Teclas de guía – para acceder de forma instantánea a guías y menús de programas de cable y satélite
•Biblioteca de códigos localizables – contiene el grupo de códigos de controles remotos infrarrojos más grande y eficiente del mundo, práctica mente para cada marca y fabricante existente.
•Picture-in-Picture – admite la funcionalidad de una imagen dentro de otra imagen con la que vienen algunas TVs.
Después de haber instalado cuatro (4) baterías alcalinas AAA nuevas (sólo disponible en RadioShack), podrá usar inmediatamente su control remoto 6-en-Uno para controlar sus aparatos RCA como TV,VCR, DVD y receptor de satélite, al igual que sus aparatos Pioneer de audio y CD.
14 GUÍA DE INICIO RÁPIDO

USER’S GUIDE
Para controlar otras marcas y dispositivos, favor de llevar a cabo las instrucciones de la página 14 en Configuración del 6-en-Uno.
GUÍA DE INICIO RÁPIDO
INSTALACIÓN DE BATERÍAS
Su control remoto necesita cuatro baterías AAA (no incluidas) para el suministro de energía. Para un mejor rendimiento y mayor duración, recomendamos las baterías alcalinas RadioShack.
NOTAS SOBRE LA BATERÍA:
•Deshágase de las baterías viejas de manera apropiada.
•No las queme ni entierre.
•Utilice sólo baterías nuevas del tamaño y tipo recomendado.
•No mezcle baterías viejas y nuevas o de diferentes tipos (p.ej. estándar, alcalinas o recargables), o baterías recargables de diferentes capacidades.
•Si no tiene pensado usar el control remoto por un tiempo prolongado, es mejor quitar las baterías. Las baterías pueden derramar químicos que pueden llegar a destruir las partes electrónicas del equipo.
INSTALACIÓN DE BATERÍAS:
1.Desatornille y quite la tapa del compartimiento de las baterías de su control 6-en-Uno.
2.Coloque los polos positivo (+) y negativo (-) de las baterías con las marcas + y – indicadas en el compartimiento.
3.Coloque de nuevo la tapa y los tornillos.
• REEMPLAZAR LAS BATERÍAS NO LE REQUERIRÁ REPROGRAMAR SU CON-
TROL REMOTO, YA QUE EL 6 EN-UNO CUENTA CON RETENCIÓN PERMANENTE DE MEMORIA.
• PARA ALARGAR LA VIDA DE LAS BATERÍAS, LA PANTALLA SE APAGA TRAS
10 SEGUNDOS DE INACTIVIDAD Y SE ENCIENDE DE NUEVO CUANDO SE MUEVE EL CONTROL.
•TAMBIÉN ES POSIBLE AUMENTAR O DISMINUIR EL BRILLO DEL PANEL
KAMELEON DE SU 6-EN-UNO. PARA HACER ESTO, CONSULTE LA PÁGINA
16.
GUÍA DE INICIO RÁPIDO 15


 6-IN-ONE
GUÍA DE INICIO RÁPIDO
AJUSTE DEL BRILLO DE LA PANTALLA KAMELEON
Para aumentar o disminuir el brillo de la pantalla Kameleon de su 6-en-Uno.
1.Presione y mantenga presionada la tecla P al menos 3 segundos. La parte inferior del indicador IR parpadeará dos veces, y aparecerá un círculo alrededor de la tecla P.
2.Presione 9 7 4.
3.Para aumentar el brillo, presione CH+. Para disminuir el brillo, presione CH-.
4.Presione P para guardar la configuración del brillo.
• AUMENTAR EL BRILLO DEL PANEL KAMELEON PUEDE ACORTAR LA DURACIÓN DE LAS BATERÍAS. LA VIDA DE LAS BATERÍAS VARÍA ENTRE 3 Y
12 MESES, DEPENDIENDO DE LA CONFIGURACIÓN DEL BRILLO.
ACERCA DEL TECLADO
1. Panel Kameleon
Este control remoto 6-en-Uno viene con Kameleon, una pantalla iluminada que combina la funcionalidad de un control remoto tradicional y la comodidad de una pantalla sensible al tacto (touchscreen). Sólo muestra las teclas activas para el modo de cada aparato.
Cada modo tiene una pantalla principal y una pantalla con el menú. Presione MENU para acceder a la pantalla del menú correspondiente al modo en el que está.
TRAS 10 SEGUNDOS DE INACTIVIDAD, LA ILUMINACIÓN DE FONDO DE LA PANTALLA KAMELEON SE APAGARÁ PARA CONSERVAR LAS BATERÍAS. AL PRESIONAR CUALQUIER TECLA DEL CONTROL REMOTO, VOLVERÁ LA LUMI-
NOSIDAD.
2. IR (infrared) Indicator
El IR Indicator (indicador de rayos infrarrojos) se activa al estar enviando o recibiendo una señal de rayos infrarrojos. El indicador mostrará “outgoing IR” cuando se presiona una tecla de una función. Cuando se esté usando la Característica de Aprendizaje, el indicador mostrará “incoming IR”.
3. Teclas de aparatos
[


 ]
]
Las teclas TV, VCR, SAT/CBL, CD, AUD y DVD seleccionan el aparato que desea controlar.Así, si presiona la tecla TV, su control remoto controlará las funciones de su televisión. Como valor agregado, su 6-en-Uno presenta teclas animadas para los diferentes aparatos (modos). Después de presionar una tecla de modo, empezará un movimiento animado, para mostrar la modalidad actualmente activa.
16 GUÍA DE INICIO RÁPIDO

USER’S GUIDE
4. P [  ]
]
Use P para todas las secuencias de programación. Cuando presiona y mantiene presionada la tecla P por al menos durante 3 segundos, la parte inferior del IR Indicator parpadeará dos veces, y aparecerá un círculo alrededor de la tecla P para indicarle que está en la modalidad de programación.
5. SCREEN [  ]
]
La tecla SCREEN le da la posibilidad de moverse a través de las diferentes pantallas (si aplica) dentro de un modo determinado durante el uso normal y el modo de configuración.
6. POWER [  ]
]
La tecla POWER controla la misma función que en su control remoto original.
7. Teclas numéricas
Las teclas de números (1 – 9, 0) controlan la misma función que en su control remoto original. En el modo AUD, estas teclas ofrecerán selección de entrada directa.
8. +100
Use +100 para teclear canales superiores al 100 (p.ej. para el canal 131, presione +100, luego 3 y luego 1).
9. ENTER
En algunos aparatos de TV,VCR, de cable y de satélite, hay que presionar ENTER una vez después de teclear el número del canal deseado. La tecla ENTER controla la misma función que en su control remoto original.
10. VOL (+/-)
Las teclas de volumen controlan la misma función que en su control remoto original.
11. LAST [  ]
]
Presione LAST una vez para recuperar el último canal visto o regresar a la pantalla anterior en el menú principal.
12. MUTE [  ]
]
La tecla MUTE controla la misma función que su control remoto original.
13. FAV SCAN [  ]
]
En los modos TV,VCR, DVD, SAT y CBL, presione FAV SCAN para buscar a través de sus canales favoritos y/o todos los canales.
GUÍA DE INICIO RÁPIDO 17


 6-IN-ONE
GUÍA DE INICIO RÁPIDO
14. CH / SKIP (+/-)
Estas teclas controlan las mismas funciones que en su control remoto original. En los modos DVD y CD, funcionan como las teclas SKIP +/-.
15. MENU [  ]
]
La tecla MENU controla la misma función que su control remoto original.
16. GUIDE [  ]
]
Use GUIDE para mostrar el programa, la guía o el menú de configuración para el aparato seleccionado.
17. EXIT [  ]
]
Presione EXIT para salir del programa, guía o menú del aparato seleccionado.
18. INFO
Use INFO para mostrar la información sobre el canal y el programa actual.
19. SELECT [

 ]
]
Presione SELECT para seleccionar las opciones desde el menú o guía de su aparato seleccionado.
20. Teclas direccionales
Use las teclas direccionales para mover el cursor a través de las pantallas de la guía del programa y del menú. Si su aparato estereofónico no tiene un menú, estas teclas le permitirán ajustar el volumen de sus bocinas más alto (


 ) o más bajo (


 ) y para ajustar el balance a la izquierda
( 

 ) o a la derecha (

 ).
).
21. PAGE KEYS / [  ]
]
Use las teclas direccionales a voluta a través de las pantallas de la guía del programa y del menú.
22.Teclas de movimiento de VCR / DVD / SAT / CD / AUD
Estando en el modo VCR, DVD, SAT, CD o AUD, estas teclas operan las funciones de movimiento (PLAY, FF, REW etc.) de su aparato. En las pantallas del menú de los modos SAT y CBL, las teclas Page Up/Down se iluminarán en su lugar. Para prevenir la grabación accidental, la tecla RECORD debe presionarse dos veces para que empiece la grabación.
18 GUÍA DE INICIO RÁPIDO

USER’S GUIDE
23. PIP / [  ]
]
Use PIP para activar y desactivar la característica de Picture-in-Picture (sólo si su TV cuenta con esta funcionalidad). La tecla [  ] Instant Replay (reproducción instantánea) realiza la misma función que en su control remoto original TiVo o Replay.
24. MOVE / [ ]
]
Use MOVE para colocar la imagen de la ventana (si está disponible) en diferentes posiciones dentro de la imagen principal. La tecla Advance realiza la misma función que en su control remoto original TiVo o Replay.
25. FREEZE / LIVE TV [  ]
]
Presione FREEZE una vez para capturar una cuadro de video en la imagen principal (si está disponible). Presione otra vez para volver a la visualización normal. La tecla LIVE TV realiza la misma función que en su control remoto original TiVo o Replay.
26. SWAP / [  ]
]
Use SWAP para intercambiar la imagen y el sonido (si está disponible) entre la imagen principal y la de la ventana. La tecla Slow key [  ] realiza la misma función que en su control remoto original TiVo o Replay.
27. SUR SND / SLEEP [  ]
]
Cuando se está en el modo AUD, la tecla SUR SND se ilumina para permitirle el acceso a la función Surround Sound de su aparato de audio. Cuando se está en el modo TV,VCR, SAT o CBL, la tecla SLEEP se ilumina para permitirle el acceso a la función Sleep en los aparatos que incorporen un temporizador. Estas teclas controlan las mismas funciones que en su control remoto original.
28. TV/VCR / A-B [  ]
]
Use TV/VCR (A-B) para cambiar la entrada de la TV para ver programas de TV o VCR, o para asumir las funciones del interruptor A/B de su equipo de cable.
29. M1, M2, M3, M4
Estas teclas le dan la posibilidad de personalizar el control 6-en-Uno usándolas como teclas Macro o teclas adicionales para que asuman funciones de su control remoto original a través de la Característica de Aprendizaje (vea la página 31).
GUÍA DE INICIO RÁPIDO 19
 Loading...