


®
Operating Instructions
DVD Player/
 Video Cassette Recorder
Model No. NV-VP32 Series
Before attempting to connect, operate or adjust this product, please read these instructions completely.
RQTV0049

Contents
Before Use |
|
Warning and Important Information .............................. |
3 |
Accessories .................................................................................. |
3 |
VHS Deck and Cassette Tape Information .................... |
4 |
The Remote Control ..................................................................... |
4 |
Disc Information.............................................................. |
5 |
Control Reference Guide................................................ |
6 |
Main Unit....................................................................................... |
6 |
The Unit’s Display......................................................................... |
6 |
Remote Control............................................................................. |
7 |
Getting Started |
|
Connections .................................................................... |
8 |
Basic Connections ........................................................................ |
8 |
Audio/Video Output Sockets......................................................... |
8 |
For better video from DVD............................................................ |
8 |
To enjoy sound through other audio equipment ........................... |
9 |
Operating the TV ........................................................... |
10 |
TV Maker Setting ........................................................................ |
10 |
Tuning the TV to Your Unit ........................................... |
11 |
To change the RF output channel .............................................. |
11 |
Setting Up for VHS ........................................................ |
12 |
CLOCK SET ............................................................................... |
12 |
DVD Quick Setup........................................................... |
13 |
VHS Operations |
|
Playback......................................................................... |
14 |
Adjusting the playback picture .................................................... |
15 |
NTSC Playback .......................................................................... |
15 |
Recording ...................................................................... |
16 |
One-Touch Recording (OTR) ..................................................... |
17 |
Recording from an external source............................................. |
17 |
TAPE REFRESH ........................................................................ |
17 |
Timer Recording............................................................ |
18 |
To check and cancel a Timer Programme.................................. |
19 |
Timer recording for the same programme on the following week |
|
(Intelligent Timer)........................................................................ |
19 |
Search Functions .......................................................... |
20 |
Jet Navigator............................................................................... |
20 |
VHS Index Search System (VISS).............................................. |
21 |
Easy Programme Playback ........................................................ |
21 |
Settings Using the On-Screen Display........................ |
22 |
TUNER PRESET ........................................................................ |
22 |
SYSTEM ..................................................................................... |
23 |
OPTION ...................................................................................... |
24 |
Various indications in on-screen display..................................... |
25 |
Changing audio........................................................................... |
25 |
DVD Operations |
|
Playing Discs-basic play............................................... |
26 |
Position Memory ......................................................................... |
27 |
Chapter Review........................................................................... |
27 |
Convenient Functions ................................................... |
28 |
Starting play from a selected item............................................... |
28 |
Starting play from a selected group ............................................ |
28 |
Quick Replay............................................................................... |
28 |
Changing play speed .................................................................. |
28 |
AV Enhancer ............................................................................... |
29 |
Picture Mode ............................................................................... |
29 |
Rotating Pictures......................................................................... |
29 |
Changing Play Sequence.............................................. |
30 |
Program Play .............................................................................. |
30 |
Random Play............................................................................... |
30 |
Playing the Programmes or |
|
Play Lists on DVD-RAM................................................. |
31 |
Direct Navigator .......................................................................... |
31 |
Playing a play list ........................................................................ |
31 |
MP3/WMA, CD text and JPEG Navigating Menus ....... |
32 |
Playing HighMAT discs ............................................................... |
33 |
To Enjoy Movies and Music More................................. |
34 |
Changing soundtracks, subtitles and angles............................... |
34 |
Advanced Surround .................................................................... |
35 |
Repeat Play................................................................................. |
36 |
Variable Zoom function ............................................................... |
36 |
Digital output ............................................................................... |
37 |
Using On-Screen Menus ............................................... |
38 |
Main Menu .................................................................................. |
38 |
Elapsed play time indicator ......................................................... |
38 |
Other settings.............................................................................. |
39 |
Changing Settings......................................................... |
40 |
Entering a password (Ratings).................................................... |
40 |
SETUP menu .............................................................................. |
41 |
Editing |
|
Recording from DVD to VHS......................................... |
42 |
Manual Dubbing .......................................................................... |
42 |
DVD-RAM Dubbing ..................................................................... |
42 |
Helpful Hints |
|
Before Requesting Service........................................... |
43 |
Error Messages........................................................................... |
45 |
Glossary ......................................................................... |
46 |
Specifications ................................................................ |
47 |
2
Warning and Important Information
Thank you for purchasing this product. For optimum performance and safety, please read these instructions carefully.
CAUTION!
DO NOT INSTALL, OR PLACE THIS UNIT, IN A BOOKCASE, BUILT-IN CABINET OR IN ANOTHER CONFINED SPACE. ENSURE THE UNIT IS WELL VENTILATED. TO PREVENT RISK OF ELECTRIC SHOCK OR FIRE HAZARD DUE TO OVERHEATING, ENSURE THAT CURTAINS AND ANY OTHER MATERIALS DO NOT OBSTRUCT THE VENTILATION VENTS.
CAUTION!
THIS PRODUCT UTILIZES A LASER.
USE OF CONTROLS OR ADJUSTMENTS OR PERFORMANCE OF PROCEDURES OTHER THAN THOSE SPECIFIED HEREIN MAY RESULT IN HAZARDOUS RADIATION EXPOSURE.
DO NOT OPEN COVERS AND DO NOT REPAIR YOURSELF. REFER SERVICING TO QUALIFIED PERSONNEL.
WARNING
TO REDUCE THE RISK OF FIRE, ELECTRIC SHOCK OR PRODUCT DAMAGE, DO NOT EXPOSE THIS EQUIPMENT TO RAIN, MOISTURE, DRIPPING OR SPLASHING AND ENSURE THAT NO OBJECTS FILLED WITH LIQUIDS, SUCH AS VASES, SHALL BE PLACED ON THE EQUIPMENT.
TO REDUCE THE RISK OF FIRE, SHOCK HAZARD AND ANNOYING INTERFERENCE, USE THE RECOMMENDED ACCESSORIES ONLY.
Important
Your attention is drawn to the fact that the recording of pre-recorded tapes or discs or other published or broadcast material may infringe copyright laws.
For your safety
≥Do not remove outer cover.
≥Touching internal parts of the unit is dangerous, and may seriously damage it.
≥To prevent electric shock, do not remove cover. There are no user serviceable parts inside. Refer all servicing to qualified service personnel.
Cautions before you operate this unit
Avoid:
≥Humidity and dust.
≥Covering the ventilation holes with soft materials such as cloth or paper.
≥Extreme heat such as direct sunlight. ≥Magnets or electromagnetic objects. ≥Touching internal parts of the unit.
≥Water or some other liquid.
≥Lightning (disconnect the aerial plug from the unit during a lightning storm).
≥Anything heavy on the unit.
≥Connecting or handling the equipment with wet hands. ≥Using a cell phone near the unit because doing so may cause
noise to adversely affect the picture and sound.
Do:
≥Wipe the unit with a clean and dry cloth. ≥Install the unit in a horizontal position.
≥Keep the unit, TV and other equipment switched off until you have finished all connections.
Condensation may form in the following cases:
≥The unit is brought from cold surroundings into a well-heated room.
≥The unit is suddenly brought from cool surroundings, such as an air-conditioned room or car, to a place which is hot and humid.
Note:
≥In any of the above-mentioned conditions, do not operate the unit for at least 1 hour. This unit is not equipped with a dew sensor.
NV-VP32GL: Australia model
NV-VP32GN: New Zealand model
THIS UNIT IS INTENDED FOR USE IN
MODERATE CLIMATES.
About descriptions in these Operating Instructions
≥Pages to be referred to are indicated as (l ±±).
≥The explanations concerning discs are indicated by [DVD], those concerning video are indicated by [VHS].
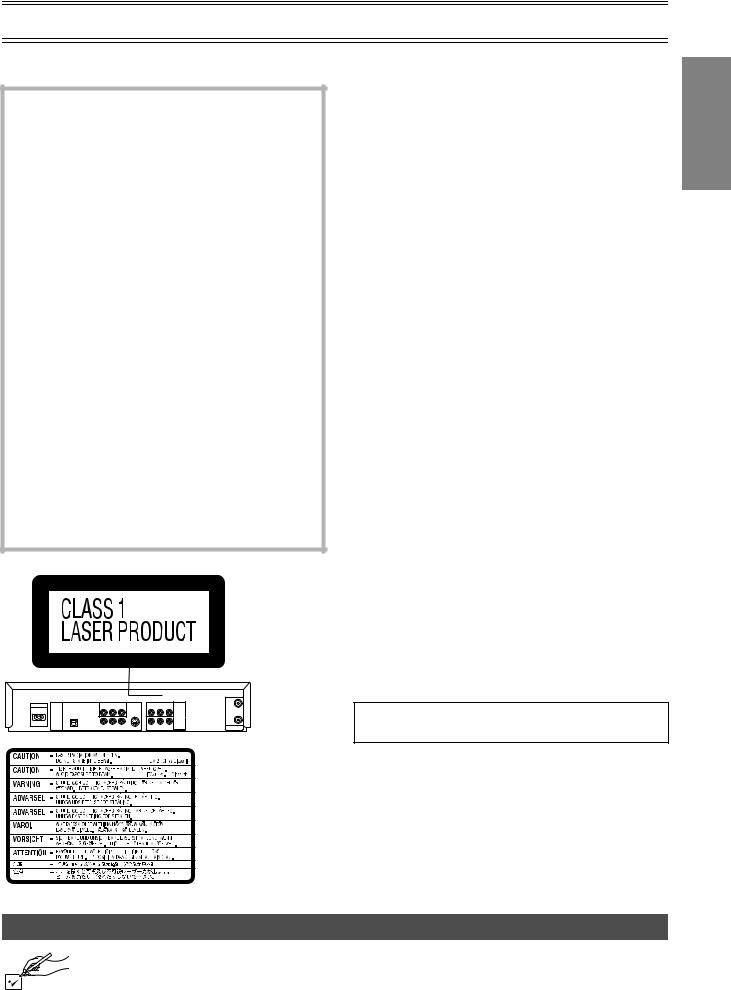
(Inside of product)
RQLCA0141
Accessories
Please check and identify the supplied accessories. |
|
∏1 pc. Remote Control |
∏1 pc. AC Main Lead |
∏1 pc. RF Coaxial cable |
∏1 pc. Audio/Video cable |
∏2 pcs. “R6” size batteries |
|
Before Use
3

VHS Deck and Cassette Tape Information
ªSurge Absorber
For further protection for this product, these models are equipped with new surge absorbing circuits which prevents damage due to power surges caused by lightning.
≥This function may not be effective for surges by direct lightning.
ªCrystal View Control
The crystal view control function ensures the optimum picture quality so that you get the best picture automatically.
ªTapes
≥You can use tapes with the VHS and S-VHS marks, but this unit is unable to make full use of the characteristics of S-VHS tapes.
≥Break the tape’s tab to prevent accidental erasure. Cover the hole with a
double layer of adhesive tape when you want to use the tape for recording again.
 Tab
Tab
ªS-VHS Quasi Playback (SQPB)
It is possible to play back tapes recorded in the S-VHS system. ≥Some picture noise may occur depending on the type of tape
used.
≥It is not possible to fully obtain the high resolution that S-VHS is capable of.
It is not possible to record in the S-VHS system with this unit.
ªDirt on the video heads
If the video heads get dirty, pictures will not be recorded or played back clearly. (See the following conditions.)
Normal picture |
Small amount of dirt Large amount of dirt |
|||
|
|
|
|
|
|
|
|
|
|
If this happens, insert and eject a cassette 5–10 times successively to remove the dirt from the video heads.
If the problem still persists after performing above, contact a service personnel.
Head cleaning by service agents is not covered by warranty.
Heads mainly become dirty because of scratched or dirty tapes, use of the unit under high temperature and humidity or under the dust and other reasons.
Never use tapes on which liquids have been spilt or those that are extremely damaged since these will cause not only the heads to become dirty, but also the unit malfunction.
The Remote Control
ªInstalling the batteries
Insert the batteries with the polarity (+ and -) correctly aligned.
R6, AA, UM-3
Notes:
The service life of the batteries is approximately 1 year. However, it varies considerably depending on the frequency of use.
≥When the batteries are exhausted, remove them immediately and dispose them correctly.
≥Do not mix old battery with new battery.
≥Do not mix different battery types, i.e. Alkaline and Manganese. ≥Do not use rechargeable (Ni-Cd) batteries.
≥Do not heat or short-circuit the batteries.
≥When you do not use the remote control for a long time, take out the batteries and store them in a cool, dry place.
ªUse
Aim at the receiver window (l 6), avoiding obstacles, at a maximum range of 7 m directly in front of the unit.
≥Keep the transmission window and the unit’s sensor free from dust.
≥Operation can be affected by strong light sources, such as direct sunlight, and the glass doors on cabinets.
4

Disc Information
ªDiscs that can be played
DVD-RAM |
DVD-Video |
|
DVD-R |
SVCD |
|
Video CD |
|
|
|
CD |
CD-R/RW |
|||||||
|
|
|
|
|
|
|
|
|
|
|
|
|
|
|
|
|
|
|
|
|
|
|
|
|
|
|
|
|
|
|
|
|
|
|
|
|
— |
|
|
|
|
|
|
|
|
|
|
|
|
|
|
|
|
|
|
|
|
|
|
|
|
|
|
|
|
|
|
|
|
|
|
|
|
|
|
Shown as “DVD- |
|
|
|
|
Conforming to |
|
|
|
|
|
|
|
|
|
|
|
|
|
|
|
|
|
IEC62107 |
|
|
|
|
|
|
|
|
|
|
|
|
||
VR” on the |
|
|
|
|
|
|
|
|
|
|
|
|
|
|
|
|
||
|
|
|
|
|
|
|
|
|
|
|
|
|
|
|
|
|||
|
|
|
|
|
|
|
|
|
|
|
|
|
|
|
|
|
|
|
display |
|
|
|
|
|
|
|
|
|
|
|
|
|
|
|
|
|
|
|
|
|
|
|
|
|
|
|
|
|
|
|
|
|
|
|
|
|
[RAM] |
|
|
[DVD-V] |
|
|
[VCD] |
[CD] [CDtext] |
[MP3] [WMA] |
||||||||||
|
|
|
|
|
|
|
|
|
|
|
|
|
|
|
|
|
|
[JPEG] |
|
|
|
|
|
|
|
|
|
|
|
|
|
|
|
|
|
|
|
Use discs with the above logos and that conform to specifications. The unit cannot play other discs correctly. Do not use irregularly shaped discs (e.g. heart-shaped), as these can damage the unit.
It may not be possible to play CD-R, CD-RW, DVD-R and DVD-RAM in all cases due to the type of disc or condition of the recording.
ªDiscs that cannot be played
DVD-ROM, DVD-Audio, CD-ROM, CDV, CD-G, iRW, DVD-RW, CVD, SACD, Divx Video Discs and Photo CD, DVD-RAM that cannot be removed from their cartridge, 2.6-GB and 5.2-GB DVDRAM, and “Chaoji VCD” available on the market including CVD, DVCD and SVCD that do not conform to IEC62107, etc.
ªRegion number supported by this player
Region numbers are allocated to DVD players and software according to where they are sold.
The region number of the unit is “4”. The unit will play DVD-Video marked with labels containing “4” or “ALL”.
Examples:
4 ALL 246 , etc.
ªDVDs that can be played
You can play discs with these symbols. 


ªVideo systems
≥This unit can play PAL and NTSC, but your TV must match the system used on the disc.
≥PAL discs cannot be correctly viewed on an NTSC television. ≥This unit can convert NTSC signals to PAL 60 for viewing on a
PAL television (Video—NTSC Disc Output l 41). ≥Output is interlace (576I), when playing PAL discs.
ªDisc structure
Disc structure and the labels given to the items on discs depend on the disc type.
Track: |
The smallest division on CDs and Video CDs, or a |
|
single MP3/WMA file. |
Chapter: |
The smallest division on DVD-Video. |
Group: |
Equivalent to folders or albums on data discs. |
Title: |
The largest division on DVD-Video, usually an entire |
|
movie. |
Programme:The division on DVD-RAM equivalent to a single |
|
|
recording. |
Picture: |
A single JPEG file. |
Play list: |
The largest grouping on a HighMAT disc, or a group of |
|
scenes on DVD-RAM. |
Scene: |
DVD-RAM programme sections specified and grouped |
|
into play lists on a DVD video recorder. |
Content: |
Covers tracks and pictures on HighMAT discs. |
ªDVD-RAM discs
The DVD-RAM you can play on this unit are those recorded with DVD video recorders, DVD video cameras, personal computers, etc. using Version 1.1 of the Video Recording Format (a unified video recording standard).
≥Remove discs from their cartridges
before use and return them when you are finished, making sure that the
labels of the disc and cartridge face the same way.
≥Some parts of the disc, for example where one programme ends and another begins, may not play smoothly.
ªDVD-R discs
Panasonic DVD-R discs recorded and finalized (a process that allows play on compatible equipment) on a Panasonic DVD video recorder or DVD video camera are played as DVD-Video on this unit.
ªPlaying DVDs and Video CDs
The producer of these discs can control how they are played so you may not always be able to control play as described in these operating instructions (for example if the play time is not displayed or if a Video CD has menus). Read the disc’s instructions carefully.
ªCD-R and CD-RW discs
This unit can play CD-R/RW (audio recording disc) recorded with CD-DA, Video CD, SVCD (conforming to IEC62107), MP3, WMA, or JPEG. Finalize (a process that allows play on compatible equipment) the disc after recording.
ªHighMATTM discs
This unit is compatible with HighMATTM discs containing MP3, WMA and/or JPEG files.
ªTo clean discs
DVD-Video, Video CD, CD
Wipe with a damp cloth and then wipe dry.
DVD-RAM, DVD-R
≥Clean with an optional DVD-RAM/PD disc cleaner (LFK200DCA1, where available).
≥Never use cloths or cleaners for CDs etc.
ªHandling precautions
≥Do not write on the label side with a ball-point pen or other writing instrument.
≥Do not use record cleaning sprays, benzine, thinner, static electricity prevention liquids or any other solvent.
≥Do not attach labels or stickers to discs (do not use discs with exposed adhesive from tape or left over peeled-off stickers).
≥Do not use scratch-proof protectors or covers.
≥Do not use discs printed with label printers available on the market.
Before Use
5

Control Reference Guide
Operations in these instructions are described mainly for the remote control, but you can do the operations on the main unit if the controls are the same.
Main Unit
(1) |
[A] |
(2) |
(3) |
(4) |
|
|
|
(1) |
(2) |
|
/ I |
|
|
|
|
|
|
|
|
|
|
|
|
|
|
|
|
|
OPEN/CLOSE |
|
EJECT |
|
|
|
|
|
|
|
|
|
|
|
PLAY |
/REW FF/ |
|
|
DVD-RAM AV |
PLAY |
|
|
|
|
|
|
DUBBING ENHANCER |
|
|||
|
|
|
STOP |
|
|
|
|
STOP |
|
|
|
(5) |
(6) (7) (8) |
[B] |
[C] |
(3) (4) |
(5) (6) |
|
|
ªCommon section
[A]Power button (Í/I)
≥Press [Í/I] to switch this unit from on to standby mode or vice versa. In standby mode, the unit is still connected to the main AC power.
[B]Infra-red remote control receiver window
[C]Display
ªVHS section
(1) |
Tape eject button (<EJECT).................................... |
(l 14) |
(2) |
Channel up/down buttons (CHJI)................. |
(l 15, 16) |
(3) |
Recording/One-Touch Recording button |
|
|
(¥REC/OTR) ........................................................ |
(l 16, 17) |
(4) |
Cassette compartment |
|
(5) |
AV2 IN (AUDIO/VIDEO) sockets ............................... |
(l 17) |
(6) |
∫STOP button ........................................................... |
(l 14) |
(7) |
1PLAY button........................................................... |
(l 14) |
(8) |
Fast-forward/rewind buttons |
|
|
(6/REW FF/5, 6 5) ........................................ |
(l 14) |
ªDVD section
(1) |
Disc tray |
|
(2) |
Disc tray open/close button (OPEN/CLOSE<) |
.........(l 26) |
(3) |
DVD-RAM Dubbing button |
|
|
(DVD-RAM DUBBING) ............................................... |
(l 42) |
(4) |
AV Enhancer button (AV ENHANCER).................... |
(l 29) |
(5) |
∫STOP button ........................................................... |
(l 26) |
(6) |
1PLAY button........................................................... |
(l 26) |
The Unit’s Display
(1) (2) (3)
REC
 R
R
(5) |
|
|
[A] |
(6) (7) |
|||
ªCommon section
[A]Main display
≥Current time/VHS recording and play counter/Timer recording start time/Miscellaneous messages, etc.
[B]Main display
≥Disc play counter/Timer recording end time/Disc type (l 5)/ Miscellaneous messages, etc.
PL: Play list number PG: Programme number
C:Contents number (HighMAT discs l 33)
G:Group number (HighMAT discs l 33)
ªVHS section
(1)VHS selector indicator
≥Lights up when the VHS section is active. It flashes for about 5 seconds immediately after selection is made.
(2)Operation status of VHS section
≥Lights up when a cassette is inserted.
≥Flashes when recording or timer recording is attempted with no cassette inserted.
≥Displays play status graphically. Rotating: Playing
Stopped: Paused
(3) |
Timer programme recording indicator.................... |
(l 18) |
(4) |
Recording mode indicator ....................................... |
(l 16) |
(5) |
Recording indicator .................................................. |
(l 16) |
(6) |
Channel display ........................................................ |
(l 16) |
(7) |
Repeat playback indicator ....................................... |
(l 14) |
(4) (1)(2) |
(3) |
GRP |
TTL PRG RND TRK CHP |
SP 

SLP 
EP A B 
(4)[B]
ªDVD section
(1)DVD selector indicator
≥Lights up when the DVD section is active. It flashes for about 5 seconds immediately after selection is made.
(2)Operation status of DVD section
≥Lights up when a disc is inserted.
≥Displays play status graphically. Rotating: Playing
Stopped: Paused
(3)The display mode of the main display section GRP: Group number
TTL: Title number
PRG: Lights up during programme play. RND: Lights up during random play. TRK: Track number
CHP: Chapter number
(4)A-B repeat indicator .................................................(l 39)
≥Lights up during A-B repeat play. *During repeat play, only  is lit.
6

|
|
|
|
|
|
|
|
Control Reference Guide |
|||
Remote Control |
|
|
|
|
|
|
|
||||
|
|
|
|
|
|
(33) |
(1) |
VHS/DVD Power button (VHS/DVDÍ) ............... |
(l 14, 26) |
||
|
|
|
|
|
|
(2) |
Audio button (AUDIO) |
|
(l 25, 34) |
||
|
|
|
|
|
|
|
|
||||
|
VHS/DVD |
|
|
|
|
(3) |
VHS/DVD Output Switch button |
|
|
||
|
|
|
|
|
|
(VHS/DVD OUTPUT) |
|
(l 12) |
|||
(1) |
|
|
|
|
|
|
|
|
|||
|
|
|
|
|
(32) |
(4) |
Numeric buttons (0–9, – /– –, S10) |
|
(l 16, 27, 28) |
||
|
|
|
|
|
|
|
|||||
(2) |
AUDIO |
|
|
CH |
VOLUME |
|
(5) |
Cancel/Reset button (CANCEL/RESET) |
(l 19, 25) |
||
|
|
|
|
||||||||
|
AV |
|
|
|
|||||||
|
|
|
|
(31) |
(6) |
Index Search, Skip buttons |
|
|
|||
|
VHS/DVD |
|
|
|
|
|
|||||
(3) |
VHS |
DVD |
|
(INDEX/SKIP: 9) |
|
(l 21, 26) |
|||||
|
|
(30) |
|
|
|||||||
|
|
|
|
TRACKING/V-LOCK |
(7) |
Stop button (STOP∫).......................................... |
|
(l 14, 26) |
|||
|
|
|
|
|
|
(29) |
(8) |
Jet Navigator, Direct Navigator/Top Menu button |
|||
(4) |
|
|
|
|
|
|
(NAVI, DIRECT NAVIGATOR, TOP MENU) |
(l 20, 31, 32) |
|||
|
|
|
|
|
|
|
|||||
|
|
|
|
|
|
(9) |
Cursor, Enter button |
|
|
||
|
|
|
|
|
|
|
|
|
|||
|
|
|
|
|
|
(28) |
|
(342 1, ENTER) .................................. |
(l 12, 22, 38, 40) |
||
(5) |
CANCEL/RESET |
|
|
PLAY SPEED |
(10) |
Display/On-Screen Menu button |
|
|
|||
|
|
|
|
|
|||||||
|
|
|
-/ |
|
|
|
|
||||
|
|
|
|
|
|
(DISPLAY) |
|
(l 38) |
|||
|
INDEX/SKIP |
SLOW/ |
|
|
|
||||||
(6) |
REW SEARCH FF |
(27) |
(11) |
Timer Programming and Check, AV Enhancer button |
|||||||
|
|
|
|
|
|||||||
(7) |
|
|
|
PLAY |
(26) |
|
(PROG/CHECK, AV ENHANCER) ................. |
|
(l 18, 19, 29) |
||
|
|
|
|
|
(12) |
Intelligent Timer, Position Memory button |
|
||||
|
NAVI |
|
SLOW |
MENU |
(25) |
|
(I-TIMER, P. MEMORY) ........................................ |
|
(l 19, 27) |
||
|
DIRECT NAVIGATOR |
|
PLAY LIST |
(13) |
Timer Recording button (TIMER |
) |
(l 18) |
||||
(8) |
|
|
|
|
|
(24) |
|||||
|
|
|
|
|
(14) |
DVD-RAM Dubbing button |
|
|
|||
|
TOP MENU |
|
|
|
|
|
|
||||
|
|
|
|
|
|
(DVD-RAM DUBBING) |
|
(l 42) |
|||
(9) |
|
|
|
|
|
|
|
|
|||
|
|
ENTER |
|
|
(15) |
Jet Rewind, Group button |
|
|
|||
|
DISPLAY |
|
|
|
RETURN |
|
|
(JET REW6, GROUP) ...................................... |
|
(l 14, 28) |
|
(10) |
|
|
|
|
|
(23) |
(16) |
Easy Programme Playback, Picture Mode button |
|||
|
PROG/CHECK |
I-TIMER |
|
|
|
|
(PROG PLAY, PICTURE MODE) ......................... |
|
(l 21, 29) |
||
(11) |
|
|
(22) |
(17) |
Input Select, Quick Replay button |
|
|
||||
AV ENHANCER |
P.MEMORY PLAY MODE SET UP |
|
(l 17, 28, 42) |
||||||||
(12) |
|
|
DVD-RAM |
|
|
(21) |
|
(INPUT SELECT, QUICK REPLAY)............... |
|
||
TIMER |
REC MODE |
REC |
(18) |
VHS/DVD Status button |
|
|
|||||
(13) |
DUBBING |
(20) |
|
|
|||||||
|
|
|
|
|
|
(VHS STATUS, DVD STATUS) |
|
(l 25, 26) |
|||
(14) |
JET REW |
PROG PLAY INPUT SELECT VHS STATUS |
(19) |
|
|
||||||
(19) |
Recording mode button (REC MODE) |
(l 16) |
|||||||||
|
|
|
|
|
|||||||
(15) |
GROUP |
PICTURE MODE |
QUICK REPLAY DVD STATUS |
(18) |
(20) |
Recording button (REC¥) |
|
(l 16) |
|||
|
|
|
|
|
|
||||||
(16) |
|
|
|
|
|
(17) |
(21) |
Play mode button (PLAY MODE) ....................... |
|
(l 30, 38) |
|
|
|
|
|
|
(22) |
DVD Setup menu button (SETUP) |
|
(l 40) |
|||
|
|
|
|
|
|
|
|
||||
|
|
|
|
|
|
|
(23) |
Return button (RETURN) .................. |
(l 13, 31, 35, 38, 40) |
||
|
|
|
|
|
|
|
(24) |
Menu, Play List button |
|
|
|
|
|
|
|
|
|
|
|
(MENU, PLAY LIST)......................................... |
|
(l 12, 22, 31) |
|
ª[VHS] and [DVD] button |
|
|
(25) |
Pause/Slow, Still button |
|
|
|||||
|
|
|
(PAUSE, SLOW;/D) |
|
(l 14, 26) |
||||||
|
|
|
|
|
|
|
|
|
|||
[VHS] |
|
|
|
|
|
|
(26) |
Play button (PLAY1) .......................................... |
|
(l 14, 26) |
|
≥Switch the remote control mode into VHS. |
|
(27) |
Rewind/Fast-Forward, Slow/Search buttons |
||||||||
≥Set main unit’s common output to VHS when OUT[VHS/DVD] |
|
(REW, FF, SLOW, SEARCH6 5) ................. |
(l 14, 26) |
||||||||
selection is AUTO. |
|
|
|
|
|
(28) |
Play Speed buttons (PLAY SPEEDJI) ................ |
(l 28) |
|||
[DVD] |
|
|
|
|
|
|
(29) |
Tracking/V-Lock and Channel up/down buttons |
|||
≥Switch the remote control mode into DVD. |
|
|
(TRACKING/V-LOCK, CHJI)........................... |
|
(l 15, 16) |
||||||
≥Set main unit’s common output to DVD when OUT[VHS/DVD] |
(30) |
VHS Select button (VHS) ..................................... |
|
(l LEFT) |
|||||||
selection is AUTO. |
|
|
|
|
|
(31) |
DVD Select button (DVD) ..................................... |
|
(l LEFT) |
||
|
|
|
|
|
|
|
(32) |
TV Operation buttons |
|
|
|
|
|
|
|
|
|
|
|
TV Power button (Í) |
|
|
|
|
|
|
|
|
|
|
|
TV Input Mode Selector (AV) |
|
|
|
|
|
|
|
|
|
|
|
TV Channel up/down buttons (CHJI) |
|
||
|
|
|
|
|
|
|
|
TV Volume up/down buttons (VOLUME s N r) |
|||
|
|
|
|
|
|
|
(33) |
Infra-red Transmitter |
|
|
|
Before Use
7

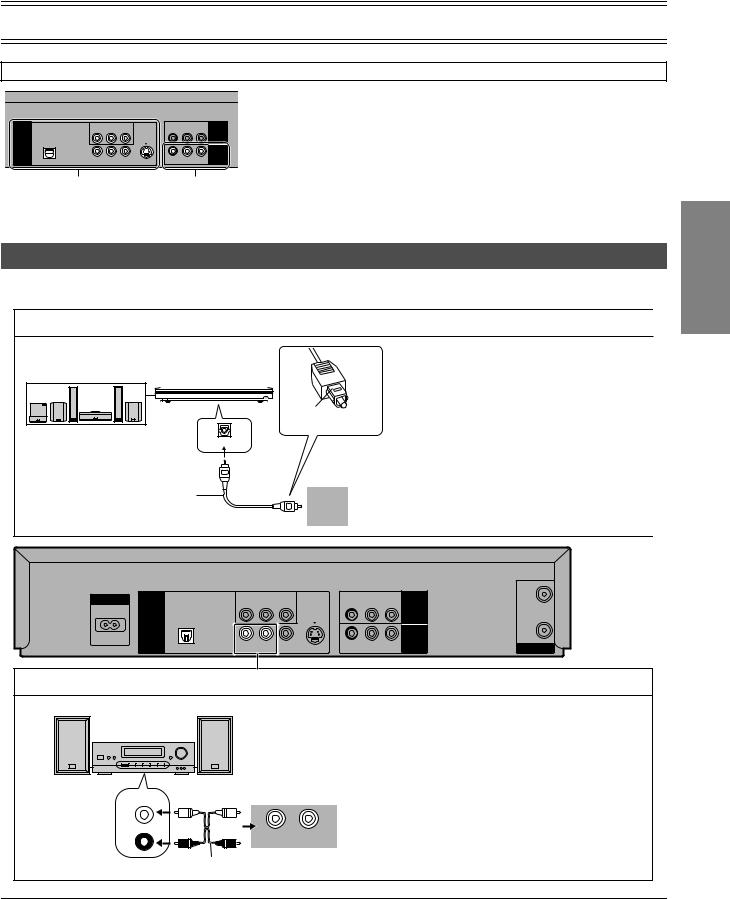
Connections
When the unit is turned on after connecting the aerial cable and the mains lead, Plug in Auto Tuning starts automatically. (NV-VP32GN only)
Basic Connections
The following connections are required to record the video cassette and play back the video cassette/discs through the TV.
≥Refer to the TV’s operating instructions.
≥Turn the TV off and disconnect its AC mains lead.
|
|
|
TV Set (Not supplied) |
|
|
|
|
|
|
|
Aerial |
|
|
|
|
|
(Not supplied) |
To mains supply |
|
|
|
Aerial Connector |
|
|
|
|
|
|
|
AC IN ~ |
COMPONENT VIDEO |
|
IN |
|
|
(NTSC 480P/480I PAL 576I) |
R-AUDIO-L |
VIDEO |
|
||
|
PR PB |
Y |
|
AV1 IN |
|
DIGITAL AUDIO |
|
|
|
|
|
(PCM/BITSTREAM) |
|
|
|
|
|
DVD OUT |
|
|
|
|
|
|
|
|
|
OUT |
|
|
|
|
|
VHS/DVD |
|
|
|
|
|
OUT |
RF |
OPTICAL |
R-AUDIO-L |
VIDEO S VIDEO |
R-AUDIO-L |
VIDEO |
|
Audio/Video Output Sockets
≥Set the RF output channel of the unit to “ss” (RF OFF) (l 11).
≥Connect audio/video cables directly to your TV. The video signals on DVDs and video tapes have copyright protection. The video may not be shown correctly if you connect through an A/V selector or other equipment.
AUDIO VIDEO
IN IN
L R
Audio/video cable
(Supplied) Television
AC IN ~ |
COMPONENT VIDEO |
|
|
|
||
(NTSC: 480P/480I PAL: 576I) |
|
R-AUDIO-L |
VIDEO |
|||
|
Y |
PB |
PR |
|
|
AV1 IN |
DIGITAL AUDIO |
|
|
|
|
|
|
(PCM/BITSTREAM) |
|
|
|
|
|
|
DVD OUT |
|
|
|
|
|
|
|
|
|
|
|
|
VHS/DVD |
|
|
|
|
|
|
OUT |
OPTICAL |
R-AUDIO-L |
VIDEO |
S VIDEO |
R-AUDIO-L |
VIDEO |
|
For better video from DVD
Y PB PR
COMPONENT
VIDEO IN Video cable (Not supplied)
Television
COMPONENT VIDEO terminal (progressive out)
These terminals can be used for either interlace or progressive output and provide a clearer picture than the S VIDEO terminal. Connection using these terminals outputs the colour difference signals (PB/PR) and luminance signal (Y) separately in order to achieve high fidelity in reproducing colours.
≥The description of the component video input terminals depends on the TV or monitor (e.g. Y/PB/PR, Y/B-Y/R-Y, Y/CB/CR). Connect to terminals of the same colour.
¬ To enjoy progressive video (l 13)
S-Video cable (Not supplied) S VIDEO IN
Television
S VIDEO terminal
The S VIDEO terminal achieves a more vivid picture than the VIDEO OUT terminal by separating the chrominance (C) and luminance
(Y) signals (Actual results depend on the TV). ≥Connect to a different terminal group (e.g.
“VIDEO 2”) than that you used for the connection through this unit’s VHS/DVD OUT terminal. Picture from the VHS section will not appear when you use the same group input terminal connections because the S Video terminal input takes precedence.
≥These connections are for the DVD section only.
Carry out the Basic Connections described above to view video from the VHS section.
≥When making this connection, ensure that you connect the audio cables (not supplied) to the corresponding audio input terminals on the TV.
≥You may need to change the video-input mode on the TV to view video from the VHS and DVD sections. Read your TV’s operating instructions for details.
VIDEO OUT
(480P/480I)
R-AUDIO-L |
VIDEO |
S VIDEO |
Audio cable
(Not supplied) Television
L R
AUDIO IN
8
Connections
The output terminal common to VHS and DVD, and the one exclusively for DVD
|
COMPONENT VIDEO |
|
|
|
||
|
(NTSC: 480P/480I PAL: 576I) |
|
R-AUDIO-L |
VIDEO |
||
|
PR |
PB |
Y |
|
|
AV1 IN |
DIGITAL AUDIO |
|
|
|
|
|
|
(PCM/BITSTREAM) |
|
|
|
|
|
|
DVD OUT |
|
|
|
|
|
|
|
|
|
|
|
|
VHS/DVD |
|
|
|
|
|
|
OUT |
OPTICAL |
R-AUDIO-L |
VIDEO |
S VIDEO |
R-AUDIO-L |
VIDEO |
|
DVD-only terminal |
Output common to |
DVD OUT |
VHS and DVD |
|
VHS/DVD OUT |
For the VHS/DVD OUT terminal, VHS and DVD outputs can be switched or it can be assigned for VHS output only (l 12).
The DVD OUT terminal can only output the DVD signal.
Note:
≥When Video is switched to DVD or vice versa, the audio volume may suddenly increase or decrease. This is because when the audio output of this unit is connected to the TV, etc., the audio output of the DVD is generally lower.
≥When you increase the volume level to play back DVD audio, reduce it when playback is finished.
To enjoy sound through other audio equipment
You can enjoy the powerful movie theater and hall-like sound available with multiple channel audio found on DVDs by connecting an amplifier and speakers.
Digital connection
Amplifier (Not supplied)
|
|
Insert fully with |
Connect 3 or more speakers |
this side facing up. |
|
|
||
for surround sound. |
(DVD) IN |
|
|
|
|
|
Optical digital cable |
|
|
(Not supplied) |
|
|
Do not bend sharply |
|
|
when connecting. |
OPTICAL |
¬To enjoy multi-channel surround sound
Connect an amplifier with a built-in decoder or a decoder-amplifier combination.
Change the settings in the SETUP menu (l 37, 41).
You can only use DTS Digital Surround decoders that are compatible with DVD.
≥Turn the Advanced Surround function “Off” (l 35).
¬To enjoy stereo or Dolby Pro Logic
Connect a digital amplifier or system component.
Change the settings in the SETUP menu (l 37, 41).
AC IN ~ |
|
COMPONENT VIDEO |
|
|
|
IN |
|
(NTSC: 480P/480I PAL: 576I) |
|
R-AUDIO-L |
VIDEO |
|
|||
|
Y |
PB |
PR |
|
|
|
AV1 IN |
DIGITAL AUDIO |
|
|
|
|
|
|
|
(PCM/BITSTREAM) |
|
|
|
|
|
|
|
DVD OUT |
|
|
|
|
|
|
|
|
|
|
|
|
|
|
OUT |
|
|
|
|
|
|
|
VHS/DVD |
|
|
|
|
|
|
|
OUT |
OPTICAL |
R-AUDIO-L |
VIDEO |
S VIDEO |
R-AUDIO-L |
VIDEO |
RF |
|
Analog connection
Amplifier (Not supplied) or system component (Not supplied) |
¬ To enjoy stereo or Dolby Pro Logic |
|
|
|
Connect an analog amplifier or system |
|
|
component. |
|
|
Change the settings in the SETUP menu |
|
|
(l 37, 41). |
|
|
The audio terminal of VHS/DVD OUT can also |
AUX IN |
|
be connected. |
|
|
|
L |
|
|
R |
R - AUDIO - L |
|
|
Audio cable (Not supplied) |
|
Notes:
≥To purchase an optical digital cable (not supplied), check the terminal shape of the equipment to be connected beforehand.
≥The OPTICAL DIGITAL AUDIO terminal is provided with a cap to prevent dust from entering. Simply plug into it, and the cap will be encapsulated in the unit.
Getting Started
9

Operating the TV
(1)
(2)
VHS/DVD
|
|
(3) |
AUDIO |
CH |
VOLUME |
|
||
|
AV |
(4) |
VHS/DVD |
|
VHS DVD
TRACKING/V-LOCK
Numeric buttons
CANCEL/RESET |
|
|
|
|
PLAY SPEED |
|
≥To select desired AV input on the TV. |
||
|
|
|
|
|
-/-- |
|
(3) |
TV Volume up/down buttons (VOLUME s N r) |
|
INDEX/SKIP |
|
SLOW/ |
|||||||
REW SEARCH FF |
|
||||||||
|
|
|
|
|
|
|
|
|
≥To adjust the volume of the TV. |
|
|
|
|
|
|
|
|
|
|
|
|
|
|
|
|
PLAY |
(4) TV Channel up/down buttons (CHJI) |
||
|
|
|
|
|
|
|
|
||
|
|
|
|
SLOW |
|
|
≥To select the desired programme position (TV station) on the TV. |
||
NAVI |
|
MENU |
|
||||||
|
|
|
|||||||
DIRECT NAVIGATOR |
|
|
PLAY LIST |
|
|
||||
TOP MENU |
|
|
|
|
|
|
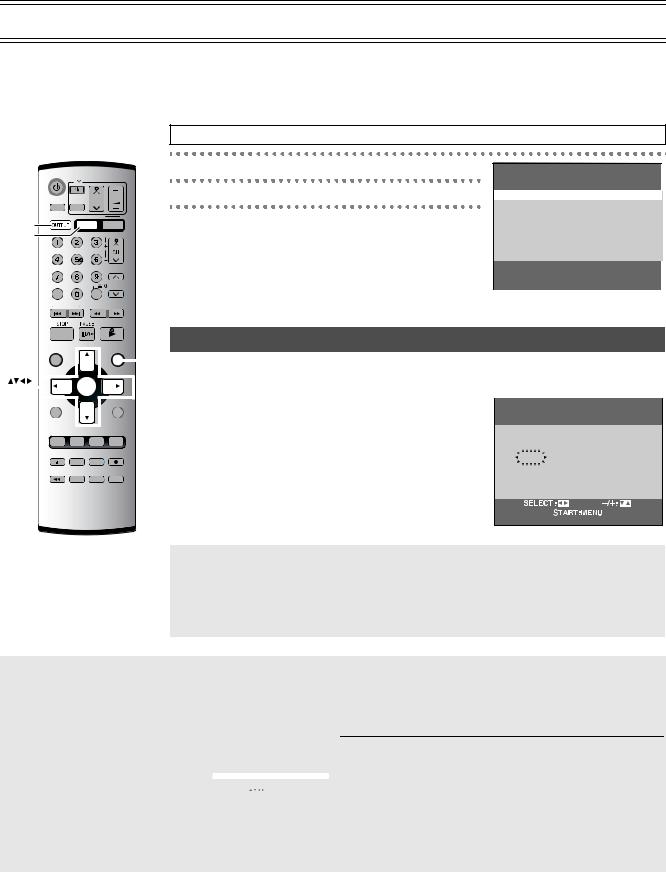
TV Maker Setting |
||
|
|
|
|
|
|
||||
|
|
|
|
|
|
|
|
|
|
|
|
|
ENTER |
|
You can operate the TVs of the manufacturers listed below with the remote control after setting it. |
||||
|
|
|
|
|
|
|
|
||
DISPLAY |
|
|
|
|
RETURN |
............................................................................................................................................................................................................................................................................................................................. |
|
||
PROG/CHECK |
I-TIMER |
|
|
|
[1] Refer to the chart below for the code of your TV. |
||||
|
|
|
|
|
|||||
AV ENHANCER |
P.MEMORY PLAY MODE SET UP |
[2].............................................................................................................................................................................................................................................................................................................................Aim the remote control at the TV and |
|||||||
TIMER |
DVD-RAM |
REC MODE |
REC |
||||||
DUBBING |
|
While holding down [Í] (1), use the numeric buttons to enter |
|||||||
JET REW |
PROG PLAY INPUT SELECT VHS STATUS |
|
|||||||
|
the two-digit code. |
||||||||
GROUP PICTURE MODE |
QUICK REPLAY DVD STATUS |
|
|||||||
Brand |
Code |
Panasonic/National |
01-04 |
|
|
SONY |
05 |
|
|
TOSHIBA |
06 |
|
|
JVC |
07 |
|
|
HITACHI |
08 |
|
|
MITSUBISHI |
09, 10 |
|
|
SHARP |
11 |
|
|
PHILIPS, SAMSUNG |
12 |
|
|
NEC |
13 |
|
|
SANYO |
14 |
|
|
GOLDSTAR/LG |
15, 16 |
|
|
SAMSUNG |
17, 18 |
|
|
SANYO |
19 |
|
|
10
Tuning the TV to Your Unit
The unit supplies a signal to the TV via the RF coaxial cable on channel AU28s 69 or NZ21s 69. It is possible to view the unit’s picture on your TV in the same way that you watch TV broadcasts. The unit is fitted with its own tuner (just like a normal TV) and can be preset to receive up to 99 TV broadcast stations.
≥Press [VHS].
¬ If you have connected the unit to the TV through the audio/video output sockets
You do not need to follow the procedure below. To view the pictures from the unit, set to the AV mode on the TV with [AV].
VHS/DVD
VHS
|
AUDIO |
CH |
VOLUME |
AV |
AV |
|
|
VHS/DVD |
|
|
|
VHS |
|
VHS DVD |
|
|
|
TRACKING/V-LOCK |
|
Numeric |
|
|
CH |
|
|
|
|
buttons |
|
|
|
|
CANCEL/RESET |
|
PLAY SPEED |
|
|
-/-- |
|
|
INDEX/SKIP |
|
SLOW/ |
|
REW SEARCH FF |
||
PLAY
NAVI |
SLOW |
MENU |
DIRECT NAVIGATOR |
|
PLAY LIST |
|
|
MENU |
TOP MENU |
|
|
Pre-programmed TV Channels (for NV-VP32GL/Australia)
The local TV broadcast channels 2, 7, 9, 10 and 28 are factory-preset in the unit.
That is, if you can receive TV broadcasts on VHF channels 2, 7, 9, 10 and UHF channel 28, these are already tuned on the programme positions with the matching numbers.
[1]Press [VHSÍ] to turn on this unit.
[2]Hold down [MENU] for 5 seconds or more.
[3]Set the TV to an unused position for the unit
viewing channel.
≥Tune the TV until the display shown on the right appears. Refer also to the TV’s instructions regarding tuning.
Panasonic
END: MENU
[4] Press [MENU].
ENTER |
Plug in Auto Tuning (for NV-VP32GN/New Zealand) |
|
DISPLAY |
RETURN |
When the unit is turned on after connecting the aerial cable and the |
|
|
|
|
|
|
|
|
|
||
PROG/CHECK I-TIMER |
|
mains lead for the first time, tuning starts automatically. |
|
|
|
|
|
|
|
|
|||
AV ENHANCER P.MEMORY PLAY MODE SET UP |
≥If the unit is turned on with the aerial not connected, all channels are skipped. |
|
|
|
||
|
|
|
AUTO TUNING |
|
||
DVD-RAM |
|
|
Press [VHSÍ] to turn on this unit. |
|
IN PROGRESS, |
|
REC MODE REC |
[1] |
|
PLEASE WAIT. |
|
||
TIMER DUBBING |
|
|
||||
|
|
|
|
|
||
JET REW PROG PLAY INPUT SELECT VHS STATUS |
|
|
CH 22 |
SEARCH |
21 |
|
|
|
[2] |
Set the TV to an unused position for the unit |
|
END: MENU |
|
GROUP PICTURE MODE |
QUICK REPLAY DVD STATUS |
|
|
|
||
|
|
|
|
|
|
|
viewing channel.
≥Tune the TV until the display shown on the right appears. Refer also to
|
|
the TV’s instructions regarding tuning. |
AUTO TUNING IS |
|
|
|
COMPLETED. |
CH |
|
[3] Press [MENU]. |
END: MENU |
|
|
|
|
/ I |
|
¬ To cancel Auto Tuning partway through |
|
EJECT |
|
Press [MENU]. Auto Tuning will stop halfway by turning the unit off, pressing [MENU], playback or a |
|
|
|
power failure. |
|
|
PLAY |
¬ If Auto Tuning stops halfway by turning the unit off, playback or a power failure |
|
|
STOP |
≥Disconnect the mains lead and then reconnect it. |
|
|
≥Turn on the unit. Plug in Auto Tuning restarts. |
|
|
|
|
|
|
|
|
¬ To set the channels manually (l 23) |
|
NV-VP32GL
28 … 69
(RF OFF)
NV-VP32GN
21 |
69 |
(RF OFF)
ªTo restart Plug in Auto Tuning
≥Turn the unit on.
1)Keep both [CH] J and I on the unit pressed simultaneously for 3 seconds or more until the channel on the unit’s display changes to 1.
2)Disconnect the mains lead and then reconnect it.
3)Turn on the unit. Plug in Auto Tuning restarts.≥Make sure there is no video cassette in the unit.
To change the RF output channel
You can change the RF output channel, for example, when interference occurs on the picture after tuning.
................................................................................................................................................................................................................
1)Hold down [MENU] for 5 seconds or more.
2)Press [CH]JI to select the channel (AU28s69, NZ21s69).
≥Each time you press [CH]JI (l left)
≥Set to “ss” (RF OFF) when you use the audio/video cable for the connection.
≥You can also use the numeric buttons. Example: “28”; [2]l[8]
3)Retune your TV to the new RF channel for the unit.
4)Press [MENU] to exit the setting mode.
Note:
≥Even if the RF output channel has been changed, it is not necessary to perform Auto Tuning.
Disappears  1
1
NV-VP32GL
NV-VP32GN
Panasonic
END: MENU
Getting Started
11
Setting Up for VHS
Make basic settings for VHS. These settings are retained in memory until they are changed, even if the unit is turned off. ≥Select the unit viewing channel (or the AV input) on the TV.
≥Turn on the unit. ≥Press [VHS].
Common procedures
VHS/DVD
|
AUDIO |
CH |
VOLUME |
VHS/DVD |
AV |
|
|
VHS/DVD |
|
|
|
OUTPUT |
|
VHS DVD |
|
VHS |
|
|
TRACKING/V-LOCK |
|
CANCEL/RESET |
|
PLAY SPEED |
|
|
-/-- |
|
|
INDEX/SKIP |
|
SLOW/ |
|
REW SEARCH FF |
||
PLAY
[1]Press [MENU].
[2]Press [34] to select the menu.
[3]Press [ENTER].
VHS MENU
 CLOCK SET TUNER PRESET SYSTEM OPTION
TAPE REFRESH
SELECT : 
 , ENTER END :MENU
|
|
NAVI |
|
|
|
|
SLOW |
MENU |
CLOCK SET |
|
|
|
|
||||
|
|
DIRECT NAVIGATOR |
|
|
PLAY LIST |
MENU The clock operates for at least 3 years on its backup system in the event of a power failure. |
|
||||||||||
|
|
TOP MENU |
|
|
|
|
|
|
|
|
|
||||||
|
|
|
|
|
|
|
|
|
|
|
|||||||
|
|
|
|
|
|
|
|
|
|
After 3 years, clock back up can only be guaranteed for maximum of 1 hour. |
|
|
|
||||
|
|
|
|
|
|
|
|
|
|
|
|
|
|
|
|
||
ENTER |
|
|
|
|
|
ENTER |
|
|
|
|
|
|
|||||
|
|
|
|
|
|
................................................................................................................................................................................................................ |
|
|
|
|
|||||||
|
|
|
|
|
|
|
|
|
|
|
|
|
|||||
|
|
|
|
|
|
|
|
|
|
|
|
|
[1] Set each item with [34 1]. |
|
|
|
|
|
|
DISPLAY |
|
|
|
|
|
RETURN |
|
|
|
|
|||||
|
|
PROG/CHECK |
|
|
|
|
|
|
|
|
Press [2] to return to the previous item. |
|
CLOCK SET |
|
|||
|
|
I-TIMER |
|
|
|
|
|
|
|
|
|||||||
|
|
AV ENHANCER P.MEMORY PLAY MODE SET UP |
At the set time (H:M) point: |
|
|
|
|
||||||||||
|
|
|
|
|
|
|
|
|
|
|
|
|
Y |
M |
D |
H:M |
|
|
|
TIMER |
DVD-RAM |
REC |
≥When [34] is kept pressed, the indication changes in 30 |
||||||||||||
|
|
DUBBING REC MODE |
2004 |
1 |
1 |
0:00 |
|||||||||||
|
|
|
|
|
|
|
|
|
|
|
|
|
minute steps. |
||||
|
|
JET REW |
PROG PLAY INPUT SELECT VHS STATUS |
|
|
|
|
||||||||||
|
|
≥There is no need to press [34] continuously. |
|
|
|
|
|||||||||||
|
|
GROUP PICTURE MODE QUICK REPLAY DVD STATUS |
|
|
|
|
|||||||||||
|
|
................................................................................................................................................................................................................ |
|
|
|
|
|||||||||||
|
|
|
|
|
|
|
|
|
|
|
|
|
|
|
|
|
|
[2] Press [MENU] to start the clock and exit the setting screen.
Time Reset Function
If the clock is less than 2 minutes early or late, it can easily be reset to the proper time.
Example: Resetting the clock to 12:00.00
1)Display the “CLOCK SET” screen.
2)When the current clock display on the unit is between 11:58.00 and 12:01.59, press [MENU] as soon as it is 12:00.00. This will reset the time to 12:00.00.
ªTo switch to the desired video
You can set the unit so that the VHS/DVD output is automatically switched to the device which starts playback.
1) |
In the OPTION menu, |
|
OPTION |
|
1/2 |
||||
|
select “OUT [VHS/DVD]” with [34]. |
|
|
||||||
|
TAPE SELECT |
|
[AUTO] |
||||||
2) |
Press [2 1] to change the setting. |
NTSC INPUT SELECT |
[AUTO] |
||||||
NTSC PB SELECT |
|
[onPALTV] |
|||||||
|
|
JET NAVIGATOR |
|
[OFF] |
|||||
3) |
Press [MENU] twice to make the on- |
DELETE NAVIDATA |
[NO] |
||||||
OSD |
|
[AUTO] |
|||||||
|
screen display disappear. |
OUT[VHS/DVD] |
|
[AUTO] |
|||||
|
DUBBING NORMAL AUDIO [L] |
||||||||
|
|
SELECT: |
|
|
|
|
|
END :MENU |
|
|
|
|
|
|
|
|
|
|
|
VHS: The output is only for VHS, even if you press [VHS/DVD OUTPUT], the DVD video is not shown.
MANUAL: Press [VHS/DVD OUTPUT] to switch to the desired video source. They are not switched automatically.
AUTO (Initial setting):
VHS and DVD are automatically switched depending on the manipulation or the unit operation. You may also switch them with [VHS/DVD OUTPUT].
Notes:
≥You can switch to the desired video with the above operation only when the video from this unit is viewed through the VHS/DVD OUT terminal.
≥Depending on the operation, the output may not be switched automatically even if “AUTO” is selected. In this case, press [VHS/ DVD OUTPUT] to switch it manually.
≥After setting timer recording, the output is automatically switched to DVD even if “MANUAL” is selected.
12
DVD Quick Setup
Answer questions in the QUICK SETUP screen to make basic settings for DVD. ≥Select the unit viewing channel (or the AV input) on the TV.
≥Press [DVD]. ≥Turn on the unit.
|
|
|
|
|
|
|
|
|
|
|
|
[1] Press [SETUP] and press [34] to |
|
VHS/DVD |
|
|
|
|
|
|
|
select “Others”. |
|
||||
|
CH |
|
VOLUME |
[2] Press [ 1] and press [34] to select |
|||||||||
|
|
|
|||||||||||
AUDIO |
|
||||||||||||
|
|
|
|
AV |
|
|
|
|
|
|
“QUICK SETUP” and press [ENTER]. |
||
VHS/DVD |
|
|
|
|
|
|
DVD |
||||||
|
|
|
|
|
VHS |
|
DVD |
|
[3] Select “Yes” with [34] and press |
||||
|
|
|
|
|
|
|
|||||||
|
|
|
|
|
|
TRACKING/V-LOCK |
|||||||
|
|
|
|
|
|
|
|
|
|
|
|
||
|
|
|
|
|
|
|
|
|
|
|
|
||
|
|
|
|
|
|
|
|
|
|
|
|
[ENTER]. |
|
|
|
|
|
|
|
|
|
|
|
|
|
|
|
CANCEL/RESET |
-/-- |
|
PLAY SPEED |
[4] Press [34] to select the item and |
|||||||||
|
|
|
|
||||||||||
INDEX/SKIP |
|
SLOW/ |
press [ENTER]. |
|
|||||||||
REW SEARCH FF |
|
||||||||||||
|
|
||||||||||||
|
|
|
|
|
|
|
|
|
|
|
|
Menu Language (l 41) |
TV Aspect (l below) |
|
|
|
|
|
|
|
PLAY |
||||||
|
|
|
|
|
|
|
|
|
|||||
|
|
|
|
|
|
|
|
|
|
|
|
|
|
|
|
|
|
|
|
|
|
|
|
|
|
|
|
|
DVD Setup |
|
||
|
Disc |
|
|
|
|
|
HighMAT |
Enable |
|
|
|
|
||
|
Video |
|
QUICK SETUP |
|
|
Audio |
|
Re–initialize Setting |
|
|
|
|
|
|
|
Display |
|
|
|
|
Others |
|
|
|
|
|
|
|
|
|
|
to select and press ENTER |
RETURN to exit |
|
|
|
|
|
|
Progressive Out (l below)
NAVI |
SLOW |
MENU |
DIRECT NAVIGATOR |
|
PLAY LIST |
TOP MENU |
|
|
ENTER |
|
|
|
ENTER |
|
DISPLAY |
|
RETURN |
|
|
RETURN |
PROG/CHECK I-TIMER
AV ENHANCER P.MEMORY PLAY MODE SET UP
SETUP
|
DVD-RAM |
REC MODE |
REC |
TIMER DUBBING |
|||
JET REW |
PROG PLAY INPUT SELECT |
VHS STATUS |
|
GROUP |
PICTURE MODE |
QUICK REPLAY |
DVD STATUS |
[5] Press [ENTER] and then [SETUP] to end the settings.
¬ To return to the previous screen Press [RETURN].
TV Aspect
Select “4:3” (regular) or “16:9” (widescreen) to suit your TV.
If you have a regular 4:3 TV, you can also select how video on some discs is shown.
≥4:3 Pan & Scan (Initial Setting)
Widescreen software is expanded to fill the screen of a 4:3 aspect TV (unless prohibited by the producer of the disc).
≥4:3 Letterbox
Widescreen software is shown in the letterbox style on a 4:3 aspect TV.
≥If you have a wide-screen TV (16:9), you can select the style with the TV’s screen mode function.
4:3 Pan & Scan
4:3 Letterbox
Progressive Out (Component)
You can enjoy higher image quality than that output from the conventional video out terminal or S Video terminal (Interlace and progressive output l 46).
≥Connect to the component video input terminals on a 480P compatible TV (l 8). Video will not be displayed correctly if connected to an incompatible TV.
1) Select “Enable (NTSC Disc Only)” in “Progressive Out (Component)” (l 41). 2) Change “Video Output Mode” to “480P” in the on-screen menu 

(l 39).
≥All Panasonic TVs that have 480P input terminals are compatible. Consult the manufacturer if you have another brand of TV.
Notes:
≥The VHS video may not be progressive-output.
≥The TV will be disrupted for a moment but this is normal.
≥Output from this unit is interlaced scanning if you have connected to the TV through VIDEO OUT or S VIDEO OUT terminals, regardless of the settings.
≥When progressive output is on, closed captions will not be displayed.
Getting Started
13

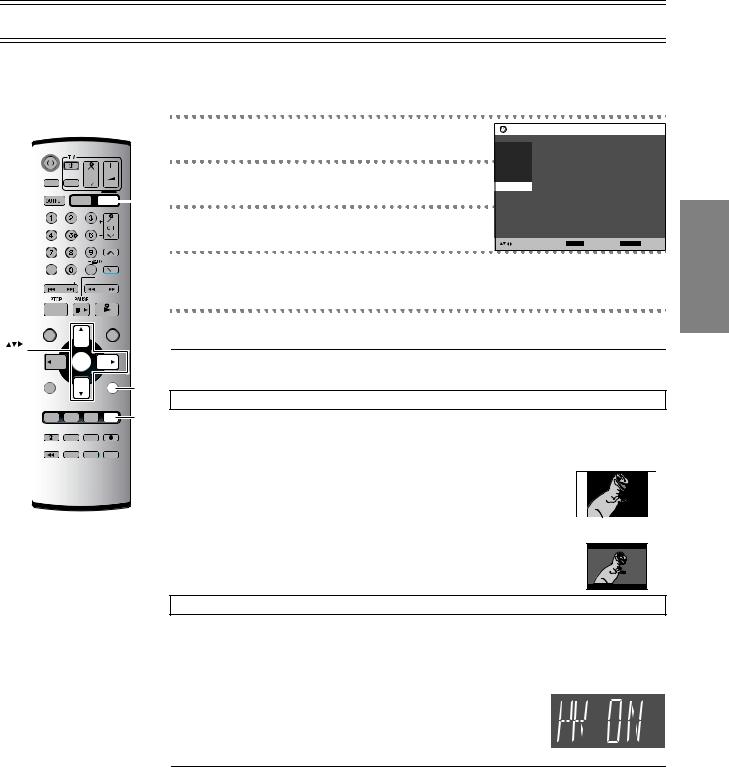
Playback
≥Select the unit viewing channel (or the AV input) on the TV. ≥Press [VHS].
≥Press [VHS Í] to turn on the unit.
[1] Insert a recorded video cassette tape.
[2] Press [1] (PLAY).
|
|
|
|
|
|
|
|
|
|
|
|
|
|
|
|
|
≥Play starts automatically if you insert a tape which it’s tab has been removed |
|
|
VHS/DVD |
|
|
|
|
|
|
|
|
(Tapes l 4). |
|
|||||||
VHS |
|
|
|
|
|
|
|
|
|
|
|
|
|
|
||||
|
|
|
|
|
|
|
|
|
|
|
|
|
|
|||||
|
|
AUDIO |
AV |
CH |
VOLUME |
[∫] |
Stop |
|||||||||||
|
|
|
|
|
|
|
|
|
|
|
|
|||||||
|
|
VHS/DVD |
|
|
|
|
|
|
|
|
|
Press this button to stop playback. |
||||||
|
|
|
|
|
|
|
|
|
|
|
||||||||
|
|
|
|
|
|
|
|
VHS |
DVD |
|
|
|||||||
VHS |
|
|
|
TRACKING/V-LOCK |
[6] (backward)/ |
Cue / Review |
||||||||||||
|
|
|
|
|
|
|
|
|
|
|
|
|
|
|
|
TRACKING/ |
[ 5] (forward) |
During playback, tap or keep pressing these buttons. |
|
|
|
|
|
|
|
|
|
|
|
|
|
|
|
|
|||
|
|
|
|
|
|
|
|
|
|
|
|
|
|
|
|
V-LOCK |
||
|
|
|
|
|
|
|
|
|
|
|
|
|
|
|
|
|
If you keep pressing these buttons, playback restarts by releasing them. |
|
|
|
|
|
|
|
|
|
|
|
|
|
|
|
|
|
|
|
|
|
CANCEL/RESET |
|
|
-/-- |
PLAY SPEED |
|
Jet Search |
|||||||||||
|
|
|
|
|
|
|
|
|
|
|
|
|
|
|
|
During playback, tap these buttons twice. You can increase Cue/Review |
||
|
|
INDEX/SKIP |
|
SLOW/ |
|
|||||||||||||
|
|
REW SEARCH FF |
|
|
search speed. |
|||||||||||||
|
|
|
|
|
|
|
|
|
|
|
|
|
|
|
|
|
|
|
|
|
|
|
|
|
|
|
|
|
|
PLAY |
|
|
Fast-forward / Rewind |
||||
|
|
|
|
|
|
|
|
|
|
|
|
|
|
|
|
|
|
|
|
|
NAVI |
|
SLOW |
MENU |
|
Press these buttons in the stop mode. Press [∫] to cancel. |
|||||||||||
|
|
|
|
|
|
|
|
|
|
|
|
|
|
|
|
|||
|
DIRECT NAVIGATOR |
|
|
PLAY LIST |
|
|
||||||||||||
|
|
|
|
|
|
|
|
|
|
|
|
|
|
|||||
|
TOP MENU |
|
|
|
|
|
|
|
|
|
|
[JET REW6] |
Jet Rewind |
|||||
|
|
|
|
|
|
|
|
|
|
|||||||||
|
|
|
|
|
|
|
ENTER |
|
|
|
|
|
|
|
Press this button to obtain a Higher Speed Rewind. |
|||
|
|
|
|
|
|
|
|
|
|
|
|
|
|
The “J. REW” indication appears on the TV screen (except when the |
||||
|
|
|
|
|
|
|
|
|
|
|
|
|
|
|
|
|
|
|
|
DISPLAY |
|
|
|
|
RETURN |
|
remaining tape time indication appears). |
||||||||||
|
|
|
|
|
|
|
|
|
|
|
|
|
|
|
|
|
|
|
|
|
|
|
|
|
|
|
|
|
|
|
|
||||||
|
PROG/CHECK |
I-TIMER |
|
|
|
|
|
|
|
|
[;/D] |
Pause |
||||||
|
AV ENHANCER |
P.MEMORY PLAY MODE SET UP |
|
Press this button during playback. Press [ 1] (PLAY) or [;/D] to restart. |
||||||||||||||
|
|
|
|
|
|
|
|
|
|
|
|
|
|
|
|
|
|
|
|
|
TIMER |
DVD-RAM |
REC MODE |
REC |
|
Slow |
|||||||||||
|
|
DUBBING |
|
|||||||||||||||
|
|
|
|
|
|
|
|
|
|
|
|
|
|
|
|
|
|
|
|
JET REW |
PROG PLAY INPUT SELECT VHS STATUS |
|
Press and hold for 2 seconds or more. |
||||||||||||||
|
GROUP PICTURE MODE |
QUICK REPLAY DVD STATUS |
|
|
||||||||||||||
|
[<EJECT] |
Eject |
||||||||||||||||
|
|
|
|
|
|
|
|
|
|
|
|
|
|
|
|
|
||
|
|
|
|
|
|
|
|
|
|
|
|
|
|
|
|
|
|
Press this button to remove the video cassette. |
|
|
|
|
|
|
|
|
|
|
|
|
|
|
|
|
|
|
Or, keep pressing [∫] on the remote control for at least 3 seconds. |
|
|
|
|
|
|
|
|
|
|
|
|
|
|
|
|
|
|
|
|
|
|
|
|
|
|
|
|
|
|
|
|
|
|
|
|
[1](PLAY) |
Repeat Playback |
|
|
|
|
|
|
|
|
|
|
|
|
|
|
|
|
|
|
If you press and hold [ 1] (PLAY) for 5 seconds or more, you can play back |
|
|
|
|
|
|
|
EJECT |
|
|
|
|
|
|
|
the recorded part on the tape repeatedly. |
|||
|
|
|
|
|
|
|
|
|
|
|
|
|
|
The “R 1” indication appears on the TV screen. |
||||
|
|
|
|
|
|
|
|
|
|
|
|
|
|
|||||
|
|
|
|
|
|
|
|
|
|
|
|
|
|
|
|
|
|
|
|
|
|
|
|
|
|
|
|
|
|
|
|
|
|
|
|
|
Press [∫] to cancel (it also cancels if you play, pause, cue, or review). |
|
|
|
|
|
|
|
|
|
|
|
|
|
|
|
|
|
|
|
/ I |
|
|
|
|
EJECT |
|
Repeat Playback |
Beginning of Tape |
End of Recorded Part |
|
|
At the end of the programme, the tape rewinds to the |
Repeat Playback |
|
|
PLA |
beginning of the programme and plays it again (it only |
|
|
|
|
|
||
|
|
works if there is at least 5 seconds blank at the end of the |
PLAY |
Control signal |
|
STO |
programme). This repeats until you cancel it. |
|
|
|
|
|
Interruption |
|
|
|
|
REW |
(at least 5 sec.) |
¬To change back to normal playback Press [ 1] (PLAY).
¬To adjust tracking control manually (l 15)
14

Other convenient functions
≥When the unit is off, an inserted video cassette can be played back by pressing [ 1] (PLAY). ≥You can eject tapes when the unit is in standby mode. It switches back to standby once it ejects the
tape.
≥When the tape reaches its end, this unit automatically rewinds it to the beginning. During timer recording, OTR and fast-forwarding, this function does not work.
Notes:
≥Jet Search, cue, review or slow playback will be automatically released after 10 minutes, and for still playback, it will be released after 5 minutes.
≥The tape counter does not appear during Jet Rewind.
≥Depending on a cassette or the operating condition, Jet Rewind may not work or change the rewind speed somewhat.
≥During playback function other than normal playback, horizontal noise bars may appear in the picture, the colour of the picture may be unstable, or the picture may be otherwise distorted.
≥When you play back a tape recorded in the LP mode, the picture may be turned into monochrome. ≥When you play back a tape recorded in the EP mode, the picture and the sound may be unstable.
However, these are not malfunctions.
Adjusting the playback picture
Manual tracking
The unit usually makes tracking adjustments, but you may need to do it manually, if noise appears on a tape recorded on other equipment.
..............................................................................................................................................................................................................................................................................................................................J I
During play, press [TRACKING/V-LOCK] or .
24).
Playback
VHS Operations
15
 Loading...