


Outbreaker Sailor Compass /
Outbreaker Sailor Compass Medium
Model: RA202 / RA282
User Manual
TABLE OF CONTENTS
Introduction |
2 |
Key Features |
3 |
Watch |
3 |
LCD Display |
4 |
Getting Started |
4 |
Unpack the Watch |
4 |
Turn ON the Watch (First-Time Use Only) |
5 |
Batteries |
5 |
Switch between Main Modes |
6 |
Using the Clock |
7 |
Set the Clock / Calendar / Temperature Unit |
7 |
View Clock Displays |
8 |
Set the Daily Alarm / Time Zone / Keypad Tone |
8 |
Alarm Sound |
9 |
Turn the Alarm Sound OFF |
9 |
Activate / Deactivate the Alarm |
9 |
Using the Altimeter-Barometer |
9 |
About the Altimeter-Barometer |
9 |
Set the Altitude |
10 |
Altitude Bar Chart |
10 |
View Altitude Displays |
11 |
EN
Set the Altitude Alarm / Sea Level / Weather Icon |
12 |
Using the Sailing Timer |
13 |
About the Sailing Timer |
13 |
Set the Sailing Timer |
13 |
Sailing Timer Sound Alert |
15 |
Sea Level Pressure Display |
15 |
Using the Compass |
16 |
About the Compass |
16 |
Set the Compass Sensor Calibration |
17 |
View Compass Displays |
17 |
Set the Bearing Tracking System |
18 |
Set the Declination |
19 |
Set the True North Calibration |
20 |
To Turn the Bearing Tracking / Declination / |
|
True North Calibration ON / OFF |
20 |
Backlight |
20 |
Keypad Lock |
20 |
Specifi cations |
21 |
Warnings and Care Instructions |
22 |
About Oregon Scientifi c |
23 |

EN
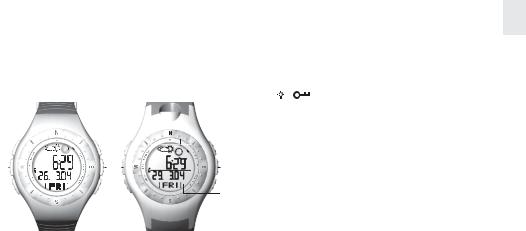
INTRODUCTION
Thank you for selecting the Oregon Scientific™ Outbreaker Sailor Compass / Outbreaker Sailor Compass Medium (RA202 / RA282) watch as your product of choice. This precision device includes the following features:
•Highly accurate chronometer clock with calendar and backlight
•Digital compass
•Adjustable declination angle
•Compass sensor calibration
•True north calibration
•Bearing tracking system
•Sailing timer with laps - Counts up and down
•Altitude measurement with alarm alert and bar chart display
•Barometric pressure measurement with sea level line chart display
•Temperature measurement
•Weather forecast with 4 displays
•Water resistant up to:
-50 metres RA202
-30 metres RA282
•Daily alarm
This manual contains important safety and care information, and provides step-by-step instructions for using this product. Read the manual thoroughly, and keep it in a safe place in case you need to later refer to it.
IMPORTANT
•The measurement functions built into the RA202 / RA282 are not meant to substitute professional measurement or industrial precision devices. Values produced by this watch should be considered as reasonable representations only.
•When engaging in mountain climbing or other activities in which losing your way can create a dangerous or life-threatening situation, always be sure to use a second compass to confi rm direction readings.
•Oregon Scientifi c™ assumes no responsibility for any loss, or any claims by third parties that may arise through the use of this watch.
2

EN
KEY FEATURES |
|
|
1. |
N / S / E / W: Cardinal points - north, south, east and |
||
|
|
|
west. |
|
||
WATCH |
|
|
|
|
||
|
|
2. |
SELECT / -: View screen displays within a main |
|||
RA202 |
|
RA282 |
|
mode; decrease setting value; reactivate compass |
||
|
|
sensor |
|
|||
|
|
|
|
|
||
|
|
|
3. |
/ |
: Turn ON backlight for 3 seconds; lock / |
|
|
|
|
|
unlock the keypad. |
||
1 |
5 1 |
|
4. |
MODE: Switch to another display; quick exit during |
||
5 |
|
any setting mode. |
||||
2 |
6 2 |
6 |
5. |
Bubble level: Use to position watch on a level |
||
|
|
|
||||
3 |
7 3 |
7 |
|
plane. |
|
|
6. |
LAP / +: Take a lap; increase setting value. |
|||||
|
|
|
||||
4 |
8 4 |
8 |
7. |
ST / SP: Start / stop timer and stopwatch. |
||
|
9 |
9 |
8. |
FUNC / SET: Enter setting mode; select another |
||
|
|
|
|
setting option; confi rm setting value; reload the timer |
||
|
|
|
|
pre-set value. |
||
|
|
|
9. |
LCD display |
||
3

EN
LCD DISPLAY
1 |
|
|
2 |
|
|
3 |
9 |
|
|
||
|
10 |
|
4 |
11 |
|
|
||
|
12 |
|
5 |
13 |
|
6 |
15 |
|
16 |
||
7 |
||
|
||
8 |
|
1.Compass segments: Shows compass direction; calibration status.
2.Weather Forecast: 4 weather displays.
3. : Battery status.
4. : Keypad tone is disabled.
5.AM / PM: 12-hour clock is being used.
6.LAP: Take lap; lap number; lap memory.
7. : Daily alarm is activated.
8.


 : Shows sea level chart; altitude bar chart; current cardinal point reading or the status of a setting.
9. : Keypad lock is enabled.
10.123: Countdown timer 1, 2 or 3 is shown or running.
11. : Countdown timer is shown or running.
12.STW: Stopwatch is shown or running.
13.ftm or ft / m: Altitude units - feet or metres.
14.inHg / hPa: Barometric pressure units.
15.TTL: Total time is displayed.
16.ZONE: Time zone hour offset.
GETTING STARTED
UNPACK THE WATCH
When you unpack your watch, make sure to keep all the packing materials in a safe place, in case you need to later transport or return the product for servicing.
In this box, you will fi nd:
•Watch
•1 x CR2032 (3V) lithium battery - already installed
4

TURN ON THE WATCH (FIRST-TIME USE ONLY)
Press any key for 2 seconds to activate the LCD display.
BATTERIES
The watch uses a 1 x CR2032 lithium battery, which has already been installed. See below for battery warnings.
LOW BATTERY |
DESCRIPTION |
ICON |
|
|
The watch battery is low |
- - |
Appears when the battery is too low |
|
to operate the sensor. “- -” is shown |
|
instead of temperature, altitude, |
|
barometer and compass values. |
|
The bar and line charts will also be |
NOTE Heavy use of the backlight, altitude alarm and sailing timer will reduce the battery service life signifi cantly.
If you need to replace the battery, we highly recommend that you contact the retailer or our customer service department.
EN
To replace the watch battery:
1.Locate the battery compartment on the back of the watch.
2.Using a coin, as shown above, twist the compartment lid counter-clockwise until it clicks out of place.
3.With your fi nger, remove the old battery.
4.Insert the new battery with the + side upwards.
5.Replace the battery compartment lid by twisting it clockwise until it is fi rmly in place.
NOTE When you replace the batteries it is important to re-calibrate the magnetic sensor and altitude or sea level. (See “Set the Altitude” or “Set the Altitude Alarm / Sea Level / Weather Icon” section.)
5

EN
IMPORTANT
 Non-rechargeable and rechargeable batteries must be disposed of properly. For this purpose, special containers are provided for non-rechargeable and rechargeable battery disposal at communal collection centres.
•Batteries are extremely dangerous when swallowed!
Therefore, keep batteries and the article away from infants. If a battery has been swallowed seek immediate medical advice.
•The batteries supplied must not be recharged, reactivated by any other means, dismantled, put into
fi re or short-circuited.
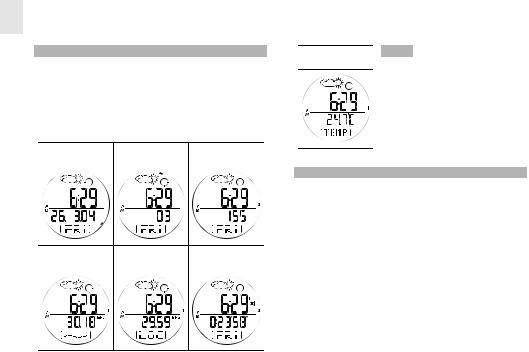
SWITCH BETWEEN MAIN MODES
There are 4 main modes: Clock, Altimeter-Barometer, Sailing Timer and Compass. Each main mode displays a banner screen telling you which mode you are entering.
After 1 second the banner screen is automatically replaced by the main mode screen.
Press MODE to switch between the 4 main modes.
MODE |
BANNER |
MAIN MODE |
CLOCK
ALTI-BARO
6

MODE |
BANNER |
MAIN MODE |
SAILING
TIMER
COMPASS
USING THE CLOCK
SET THE CLOCK / CALENDAR / TEMPERATURE UNIT
The real-time clock is the default display for the watch.
EN
To set the clock:
1. Press MODE to switch to Clock
Mode.
2. Press and hold SET until the fi rst setting fl ashes.
3. Press or to change the setting. Hold to speed through the options. Press SET to confi rm the setting and move on to the next one.
4.Repeat step 3 to change other settings for this mode.
The order of the clock settings is:
•12 / 24 hour clock format
•Hour
•Minute
•Year
•DD:MM or MM:DD date format
•Month
•Day
•Temperature Unit - °C / °F
NOTE The clock is programmed with a 50-year autocalendar, which means you do not need to reset the day and date each month.
7
EN
VIEW CLOCK DISPLAYS
Within the Clock Mode there are 7 different screen displays. To switch between them:
1.Press MODE to navigate to the Clock Mode.
2.Press SELECT to scroll through the different clock screen displays.
Clock with Date |
Clock with |
Clock with |
|
Seconds |
Altitude |
Clock with Sea |
Clock with Local |
Clock with |
Level |
Pressure |
Timer |
Clock with
Temperature
NOTE When wearing the watch, the temperature measured could be affected by body heat. To acquire an accurate temperature reading, remove the watch from your wrist and wait for about 15 minutes before taking the
SET THE DAILY ALARM / TIME ZONE / KEYPAD TONE
From any of the 7 clock screen displays you can set the:
Daily Alarm - When activated the alarm will go off daily at the set time
Time Zone Offset - Offsets the time setting when you are in a different time zone (+ / - 23 hours)
Keypad Tone - When set to ON the keypad will sound when pressed
8

1.Press FUNC to select daily alarm, time zone or keypad tone.
2.Press and hold SET to enter setting mode for the daily alarm and time zone only.
3. Press to change the setting.
4.Press SET to confi rm the setting. Once the setting is complete the display will return to the previous clock display screen.
EN
ALARM SOUND
The alarm will sound for 1 minute and the backlight will fl ash for the fi rst 10 seconds.
TURN THE ALARM SOUND OFF
Press any key to turn the alarm sound OFF. The alarm will automatically reset itself unless you deactivate it.
ACTIVATE / DEACTIVATE THE ALARM
Press MODE to navigate to Clock Mode. Press SET, then press to activate or deactivate the alarm.  shows when the alarm is activated.
USING THE ALTIMETER-BAROMETER
ABOUT THE ALTIMETER-BAROMETER
The altimeter measures altitude in either metres or feet.
The watch is equipped with an intelligent barometer that determines altitude by the built-in sensor with the advanced Baro-compensation technology. The sensor can also distinguish the differences between pressure caused by the changes in physical altitudes and pressure caused by weather conditions. This smart distinction eliminates discrepancies and makes the altimeter reading more accurate than most of the average devices available on the market.
9
EN
SET THE ALTITUDE
To set the altitude:
1.Press MODE to switch to Altimeter-Barometer Mode.
2.Press and hold SET until the fi rst setting fl ashes.
3. Press or to change the setting. Hold to speed through the options. Press SET to confi rm the setting and move on to the next one.
4.Repeat step 3 to change other settings for this mode.
The order of the altitude settings is:
•Altitude unit - metres / feet
•Altitude height
To effectively set the altimeter you need to know the correct altitude. To do this:
•Obtain a topographical map; fi nd your location and its related altitude reading.
OR
•Set the sea level pressure on your watch.
IMPORTANT
•This unit employs a semiconductor pressure sensor that could be affected by temperature change. While taking the altitude measurement, ensure that the unit is not exposed to sudden temperature changes.
•It is recommended to calibrate the altitude or sea level pressure regularly to maintain the accuracy of the watch.
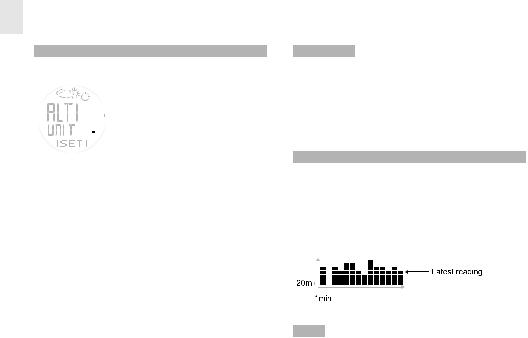
ALTITUDE BAR CHART
The altitude bar chart at the bottom of the display shows the altitude history. It consists of 7 rows and 14 columns.
The latest reading is entered in the right hand column and always at the height of the 4th row. Therefore, all the other readings will adjust their position to refl ect the latest reading.
NOTE 1 row = 20m (20m = 65.6ft)
1 column =1 min
10

Look at your watch to see what your current altitude level is, then look at the bar chart to see the changes in altitude. See the table below for how to read the bar chart in more detail.
1. Altitude level 400m. User walking on a
fl at road
2. Altitude level 420m.
(Increase of 20m)
3. Altitude level 380m.
(Decrease of 40m)
4. Altitude level 480m.
(Increase of 100m)
5. Altitude level 380m.
(Decrease of 100m)
EN
VIEW ALTITUDE DISPLAYS
Within theAltimeter-Barometer Mode there are 5 different
altitude screen displays. To switch between them:
1.Press MODE to navigate to theAltimeter-Barometer Mode.
2.Press SELECT to scroll through the different altitude screen displays.
Altitude with |
Altitude with |
Altitude with |
Clock |
Sea Level |
Local Pressure |
Altitude with |
Altitude with |
Timer |
Temperature |
11

EN
SET THE ALTITUDE ALARM / SEA LEVEL / WEATHER ICON
From any of the 5 altitude screen displays you can set the:
Altitude Alarm - Select alarm to activate above or below your setting; set altitude alarm
Sea Level - Select unit hPa or inHg; set sea level Weather Icon - 1 of 4 displays to choose from
1.Press FUNC to select altitude alarm, sea level or weather icon.
3. |
Press to change the setting. |
4. |
Press SET to confi rm the setting. |
ALTITUDE ALARM
The ascending or descending altitude alarm will be turned on when the set altitude is reached during an ascent or descent respectively.
Press any key to stop the alarm sound. If the set value is reached again, the alarm will be re-activated.
NOTE Setting the altitude affects the sea level pressure
SEA LEVEL
For an accurate reading, you must fi rst calibrate the sea level pressure. Once the sea level pressure is calibrated, the altitude will automatically calibrate to the reference altitude using the built-in auto-calibration function.
When you set the sea level on your watch it adjusts the altimeter to the current altitude. Information on the current sea level pressure can be found in newspapers, local news and radio reports, or on the Internet.
NOTE It is necessary to re-calibrate the sea level pressure or altitude if the product is placed in a pressurised cabinet such as an aeroplane.
12

WEATHER FORECAST
This product forecasts the weather for the next 12 to 24 hours within a 30-50 km (19-31 mile) radius. The weather forecast is based on barometric pressure trend readings.
SUNNY |
PARTLY |
CLOUDY RAINY |
|
CLOUDY |
|
NOTE If the watch is subjected to fl uctuating altitude levels the weather forecast may disappear. Simply stay at the same altitude for 5 minutes and the weather forecast will reappear.
NOTE The manufacturer is not responsible for any inconveniences caused by faulty weather forecast.
USING THE SAILING TIMER
ABOUT THE SAILING TIMER
The sailing timer has 3 countdown timers and a stopwatch:
Timer 1 - User-selectable timer / Stopwatch
Timer 2 - 10 minute countdown timer Timer 3 - 5 minute countdown timer
EN
The countdown timers have sound alerts to help you track time at the start of a race. And, a single key press is all it takes to make quick adjustments to the timer i.e. press or to increase or decrease your timer to the nearest minute. It is also equipped with a lap timer.
SET THE SAILING TIMER
To change the sailing timer settings:
1.Press MODE to navigate to Sailing Timer Mode.
2.Press and hold SET to reset the previous timer you were using. Press and hold SET again to enter setting mode where you can select any timer.
3. Press or to choose 1 of the 3 timers, then press
SET to select it.
13

EN
4.If you are in timer 1 (userselectable countdown timer)
setting, use or to enter the values you require. If you want to usethestopwatchfunction,simply change all values to zero.
Once you have set the timer you wish to use, you can perform the following functions:
TIMER 1, 2, 3 / |
INSTRUCTION |
STOPWATCH |
|
Start / stop |
Press ST / SP |
Pause / resume |
Press ST / SP |
Edit time while |
Press or to make the timer |
timer is running |
increase or / decrease to |
|
the nearest minute |
Reset timer / |
Stop timer / stopwatch. Press and |
stopwatch |
hold SET |
Save lap |
Press LAP while the stopwatch |
(lap function can |
is running |
only be used in |
|
stopwatch mode) |
NOTE The stopwatch and lap times |
|
are stored in the same memory. The |
|
memory has capacity for 99 readings |
|
or 99 hrs, 59 mins |
View total time / |
1. Stop timer / stopwatch. Press |
lap memory |
SET to view memory record |
|
2. Press |
or |
to scroll through |
|
memory records |
||
|
3. The latest memory will show |
||
|
as “M 1” |
|
|
|
4. Press SET to view total time |
||
|
OR |
|
|
|
5. Press |
or |
to view lap time (at |
|
least 1 lap must have been taken) |
||
Delete 1 memory 1. Stop timer / stopwatch |
|||
record or all |
2. Press SET to view memory record |
||
records |
3.The latest memory will show as “M1” |
||
14

|
4.Press |
or to select the memory |
|
record you wish to view |
|
|
5. Press and hold SET |
|
|
6. Press |
or to delete 1 memory |
|
or all records |
|
|
7. Press and hold SET to confi rm |
|
NOTE |
When any countdown timer has reached |
|
zero, it will beep and automatically start to count up in stopwatch timer.
NOTE In the Sailing Timer Mode, only one of the timers can be used at a time.
SAILING TIMER SOUND ALERT
The countdown timer advises you of the countdown status with a series of beeps.
COUNTDOWN TIME AT THE:  SOUND ALERT
10th , 9th , 8th , 7th , 6th min |
2 beeps |
5th min |
5 sets of 2 beeps |
4th , 3rd , 2nd min |
2 beeps |
60th - 51 st sec |
Continuous beeps |
50th , 40th , 30th , 20th , 10th sec |
2 beeps |
9th - 1 st sec |
1 beep each sec |
0 sec |
1 long beep |
EN
SEA LEVEL PRESSURE DISPLAY
The sea level history can be viewed as a measurement reading in hPa / inHg or as a line chart. It consists of 7 rows and 14 columns.
The latest reading is entered in the right hand column and always at the height of the 4th row. Therefore, all the other readings will adjust their position to refl ect the latest reading.
NOTE 1hPa=0.02953inHg
Look at your watch to see what your sea level pressure is, then look at the line chart to see the changes in pressure. See the table below for how to read the line chart in more detail.
15

EN
1. Sea pressure level
5hPa.
2. Sea pressure level 6hPa. (Increase of 1hPa)
3. Sea pressure level 4hPa. (Decrease of 2hPa)
4. Sea pressure level 9hPa, (Increase of 5hPa)
5. Sea pressure level 4hPa, (Decrease of 5hPa)
USING THE COMPASS
ABOUT THE COMPASS
The compass shows the bearing in degrees together with 16 cardinal points. The outer circumference of the display consists of 60 segments, which graphically show the bearing, (one lit segment indicates North, three lit segments indicate South). The bubble shows you when the compass is fl at so you can take an accurate reading.
Simply look directly over the bubble and position the small bubble in the centre of the circle.
|
2 |
1. |
North |
|
3 |
2. |
South |
|
4 |
3. |
Bubble |
|
|
4. |
Bearing |
|
|
5. |
Cardinal point |
1 |
5 |
|
|
|
|
|
The compass display is active for 30 seconds at a time. After this, the compass will go into power saving mode and “ ” will appear on the display. To re-activate the compass, press SELECT
NOTE Always take bearings in the open air, not inside buildings, tents, caves, or other shelters.
16

NOTE Compass readings should be performed away from magnetic materials. Avoid large magnetic objects, power lines, loudspeakers, electric motors etc. If the compass is exposed to large magnetic forces reset the calibration.
SET THE COMPASS SENSOR CALIBRATION
The compass should be calibrated:
•Before you use it for the fi rst time.
•When the battery is replaced.
•Before you leave for an extended outdoor activity.
•Whenever it is exposed to a strong magnetic source, extreme cold weather, or you suspect that other environmental conditions have affected the compass readings.
•If you notice that the compass is not showing the direction correctly.
To set the compass sensor calibration:
1. Press MODE to switch to
Compass Mode.
EN
2. Press and hold SET until you see the screen opposite.
3. Rotate the watch counterclockwise at the same speed as the segments that are moving around the circumference. The rotation is fi nished when you have completed 1 1/4 turns and the screen display opposite appears.
NOTE For successful calibration, it is important to hold the compass level during the calibration process. Simply lay it on a fl at surface such as an over-turned drinking glass on a table.
VIEW COMPASS DISPLAYS
Within the Compass Mode there are 5 different compass screen displays. To switch between them:
1.Press MODE to navigate to the Compass Mode.
2.Press SELECT to scroll through the different compass screen displays.
17
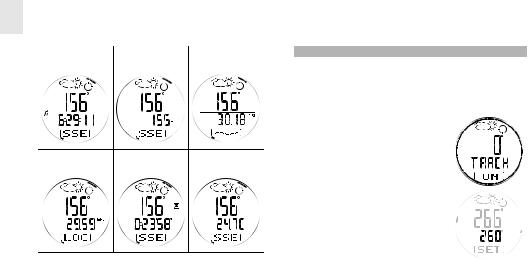
EN
Compass with |
Compass with |
Compass with |
Clock |
Altitude |
Sea Level |
Compass with |
Compass with |
Compass with |
Local Pressure |
Timer |
Temperature |
From any of the 5 compass screen displays you can set the:
Bearing Tracking System - Select ON / OFF; set bearing
Declination - Select ON / OFF; set declination angle
True North Calibration - Select ON / OFF; set true north calibration
SET THE BEARING TRACKING SYSTEM
The bearing tracking system can be set to lock on a specifi c bearing you wish to follow. By locking the bearing you can see when you deviate from your course and how much you need to correct it to get back on track.
1. In any compass display screen, press SET until the screen opposite appears.
2. Press and hold SET to enter setting mode.
• The top number shows your  previous locked bearing.
• The bottom flashing number shows your current bearing.
3.Move the compass until the bearing you wish to lock is displayed and press SELECT
4.Press SET to confi rm the setting.
5. To fi ne-tune the bearing, press or
6.Press SET to lock the setting.
7.In the Compass Mode, the locked value will appear at the bottom of the display instead of the cardinal reading.
18
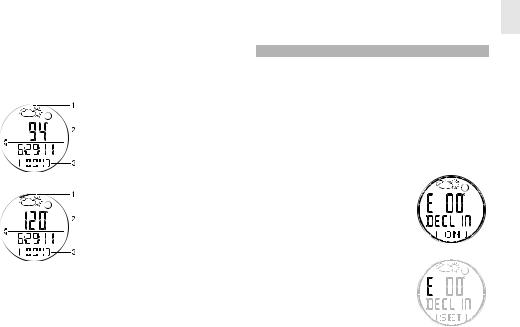
Once the bearing tracking system has been set, the compass segments on the display will show how far you deviate from your locked course. See the examples below:
1. The locked bearing is 94° and the current bearing is 94°
2. Current compass bearing
3. Locked compass bearing
1. Your locked bearing is 94° and your current bearing is 120°.
2. Current compass bearing
3. Locked compass bearing
The compass segments now show the angle between your locked bearing and your current bearing. Therefore, you need to change the direction you are on to get back onto your locked bearing course.
EN
SET THE DECLINATION
Declination is the angle between where a compass needle points (magnetic North Pole) and the true North Pole. The declination angle can vary from 0-30 degrees East
(E) or West (W) and can be found on most maps or on the Internet.
When you set the declination angle on the compass you compensate for the difference between true north and magnetic north. This makes the compass reading more accurate.
1. In any compass display screen, press SET until the screen opposite appears.
2.Press and hold SET to enter setting mode.
3.Press or to change the setting.
4.Press SET to confi rm.
19

EN
SET THE TRUE NORTH CALIBRATION
When you do not know the declination angle, the true north calibration function can be used to compensate for the difference between magnetic and true north. All you need to know is the direction of true north (this can be found from landmarks in your immediate vicinity). Setting the true north calibration makes the compass reading more accurate.
To set the true north calibration:
1.In any compass display screen, press SET until the screen opposite appears.
2.Press and hold SET to enter setting mode.
3.Turn the compass to the position of true north and press SET
NOTE If the declination function is turned ON, the true north function is automatically turned OFF and vice-versa.
TO TURN THE BEARING TRACKING / DECLINATION / TRUE NORTH CALIBRATION ON / OFF
In any compass display screen press SET. Press to toggle between ON / OFF.
BACKLIGHT
To turn the backlight ON for 3 seconds:
1.Press 
2.Press any other key while the light is on and it will extend the light time by another 3 seconds.
NOTE |
The backlight does not work when the low |
battery icon |
is shown and will return to normal once |
the batteries are replaced. |
|
KEYPAD LOCK
To turn the keypad lock ON or OFF:
•Press and hold  for 2 seconds to toggle between ON and OFF. When it is set to ON the
  icon will appear on the display.
20
SPECIFICATIONS
TYPE |
DESCRIPTION |
CLOCK |
|
Time format |
12 hr / 24 hr |
Date format |
DD / MM or MM / DD |
Year format |
2001-2050 (auto-calendar) |
Alarm |
Daily alarm |
TIMER 1 |
|
User-selectable |
99:59:59 (hr:min:sec) |
countdown timer |
|
TIMER 2 |
|
Countdown timer |
00:10:00 (hr:min:sec) |
TIMER 3 |
|
Countdown timer |
00:05:00 (hr:min:sec) |
TIMER 1, 2, 3 |
|
Stopwatch / lap |
99 readings / 99:59:59 |
|
(hr:min:sec) |
THERMOMETER |
|
Measuring range |
-10°C-60°C (14°F-140°F) |
Resolution |
0.1°C / 0.2°F |
ALTIMETER |
|
Altitude display range |
-400 to 9000 m |
|
(-1312 to 29520 ft) |
EN
Altitude setting |
-400 to 9000 m |
|
(-1312 to 29520 ft) |
Resolution |
1 m / 3 ft |
BAROMETER |
|
Local air pressure display |
300 to 1100 hPa / |
range |
8.86 to 32.48 inHg |
Local air pressure resolution |
1 hPa / 0.01 inHg |
Sea level pressure display |
900 to 1100 hPa / |
|
26.58 to 32.48 inHg |
Sea level pressure setting |
900 to 1100 hPa / |
|
26.58 to 32.48 inHg |
Sea level pressure |
1 hPa / 0.01 inHg |
resolution |
|
Weather forecast indication |
Sunny, partly cloudy, cloudy |
|
and rainy |
POWER |
|
Watch |
1 x CR2032 3V lithium |
|
battery |
OPERATING ENVIRONMENT |
|
Operation temperature |
-10°C-60°C (14°F-140°F) |
Storage temperature |
-20°C-70°C (-4°F-158°F) |
Water resistant |
50 m / 164 ft (RA202) |
|
30 m / 98 ft (RA282) |
21

EN
WARNINGS AND CARE INSTRUCTIONS
To ensure you receive the maximum benefi t from using this product, please observe the following guidelines:
•Clean the product with a soft, slightly moistened cloth.
Do not use abrasive or corrosive cleaning agents, such as gasoline, chlorine, perfume, alcohol, hair spray, etc., as these may cause damage.
•Avoid pressing the keys with wet fi ngers, under water, or in heavy rain, as this may allow water to gain entry into the electrical circuitry.
•Do not subject the product to excessive force, shock, dust, temperature changes or humidity. Never expose the product to direct sunlight for extended periods. Such treatment may result in malfunction.
•Do not tamper with the internal components. Doing so will terminate the product warranty and may cause damage. The main unit contains no user-serviceable parts.
•Do not touch the exposed electronic circuitry, as there is a danger of electric shock.
•Do not scratch hard objects against the LCD display as this may cause damage.
•Take precautions when handling all battery types.
•Remove the batteries whenever you are planning to store the product for a long period of time.
•When replacing batteries, use new batteries as specifi ed in this user manual.
•Do not use in hot water.
•When disposing of this product, do so in accordance with your local waste disposal regulations.
22

EN
ABOUT OREGON SCIENTIFIC
Visit our website (www.oregonscientifi c.com) to learn more about Oregon Scientifi c products such as digital cameras; MP3 players; children’s electronic learning products and games; projection clocks; health and
fi tness gear; weather stations; and digital and conference phones. The website also includes contact information for our customer care department in case you need to reach us, as well as frequently asked questions and customer downloads.
We hope you will fi nd all the information you need on our website, however if you’d like to contact the Oregon Scientifi c Customer Care department directly, please visit: www2.oregonscientifi c.com/service/support
OR
Call 949-608-2848 in the US.
For international enquiries, please visit: www2.oregonscientifi c.com/about/international/default.
asp
23

Outbreaker Sailor Compass /
Outbreaker Sailor Compass Medium
Model: RA202 / RA282
User Manual

© 2005 Oregon Scientifi c. All rights reserved.
086L003677-018
25

Outbreaker Sailor Compass / Outbreaker
Sailor Compass Medium
Modell: RA202 / RA282
Bedienungsanletitung
INHALTSVERZEICHNIS |
|
Einleitung .................................................................. |
2 |
Haupteigenschaften ................................................. |
3 |
Armbanduhr ......................................................... |
3 |
LCD-Anzeige ........................................................ |
4 |
Inbetriebnahme ........................................................ |
4 |
Armbanduhr auspacken ....................................... |
4 |
Einschalten der Armbanduhr (Nur beim ersten |
|
Einsatz) ................................................................ |
5 |
Batterien ............................................................... |
5 |
Umschalten zwischen den Betriebsarten ............. |
6 |
Einsatz der Uhr ......................................................... |
7 |
Einstellen von Uhr / Kalender / Temperatureinheit .. |
7 |
Zeitanzeigen abrufen ........................................... |
8 |
Einstellen von Tagesalarm / Zeitzone / Tastenton .. |
8 |
Alarm .................................................................... |
9 |
Alarmabschaltung ................................................ |
9 |
Alarm aktivieren / deaktivieren ............................. |
9 |
Verwenden des Höhenmessers / Barometers ....... |
9 |
Über den Höhenmesser / das Barometer ........... |
9 |
Höheneinstellung ............................................... |
10 |
Höhen-Säulendiagramm .................................... |
10 |
DE
Die Höhen-Anzeigen .......................................... |
11 |
Einstellung Höhenlarm / Meeresspiegel / |
|
Wetter-Symbol ................................................... |
12 |
Verwenden des Segel-Timers ............................... |
13 |
Über den Segel-Timer ........................................ |
13 |
Einstellen des Segel-Timers .............................. |
14 |
Segel-Timer-Alarm ............................................. |
16 |
Anzeige des Luftdrucks auf Meeresspiegelniveau.. |
16 |
Verwenden des Kompass ...................................... |
17 |
Über den Kompass ............................................ |
17 |
Kompass-Sensorkalibrierung ............................. |
18 |
Die Kompassanzeige ......................................... |
18 |
Einstellen der Richtungsverfolgung.................... |
19 |
Einstellen der Richtungsabweichung ................ |
20 |
Nordpol-Kalibrierung .......................................... |
21 |
Einund Ausschalten von Richtungsverfolgung, |
|
-abweichung und Nordpol-Kalibrierung .............. |
21 |
Hintergrundbeleuchtung ....................................... |
21 |
Tastensperre ........................................................... |
22 |
Technische Daten .................................................. |
22 |
Warnund Pflegehinweise .................................... |
23 |
Über Oregon Scientific .......................................... |
24 |
1

DE
EINLEITUNG
Danke, dass Sie sich für die Armbanduhr Outbreaker Sailor Compass / Outbreaker SAILOR Compass Medium (RA 202 / RA 282) von Oregon Scientific™ entschieden haben. Dieses Präzisionsgerät weist folgende Funktionen auf:
• |
Hochpräzises |
Chronometer mit Kalender und |
|
H i n t e r g r u n d b e l e u c h t u n g |
|
• |
Digitaler Kompass |
|
• |
Einstellbare |
Richtungsabweichung |
•K o m p a s s - S e n s o r k a l i b r i e r u n g
•N o r d p o l - K a l i b r i e r u n g
•R i c h t u n g s v e r f o l g u n g
•Segel-Timer mit Rundenspeicher -aufwärts und
abwärts zählend
• Höhemessung mit Alarm und Säulendiagramm- D a r s t e l l u n g
•Barometrische Druckmessung mit Liniendiagramm-
Darstellung des Meeresspiegels
•Te m p e r a t u r m e s s u n g
• |
Wettervorhersage |
mit 4 Anzeigen |
• |
Wasserbeständig |
bis: |
-50 Meter RA202
-30 Meter RA282
•Ta g e s a l a r m
Dieses Handbuch enthält wichtige Sicherheitsund Pflegeinformationen und umfasst eine schrittweise Einführung in die Verwendung dieses Produkts. Lesen Sie das Handbuch aufmerksam durch und bewahren Sie es sicher auf, so dass Sie es später jederzeit zum Nachschlagen heranziehen können.
WICHTIG
•Die in die RA202 / RA282 eingebauten
Messfunktionen sollen weder offizielle Messnoch industrielle Präzisionsgeräte ersetzen. Die mit dieser Armbanduhr gemessenen Werte sollten nur als Richtwerte angesehen werden.
•Während des Bergsteigens oder während anderer Aktivitäten, bei denen Sie sich verirren und in lebensbedrohliche Gefahrensituationen gelangen könnten, müssen Sie zum Abgleich der angezeigten
Richtungswerte stets einen zweiten Kompass h e r a n z i e h e n .
•Oregon Scientific™ übernimmt keine Haftung für Verluste oder andere Ansprüche Dritter, die sich aus
der Verwendung dieser Armbanduhr ergeben k ö n n t e n .
2
DE
|
HAUPTEIGENSCHAFTEN |
|
|
|
|
1. |
N / S / E / W: Haupthimmelsrichtungen - Nord, Süd, |
||||||||||||||
|
|
|
|
|
|
|
|
|
|
|
|
|
|
|
|
|
|
|
|
Ost und West. |
|
|
ARMBANDUHR |
|
|
|
|
|
|
|
|
|
2. |
SELECT / -:Anzeige in Hauptbetriebsmodi aufrufen; |
|||||||||
|
|
|
|
|
|
|
|
|
|
|
|
|
|
|
|
|
|
|
|||
|
RA202 |
|
|
|
|
|
RA282 |
|
Reaktivierung des Kompass-Sensors. |
||||||||||||
|
|
|
|
|
|
|
|
|
|
|
|
|
|
|
|
|
|
|
3. |
/ |
: Einschalten der Hintergrundbeleuchtung |
|
|
|
|
|
|
|
|
|
|
|
|
|
|
|
|
|
|
|
|
für 3 Sekunden; Tastenfeld sperren / entsperren |
|
|
|
|
|
|
|
|
|
|
|
|
|
|
|
|
|
|
|
|
4. |
MODE: Umschalten zu einer anderen Anzeige, |
|
1 |
|
|
|
|
|
|
|
|
1 |
|
|
|
|
|
|
|
schnelle Rückkehr aus jedem Einstellungsmodus. |
||||
|
|
|
|
|
|
|
|
|
|
|
|
|
|
|
|
|
|||||
|
|
|
|
|
|
|
|
|
|
|
5 |
|
|
5 |
5. |
Libelle: Zur horizontalen Ausrichtung der |
|||||
2 |
|
|
|
|
|
|
|
|
|
|
6 2 |
|
|
|
|
6 |
|
Armbanduhr. |
|||
|
|
|
|
|
|
|
|
|
|
|
|
|
|
|
|
|
|
|
|
||
3 |
|
|
|
|
|
|
|
|
7 3 |
|
|
7 |
6. |
LAP / +: Rundenzeit nehmen; Erhöhen des |
|||||||
|
|
|
|
|
|
|
|
|
|
|
eingestellten Wertes. |
||||||||||
|
|
|
|
|
|
|
|
|
|
|
|
|
|
|
|
|
|
|
|
||
4 |
|
|
|
|
|
|
|
|
|
|
8 4 |
|
|
|
|
8 |
7. |
ST / SP: Start- / Stopp-Timer und Stoppuhr. |
|||
|
|
|
|
|
|
|
|
|
|
|
9 |
|
|
9 |
8. |
FUNC / SET: Einstellmodus aufrufen;Auswahl einer |
|||||
|
|
|
|
|
|
|
|
|
|
|
|
|
|
|
|
|
|
|
|||
|
|
|
|
|
|
|
|
|
|
|
|
|
|
|
|
|
|
|
|
anderen Einstelloption; Bestätigung des eingestellten |
|
|
|
|
|
|
|
|
|
|
|
|
|
|
|
|
|
|
|
|
|
Wertes; Voreingestellten Timer-Wert aufrufen. |
|
|
|
|
|
|
|
|
|
|
|
|
|
|
|
|
|
|
|
|
9. |
LCD-Anzeige. |
|
3

DE
LCD-ANZEIGE
1 |
|
|
|
|
|
|
|
|
|
|
|
|
|
|
|
|
|
|
|
|
|
|
|
|
|
|
|
|
|
|
|
|
|
|
|
|
|
2 |
|
|
|
|
|
|
|
|
|
|
|
|
|
|
|
|
|
|
|
|
|
|
|
|
|
|
|
|
|
|
|
|
|
|
|
|
|
3 |
|
|
|
|
|
|
|
|
|
|
|
|
|
|
|
|
9 |
|
|
|
|
|
|
|
|
|
|
|
|
|
|
|
|
|
|||
4 |
|
|
|
|
|
|
|
|
|
|
|
|
|
|
10 |
|||
|
|
|
|
|
|
|
|
|
|
|
|
|
|
|||||
|
|
|
|
|
|
|
|
|
|
|
|
|
||||||
|
|
|
|
|
|
|
|
|
|
|
|
|
|
|
|
11 |
||
|
|
|
|
|
|
|
|
|
|
|
|
|
|
|
|
|||
|
|
|
|
|
|
|
|
|
||||||||||
5 |
|
|
|
|
|
|
|
12 |
||||||||||
|
|
|
||||||||||||||||
|
|
|
|
|
|
|
|
|
|
|
|
|
|
|
|
|||
|
|
|
|
|
|
|
|
|
|
|
|
|
|
|
13 |
|||
|
|
|
|
|
|
|
|
|
|
|
|
|
|
|
14 |
|
||
|
|
|
|
|
|
|
|
|
|
|
|
|
|
|
|
|||
|
|
|
|
|
|
|
|
|
|
|
|
|
|
|
|
|
||
6 |
|
|
|
|
|
|
|
|
|
|
|
|
|
|
15 |
|||
|
|
|
|
|
|
|
|
|||||||||||
|
|
|
|
|
|
|
|
|
|
|
|
|
|
|
|
16 |
||
7 |
|
|
|
|
|
|
|
|
|
|
||||||||
|
|
|
|
|
|
|
|
|
|
|
|
|
|
|
|
|
|
|
8 |
|
|
|
|
|
|
|
|
|
|
|
|
|
|
|
|
|
|
|
|
|
|
|
|
|
|
|
|
|
|
|
|
|
|
|
|
|
1. Kompass-Segmente: |
Anzeige |
der |
Kompassrichtung; Kalibrierungsstatus. |
|
|
2.Wettervorhersage: 4 Wetteranzeigen
3. : Batteriezustand
4. : Tastentöne sind deaktiviert.
5.AM / PM: Das 12-Std. Format wird verwendet.
6.LAP: Runden-Zeitnahme; Runden-Nummer, Runden-Speicher
7.: Aktivierter Tagesalarm.
8. : Darstellung von Meeresspiegel-, HöhenSäulendiagramm, aktuell gemessener Haupthimmelsrichtung oder Status einer Einstellung.
9. : Aktivierte Tastensperre.
10.123: Der Countdown-Timer 1, 2 oder 3 wird angezeigt oder läuft.
11. : Der Countdown-Timer wird angezeigt oder läuft.
12.STW: Stoppuhr wird angezeigt oder läuft.
13.ftm oder ft / m: Höheneinheiten - Fuß oder Meter.
14.inHg / hPa: Barometrische Druckeinheiten
15.TTL: Die Gesamtzeit wird angezeigt.
16.ZONE: Zeitzonen-Stundenversatz
INBETRIEBNAHME
ARMBANDUHR AUSPACKEN
Achten Sie beimAuspacken der Uhr darauf, das gesamte Packmaterial an einem sicheren Platz aufzubewahren, falls Sie es für den späteren Transport oder zur Rücksendung des Gerätes zur Reparatur benötigen.
In dieser Verpackung finden Sie:
•A r m b a n d u h r
•1 x CR2032 (3V) Lithium-Batterie - bereits eingesetzt
4
EINSCHALTEN DER ARMBANDUHR (NUR BEIM ERSTEN EINSATZ)
Zur Aktivierung der LCD-Anzeige drücken Sie für 2 Sekunden eine beliebige Taste.
BATTERIEN
Die Uhr mit einer vorinstallierten 1 x CR2032 LithiumBatterie. Beachten Sie die folgenden Warnhinweise zu Batterien:
SYMBOL |
BESCHREIBUNG |
NIEDRIGE |
|
BATTERIE- |
|
LADUNG |
|
|
Die Armbanduhr-Batterie ist fast leer. |
- - |
Der Batterieladezustand ist zu gering |
|
um den Sensor zu aktivieren.Anstelle |
|
der Temperatur-, Höhen-, Barometer- |
|
oder Kompasswerte wird “--” |
|
angezeigt. Außerdem sind die |
|
Balkenund Liniendiagramme |
|
eingefroren. |
ANMERKUNG Der häufige Einsatz von Hintergrundbeleuchtung, Höhenalarm und Segel-Timer schränkt die Batterielebensdauer stark ein.
DE
Wenn Sie die Batterie austauschen müssen, empfehlen wir Ihnen, sich mit ihrem Händler oder unserem Kundendienst in Verbindung zu setzen.
Austausch der Armbanduhr-Batterie:
1.Das Batteriefach befindet sich auf der Rückseite der Armbanduhr.
2.Drehen Sie dieAbdeckung wie oben gezeigt mit einer Münze so lange gegen den Uhrzeigersinn bis sich die Abdeckung löst.
3.Nehmen Sie die alte Batterie mit den Fingern heraus.
4.Setzen Sie die neue Batterie mit der „+”-Seite nach oben ein.
5.Setzen Sie die Batteriefachabdeckung wieder ein und drehen Sie diese im Uhrzeigersinn, bis sie fest sitzt.
5
 Loading...