


SL929

EN
TABLE OF CONTENTS
About this guide ......................................... 2
Product overview ........................................ 3
Getting started ........................................... 5
Batteries .................................................. 5
Safety cord .............................................. 5
Switch between modes .......................... 5
Change settings ..................................... 5
Clock ........................................................... 6
Alarm ........................................................... 6
Timer ........................................................... 7
Stopwatch ................................................... 9
Pacer ........................................................ 1 2
Backlight ................................................... 13
Safety and care ........................................ 1 4
Warnings ................................................... 1 4
Troubleshooting ........................................1 5
Specifications ........................................... 1 6
Additional resources ................................ 19
1

EN
ABOUT THIS GUIDE
Congratulations on your selection of the Oregon
Scientific Hockenheim 500-Lap Stopwatch
(SL-929). This powerful device bundles clock,
alarm, stopwatch, timer, and pacer features into
a single hand-held tool you can use for all your
sporting activities.
Keep this manual handy as you use your new
product. It contains practical step-by-step
instructions, as well as technical specifications
and warnings you should know.
In this box, you will find:
• Stopwatch
• Safety cord
• User manual
2

EN
PRODUCT OVERVIEW
1
2
3
4
5
DESCRIPTIONS
1. Start / Stop button
2. Lap / Reset button
3. Mode button ( 5)
4. Backlight button ( 13)
5. Safety cord ( 5)
3
EN
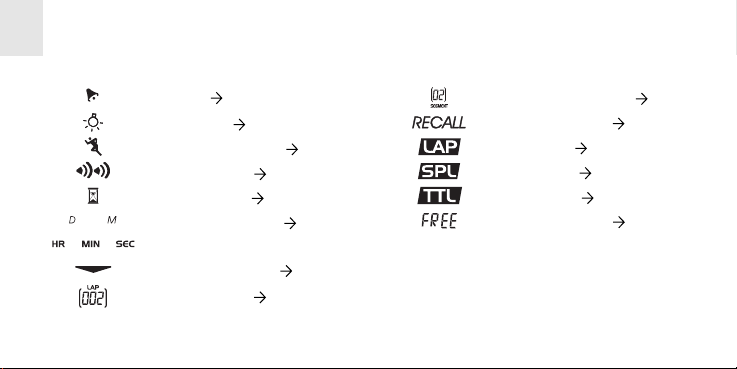
LCD ICON DESCRIPTION
Alarm ( 6 , 7)
Backlight ( 13)
Stopwatch Mode ( 9)
Pacer Mode ( 12 , 13)
Timer Mode ( 7)
Clock / Calendar ( 6)
Elapsed time
Stopwatch units ( 9)
Lap number ( 11)
LCD ICON DESCRIPTION
Segment number ( 11)
Memory recall ( 11)
Lap time ( 9)
Split time ( 9)
Total time ( 9)
Laps available ( 10)
4

EN
GETTING STARTED
BATTERIES
Batteries are supplied with this product.
Replace them whenever the display becomes
dim. Use a coin to remove the battery
compartment lid (on the back of the Stopwatch).
Be sure to match the correct polarity, as sho wn
in the battery compartment.
SAFETY CORD
Thread the safety cord through the loop on the
bottom of the unit.
SWITCH BETWEEN MODES
Press MODE.
CHANGE SETTINGS
Press and hold MODE for 2 seconds. Then,
press LAP / RESET or START / STOP to
change each setting. Press and hold for
fast-setting mode. Press MODE to switch
between options.
5
EN
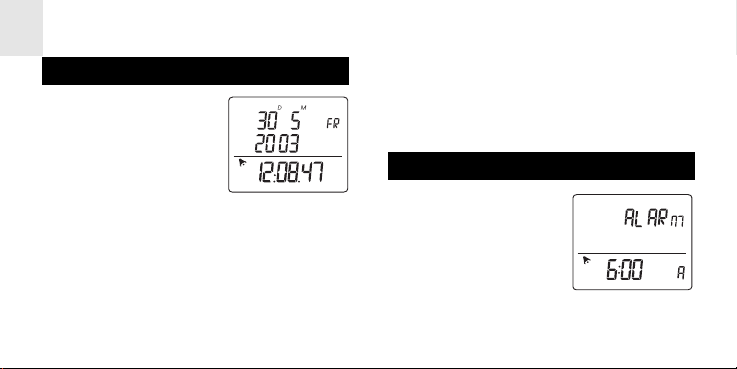
CLOCK
The Clock Mode shows
the date, month, year, da y
of week, current time, and
alarm status.
SET OR CHANGE THE CLOCK
1. Press MODE to switch to the Clock Mode.
2. Press and hold MODE for 2 seconds to
enter the setting mode.
3. Select the 12/24-hour format, second,
minute, hour, year , month, and date. Press
LAP / RESET or STA RT / STOP to change
the setting. Press MODE to confirm.
ALARM
When activated, the
alarm beeps continuously for 30 seconds.
6
 Loading...