


MD40820
Table of contents
 Loading...
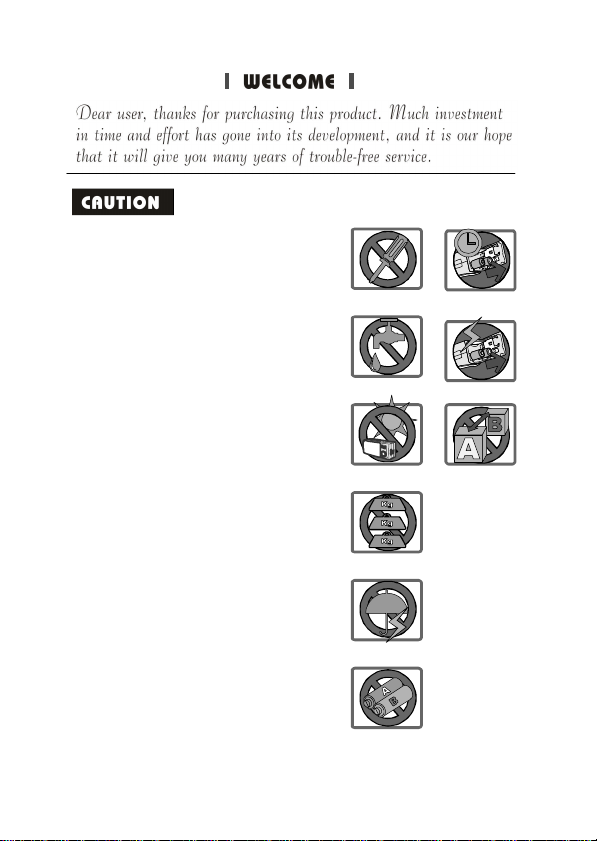
Donotdrop,punctureordisassemble
thecamera;otherwisethewarrantywill
bevoided.
Avoidallcontactwithwateranddry
handsbeforeusing.
Donotexposethecameratohigh
temperatureorleaveitindirectsunlight.
Doingsomaydamagethecamera.
Usethecamerawithcare.Avoid
pressinghardonthecamerabody.
Foryourownsafety,avoidusingthe
camerawhenthereisastormor
lightning.
Avoidusingbatteriesofdifferent
brandsortypesatthesametime.
Thereispotentialofexplosionbydoing
that.
Removebatteriesduringlongperiods
betweenusage,asdeteriorated
batteriesmayaffectthefunctionalityof
thecamera.
Removebatteriesiftheyshowsignsof
leakingordistortion.
Wesuggestusingonlytheaccessories
suppliedbythemanufacturer.
1.
2.
3.
4.
5.
6.
7.
8.
9.
1
2
3
4
5
6
7
8
9
UserManual

Contents
~1~
GettingStarted
1.Yourcameraparts
2.Loadingthebattery
Basicoperation
1.Poweringonandoff
2.SettingtheModeswitch
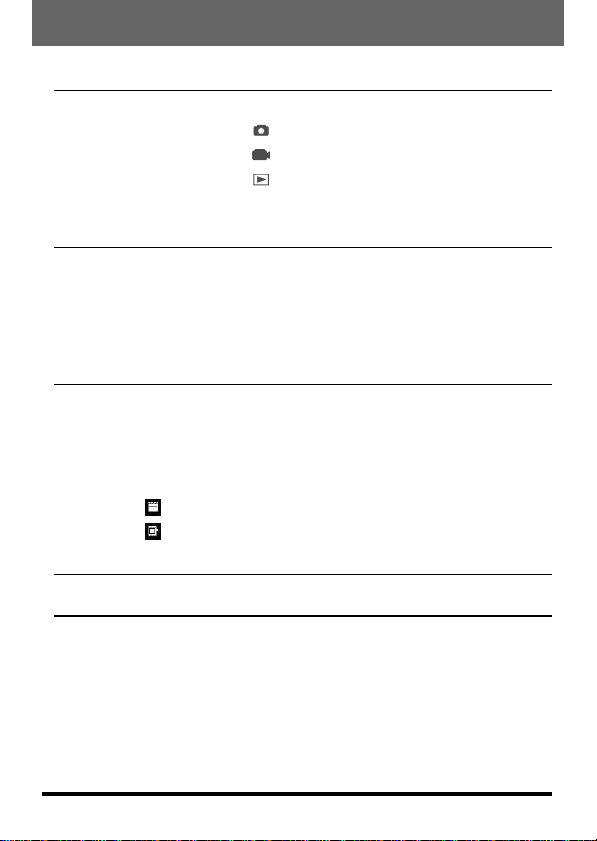
PlayingYourImagesontheLCDatOnce
1.Viewingpicturesandmovies
3.InsertingandremovingtheSD/MMCcard(optional)
4.Attachingthestrap(optional)
3.Takingstillpictures
4.Recordingmovies
UsingtheLenscover
UsingthePowerbutton
Focus
Zoomin/out
TheLCDdisplayundermode
TheLCDdisplayundermode
Insertingthecard
Removingthecard
5.Usingthetripod(optional)
2.Deletingthepictureandmovie
3
3
4
5
7
6
7
7
7
7
8
8
10
9
10
11
8
11
11
5
5
6
12
TheLCDdisplayundermode
Snapshot
8
Flashstrobeandself-timer
9
~2~
UsingthePCCameraFunctionforFun
Troubleshooting
2.Configuringsettings
2.Connectingyourcameratoyourcomputer
4.Viewingonyourcomputer
1.InstallingtheMD40820Driver
3.Capturingimmediateimagestoyourcomputer
MENUundermode
MENUundermode
MENUundermode
20
23
13
14
24
15
16
24
24
26
30
1.InstallingtheMD40820Driver
17
3.Copyingpicturesandmoviestoyourcomputer
21
EnjoyingViewingYourImagesonaPC
17
OtherInformation
32
1.Lifeofbattery
4.Moreonflicker
32
33
33
2.Connectingyourcameratoyourcomputer
4.Advancedsettings
28
Formatsettings
3.StorageCapacity
Propertiessettings
28
29
5.Specification
34
2.LEDindicatorevents
32
AdvancedOperationandSettings
1.UsingtheMENUbutton
13
13
1
2
3
4
5
6
7
8
9
11
12
13
14
15
16
17
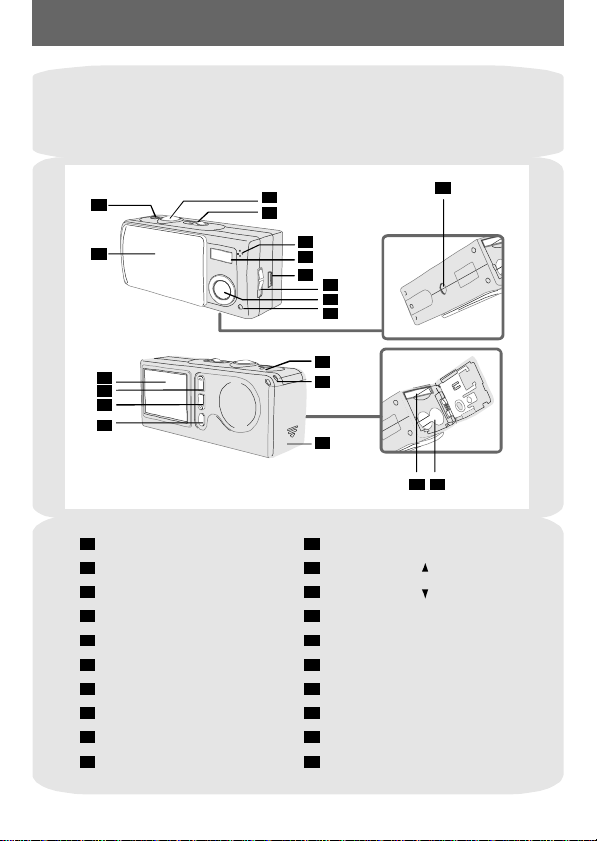
GettingStarted
1.Yourcameraparts
Modeswitch
LCDdisplay
Batterysection
Controlbutton(Zoomout)
LEDindicator
Strapholder
Controlbutton(Zoomin)
Flashstrobe
Microphone
Lenscover
Focusswitch
USBport
Lens
Self-TimerLEDindicator
Battery/SD/MMCcardcover
Tripodport
MENU/OKbutton
Powerbutton
~3~
10
Shutter/QuickExitbutton
18
19
1
3
4
6
7
8
9
10
11
12
13
14
15
16
17
18
2
5
19
20
20
SD/MMCcardslot
Knowingyourcamerapartswellbeforeusingitwillhelpyouoperateit
moreeasily.
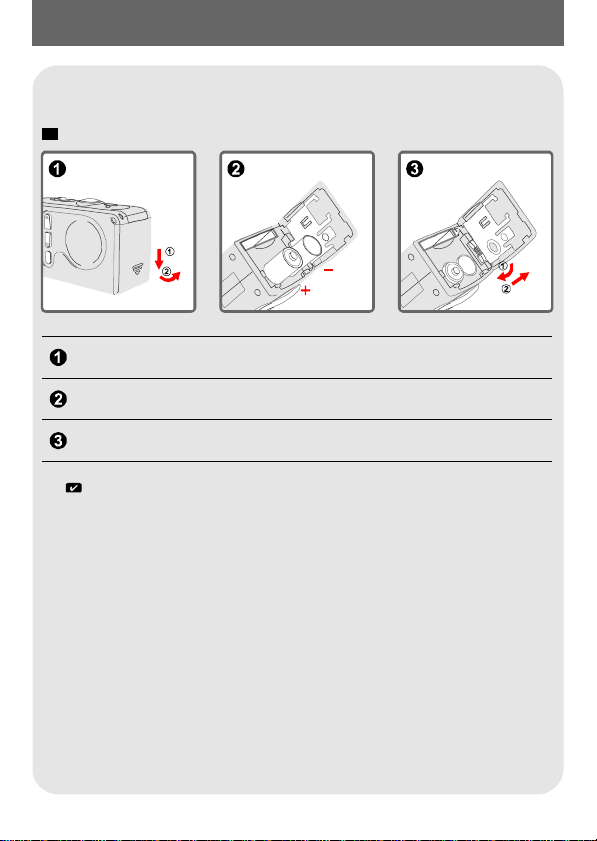
2.Loadingthebattery
Werecommendyoutousealkalinebatteries.
!
PleaseusetwoAAA1.5Vbatteries.
Slidetheinthedirectionoftheindicationtoopenit.battery/cardcover
FollowtheindicationtoloadtwoAAAbatteries.
Closeinwardthetolockit.battery/cardcoverandslideupward
~4~
Fordetailsofthebatterylife,seethe"Lifeofbattery"sectiononpage32.
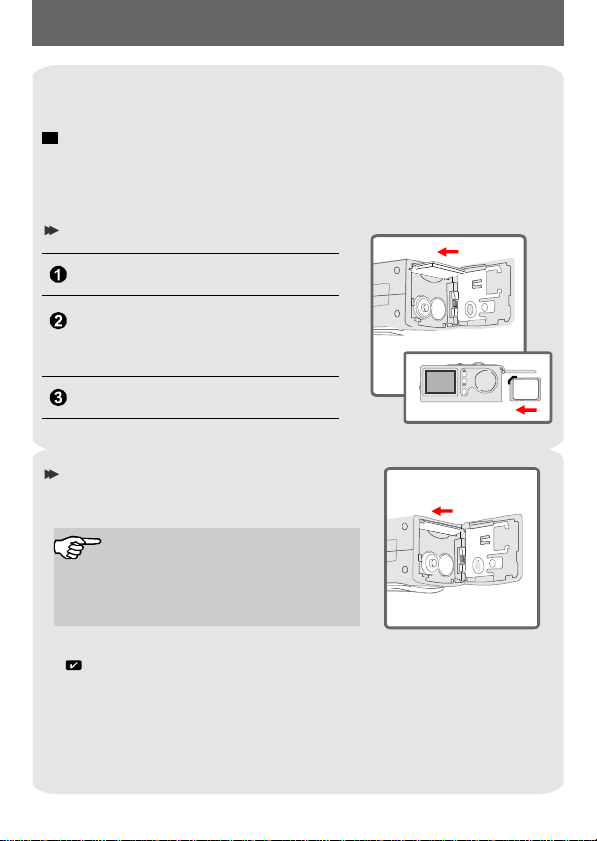
3.InsertingandremovingtheSD/MMCcard
(Optional)
Insertingthecard
NeverejecttheSD/MMCcardwhilethecameraisprocessingdata.
(TheLEDindicatorlightsredwhilethecameraisprocessingdata.
FormoreinformationontheLEDmessages,pleaseseethe"LED
indicatorevents"sectiononpage32)
!
Openthe.battery/cardcover
Insertthecardinthedirectionofthe
indicatiorandpushitintilltheendof
thecardplot.
Closethe.battery/cardcover
MENU/OK
Removingthecard
Pushthecardtoremoveit.inandrelease
Thecameracomeswith16MBflash
memorybuiltinsideforstorage.If
youdonotinsertaSD/MMCcard,the
datawillbesavedinthebuilt-inflash
memoryautomatically.
~5~
FordetailsofthestoragecapacityoftheSD/MMCcardandinternalmemory
(16MBflashmemory),pleaseseethe"Storagecapacity"sectiononpage33.

4.Attachingthestrap(Optional)
Forconvenienceandsafety,youmaywishto
attachthecarryingstrap.
~6~
5.Usingthetripod(Optional)
Thetripodcanbeattachedtoyourcameratominimizecameramovement
andensureoptimalimagequality,particularlywhiletakingself-portraits,
longermoviesorinamacromode.
Attachthetripodtotheportonthebottomofthecameraandrotatethe
serratedwheeltolockit.
Unfoldthelegstosetup.
Threadthestraploopthroughtheholderinthe
directionindicated.
Fastenthestrapasindicated.
Tight
Loose
Serratedwheel
Adjustthealignmenttothedesiredposition.
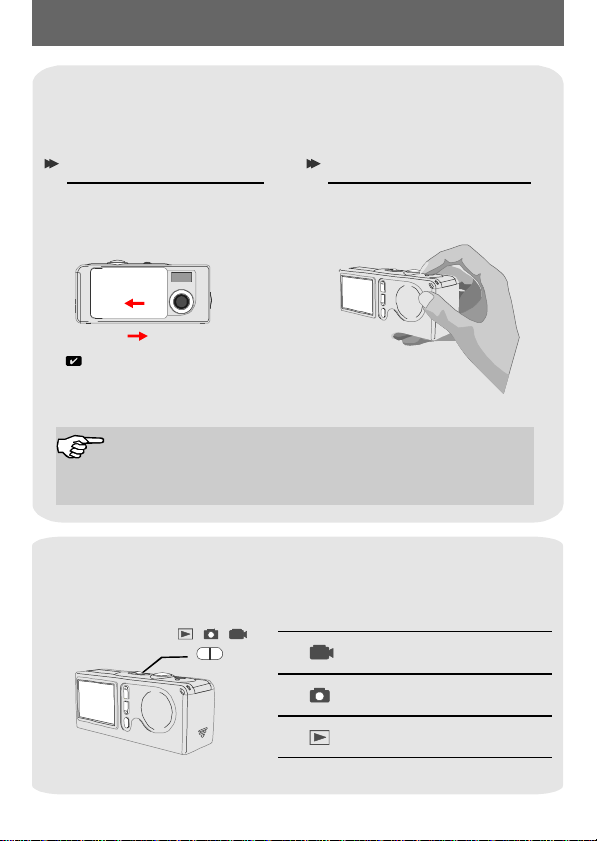
1.Poweringonandoff
Slidetheorpressthetopoweronoroffthe
camera.
LenscoverPowerbutton
UsingtheLenscover UsingthePowerbutton
Slidetheinthe
directionofthearrowtoturnthe
poweronoroff.
Lenscover
ON
OFF
~7~
Pressthetoturn
thepoweronoroff.
Powerbutton
Ifthecameraisidleforover60seconds,theLCDdisplaywillbe
turnedofftoconservebatterypower;pressanykeytowakeup
.Ifitisidleforover3minutes,thecamerawillshut
downautomatically.
thecamera
Whiletheisopen,you
canalsopresstheto
deactivateyourcamera.
Lenscover
Powerbutton
BasicOperation
2.SettingtheModeswitch
Thiscameraprovidesthreemodestouse.Pushtheto
selectthemodethatyouwanttouse.
Modeswitch
StillPicturemode
Playbackmode
Moviemode
~8~
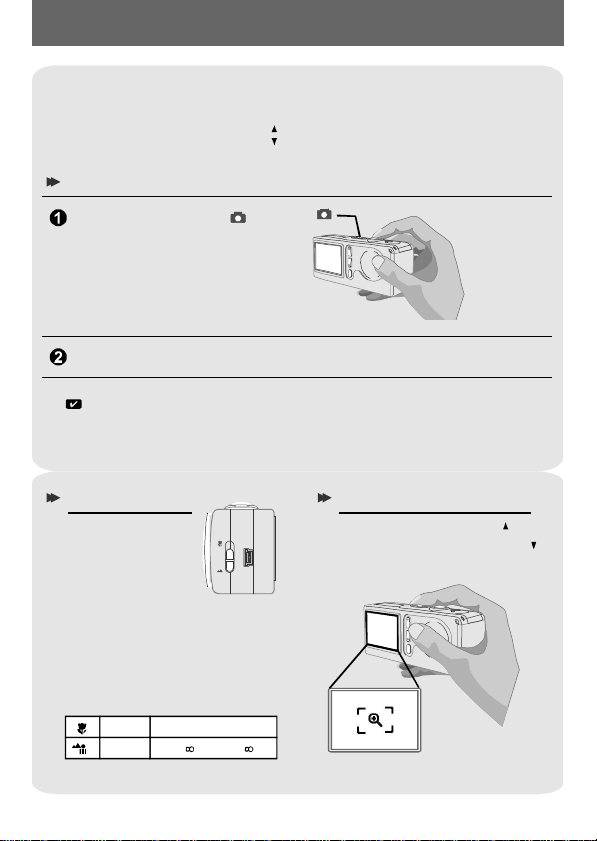
3.Takingstillpictures
WhiletheLEDindicatorisflashingred,theimageisbeingcaptured;whiletheLED
turnsgreen,thepictureprocessingisdone.(FormoreinformationoftheLEDmessage,
pleaseseethe"LEDindicatorevents"sectiononpage32.)
Settheto.Modeswitch
Pressthetotakepictures.Shutterbutton
Followthestepstosnapstills.Alsousethe
andthetoadjustzoominorzoomoutsothat
youcangetbestresult.
Focusswitch
Controlbuttons
tosetthe
focus
Focus
Adjustthefocus
beforetakingthe
stillpicture.Push
the,
thenselectthe
modebestforyourpicture.The
followingtabletellsyouwhich
focusmodeyoumaychoose
withthedistancefromthe
object.
Focusswitch
Macro
Micro
12"~24"(30cm~60cm)
24"~(60cm~)
USB
Zoomin/out
Presstheto
zoominorthe
tozoomout.
Controlbutton
Controlbutton
Snapshot
~9~
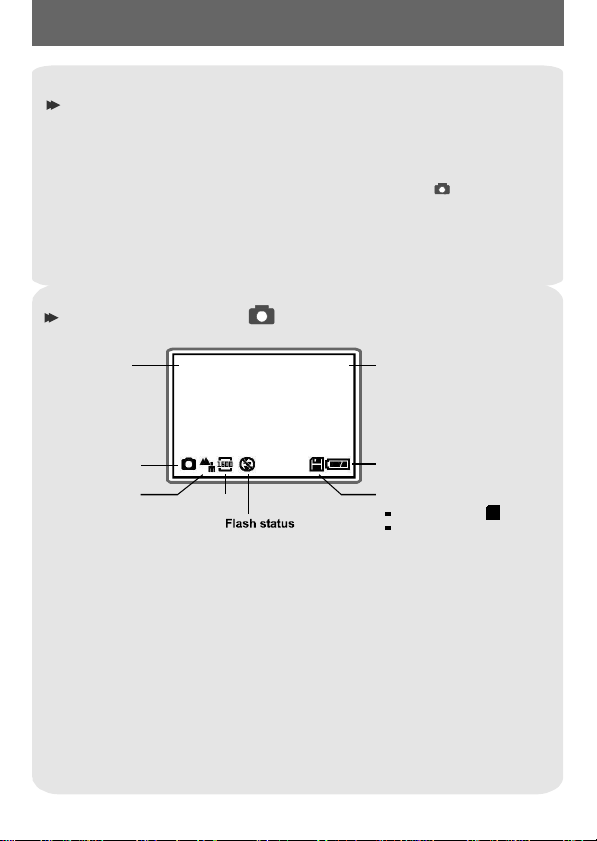
TheLCDdisplayundermode
Zoom Numberofpictures
andmoviestaken
Lifeofbattery
Storagemode
Still
pictures
mode
Focus
mode
Resolution
SD/MMCcard:
Flashmemory:non-icon
1.0X 20
Flashstrobeandself-timer
Thestrobeandself-timerareprovidedtooffermoreconvenientutilities
whentakingpictures.Youcanusethestrobeifthelightisnotadequate.
Theself-timerfunctionisusefulincertainsituations(ex.takingself-portait
photo).Thereareothersettingsintheundermodetoaffect
theresultofimage,i
MENU
ncludingsize,exposure,whitebalance,andeffect.
Fordetailsonoperationandinformation,pleaseseepage13-14.
Loading...