


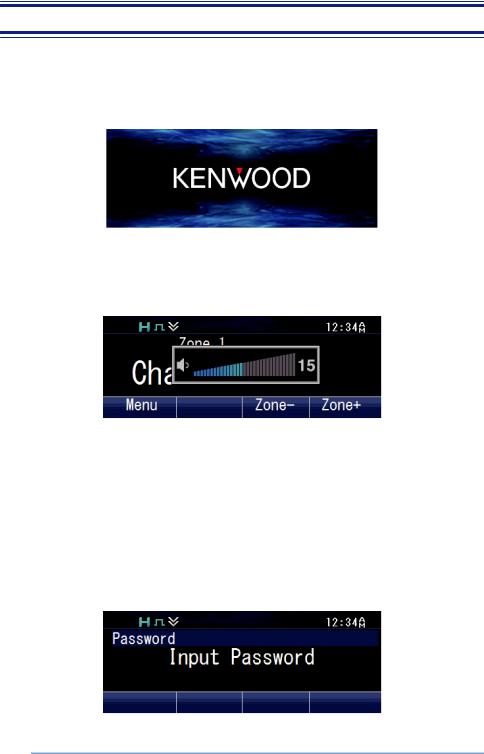
 Loading...
TK-5730 TK-5830 TK-5930
USER MANUAL
B5A-0974-00 (K)

CONTENTS |
|
SCREEN DISPLAY ................................................................................................................... |
3 |
BASIC OPERATIONS ................................................................................................................. |
4 |
SWITCHING POWER ON/ OFF ................................................................................................ |
4 |
ADJUSTING THE VOLUME ...................................................................................................... |
4 |
TRANSCEIVER PASSWORD ................................................................................................... |
4 |
SELECTING A ZONE AND CHANNEL ..................................................................................... |
5 |
TRANSMITTING ....................................................................................................................... |
6 |
RECEIVING ............................................................................................................................. |
12 |
PROGRAMMABLE FUNCTIONS .............................................................................................. |
14 |
FUNCTIONS OVERVIEW .......................................................................................................... |
23 |
FUNCTION DETAILS ................................................................................................................ |
34 |
SCAN ...................................................................................................................................... |
34 |
DTMF (DUAL TONE MULTI FREQUENCY) CALLS ............................................................... |
37 |
TRUNKING CALLS ................................................................................................................. |
38 |
EMERGENCY CALLS ............................................................................................................. |
40 |
SCRAMBLER (ANALOG)/ ENCRYPTION (P25/ NXDN) ......................................................... |
41 |
SIGNALING ............................................................................................................................. |
43 |
CLOCK .................................................................................................................................... |
45 |
COLOR SCHEME ................................................................................................................... |
46 |
MULTI RF DECK VIEW ........................................................................................................... |
47 |
MULTI LANGUAGE ................................................................................................................. |
49 |
FleetSync: ALPHANUMERIC 2-WAY PAGING FUNCTION ................................................... |
50 |
VOICE OPERATED TRANSMISSION (VOX) ........................................................................... |
53 |
BACKGROUND OPERATIONS ................................................................................................ |
54 |
Bluetooth .................................................................................................................................. |
56 |
microSD CARD & BUILT-IN MEMORY .................................................................................... |
68 |
INDICATOR LIST ...................................................................................................................... |
71 |
This manual has been prepared based on basic settings. Depending on the setting, the descriptions provided may be different from the actual operations.
2

SCREEN DISPLAY
The display on the screen differs as follows depending on the type of panel used.
oWhen KCH-19 is used
oWhen KCH-20R is used
3
BASIC OPERATIONS
SWITCHING POWER ON/ OFF
Press [  ] to switch the transceiver ON.
● The following screen appears if the Custom Start-up Screen has not been set.
Press [  ] again to switch the transceiver OFF.
ADJUSTING THE VOLUME
Press the key programmed as [Volume Up] to increase the volume. Press the key programmed as [Volume Down] to decrease the volume.
TRANSCEIVER PASSWORD
If the transceiver is protected, “Input Password” will appear on the display when the power is turned on. To unlock the transceiver, enter the correct password.
1Press the key programmed as [Transceiver Password] to enter Transceiver Password Mode.
Alternatively, press the key programmed as [Menu] to enter Transceiver Password Mode using the Menu Mode.
●If a password has been registered and the [Transceiver Password] function has not been programmed to a key or configured to the menu, the transceiver enters Transceiver Password Mode when the power is turned on.
4
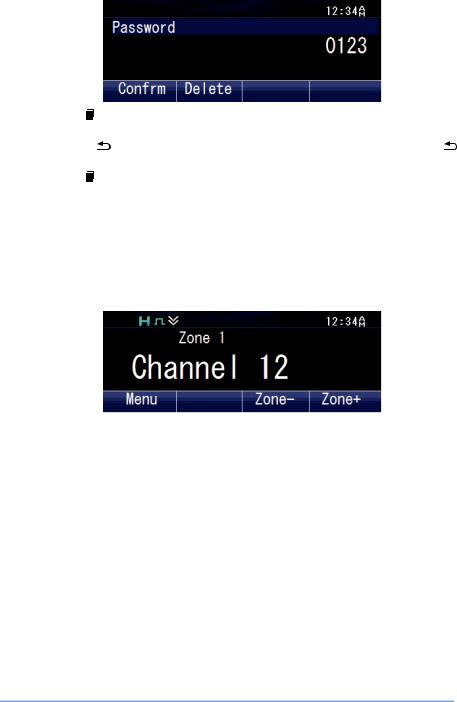
2Enter a code using the [J] and [K] keys.
●On an optional microphone with keypad, you can enter the password directly by pressing the keypad.
3 |
Press the [ |
] key to accept the code. |
|
4 |
Repeat steps 2 and 3 to enter the entire password. |
||
|
● Press the [ |
] key to delete an incorrectly entered code. Press and hold the [ ] key |
|
5 |
to delete all codes. |
||
Press the [ |
] key to confirm the entry. |
||
●If you enter an incorrect password, an error tone sounds and the transceiver remains locked.
●The password can contain a maximum of 6 digits.
SELECTING A ZONE AND CHANNEL
1Select the desired zone using the keys programmed as [Zone Up]/ [Zone Down]. Each zone contains a group of channels.
2Select the desired channel using the keys programmed as [Channel Up]/ [Channel Down]. Each channel is programmed with settings for transmitting and receiving.
●The transceiver may have names programmed for zones and channels. The zone name and channel name can contain up to 16 and 14 characters respectively.
5

TRANSMITTING
1Select the desired zone and channel using the keys programmed as [Zone Up]/
[Zone Down] and [Channel Up]/ [Channel Down].
2Press the PTT switch and speak into the microphone. Release the PTT switch to receive.
●The LED indicator lights red while transmitting and green while receiving a signal. This indicator can also be disabled by your dealer.
●For best sound quality at the receiving station, hold the microphone approximately 1.5 inches (3 cm to 4 cm) from your mouth.
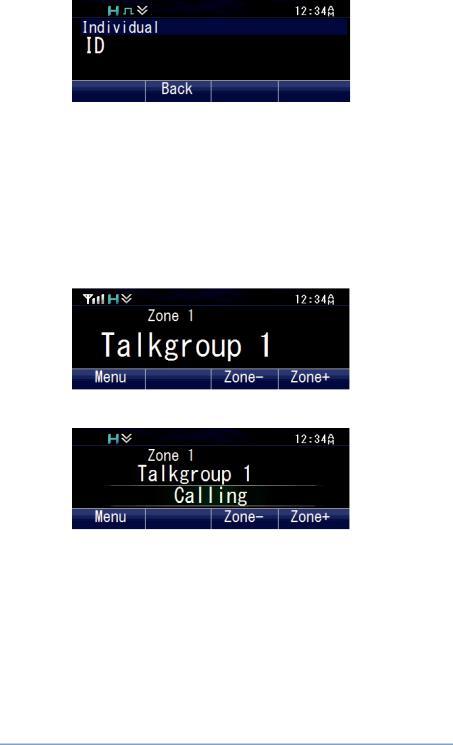
o Making Group Calls (P25 Conventional)
You can select a Talkgroup ID from the list to make a call to those parties on a Conventional channel.
1Press the key programmed as [Group], [Group + Status] or [Group + Short Message] to enter Talkgroup ID Select Mode.
Alternatively, press the key programmed as [Menu] to enter Talkgroup ID Select Mode using the Menu Mode.
●The Talkgroup ID List appears on the display.
6

2Press the [J] and [K] keys to select a Talkgroup ID from the list that has been pre-entered into your transceiver.
3 |
Press the [ ] key to confirm the Talkgroup ID. |
|
● The LCD display will return to the zone and channel screen after the Talkgroup ID is |
4 |
confirmed. |
Press and hold the PTT switch to make the call. |
●Speak into the transceiver as you would during a normal call.
o Making Individual Calls (P25 Conventional)
You can make calls to specific persons on a Conventional channel.
1Press the key programmed as [Individual], [Individual + Status] or [Individual + Short Message] to enter Individual Call Mode.
Alternatively, press the key programmed as [Menu] to enter Individual Call Mode using |
|
the Menu Mode. |
|
● |
The Individual ID List appears on the display. |
2Press the [J] and [K] keys to select a unit ID from the list that has been preentered into your transceiver.
Alternatively, you can enter a unit ID manually.
●Press the [ ] key to enter the manual input mode. Press the [J] and [K] keys to enter
the code. On an optional microphone with keypad, you can enter the code directly. Press the [ ] key to confirm the code after entering the code.
To delete the code entered, press the [ ] key to delete one digit, or press and hold the [ ] key to delete all digits.
7
3Press and hold the PTT switch to make the call.
●Speak into the transceiver as you would during a normal call.
●The LCD display will return to the zone and channel screen after call ends.
o Making Group Calls (P25 Trunking)
You can select a channel with the Talkgroup ID you wanted to call to make a call to those parties on a Trunking channel.
●If the traffic channel is busy, a busy message appears and the busy tone sounds. Release the PTT switch and wait for the channel to become free. When the traffic channel becomes free, a proceed tone sounds.
1Select the configured Talkgroup channel using the keys programmed as
[Channel Up]/ [Channel Down].
2Press and hold the PTT switch to make the call.
●Speak into the transceiver as you would during a normal call.
●The display will alternate between the called Group ID/ name and “Calling”.
●The LCD display will return to the zone and channel screen after call ends.
o Making Individual Calls (P25 Trunking)
You can make calls to specific persons on a Trunking channel.
1Press the key programmed as [Individual], [Individual + Status] or [Individual + Short Message] to enter Individual Call Mode.
Alternatively, press the key programmed as [Menu] to enter Individual Call Mode using the Menu Mode.
8

2Press the [J] and [K] keys to select a unit ID from the list that has been preentered into your transceiver.
●The target unit ID/ name appears on the display.
Alternatively, you can enter a unit ID manually. |
||
● |
Press the [ |
] key to enter the manual input mode. Press the [J] and [K] keys to enter |
|
the code. On an optional microphone with keypad, you can enter the code directly. |
|
|
Press the [ |
] key to confirm the code after entering the code. |
|
To delete the code entered, press the [ ] key to delete one digit, or press and hold |
|
|
the [ ] key to delete all digits. |
|
3Press and hold the PTT switch to make the call.
●Speak into the transceiver as you would during a normal call.
●The display will alternate between the called unit ID/ name and “Calling”.
●The LCD display will return to the zone and channel screen after call ends.
4 To end the call, press the key programmed as [Clear].
o Making Group Calls (NXDN Conventional)
You can select a group ID from the list to make a call to those parties on a Conventional channel.
1Press the key programmed as [Group], [Group + Short Message] or [Group + Status] to enter Group Call Mode.
Alternatively, press the key programmed as [Menu] to enter Group Call Mode using the |
|
Menu Mode. |
|
● |
The group ID list appears on the display. |
9

2Press the [J] and [K] keys to select a Group ID/ name from the list that has been pre-entered into your transceiver.
3Press and hold the PTT switch to make the call.
●Speak into the transceiver as you would during a normal call.
●The LCD display will return to the zone and channel screen after call ends.
o Making Individual Calls (NXDN Conventional)
You can make calls to specific persons.
1Press the key programmed as [Individual], [Individual + Short Message] or
[Individual + Status] to enter Individual Call Mode.
Alternatively, press the key programmed as [Menu] to enter Individual Call Mode using the Menu Mode.
●The ID list appears on the display.
2Press the [J] and [K] keys to select a unit ID from the list that has been preentered into your transceiver.
10
Alternatively, you can enter a unit ID manually. |
|||
● |
Press the [ |
] key to enter the manual input mode. Press the [J] and [K] keys to enter |
|
|
the code. On an optional microphone with keypad, you can enter the code directly. |
||
|
Press the [ |
] key to confirm the code after entering the code. |
|
|
To delete the code entered, press the [ |
] key to delete one digit, or press and hold |
|
|
the [ ] key to delete all digits. |
|
|
3Press and hold the PTT switch to make the call.
●Speak into the transceiver as you would during a normal call.
●The LCD display will return to the zone and channel screen after call ends.
o Making Group Calls (NXDN Trunking)
You can select a channel with the Group ID you wanted to call to make a call to those parties on a Trunking channel.
●If the traffic channel is busy, a busy message appears and the busy tone sounds. Release the PTT switch and wait for the channel to become free. When the traffic channel becomes free, a proceed tone sounds.
1Select the configured Group channel using the keys programmed as [Channel Up]/ [Channel Down].
11

2Press and hold the PTT switch to make the call.
●Speak into the transceiver as you would during a normal call.
●The display will alternate between the called Group ID/ name and “Calling”.
●The LCD display will return to the zone and channel screen after call ends.
o Making Individual Calls (NXDN Trunking)
You can make calls to specific persons.
Operate in the same way as you would for Conventional channel. Refer to “Making Individual Calls (NXDN Conventional)” {p. 10} .
RECEIVING
1 |
Select the desired zone and channel using the keys programmed as [Zone Up]/ |
|
[Zone Down] or [Channel Up]/ [Channel Down]. (If the Scan function has been |
2 |
programmed, you can switch it on or off as desired.) |
When you hear the caller’s voice, readjust the volume as necessary. |
●If signaling has been programmed on the selected channel, you will hear a call only if the signal tone matches the tone set up on your transceiver.
Note:
●Signaling allows your transceiver to code your calls. This will prevent you from listening to unwanted calls. It does not make calls private, it only prevents them from being heard by transceivers set with a different signaling code. Refer to “SIGNALING” {p. 43} for details.
●A ringing tone will sound when receiving a call if the alert tone has been enabled in the Alert Tone setting. For details, consult your dealer.
o Receiving Group Calls (P25)
When you receive a group call on a Conventional channel and the received group ID matches the ID set up on your transceiver, you can hear the caller’s voice.
When you receive a group call on a Trunking channel, the transceiver automatically switches to the traffic channel to receive the call.
12

o Receiving Individual Calls (P25)
When you receive an individual call on a Conventional channel, a ringing tone will sound and the display will show the caller’s ID. To respond to the call, press and hold the PTT switch and speak into the transceiver as you would during a normal call.
When you receive an individual call on a Trunking channel, a ringing tone will sound and the caller’s ID and “Incoming” appear on the display. To receive the call, press the PTT switch. To deny the call, press the key programmed as [Clear]. After receiving the call, you can respond to the call by pressing and holding the PTT switch and speaking into the transceiver as you would during a normal call. After the call is finished, press the key programmed as [Clear] to end the call.
o Receiving Group Calls (NXDN)
When you receive a group call on a Conventional channel and the received group ID matches the ID set up on your transceiver, you can hear the caller’s voice.
When on a Trunking channel, if the Group ID of a received call matches your Group ID, you will hear the call.
o Receiving Individual Calls (NXDN)
When you receive an individual call on a Conventional channel, a ringing tone will sound and the display will show the caller’s ID. To respond to the call, press and hold the PTT switch and speak into the transceiver as you would during a normal call.
When you receive an individual call on a Trunking channel, a ringing tone will sound and the caller’s ID and “Individual” appear on the display. To receive the call, press the PTT switch. To deny the call, press the key programmed as [Clear]. After receiving the call, you can respond to the call by pressing and holding the PTT switch and speaking into the transceiver as you would during a normal call. After the call is finished, press the key programmed as [Clear] to end the call.
13
PROGRAMMABLE FUNCTIONS
Refer to the tables in this section to determine which functions are available for appropriate channels. Function descriptions start on page 23. Please contact your
dealer for further details on these functions.
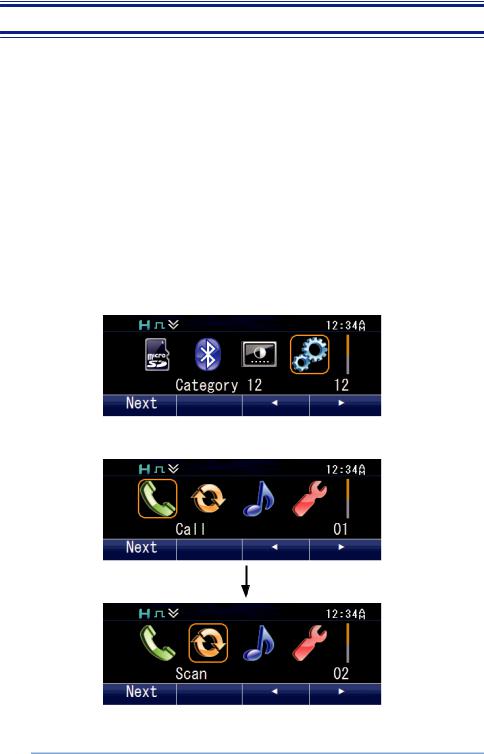
MENU MODE
Many functions on this transceiver are selected or configured through the Menu instead of physical controls. Once you become familiar with the Menu system, you will appreciate the versatility it offers.
Some transceiver keys may already be programmed with functions listed in the Menu. Those functions can be accessed directly by pressing the key. All other functions can still be accessed using the transceiver Menu. Refer to “FUNCTION LIST” {p. 16}
for the available Menu items. o MENU ACCESS
1Press the key programmed as [Menu].
●The category list is shown.
●When there is only one category, the function list is shown (proceed to step 4).
2Press [J]/[K]/[H]/[I] to select a category item.
●On an optional microphone with keypad, you can enter a category number directly.
[ I]
14
3Press the [  ] key to view the function list.
4Press [J]/[K] to select a function item.
●On an optional microphone with keypad, you can enter a function number directly.
5 Press the [ 
●Press the [ ] key to return to the category list.
6Press [J]/[K] to select your desired setting.
●For settings with more than one level, repeat steps 5 and 6.
7Press the [  ] key to set the selected setting and exit Menu mode.
●Press the [  ] key at any time to return to the previous display.
●Press the [  ] key at any time to exit Menu mode.
KEY MODE
Your transceiver operations vary according to the functions that your dealer has programmed onto the transceiver keys. Refer to “FUNCTION LIST” {p. 16} for the
available programmable functions.
15

FUNCTION LIST
PF Key: Functions that can be programmed to the transceiver keys |
||||||||||
Menu: Functions that can be accessed using the transceiver Menu |
||||||||||
Analog Conv.: Channels set up for Analog Conventional Operation |
|
|||||||||
NXDN Conv.: Channels set up for NXDN Conventional Operation |
|
|||||||||
P25 Conv.: Channels set up for P25 Conventional Operation |
|
|
||||||||
LTR Trunking: Channels set up for LTR Trunking Operation |
|
|
||||||||
NXDN Trunking: Channels set up for NXDN Trunking Operation |
|
|
||||||||
P25 Trunking: Channels set up for P25 Trunking Operation |
|
|
||||||||
p: |
Available |
|
|
|
|
|
|
|
|
|
N/A: |
Not Available |
|
|
|
|
|
|
|
|
|
Function |
Menu |
KeyPF |
Menu |
Analog Conv. |
NXDN Conv. |
P25 Conv. |
LTR Trunking |
NXDN Trunking |
P25 Trunking |
|
Display |
|
|
|
|
|
|
|
|
||
|
|
|
|
|
|
|
|
|
||
|
|
|
|
|
|
|
|
|
|
|
None |
- |
p |
N/A |
p |
p |
p |
p |
p |
p |
|
2-tone |
2-tone |
p |
p |
p |
p |
p |
N/A |
N/A |
N/A |
|
ANR Preset |
ANR Preset |
N/A |
p |
p |
p |
p |
p |
p |
p |
|
Audio Profile |
Audio Profile |
N/A |
p |
p |
p |
p |
p |
p |
p |
|
Auto Dimmer |
Auto Dimmer |
N/A |
p |
p |
p |
p |
p |
p |
p |
|
Auto Telephone |
Auto |
p |
p |
N/A |
N/A |
N/A |
p |
N/A |
N/A |
|
Telephone |
||||||||||
|
|
|
|
|
|
|
|
|
||
Autodial |
Auto Dial |
p |
p |
p |
p |
N/A |
p |
p |
p |
|
Autodial |
Auto Dial Prog |
p |
p |
p |
p |
p |
p |
p |
p |
|
Programming |
||||||||||
|
|
|
|
|
|
|
|
|
||
AUX A |
AUX A |
p |
p |
p |
p |
p |
p |
p |
p |
|
AUX B |
AUX B |
p |
p |
p |
p |
p |
p |
p |
p |
|
AUX C |
AUX C |
p |
p |
p |
p |
p |
p |
p |
p |
|
AUX Output ID 1 |
- |
p |
N/A |
p |
p |
p |
p |
p |
p |
|
AUX Output ID 2 |
- |
p |
N/A |
p |
p |
p |
p |
p |
p |
|
AUX Output ID 3 |
- |
p |
N/A |
p |
p |
p |
p |
p |
p |
|
Bluetooth |
Bluetooth |
p |
p |
p |
p |
p |
p |
p |
p |
|
Bluetooth |
- |
|
N/A |
|
|
|
|
|
|
|
Connect/ |
p |
p |
p |
p |
p |
p |
p |
|||
Disconnect |
|
|
|
|
|
|
|
|
|
|
Bluetooth Device |
BT Device |
N/A |
p |
p |
p |
p |
p |
p |
p |
|
Bluetooth |
Discoverable |
N/A |
p |
p |
p |
p |
p |
p |
p |
|
Discoverable |
||||||||||
|
|
|
|
|
|
|
|
|
||
Bluetooth |
Bluetooth Info |
N/A |
p |
p |
p |
p |
p |
p |
p |
|
Information |
||||||||||
|
|
|
|
|
|
|
|
|
||
Bluetooth Speaker |
BT Speaker |
p |
p |
p |
p |
p |
p |
p |
p |
|
Broadcast |
Broadcast |
p |
p |
N/A |
N/A |
N/A |
N/A |
p |
N/A |
|
Call 1 ~ 6 |
- |
p |
N/A |
p |
p |
p |
p |
p |
N/A |
|
Call Response |
- |
p |
N/A |
N/A |
p |
N/A |
N/A |
p |
p |
|
16

Function |
Menu |
PF Key |
Menu |
Analog Conv. |
NXDN Conv. |
P25 Conv. |
LTR Trunking |
NXDN Trunking |
P25 Trunking |
|
Display |
||||||||||
|
||||||||||
|
|
|||||||||
Channel Down |
- |
p |
N/A |
p |
p |
p |
p |
p |
p |
|
Channel Entry |
- |
p |
N/A |
p |
p |
p |
p |
p |
p |
|
Channel |
ChInfo |
p |
N/A |
p |
p |
N/A |
N/A |
N/A |
N/A |
|
Information |
||||||||||
|
|
|
|
|
|
|
|
|
||
Channel Recall |
- |
p |
N/A |
p |
p |
p |
p |
p |
p |
|
Channel Up |
- |
p |
N/A |
p |
p |
p |
p |
p |
p |
|
Clear |
- |
p |
N/A |
N/A |
p |
N/A |
p |
p |
p |
|
Clock |
Clock |
p |
p |
p |
p |
p |
p |
p |
p |
|
Clock Adjustment |
Clock Adjust |
p |
p |
p |
p |
p |
p |
p |
p |
|
Color Scheme |
Color Scheme |
N/A |
p |
p |
p |
p |
p |
p |
p |
|
CW Message |
- |
p |
N/A |
N/A |
p |
N/A |
N/A |
N/A |
N/A |
|
Direct Channel 1 ~ |
- |
p |
N/A |
p |
p |
p |
p |
p |
p |
|
5 |
||||||||||
|
|
|
|
|
|
|
|
|
||
Direct Channel 1 ~ |
Direct Ch1 Sel |
p |
p |
p |
p |
p |
p |
p |
p |
|
5 Select |
|
|
|
|
|
|
|
|
|
|
Display Format |
Display |
p |
p |
p |
p |
p |
p |
p |
p |
|
Format |
||||||||||
|
|
|
|
|
|
|
|
|
||
Eject SD Card |
Eject Card |
p |
p |
p |
p |
p |
p |
p |
p |
|
Emergency *1 |
- |
p |
N/A |
p |
p |
p |
p |
p |
p |
|
External Mic |
Ext Mic Sense |
N/A |
p |
p |
p |
p |
p |
p |
p |
|
Sense |
||||||||||
|
|
|
|
|
|
|
|
|
||
External Speaker |
External SP |
p |
p |
p |
p |
p |
p |
p |
p |
|
Fixed Volume |
Fixed Volume |
p |
p |
p |
p |
p |
p |
p |
p |
|
Format SD Card |
Format Card |
p |
p |
p |
p |
p |
p |
p |
p |
|
Function |
- |
p |
N/A |
p |
p |
p |
p |
p |
p |
|
GPS |
GPS |
p |
p |
p |
p |
p |
p |
p |
p |
|
GPS/ Bluetooth |
GPS/BT |
N/A |
p |
p |
p |
p |
p |
p |
p |
|
Reset |
Reset |
|||||||||
|
|
|
|
|
|
|
|
|||
GPS Position |
GPS Pos Disp |
p |
p |
p |
p |
p |
p |
p |
p |
|
Display |
||||||||||
|
|
|
|
|
|
|
|
|
||
Group *2 |
Group |
p |
p |
p |
p |
p |
p |
N/A |
N/A |
|
Group + Short |
Group+SDM |
p |
p |
p |
p |
p |
p |
p |
N/A |
|
Message *2*3 |
||||||||||
|
|
|
|
|
|
|
|
|
||
Group + Status |
Group+Status |
p |
p |
p |
p |
p |
p |
p |
N/A |
|
*2*3 |
||||||||||
|
|
|
|
|
|
|
|
|
||
Group ID/ Channel |
- |
p |
N/A |
p |
p |
p |
p |
p |
p |
|
Entry |
||||||||||
|
|
|
|
|
|
|
|
|
||
High Transmit |
High TX |
p |
p |
p |
p |
p |
p |
p |
p |
|
Power |
Power |
|
|
|
|
|
|
|
|
|
Home Channel |
- |
p |
N/A |
p |
p |
p |
p |
p |
p |
17

Function |
Menu |
PF Key |
Menu |
Analog Conv. |
NXDN Conv. |
P25 Conv. |
LTR Trunking |
NXDN Trunking |
P25 Trunking |
|
Display |
||||||||||
|
||||||||||
|
|
|||||||||
Home Channel |
Home Ch Sel |
p |
p |
p |
p |
p |
p |
p |
p |
|
Select |
||||||||||
|
|
|
|
|
|
|
|
|
||
Horn Alert |
Horn Alert |
p |
p |
p |
p |
p |
p |
p |
p |
|
Individual *2 |
Individual |
p |
p |
p |
p |
p |
p |
p |
p |
|
Individual + Short |
Indiv+SDM |
p |
p |
p |
p |
p |
p |
p |
p |
|
Message *2*4 |
||||||||||
|
|
|
|
|
|
|
|
|
||
Individual + Status |
Indiv+Status |
p |
p |
p |
p |
p |
p |
p |
p |
|
*2*4 |
||||||||||
|
|
|
|
|
|
|
|
|
||
Intercom |
Intercom |
p |
p |
p |
p |
p |
p |
p |
p |
|
IP Address |
IP Address |
N/A |
p |
N/A |
N/A |
N/A |
N/A |
N/A |
p |
|
Key Delete |
Key Delete |
p |
p |
p |
p |
p |
p |
p |
p |
|
Key Lock |
- |
p |
N/A |
p |
p |
p |
p |
p |
p |
|
Keyset *5 |
Keyset |
p |
p |
N/A |
N/A |
p |
N/A |
N/A |
p |
|
Language |
Language |
N/A |
p |
p |
p |
p |
p |
p |
p |
|
LCD Brightness |
LCD |
p |
p |
p |
p |
p |
p |
p |
p |
|
Brightness |
||||||||||
|
|
|
|
|
|
|
|
|
||
Lone Worker |
Lone Worker |
p |
p |
p |
p |
p |
p |
p |
p |
|
Low Transmit |
Low TX Power |
p |
p |
p |
p |
p |
p |
p |
p |
|
Power |
||||||||||
|
|
|
|
|
|
|
|
|
||
Maintenance |
Maintenance |
p |
p |
p |
p |
p |
p |
p |
p |
|
Master Volume |
Master |
p |
p |
p |
p |
p |
p |
p |
p |
|
Control |
Volume |
|
|
|
|
|
|
|
|
|
Medium Transmit |
Med TX |
N/A |
p |
p |
p |
p |
p |
p |
p |
|
Power |
Power |
|||||||||
|
|
|
|
|
|
|
|
|||
Menu |
- |
p |
N/A |
p |
p |
p |
p |
p |
p |
|
Mic Sense |
Mic Sense |
N/A |
p |
p |
p |
p |
p |
p |
p |
|
Microphone Type |
Mic Type |
N/A |
p |
p |
p |
p |
p |
p |
p |
|
Monitor |
Monitor |
p |
p |
p |
p |
p |
p |
p |
p |
|
Monitor |
- |
p |
N/A |
p |
p |
p |
p |
p |
p |
|
Momentary |
||||||||||
|
|
|
|
|
|
|
|
|
||
Multi RF Deck |
Multi View |
p |
p |
p |
p |
p |
p |
p |
p |
|
View |
||||||||||
|
|
|
|
|
|
|
|
|
||
Operator |
OST |
p |
p |
p |
N/A |
N/A |
N/A |
N/A |
N/A |
|
Selectable Tone |
||||||||||
|
|
|
|
|
|
|
|
|
||
OST Down |
- |
p |
N/A |
p |
N/A |
N/A |
N/A |
N/A |
N/A |
|
OST List |
OST List |
p |
p |
p |
N/A |
N/A |
N/A |
N/A |
N/A |
|
OST Up |
- |
p |
N/A |
p |
N/A |
N/A |
N/A |
N/A |
N/A |
|
Playback |
Playback |
p |
p |
p |
p |
p |
p |
p |
p |
|
Priority-channel |
Pri Ch Select |
p |
p |
p |
p |
p |
N/A |
p |
p |
|
Select |
||||||||||
|
|
|
|
|
|
|
|
|
18

Function |
Menu |
PF Key |
Menu |
Analog Conv. |
NXDN Conv. |
P25 Conv. |
LTR Trunking |
NXDN Trunking |
P25 Trunking |
|
Display |
||||||||||
|
||||||||||
|
|
|||||||||
Public Address |
Public |
p |
p |
p |
p |
p |
p |
p |
p |
|
Address |
||||||||||
|
|
|
|
|
|
|
|
|
||
Radio Check |
Radio Check |
N/A |
p |
p |
N/A |
N/A |
p |
N/A |
N/A |
|
Radio Inhibit |
Inhibit |
N/A |
p |
p |
N/A |
N/A |
p |
N/A |
N/A |
|
Radio Uninhibit |
Uninhibit |
N/A |
p |
p |
N/A |
N/A |
p |
N/A |
N/A |
|
Regroup Request |
Regroup Req |
p |
p |
N/A |
N/A |
N/A |
N/A |
N/A |
p |
|
Rekey Request *5 |
Rekey |
p |
p |
N/A |
N/A |
p |
N/A |
N/A |
p |
|
Request |
||||||||||
|
|
|
|
|
|
|
|
|
||
RF Deck 1 |
- |
p |
N/A |
p |
p |
p |
p |
p |
p |
|
RF Deck 2 |
- |
p |
N/A |
p |
p |
p |
p |
p |
p |
|
RF Deck 3 |
- |
p |
N/A |
p |
p |
p |
p |
p |
p |
|
RF Deck Select |
RF Deck |
p |
p |
p |
p |
p |
p |
p |
p |
|
Select |
||||||||||
|
|
|
|
|
|
|
|
|
||
RX Audio |
RX EQ High |
N/A |
p |
p |
p |
p |
p |
p |
p |
|
Equalizer (High) |
||||||||||
|
|
|
|
|
|
|
|
|
||
RX Audio |
RX EQ High |
|
|
|
|
|
|
|
|
|
Equalizer (High |
N/A |
p |
p |
p |
p |
p |
p |
p |
||
Mid |
||||||||||
Midrange) |
|
|
|
|
|
|
|
|
||
|
|
|
|
|
|
|
|
|
||
RX Audio |
RX EQ |
|
|
|
|
|
|
|
|
|
Equalizer |
N/A |
p |
p |
p |
p |
p |
p |
p |
||
Midrange |
||||||||||
(Midrange) |
|
|
|
|
|
|
|
|
||
|
|
|
|
|
|
|
|
|
||
RX Audio |
RX EQ Low |
|
|
|
|
|
|
|
|
|
Equalizer (Low |
N/A |
p |
p |
p |
p |
p |
p |
p |
||
Mid |
||||||||||
Midrange) |
|
|
|
|
|
|
|
|
||
|
|
|
|
|
|
|
|
|
||
RX Audio |
RX EQ Low |
N/A |
p |
p |
p |
p |
p |
p |
p |
|
Equalizer (Low) |
||||||||||
|
|
|
|
|
|
|
|
|
||
RX Auto Gain |
RX AGC |
N/A |
p |
p |
p |
p |
p |
p |
p |
|
Control |
||||||||||
|
|
|
|
|
|
|
|
|
||
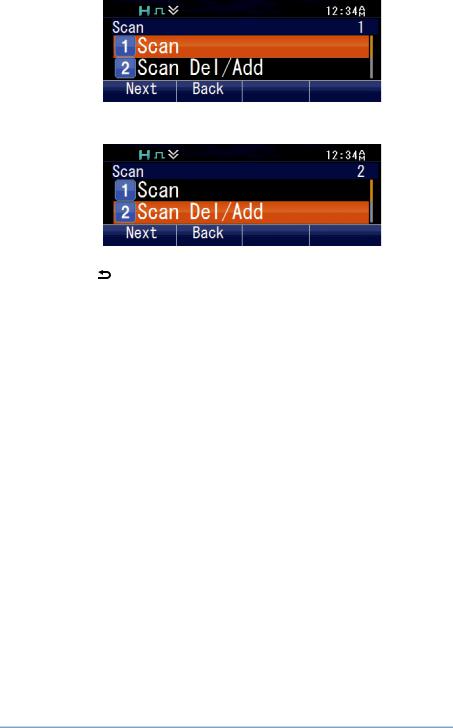
Scan |
Scan |
p |
p |
p |
p |
p |
p |
p |
p |
|
Scan Delete/ Add |
Scan Del/Add |
p |
p |
p |
p |
p |
p |
p |
p |
|
Scan Normal |
Scan Normal |
p |
p |
p |
p |
p |
p |
p |
p |
|
Scan Program |
Scan Program |
p |
p |
p |
p |
p |
p |
p |
p |
|
Scrambler/ |
Scram/Encryp |
p |
p |
p |
p |
p |
p |
p |
p |
|
Encryption |
||||||||||
|
|
|
|
|
|
|
|
|
||
Scrambler/ |
Scram/Enc |
p |
p |
p |
p |
p |
p |
p |
p |
|
Encryption Code |
Code |
|
|
|
|
|
|
|
|
|
Send the GPS |
Send GPS |
p |
p |
p |
p |
p |
p |
p |
p |
|
Data |
Data |
|
|
|
|
|
|
|
|
|
Short Message |
Short |
p |
p |
p |
p |
N/A |
p |
p |
N/A |
|
Message |
||||||||||
|
|
|
|
|
|
|
|
|
||
Site Down |
- |
p |
N/A |
N/A |
N/A |
N/A |
N/A |
p |
N/A |
19

Function |
Menu |
PF Key |
Menu |
Analog Conv. |
NXDN Conv. |
P25 Conv. |
LTR Trunking |
NXDN Trunking |
P25 Trunking |
|
Display |
||||||||||
|
||||||||||
|
|
|||||||||
Site Lock |
Site Lock |
p |
p |
N/A |
N/A |
N/A |
N/A |
p |
p |
|
Site Number |
Site No. |
N/A |
p |
N/A |
N/A |
N/A |
N/A |
p |
p |
|
Site Select |
Site |
p |
p |
N/A |
N/A |
N/A |
N/A |
p |
N/A |
|
Site Up |
- |
p |
N/A |
N/A |
N/A |
N/A |
N/A |
p |
N/A |
|
Speaker 1-2 Mute |
Speaker1- |
p |
p |
p |
p |
p |
p |
p |
p |
|
2Mute |
||||||||||
|
|
|
|
|
|
|
|
|
||
Speaker Type |
Speaker Type |
N/A |
p |
p |
p |
p |
p |
p |
p |
|
Squelch Level |
Squelch Level |
p |
p |
p |
N/A |
N/A |
N/A |
N/A |
N/A |
|
Squelch Off |
Squelch Off |
p |
p |
p |
p |
p |
p |
p |
p |
|
Squelch Off |
- |
p |
N/A |
p |
p |
p |
p |
p |
p |
|
Momentary |
||||||||||
|
|
|
|
|
|
|
|
|
||
Stack |
Stack |
p |
p |
p |
p |
p |
p |
p |
p |
|
Status |
Status |
p |
p |
p |
p |
N/A |
p |
p |
p |
|
Surveillance |
Surveillance |
p |
p |
p |
p |
p |
p |
p |
p |
|
System Search |
System |
p |
p |
N/A |
N/A |
N/A |
N/A |
p |
p |
|
Search |
||||||||||
|
|
|
|
|
|
|
|
|
||
Tactical Zone |
- |
p |
N/A |
p |
N/A |
p |
N/A |
N/A |
N/A |
|
Talk Around |
Talk Around |
p |
p |
p |
p |
p |
p |
N/A |
N/A |
|
Talkgroup Reset |
Talkgroup Rst |
p |
p |
N/A |
N/A |
p |
N/A |
N/A |
N/A |
|
Telephone |
- |
p |
N/A |
N/A |
N/A |
N/A |
p |
N/A |
N/A |
|
Disconnect |
||||||||||
|
|
|
|
|
|
|
|
|
||
Transceiver |
Password |
p |
p |
p |
p |
p |
p |
p |
p |
|
Password |
||||||||||
|
|
|
|
|
|
|
|
|
||
TX Audio Equalizer |
TX EQ High |
N/A |
p |
p |
p |
p |
p |
p |
p |
|
(High) |
|
|
|
|
|
|
|
|
|
|
TX Audio Equalizer |
TX EQ High |
N/A |
p |
p |
p |
p |
p |
p |
p |
|
(High Midrange) |
Mid |
|||||||||
|
|
|
|
|
|
|
|
|||
TX Audio Equalizer |
TX EQ |
N/A |
p |
p |
p |
p |
p |
p |
p |
|
(Midrange) |
Midrange |
|||||||||
|
|
|
|
|
|
|
|
|||
TX Audio Equalizer |
TX EQ Low |
N/A |
p |
p |
p |
p |
p |
p |
p |
|
(Low Midrange) |
Mid |
|||||||||
|
|
|
|
|
|
|
|
|||
TX Audio Equalizer |
TX EQ Low |
N/A |
p |
p |
p |
p |
p |
p |
p |
|
(Low) |
|
|
|
|
|
|
|
|
|
|
TX Auto Gain |
TX AGC |
N/A |
p |
p |
p |
p |
p |
p |
p |
|
Control |
||||||||||
|
|
|
|
|
|
|
|
|
||
Unselected RF |
Unsel Deck |
p |
p |
p |
p |
p |
p |
p |
p |
|
Deck Speaker |
SP |
|
|
|
|
|
|
|
|
|
Unselected |
Unsel Deck |
N/A |
p |
p |
p |
p |
p |
p |
p |
|
Speaker Offset |
Vol |
|||||||||
|
|
|
|
|
|
|
|
|||
Volume Down |
- |
p |
N/A |
p |
p |
p |
p |
p |
p |
|
Volume Up |
- |
p |
N/A |
p |
p |
p |
p |
p |
p |
20
|
Function |
Menu |
KeyPF |
Menu |
Analog Conv. |
NXDN Conv. |
P25 Conv. |
LTR Trunking |
NXDN Trunking |
P25 Trunking |
|
Display |
|
|
|
|
|
|
|
|
|
|
|
|
|
|
|
|
|
|
|
|
|
|
|
|
|
|
|
|
|
|
|
VOX |
VOX Level |
p |
p |
p |
p |
p |
N/A |
N/A |
N/A |
|
VOX Function |
VOX |
p |
p |
p |
p |
p |
N/A |
N/A |
N/A |
|
Zeroize |
Zeroize |
p |
p |
p |
p |
p |
p |
p |
p |
|
Zone Delete/ Add |
Zone Del/ Add |
p |
p |
p |
p |
p |
p |
N/A |
N/A |
|
Zone Down |
- |
p |
N/A |
p |
p |
p |
p |
p |
p |
|
Zone Up |
- |
p |
N/A |
p |
p |
p |
p |
p |
p |
|
*1 |
Emergency can be programmed only on the Auxiliary (orange) key. |
|
|
|
||||||
*2 |
Group, Group + Short Message, Group + Status, Individual, Individual + Short Message and |
|||||||||
*3 |
Individual + Status function as Selcall in Fleetsync systems. |
|
|
|
|
|||||
In P25 Conventional systems, Group + Short Message and Group + Status function in the same |
||||||||||
*4 |
manner as Group. Sending of short messages and status messages is not supported. |
|
||||||||
In P25 Conventional and P25 Trunking systems, Individual + Short Message and Individual + Status |
||||||||||
|
function in the same manner as Individual. Sending of short messages and status messages is not |
|||||||||
*5 |
supported. |
|
|
|
|
|
|
|
|
|
Keyset and Rekey Request can be used when set as P25 OTAR. |
|
|
|
|
||||||
21

CHARACTER ENTRY
While in the character entry screen, you can use the following two methods to enter the characters:
o Pressing the [J]/[K] keys
Press [J]/[K] to cycle the characters from A ~ Z, a ~ z, 0 ~ 9, and a space (default settings).
You can also assign a character to an optional key and later press that key to recall the assigned character: A ~ Z, a ~ z, 0 ~ 9, or a space and characters.
●You can enter characters using the [J]/[K] keys when the keys function as character input keys. When the keys function as line up/ down keys, it is not possible to enter a character.
o Using the keypad (Optional microphone with keypad only)
Press the keypad keys to enter characters as shown in the table below.
You can press the [ ] key repeatedly to switch the input mode (upper case B lower case B numbers B back to beginning).
Keypad |
Character Cycle (Upper Case) |
Character Cycle (Lower Case) |
1 |
@ # " ( ) ! $ _ |
@ # " ( ) ! $ _ |
2 |
A B C |
a b c |
3 |
D E F |
d e f |
4 |
G H I |
g h i |
5 |
J K L |
j k l |
6 |
M N O |
m n o |
7 |
P Q R S |
p q r s |
8 |
T U V |
t u v |
9 |
W X Y Z |
w x y z |
0 |
(space) . , ? / ' & |
(space) . , ? / ' & |
22
Loading...