


531824-1EN_A


 Quick Start Guide
Visit Humminbird.com and |
Register your Humminbird® |
Register Your Humminbird® |
|
Login or Create a new account
NOTE: If your model does not have a card slot, you can use an optional-purchase PC Connect Cable.
Start-Up Options Menu
798c SI Chart View with Navionics® Cartography
Set up an online account so that you will receive the latest Humminbird® news. If your model is upgradeable, you can also access software upgrades from your account.
1.Register: Go to our Web site at humminbird.com, and click My Account. Create a new account. If you already have an account, log in and click Register a Product.
2.Download Software: Install a formatted SD memory card into a card reader connected to your PC. From
My Account\My Profile\My Equipment, click the software file name [unit name (version #)] to save the software to the SD memory card. Follow the on-screen instructions.
3.Upgrade: Insert the SD card into the control head card slot and power on the unit. Follow the on-screen instructions.
Power On
1.Press the POWER/LIGHT key.
2.On the Water: If a transducer is attached to the control head, your unit will start Normal mode automatically.
Simulator: If a transducer is not attached to the control head, select Simulator to learn how to use the unit and save your settings. When the title screen is displayed, press the MENU key and then select Simulator.
Select a Chart (chart-capable models only)
Humminbird® Combo models include a built-in map. There are also some Humminbird® models that are compatible with Navionics® and/or LakeMaster® chart cards.
1.Open the Main Menu and select Chart tab > Chart Select or Navigation tab > Chart Select. NVB units, select Chart tab > NVB Chart Preference.
2.Select a Chart Source: Auto (the unit automatically selects the best chart to display), Contour XD, UniMap, Chart Card, Left Chart Card, or Right Chart Card; Default = Auto. Menu options vary by model.


 Menus
Menus
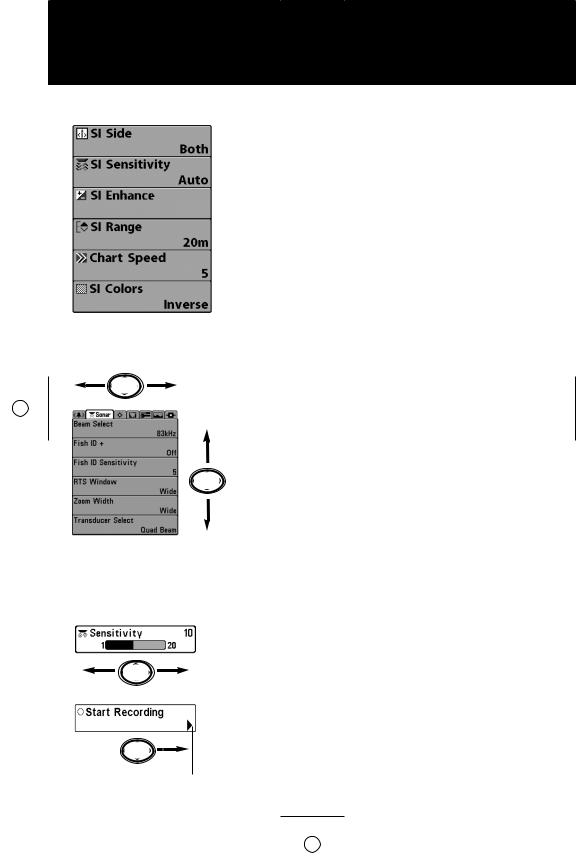
X-Press™ Menu
Use the 4-WAY Cursor Control key with the Menu System
Main Menu
Press the LEFT or RIGHT Cursor key to Change or Activate a Setting
The right arrow indicates to press the RIGHT Cursor key.
1. Open a Menu
X-Press™ Menu: Press the MENU key once.
The X-Press™ Menu displays frequently-used menu options that are related to the current view and operation mode.
Main Menu: Press the MENU key twice.
The Main Menu is divided into tabbed categories that vary by model. They are typically as follows: Alarms, Sonar, Navigation, Charts, Setup, Views, and Accessories.
2. Choose a Menu Option
Press the arrows on the 4-WAY Cursor Control key to browse the menu system.
X-Press™ Menu: Press the UP or DOWN Cursor key to select a menu option.
Main Menu: Press the RIGHT or LEFT Cursor key to select a tab, and then press the UP or DOWN Cursor key to select a menu option.
User Mode: Some menu options will only appear in the menu system if the control head User Mode is set to Advanced. Select Main Menu > Setup tab > User Mode. Select Normal or Advanced.
3. Set or Activate a Menu Setting
Set: Press the RIGHT or LEFT Cursor key to set the menu setting.
OR
Activate: If there is a right arrow on the menu option, press the RIGHT Cursor key to activate the setting or start the selected operation. This menu type might also open a submenu.
Close: Press the EXIT key.
 Loading...