


MTM 0821 F
English
Operating Instructions
2-DOOR FRIDGE
Contents
Operating Instructions, 1
Assistance,2
Description of the appliance, 3
Installation, 5
Start-up and use, 6
Maintenance and care, 7
Precautions and tips, 17
Troubleshooting, 8
 ЕллзнйкЬ
ПдзгЯет гйб фз чсЮуз
ШХГЕЙП ДЙРПСФП
Ресйечьменб
ПдзгЯет гйб фз чсЮуз, 1 ФечнйкЮ ХрпуфЮсйоз,2 РесйгсбцЮ фзт ухукехЮт, 3 ЕгкбфЬуфбуз, 9 ЕккЯнзуз кбй чсЮуз, 9
УхнфЮсзуз кбй цспнфЯдб, 10 РспцхлЬоейт кбй ухмвпхлЭт, 11 БнщмблЯет кбй лэуейт, 12
Türkçe
Kullaným talimatlarý
Iki kapýlý buzdolabý
Ýçindekiler
Kullaným talimatlarý, 1 Teknik Servis, 2 Cihazýn tanýmý, 4
Kapýlarýn açýlýþ yönünün deðiþtirilmesi, 4 Montaj, 13
Çalýþtýrma ve kullaným,14 Bakým ve özen, 15 Önlemler ve öneriler, 15 Arýzalar ve onarýmlar, 16
Assistance
Before calling for Assistance:
•Check if the malfunction can be solved on your own (see Troubleshooting).
•If after all the checks, the appliance still does not operate or the problem persists, call the nearest Service Centre
Communicating:
•type of malfunction
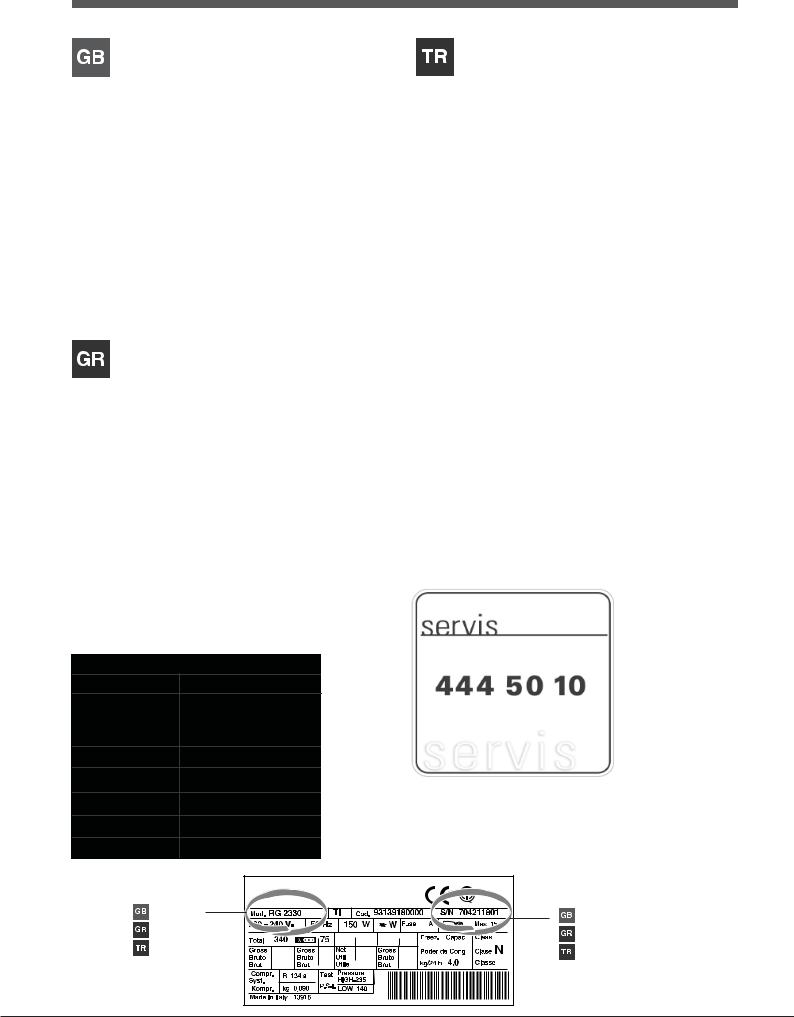
•appliance model (Mod.)
•serial number (S/N)
This information can be found on the data plate located on the bottom left side of the refrigerator compartment.
Never call on unauthorized technicians and always refuse spare parts which are not originals.
Teknik Servis
Teknik Servis ile irtibata geçmeden önce:
•Servise baþvurmadan çözülebilecek bir arýza olup olmadýðýný kontrol ediniz (Arýza ve Onarým bölümüne bakýnýz).
•Sonucun olumsuz olmasý durumunda, en yakýn Teknik Servis ile irtibata geçiniz.
Aþaðýdaki bilgileri bildiriniz:
•arýza tipi
•cihazýn modeli (Mod.)
•seri numarasý (S/N)
Bu bilgiler, soðutucu bölmesi içinde aþaðýda solda bulunan teknik veriler etiketi üzerinde bulunmaktadýr.
Kesinlikle sadece yetkili teknik elemanlara baþvurunuz ve her zaman orijinal yedek parçalarý kullanýnýz.
ФечнйкЮ ХрпуфЮсйоз
Рсйн брехихниеЯфе уфзн ФечнйкЮ ХрпуфЮсйоз:
•ВевбйщиеЯфе бн з бнщмблЯб мрпсеЯ нб бнфймефщрйуфеЯ бхфьнпмб (влЭре БнщмблЯет кбй лэуейт).
•Бн рбсЬ фпхт ьлпхт елЭгчпхт, з ухукехЮ ден лейфпхсгеЯ кбй фп рсьвлзмб рпх дйбрйуфюубфе ухнечЯжей нб хцЯуфбфбй, кблЭуфе фп рлзуйЭуфесп КЭнфсп ФечнйкЮт ХрпуфЮсйозт.
ГнщуфпрпйЮуфе:
•фпн фэрп фзт бнщмблЯбт
•фп мпнфЭлп фзт мзчбнЮт (Mod.)
•фпн бсйимь уейсЬт (S/N)
Пй рлзспцпсЯет бхфЭт всЯукпнфбй уфзн фбмрелЯфуб чбсбкфзсйуфйкюн уфп дйбмЭсйумб шхгеЯпх кЬфщ бсйуфесЬ.
Мзн рспуфсЭчефе рпфЭ уе мз еопхуйпдпфзмЭнпхт фечнйкпэт кбй нб бснеЯуие рЬнфб фзн егкбфЬуфбуз бнфбллбкфйкюн мз бхиенфйкюн.
Teknik Bilgiler
HOTPOINT-ARISTON
MTM 0821 F
T
309 kWh/y
A+
58
284lt
INDESIT COMPANY BEYAZ EÞYA PAZARLAMA A.Þ.
Karahasan Sok. No:11 Balmumcu 34349 Beþiktaþ/Ýstanbul
TEL: (+90) 212 355 53 00
FAKS: (+90) 212 212 95 59 WEB: www.indesit.com.tr
INDESIT COMPANY BEYAZ EÞYA SANAYÝ VE TÝCARET A.Þ.
Organize Sanayi Bölgesi 45030 / MANÝSA TEL: (+90) 236 233 19 05 – 233 18 20 FAKS: (+90) 236 233 16 52
- model |
- serial number |
|
- мпнфЭлп |
- бсйимьт уейсЬт |
|
- model |
||
- seri numarasý |
2
Description of the appliance
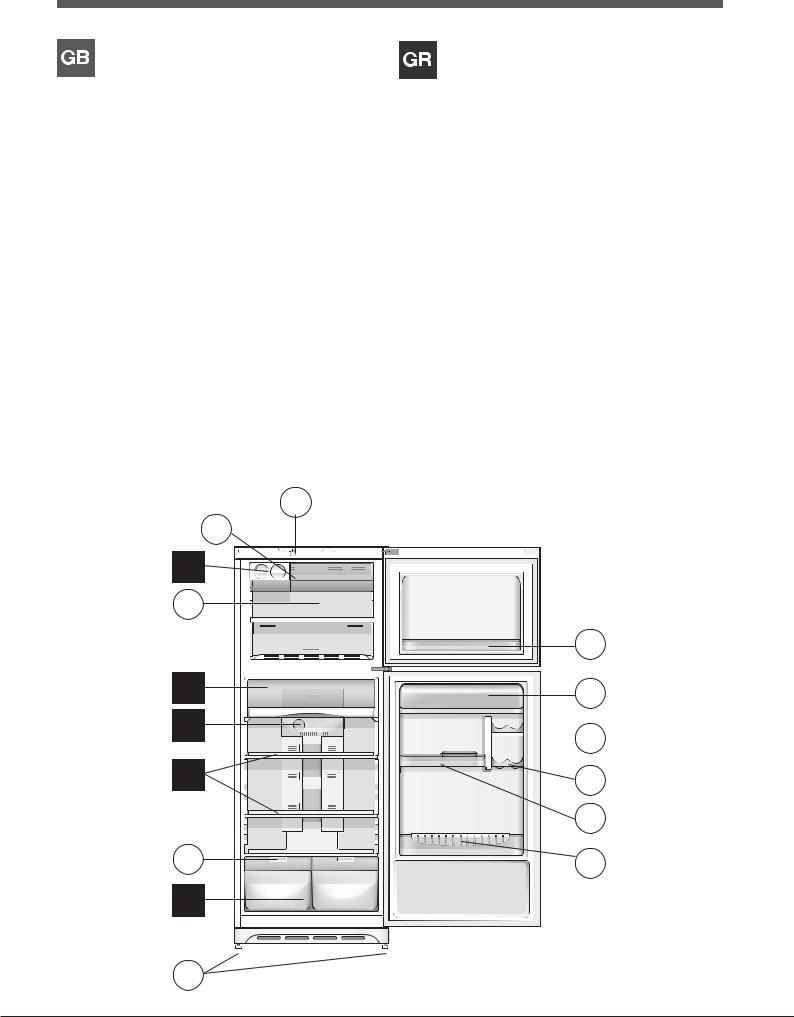
Overall view
The instructions contained in this manual are applicable to different model refrigerators. The diagrams may not directly represent the appliance purchased. For more complex features, consult the following pages.
1Levelling FEET
2FRUIT and VEGETABLE bin
3MOISTIRE adjusted
4SHELVES*
5REFRIGERATOR OPERATION Knob
6FRESH BOX Compartment
7FREEZER and STORAGE compartment
8ICE DEVICE*
9FAST FREEZER compartment*
10FREEZER OPERATION Knob
11Removable multipurpose SHELVES•
12Removable lidded shelf with EGG TRAY*
13BUTTER dish*
14BEVERAGE CAN shelves*
15Removable multipurpose SHELVES.
16BOTTLE shelf
*Varies by number and/or position,Available only on certain models.
10 |
9 |
8 |
7 |
6 |
5 |
4 |
3 |
2 |
1 |
РесйгсбцЮ фзт ухукехЮт
УхнплйкЮ ейкьнб
Пй пдзгЯет чсЮузт йучэпхн гйб дйЬцпсб мпнфЭлб прьфе мрпсеЯ з ейкьнб нб рбспхуйЬжей лерфпмЭсейет дйбцпсефйкЭт уе учЭуз ме екеЯнет фзт ухукехЮт рпх брпкфЮубфе. З ресйгсбцЮ фщн рлЭпн уэниефщн бнфйкеймЭнщн всЯукефбй уфйт бкьлпхиет уелЯдет.
1РПДБСБКЙ сэимйузт
2ЛекЬнз ЦСПХФЩН êáé ЛБЧБНЙКЩН
3Кблэммбфб цспхфплекбнюн ме схимйуфЭт хгсбуЯбт
4ÑÁÖÉ*
5ЕрйлпгЭбт ЛЕЙФПХСГЙБУ ШХГЕЙПХ
6ИЬлбмпт FRESH BOX
7ИЬлбмпт КБФБШХОЗУ êáé УХНФЗСЗУЗУ
8ICEDEVICE*
9FAST FREEZER*
10ЕрйлпгЭбт ЛЕЙФПХСГЙБУ КБФБШХКФЗ
11Брпурюменп сбцЬкй ГЙБ БНФЙКЕЙМЕНБ*
12ДПЧЕЙП ВПХФХСПХ*
13бхгпиЮкз*
14СбцЬкй КПХФЙЩН БНБШХКФЙКЩН*
15Брпурюменп сбцЬкй гйб БНФЙКЕЙМЕНБ
16СбцЬкй ЦЙБЛЩН
*РпйкЯлпхн щт рспт фпн бсйимь Ю/кбй фз иЭуз,ХрЬсчей мьнп уе псйумЭнб мпнфЭлб.
11
12
 13
13
14
15
16
3

Cihazýn tanýmý
Genel görünüm
Kullaným talimatlarý birkaç model için geçerli olduðu için þekil satýn aldýðýnýz cihazda olmayandeðiþik ayrýntýlarý gösterebilir. Sonraki sayfalarda en karýþýk cisimler açýklanmýþtýr.
1AYAK
2MEYVE ve SEBZE çekmecesi
3Rutubet ayarý
4RAF*
5SOÐUTUCU KONTROL ayar düðmesi
6FRESH BOX bölümü
7DONDURMA ve SAKLAMA bölmesi
8ICE DEVICE bölmesi*
9Hýzlý dondurma iþlemi için FAST FREEZE 10DONDURUCU KONTROL ayar düðmesi
11Çýkarýlabilen KAPI RAFI*
12Çýkarýlabilen KAPAKLI raf
13Tereyað kutusu*
14KUTU MEÞRUBAT tutucusu*
15Çýkarýlabilen KAPI RAFI*
16ÞÝÞE tutucusu
*Sayýsý ve/ya pozisyonu deðiþebilir,Sadece bazý modellerde mevcuttur.
|
10 |
|
9 |
8 |
|
7 |
|
|
11 |
6 |
12 |
5 |
13 |
|
|
4 |
14 |
|
15 |
3 |
16 |
2 |
|
1 |
|
4

Installation
!Before placing your new appliance into operation please read these operating instructions carefully. They contain important information for safe use, for installation and for care of the appliance.
!Please keep these operating instructions for future reference. Pass them on to possible new owners of the appliance.
Positioning and connection
Positioning
1.Place the appliance in a well-ventilated humidity-free room.
2.Do not obstruct the rear fan grills. The compressor and condenser give off heat and require good ventilation to operate correctly and save energy.
3.Leave a space of at least 10 cm between the top part of the appliance and any furniture above it, and at least 5 cm between the sides and any furniture/side walls.
4.Ensure the appliance is away from any sources of heat (direct sunlight, electric stove, etc.).
5.In order to maintain the correct distance between the appliance and the wall behind it, fit the spacers supplied in the installation kit, following the instructions provided.
Levelling
1.Install the appliance on a level and rigid floor.
2.If the floor is not perfectly horizontal, adjust the refrigerator by tightening or loosening the front feet.
Electrical connections
After the appliance has been transported, carefully place it vertically and wait at least 3 hours before connecting it to the electricity mains. Before inserting the plug into the electrical socket ensure the following:
•The appliance is earthed and the plug is compliant with the law.
•The socket can withstand the maximum power of the appliance, which is indicated on the data plate located on the bottom left side of the fridge (e.g. 150 W).
•The voltage must be in the range between the values indicated on the data plate located on the bottom left side (e.g. 220-240V).
•The socket is compatible with the plug of the appliance. If the socket is incompatible with the plug, ask an authorised technician to replace it (see Assistance). Do not use extension cords or multiple sockets.
!Once the appliance has been installed, the power supply cable and the electrical socket must be easily accessible.
!The cable must not be bent or compressed.
!The cable must be checked regularly and replaced by authorised technicians only (see Assistance).
!The manufacturer declines any liability should these safety measures not be observed.
Start-up and use
Starting the appliance
!Before starting the appliance, follow the installation instructions (see Installation).
!Before connecting the appliance, clean the compartments and accessories well with lukewarm water and bicarbonate.
!The appliance comes with a motor protection control system which makes the compressor start approximately 8 minutes after being switched on. The compressor also starts each time the power supply is cut off whether voluntarily or involuntarily (blackout).
1. Insert the plug into the socket and ensure that the green |
|
|
GB |
||
POWER indicator light illuminates (the FREEZER |
||
COMPARTMENT knob must not be on OFF). |
|
|
|
2.Turn the REFRIGERATOR OPERATION knob to an average value. After a few hours you will be able to put food in the refrigerator.
Using the refrigerator to its full potential
 fridge
The temperature inside the refrigerator compartment automatically adjusts itself according to the position of the thermostat knob. min = warmest
max = coldest
It is recognisable by aeration cells located on the back walls of the compartments.
The No Frost system circulates cold air continuously to collect humidity and prevent ice and frost formation. The system maintains an optimal humidity level in the compartment, preserving the original quality of the food, preventing the food from sticking together and making defrosting a thing of the past.
•Do not block the aeration cells by placing food or containers in direct contact with the refrigerating back panel.
•Close bottles and wrap food tightly.
•Place only cold or lukewarm foods in the compartment, not hot foods (see Precautions and tips).
•Remember that cooked foods do not last longer than raw foods.
SHELVES: with or without grill.
Due to the special guides the shelves are removable and the height is adjustable (see diagram), allowing easy storage of large containers and food. Height can be adjusted without complete removal of the shelf.
FRESH BOX: for fresh meat and fish. Due to the compartment’s low temperature (the coldest in the refrigerator) and to the clear door that provides protection against oxidation and blackening, food can be stored for even up to one week. It can also be used for “cold meals.”
5
 Loading...